I have a confession to make.
I hate winter.
Once Christmas and New Year’s are past, I’m so not interested in the season anymore. I’ve lived in the northeast too long to enjoy snow; it just means I have to shovel and it ruins my plans.
I absolutely hate being cold, and I’d rather wear a tank top and flip flops than a heavy coat anyday.
Soooo, to help me get through January and February, I decided to make something fun and festive for on the door. Something with lots of color and, of course, glitter!Enter my new Valentine Ribbon Wreath!
Pin ItLast fall, I made my first door decoration, this fabric flower wreath. I didn’t have the patience to yarn-wrap it, so I used wide brown ribbon, and I really liked the effect.
I wanted to do something similar, but with pinks and reds for Valentine’s day. Then, I saw this loopy ribbon wreath by Mel the Crafty Scientist. I thought it was super-fun looking and I loved the effect of the different ribbons all together.
Sooooo, I grabbed the Michael’s gift card I got for my birthday, and started browsing for fun coordinating ribbons. I decided I’d do a combination of my original ribbon wrap idea and Mel’s idea. Here’s what you need to makd one too:
VALENTINE RIBBON WREATH
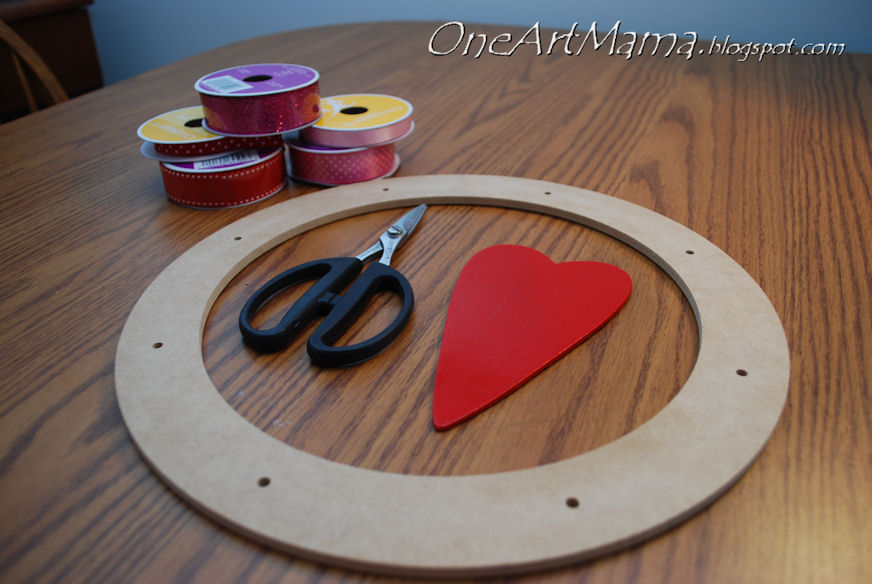
MATERIALS:
wooden wreath form
painted wooden heart {or you can get one and paint it yourself}
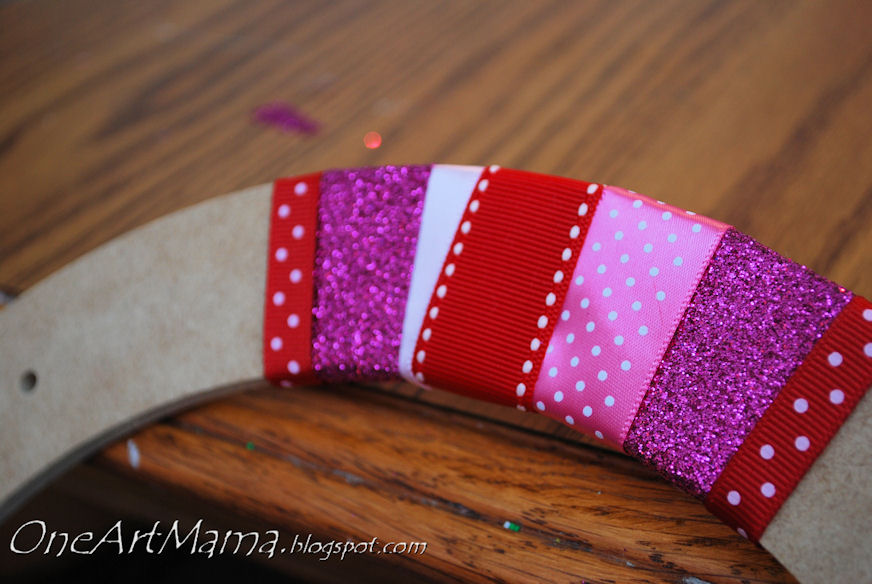
assorted ribbon {I had 5 different types; 3 pinks and 2 reds in varying widths}
scissors
low temp hot glue gun and glue sticks
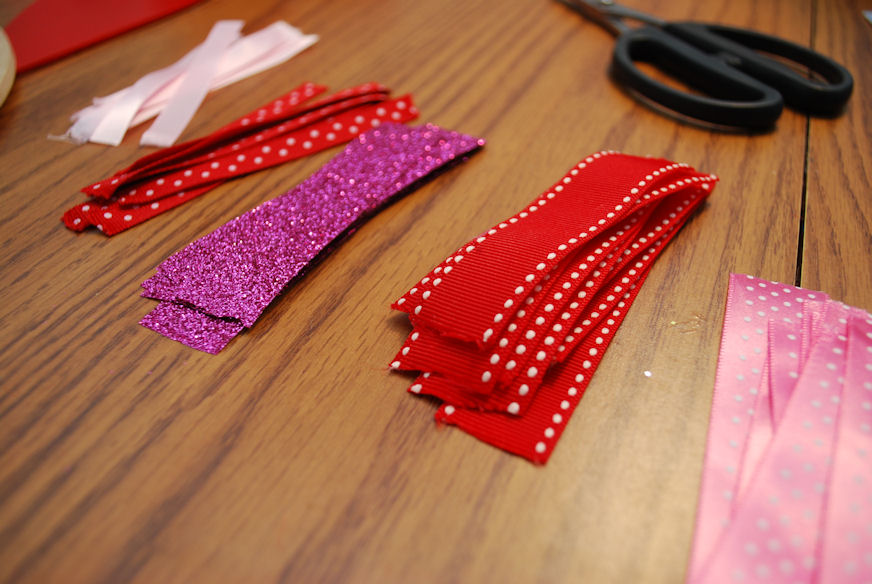
STEP 1: Cut ribbon into strips that will fit around your wreath form. I cut 12 of each color.
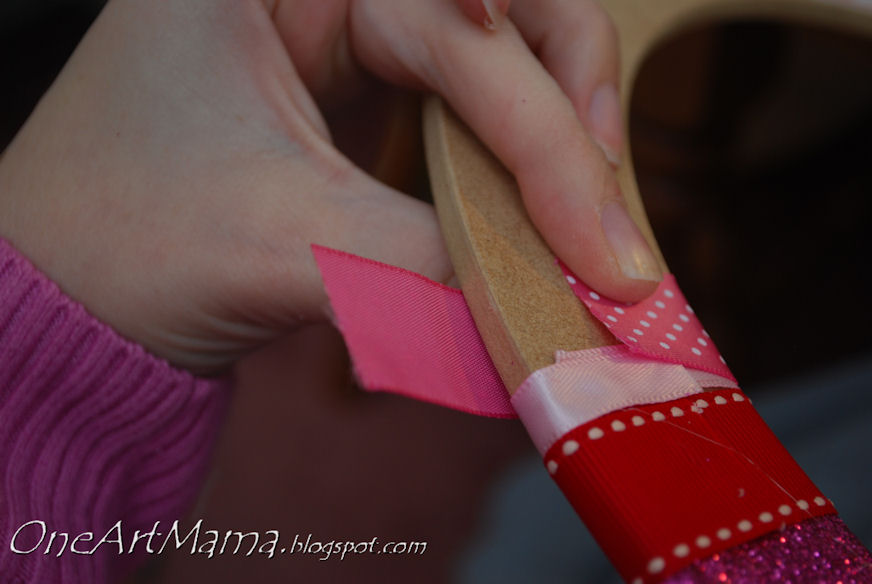
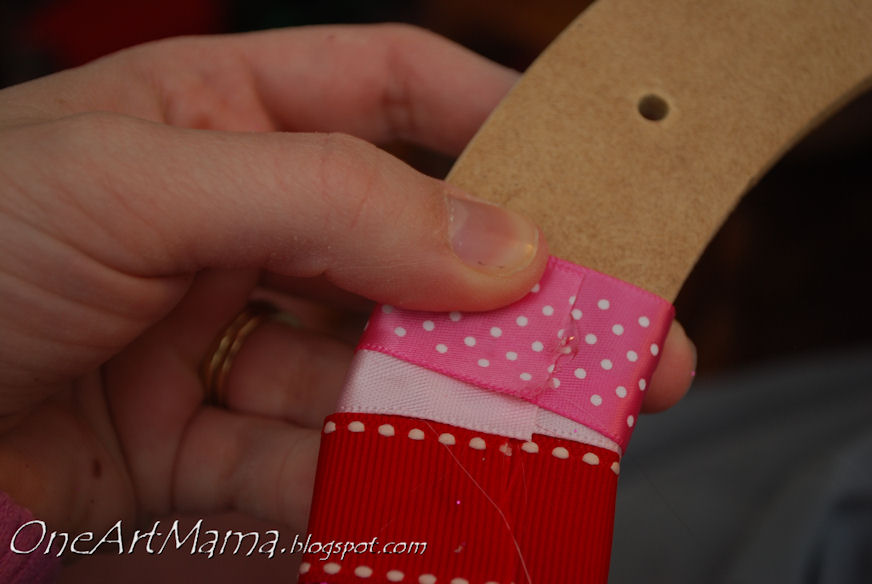
STEP 2: Begin wrapping ribbon around the form one strip at a time and hot glue in place. Try to alternate colors and widths.
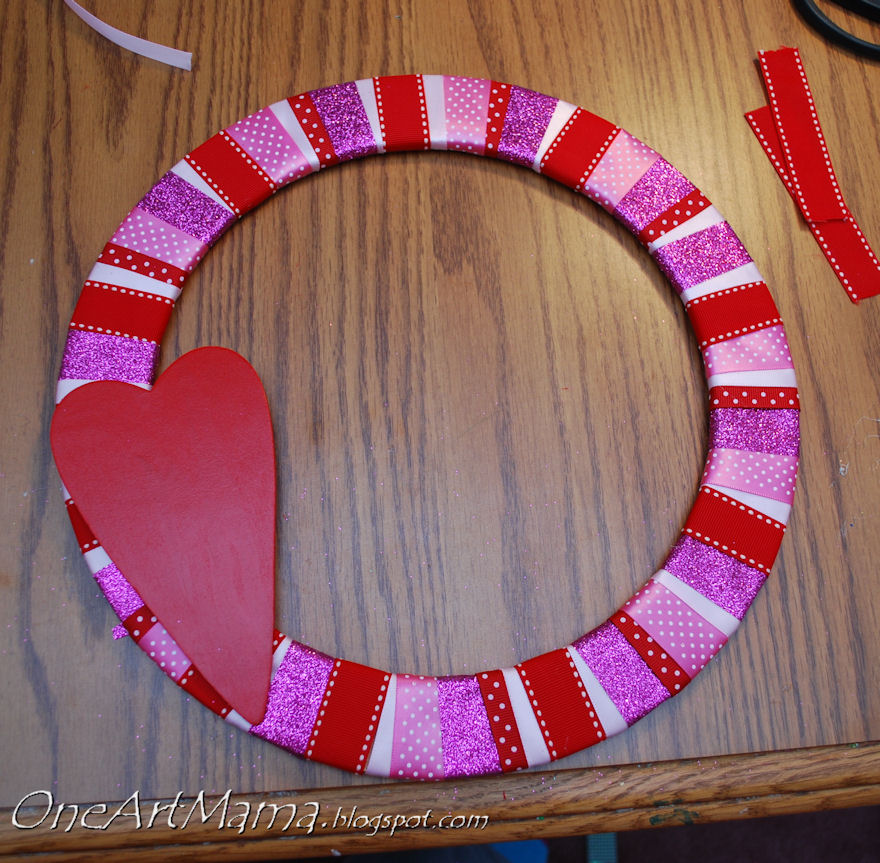
STEP 3: Continue around wreath form until it’s completely covered. The trickiest part is that as you go around, you have to adjust and overlap them so they go around the circle. I found the skinny light pink ribbon to be really good in those spots where I was trying to even up.
I had absolutely no pattern, just tried to keep a good variety as I went around. You can create any kind of pattern you want, or make it random.
STEP 4: Glue wooden heart to one side of your wreath.
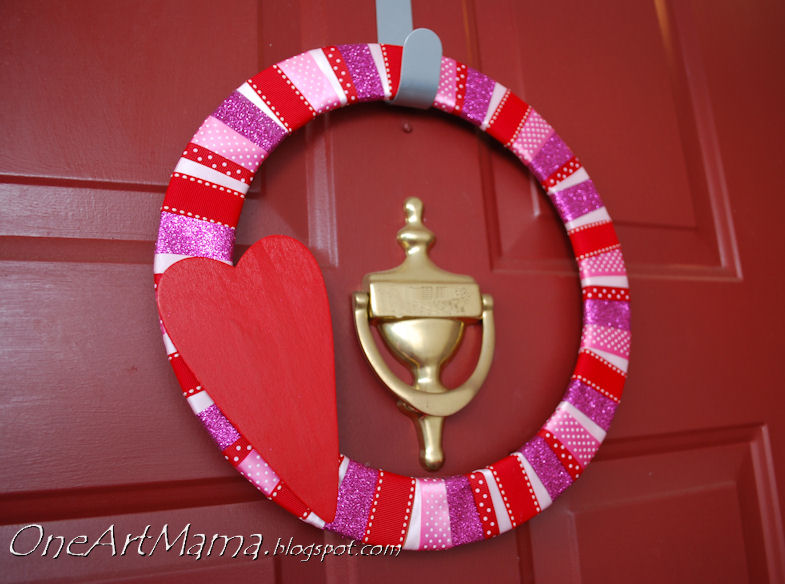
TA-DA!
That’s all there is to it!
The only thing left to do is hang and enjoy!
Happy Crafting, friends!


Love it! So simple, too!
Amanda
I love it! I love wreaths all together! They are one of my favorite things to make ever! I did a post on some that I have made in the past once! Since then I have made several more!
http://natural-nester.blogspot.com/2011/06/share-wreath-wednesday.html
Amy,
This is so cute and looks like it didn’t take hours & hours & hours to make like some other wreaths! Great job. Feeling inspired to make a valentine wreath…..
Happy New Year
Blythe
http://www.thedesperatecraftwives.blogspot.com
I hate winter too! SO much!! But I LOVE your Valentine’s Wreath! :o)
Jamie
For Love of Cupcakes
I LOVE THEM ALL!!! thank you for these, they are great!
Love is in the air…for this awesome wreath!!!!
That is so cute!! I love the idea of using ribbons! Thanks for the tutorial.
Jill
twoyellowbirdsdecor.blogspot.com
Super cute! Love the ribbons your chose and it looks great on your door.
Love this! Thank you for sharing!
I invite you to add this post (or any other Valentine’s Day posts) the Find Some Love Fest on February 1st! 5 blogs, 1 party!
http://www.feedingmytemple.com/2012/01/exciting-announcement.html
These wreaths are all SO adorable! I really love the brown ribbon one! Way be to so creative!!
I’m happy to be your newest follower, and I’m hoping you’ll stop by my BRAND NEW blog and follow me back!!
Thanks a million 🙂
Sarah @ Dotted Line Crafts
Well that is very cheerful wreath and that should help with the Jan and Feb blues!!!!
ann
Super cute wreath. Hope you will link it up on the 16th at Bacon Time for a chance to win in our Valentine contest.
I love this. It’s so cute and looks fairly simple to make. Thanks for the idea.
Nice wreath! Very festive. Thanks for linking to Things I’ve Done Thursday.
Melanie
http://www.bearrabbitbear.com
You know I love it and maybe some day I’ll experiment making glittery ribbon! Thanks for giving me any credit, but this was definitely all you! So gorgeous and I definitely want to make a version of YOUR wreath! : )
-Mel the Crafty Scientist
i love the idea of using the wooden form! so much easier to store! thanks for linking this up to my party last week!
andie
Your wreath is darling!
I love the ribbons you chose! I love polka dots. It turned out very cute. Thanks for linking it up to the Valentine Craft linky at Heartfelt Balance Handmade Life!