Fingerprint Ornaments
Thanks to DecoArt for providing the paint used in this project!
Everyone decorates their Christmas tree a little differently, which is what makes them so much fun! Our tree is a hodge podge of all kinds of ornaments; some that hubby and I received as children, some that are storebought, and plenty that are handmade. I personally treasure handmade ornaments the most, particularly the ones Little Crafter helps me make, because I feel like it’s one more way of remembering what he was like at each age and stage when we celebrate Christmas. This year, one of our projects involved preserving his five year old thumb and finger prints by turning them into festive and adorable ornaments: take a look!

My original inspiration for this project came from a pin I saw where someone had taken her son’s thumbprint and turned it into a reindeer. I thought it was unbelievably cute, so naturally we had to make some of our own.

For instructions and more photos of how cute these can be, check out the post that inspired me from Little Bit Funky! But, we also took things a step further by making a variation. We turned his fingerprints into snowmen! This way, we could tie them on packages and people would get different things; for example, Grandma gets a snowman while Pop-Pop gets a reindeer.

The snowmen were particularly hard to photograph because the ornaments are so shiny that I got all kinds of reflections and lighting issues. But hopefully you get an idea of how cute they are.
We used:
– small glass ornaments {I found a pack of 18 for a reasonable price at Target and chose silver because all the colors of paint would show up}
– DecoArt Multi-Surface and Gloss Enamels paints: brown, red, green, white, and black
– toothpicks
– small paintbrushes

To make the snowman, we dipped LC’s index finger in white paint and placed it on the ornament three times, one on top of the other. Then, after the prints were dry, I went back and added details. I used a small brush for the hat, nose, and scarf. I found that a toothpick worked best to create eyes, buttons, and even the stick arms.
One thing I noticed as we were hanging ornaments on LC’s tree this year was that I haven’t always been stellar at remembering to put dates on the ones we’ve created. So, I made sure to flip these over when they were dry and paint the year. If you use 3D Gloss Enamels, there’s a great writing tip that makes this part easy.

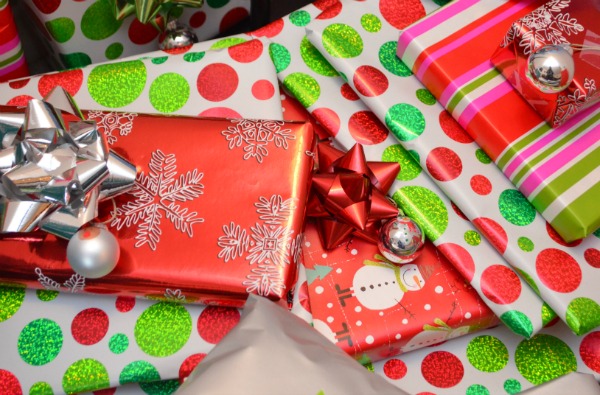
That’s it! Now they’re ready to tie onto your packages so that your family and friends can enjoy them!
Hugs & Glitter,


So cute! I love these! My girls would have a hoot creating fingerprint reindeer!
adorable ornaments…I love that they are his fingerprints…
Those are darling and would be so fun to make with the kids.
They really are fun! Thanks!
this could be really fun to make with my kids for their teachers too! Very cute.
Thanks! Great idea!
These are so cute. What a great idea to use the paints as fingerpaints.
Thank you, Shannah!
These are so cute Amy. I haven’t done anything with K yet this year for Christmas and really need to get on the ball. If only my Thanksgiving stuff would put itself away…
Cute and I love that they make a memory
These are so very cute! I wonder if I could get my 1-year-old to sit still to make them!
These ornaments are adorable! They will bring back great memories every year when you put them up!
That’s my favorite thing about them! Thanks, Kelly!
These are soooo adorable!
How fun! My kids would love making these, and the grandparents would LOVE receiving them!
So cute! I had thought about doing something similar, but then completely forgot about it. Thanks for the reminder- they turned out adorable! Pinning.
Thanks, Jamie! Have fun making yours!
This is such a fun idea! I love it! Heading over to Pin it. Thanks for coming to the DBB!
Aw, thanks, Cara!!
The ornaments turned out SO cute!!
Such a great idea! This would be so much fun to do with my kids! Pinned to our Holiday Board 🙂
Shauna @ The Best Blog Recipes
Neat ornaments!
So cute!! I wish my kids were younger. Such a cute project!!
Finger print creations are the cutest! I love how you decorated packages with your ornaments!
J would love this if I didn’t think he was going to destroy my dining room in the process! I love how you used the little balls on presents too!
Love the snowman idea! Such a fun way to create a memory!
Oh these are really sweet. It’s so nice to have ornaments that remind you of certain ages and activities that you did together.
Super cute! great kids project!
Thanks!