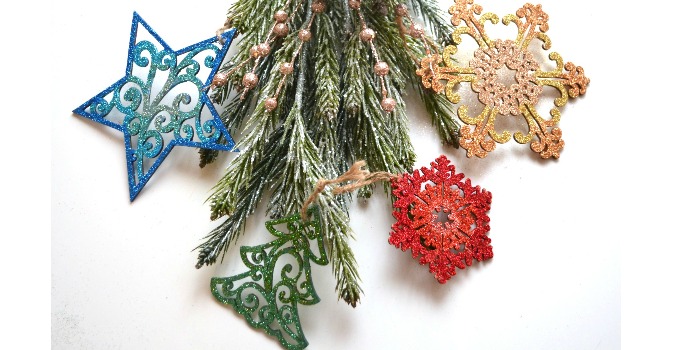
Hand Lettered Embellishments and a Christmas Ornament
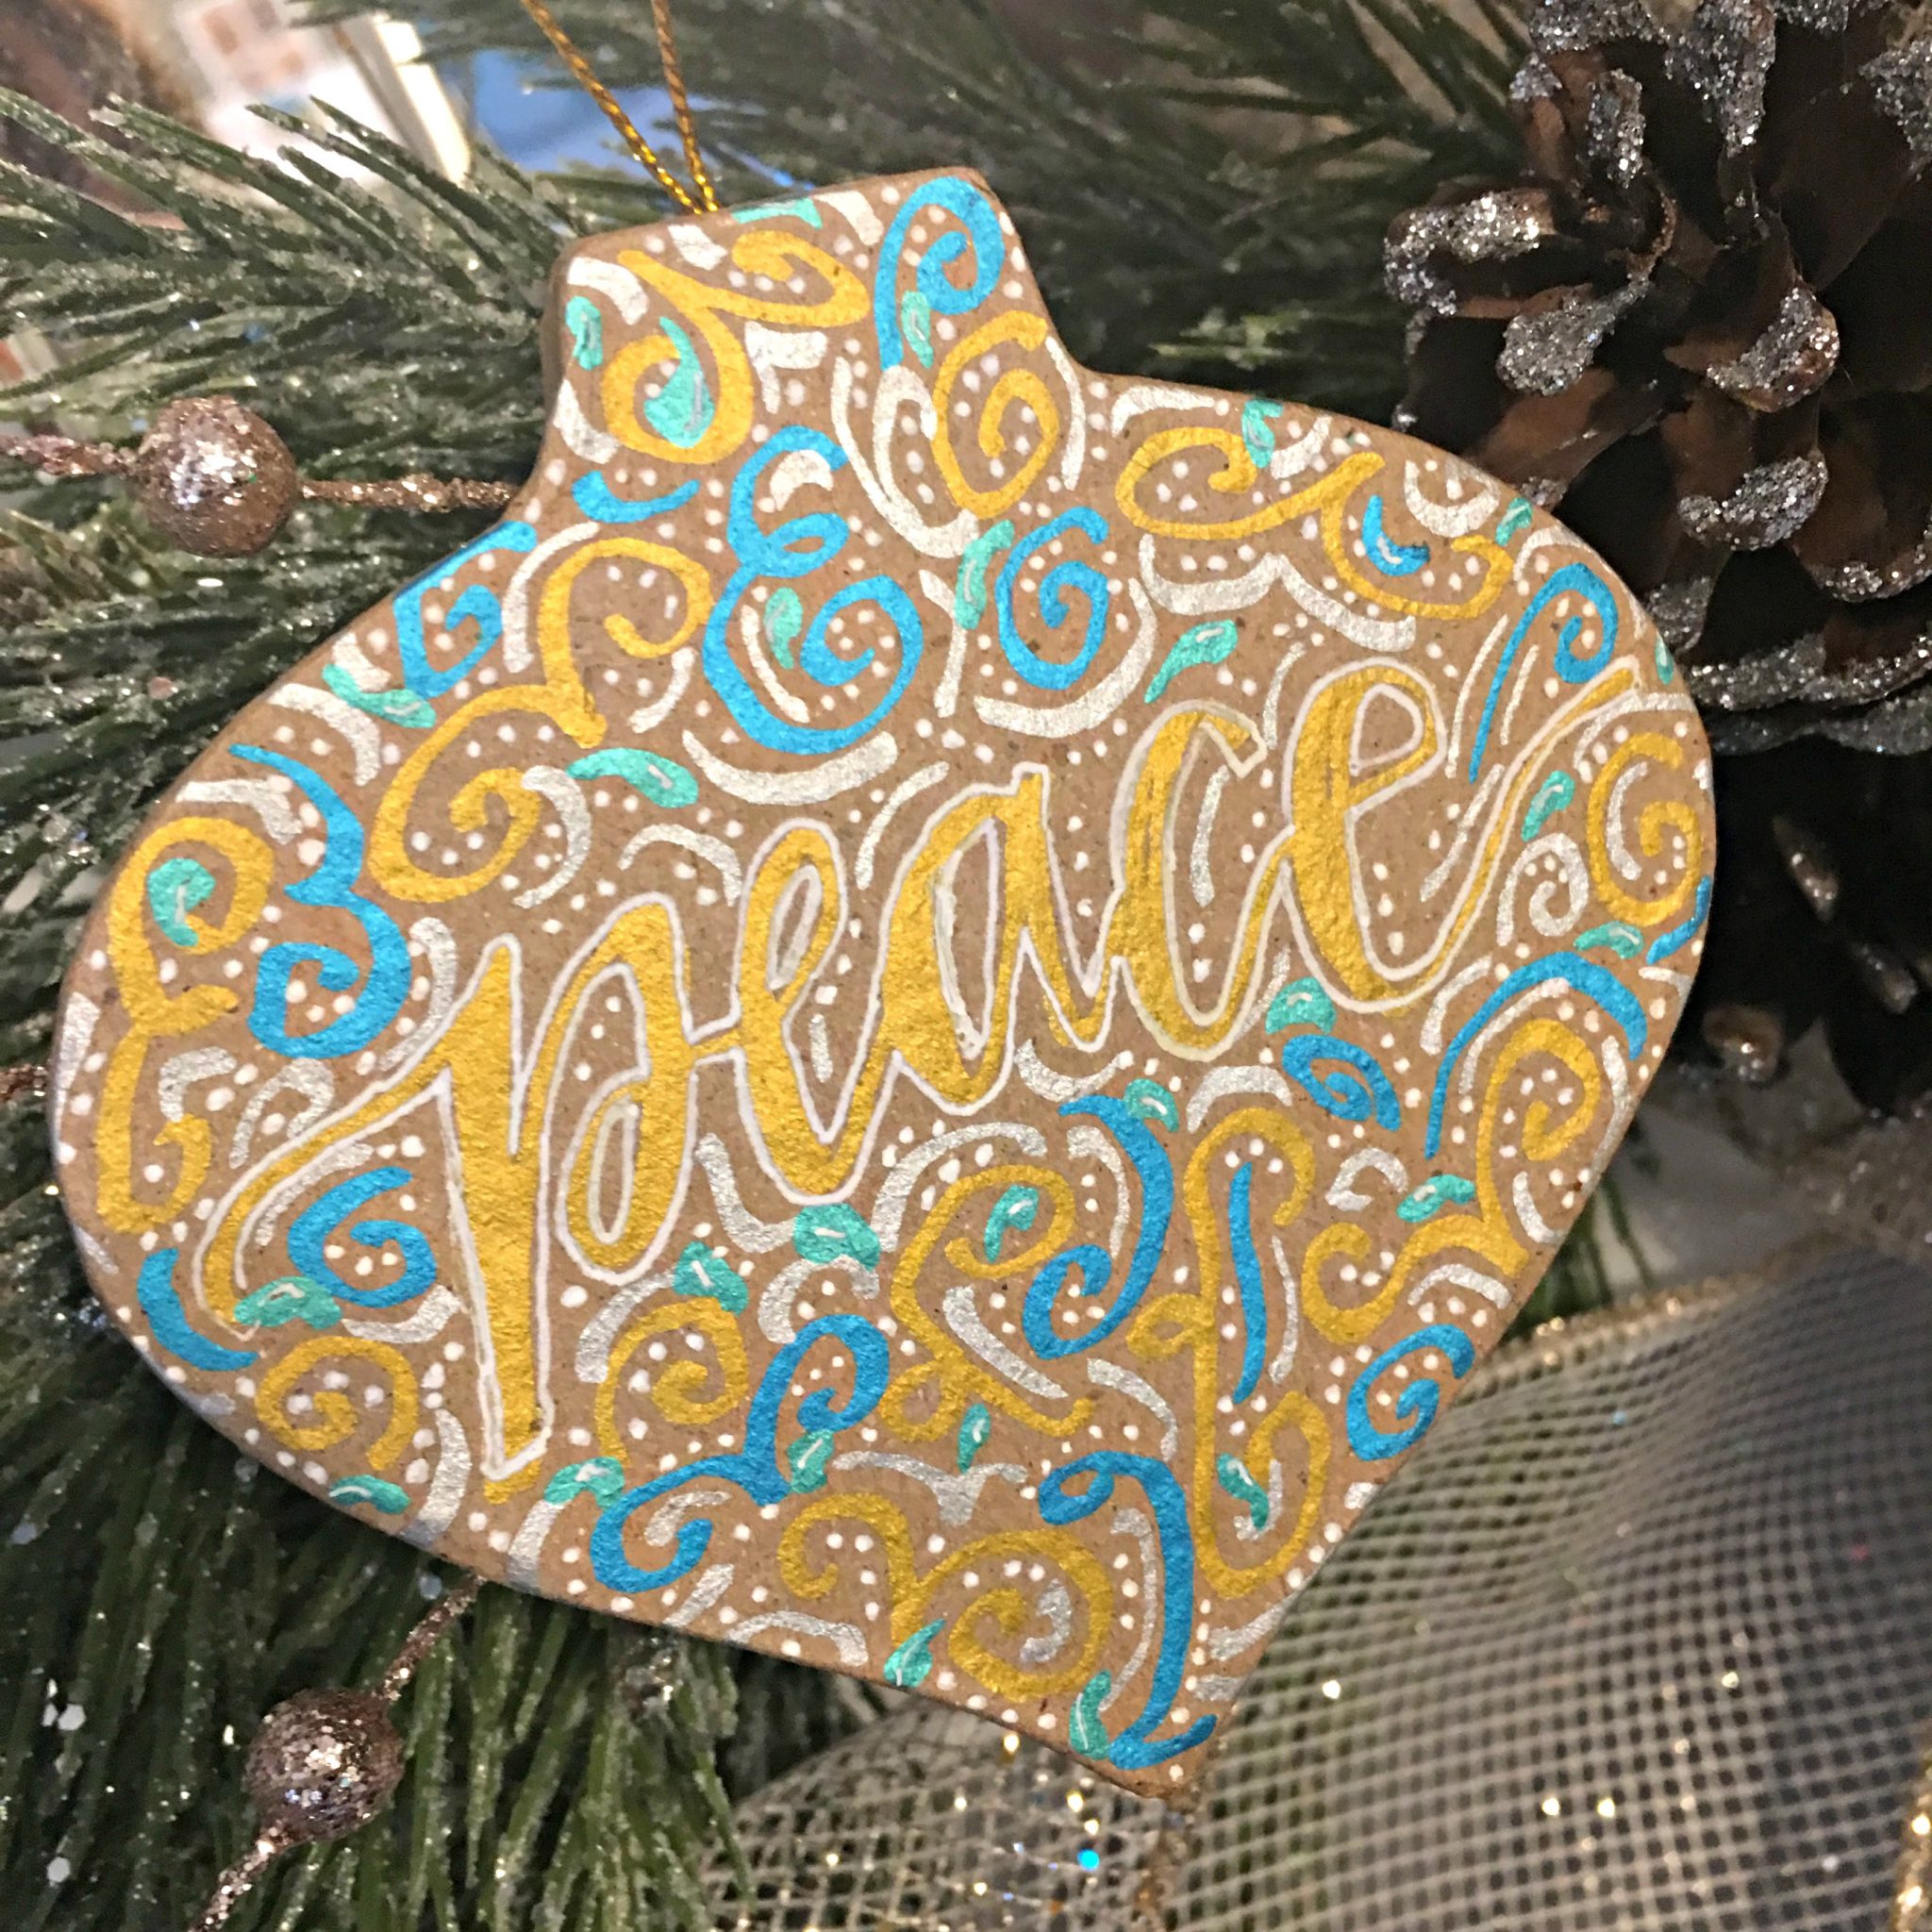
Christmas is my favorite holiday, and my favorite piece of Christmas decor is our tree! It’s 7 1/2 feet tall and packed full of a combination of store-bought and homemade ornaments, some that go all the way back to when hubby and I were babies. Every year I like to make a few new ones to add to our collection, and I also like to tie them onto gift packages. This year, I’m creating hand lettered ones, like the lettered glass ball I shared recently and this “peace” ornament that I created using some simple embellishments and paint pens. Take a look!
You’ll need:
a cardboard/paper mache ornament
paint pens, gel pens, or permanent markers
That’s it, you only need two simple supplies! Before we look at the specifics for the ornament itself, let’s take a look at the technique you’re going to use to fill it with embellishments. I recommend practicing on a piece of scrap paper or two first to get the hang of it.
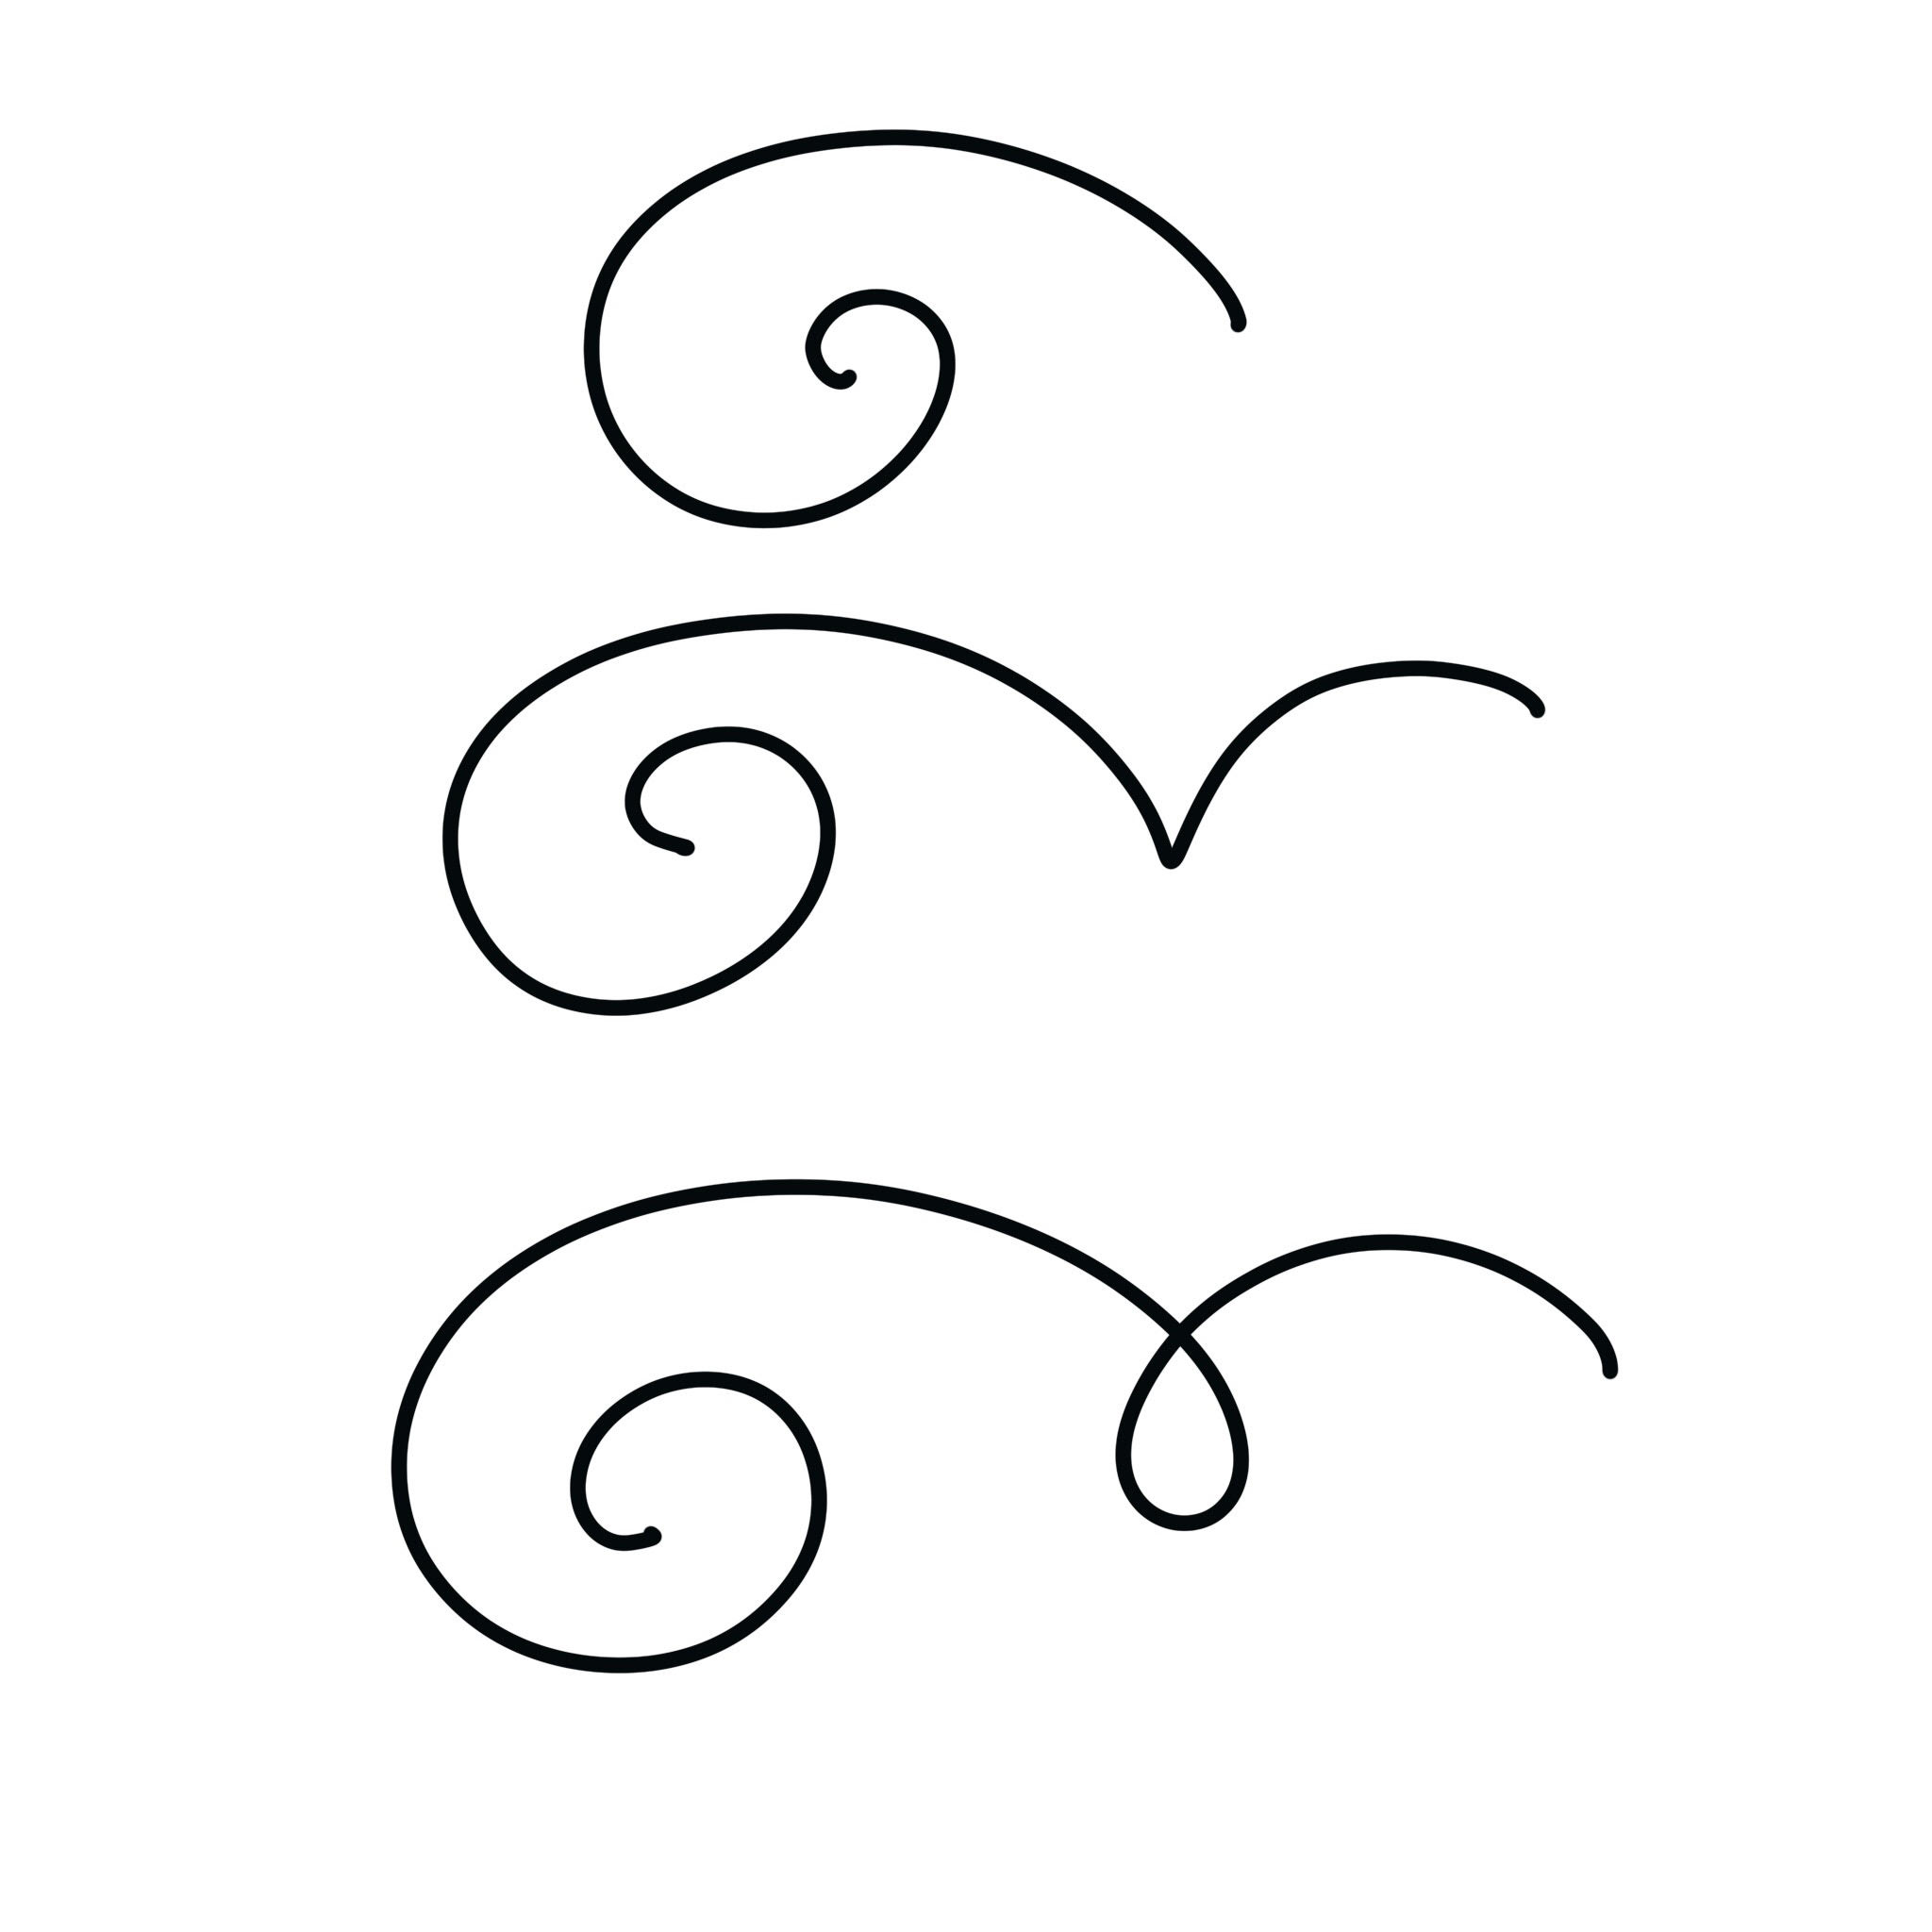
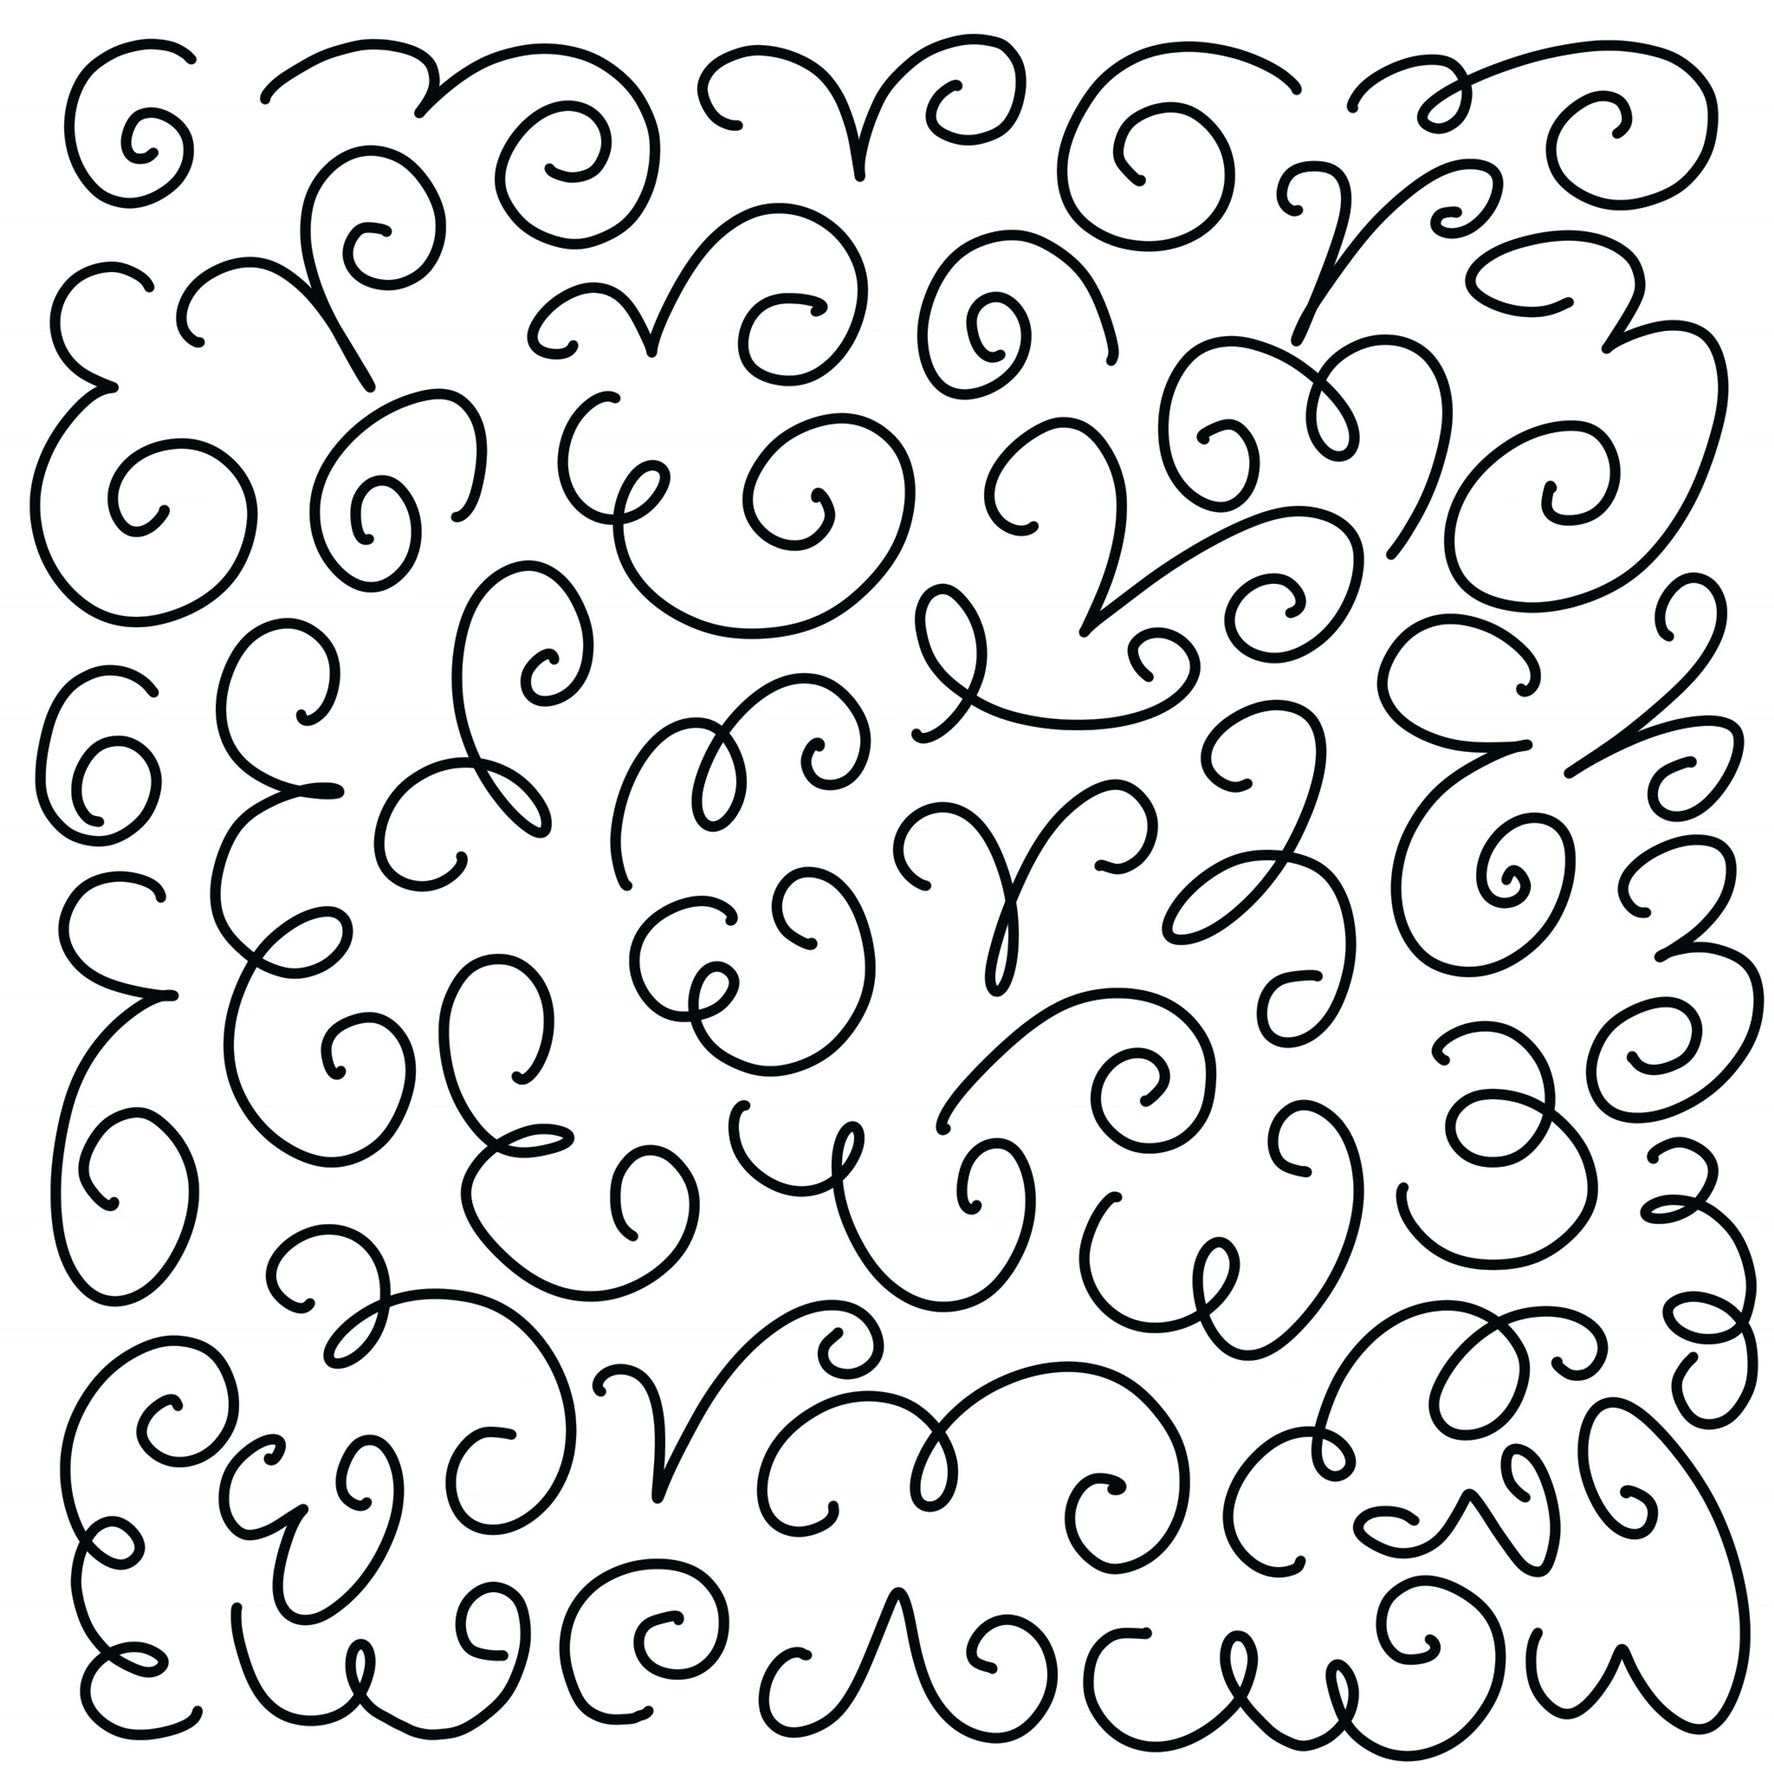
Reference – Basic Swirls:
To create your pattern, you’ll be using a combination of three basic kinds of swirls. The first is a simple spiral. The second is a spiral with a “v” on one side. I usually start with the “v” part and then end with the spiral. There’s also a basic loop followed by a spiral. Practice making these basic shapes, then try making them facing all different directions. Try them backwards, upside down, and sideways until you’re comfortable with them.
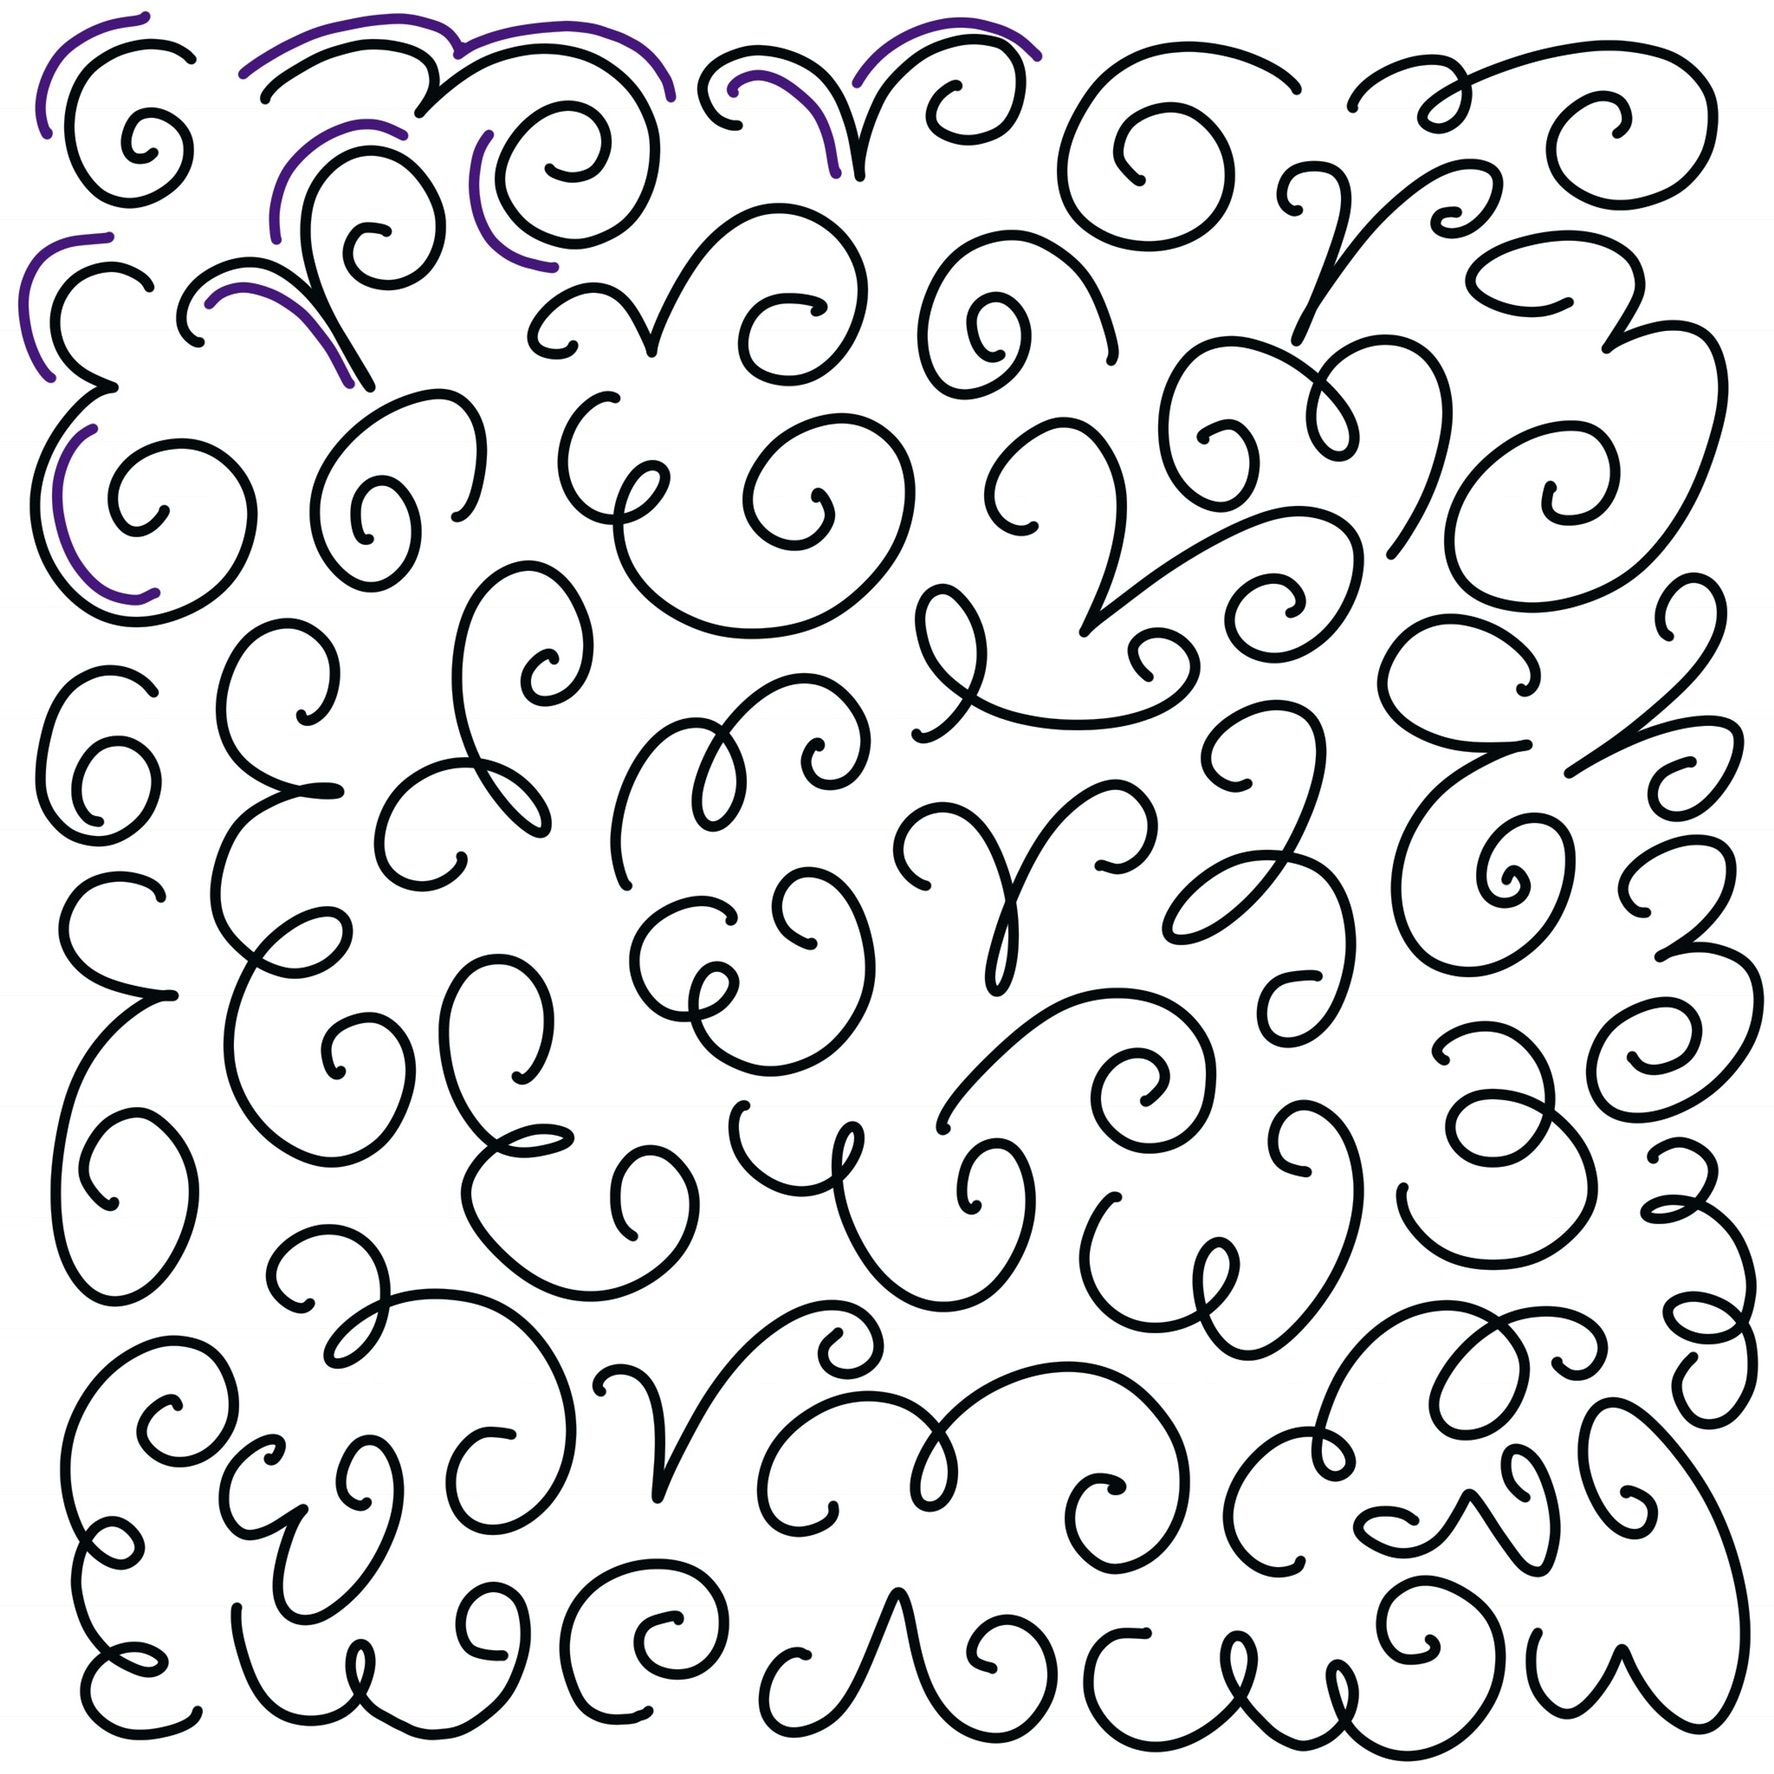
Step 1: Create a border.
Use your spirals to create a border around the edges of your paper. If you want to practice as though it were your ornament, you can trace the ornament first and then work with that shape instead.
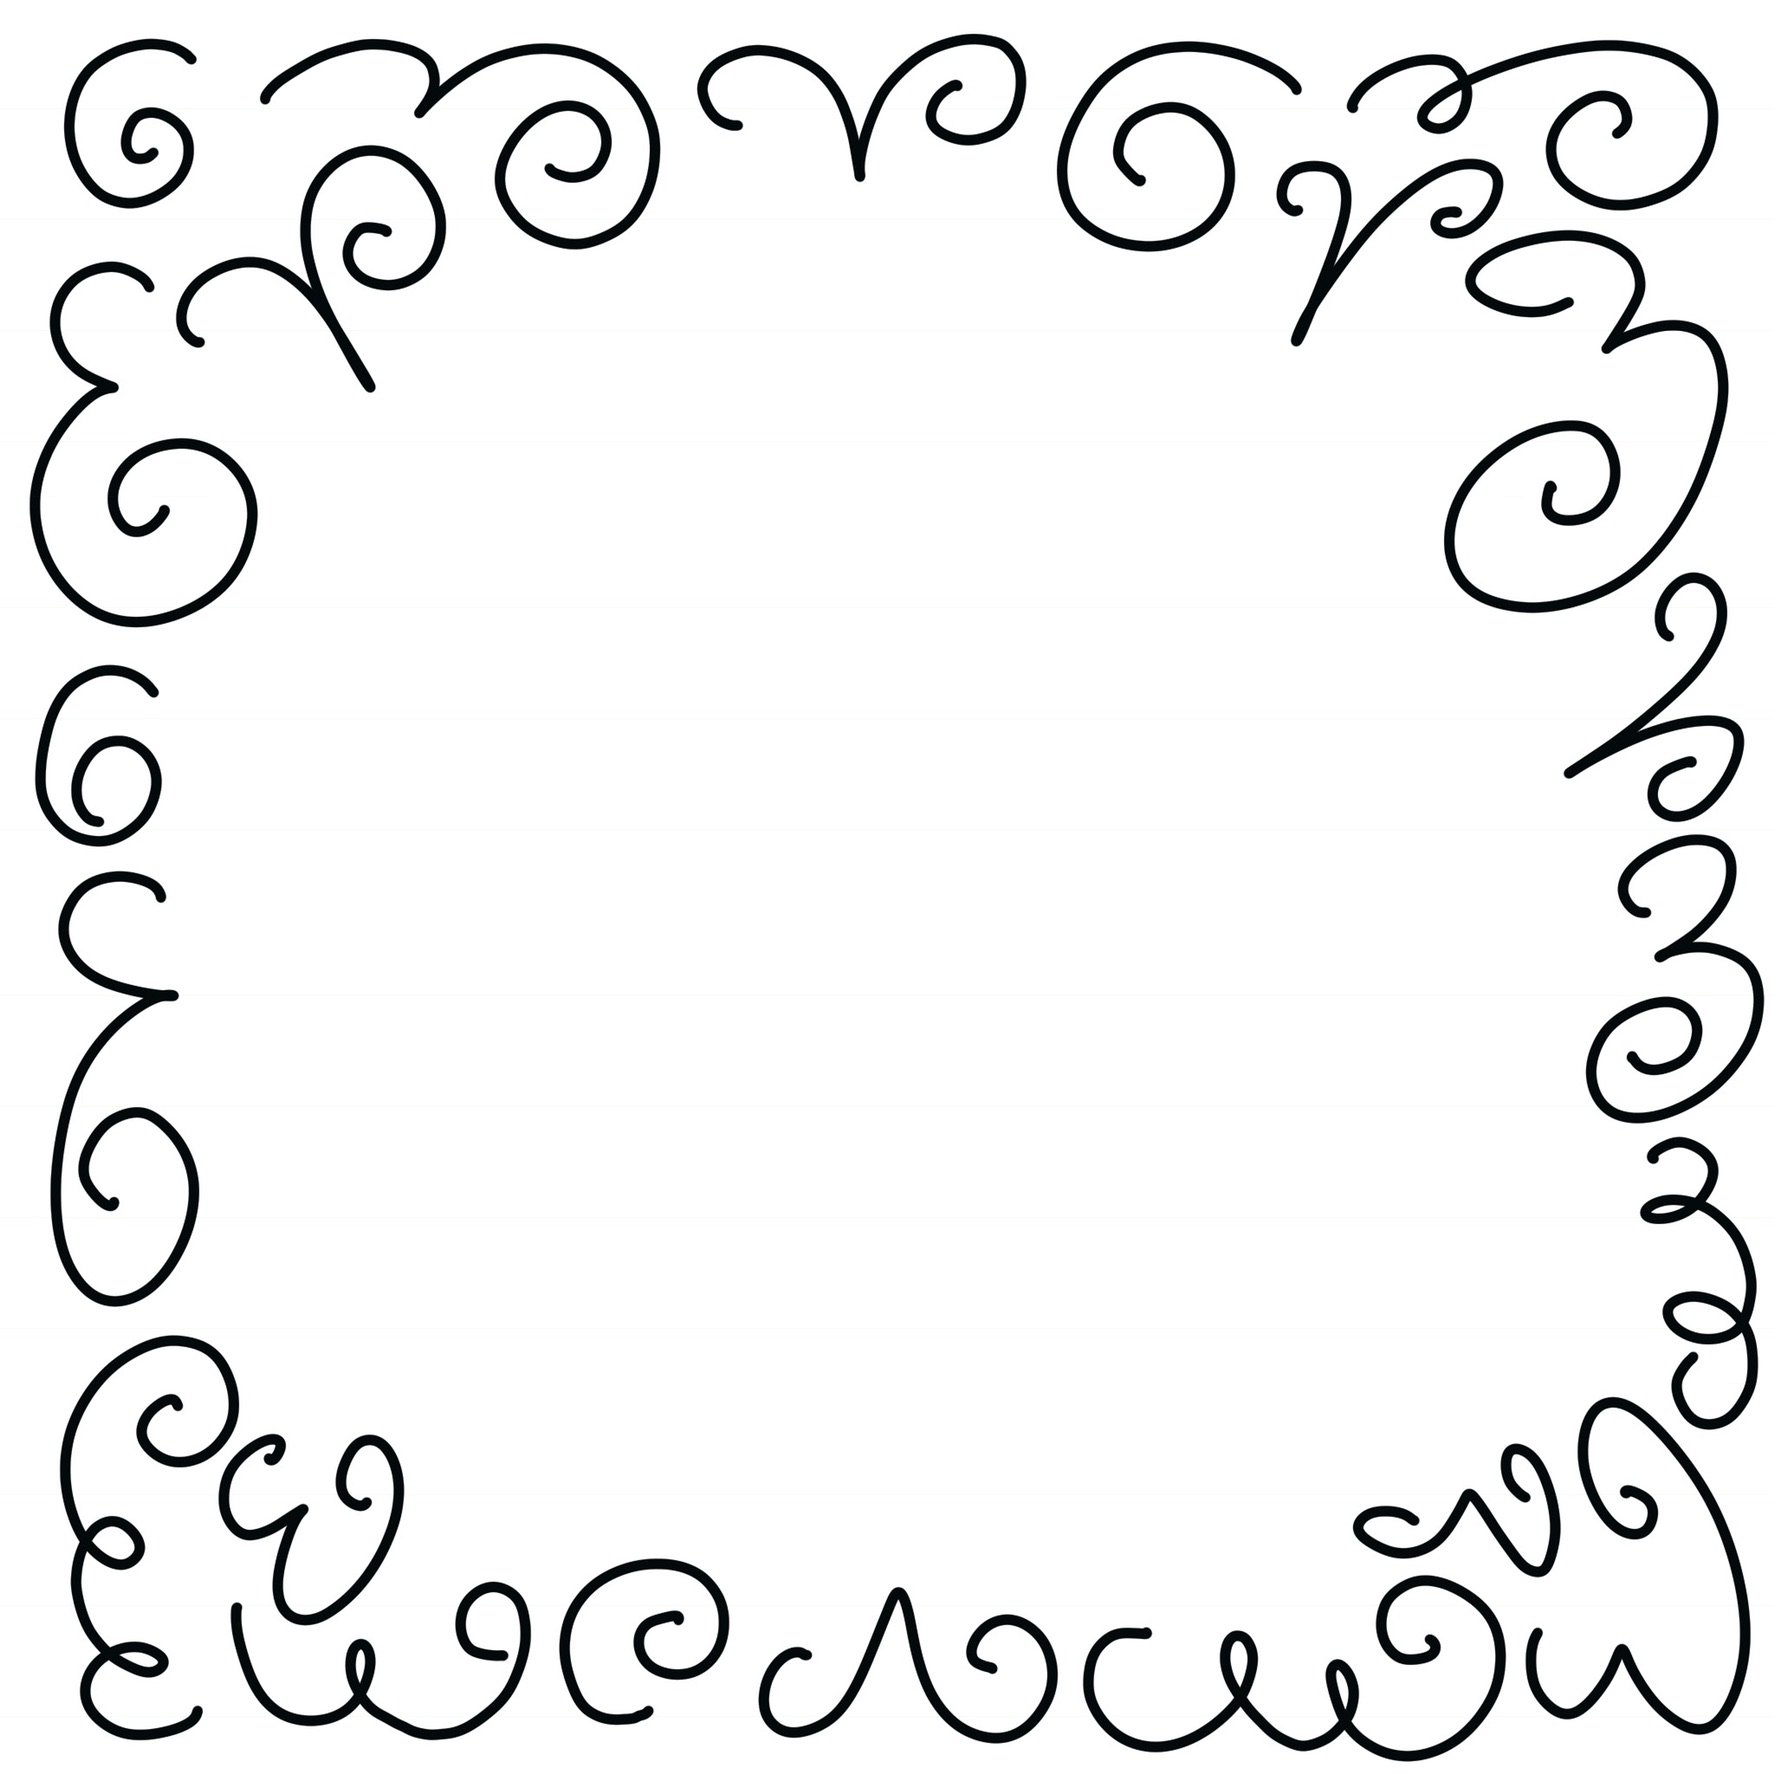
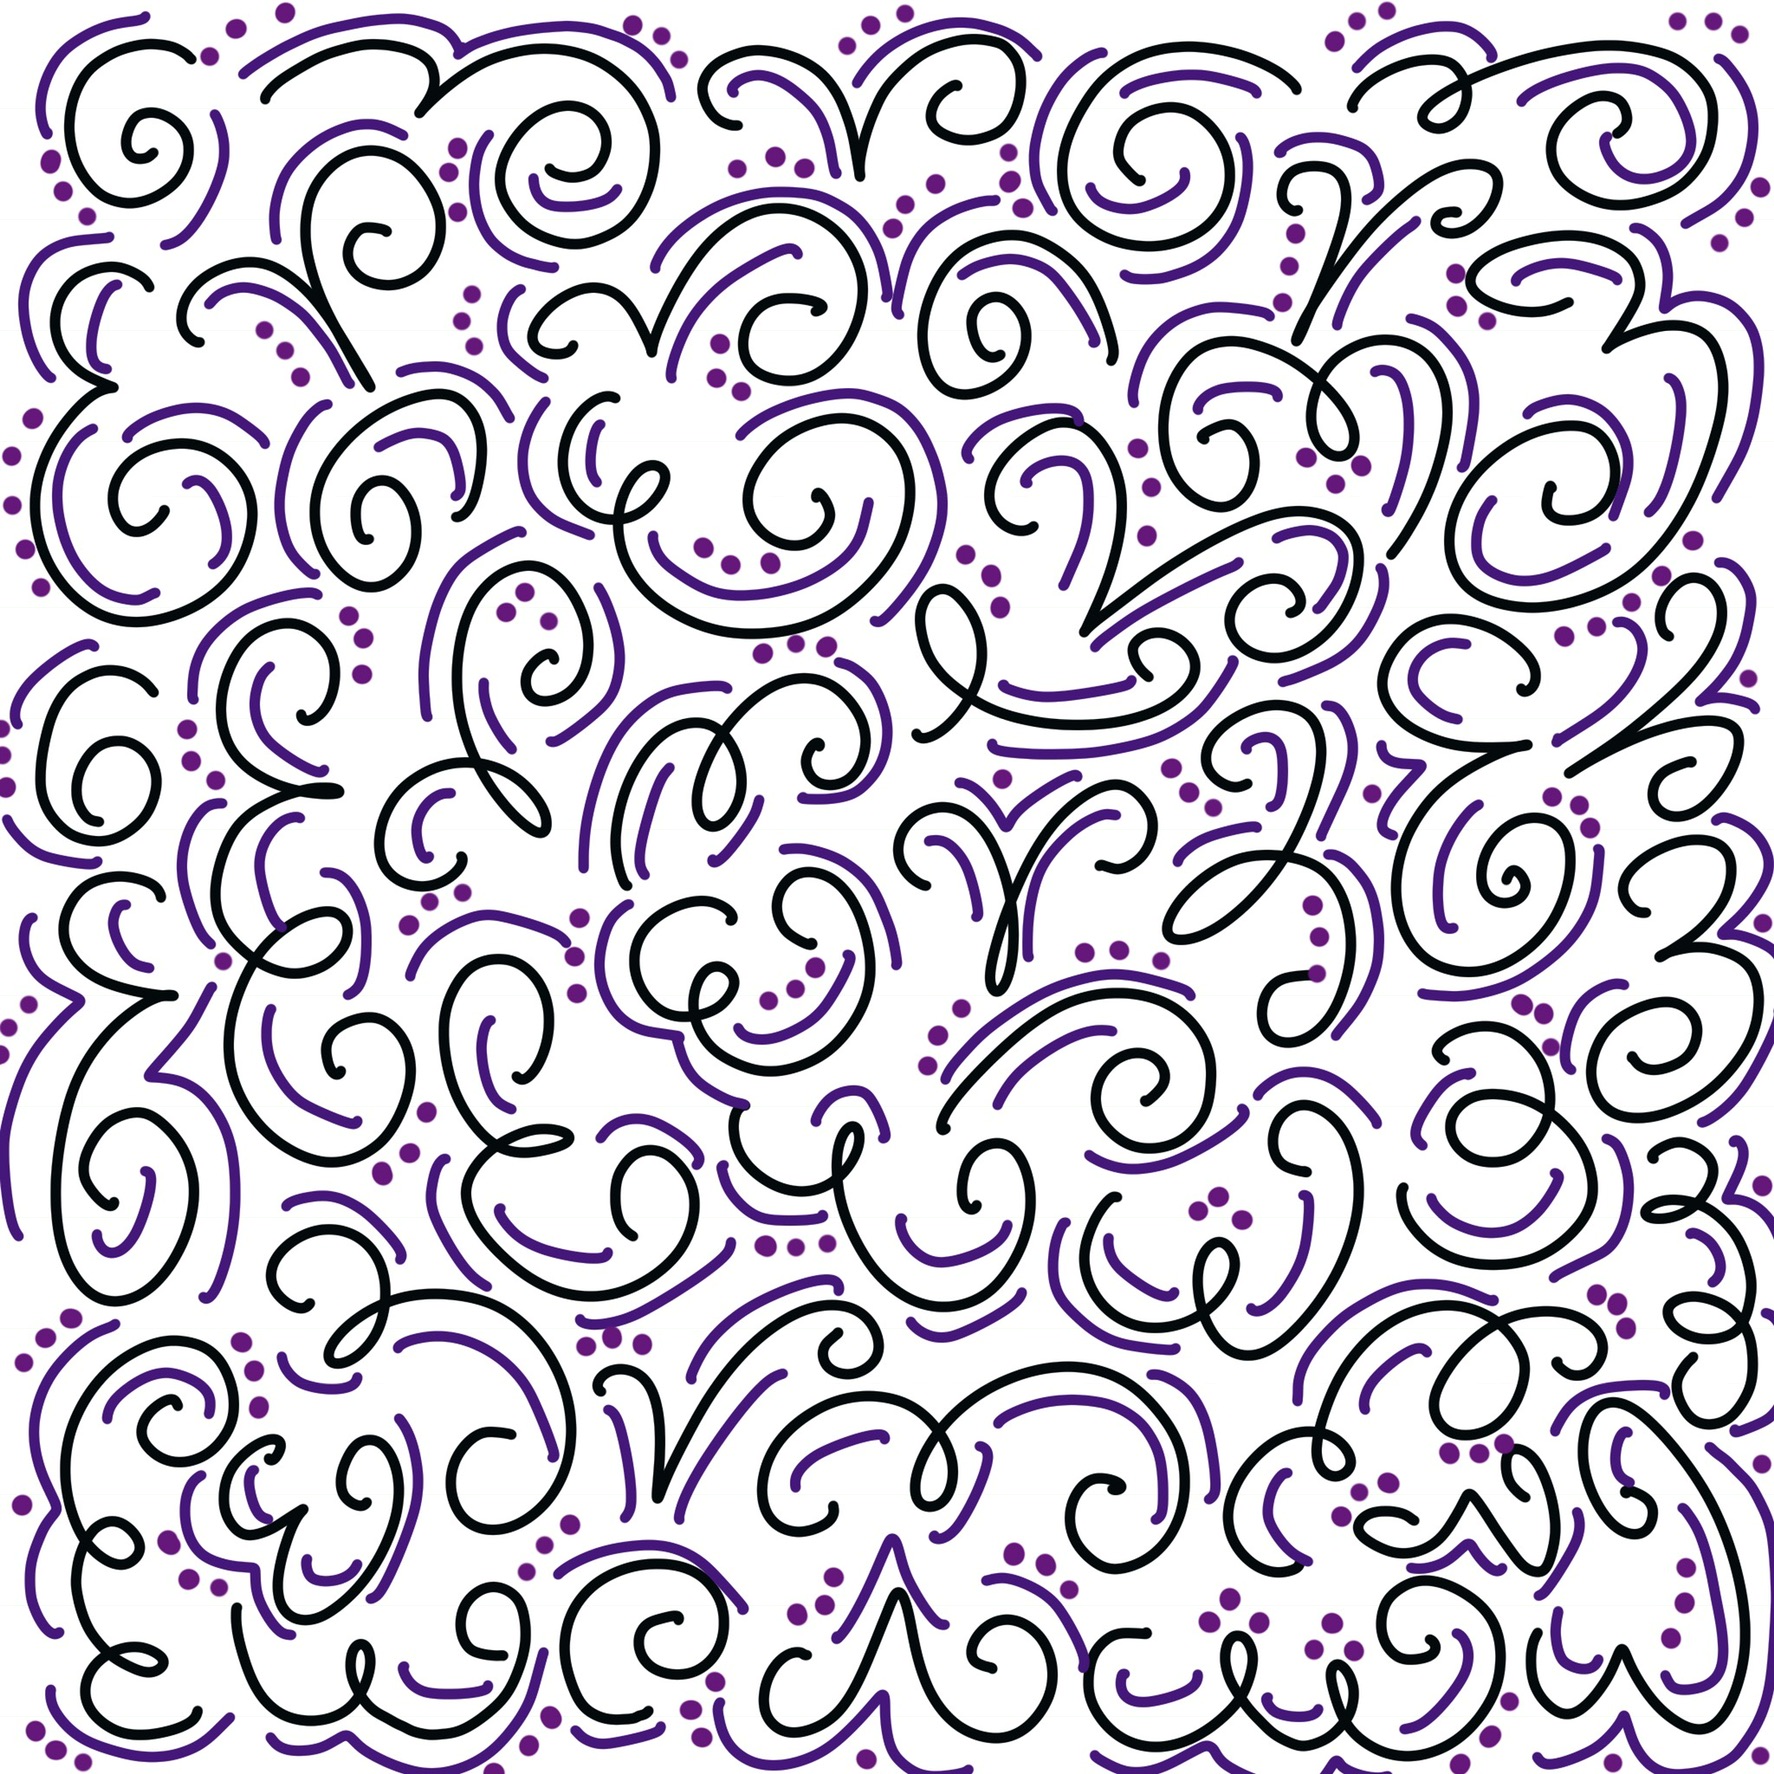
Step 2: Fill in the center area with more of the swirl shapes.
You’ll see I used a combination of all three shapes going in all different directions. There is no right or wrong way to to this, just fill the space.
Step 3: Add accent lines.
I used a second color here to show you where the accent lines are. When I do a design like this, I typically end up using 4-5 different colors. If you prefer, though, you can do everything using the same marker or pen. Play around with different color combinations, because you’ll get totally different effects!
To create the accent lines, I just make a shorter line that follows the curve of the original one. It can go outside the original one, inside of it, or both. You can see where I started to do this in the top corner of the design. Again, there’s no right or wrong to where or how many of these you draw.
Continue to add accent lines until you’ve covered the whole design.

Step 4: Add series of dots.
Use a marker with a nice round tip so that you can dot with one tap rather than having to draw a bunch of tiny circles. I like sets of three dots, but sometimes I’ll use just one and occasionally I’ll use five in a row. In design, odd numbers always look best. Let your dots follow the curves of your swirls.
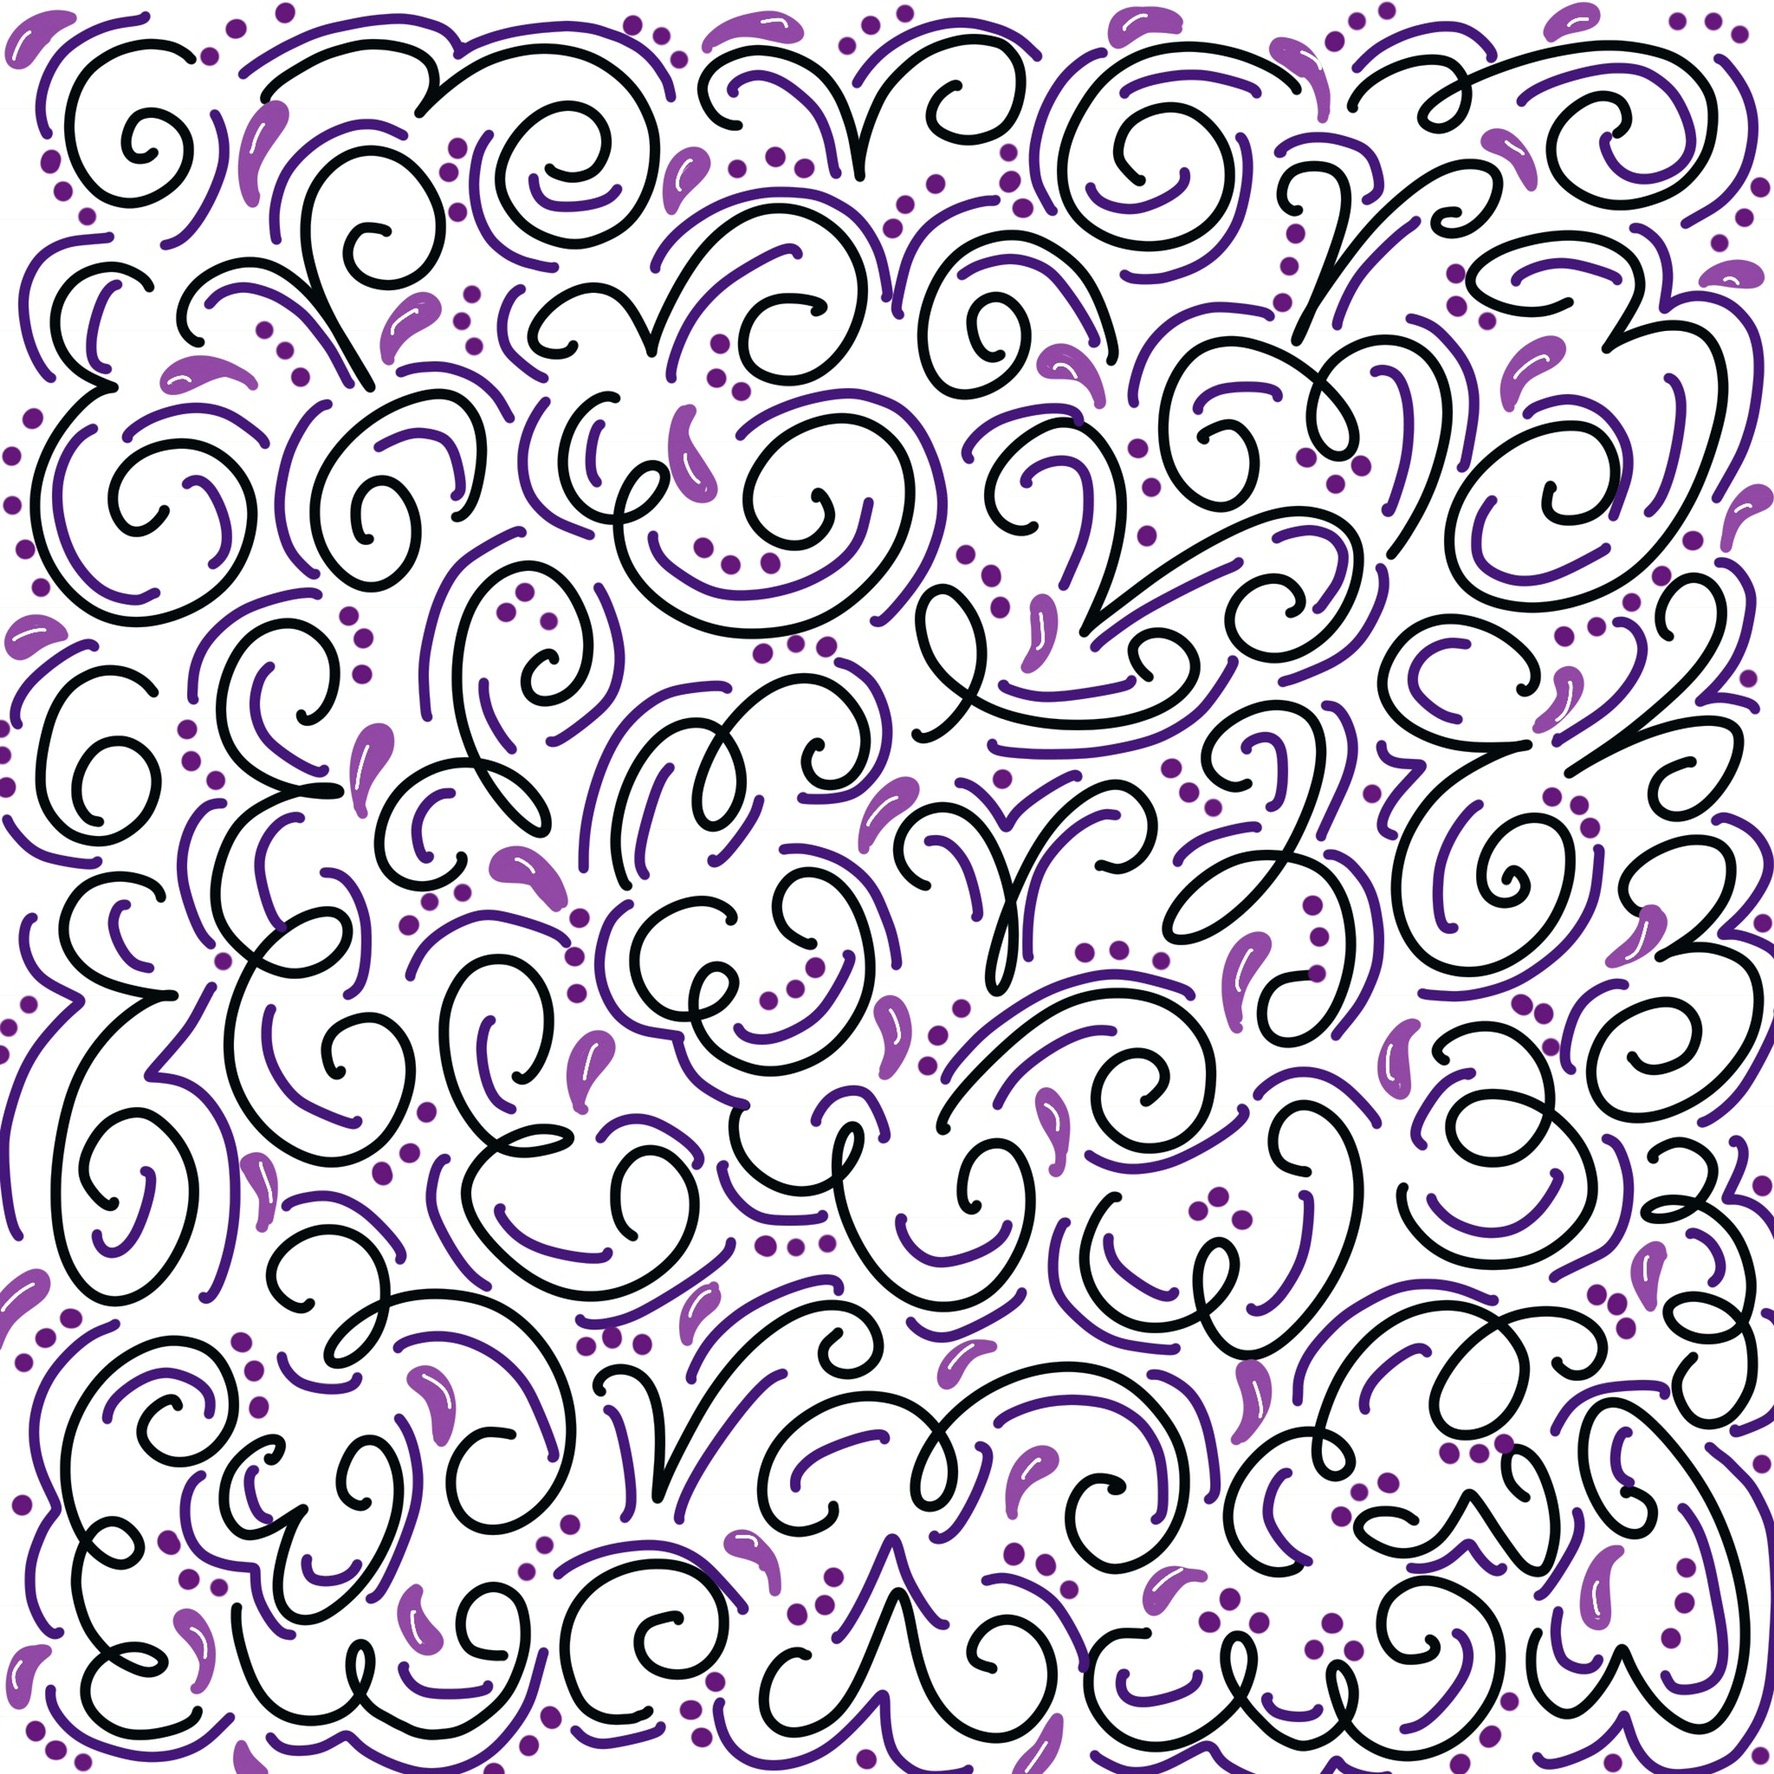
Step 5: Add teardrop shapes in any open spaces.
If you prefer, you can use another shape instead, like a heart, a star, or a larger circle. This is basically a space filler, taking up any large spots of white space that remain after your swirls and dots are complete.

Optional: Add highlight lines to your shapes.
If you have a white or metallic pen, you can go back and add a tiny line to each shape. This just gives it a little extra dimension and pizzazz. If you’re satisfied with your design, you can stop here.
See, it’s easy to do, but it looks super-impressive, right?
Here’s a quick look at the process…this is faster than real-time, but you’ll get the idea.
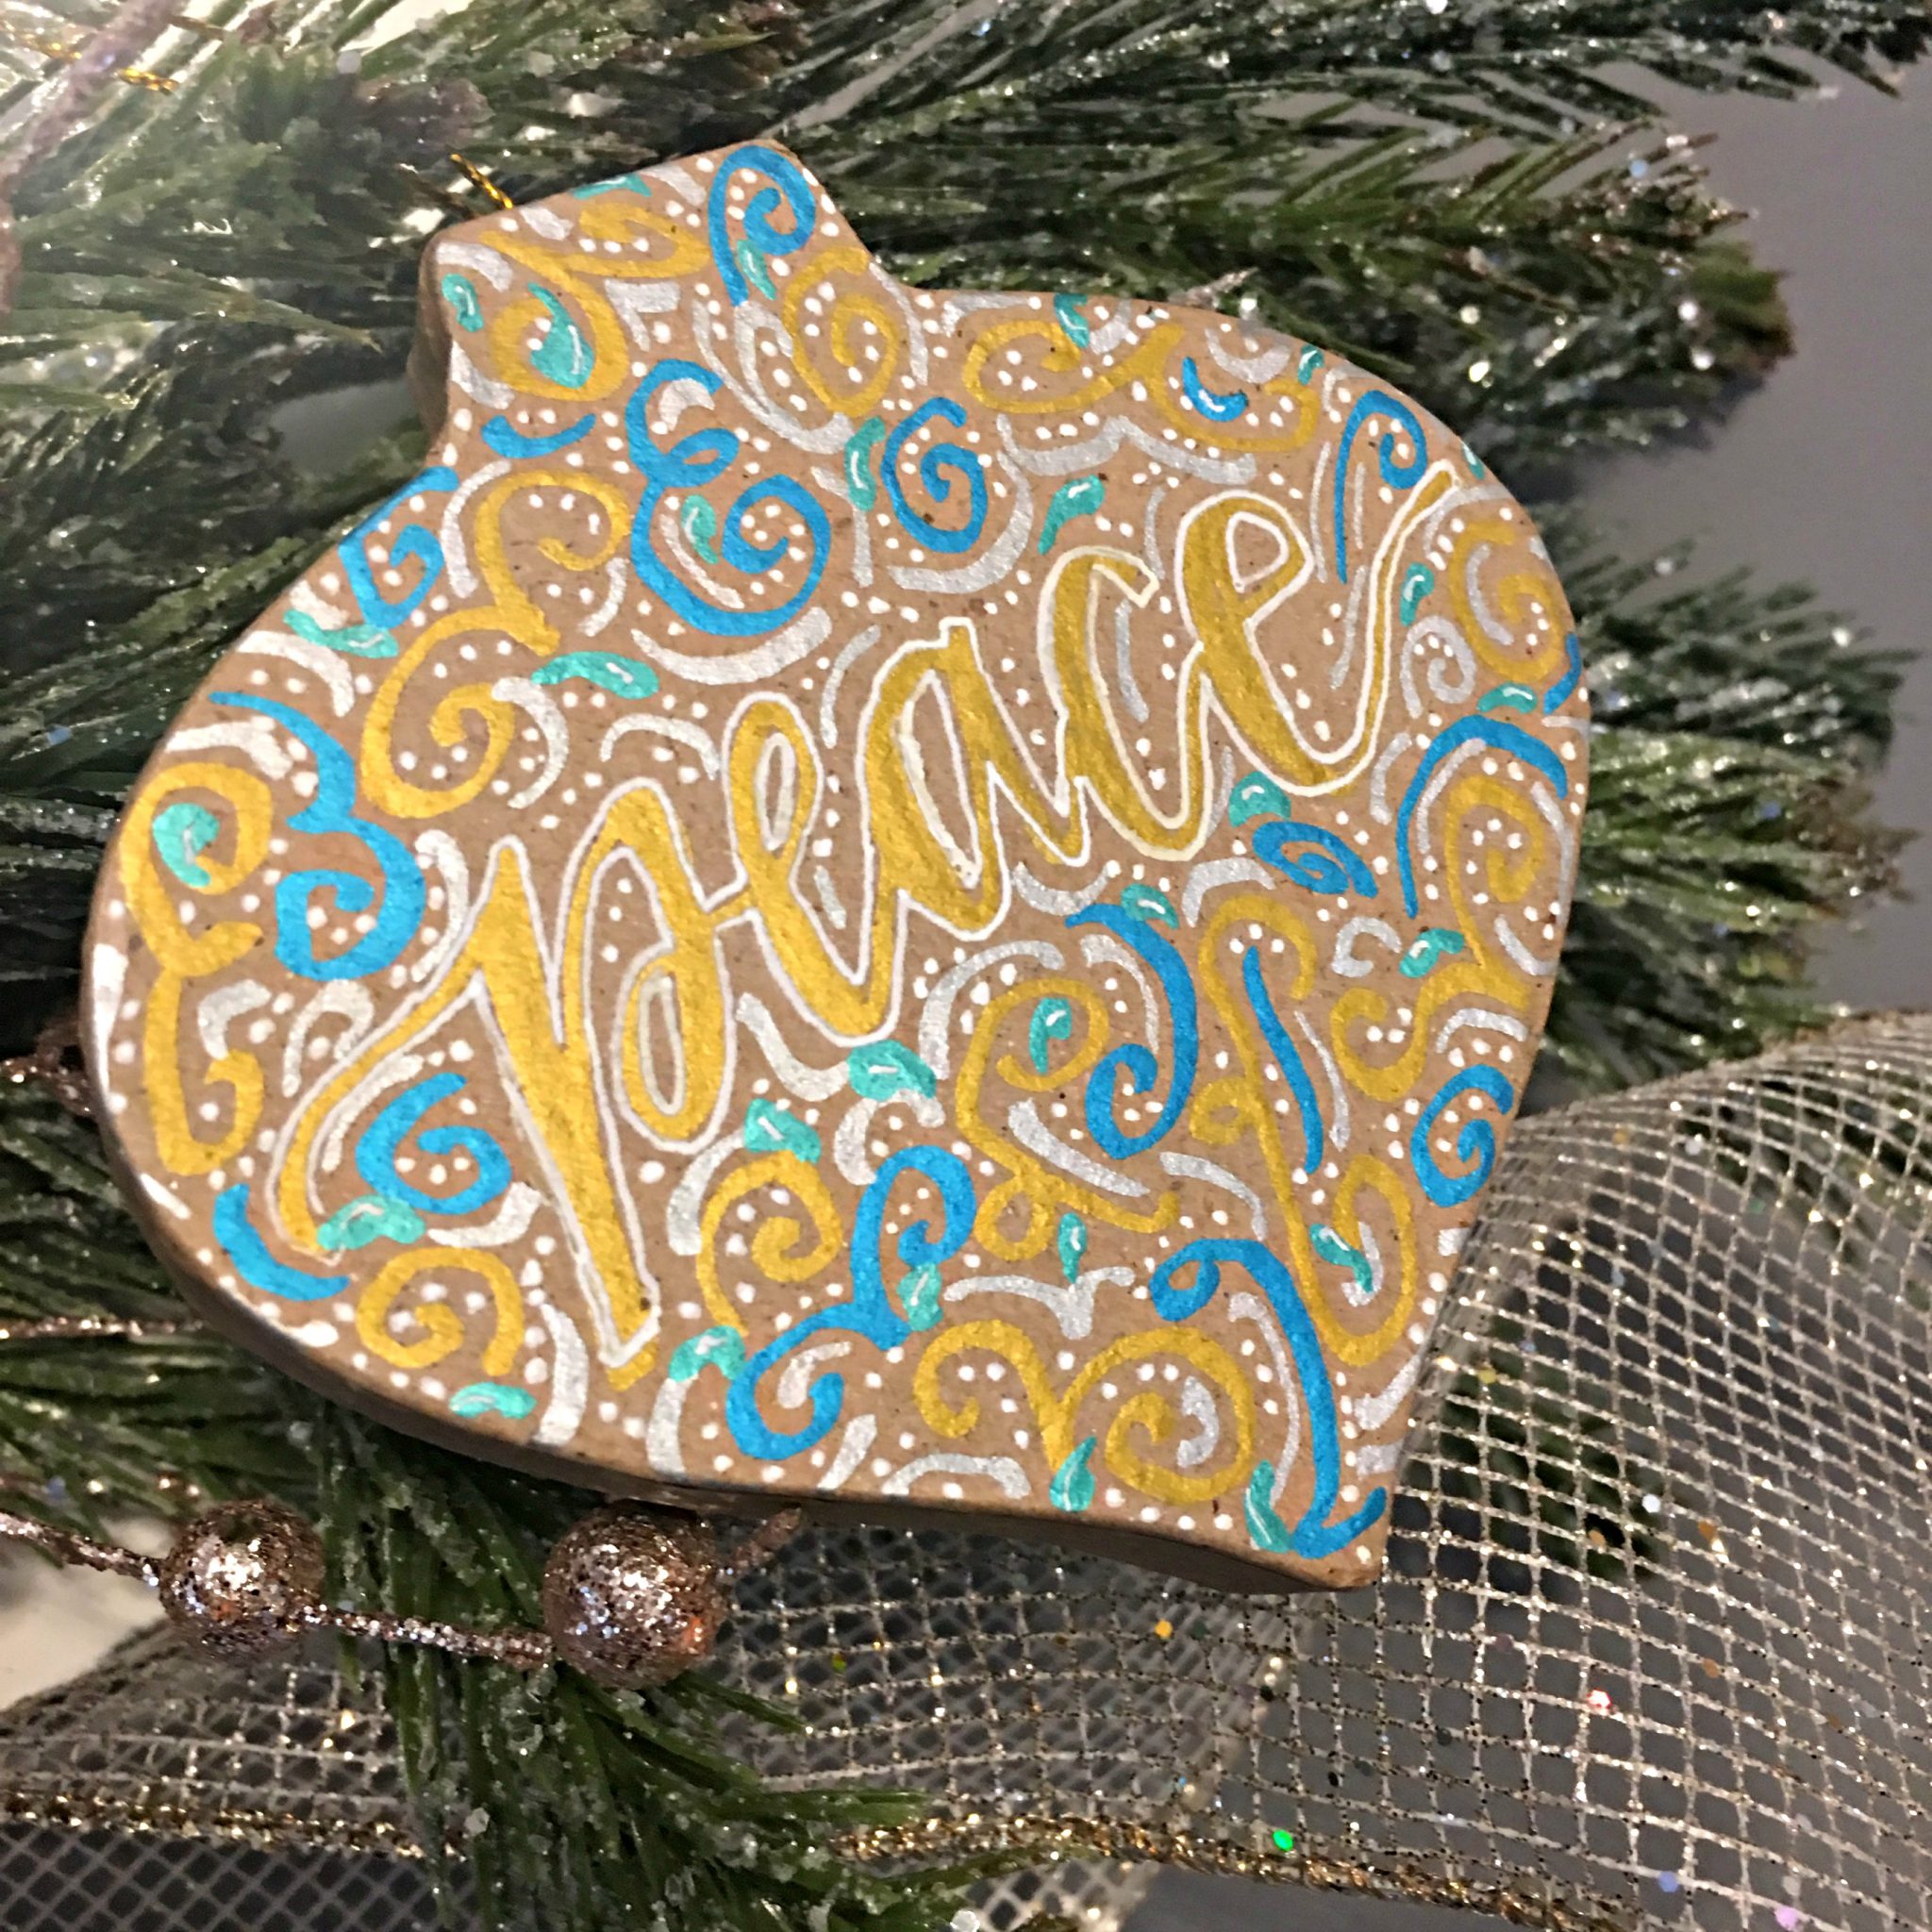
Now, let’s talk about how to use this technique to create an ornament. I started by writing the word “peace” in faux calligraphy in the center of my ornament with a gold paint pen. Then, I traced it with a white gel pen. If you prefer not to have a word, you can simply fill the entire space with your swirls instead. If you’re brand new to lettering and want to know how to make your word look like mine, you’ll want to check out my faux calligraphy post too.
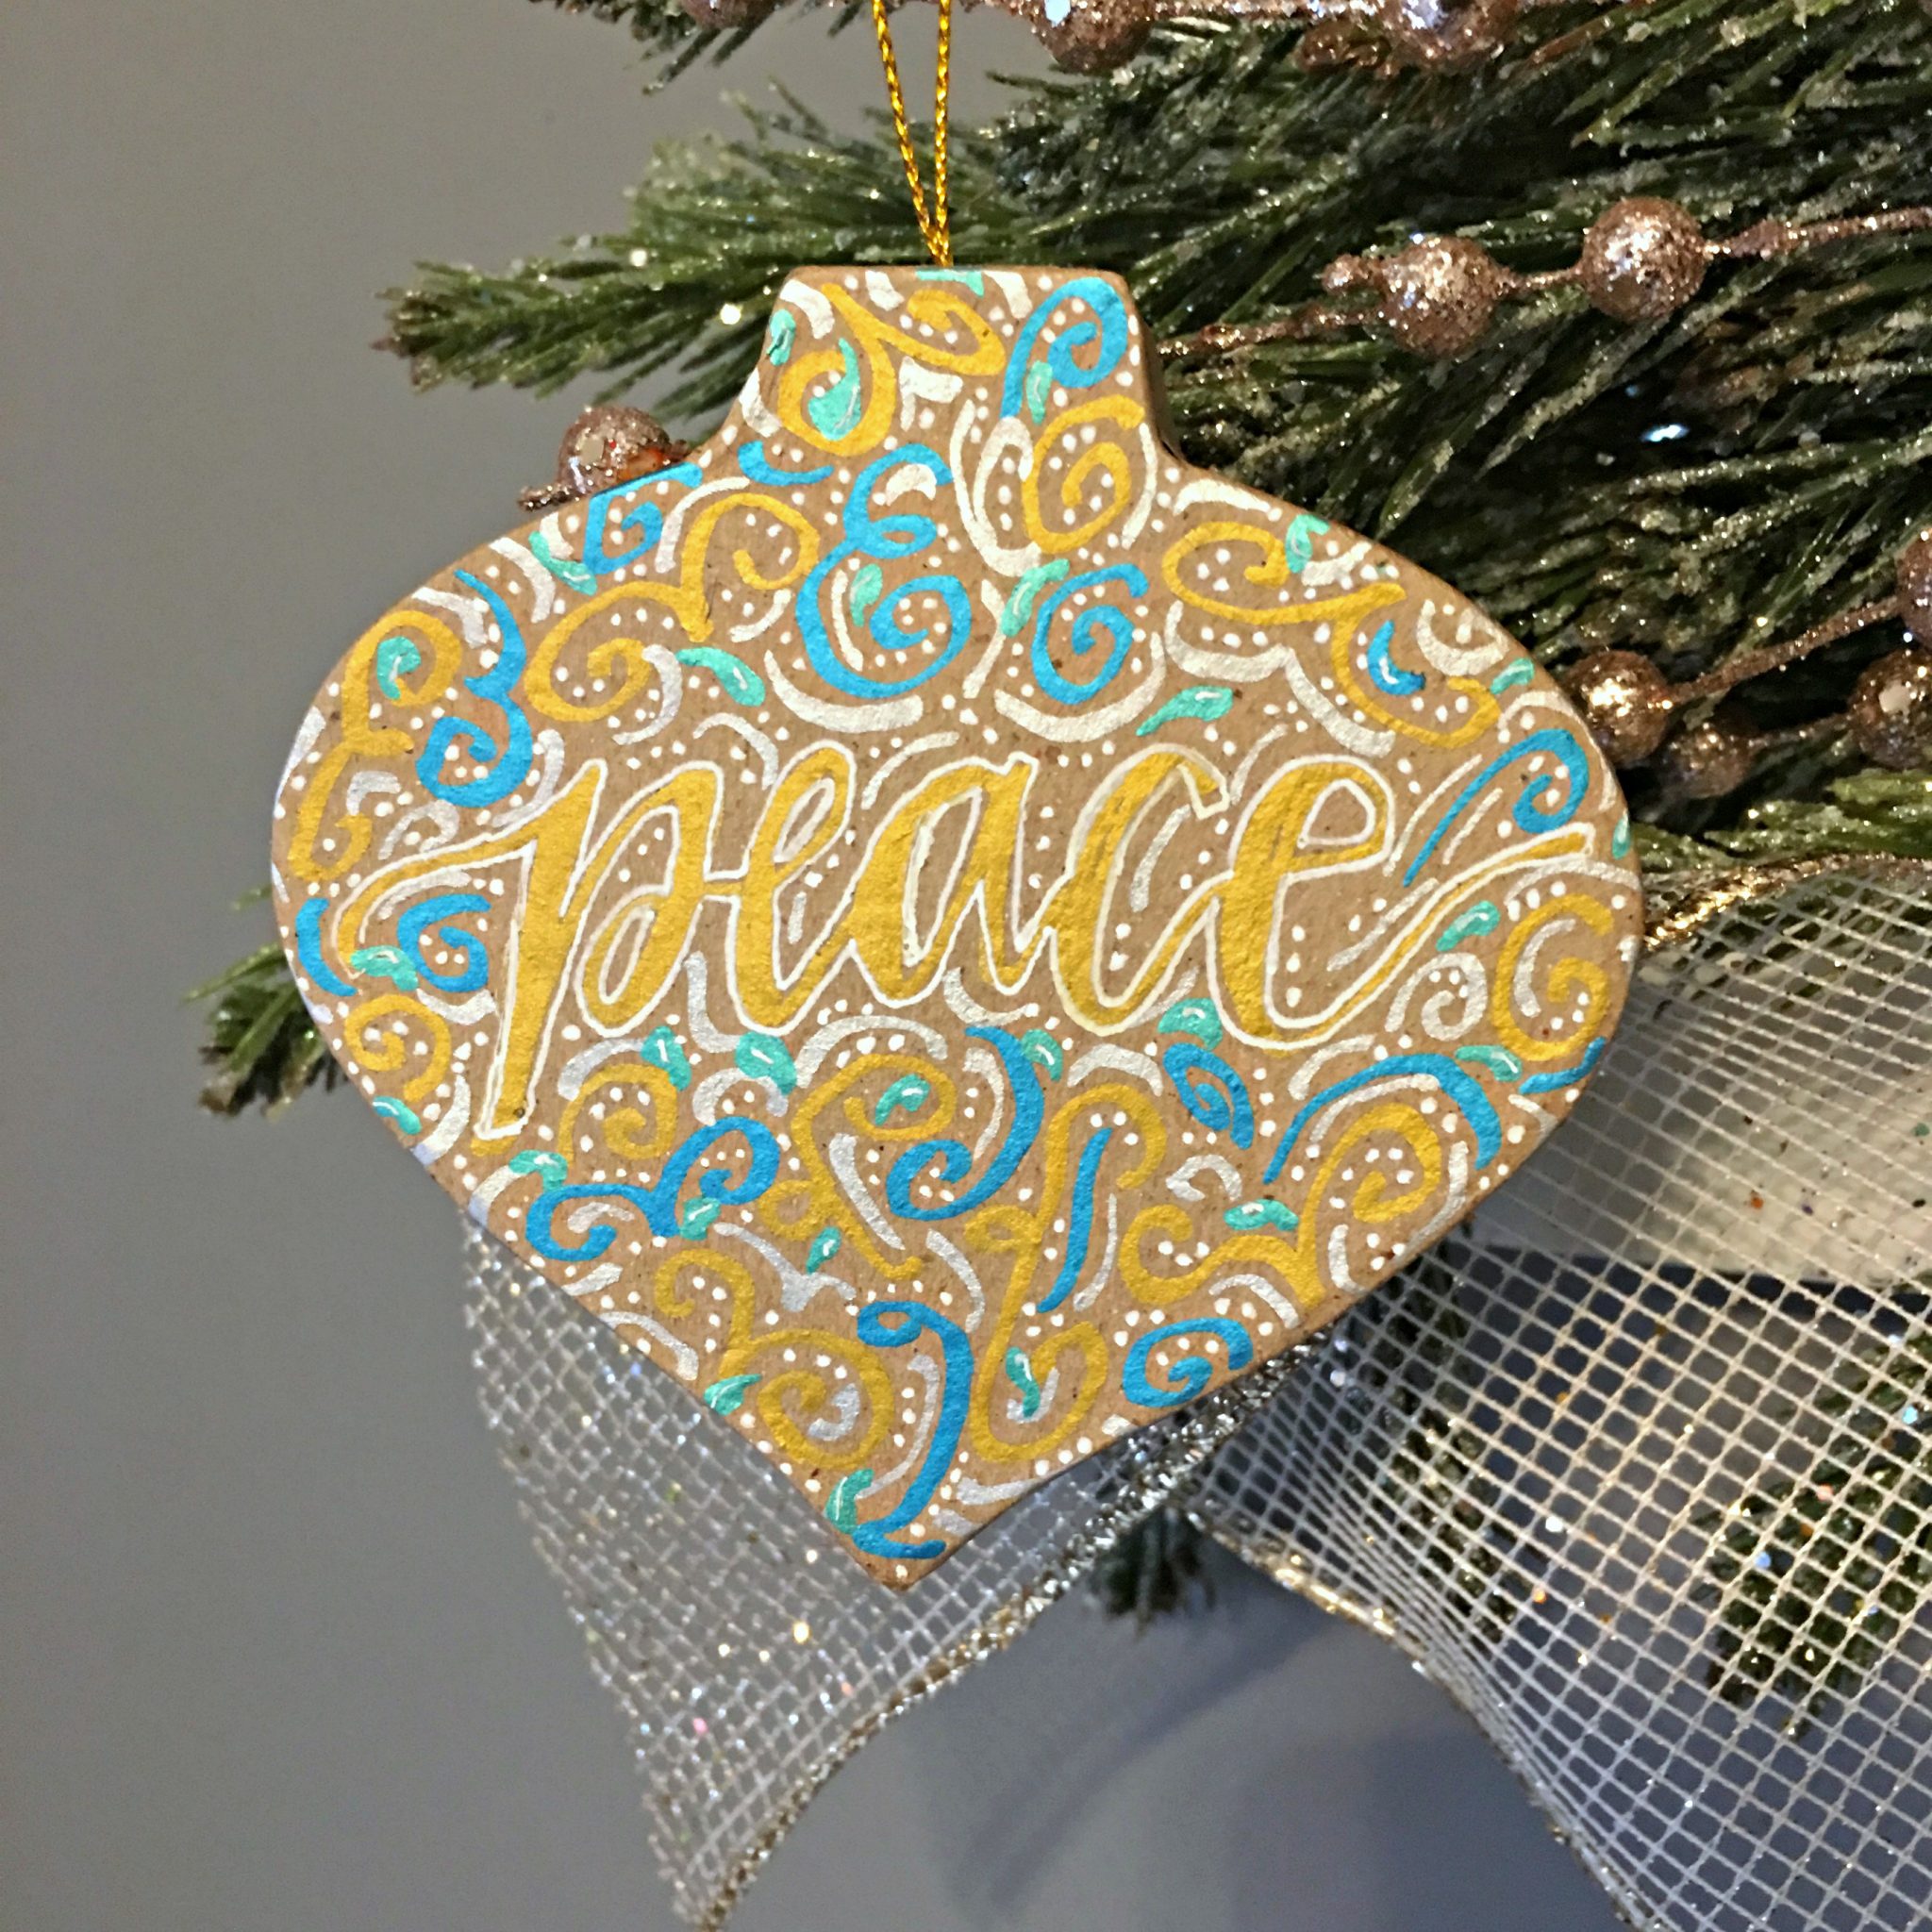
Once the word was finished, I filled in the rest of the empty space using the exact same technique we practiced. I used gold and blue for my original swirls, silver for my accent lines, white gel pen for dots, and green for my teardrop shapes. I used metallic markers, but you can use any type of paint pens, gel pens, or markers you have. You may want to test them on the back of the ornament to make sure they don’t bleed and that you like the look of the color on the brown background. If you want a different effect than the natural kraft brown, you can paint the ornament a solid color first, then use whatever paint markers you want on top after it dries.
What do you think of this technique? I’m loving the effect, and it’s actually really relaxing to sit and doodle the swirls and dots. If you try it, share a photo or two in the One Artsy Mama & Friends Facebook group! See ya there.