“PLAY” Wall Art
 Hello dear readers in One Artsy Mama land, it’s time again for a little crafty chaos! As most of you know, I {Erin} have three darling little boys, and my two eldest will be turning 3 and 4 this May (AAAHH!). As they grow older, their needs for play have been evolving, and it was time to turn our downstairs family room into a more suitable environment for the boys to grow up in! This is what I started with:

Nice right? It had become a “dumping zone” and I spent hours cleaning out, designing, and creating a new and approved play place for our active boys. Here’s the after pictures:
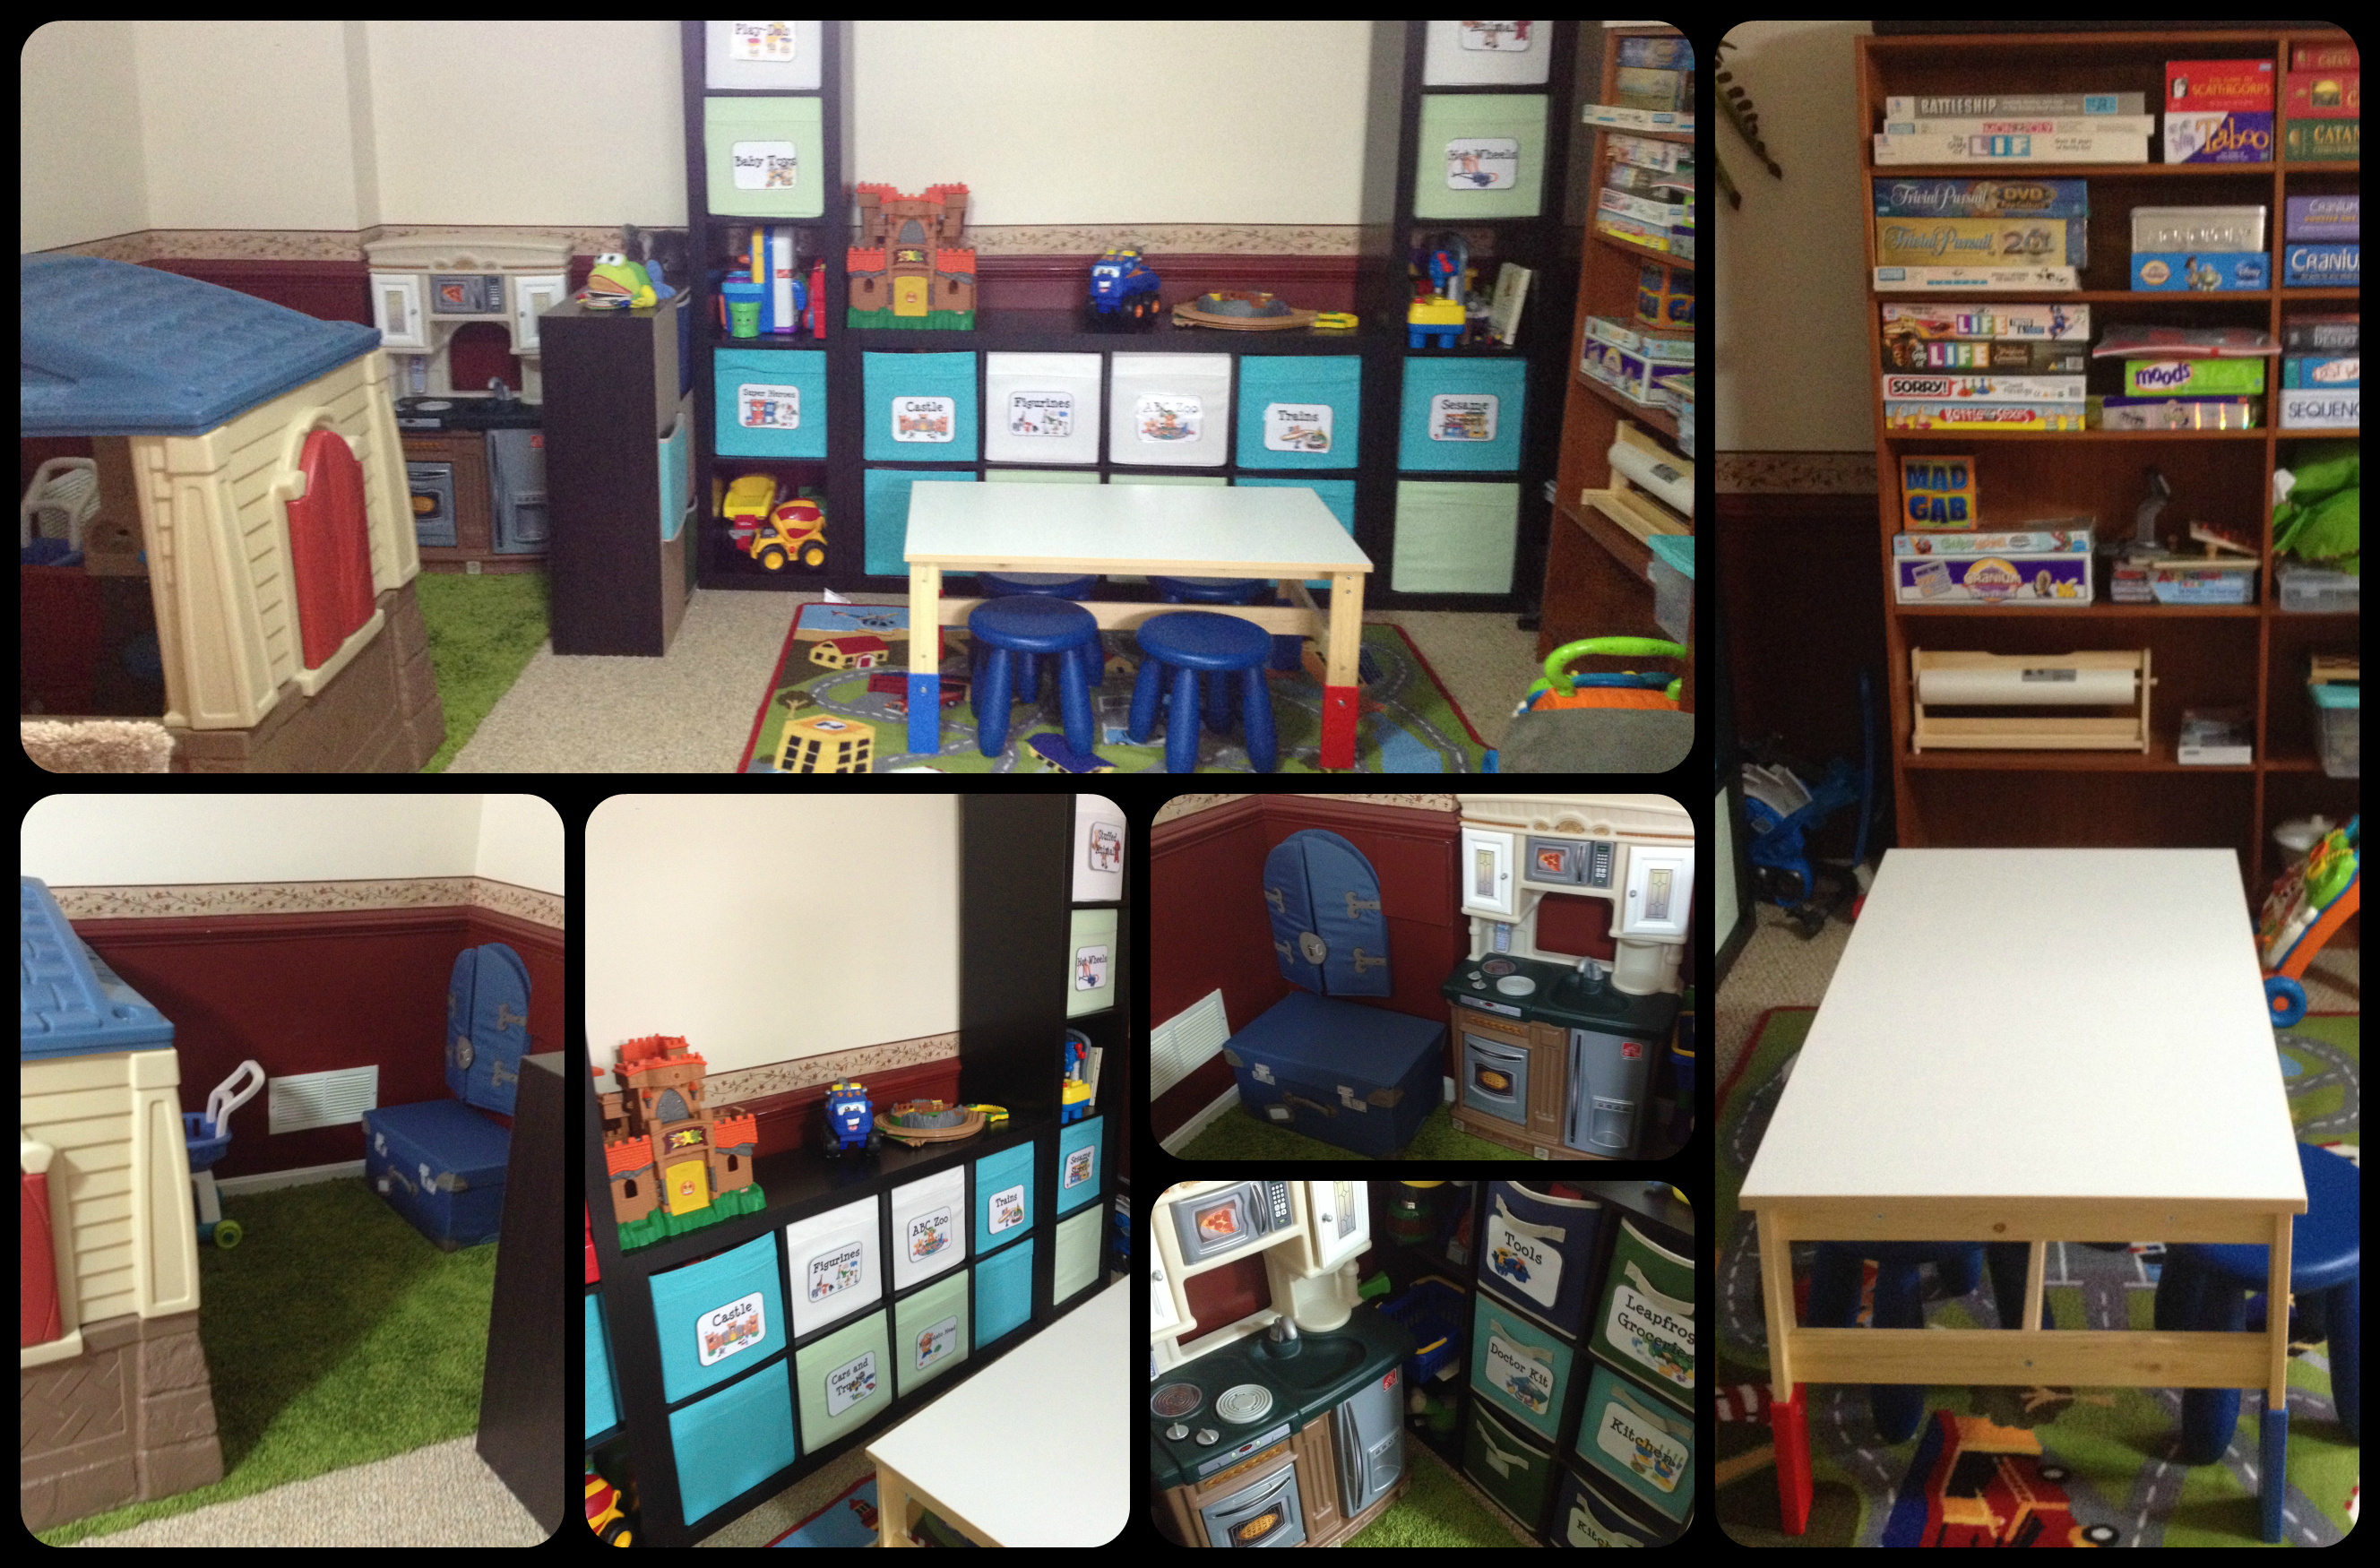
Much better! I gave them lots of dedicated areas for role play, table play, and floor play. I’m one of those people who cringe at white walls though, and I was excited to create some one-of-a kind pieces for a couple of the areas, including today’s project, “PLAY” Wall Art!
Brief Disclaimer. In true crafty chaos fashion, all I had to take pictures was my cell phone, because I definitely can’t find the battery charger for my nice point and shoot camera. I apologize. Don’t judge.
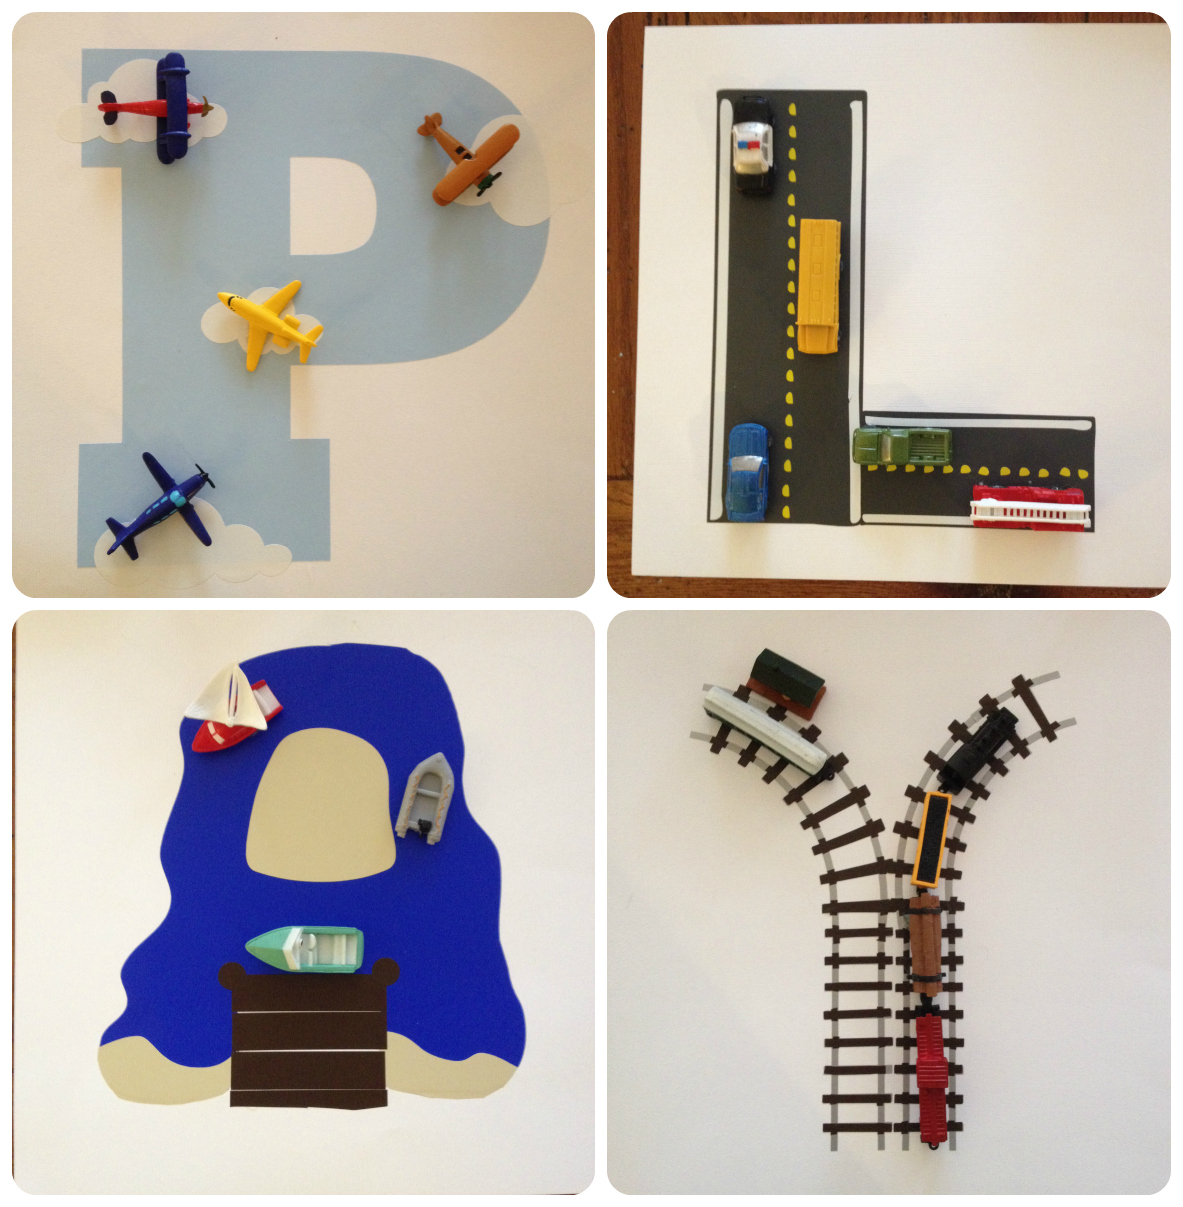
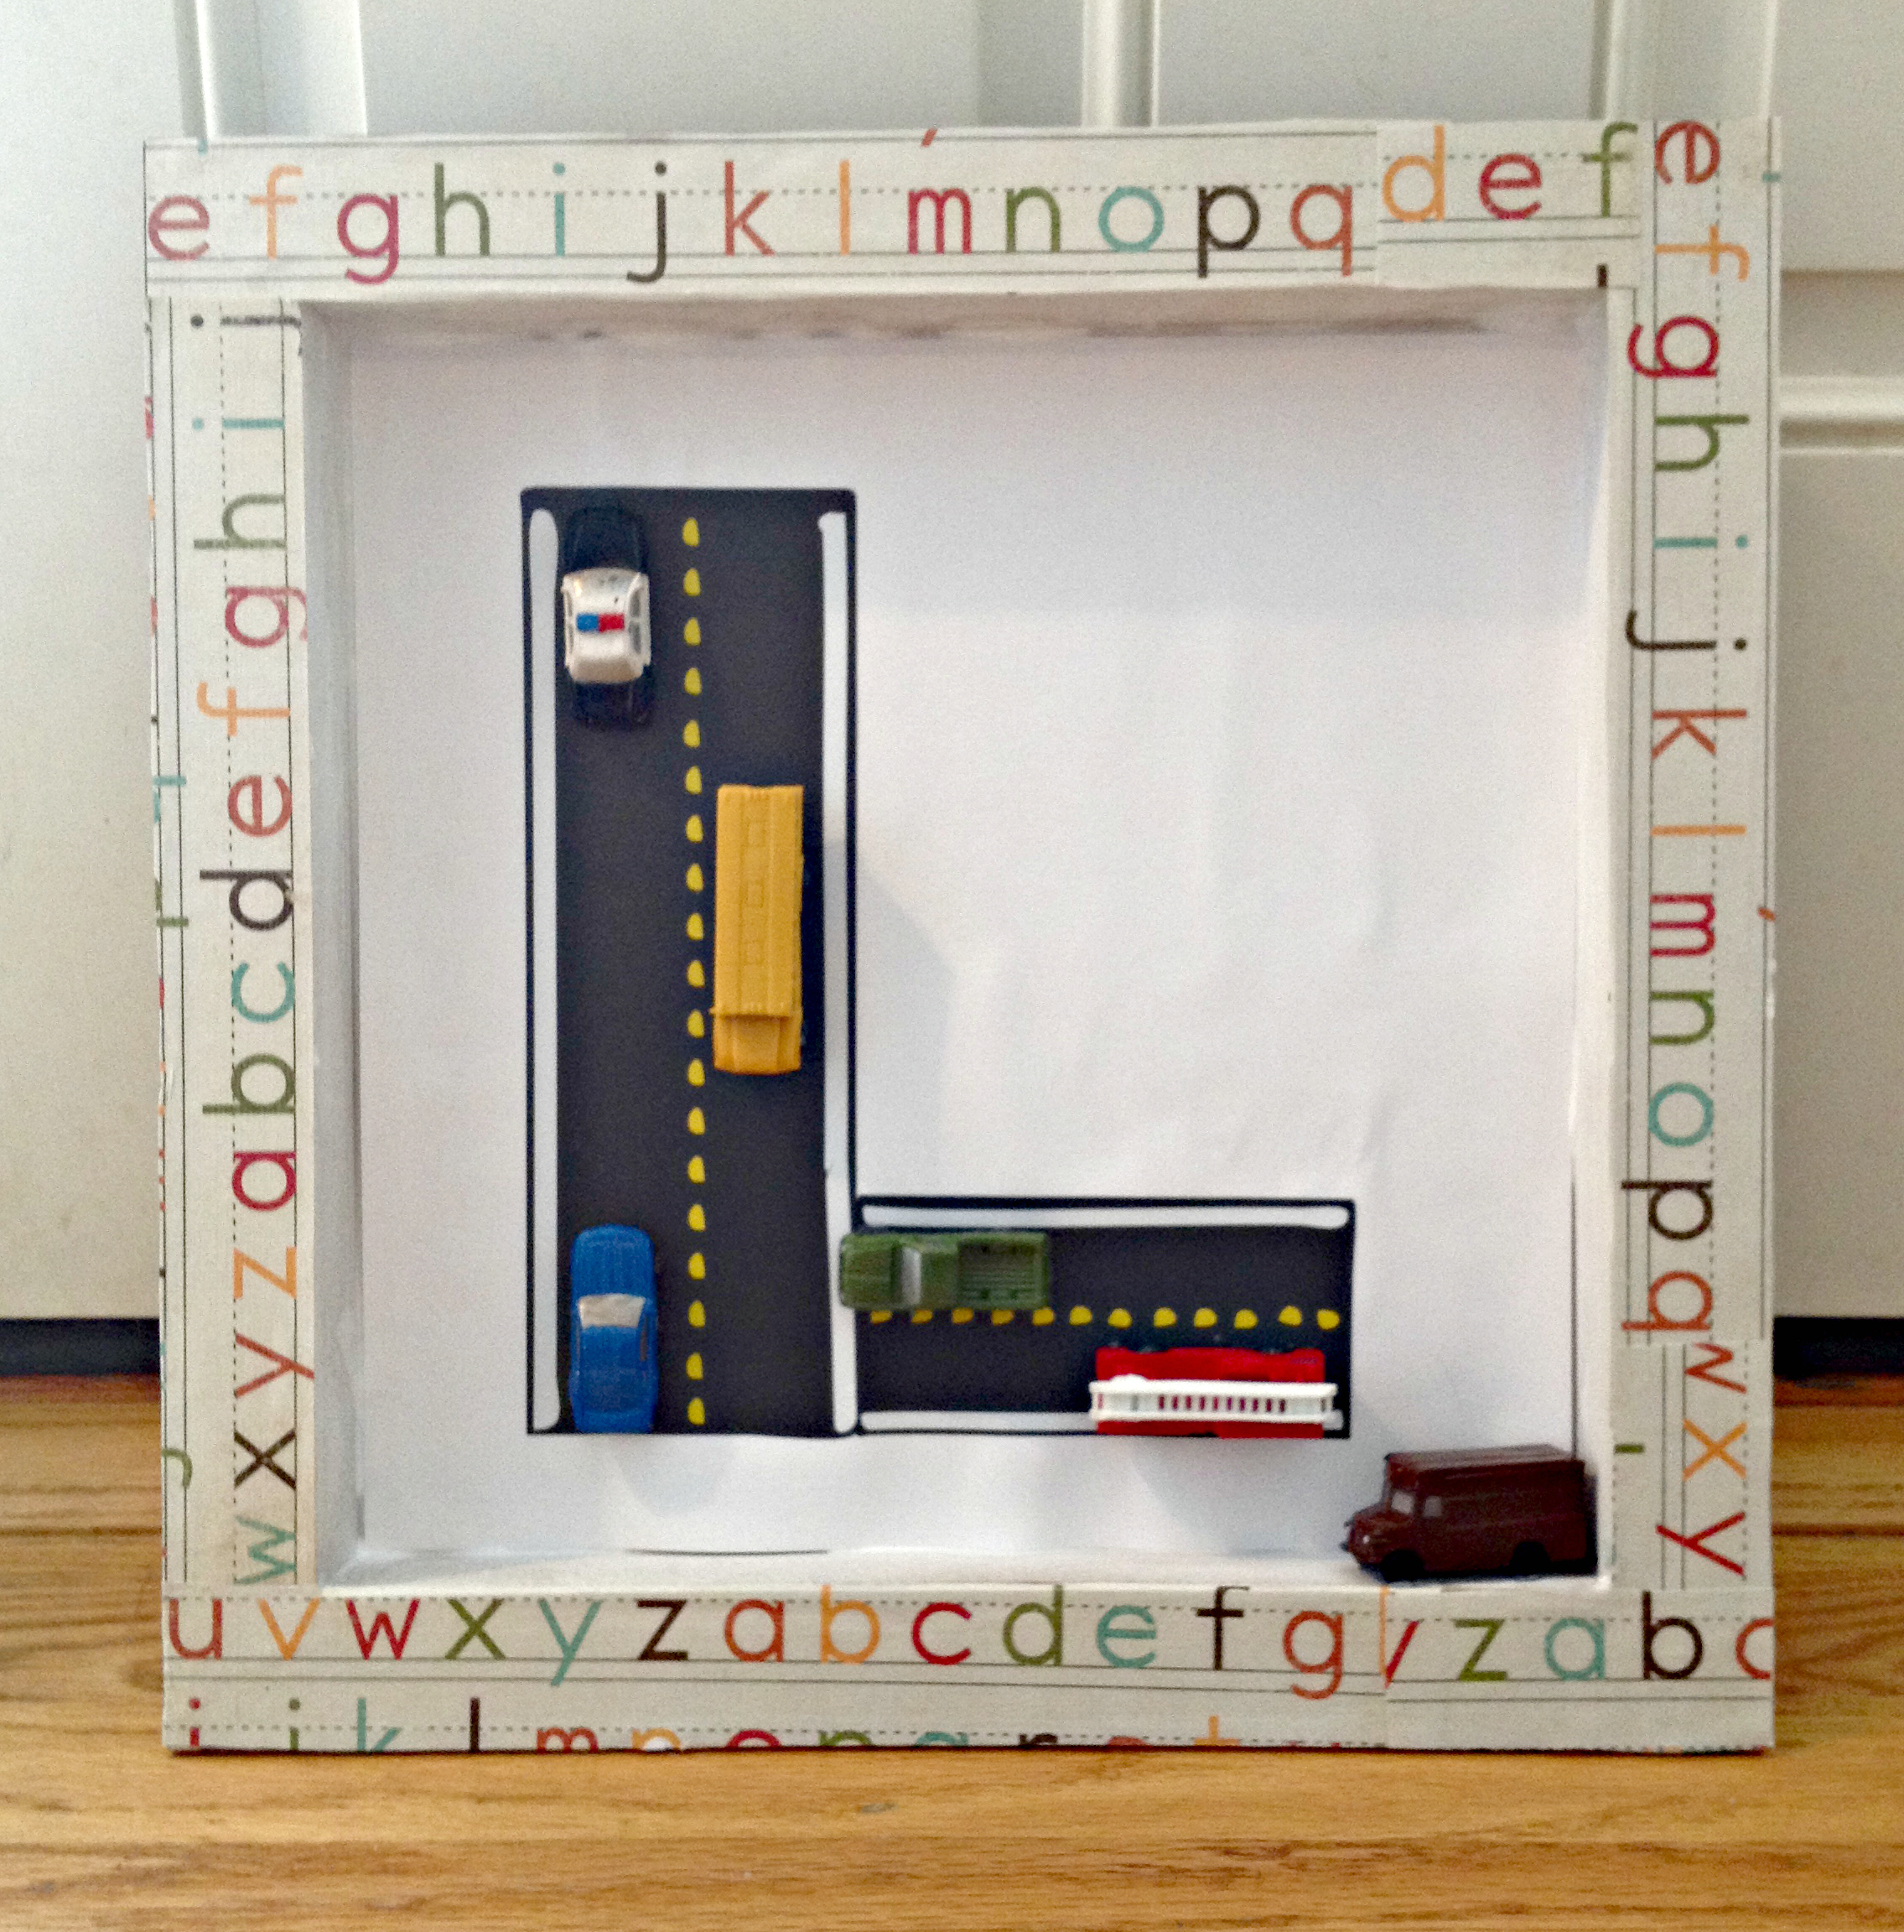
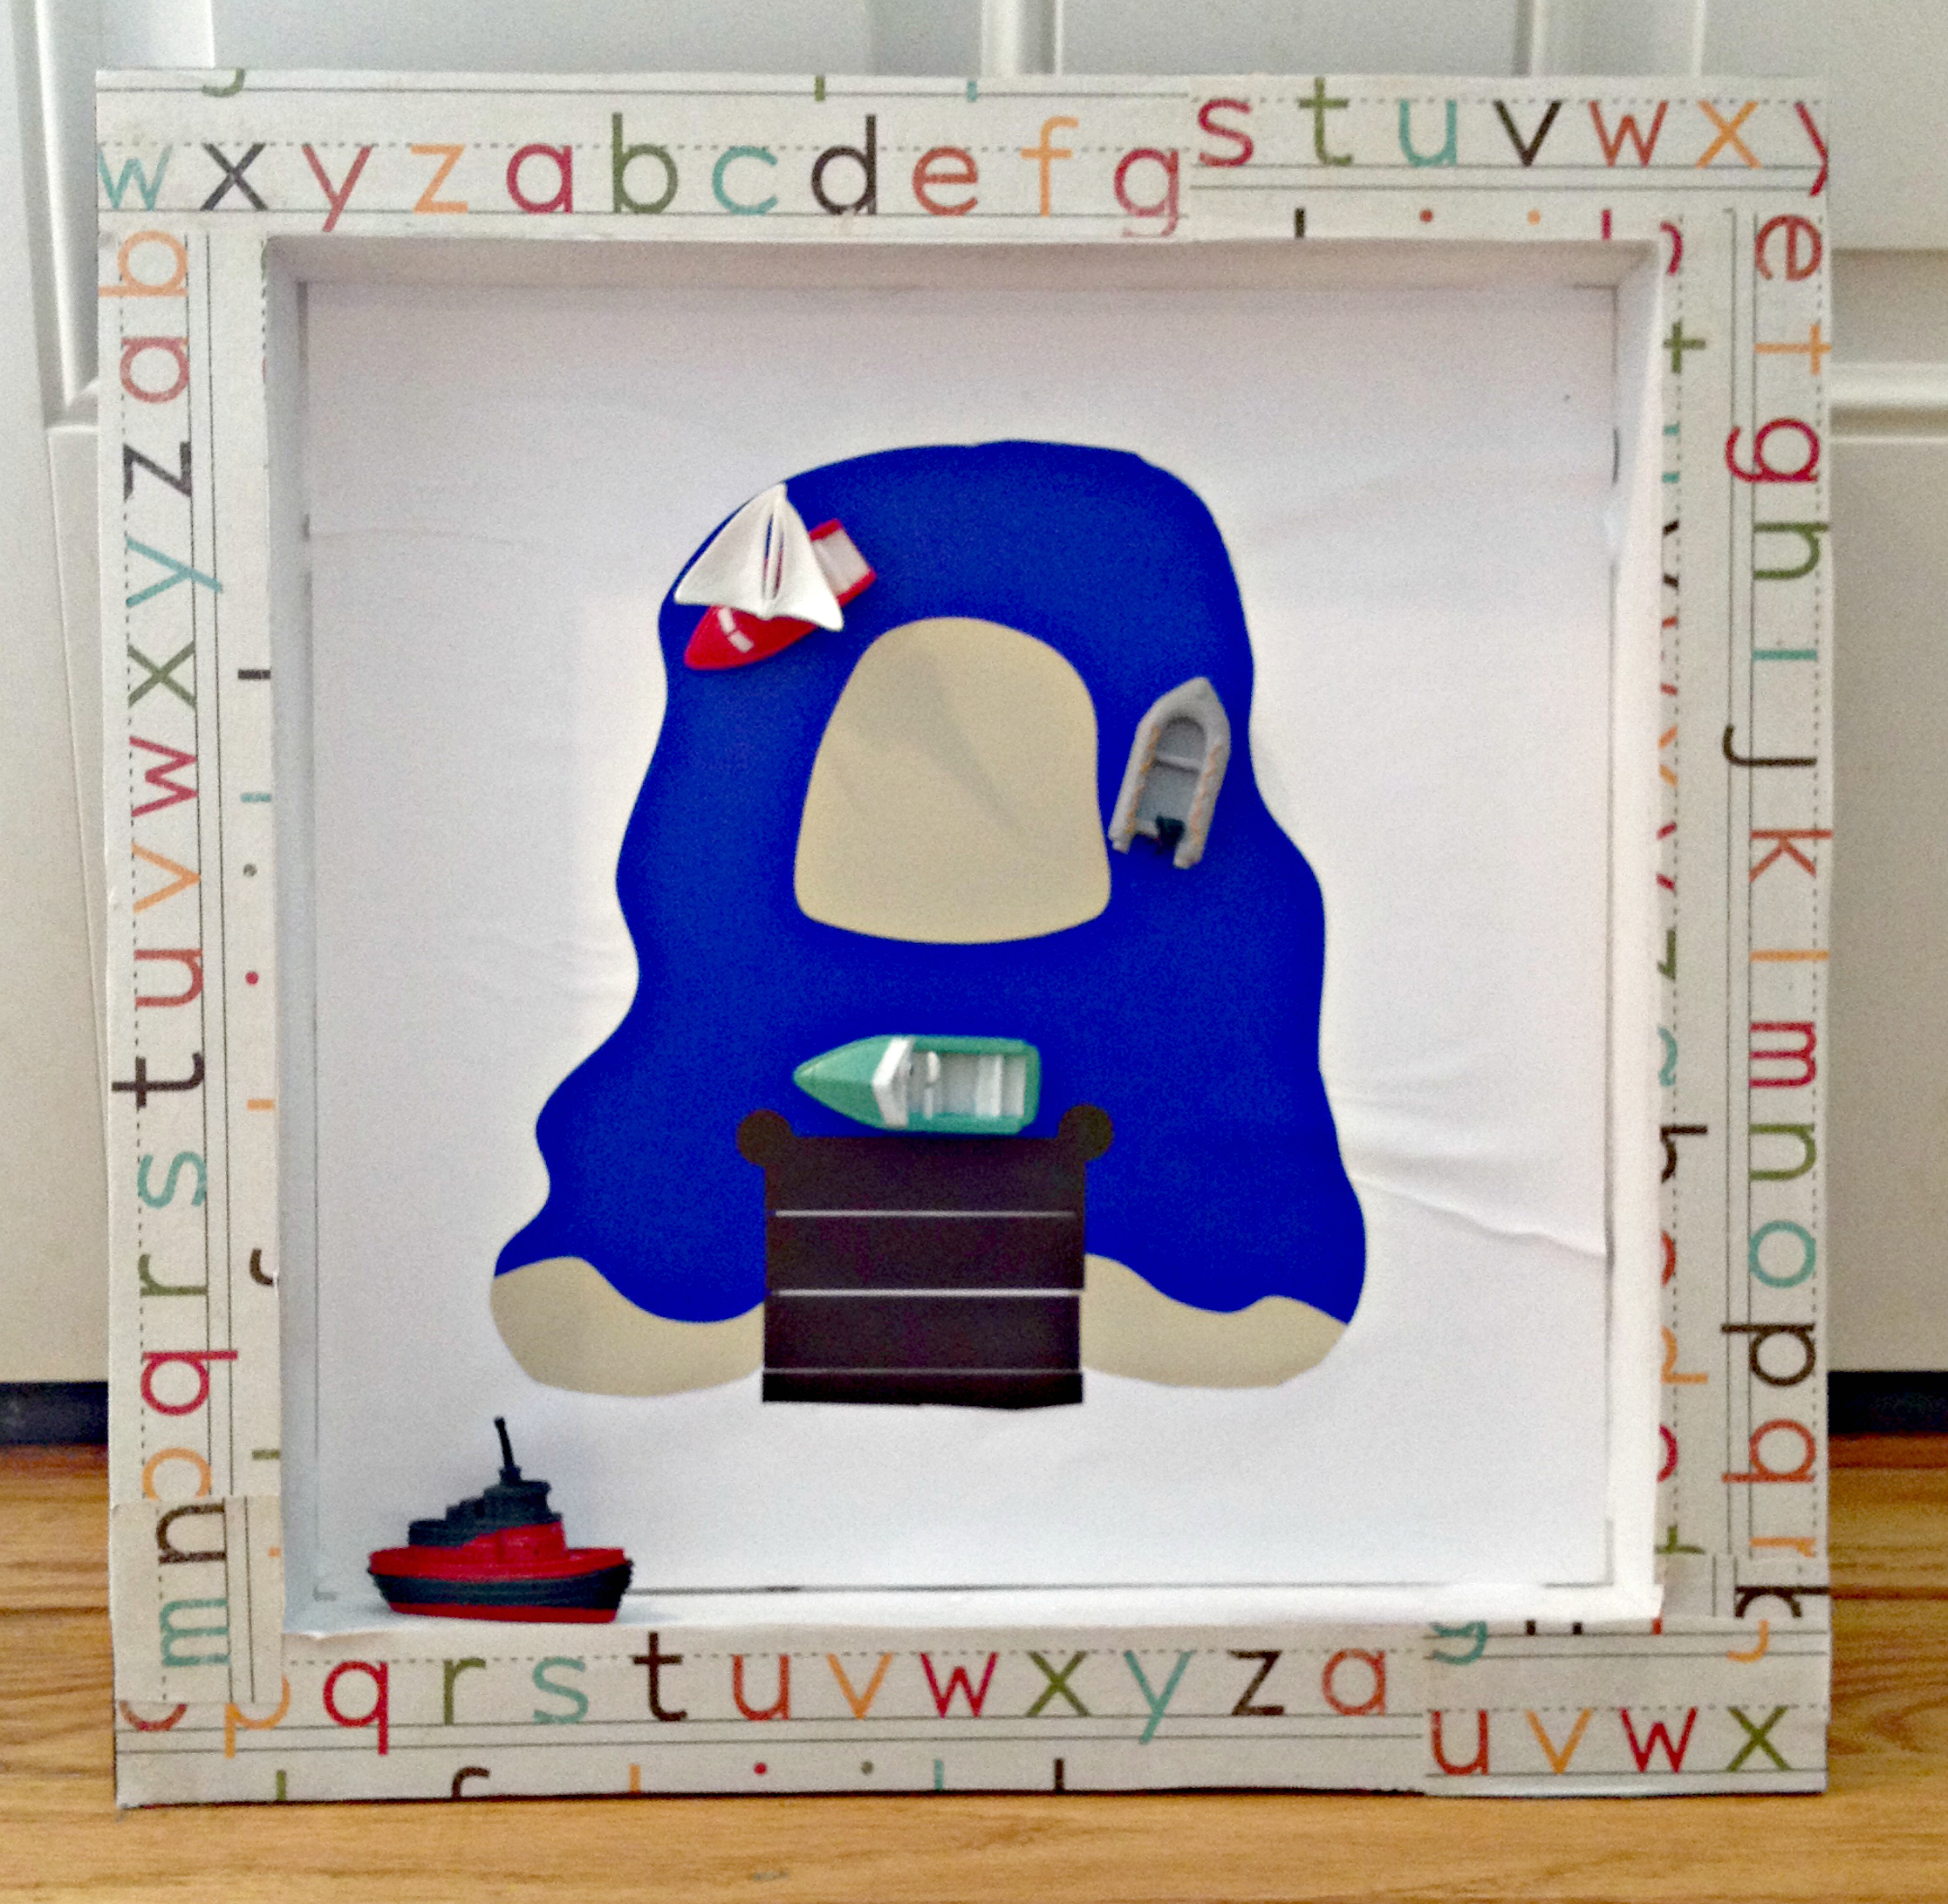
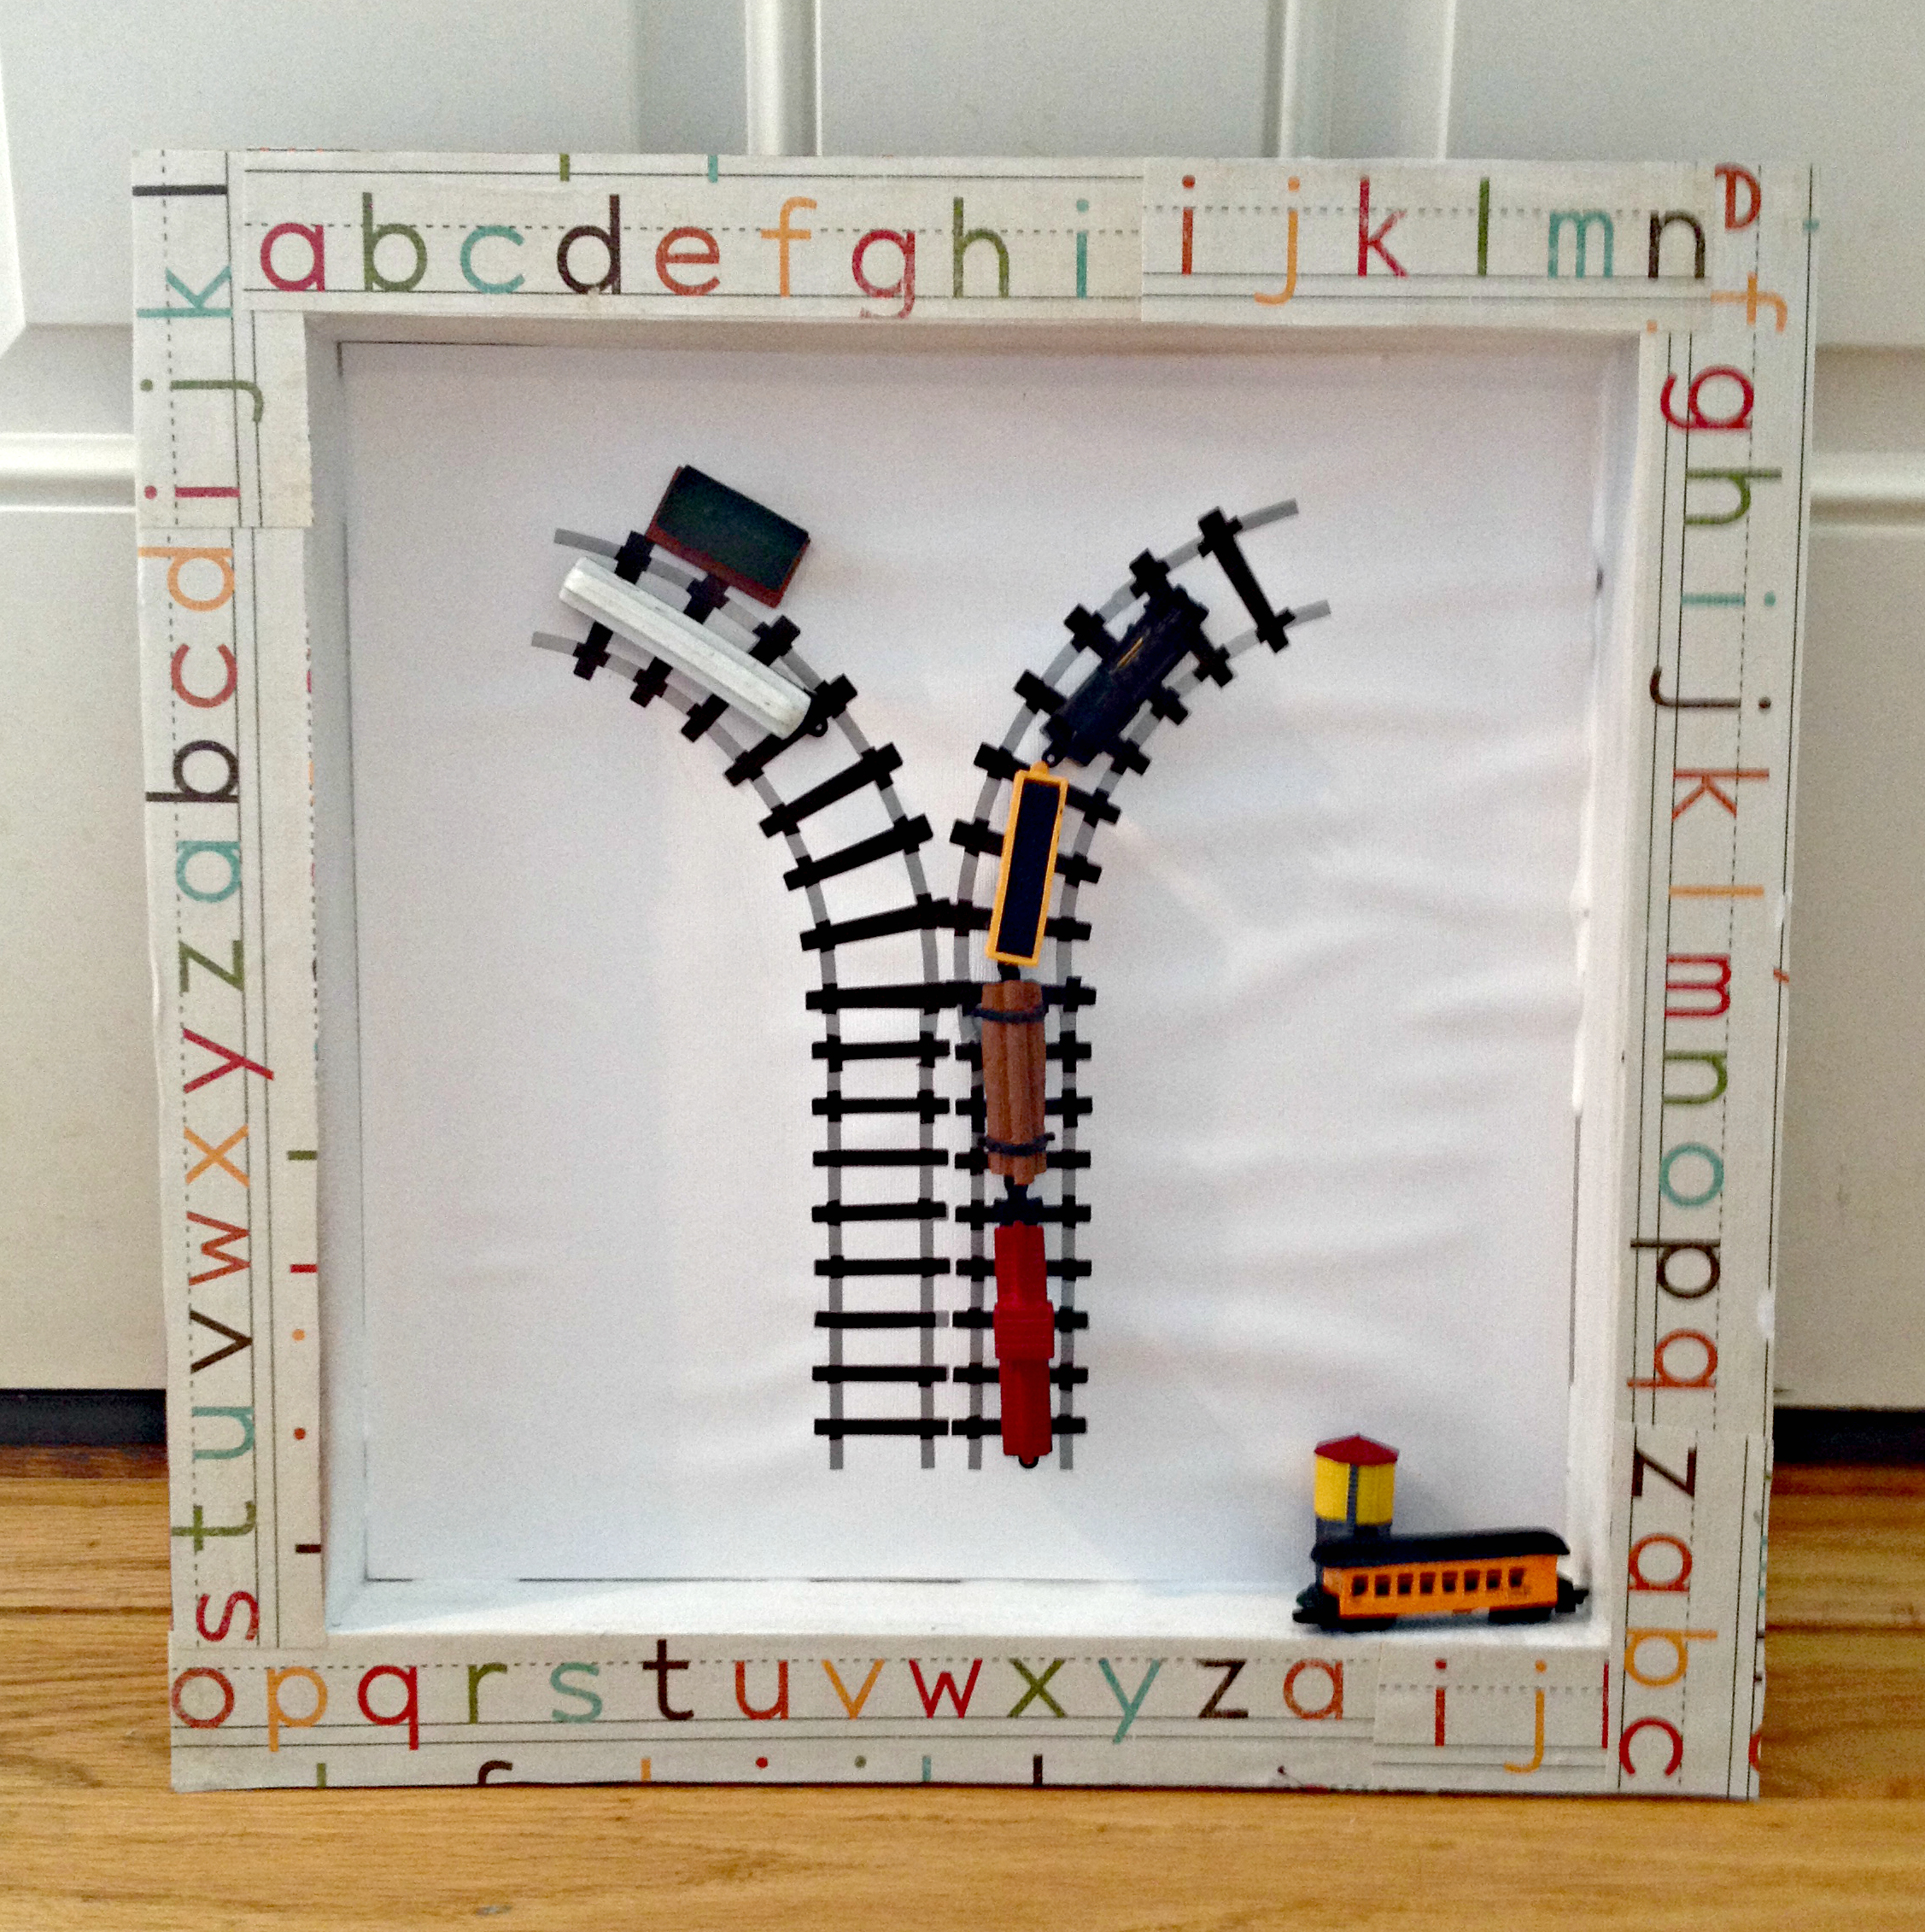
So let’s move on to the project. I wanted to create some art that incorporated the playful nature of the room, as well as some of my boys’ favorite types of things (in this case all things transportation). What came out of that was this wall art!
What You Need:
-4 Shadow Boxes
-Cardstock
-Vinyl
-Small Toys
-Spray Paint
-Mod Podge
-Picture Hangers
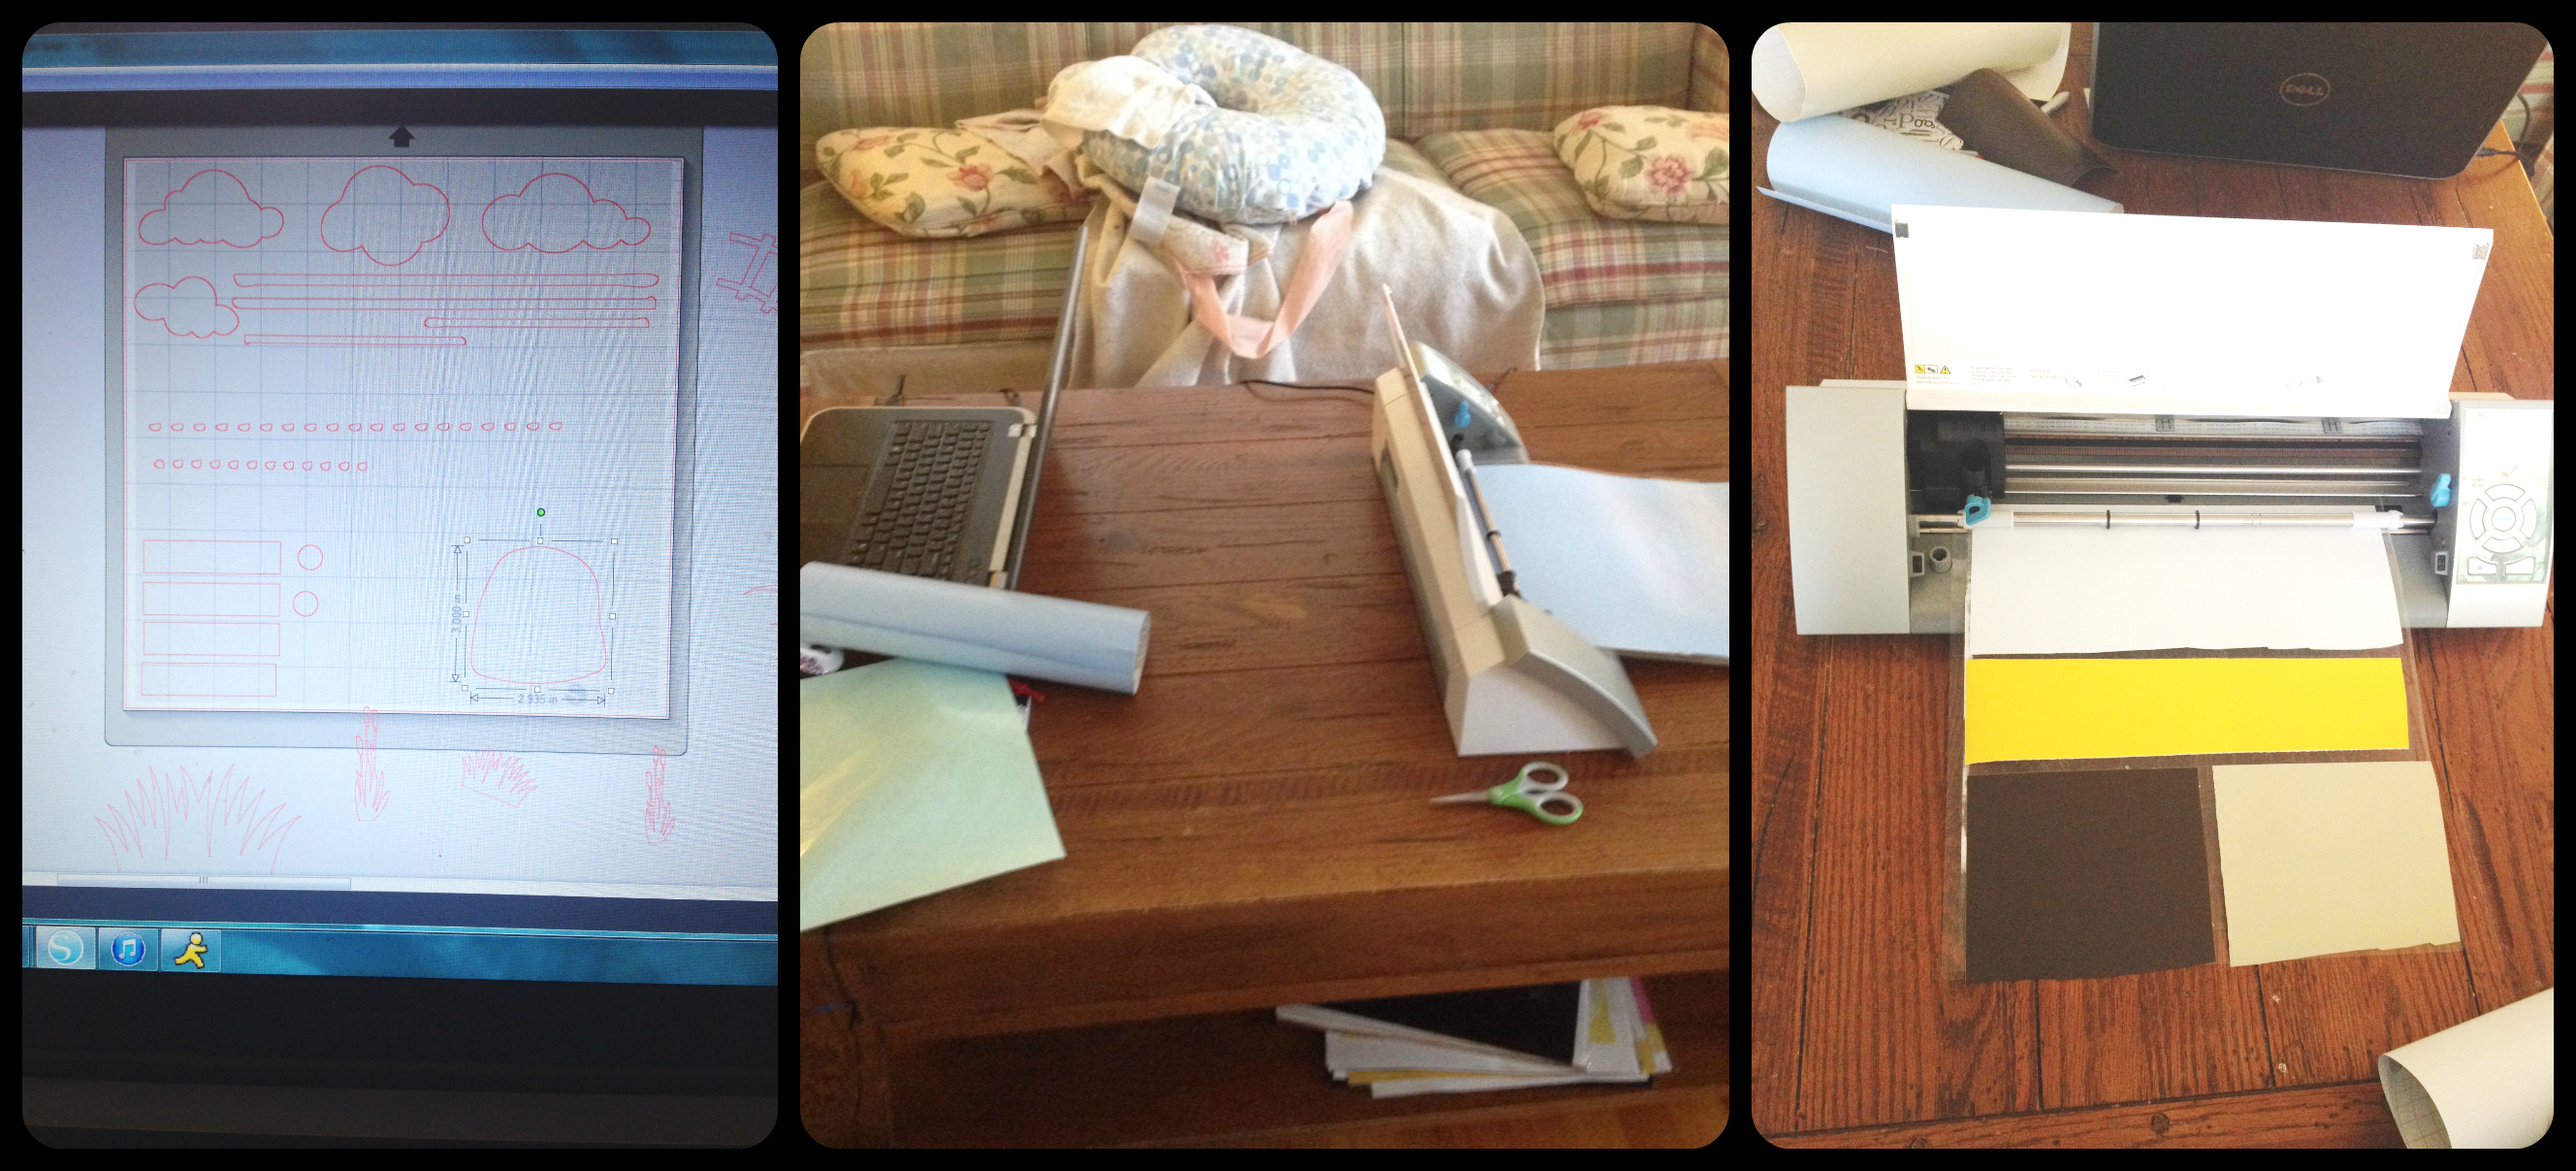
Step 1: Design and Cut Vinyl Letters and Details-I used my Silhouette Software to design my letters (I was even able to draw the “A” out in the program, since I wasn’t happy with the font choices for it) and then I added details to bring the letters alive. When I was finished, I let my Cameo do its thing!
Step 2: Stick the Vinyl to the Cardstock–I used white cardstock, to show off the letters better.
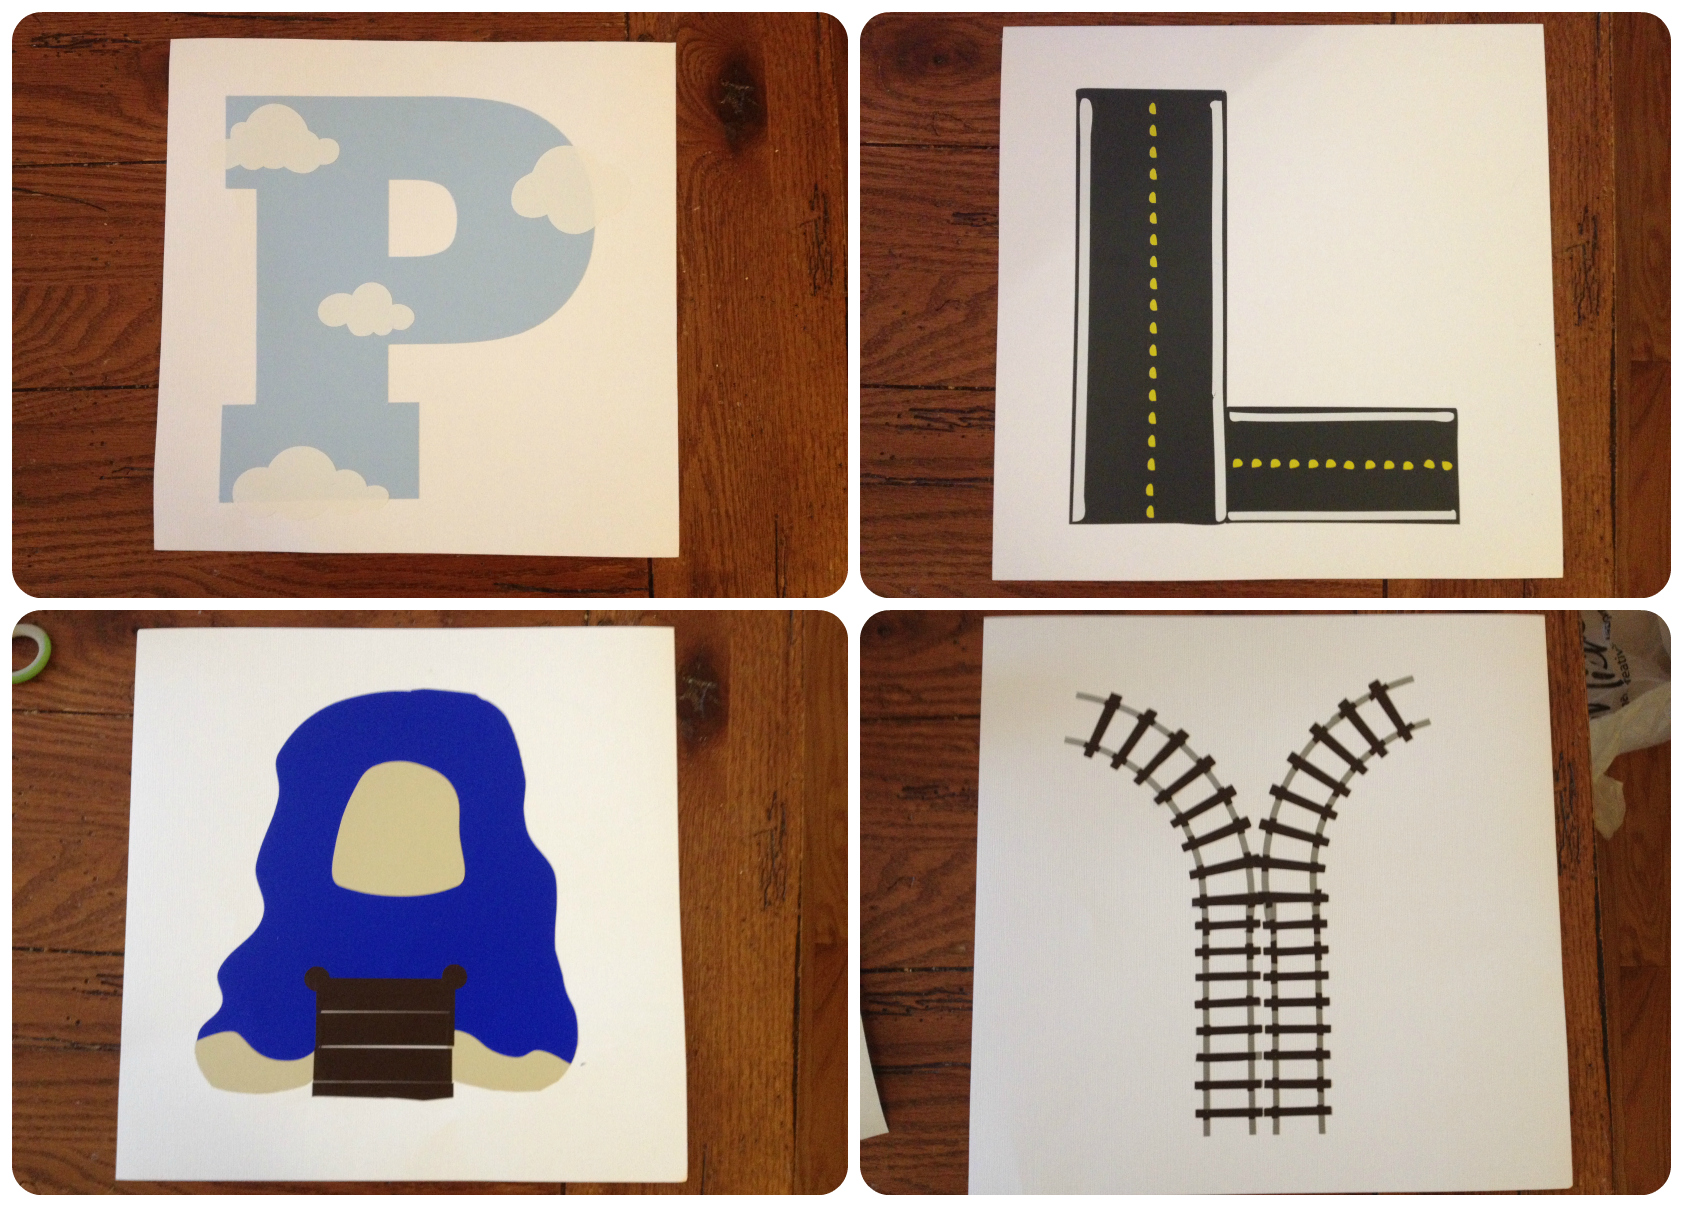
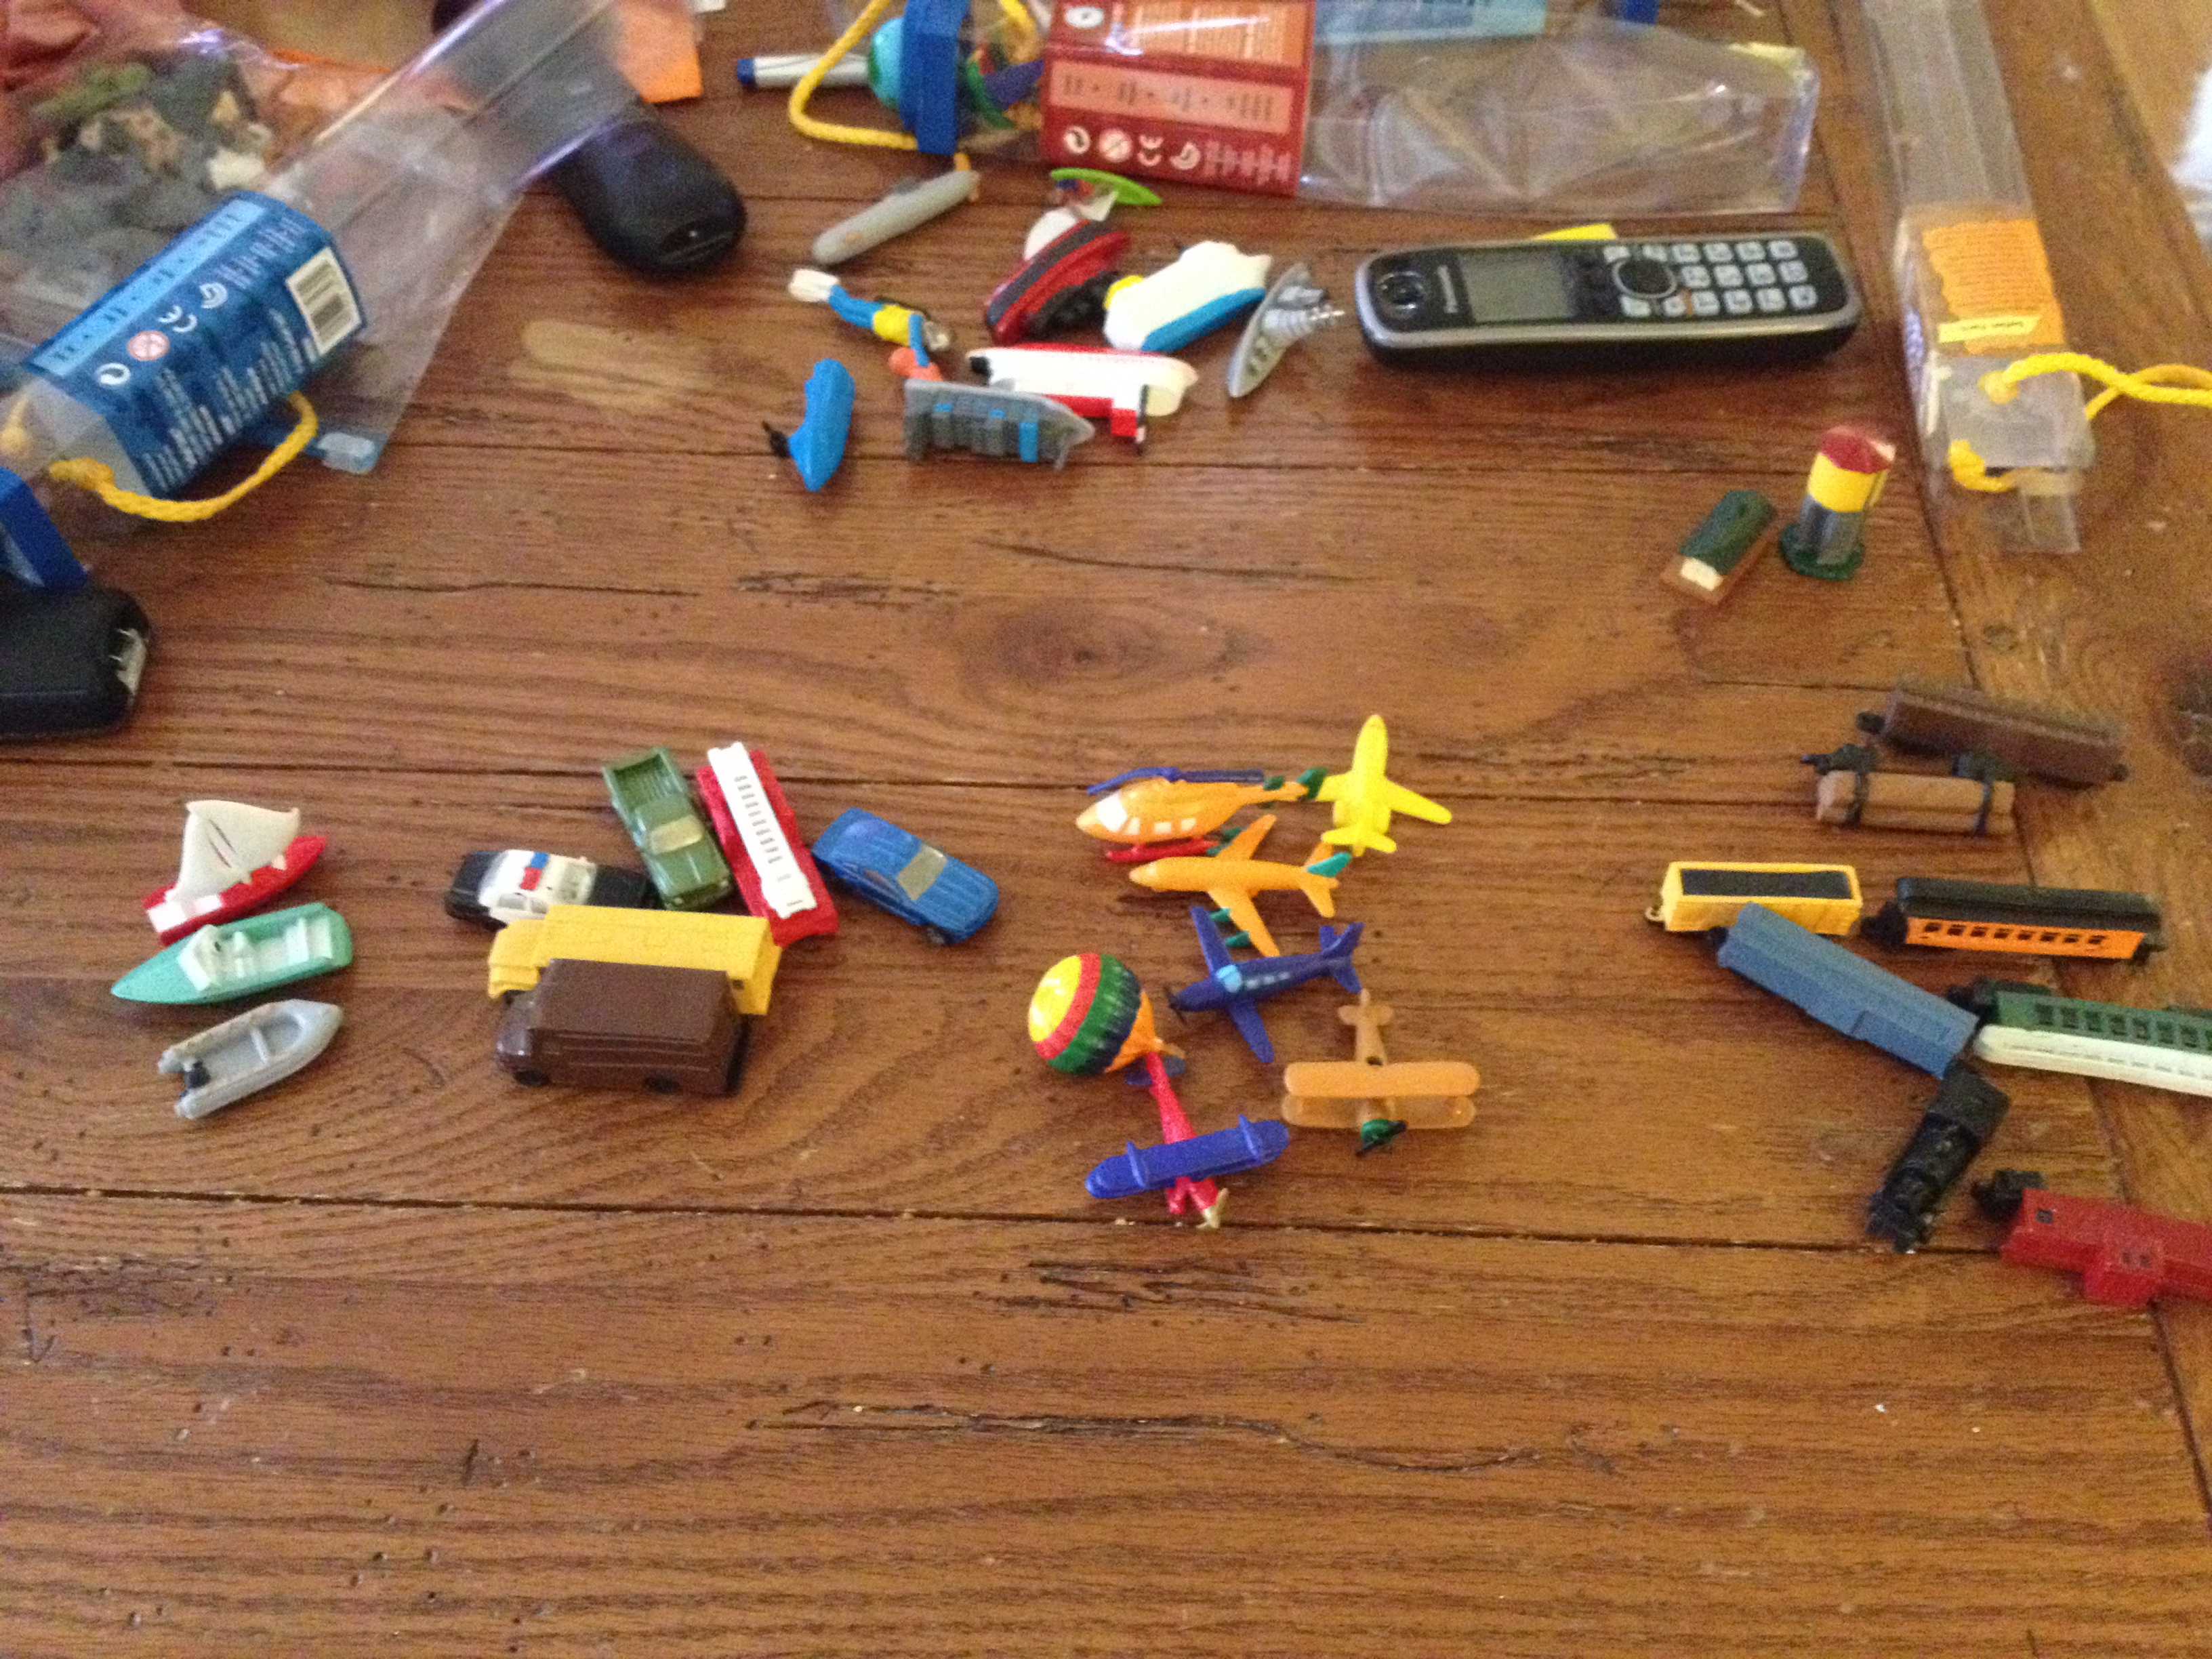
Step 3: Add Toys!-This was a lot of fun, but I had to do it secretly, because the boys kept taking them. I used hot glue to adhere them to the vinyl.
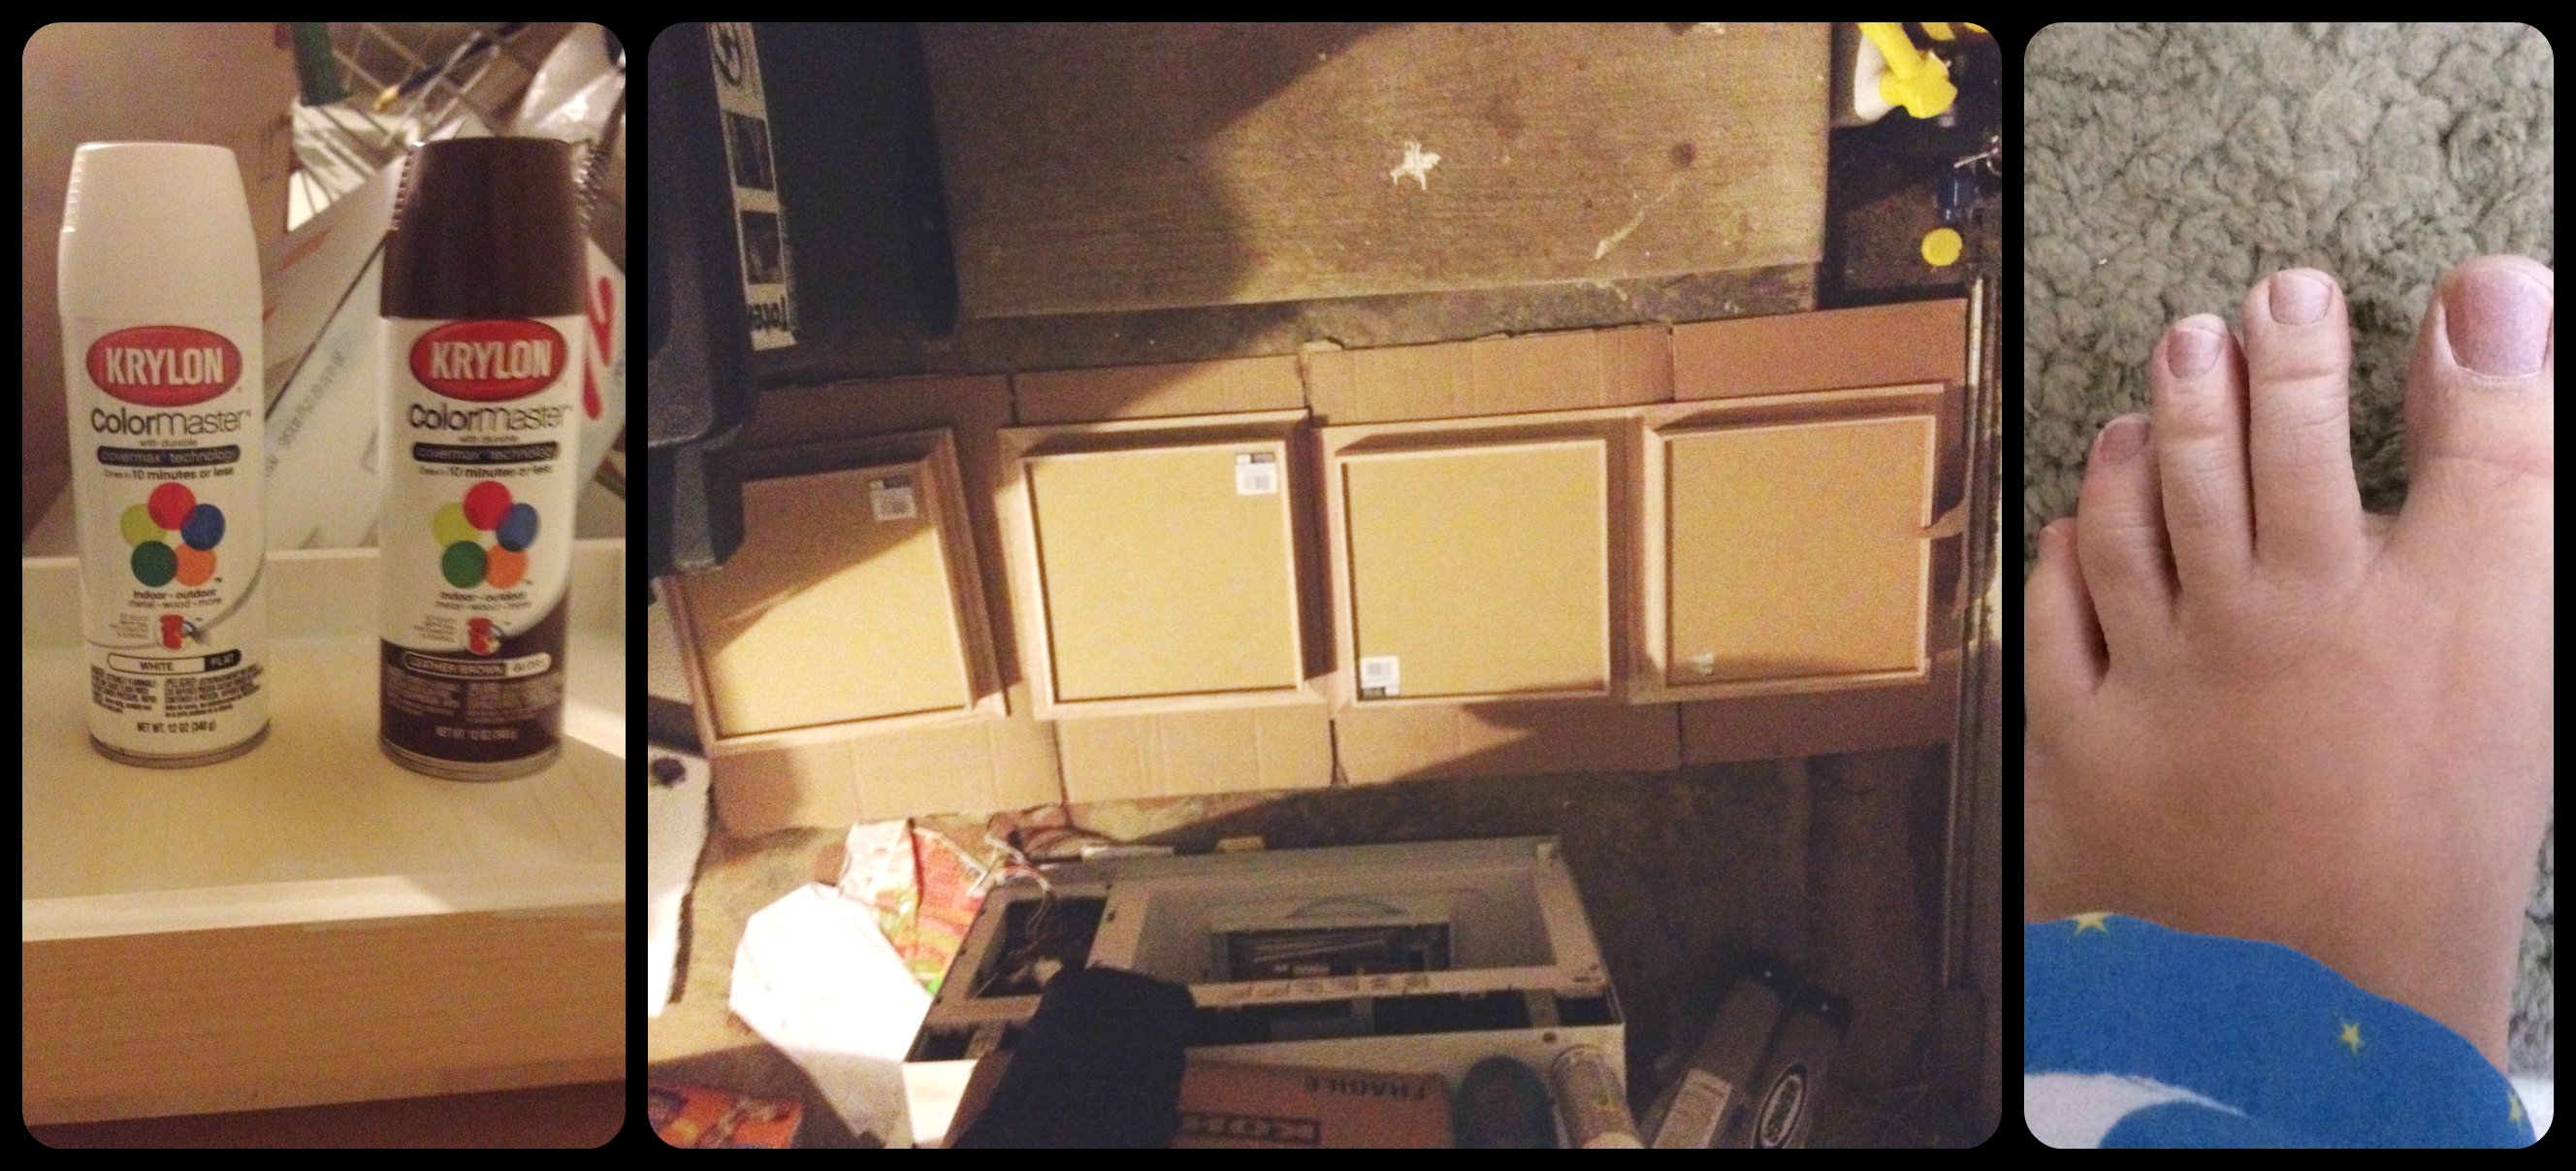
Step 4: Spray Paint Shadow Boxes-I used brown for the outside, and white for the inside. I wasn’t too worried about the front edges, because I had other plans for those. PS. Don’t you love where I had to squeeze in my spray painting? It happened to be a rainy, windy mess outside, (which then turned into a snow storm), and I was confined to the only open floor space in the whole garage. And yes, I spray painted my foot.
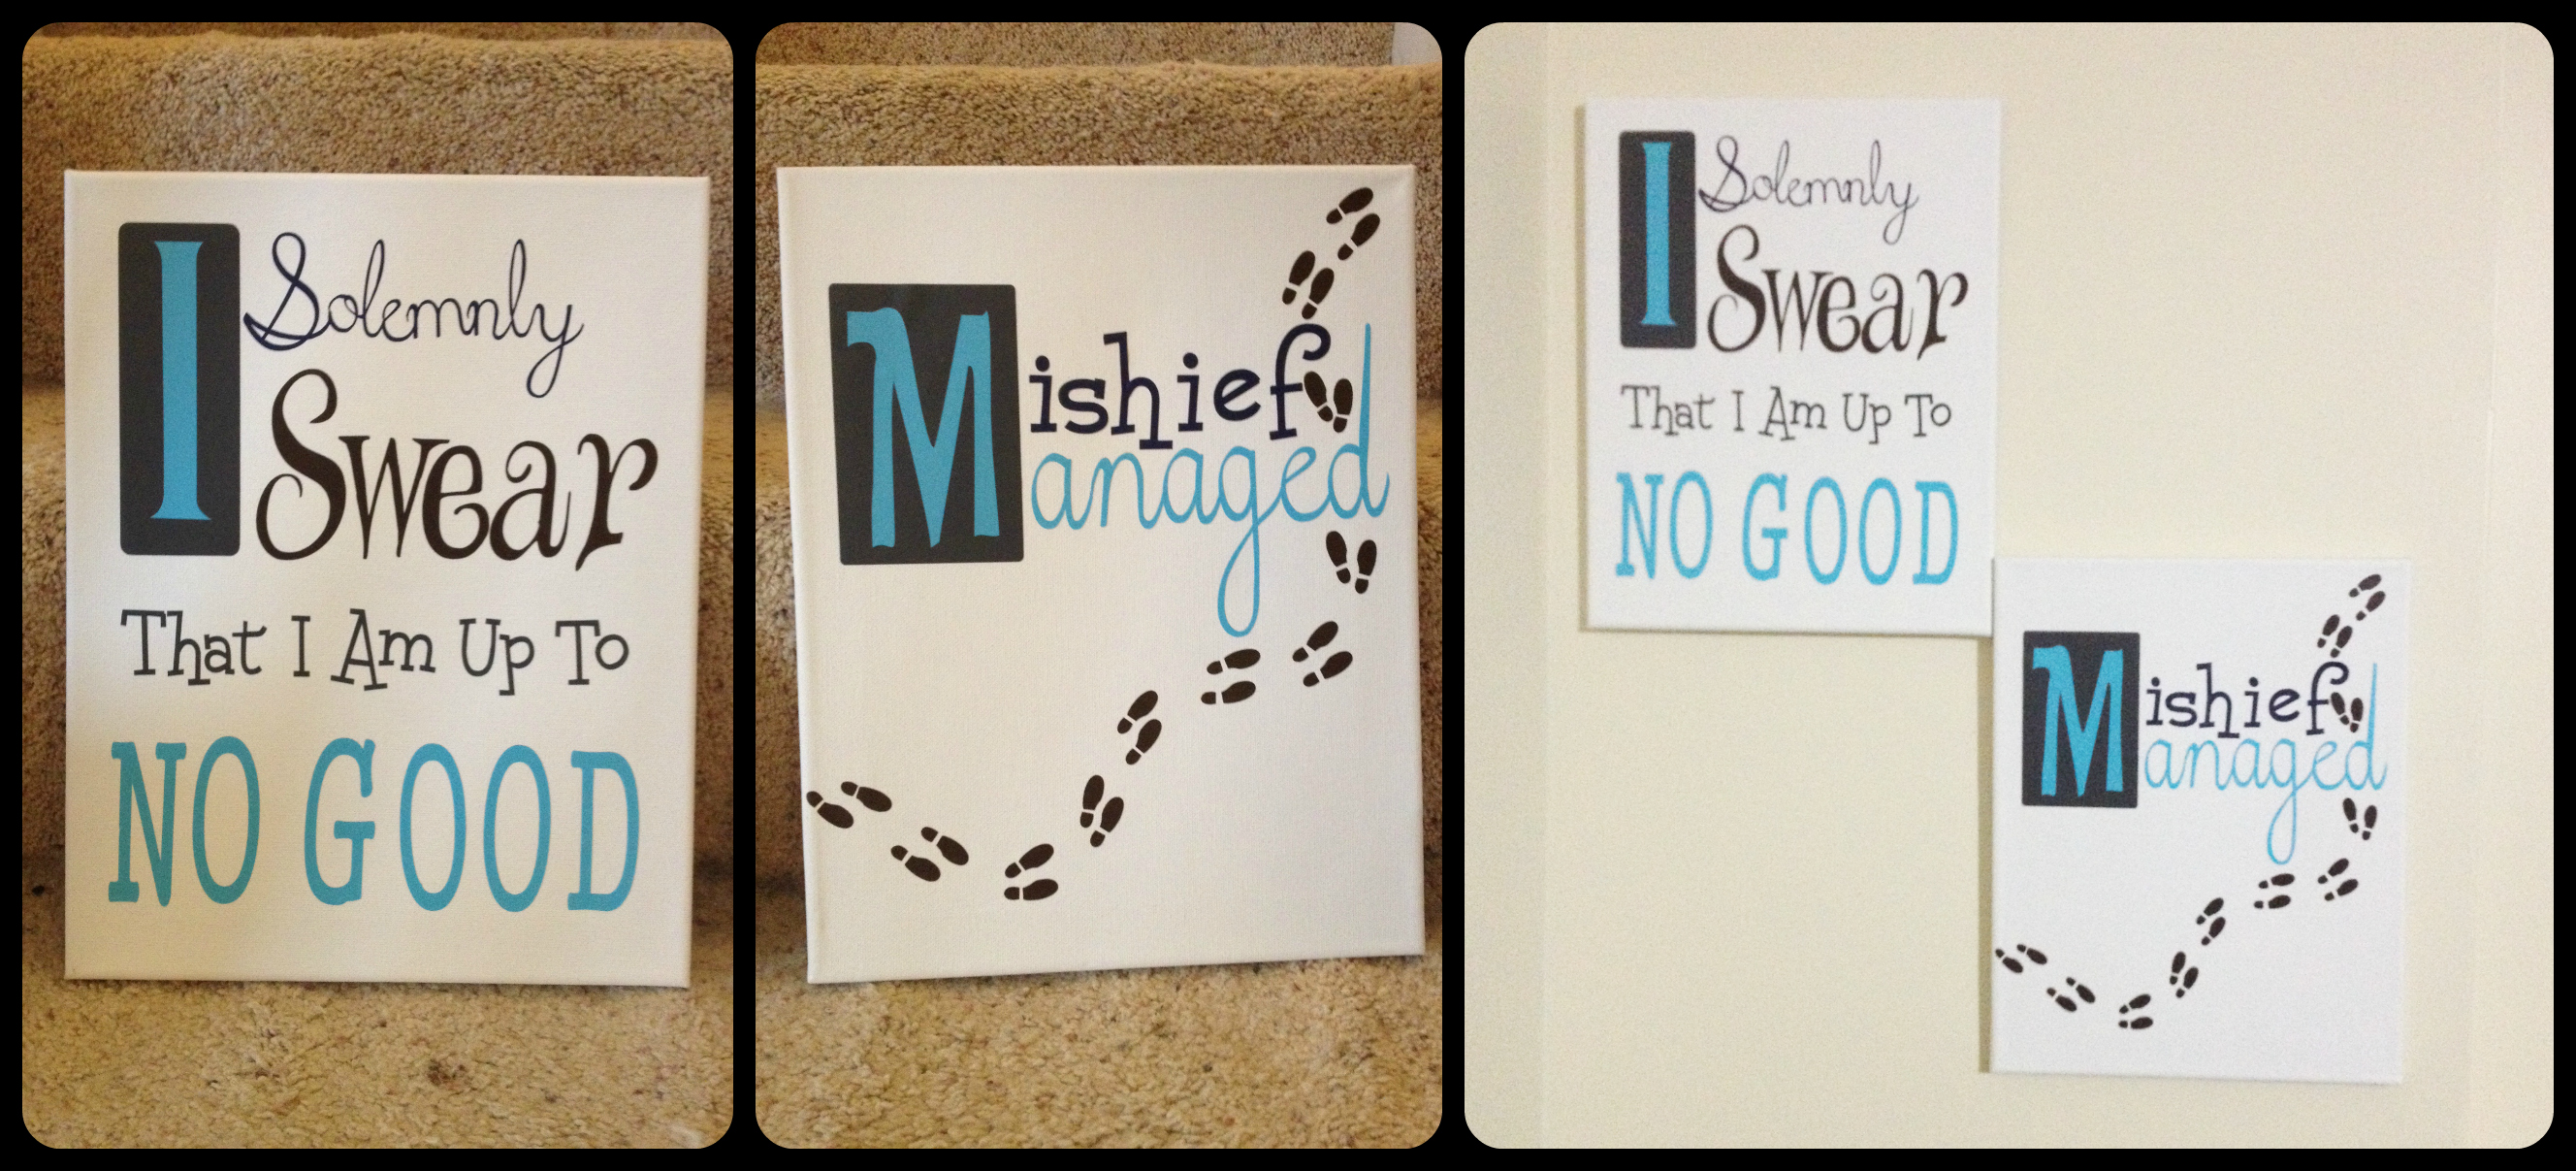
Step 5: Take Advantage of the Fact That Your Husband is Watching the Kids, and Design, Cut, and Create Some Harry Potter Canvas Wall Art While the Shadow Boxes are Drying. (and really, are there any more perfect Harry Potter quotes for a little boy playroom then these?)
Step 6: Mod Podge Decorative Cardstock to the Front of the Frame-I thought that a vintage alphabet look would really keep with the theme.

Step 7: Add the Cardstock Letters to the Frames-I used mod podge to adhere the cardstock inside the frames. Honestly, I wouldn’t use it next time, because this caused lots of bubbling, and I’d probably stick to spray adhesive or glue dots.
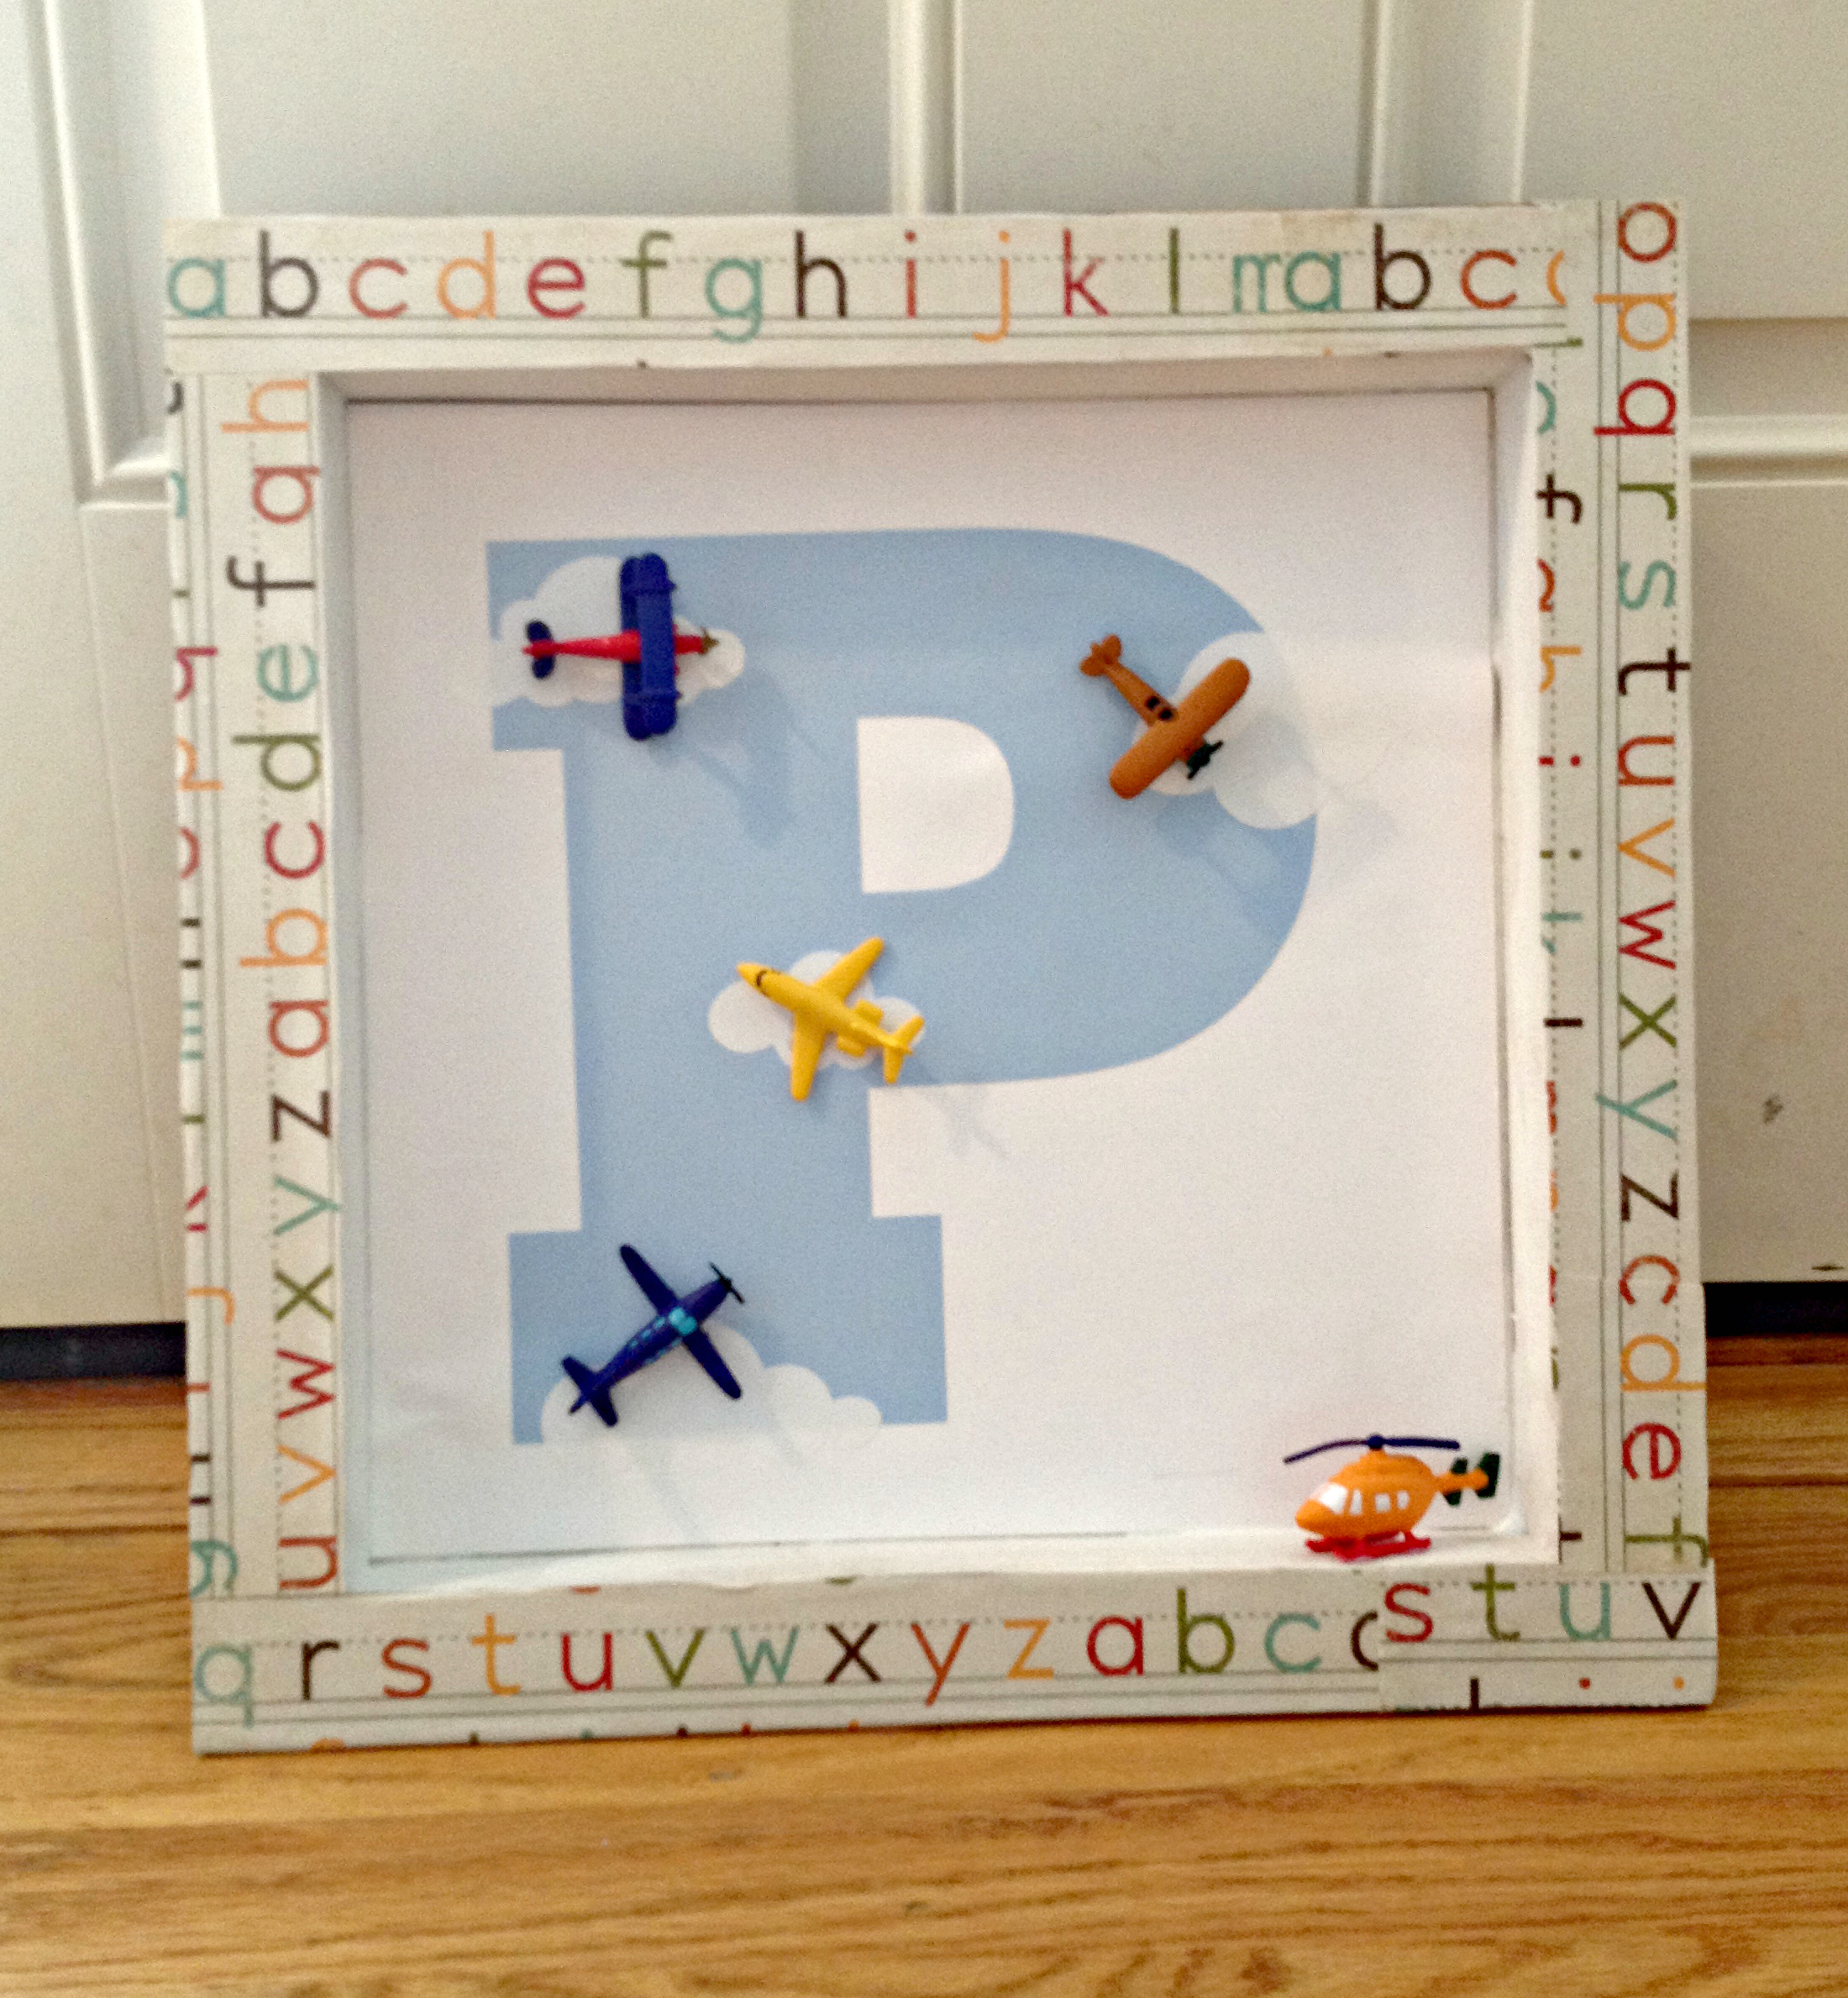
Step 8: Hang the Art! -I used velcro Command strips, so I can easily remove them when the time comes. And again, sorry for the horrible pictures, but the lighting in the family room is REALLY bad. Really.
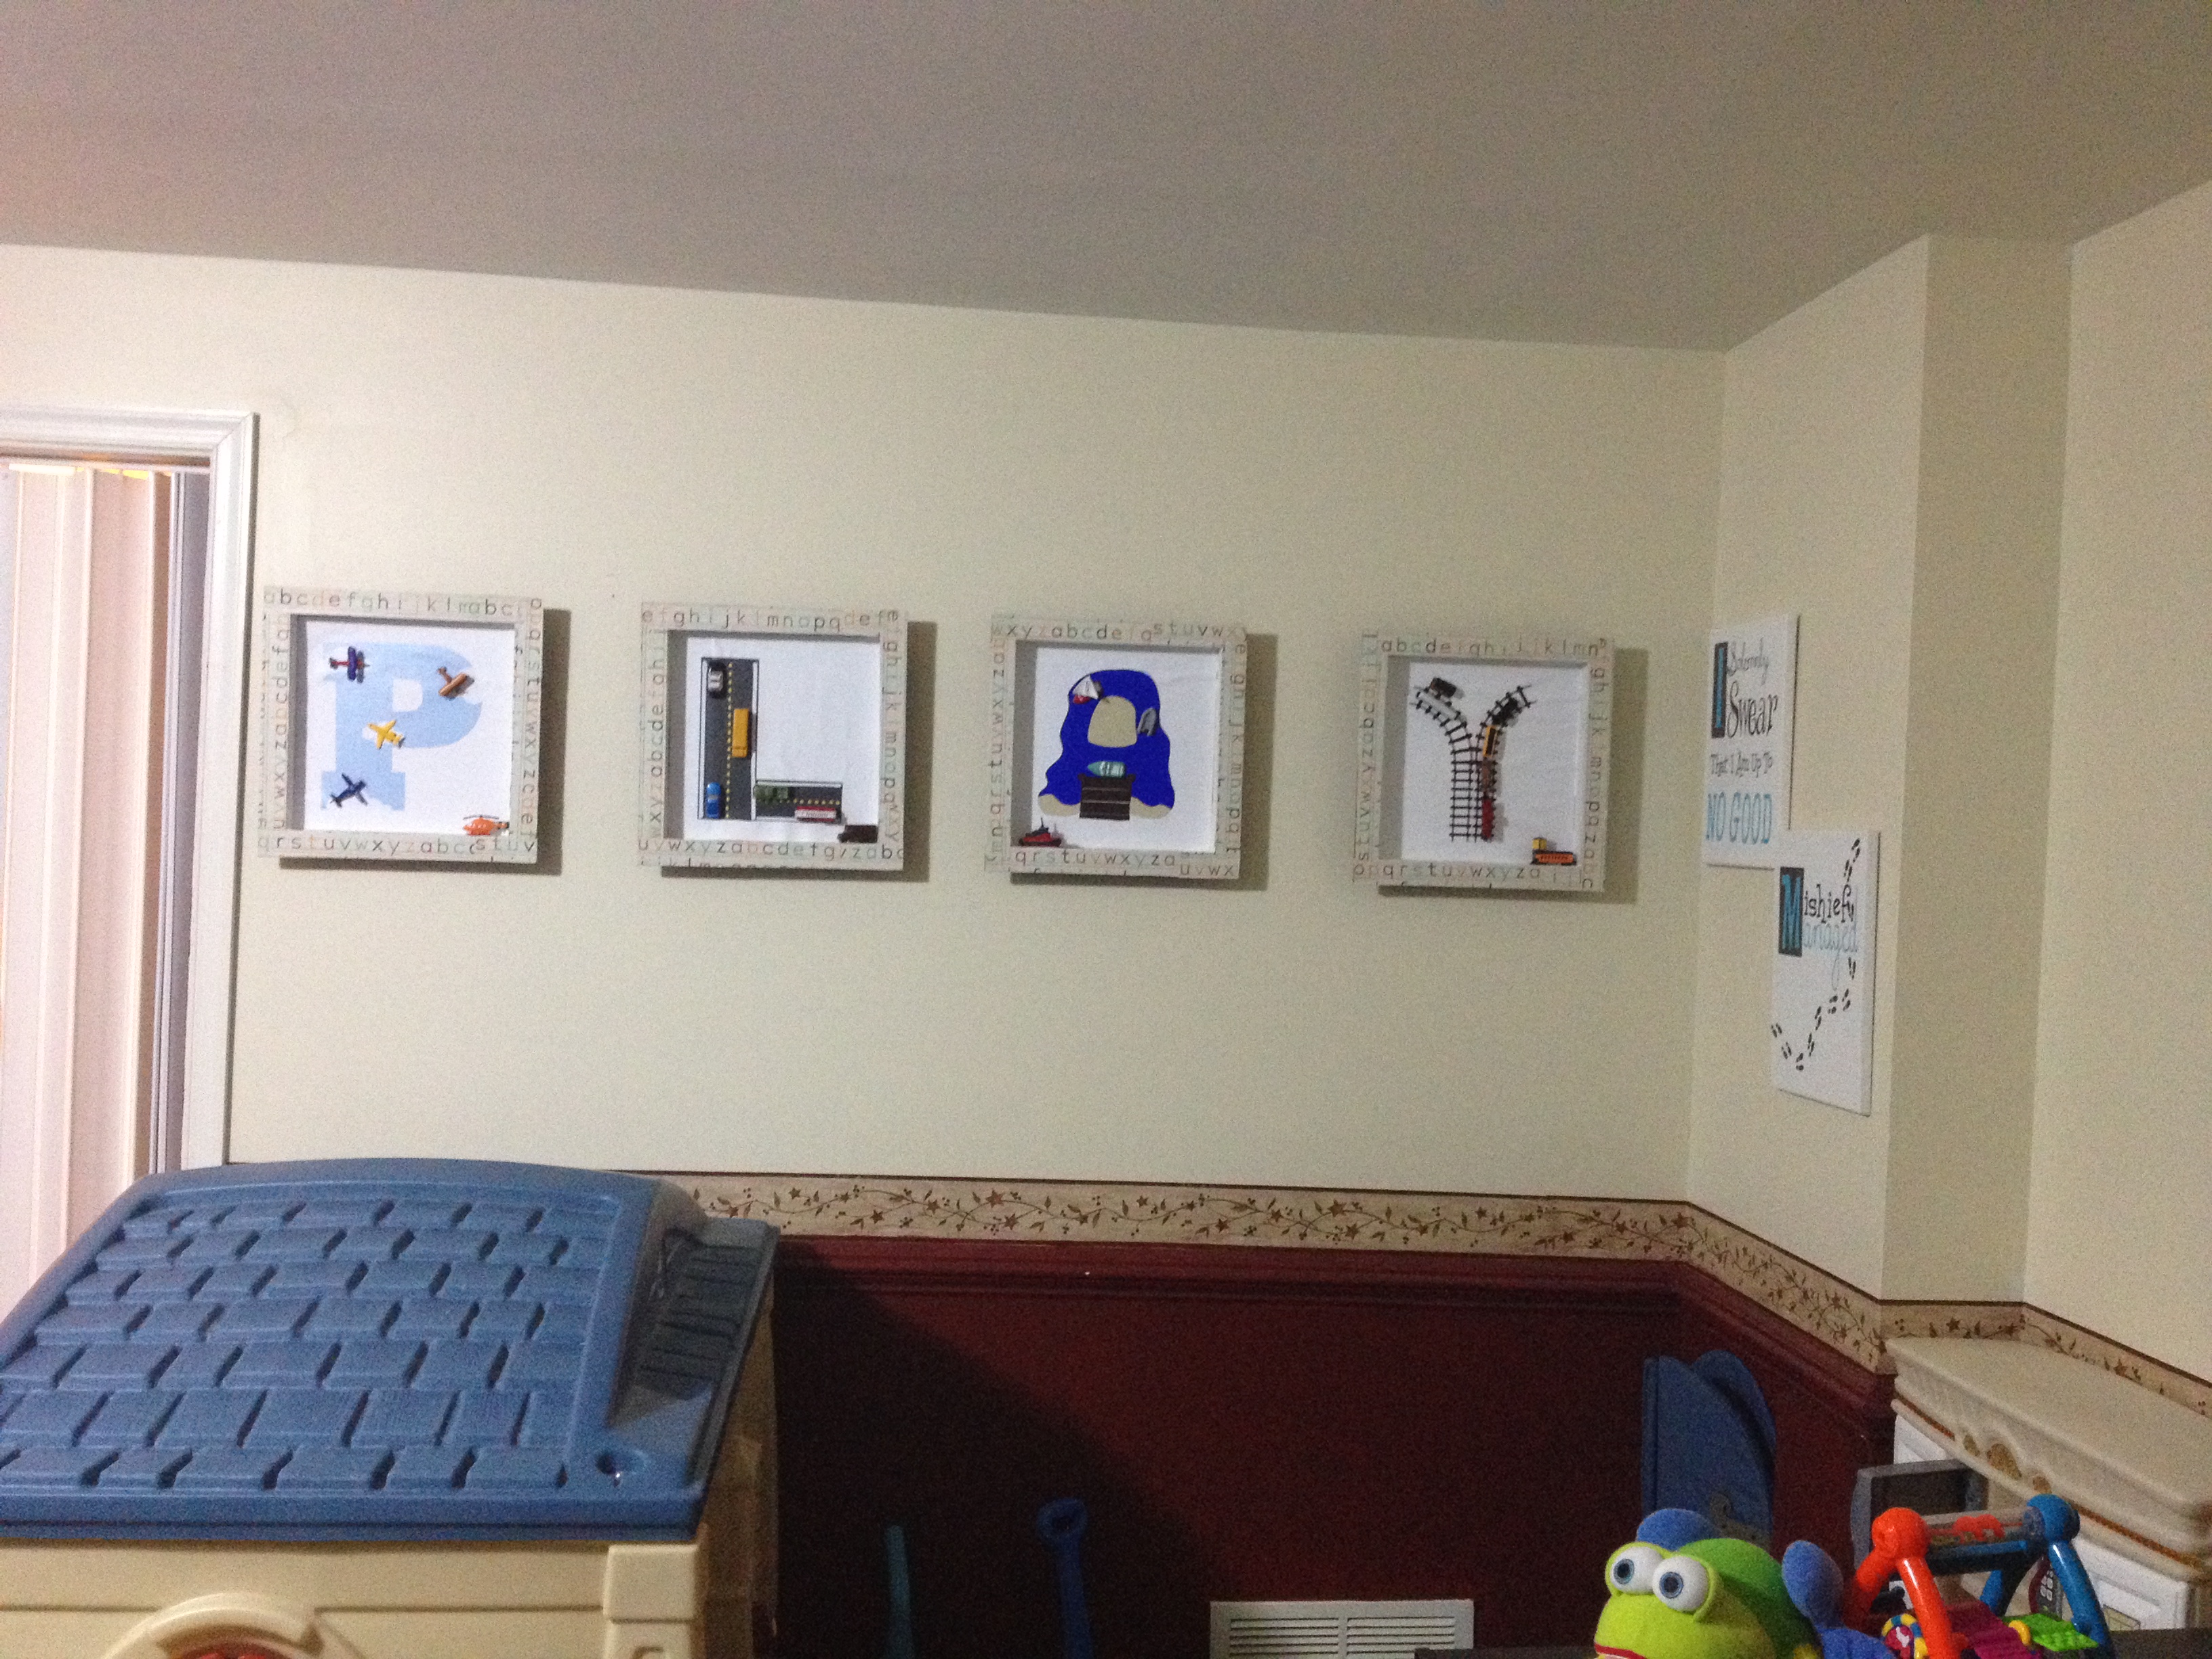
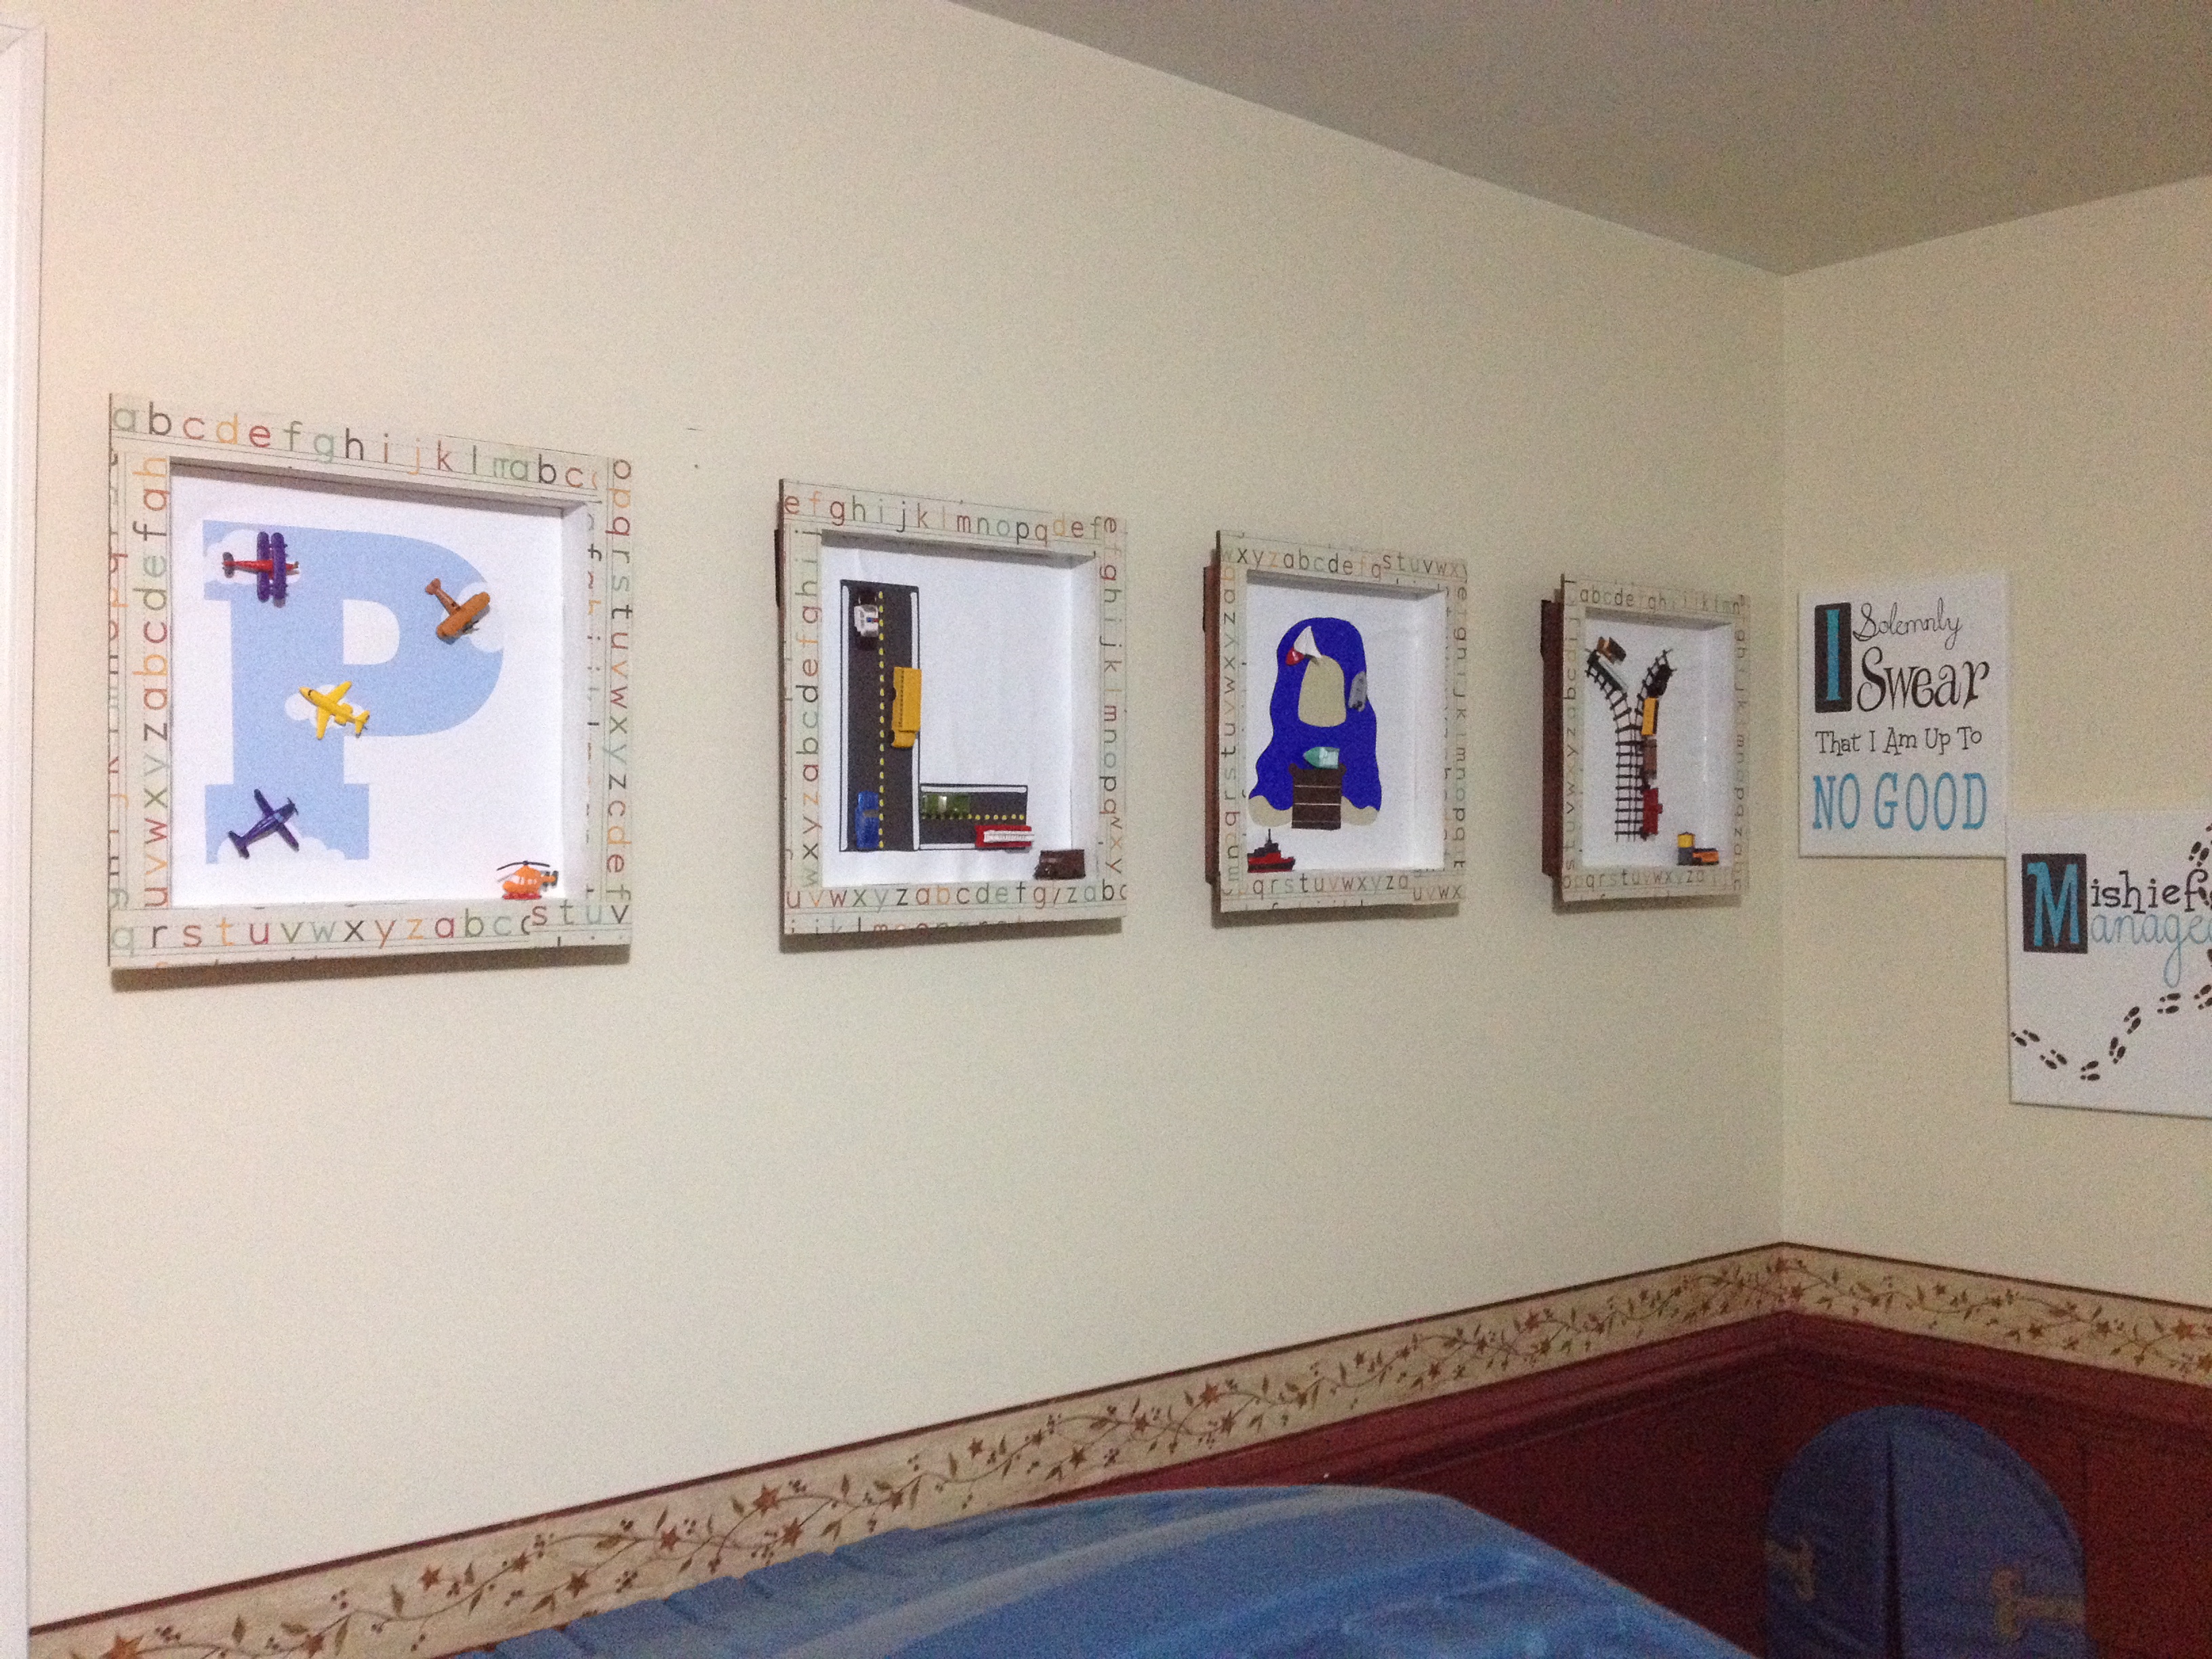
So there ya go! Easy one-of-a kind wall art suitable for any room where kids want to have fun! You can easily customize this art with different words, a child’s name, various themes and toys. The possibilities are endless!


I love these!! They are perfect for my boys playroom! Pinning!
Adorable!! Love them!! Pinned them 🙂
So cute! And really fun!