DIY Clay Jewelry Dish
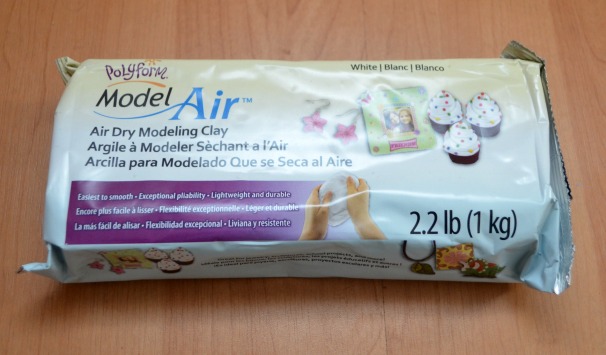
Today’s project was, believe it or not, inspired by a Kindergarten art project. Two weeks ago in art class, Little Crafter got to play with clay and make that timeless creation…the pinch pot. The first week, the kids got to mold their clay, then the following week they painted it. I happen to volunteer in his art class {I know, you’re shocked, aren’t you.} Let me just tell you it is hard to watch twenty kids play with clay and not get to do it yourself! No. fair. But hey, that didn’t mean I couldn’t play at home! My friends at Sculpey just recently sent me three packages of their Model Air air dry clay so I decided I was going to create a project of my own.

TIME REQUIRED: 10 min to create, 24 hours to dry, 5 min to paint
DIFFICULTY LEVEL: easy/beginner
SPECIAL TOOLS: none
SPECIAL SKILLS: none
Materials:
– Model Air Clay
– Acrylic Paint
– Paint brush
– Parchment paper
– Something circular to use as a cutter
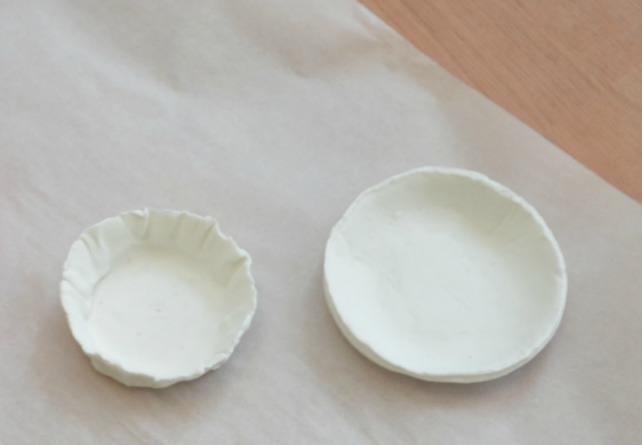
In lieu of a pinch pot, I decided to make a little dish to hold my rings so they’re not just scattered across the top of my dresser anymore. Here’s how I did it:
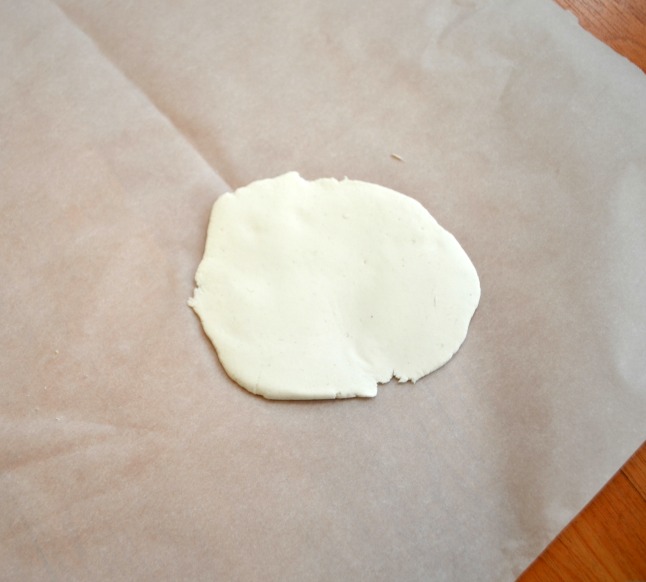
Step 1: Flatten your clay. I placed mine on parchment paper while I was working with it. Then I placed another piece of parchment paper on top while I flattened it. You can use your hand or a rolling pin…a rolling pin will give you a more even consistency {*mental note: do that next time}.
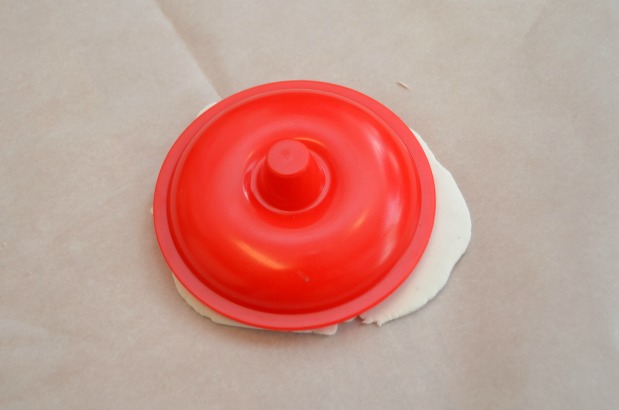
Step 2: Use a very high tech cutter to create a round shape. Although Sculpey/Polyform’s products are non-toxic, you shouldn’t use the same tools for clay that you use for food. So, until I get some cookie cutters that are intended just for my art projects, I have to make do with other things I find around the house. Like this pot lid from Little Crafter’s bin of chef toys. Don’t judge. It worked.
Step 3: Gently form the circle into a dish shape. Which sounds easier than it is. At this point in the project, if not before, remind yourself that this isn’t meant to look perfect. Machines make perfect looking things. People make art. So, every imperfection is an artistic embellishment, got it? Good. Moving on.
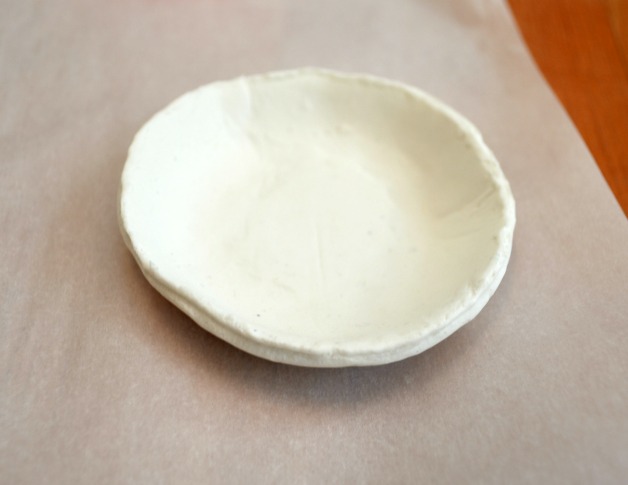
Let your dish air dry for 24 hours. {She says. Even though she didn’t.}
Step 4: Paint your dish! For some reason, I liked the idea of painting just the inside and leaving the outside white. You can do whatever you like!
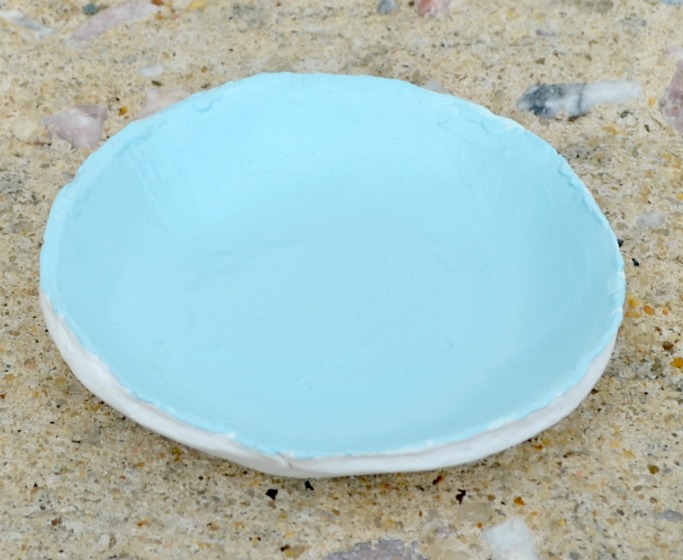
That’s it! Now it’s ready to hold your treasures; in my case, rings!

I have a few ideas for things I might like to do differently next time {like using a rolling pin and trying another cutter to smooth those rough edges}, but overall, I think it’s cute!

Have you ever played with air dry clay?


So cute! I never even knew Sculpey made air dry clay before yesterday. Your cookie cutter suggestion made me think of maybe making a star shaped dish, or a heart, or a…so many dishes 🙂
Thanks! Ooh, those are great ideas! I totally need to get some cookie cutters just for my clay endeavors…
So funny! I JUST shared one of these on my blog yesterday. I love my new ring dish. So easy to make. I love yours!
That is funny, Kim! I’ll have to stop by and see yours!