Chalk Painted End Table

You guys, I am SO excited! Finally after begging and saving up for about five years now, I was able to get new furniture for my living room! When we moved in to our house, the carpeting was a dark hunter green. I hated it, but we couldn’t afford to put new carpet down at the time, so instead we bought a couch that matched. A big sectional sofa with hunter green and burgundy plaid. At the time, it worked, but it was never what I really wanted. Finally, I was able to get a nice neutral, modern loveseat and couch which means I can also have the teal and yellow accents I’ve been dreaming of…starting with this end table!
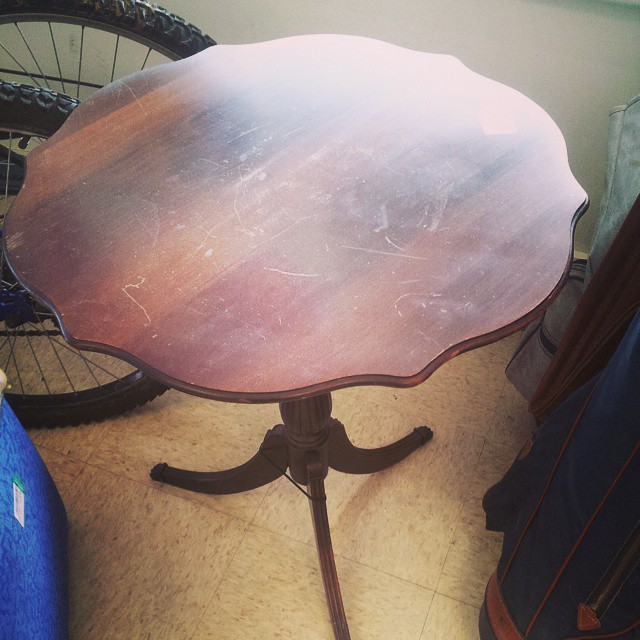
I found this sucker at our local Goodwill for just $7. The top was all kinds of scratched up, so no one but a DIY-er would want it. Here’s how I took that $7 piece of “trash” and turned it into a treasure!
You’ll need:
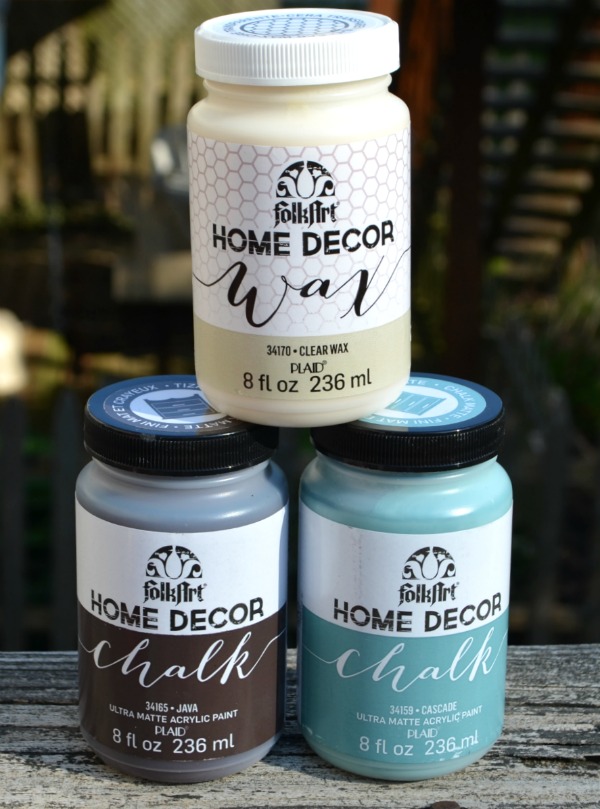
– FolkArt Home Decor Chalk: Cascade
– FolkArt Home Decor Wax: Clear
– Large paintbrushes
– Soft lint-free cloth
– dropcloths
– sandpaper or power sander if you’re fancy like that
Step 1: First, I sanded the table. If you’re lucky enough to have a power sander, use it! Or, you can go at it with sandpaper like I did. Roughing up the surface will help the paint to stick well.
Step 2: Paint the table with two coats of FolkArt Chalk. Let the first coat dry completely before you move on.

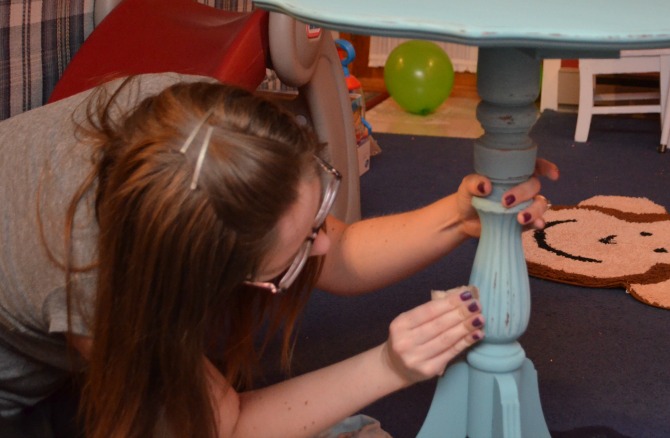
Step 3: Use sandpaper to “distress” the piece. This is the part hubby totally didn’t understand the first few times I did a piece of furniture. His philosophy was, “Why do you want to paint it and then rub all the paint back off?” Which totally makes sense, except that the distressed look is so fabulous and shabby chic and totally in style, right? If you agree with hubs, you can just leave your piece perfectly painted. But if you’re on Team Distress-that-puppy, now’s the time to go at it!
*Tip*: It looks and works best if you rub along corners and edges and grooves; places where paint would naturally tend to rub off over time. We’re going for an authentic “aged” look, not random sanded polka dots.
*Another Tip*: How much distressing you do is totally up to your own personal style. Some people like their furniture very lightly distressed, others prefer to see more of the original wood coming through. Sand it until you like how it looks, then stop! There’s no “right” or “wrong” way to do it…isn’t that great?
Step 4: Apply a light coat of FolkArt Home Decor Clear Wax. You can use a brush or a soft cloth, as long as it’s lint-free. Let the wax dry for about an hour, then buff it to your desired sheen.

What do you think? Totally different, right?

I am thrilled with the way it turned out! And it was so easy and so inexpensive too! I could’ve easily paid $50 or way more for a new end table to go in my living room, but instead I was able to do this for just $7 since the paint and wax were already in my stash.

Here’s one more look at the before and after! I’d say that’s an improvement, and I hope you would too!

Now, if you’ll excuse me, I’ve got my eye on a few other pieces that could use a little makeover…I want to paint all the things…


looks great love the color
super cute!
Looks great…
I guessed the wrong color, but I love how it turned out! Beautiful!!
It turned out beautiful! Painting furniture is addicting… 😉