Painted Dining Room Set: Giving Old Furniture New Life
Friends, I am beyond excited to show you this project! I’ve been wanting to do it for more than a year now, and this week I finally motivated myself to get started and make it happen. I absolutely love the way it turned out and I can’t wait for you to see how simple it is to do…take a look.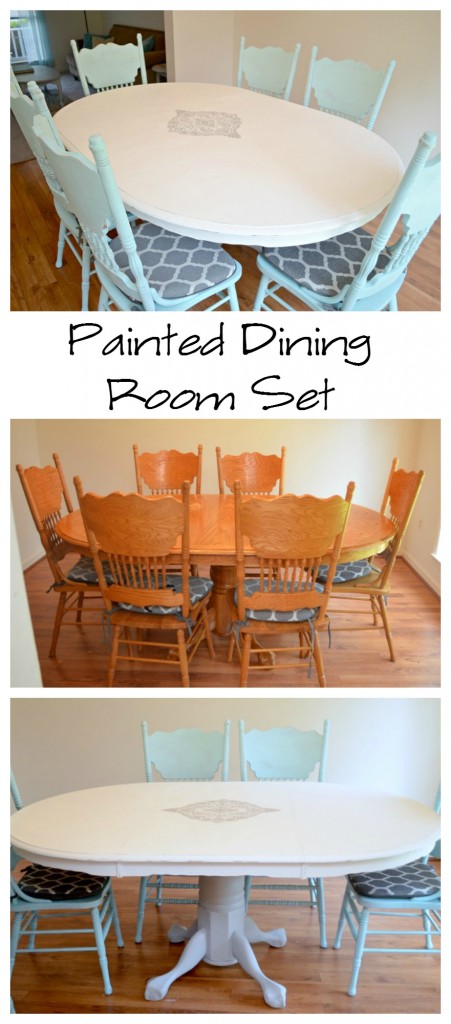
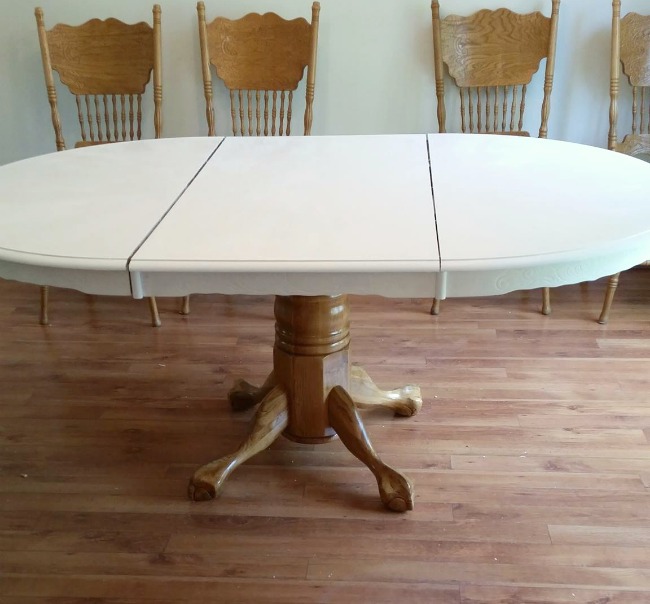
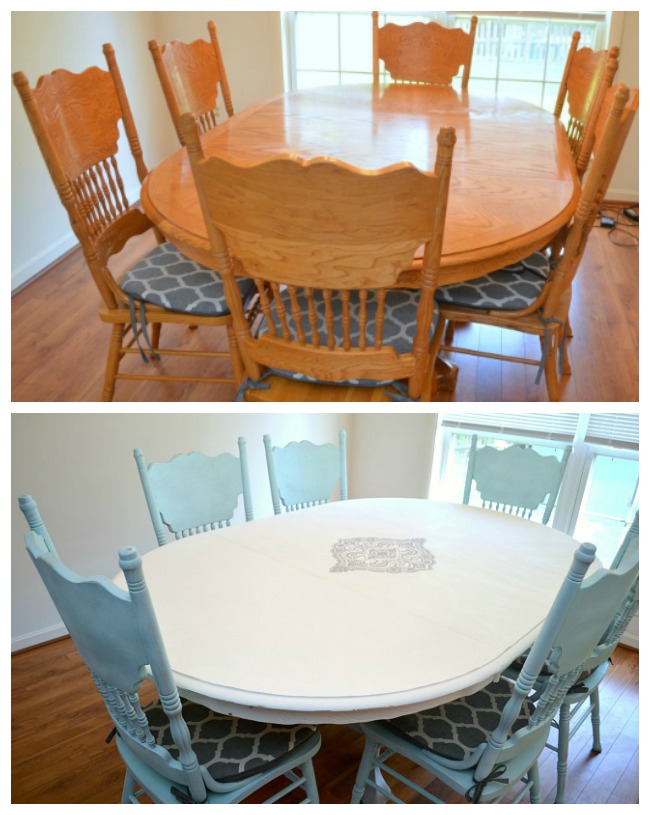
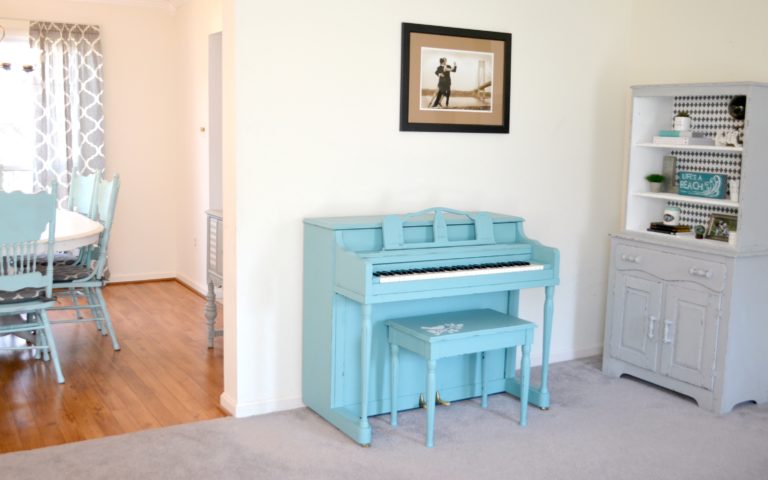
Friends, I would like you to meet my old friend, our dining room set. It has been a part of our family for about 14 1/2 years…hubby and I bought it back in December of 2001 when we got married. Over the years, it has taken some abuse, and while I’d like to be able to blame the kid and the kitten for it, the truth is that I caused the most damage myself.
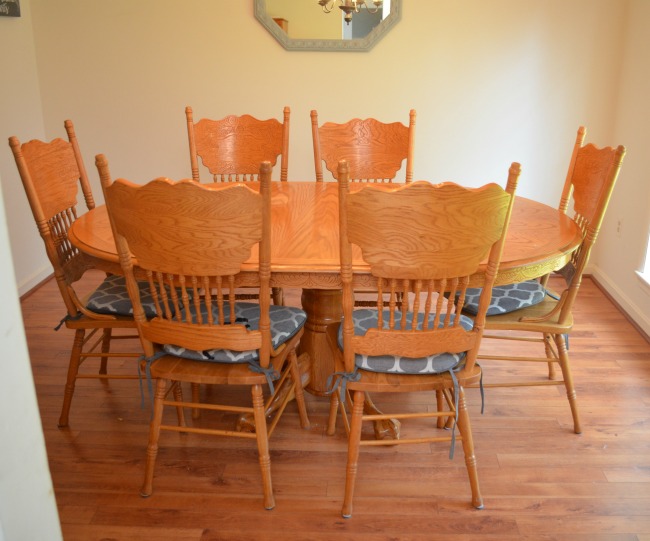
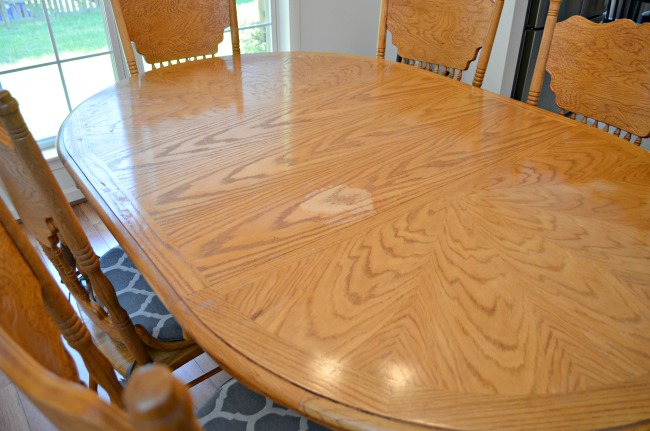
Two years ago around Christmas time, I was playing around with my new gel manicure kit and I spilled a bottle of acetone on the table. Yep, acetone. It ate a literal hole through my holiday tablecloth and continued right own down to eat the finish off the table. Fortunately, the damage was on the leaf, so when we pulled that out and tuned the table into a smaller round one, no one ever saw it. When we moved into this house last spring, though, we had this nice big dining room and it only made sense to have the full table out at all times. Sure, I could keep it covered with a tablecloth, but I still didn’t love the look of so much of the same color wood all in one place.
So, I decided to paint everything and give it a new look. I put it off for a while because it was such a daunting job, plus I wasn’t totally sure what colors I wanted to use. {Originally, I was going to go all white, but with the walls, that wouldn’t have worked.} Then, it rained here for about a month straight…which is terrible if you want to spray paint. This week, the weather suddenly decided to jump right to gorgeous summer, so I thought it was the perfect time to take advantage of it and get my project finished. Here’s how I did it, and you can too!
The Table
I used:
Martha Stewart Vintage Decor Paint: Wedding Cake
FolkArt Home Decor Chalk Paint: Parisian Grey
FolkArt Ornate Damask Wall Stencil
Delta Ceramcoat Clear Wax
Washi or Painters Tape
FolkArt Stencil Brush
Large Paintbrush
Soft, lint free cloth rag
Sandpaper and/or Power Sander
Step 1: Prepare your surface.
For me, this meant cleaning the table. I also did a little bit of sanding because I wanted the spot where the finish had been eaten off to be even with the rest of the tabletop. The paint I used didn’t require pre-sanding, though, so if your tabletop is in okay condition, you don’t need to worry with that part.
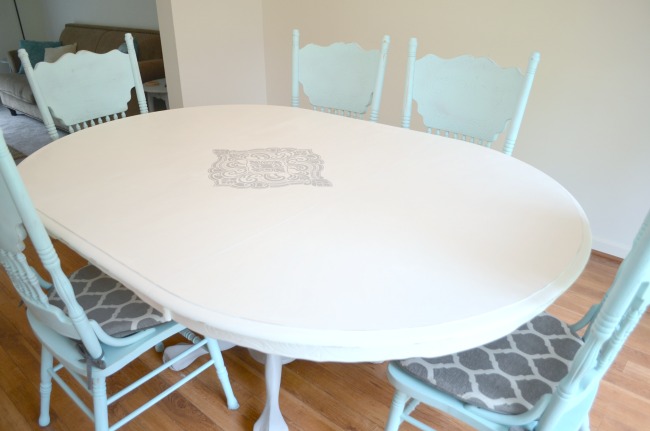
Step 2: Paint your tabletop, allowing it to dry completely between coats.
I ended up doing four coats, but you can do as many or as few as you need to get the coverage you want.
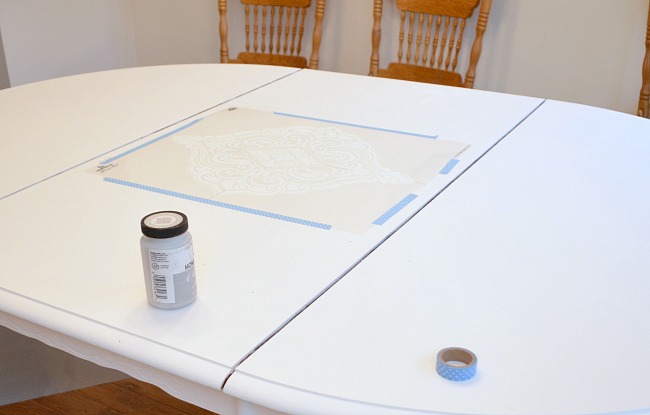
Step 2: Center and tape your stencil in place.
Step 3: Use a stencil brush to apply paint to the open areas of the design.
Stenciling can be intimidating, but if you use a few simple tricks, you’ll get a great result. First, don’t overload your brush. Keep it relatively dry with just a minimal amount of paint. It’s better to reload a million times than to oversaturate your image and have the paint bleed where you don’t want it to go. Second, use the right brush. Other types of brushes that aren’t meant for stenciling won’t give you the same results. Finally, gently dab the image in an up and down motion. This will keep the paint from spreading underneath the stencil.
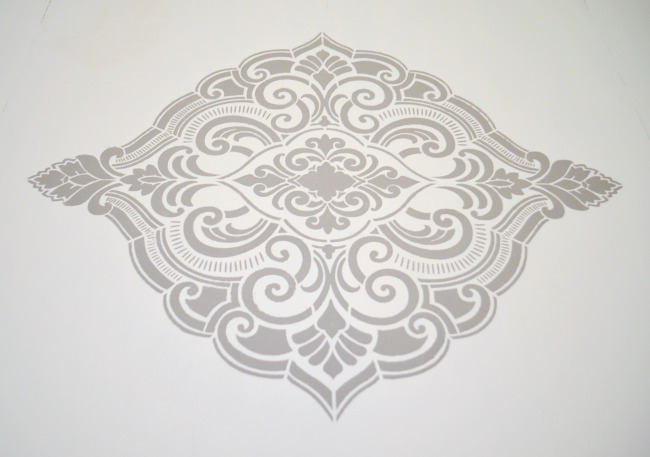
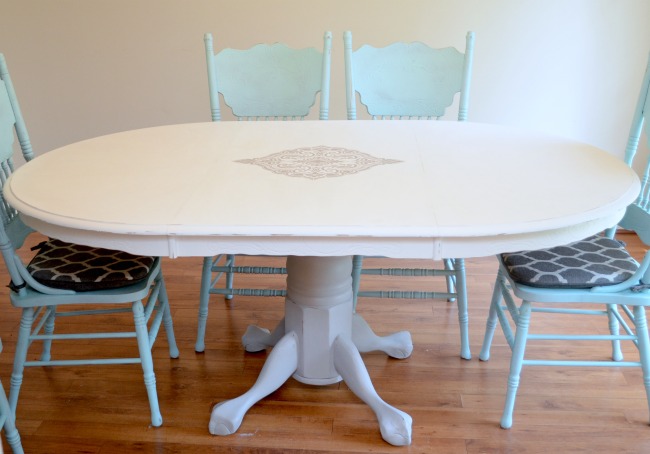
When you’re finished, remove the stencil {lifting straight up} and voila! I absolutely LOVE this particular design and have already had two friends want to borrow it for their own projects.
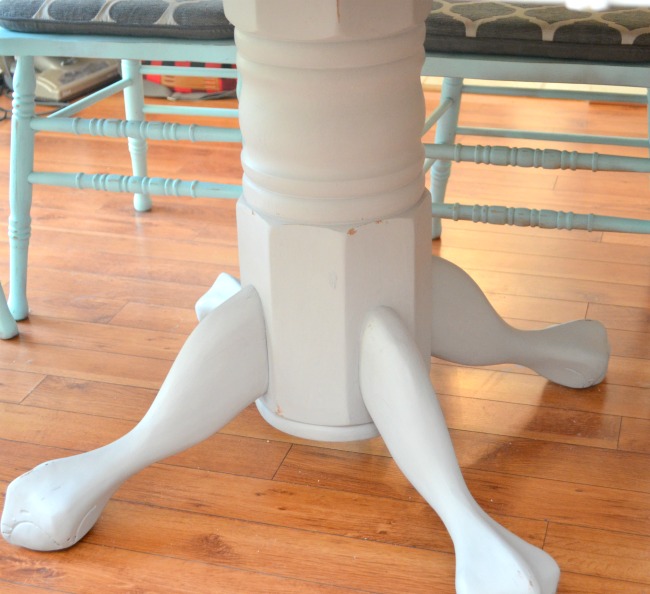
Step 4: Paint the base of the table.
You could certainly do this the same color as the top of the table, but I wanted some contrast, so I decided to use the same Parisian Grey paint that I used for stenciling. Oddly enough, it only took one coat for great coverage.
Step 5: {optional} Lightly distress your table.
I like to do this with my RYOBI Corner Cat Sander, but you can also do it by hand with fine grit sandpaper. You can distress as much or as little as you like…it’s all a matter of personal style. Just make sure you sand in places where the piece would naturally experience wear over time, like edges, raised areas, etc.
Step 6: Apply clear wax to the entire surface of the table and base.
The best way to do this is by rubbing it in with a soft lint-free cloth. After it’s dried for 24 hours, you can go back and buff it to your desired sheen.
Ta-da! Your table is finished!
THE CHAIRS
I used:
Spray Paint: Aqua Matte
Spray Sealer: Clear Matte
Sandpaper and/or Power Sander
Step 1: Prep your chairs by sanding off the existing finish.
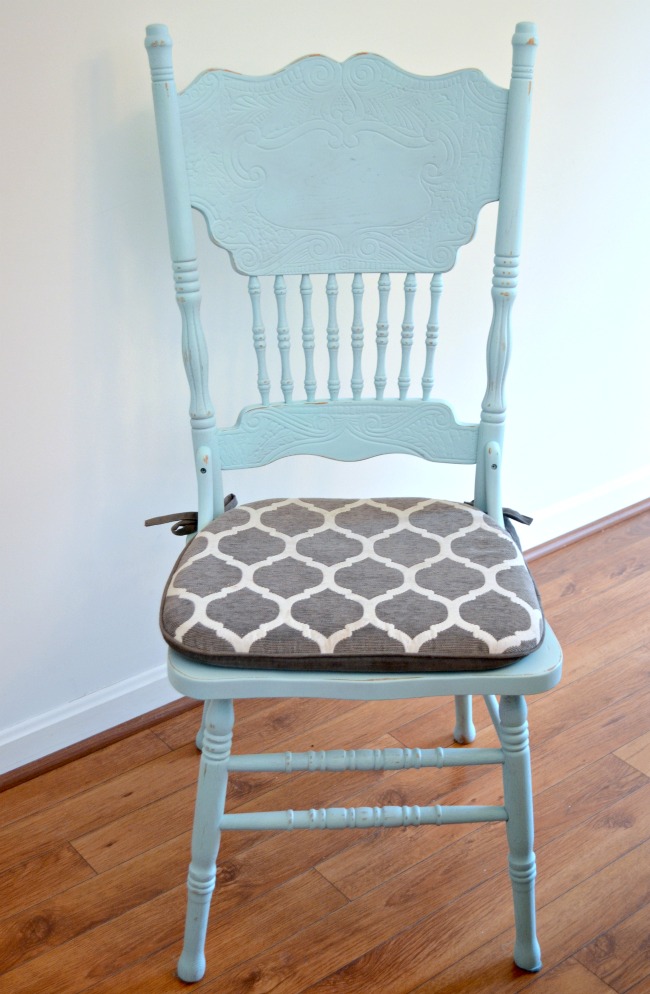
Step 2: Spray paint them the color of your choice.
It’s best to do many light coats rather than trying to apply too much paint at once. Spraying too much too fast will cause drips and running paint that will ruin the look of your project.
Step 3: {optional} Lightly distress your chairs.
Once again, make sure to do this on the areas that would naturally get wear, like the edges and the more ornate sections with designs. I used my CornerCat, but doing it by hand works too.
Step 4: Spray a clear matte sealer over the surface of each chair.
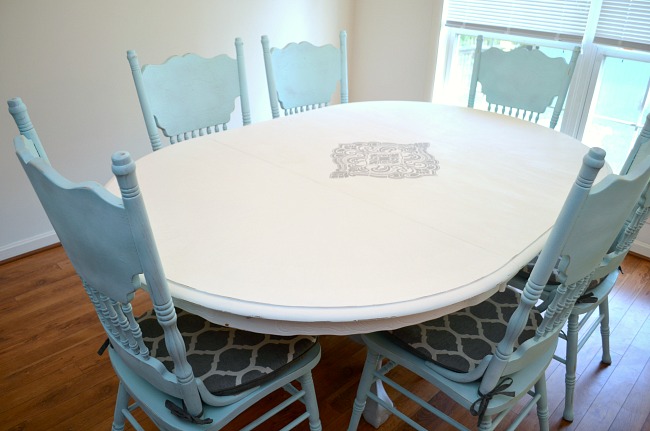
Once the paint and sealer are totally dry, you can add any cushions you like and your dining room set is ready to use!
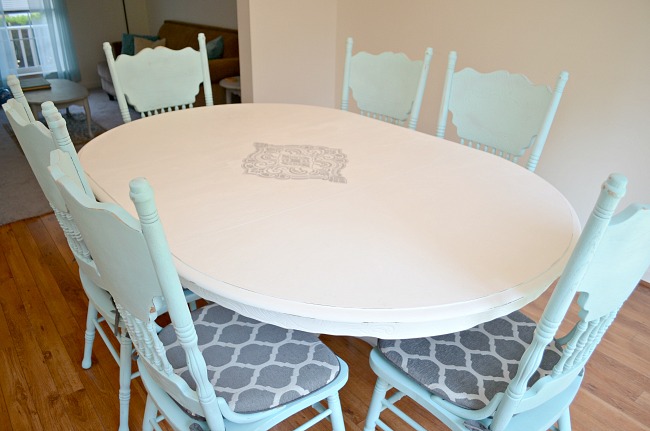
This is one of those rare projects that turned out even better than I imagined it, and I couldn’t be more excited about how it looks. Here’s one more quick look at the before and after…
What do you think? Is there some furniture in your house that could use a fresh update?

You did a great job. It looks awesome.
The new look is AMAZING ~ better than the original even. It’s vibrant and fun and interesting, so it’s way better than a standard table 😉
Aw, thanks, Loretta!!