Stuffed Robot Toy

Hey, friends! Remember a few days ago, I shared with you about a special sensory pillowcase I helped Erin make for her middle child “Bam Bam”? He got to choose the fabrics himself; a cozy flannel robot print and a soft, bumpy grey fabric for the border.
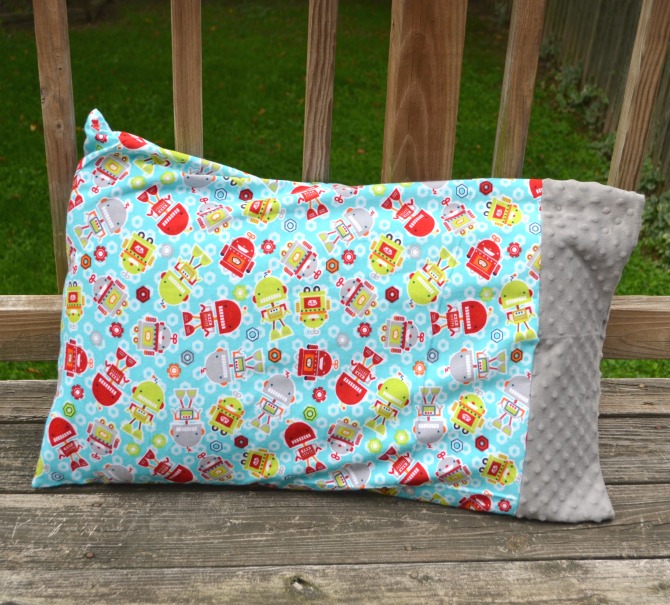
When we were getting our fabric cut, I encouraged Erin to go ahead and get a full yard of the robots instead of just the necessary 3/4 yd because I was sure we could come up with a good use for the extra. Sure enough, we did! As we brainstormed, we decided it would be fun to create a special little stuffed lovie to go with the pillowcase…and what could be more appropriate than a robot?!
Here’s what you need if you like this little guy and want to make your own.
Materials:
– 1/4 yard of printed fabric
– scraps of coordinating solid fabric
– buttons for eyes
– felt
– scissors
– sewing machine and thread
– straight pins
– polyfil
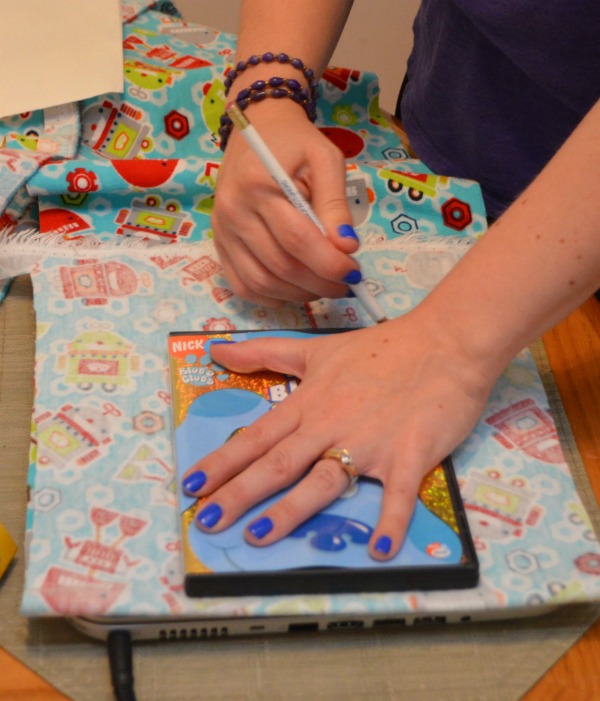
Step 1: Fold your printed fabric in half, right sides together, and trace a pattern for your robot body.
Now, in typical Erin-Amy style, we did not actually have a pattern. We just knew we basically wanted the robot to be a rectangle with arms and legs. So, I traced one of Little Crafter’s DVD cases to give us the basic body shape. Then, I folded a napkin into a small rectangle and traced it to be the arms and legs of our robot.
Step 2: Cut out the robot body.
Because your fabric is folded, this means you should end up with two identical body pieces; one for the front and one for the back.
Step 3: Cut rectangles from your coordinating fabric to be the face and tummy.
Honestly, I’m not really sure if Erin traced something for those, or if she just free-handed them. I never know what she’s doing when I’m not looking, and sometimes it’s best not to ask. I do know she adamantly wanted rounded corners on them, though.
*Note from Erin* I free-handed them punk. Because I’m that good. And yes, I did want round corners, because I thought they were a little more whimsical. I like whimsical things. The word of the day is “whimsical”, go use it in a sentence.
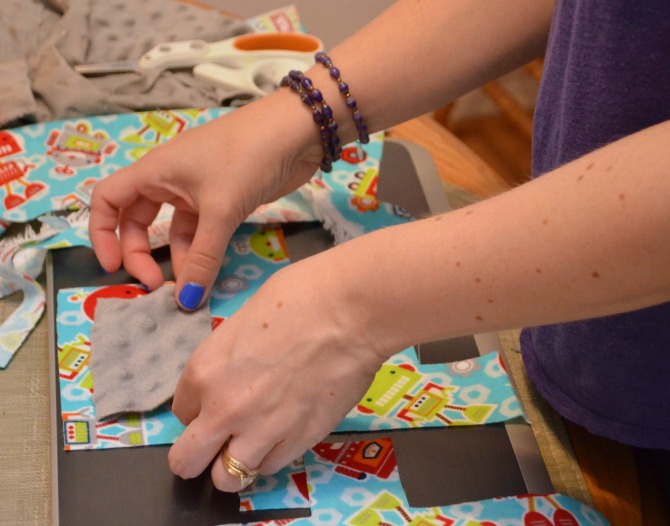
Step 4: Pin the rectangles to one of your robot body pieces and sew around the edges to hold them in place.

Step 5: Cut a heart from felt and stitch it to your robot front.
I decided to hand sew this part because I liked the handmade look, plus it would have been tricky to do on the machine since the heart was small and curvy. You could substitute any shape you want, like your child’s first initial, a star, or anything at all!
*Note from Erin* Do you know how hard it is to cut a good heart? I think I tried 3 times, threw the felt in disgust, and Amy rescued me. Because that’s what she does.
Step 6: Sew two buttons onto the robot front for eyes. Cut a felt mouth and glue or sew it in place.
Step 7: Pin the two body pieces together {with right sides together} and sew around the edges with 1/4″ seam. Leave a space open for turning and stuffing. I left the space in between the legs open, but it ended up being tricky to hand stitch later, so I’d recommend leaving the open spot somewhere on the side.
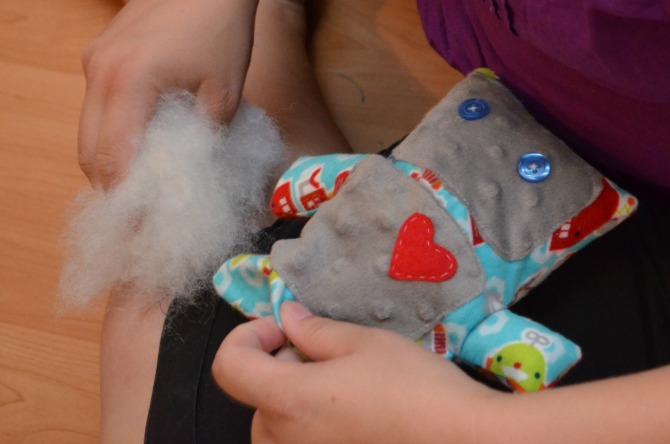
Step 8: Turn your robot right side out and stuff him {or her} with polyfil.
*Note from Erin* Do NOT stuff polyfil in your shirt, thinking that it would be a funny sight gag. Why? Because an hour later, you’ll find yourself in Target, look down, and realize that there’s a large mound of the stuff still sticking out of the top of your shirt. True Story.
Step 9: Hand stitch the opening shut.

There you have it, a fun little squishy robot! We still had even more fabric left over, so we cut two squares, sewed them together, and made a little double sided cloth Bam Bam can carry with him and touch in the car for comfort. Of course, we had to test out our creations…you can rest assured that Fuzzy approves.
*Note from Erin* I explained to Amy that this is the real reason one has pets-to put things on them and take pictures.
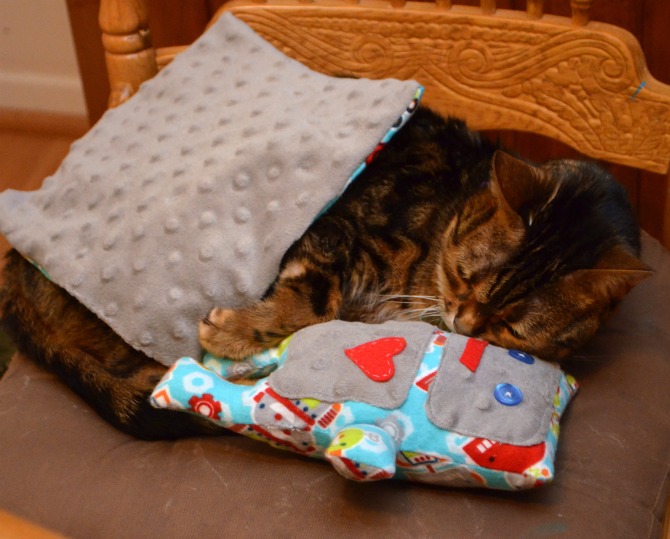
But more importantly, Bam Bam approves! He loves his robot {“Bobot”} and that’s what matters most!
*Note from Erin*-“Bobot” is what Bam Bam calls robots, because he can’t say the first “r”. Yes, it’s even more adorable to hear it said by him.

Do you know someone who’d love to receive a little robot stuffie? I sure do…I have a feeling Little Crafter is going to be demanding one of his own.