Simple Sensory Pillowcase
Hey, friends! Most of you know my bestie Erin, our Crafty Chaos contributor, and her little blonde army of three adorable boys. Her middle child, “Bam Bam”, who recently turned 3, is a super-sensory kid particularly when it comes to touch. Recently, he’s been having trouble sleeping…first of all, he misplaced his special blanket and no other one “felt right.” Fortunately, the blanket turned up, but he’s also been removing his pillowcase every night because it doesn’t “feel nice” to him. I totally empathize, since LC has some sensory issues of his own, although his revolve around food. I told Erin I wanted to help and since she and I are always up for a good project and a trip to a crafty store, we decided to make him a special Sensory Pillowcase.

I’ll get into the actual sewing tutorial in just a minute, I promise, but first, you have to know that the ultimate “Step 1” is to take the kiddo to the fabric store to choose fabrics that he/she loves. You should have seen Bam Bam’s eyes light up when he walked in. “Wow!” was the first word he said. We let him browse and look and most importantly, touch.
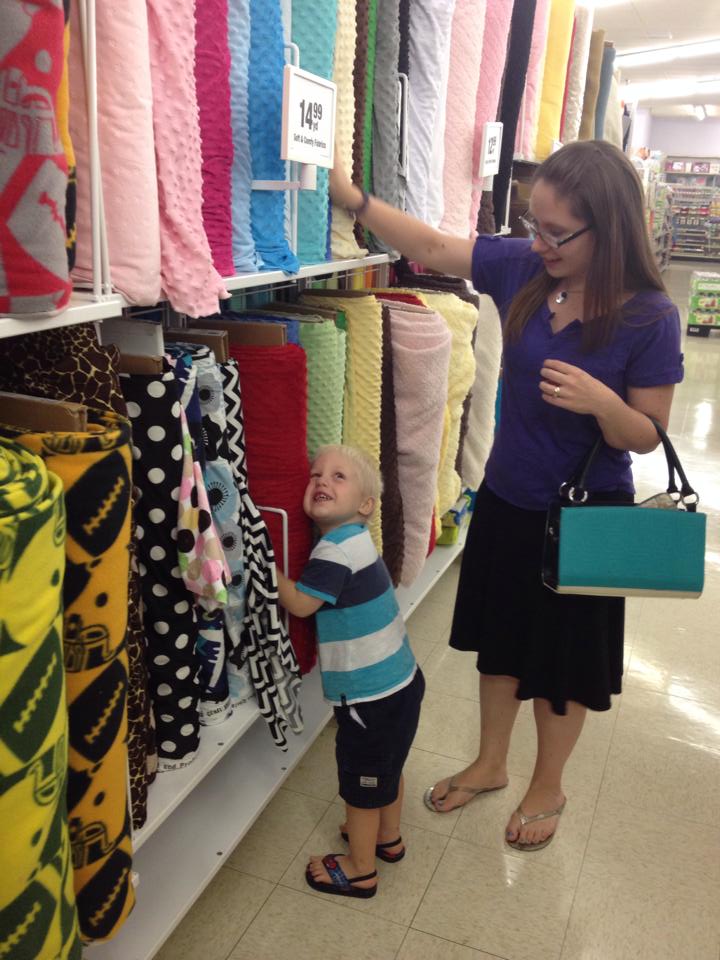
He found a soft fabric with little raised up dots that he couldn’t stop snuggling, so we knew that would have to be part of the pillowcase. Instead of using it as the part where his head would rest, though, we thought it would make a good border…that way he can touch or rub it while falling asleep. Then, we found a really fun flannel print with “bobots” {aka robots} on it. He immediately took that one and started carrying it around, so we figured that would make a great material for the main part of the case.
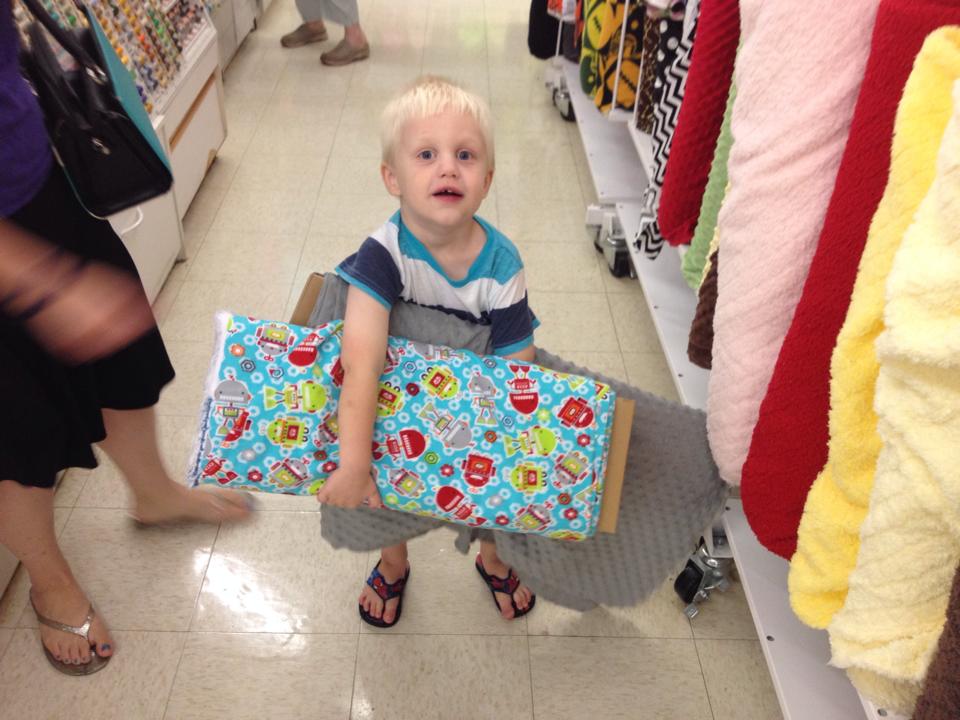
Once we got our fabric cut, we dropped our little buddy off with his daddy and headed to my house to get sewing! Here’s how we did it, and you can too.
Materials:
– 3/4 yard “main fabric”
– 1/3 yard border fabric
– scissors
– sewing machine and thread
– straight pins
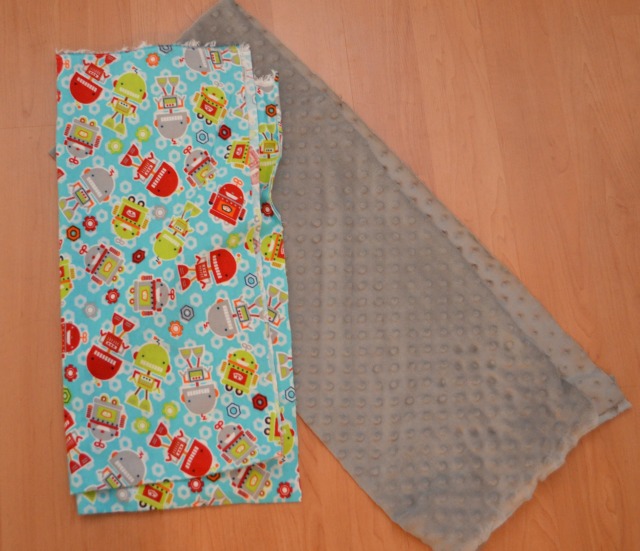
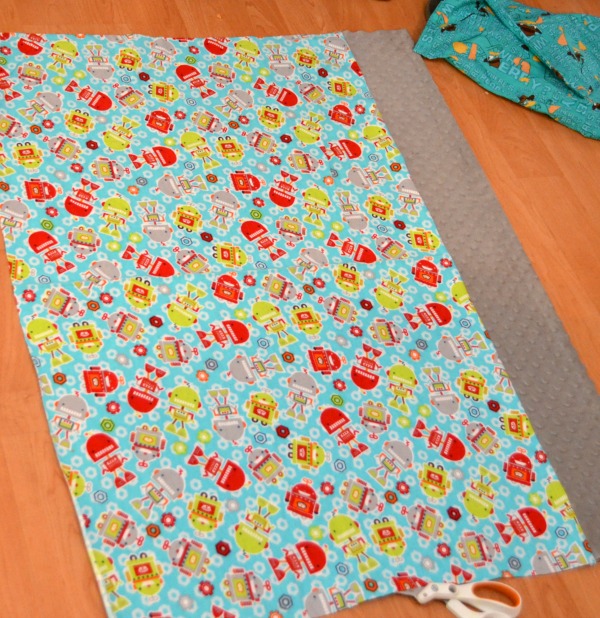
Step 1: Cut your fabrics. The measurements don’t need to be exact, but somewhere in this range should be just right. The border should be cut into a strip that’s 9 1/2″ x 41″ and the main fabric should be a 26″ x 41″ rectangle.
Step 2: Fold the border fabric strip in half with the right sides facing out. This is different from what you typically do when sewing, so make sure you’re paying attention here! The “good” side {in our case the fuzzy side with bumps} should be on the outside, just like you want it to be when the pillowcase is finished.
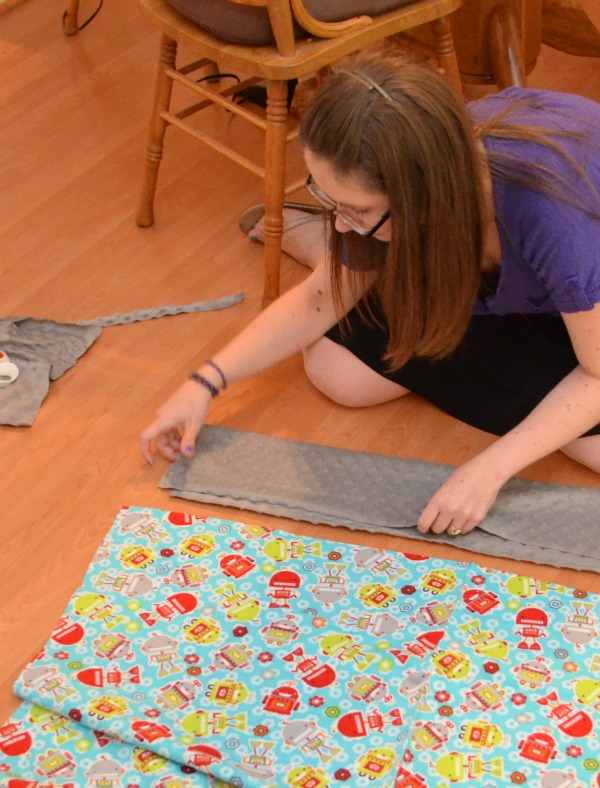
Step 3: Lay out the main fabric rectangle right side up and flat. Line up the “raw” {unfolded} edges of the border strip with one of the long edges of the main fabric. The folded part should be facing in toward the center. Pin the two fabrics together along the edge.
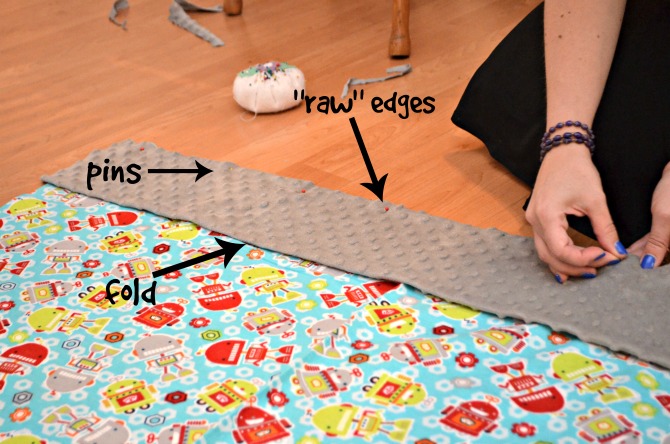
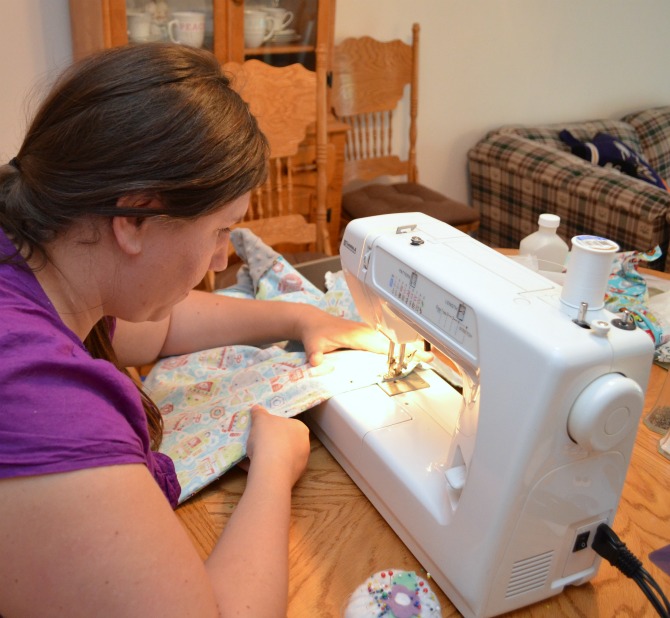
Step 4: Sew a straight 1/4″ seam along your pin line to attach the two fabrics together. Once you finish the seam, fold the border part out and it should look like this. You’re almost finished!
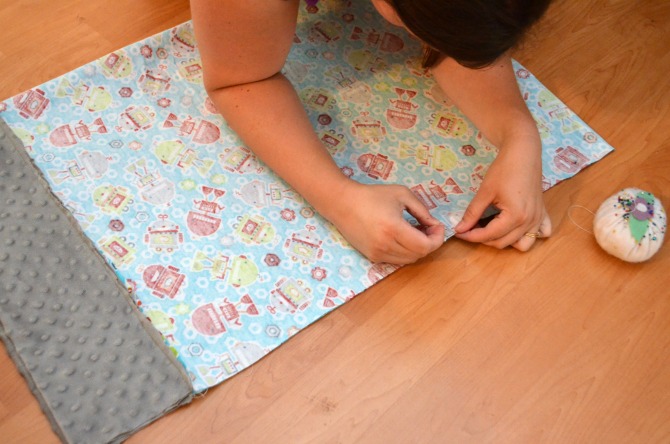
Step 5: Fold the fabric in half with the right sides together {facing in} and pin along the edges without the border. One edge will be a fold, so you just have to pin one long edge and one short one.
Step 6: Sew along the pinned edges {1/4″ seam}. This was Erin’s first time ever using a sewing machine.
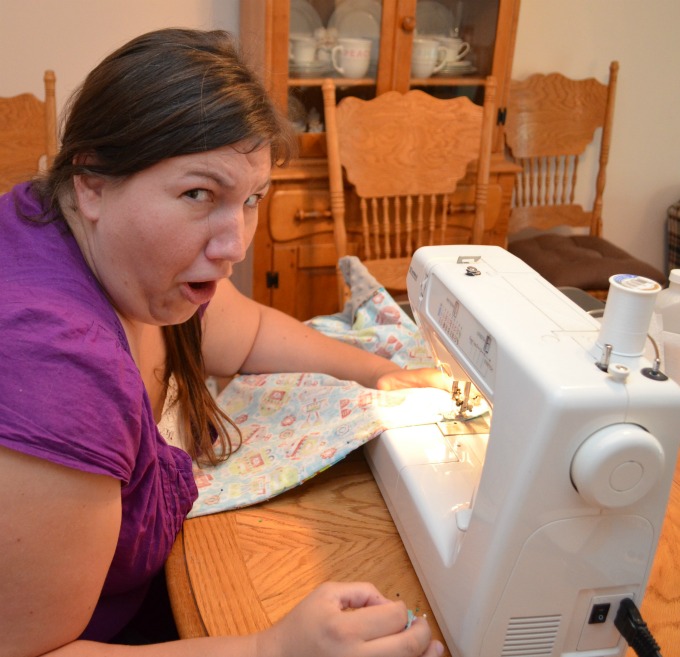
She was needlessly freaked out, but she did an awesome job, don’t you think?
*A Note From Erin* Yes, I was slightly frightened by the idea of using a machine to sew, yes Amy taught me very well (once she realized she REALLY had to go basic with me), and yes, the most valuable thing I learned was to not sew my *ahem* chest (can I say boobs?) or hair while using the machine. PS. Now I’ve caught the sewing bug, and I want a machine!
Step 7: Turn your pillowcase right side out… ta da!

Erin was a little excited about completing her first sewing project…can you tell?
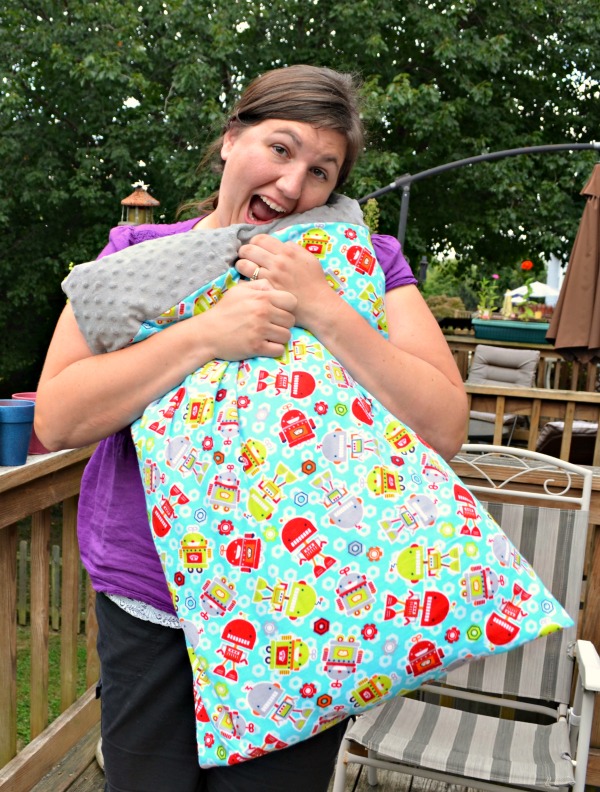
And of course, we had to quality test it, right?

But most importantly, Bam Bam LOVES it. He couldn’t wait to use it that night when he went to sleep.

I mean, seriously…how cute is this?! Now he has a pillowcase that makes him feel comfortable and helps him sleep well. You can’t even put a price on that. Erin reported that he hasn’t taken it off the pillow once, which is a record. I just love that we could do something to help him, and it was so incredibly easy too.
![IMG_8705[1]](https://www.amylattacreations.com/wp-content/uploads/2014/09/IMG_87051.jpg)
Honestly, I don’t know of any kiddo who wouldn’t enjoy a fun personalized pillowcase. Whether they’re a “sensory” kid or not, who wouldn’t think it’s fun to pick out fabrics and colors they love? Little Crafter never uses the pillowcases that came with his bedding set; instead he has a whole collection of fun ones my mom and I have made for him…Ninja Turtles, Curious George, polka dots, spaceships…and he is always excited to help change his sheets because it means choosing a new pillowcase for the week. In fact, I even know grownups *ahem* who wouldn’t mind having pillowcases made from fabric they chose. What about you? Do you know someone who’d enjoy having one?


This is awesome!! I especially love that you used the bumpy fabric as a border that he could touch as he was falling asleep. Wonderful.
So cute!! I’m pretty sure I have the same face as Erin every time I use my machine!
Hope it helps him sleep… 🙂
How super sweet!! He looks so happy with his new pillow 🙂