Succulent Planters with FolkArt Painted Finishes
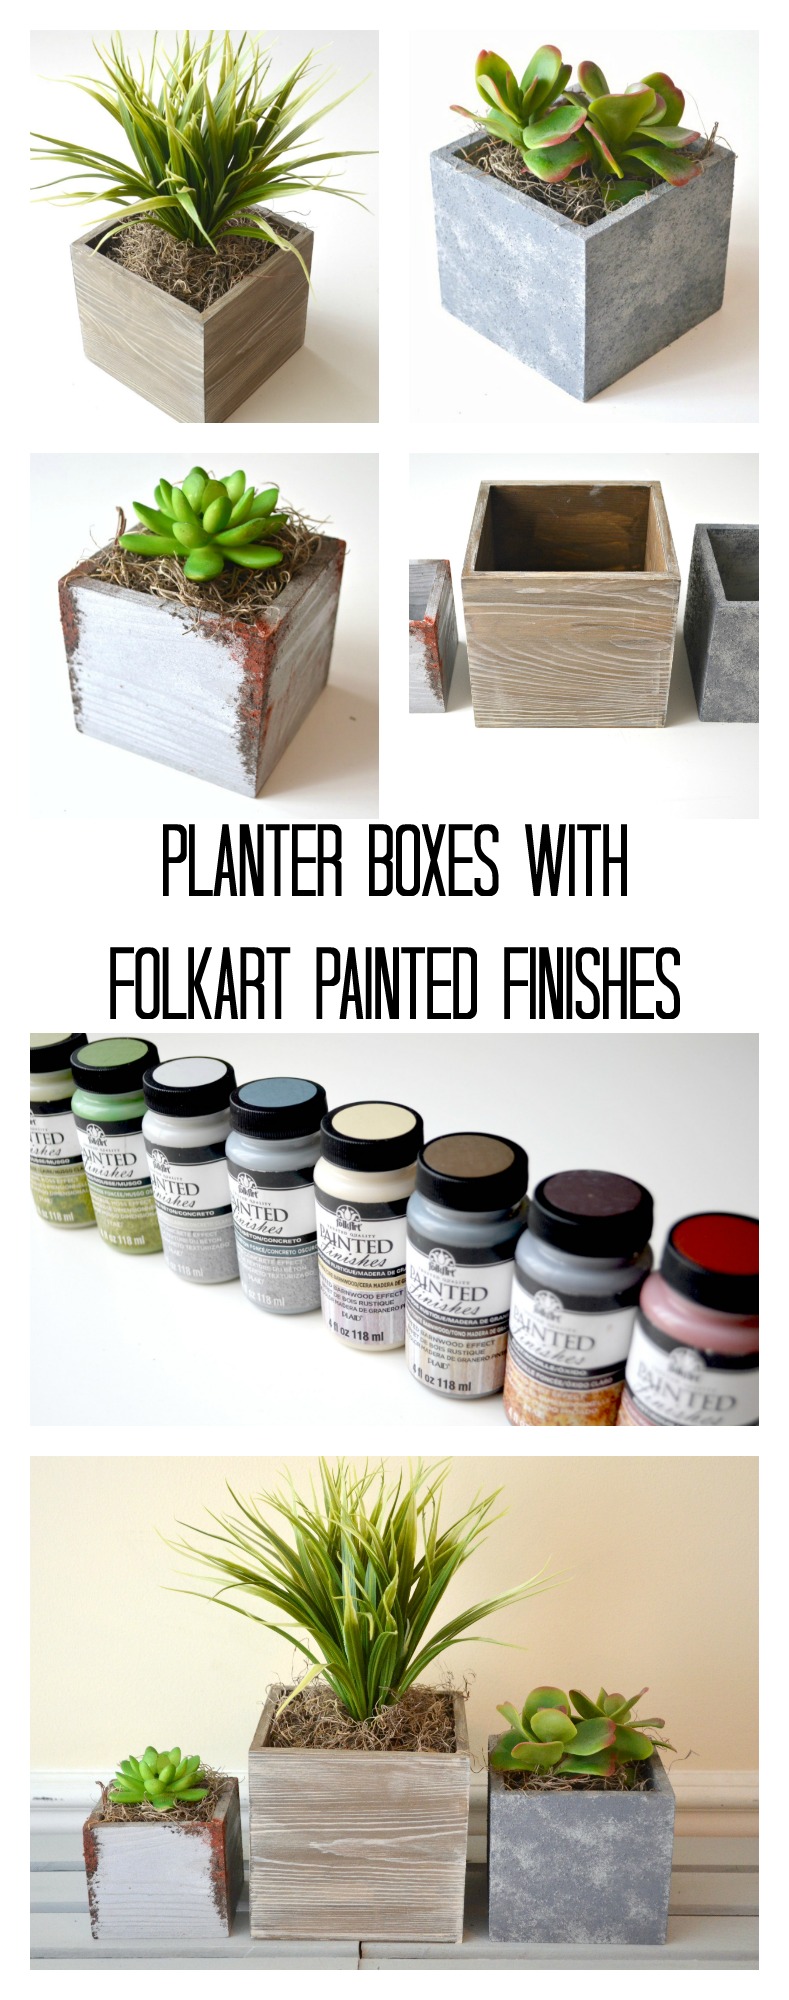
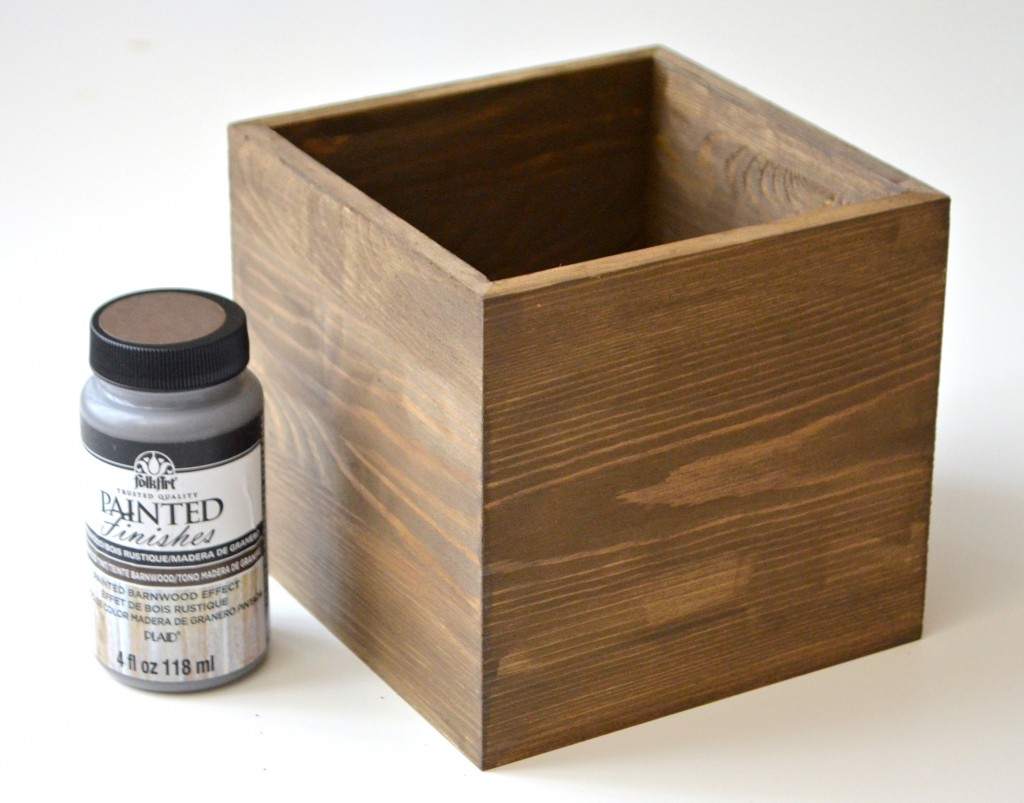
I started with three unfinished wooden boxes that are graduated in size so I could make a set of faux succulent planters for my new bookshelf.
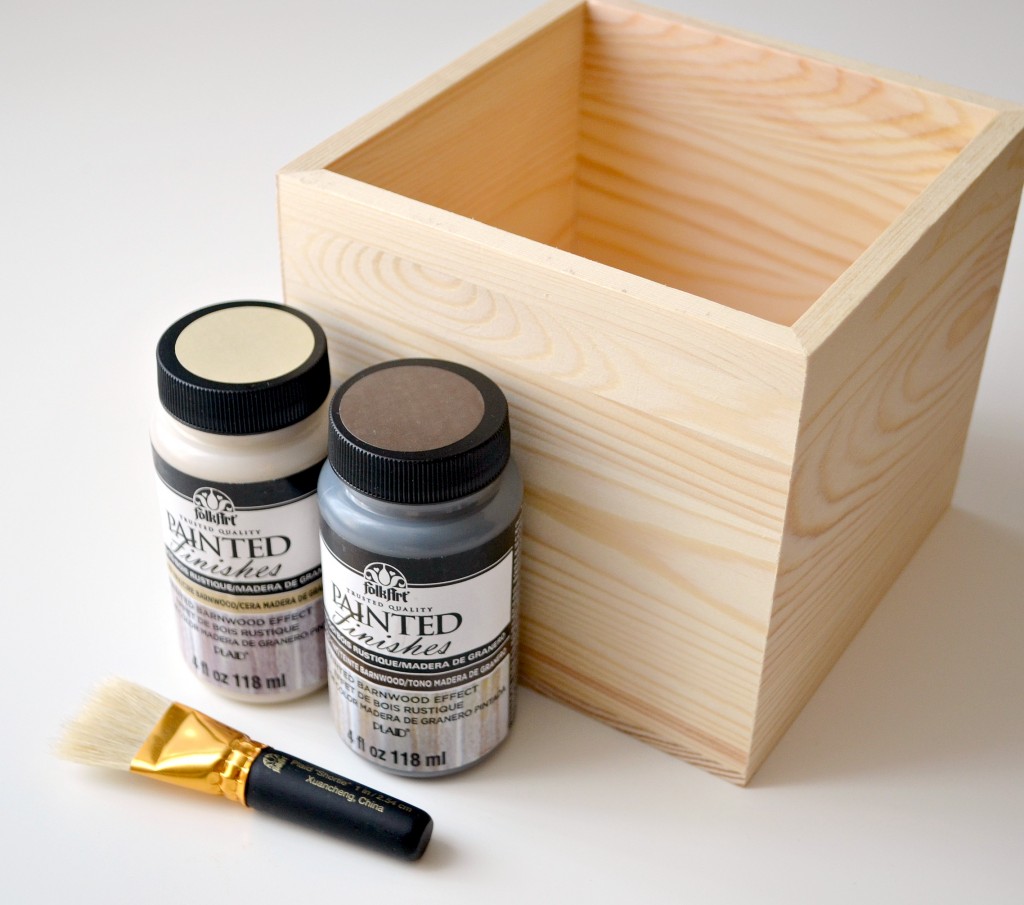
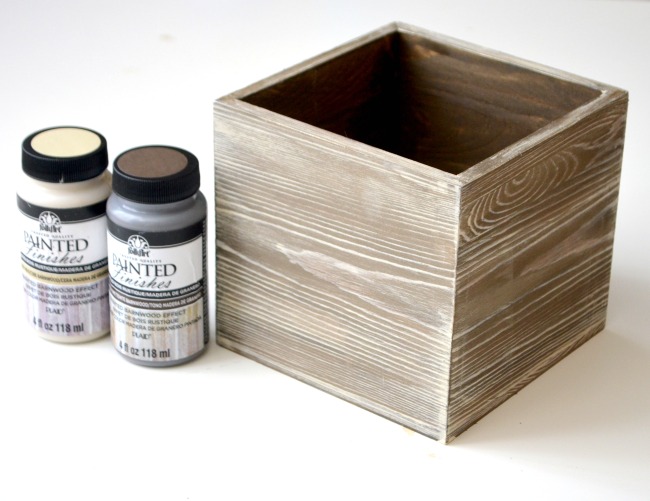
Step 1: Sand your wood if necessary, then apply a coat of your Barnwood Tint.
It goes on really easily, like a stain. In fact, you can leave it as is if you want. Allow it to dry completely.
Step 2: Brush on a coat of Barnwood Wax.
Step 3: Quickly, while it’s still wet, scrape the excess wax from the surface of the wood.
I used an old plastic gift card to do the scraping and it worked like a charm.
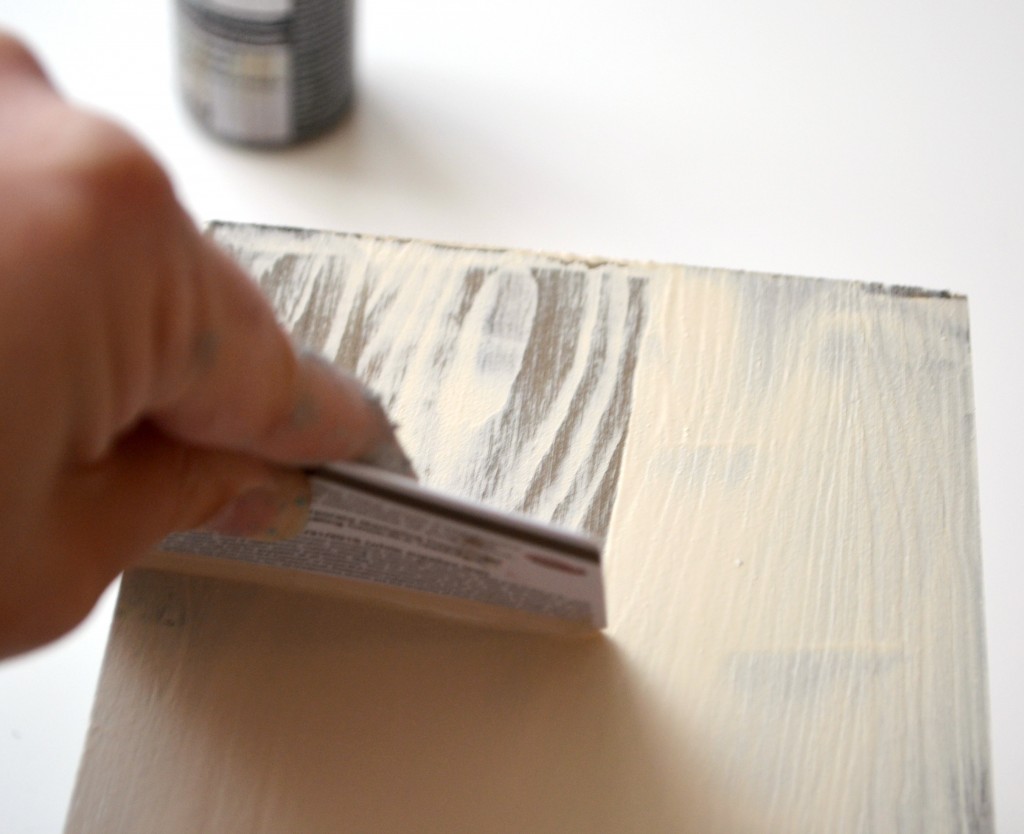
The remaining wax will settle into the pattern of the wood grain, highlighting it and making your piece look beautifully weathered. All that’s left to do is let it dry!
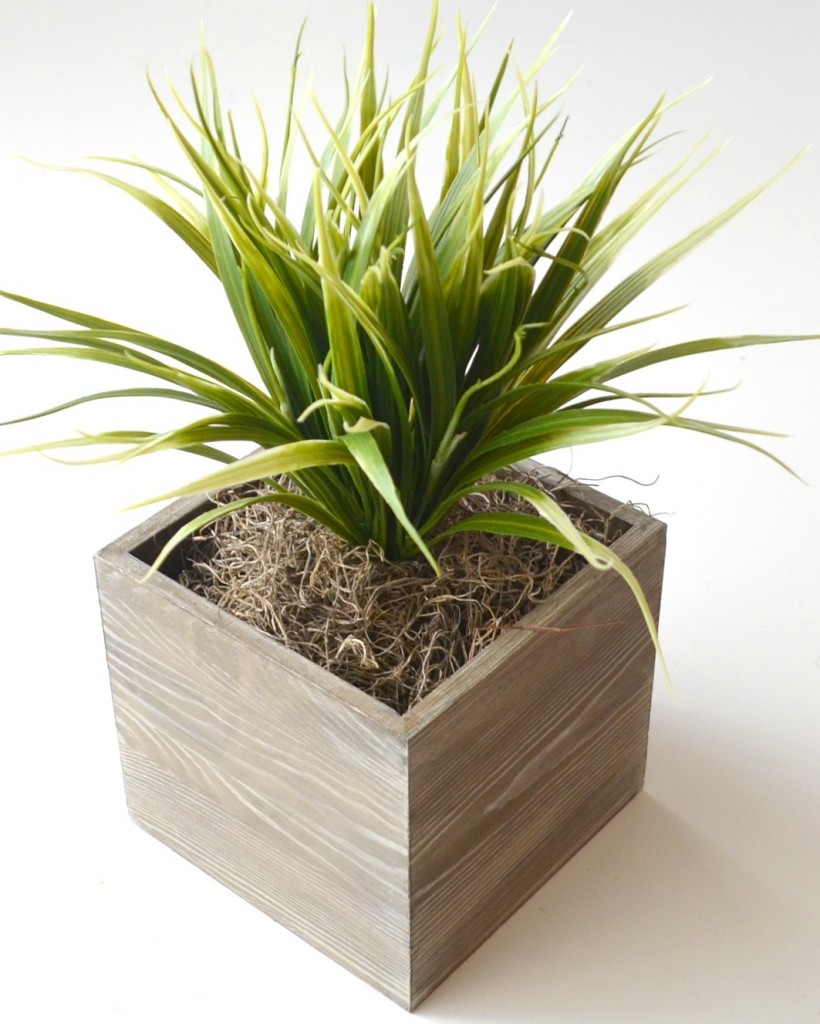
My final step for this project was to add Spanish Moss and a faux succulent, which Flynn the kitten is enamored with and constantly trying to eat. What do you think?! I absolutely love the look of the Barnwood finish…how pretty would this be on a rustic sign, a crate, or anything else you can imagine?
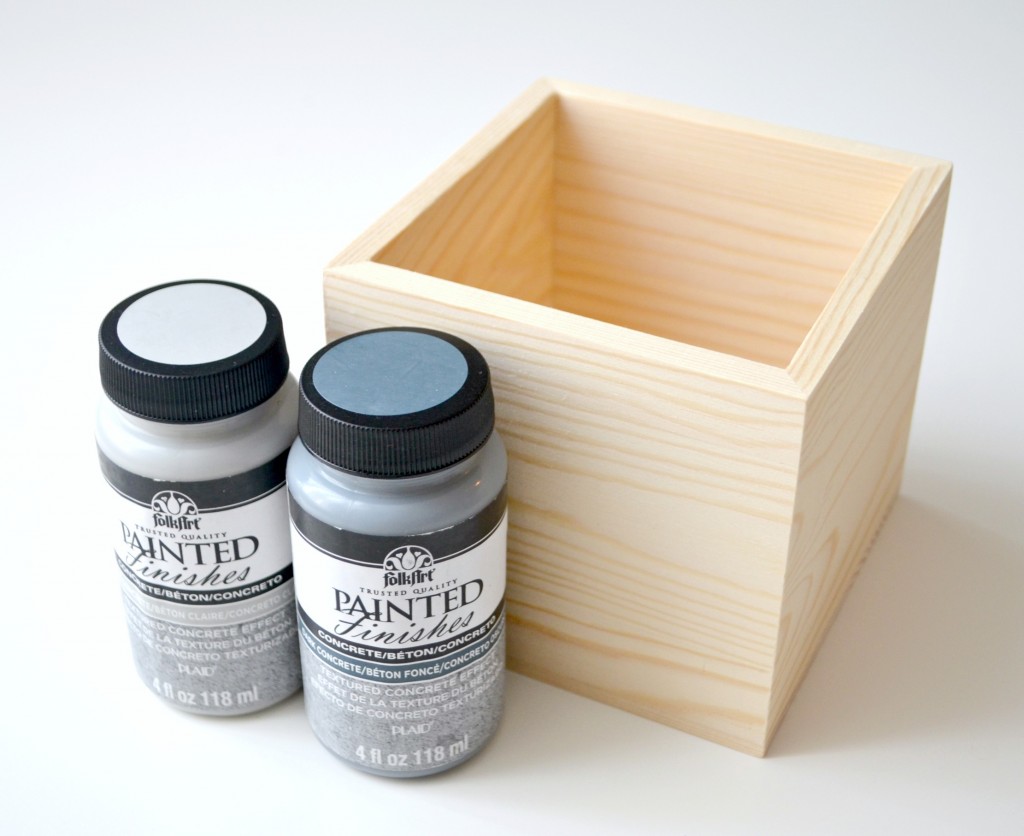
Step 1: Sand if necessary, then dab on a coat of Light Concrete.
For applying these paints, the Painted Finishes brushes are just the right size. They come in a 3 pack, are 1″ in width, and are made of 100% Hog hair with flag tip bristles. They’re easy to control and perfect for working with the thick texture of the paint. Once your first coat has dried, it’s time to move on, or you can totally leave it this way if you like the look as is.
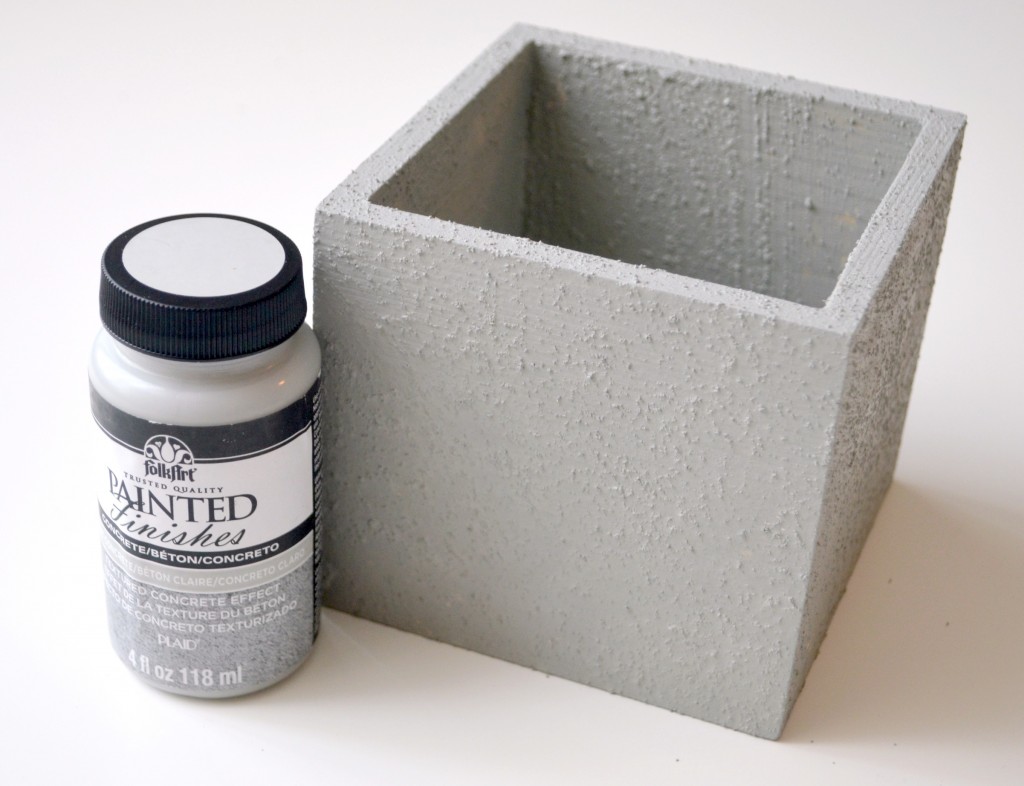
Step 2: Dab Dark Concrete onto the surface to provide shadows and accents.
You can also do this in reverse if you prefer, starting with a coat of Dark Concrete, then adding the Light Concrete later as highlights.
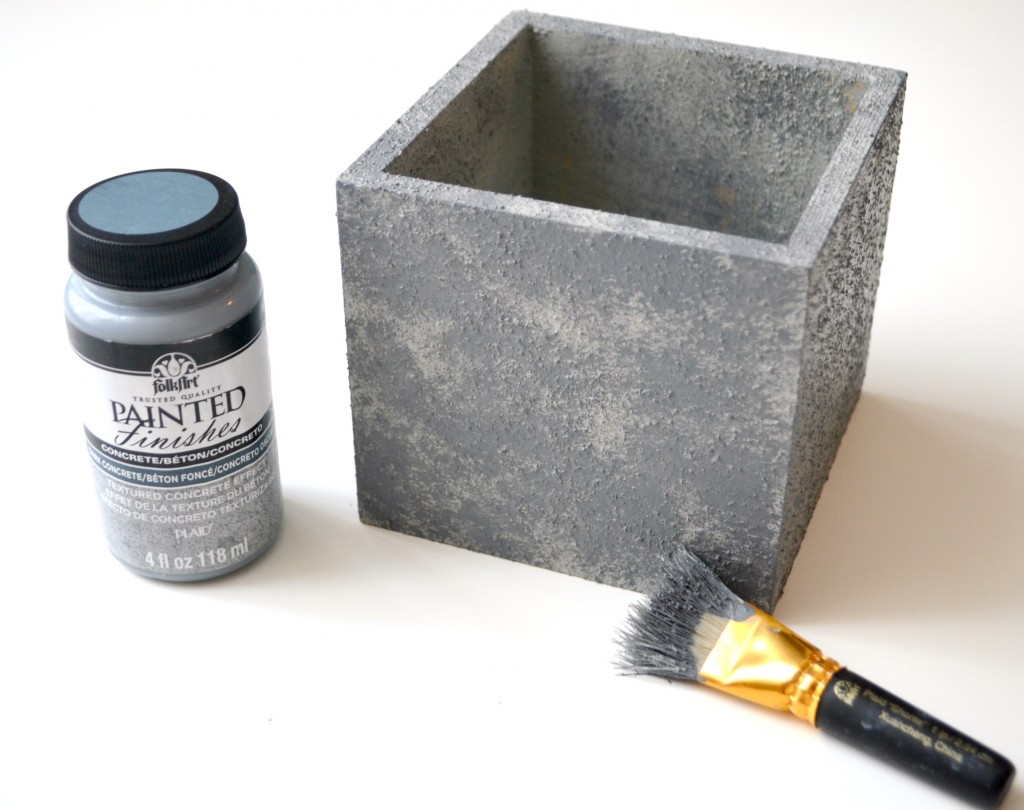
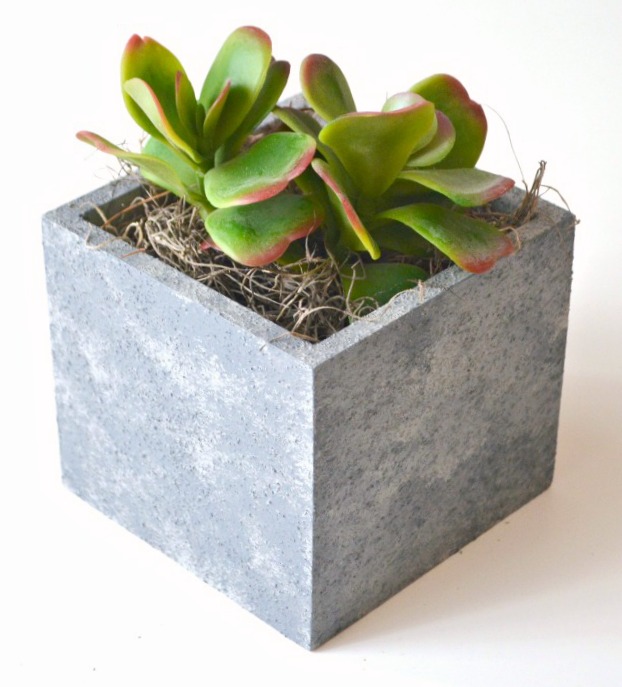
Once your planter is totally dry, it’s time to add moss and succulents! Wouldn’t you take one look at this and think it was truly made of concrete?

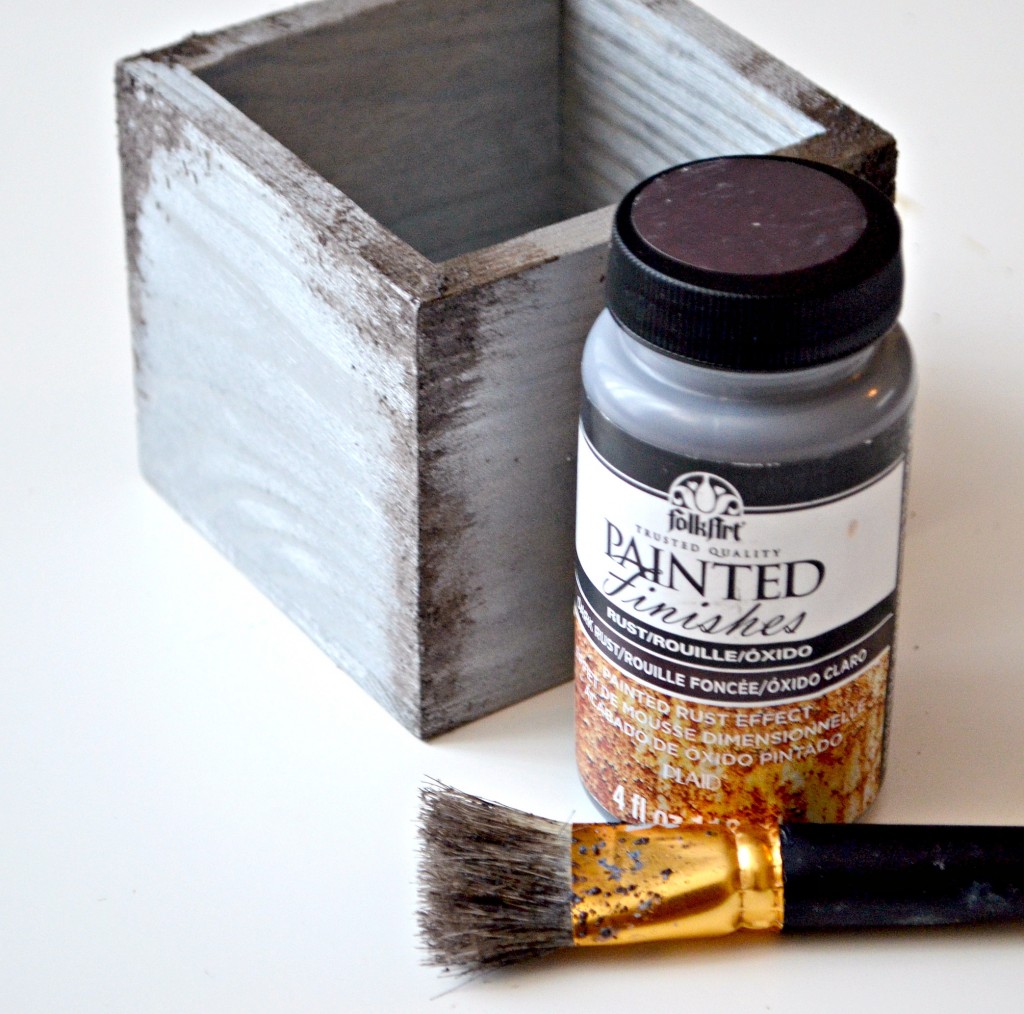
Step 1: Sand your surface and apply FolkArt Metallic paint in Silver Anniversary.
Since wood doesn’t rust, we have to start by making the planter look like it’s metal. If you’re starting with a metal surface, this step can obviously get skipped. Make sure the paint is totally dry before moving on.
Step 2: Use your Painted Finishes brush to dab Dark Rust in strategic places on your surface.
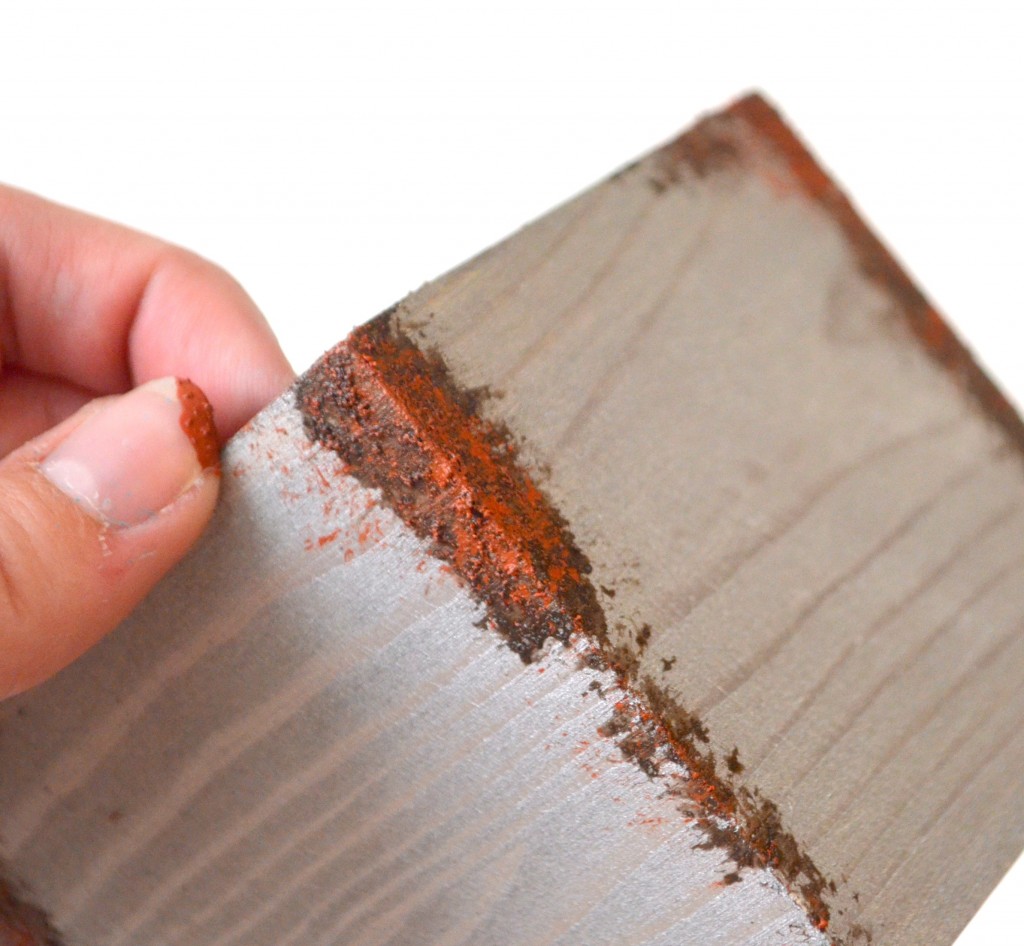
Try to think about where weathering and rust would naturally occur on the piece.
Step 3: Apply Light Rust on top of but not totally covering your dry Dark Rust.
Step 4: While the Light Rust is still wet, lightly spray with water using a spray bottle to allow the paint to run and drip just a bit.
This will add to the natural, realistic effect.
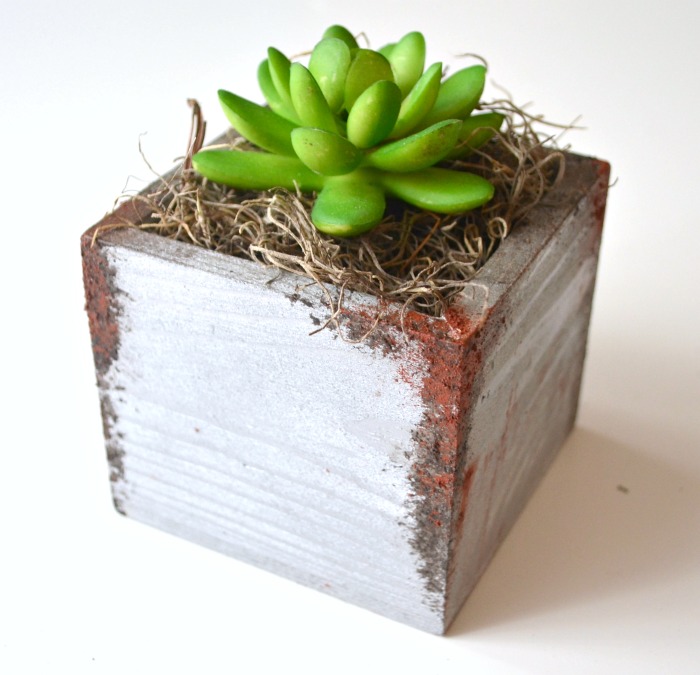
Once all your paint is dry, it’s time to fill the container with moss and a final faux succulent!
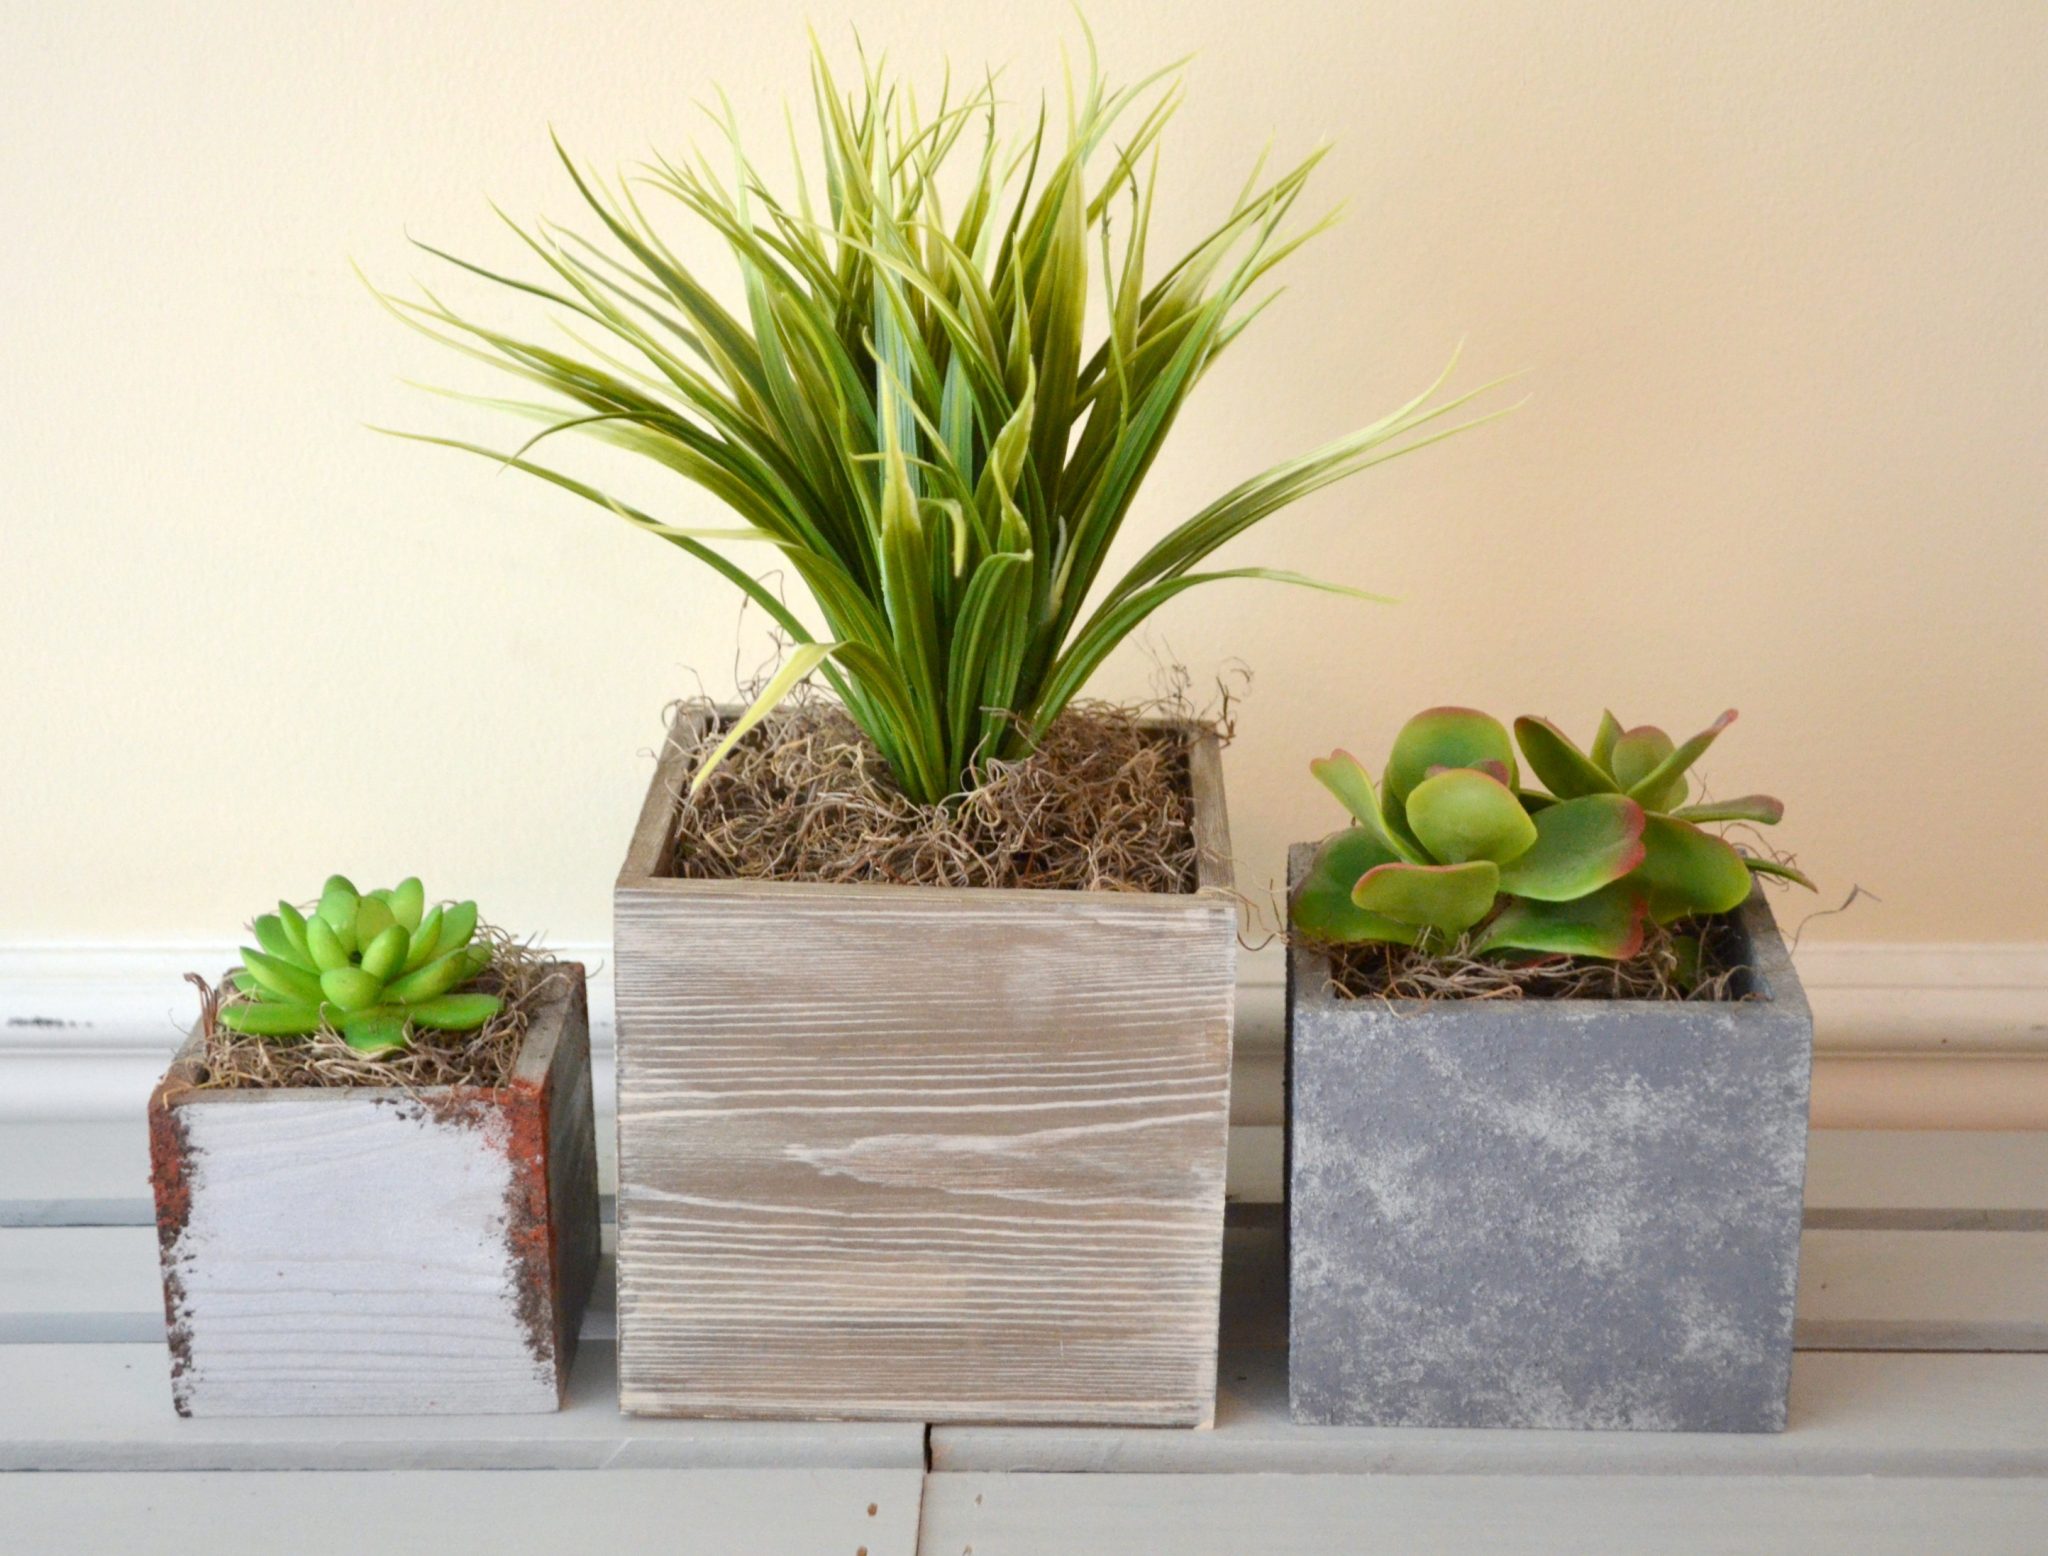
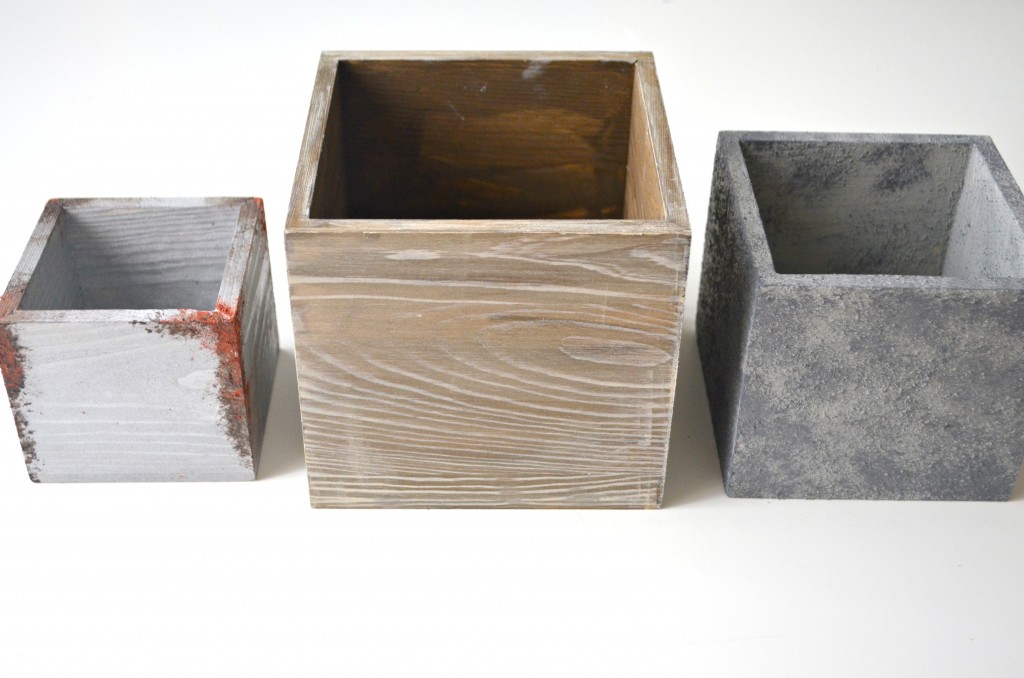
Ta-da! Here they all are together. Originally they all looked the same, except for their sizes, and now they look like three totally different surfaces! Which is your favorite?
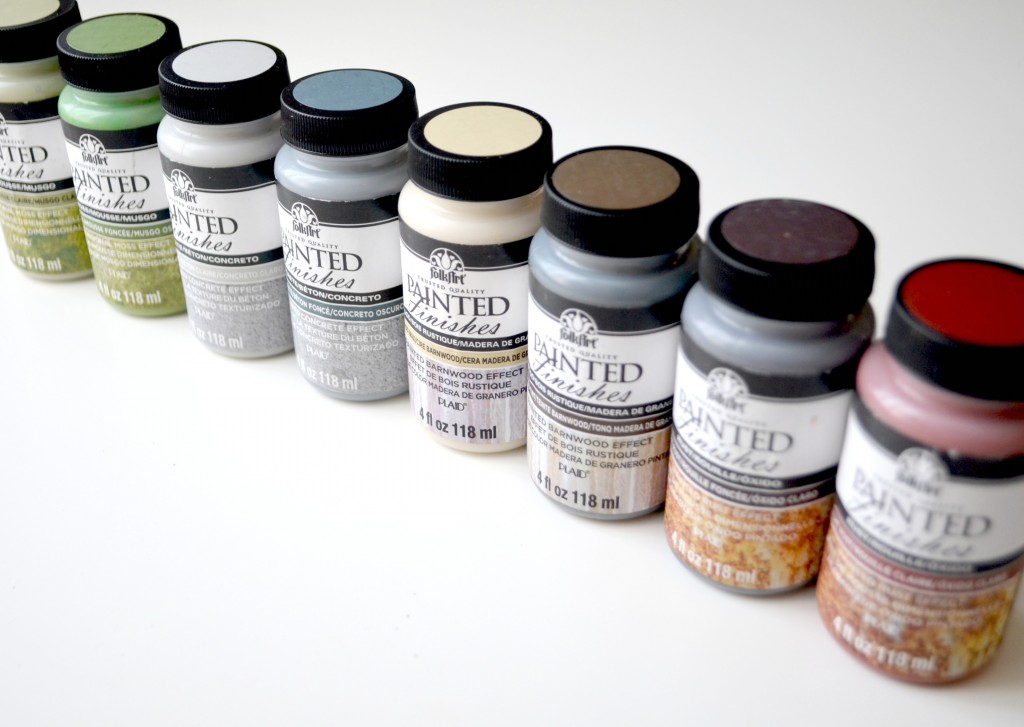
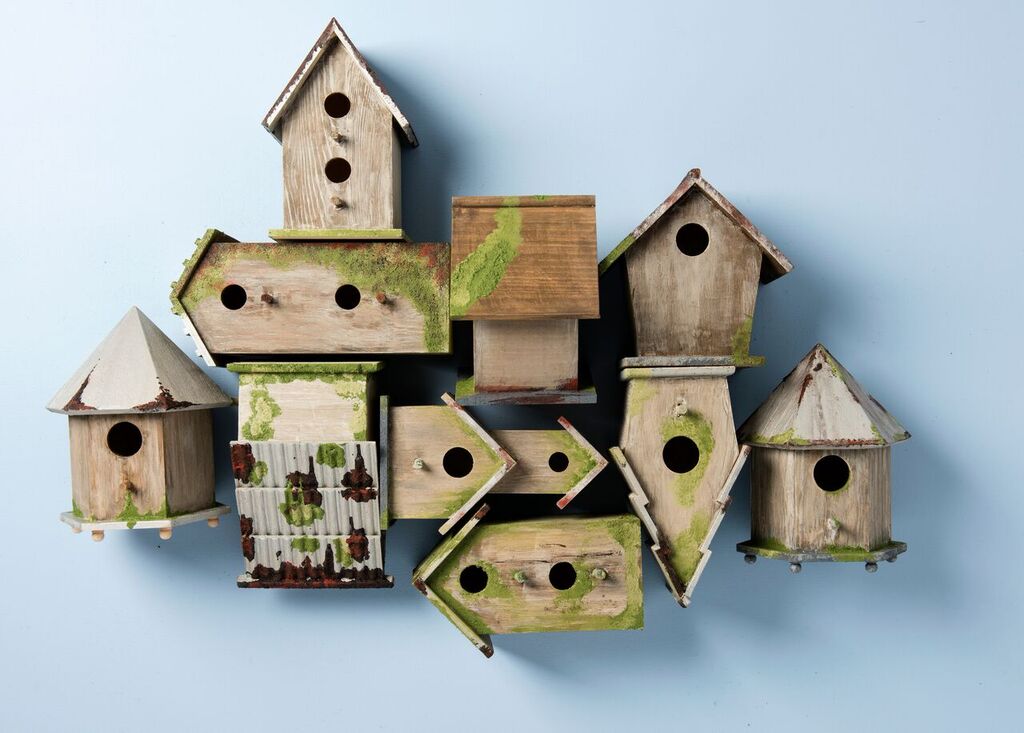
The only part of the FolkArt Painted Finishes collection I didn’t use on my planters is Moss, which works a lot like the Concrete. It’s textured to give the appearance of real moss and comes in both light and dark to create shadows and highlights. Here is a look at the finished effect on the birdhouses the Plaid Creators team made during our trip to Plaid’s Headquarters a few months ago.
All of the FolkArt Painted Finishes are water-based, non toxic, and made in the USA. They are brand new, available in stores near you this month, so be sure to grab some and try them out for yourself!
Here’s a peek at how my planters look on the Crate Bookshelf I created, along with my painted birdhouse which uses all of the finishes together.

I’d love to hear your thoughts on these new additions to the FolkArt product line. Which is your favorite finish? Have you tried any of these yet? If so, what did you make? Share all about it in our One Artsy Mama & Friends Facebook group!


I love these! You did such a good job Amy!
Thanks so much!!