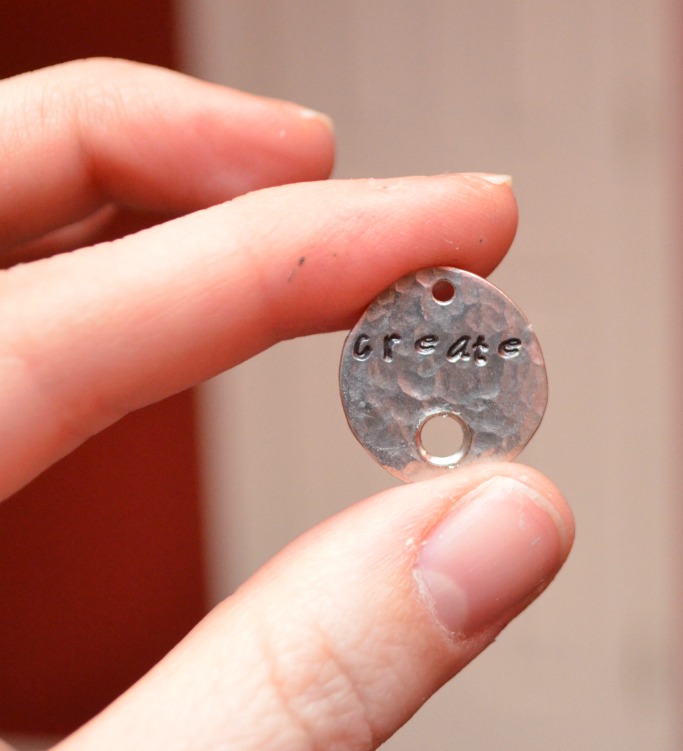
“Create” Pendant with Crystal Rivet
Metal stamping is really a great hobby. Not only does it allow you to create gorgeous, personal, one of a kind projects for yourself and the people you love, it’s also just plain fun sometimes to whack on something with a hammer. True story. Another thing I like about it is that there are always new techniques and tricks to learn that make your pieces even more beautiful. Recently, I learned how to texturize my blanks, which I showed you in my “Bloom” Necklace post. Then, just this past week, I had the chance to play with adding crystal rivets to a project. Take a look…
“Create” Pendant with Crystal Rivet

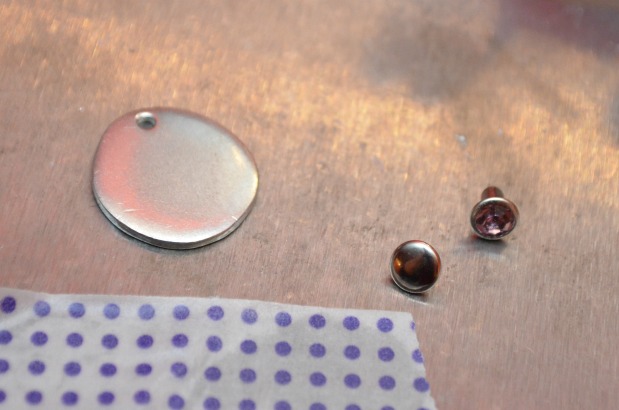
Materials:
{Special thanks to my sponsor ImpressArt for providing most of the materials used in this project. All opinions are my own}.
– River Stone Pewter Soft Strike Stamping Blank
– Prism Czech Rivet
– Rivet Setting Kit
– Large 2-Hole Punch
– Metal Stamping Hammer
– Steel Stamping Block
– Bic Mark-It Fine or Ultra Fine tip permanent marker
– Tape
– Jump Rings and clasp
– Chain
– Needle nose and flat nose pliers
{For today’s tutorial, I’m going to assume you have a basic knowledge of how to do metal stamping. If not, I have another post you should check out called Metal Stamping Basics. That will walk you through the entire process with step-by-step photos from start to finish.}
Step 1: Tape your blank to the steel block and stamp your word one letter at a time, beginning in the center and working outward.
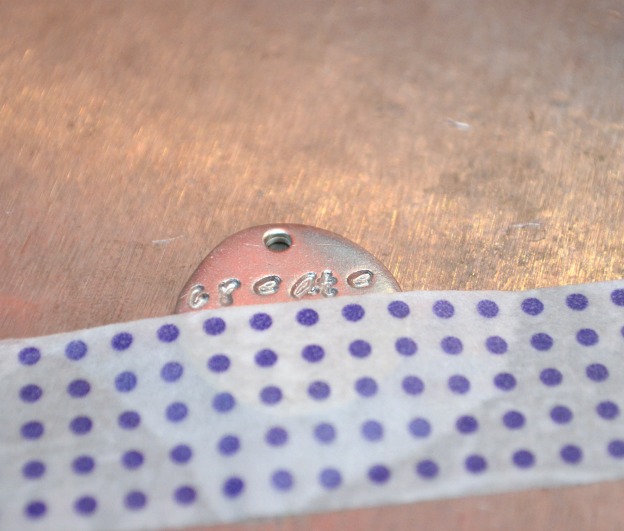
Step 2: Color in the word with your permanent marker, then wipe off the excess with a polishing cloth or a q-tip dipped in rubbing alcohol.

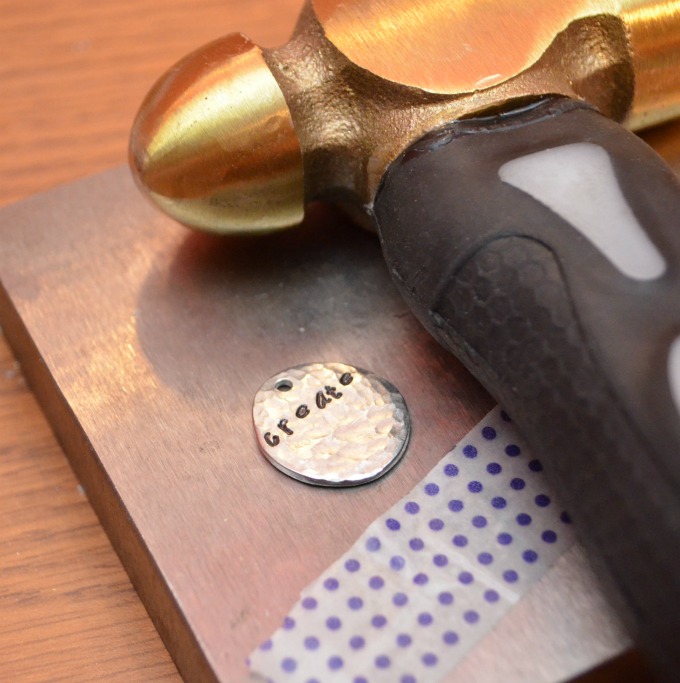
Step 3: Use the rounded end of the hammer to create texture on your blank by repeatedly striking it all over the surface until you’re pleased with how it looks.
Step 4: Use the 2-Hole punch to create a hole where you want your rivet to go. Just place the blank where you want it, then twist until the punch goes all the way through.
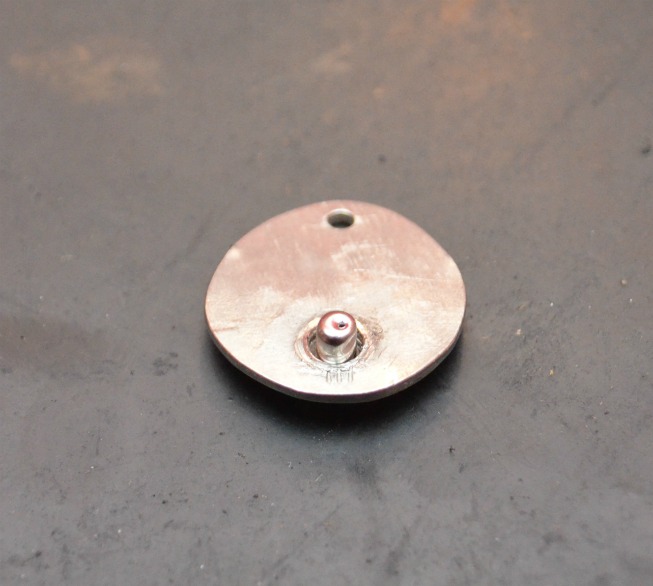
Now you’ll have a nice gaping hole. 🙂
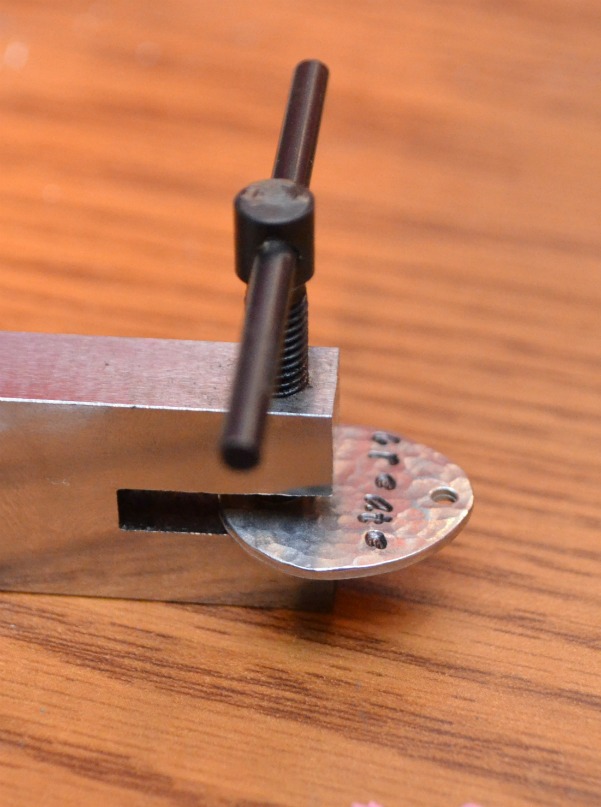
Step 5: Place the front {crystal} side of the rivet in the hole and turn it face down on the Rivet Setting Mat. Place the other end of the rivet on top, cover it with the domed end of the rivet setting tool, and strike with your hammer to set.
And there you have it, a crystal rivet, right there on your pendant! Think how fun this would be to add birthstones to a project!
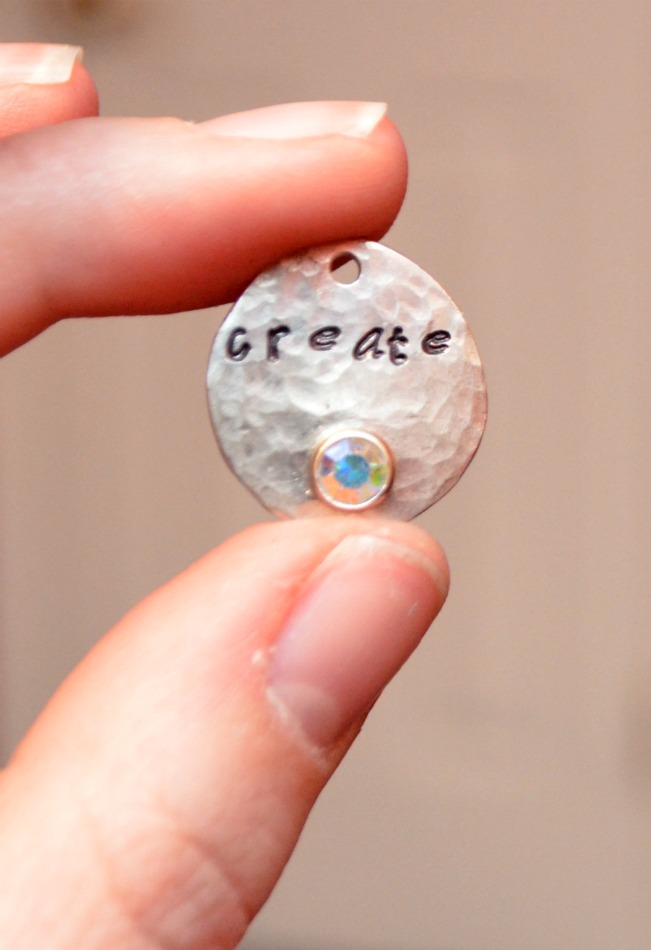
Just a note, if you use a single pewter blank like I did here, your rhinestone will actually still turn and move a little bit…which was fine with me. If you want it super-duper tight, try riveting two blanks together.

I’m really liking the look of having the crystal right there as part of my pendant instead of always adding a dangle charm. It was easier to do than I thought, too. I’ve already got a few other projects in mind where I’d like to incorporate some of these rivets…stay tuned! Because how can you say no to bling?


Pretty!
I have to try this – I’ve seen it done on vintage spoons too – just fabulous!
Thanks for sharing!
Of course! Glad you like it!