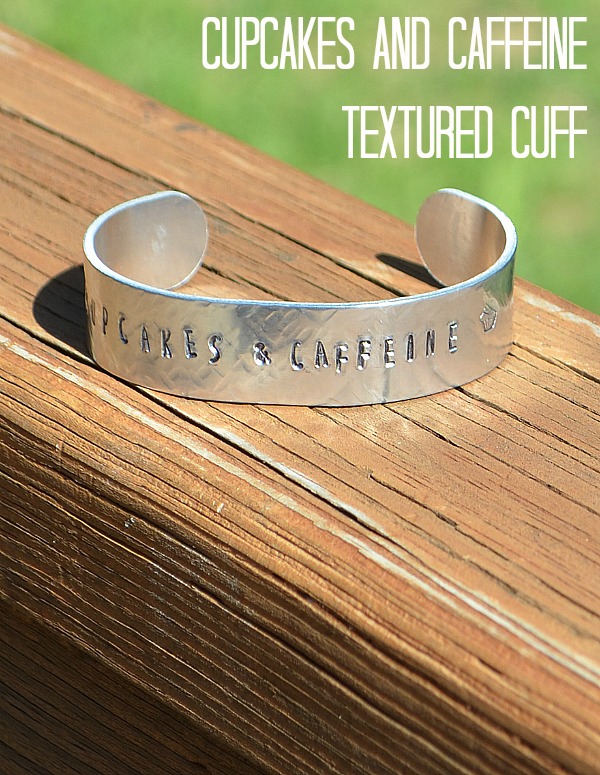
DIY Cuff Bracelet: Cupcakes & Caffeine
Thanks to ImpressArt for supplying me with materials used in today’s post. All opinions are my own.
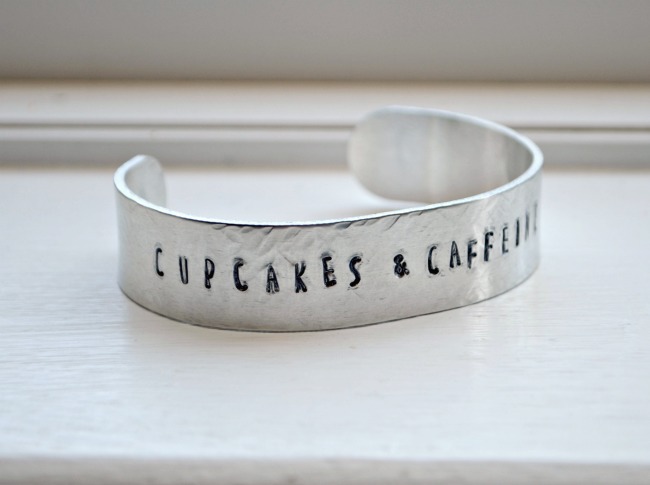
Today’s project came about because I got a new “toy” to play with. Our friends at ImpressArt just released a brand new Bracelet Bending Bar and sent it to me to try out. I couldn’t wait to see how it worked, so I decided to create a fun textured cuff. A friend of mine recently bought me a shirt that says, “cupcakes & caffeine” and I’d wear it every day if I could…I thought that would be the perfect lighthearted message to stamp on my bracelet.
The Bracelet Bending Bar Kit I received contained the bar tool itself along with seven bracelet blanks made from sturdy 14 gauge aluminum. The ends are rounded so you don’t have to worry about sanding them for comfort/safety, and both sides of the blank have a protective plastic coating that prevents the blank from getting scratched during the stamping and bending process. Here’s a list of everything I used to make my piece of jewelry.
Materials:
{some of the following are affiliate links}
– ImpressArt aluminum bracelet blank
– ImpressArt Bracelet Bending Bar
– Alphabet Stamps {mine are Lollipop Uppercase}
– Cupcake design stamp
– Texture Hammer
– Steel Stamping Block
– Hammer
– Painter’s Tape
– Black permanent marker or black acrylic enamel paint
– Jewelry polishing cloth
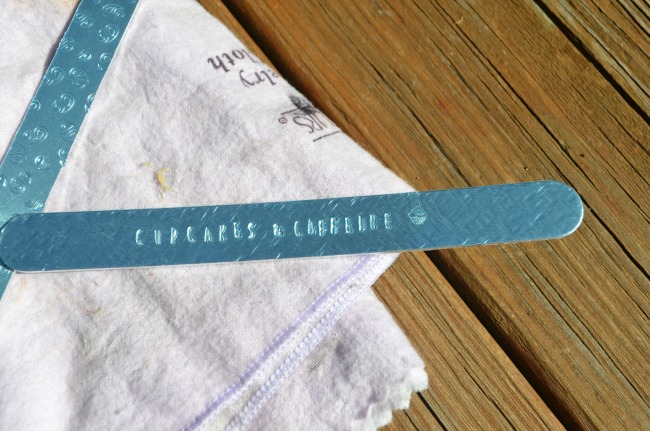
Step 1: Place your aluminum blank on the stamping block and stamp your desired texture.
I wanted a light cross-hatch design, so I used a hammer that has diagonal lines on it, first stamping on one angle, then going back and stamping the opposite way. You can use any texture you like for this step, or none at all.
Step 2: Stamp your words/images onto the blank.
If you’ve never tried metal stamping before, this might sound totally intimidating, but I promise you it’s not nearly as hard as it sounds. Just tape your blank in place so it doesn’t move, place the letters where you want them one at a time, and tap each stamp with a hammer to create the impression. If that still sounds crazy, I have full step by step photo instructions for basic metal stamping that might be helpful to you if you’re just starting out.
*TIP*: When stamping, I like to start with the center letter or character first and work my way out to each side.
Step 3: With the stamped images facing you, place one end of the blank in the notch of the Bracelet Bending Bar.
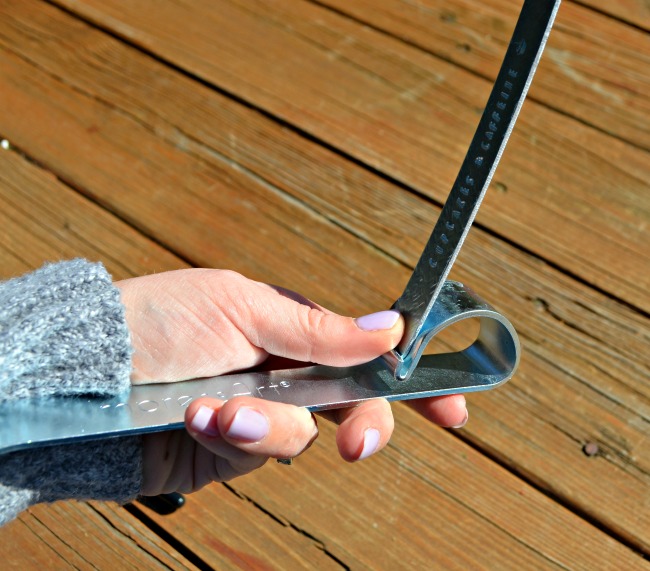
Step 4: Holding the blank in place with one hand, apply pressure with the other hand and bend it over the curved area.
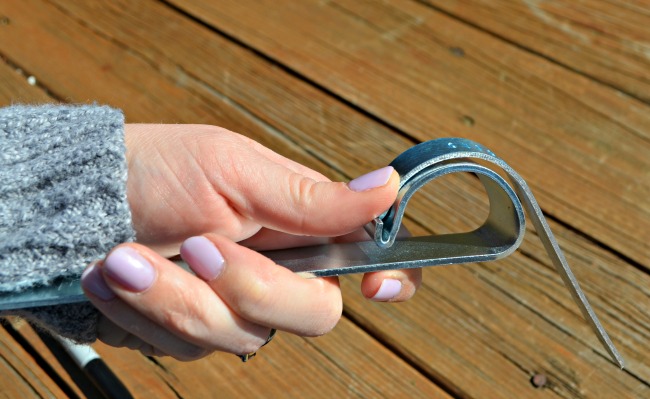
Flip the bracelet around and repeat on the other end.
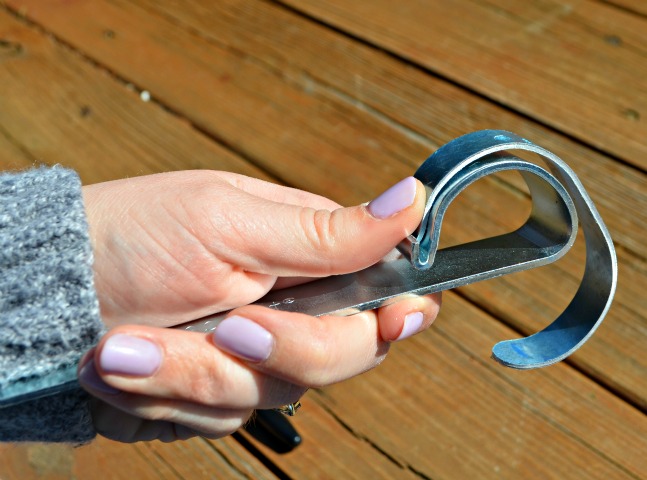
Ta-da! Your cuff is shaped. It can be adjusted further by hand to fit each individual’s wrist comfortably.
Step 5: Remove the plastic coating from both sides of the blank.
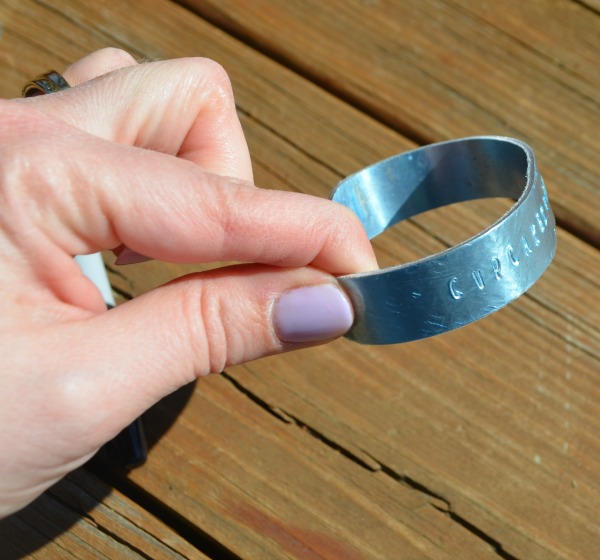
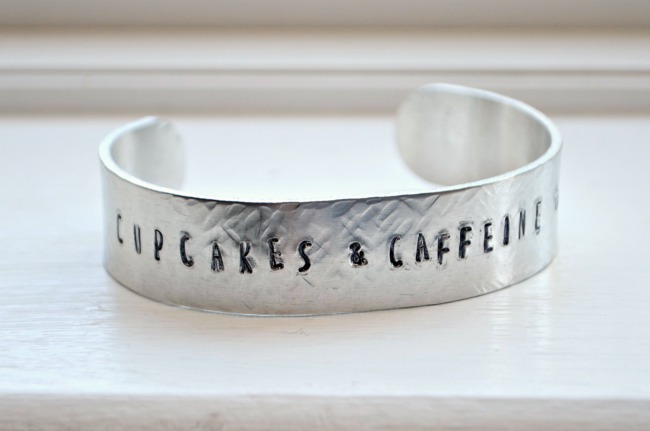
Step 6: Use a black marker or black acrylic enamel to color in the letters. You can remove the excess with a jewelry polishing cloth.
Now your stamped cuff is ready to wear!
What do you think? Are you a fan of the cuff bracelet style? What would your bracelet say?


Your bracelet turned out beautifully!
Love the saying!! What a fun bracelet!!
Turned out great…love the textured background…
I love this!! Great project!
I love this and completely agree with the sentiment!!
I think I need one of those bracelet bending kits. Love your bracelet!
Hey Amy, You have done great job and make stylish bracelet, i love this and i will try the same. Thanks for sharing it with us.