Gummi Bear Gift Idea: Haribo Sour Gold-Bears
Thanks to Haribo for sponsoring today’s post. All opinions are honestly my own.
It’s the most wonderful time of the year! Time to start thinking about holiday treats and gifts for the people in our lives. Here’s a fun way to combine both; a yummy keepsake gift that’s perfect for neighbors, teachers, classmates, and friends.

The idea for this little gift package came from Haribo‘s brand new Sour Gold-Bears, which are hitting shelves this month! As the world’s largest gummi, licorice, and marshmallow candy manufacturer, Haribo is already well known for their popular original Gold-Bears. After being asked by fans for a long time to develop sour bears, the company created this new product. They came up with a sour/sweet combination by taking the flavors from those original Gold-Bears, including Pineapple (clear), Strawberry (green), Lemon (yellow), Orange (orange) and Raspberry (red); and making them sour. The new Sour Gold-Bears taste fresh, fruity and uniquely sour – but not too sour.

There are a lot of gummi-lovers among our family and friends, so I thought it would be fun to put some of these new treats in little clear bags as a gift and attach a handmade Gummi Bear ornament they could keep long after the candy is eaten. Here’s how I created it.

Materials:
– felt, any color you like
– sewing needle and thread to match your felt
– polyfil
– small black beads
– ribbon
– glue
– clear plastic treat bags
– Haribo Sour Gold-Bears
Step 1: Fold a piece of felt in half. Trace or draw the outline of a bear on one side and cut it out so you have two identical bear shapes, one for the front and one for the back.
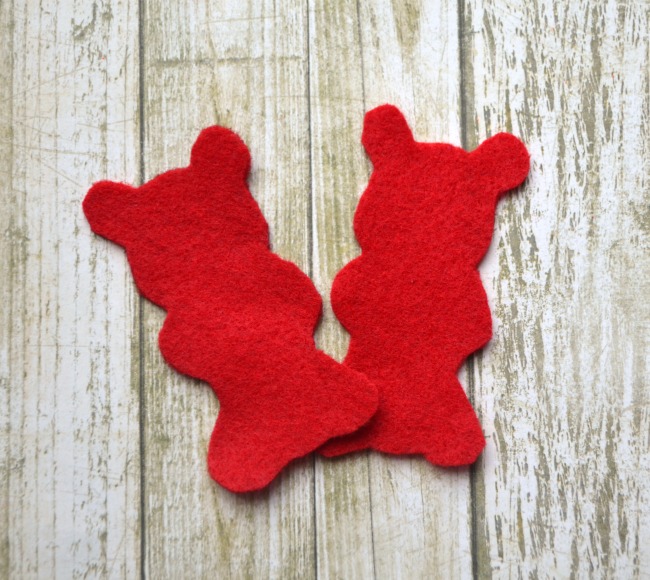
Step 2: Put the two bears together and hand stitch around the outside edges, leaving an opening in the bottom. If you don’t sew, you can always use glue to hold the pieces together instead. Just remember to keep the glue close to the edges so you have room to stuff!
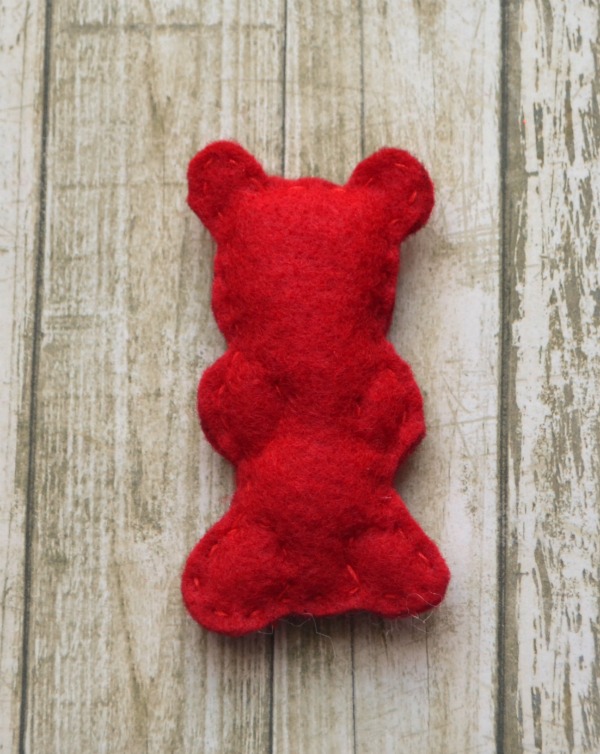
Step 3: Fill the bear with poly-fil.
Step 4: Go back and stitch details like the hands and feet. Don’t sew? Just move on to step 5; it will still look adorable!
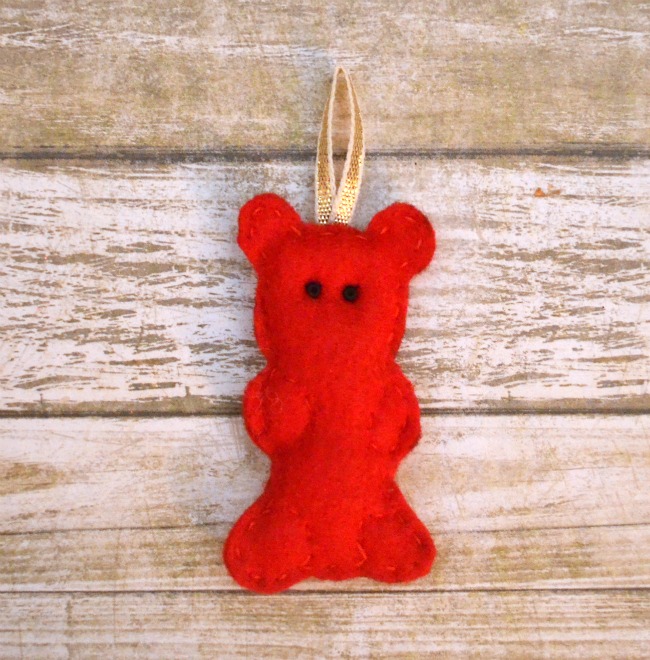
Step 6: Glue a ribbon or string to the back of the bear’s head to hang from the tree.
Step 7: Add a face. I sewed black seed beads on as eyes and a nose, then hand stitched a mouth. I also tied a tiny bow and added it as a bow tie.
Step 7: Fill a clear treat bag with candy. Tie the ornament to it with a pretty piece of ribbon. Since I have the Epson LabelWorks Printable Ribbon Kit, I couldn’t resist using it to print “Pucker Up…Meet me under the mistletoe!” on mine. Get it…they’re sour…pucker up? Haha!

What do you think? Are you a fan of gummi candies? A fan of Haribo Gold-Bears? If so, you’re going to want to check these out! We had a few bags to sample, and between hubby and Little Crafter, they’ve already eaten two of them! So, rest assured, these are Artsy-Family approved. Who do you know that might love a gift like this for Christmas?

So cute!
This is such a cute idea! We love candy at our house so I’ll have to try these. Love the adorable ornament you made!
Oh, adorable! Love it!
This is a super cute way to gift gummi bears!
Amy, this is so cute! Your felted bear is simply adorable!
This is so cute!! I love it!
Such a cute gift idea!! Love it!!