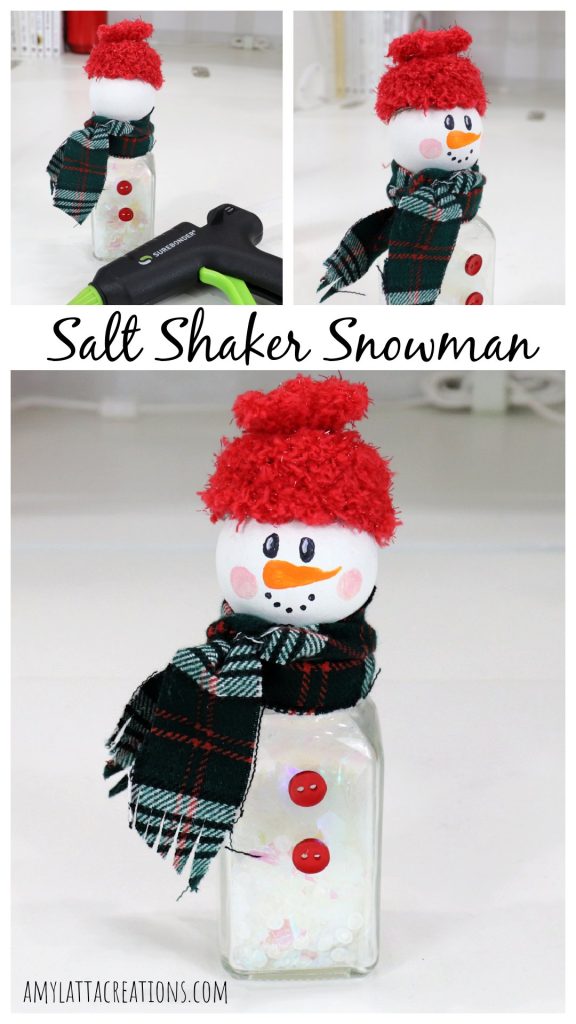
Salt Shaker Snowman
What could be cuter than a cheerful little snowman? Add this adorable piece of decor to your home this winter, using just a few basic craft supplies. Here’s how to make your own Salt Shaker Snowman!
How to Make a Salt Shaker Snowman
Crafters of all ages can enjoy this simple winter project! Just gather the supplies listed below, and you’ll have your own snowman to display in no time.
Materials
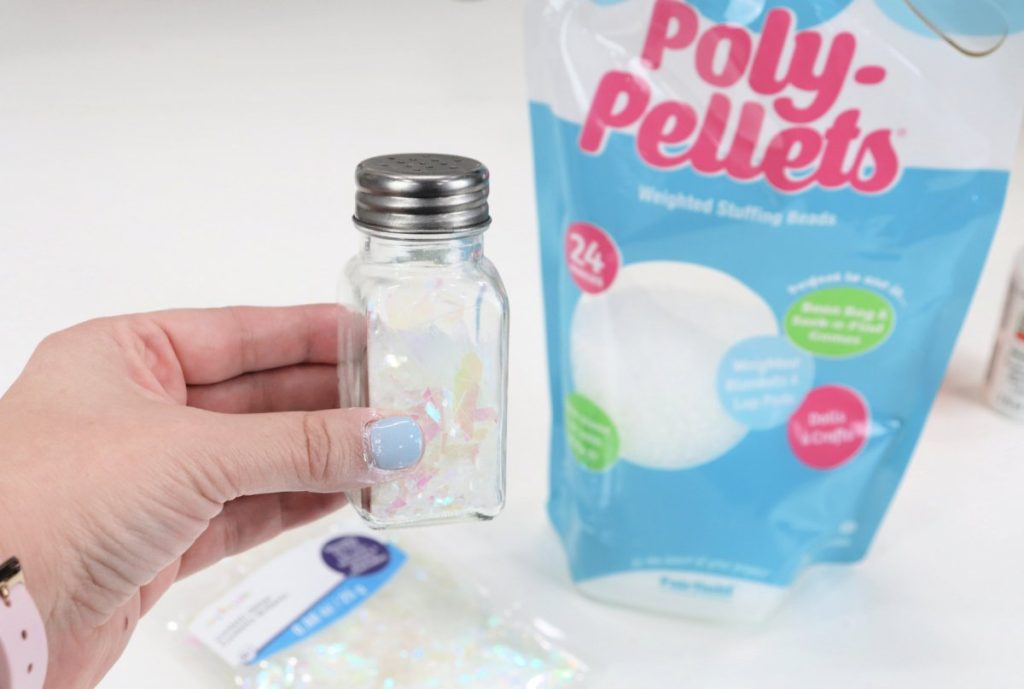
- empty clear glass salt shaker
- 1-1/2″ wooden bead
- fabric scraps (I used flannel and a fuzzy red sock)
- acrylic/multi-surface paint: white, black, orange, pink
- assorted glitter
- Poly Pellets
- scissors
- paint brushes
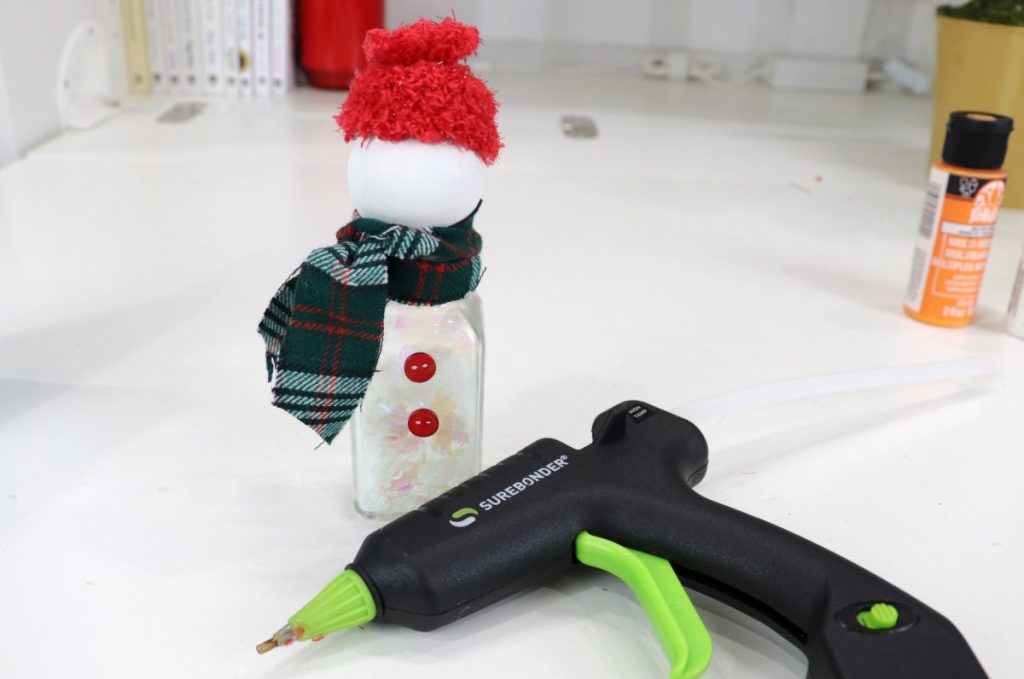
- hot glue gun and glue sticks (I used my Surebonder Mini Cordless Glue Gun)
Instructions
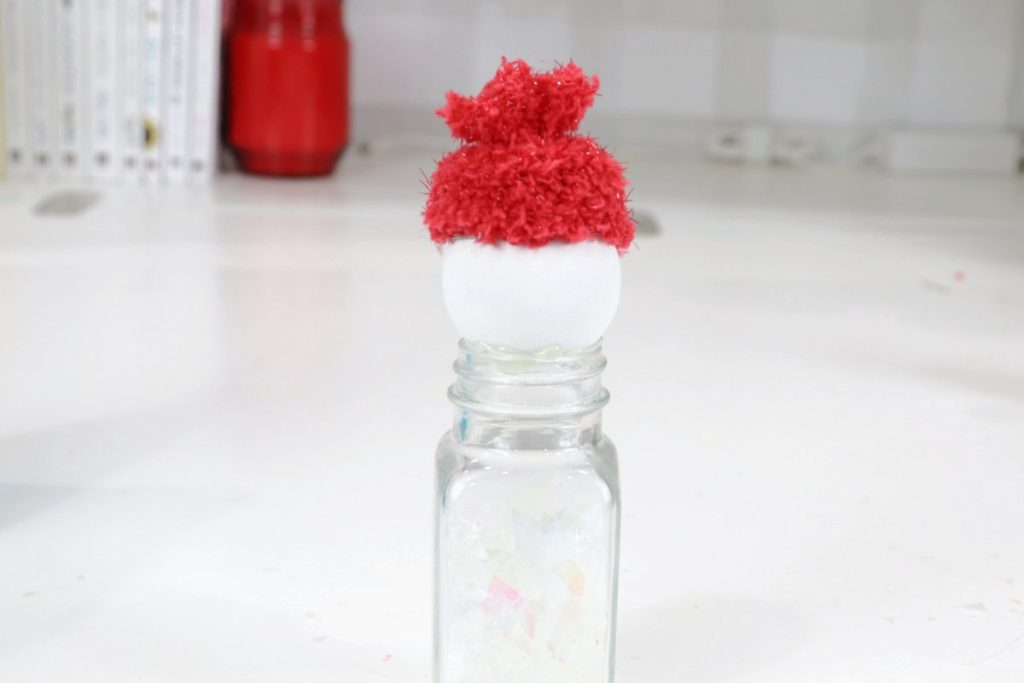
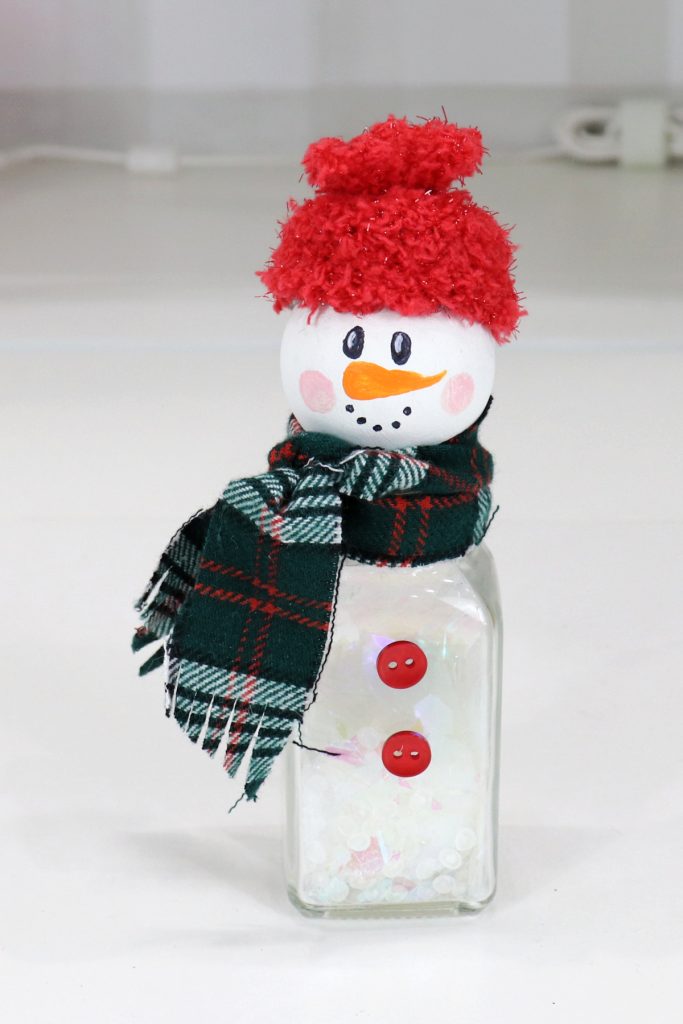
Paint the wooden bead white and set it aside to dry.
Fill the salt shaker 3/4 full with a mixture of Poly Pellets and glitter.
I used chunky glitter, but you can use whatever you like best. You can also use Poly-Fil, small styrofoam balls, confetti, or anything else you like to represent snow.
Glue the painted bead to the top of the salt shaker.

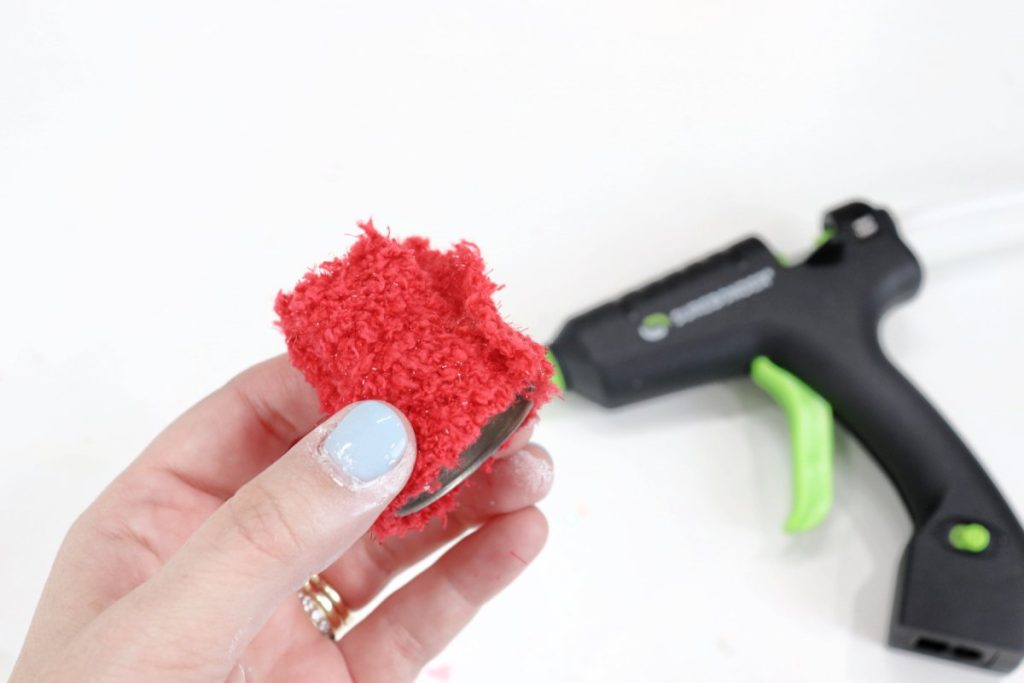
Create a hat by covering the salt shaker cap with fabric.
I used a red fuzzy sock for this. I cut a rectangle and glued it around the cap, overlapping it in the back. Then, I gathered the extra together at the top and tied it with a piece of thread.
Glue the cap onto the head.
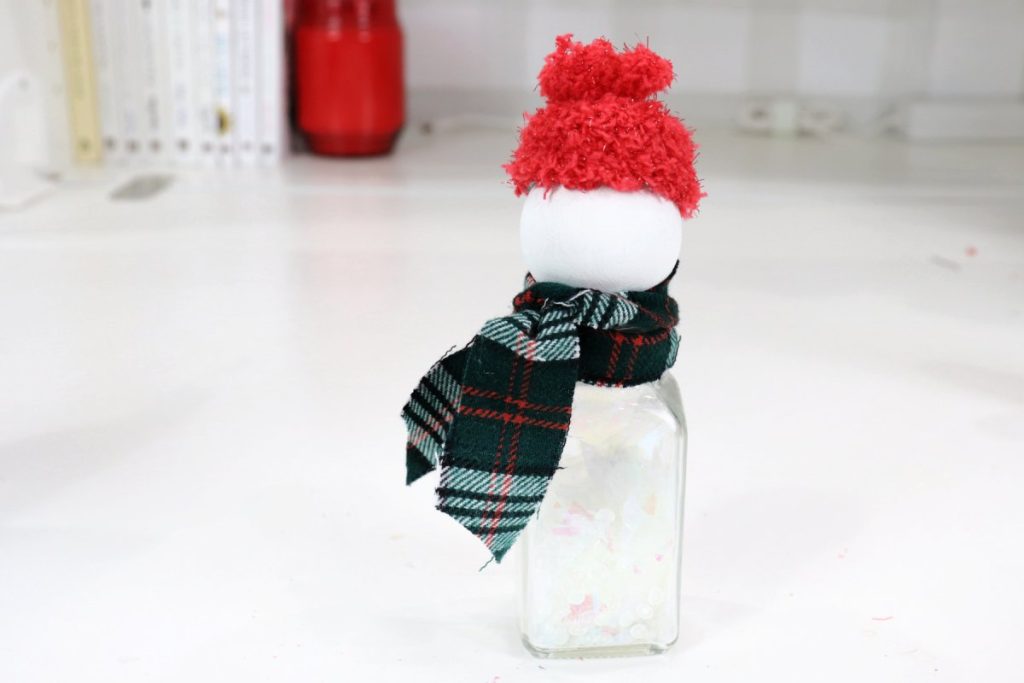
Tie a long, thin rectangle of fabric around the top of the shaker for a scarf.
I wrapped the fabric all the way around the neck first, then wrapped a second time and tied the knot.
Add buttons.
You can use any number, color, and size buttons you like. My Surebonder Mini Cordless Glue Gun was great for this project because of the detail tip, which makes it so much easier to glue small objects. You can also add buttons to the scarf and/or hat if you like.
Paint a face.
I created oval shaped black eyes with white highlights, round pink cheeks, and a bumpy orange triangle for the carrot nose. Then, I made a series of dots in a “u” shape to create the smile. You can use detail brushes and paint for this step, or fine tip paint pens.
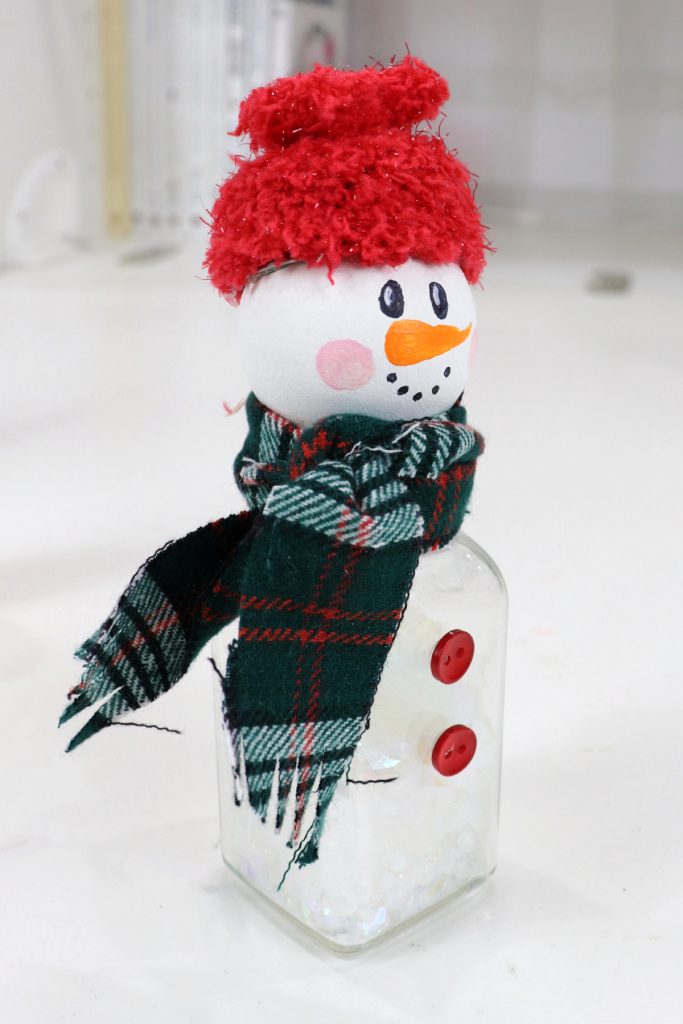
Once the face is finished, your snowman is ready to display! These are so much fun to create, and also make a great gift idea for neighbors, teachers, and friends.
Crafting Tips
- Personalize your snowman by using your favorite colors for the hat, scarf, and buttons.
- Instead of the hat, you can use pom-poms and a pipe cleaner to create a pair of ear muffs that go around the wooden bead.
- I like to paint the face last, because that way I know how much space I have in between the brim of the hat and the top of the scarf. If you paint the face first, you may end up covering part of it in later steps.
Frequently Asked Questions
Crafters from ages easily 6-106 can create this project. Younger children may need help and supervision with the glue gun.
Try your local thrift shop or a dollar store to find inexpensive clear shakers!
More Holiday Projects
If you enjoyed this project, take a look at these other winter and holiday craft ideas!

If you try any of these projects, I’d love to see how they turn out! Make sure you are part of the Amy Latta & Friends group on Facebook so you can share your photos and we can all inspire each other. See you there!

Salt Shaker Snowman
Equipment
- hot glue gun and glue sticks
- scissors
- paintbrushes
Materials
- empty clear glass salt shaker
- 1-1/2” wooden bead
- fabric scraps
- acrylic paint: black, white, pink, orange
- assorted glitter
- Poly Pellets
Instructions
- Paint the wooden bead white and set it aside to dry.
- Fill the salt shaker 3/4 full with a mixture of Poly Pellets and glitter.
- Glue the painted bead to the top of the salt shaker.
- Create a hat by covering the salt shaker cap with fabric.
- Glue the cap onto the head.
- Tie a long, thin rectangle of fabric around the top of the shaker for a scarf.
- Add buttons.
- Paint a face.