Kitchen Makeover: Painting the Cabinets
Friends, I am SO excited about the posts I’m going to be sharing with you in this little Kitchen Makeover Series! When we bought this house last Spring, there were a lot of things I loved about it, as well as some things I definitely wanted to change. The first thing we needed to do was replace the original kitchen sink and faucet because of some damage it had. Unfortunately, that also meant we had to replace the counter tops because the whole thing was one giant piece of Corian. The good news was that I got gorgeous new granite ones; the bad news was it cost quite a bit, so my other renovations got put on hold for awhile. A year later, though, we decided it was time to turn this space into the kitchen I envisioned!
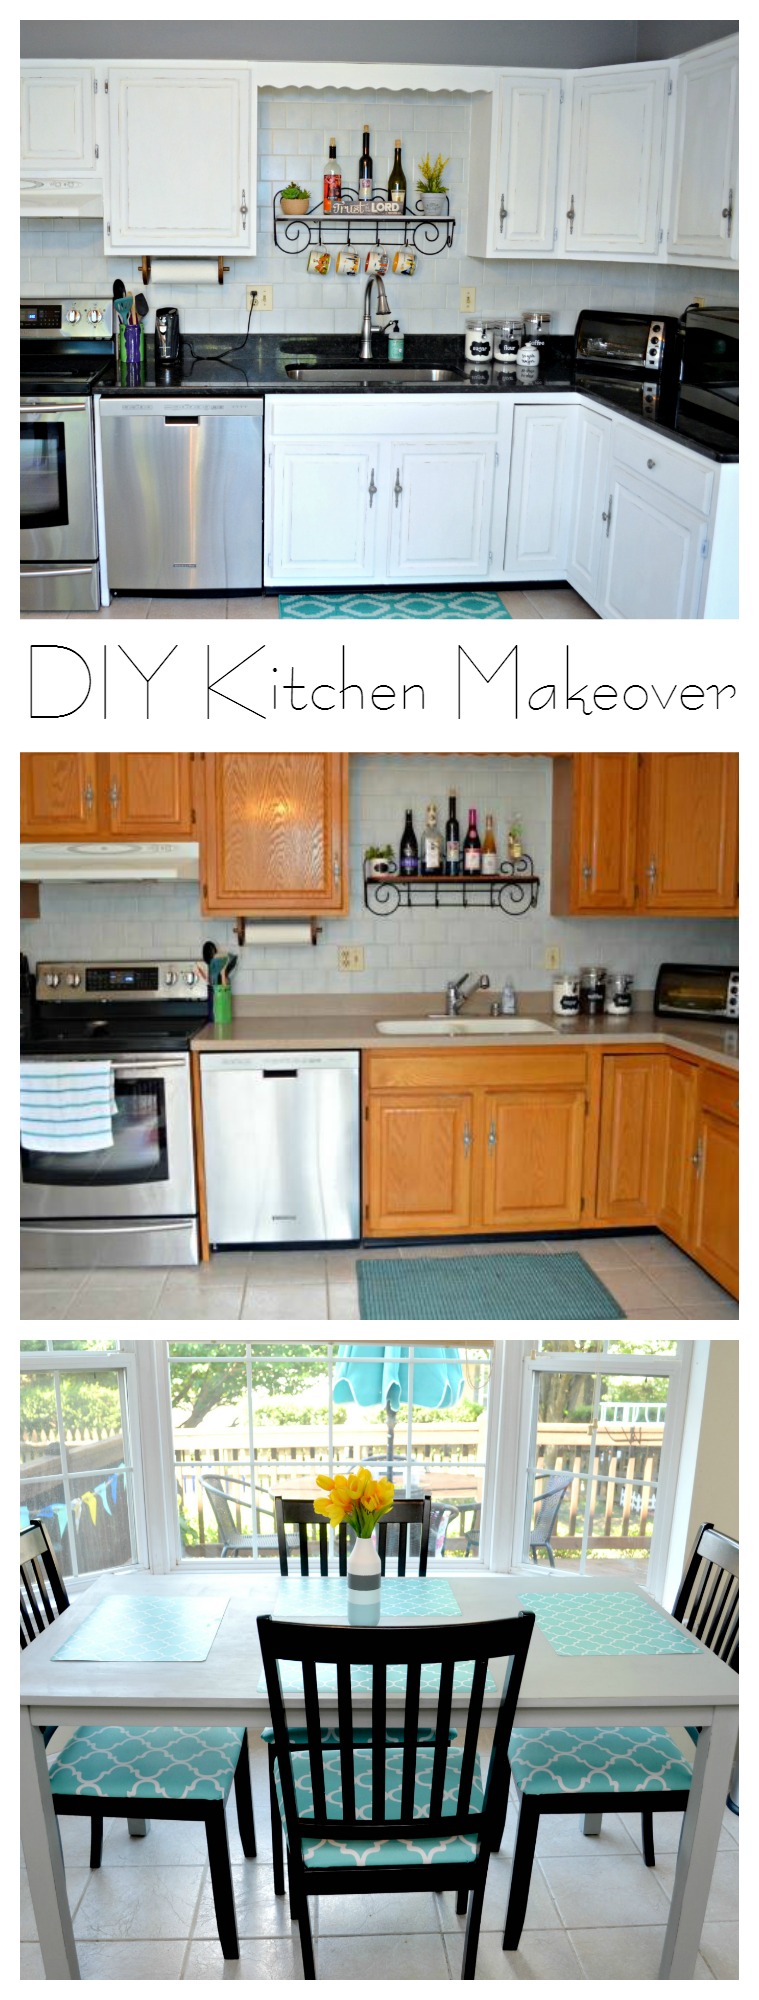
The overall Kitchen Makeover consisted of a lot of work, a lot of paint, and these major pieces:
Painting Cabinets
Painting the Table
Reupholstering the Chairs
Painting the Walls
I’ll be sharing posts about each step of the process to show you how do-able it actually was and to tell you all the tricks, tips, and things I learned along the way. First up, painting cabinets.
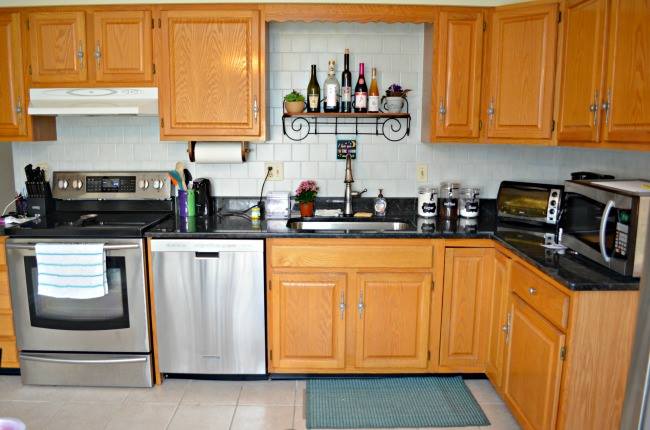
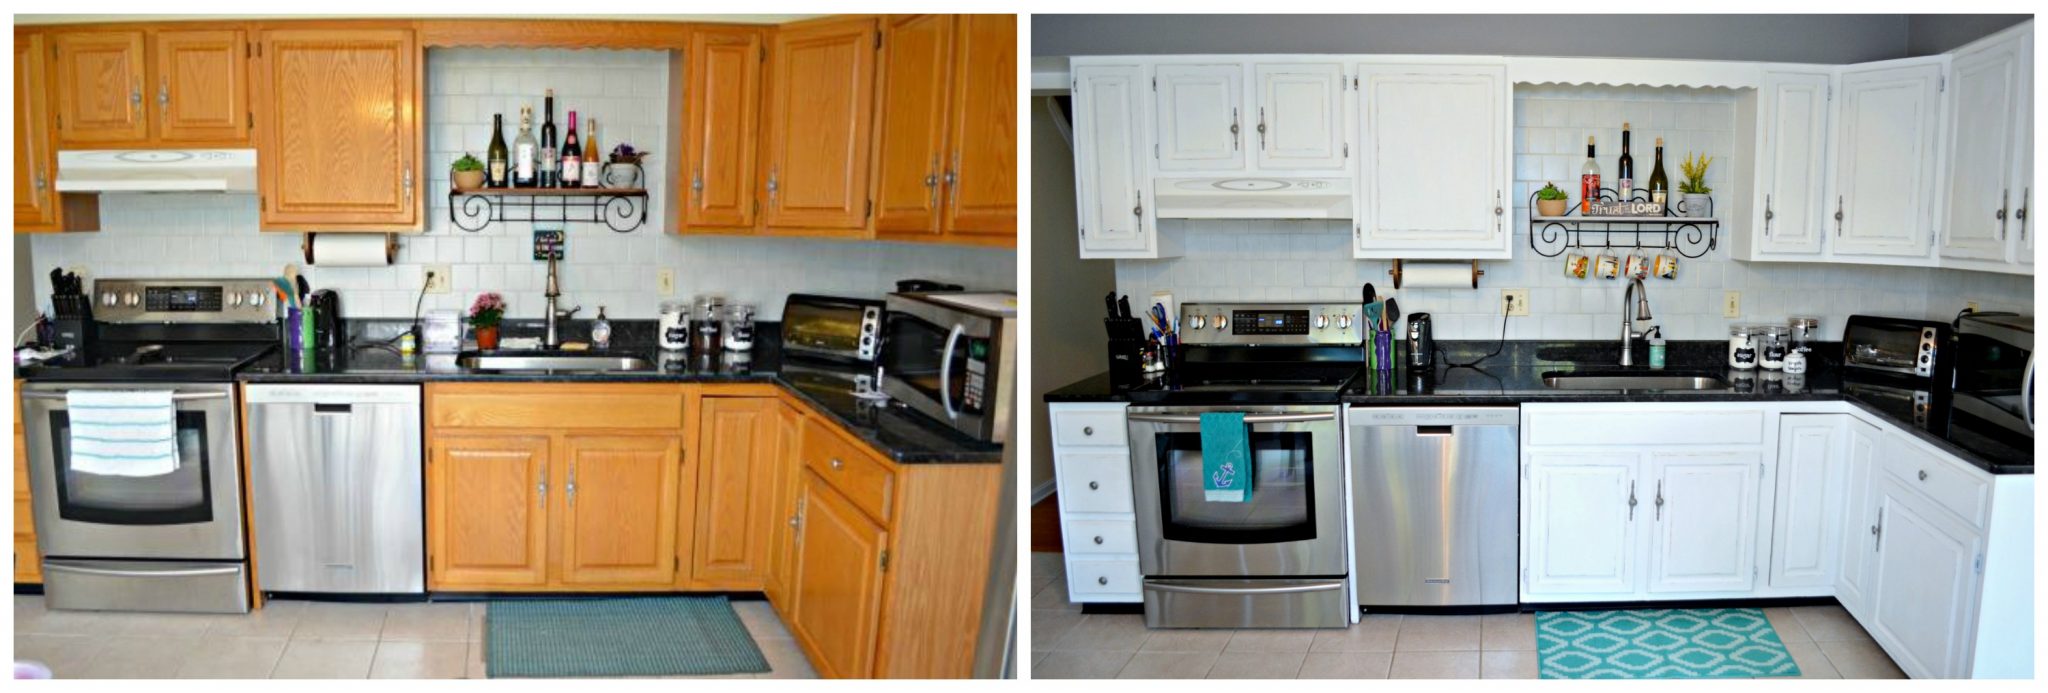
Here is how they looked originally. Although you can’t really see it in the photo, several of the doors were showing wear and tear just from being used by previous homeowners over a period of about 30 years. After spending {way too much} time on Pinterest and other home design sites, I knew that I wanted white cabinets because of the fresh, clean look and the way it opens up a space. I also thought the white would contrast beautifully with the dark counter tops and the stainless steel appliances. Here’s how I made it happen…
Materials
{Some of mine were provided by sponsors, and some of the links below are affiliate links. All opinions are my own.}
Kilz 2 Interior Latex Primer
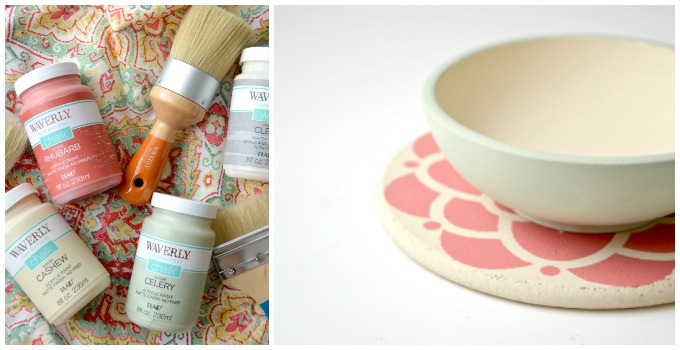
FolkArt Home Decor Chalk: Adirondack White
Delta Ceramcoat Clear Wax
Large Paintbrushes
RYOBI ONE+ 18V Corner Cat Sander
RYOBI ONE+ 18V Lithium-Ion Compact Drill/Driver
Stainless Steel Spray Paint
Soft, Lint-free Cloth
Drop Cloths
Painting Your Cabinets
Step 1: Remove all doors, drawers, and hardware.
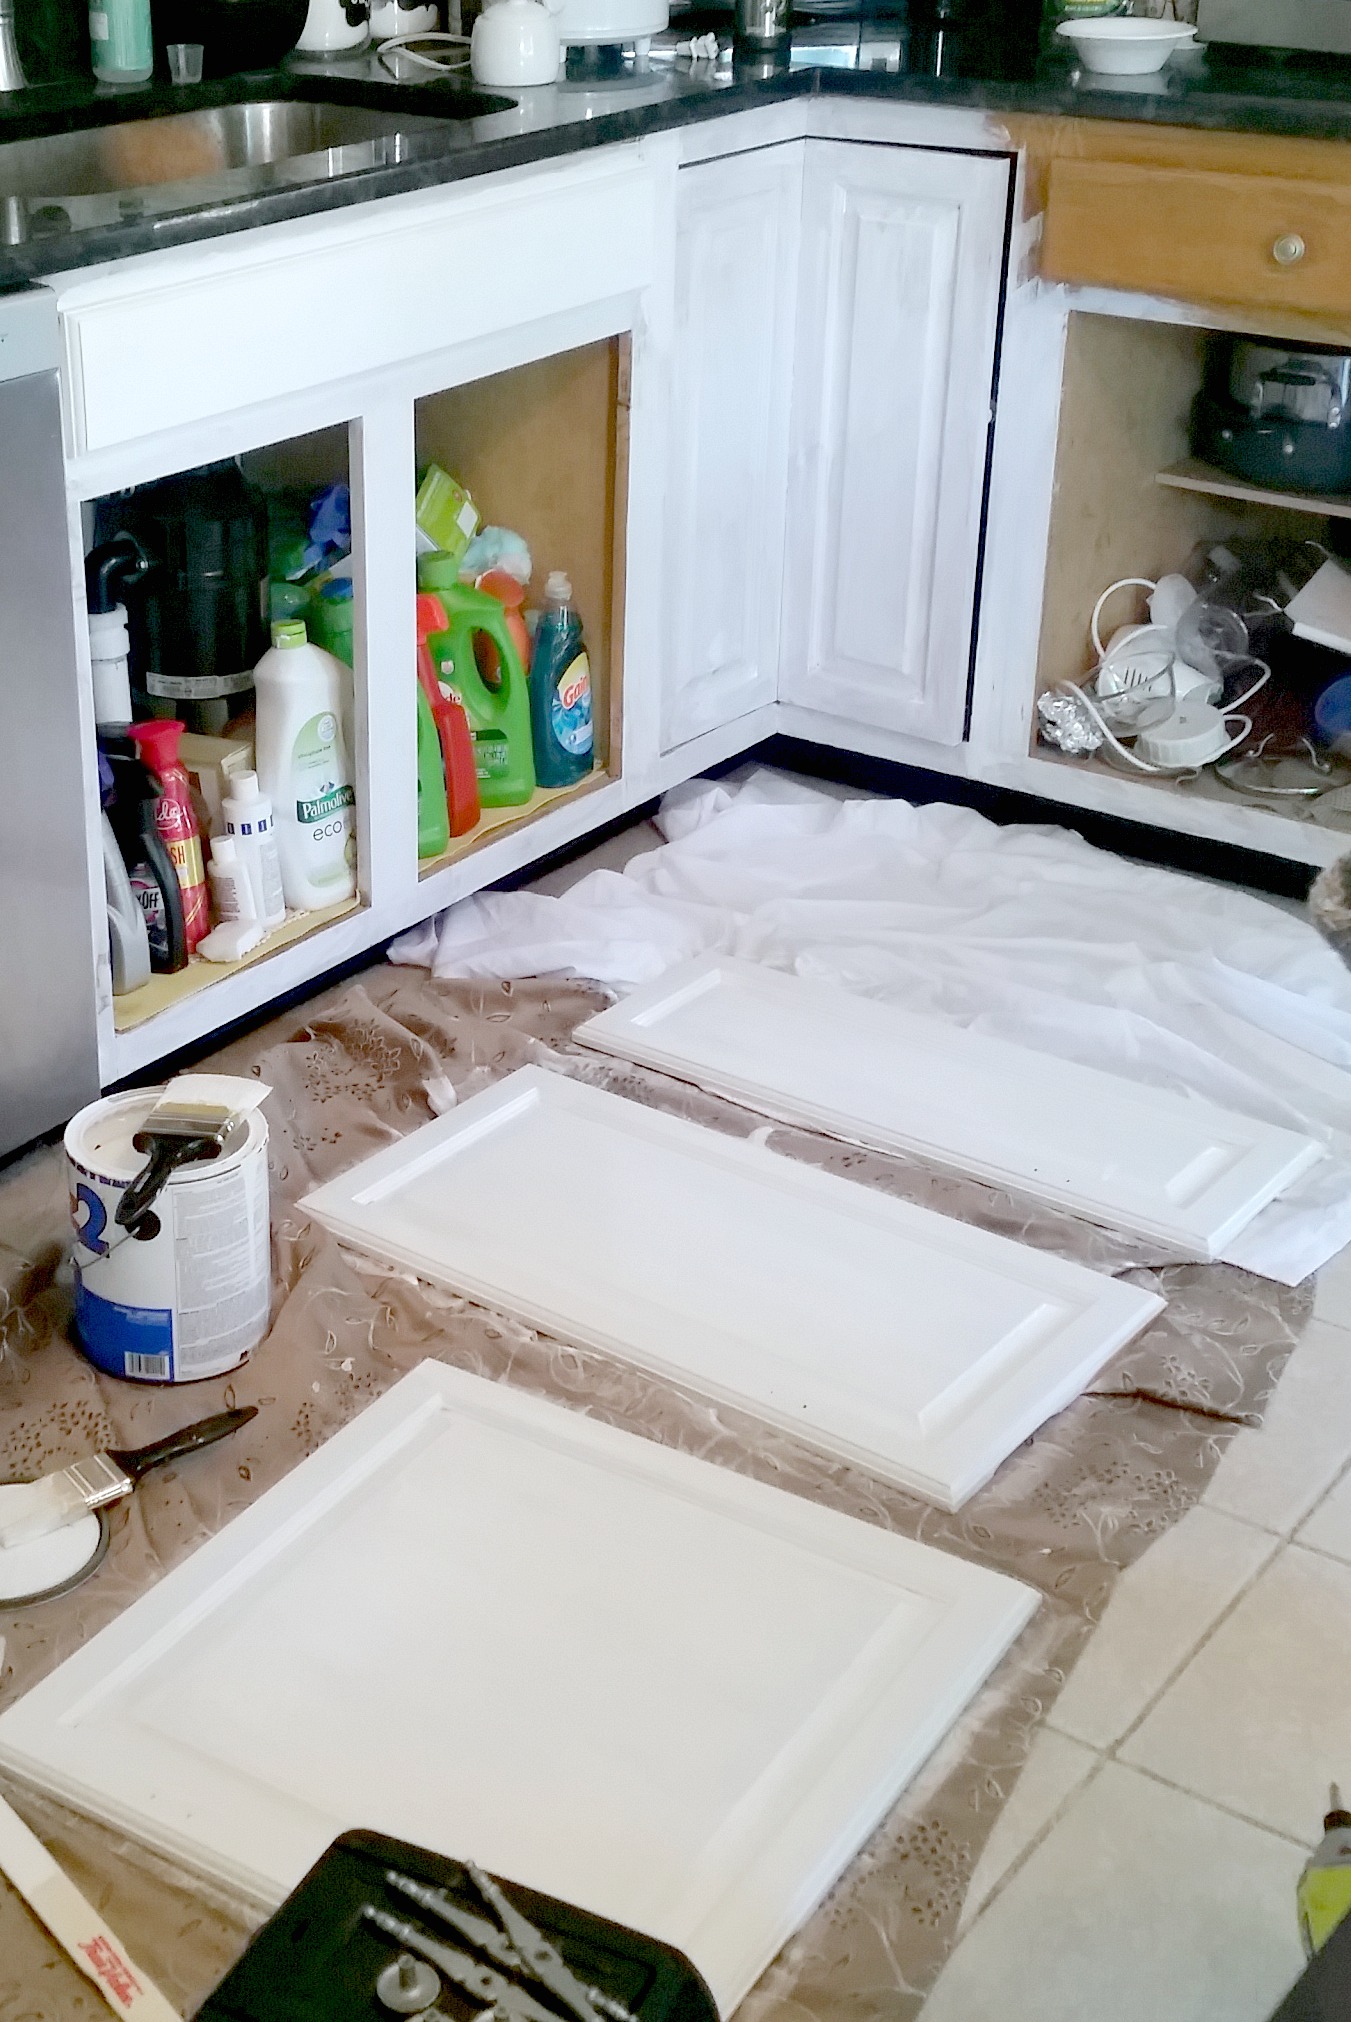
Because our kitchen still needed to be functional during this process, I did one half of the kitchen at a time. I discovered very quickly that the RYOBI power screwdriver made it fast and easy to remove the hardware! I can’t imagine having to do it all by hand.
Step 2: Next, clean all surfaces and sand where necessary.
The great thing about chalk paint is that you don’t really need to sand before applying it. However, there were a few areas where things had gotten stuck to the cabinet doors and needed to be sanded off.
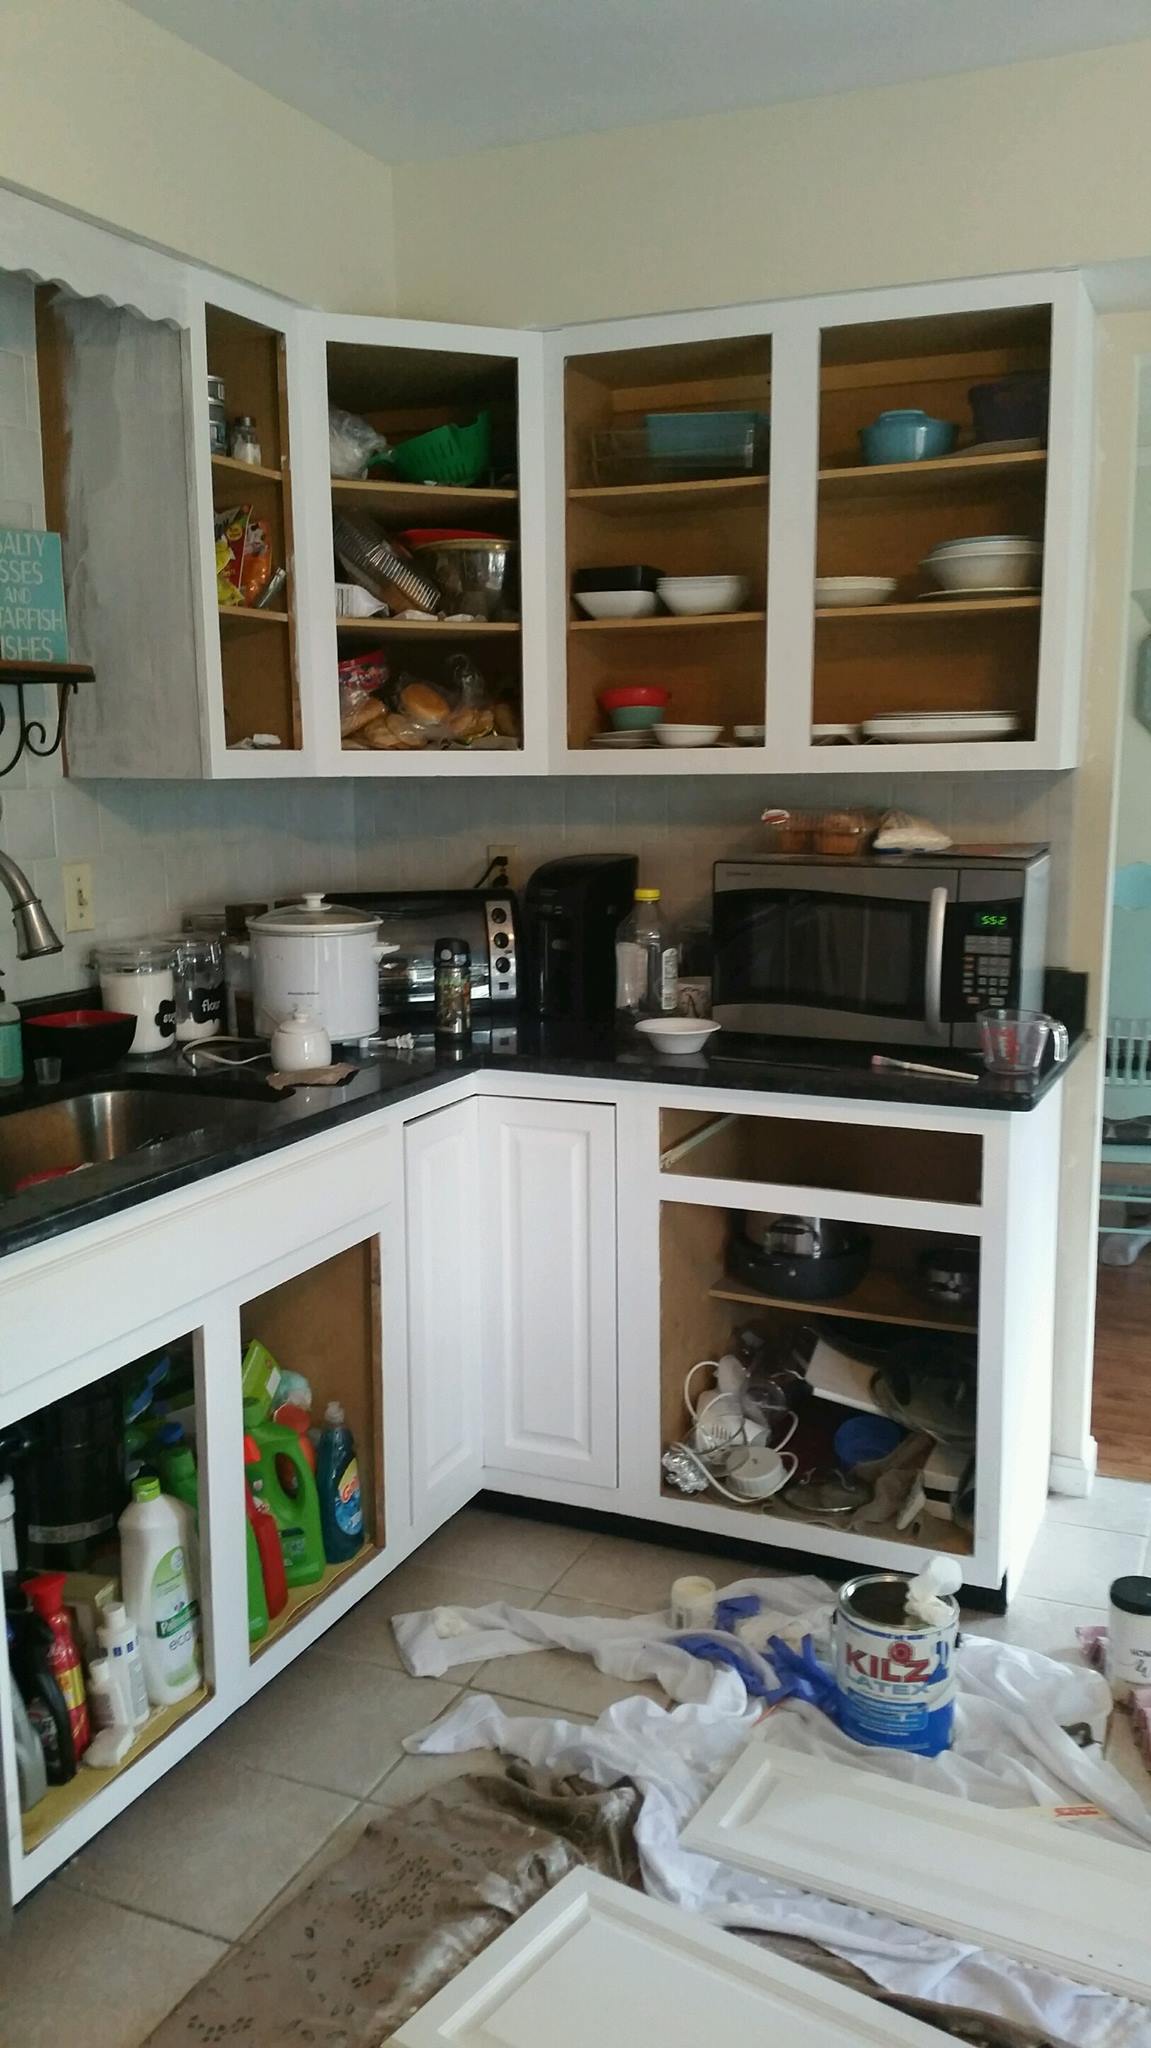
Step 3: Apply a coat of primer to all surfaces.
Make sure to let it dry thoroughly before moving on. If you are working with particularly dark cabinets and making them a very light color, you’ll want to apply a second coat of primer.
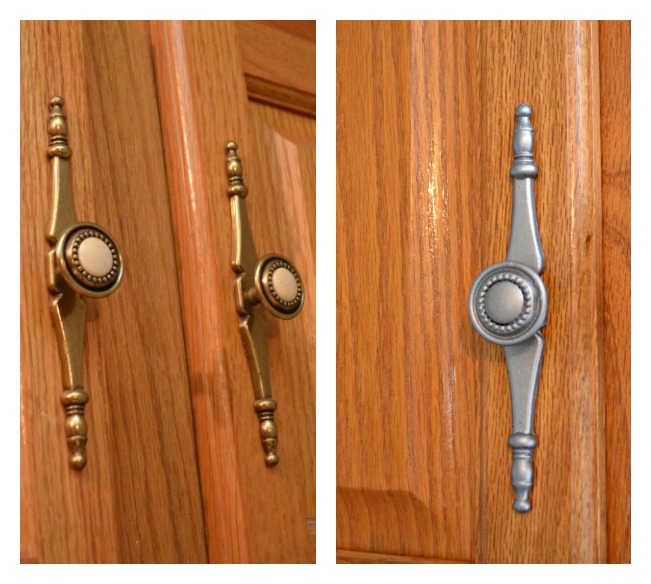
Step 4: Spray paint your hardware.
I had actually already done this step when we moved in because I didn’t like the dated look of it. It held up really well over the past year, plus I liked the look of the stainless steel against the white, so I didn’t feel like I needed to redo them. I did spray all the hinges white.
Step 5: Paint all surfaces with your FolkArt Home Decor Chalk paint.
Once again, let it dry completely, then you’ll probably want to give it another coat, depending on how the coverage looks.
Step 6: {Optional} Lightly distress by sanding.
All the other painted furniture in the house, including the dining room set I just redid, is distressed. So, it only made sense to do the same here. I went around all the corners and edges lightly with my Corner Cat sander.
Step 7: Apply clear wax to dry surfaces with a soft lint-free cloth.
Step 8: Finally, re-attach hardware, doors, and drawers.
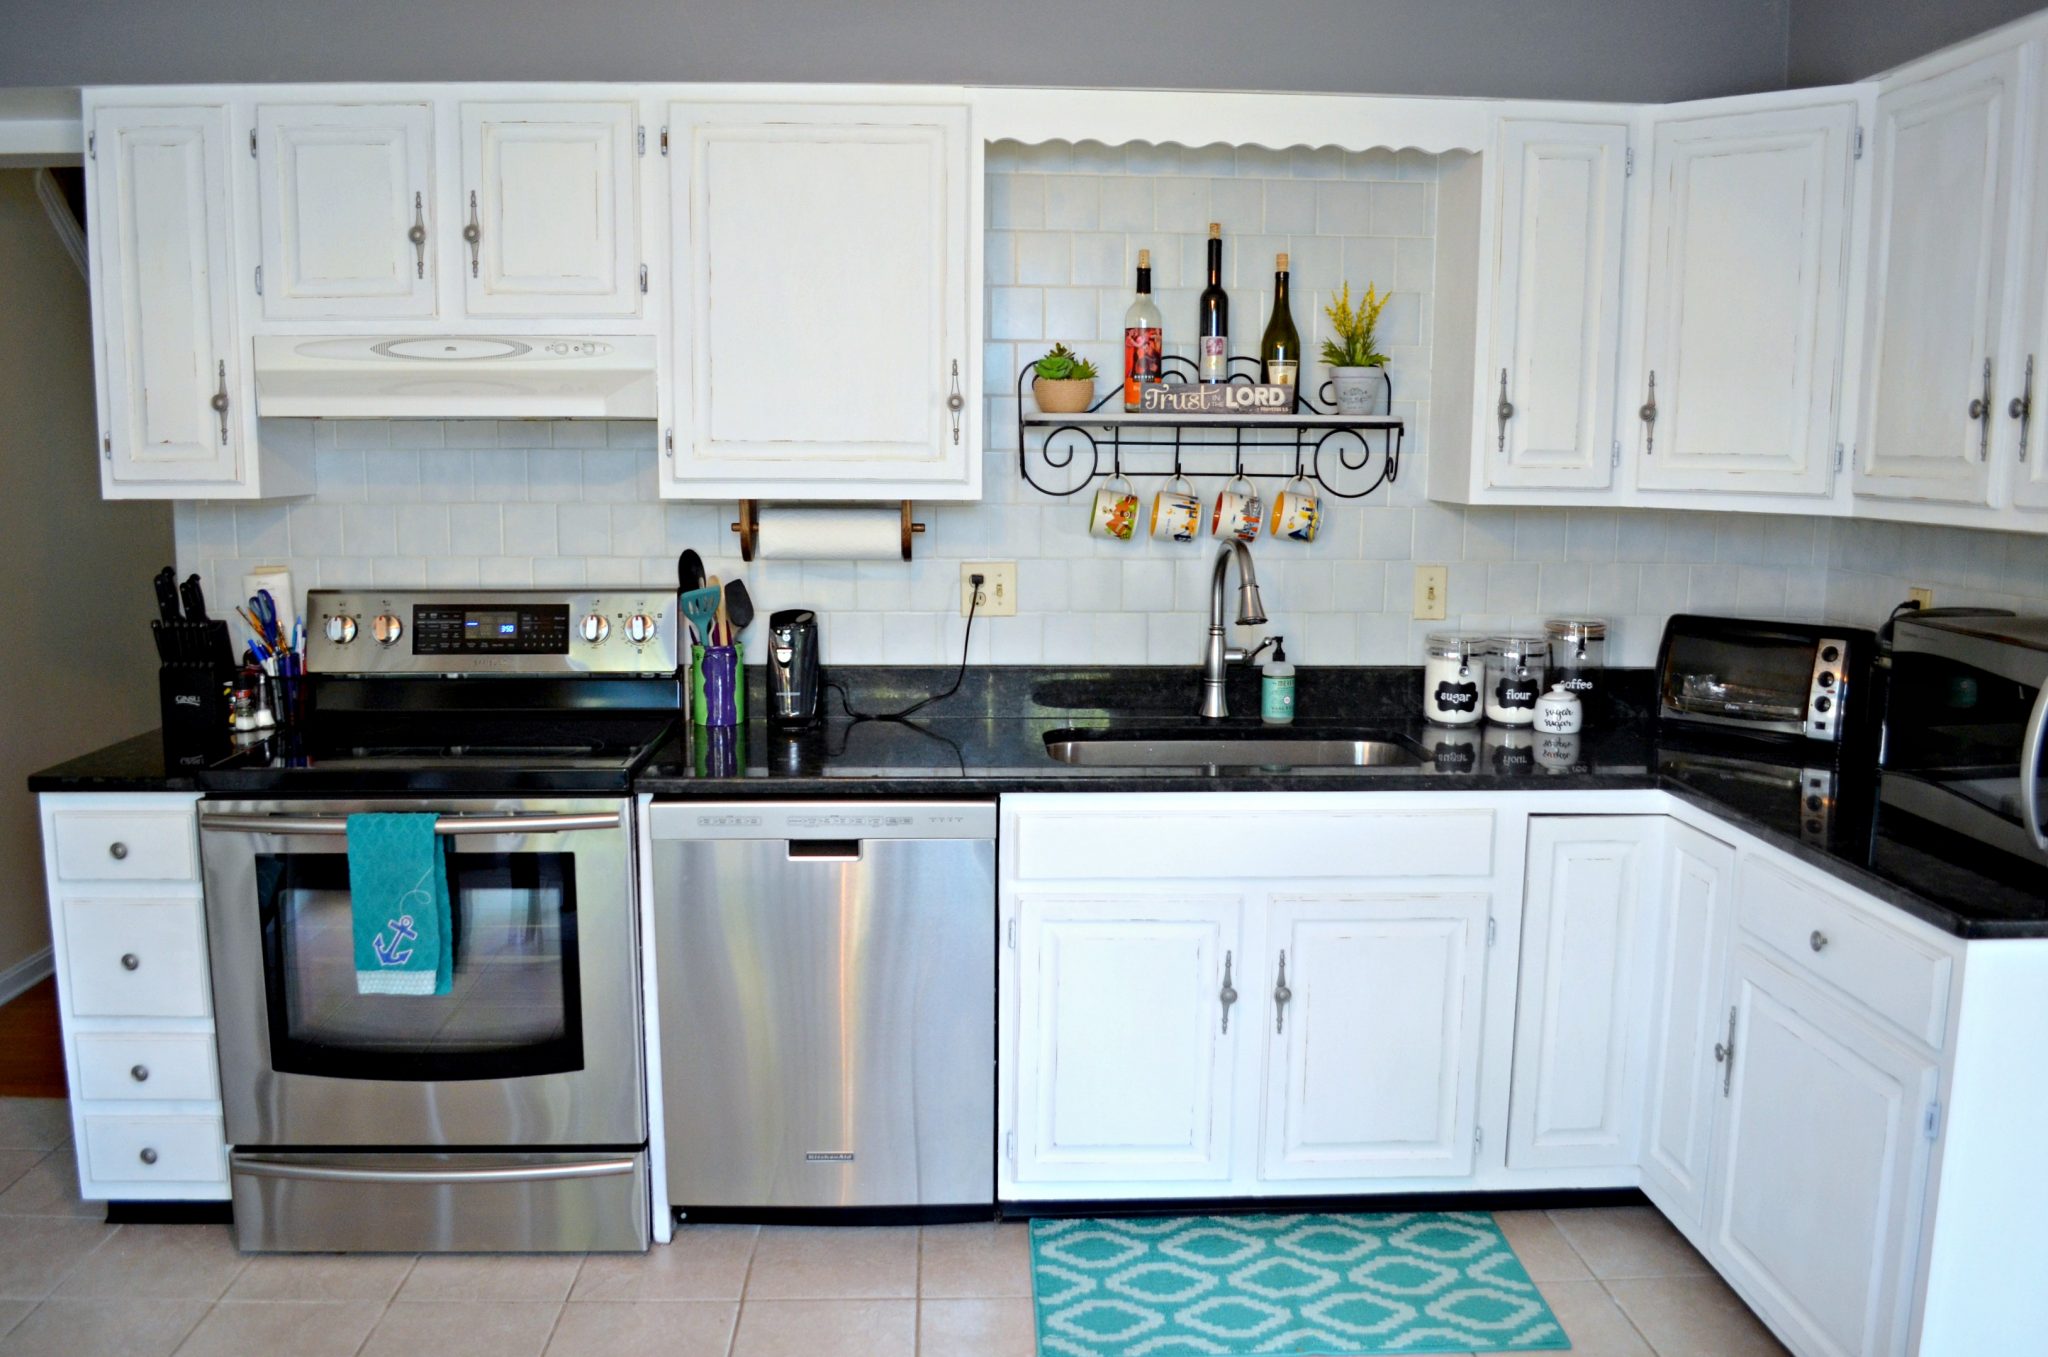
Here’s a look at the finished cabinets! A few other minor updates I made included painting the shelf above the sink and adding a new accent rug. The shelf is done with FolkArt Home Decor Chalk in Parisian Grey.
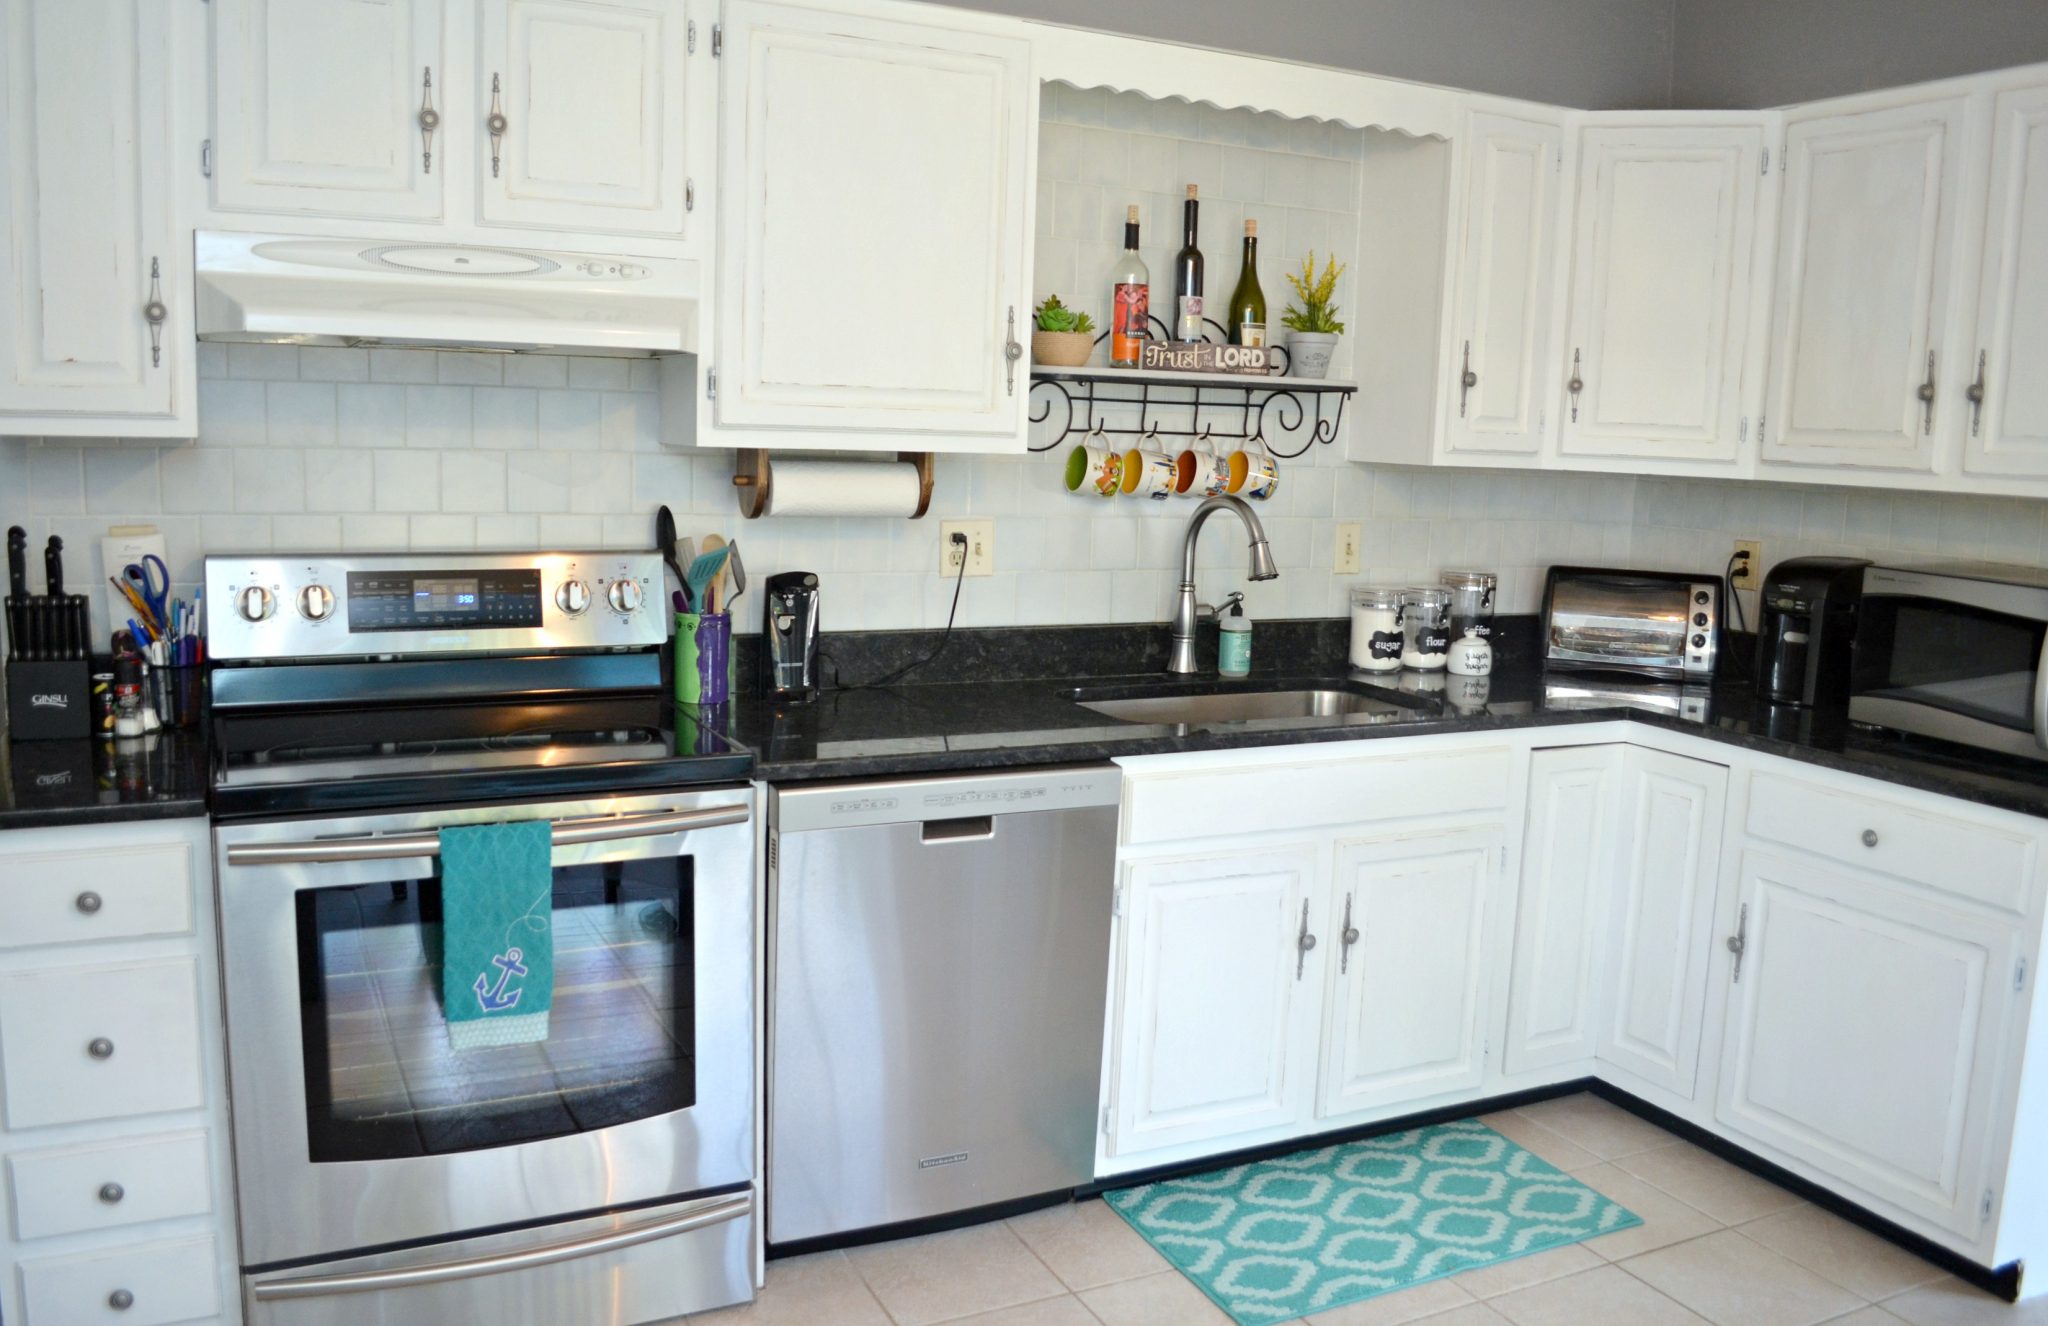
Truthfully, the process was time consuming, and it ended up being a bigger project than I initially imagined. I’m definitely not in a hurry to do it again anytime soon! But, I’m so glad I did take it on, because I absolutely love the effect. The kitchen looks bigger and brighter, and now the look is much more consistent with the style of the rest of the house. What do you think?


Your cabinets look great! Want to come paint mine? Lol.
I absolutely love this! The blue accents with the white look awesome together. The cabinets look fantastic! Nice work! Thanks for sharing this!
Are you cabinets all wood or laminate as well? I really want to paint our but the cabinets are laminate. I believe the doors are wood. I’m definitely intimidated lol
Mine are all wood. I’m not sure how the paint would take to the laminate, but you could try it out on a spot inside or somewhere that it would be hidden if it didn’t work…
Hi, How did this paint hold up over time?
Incredibly well! It still looks fantastic and it’s really easy to clean off when things splash on the cabinets. Totally recommend!