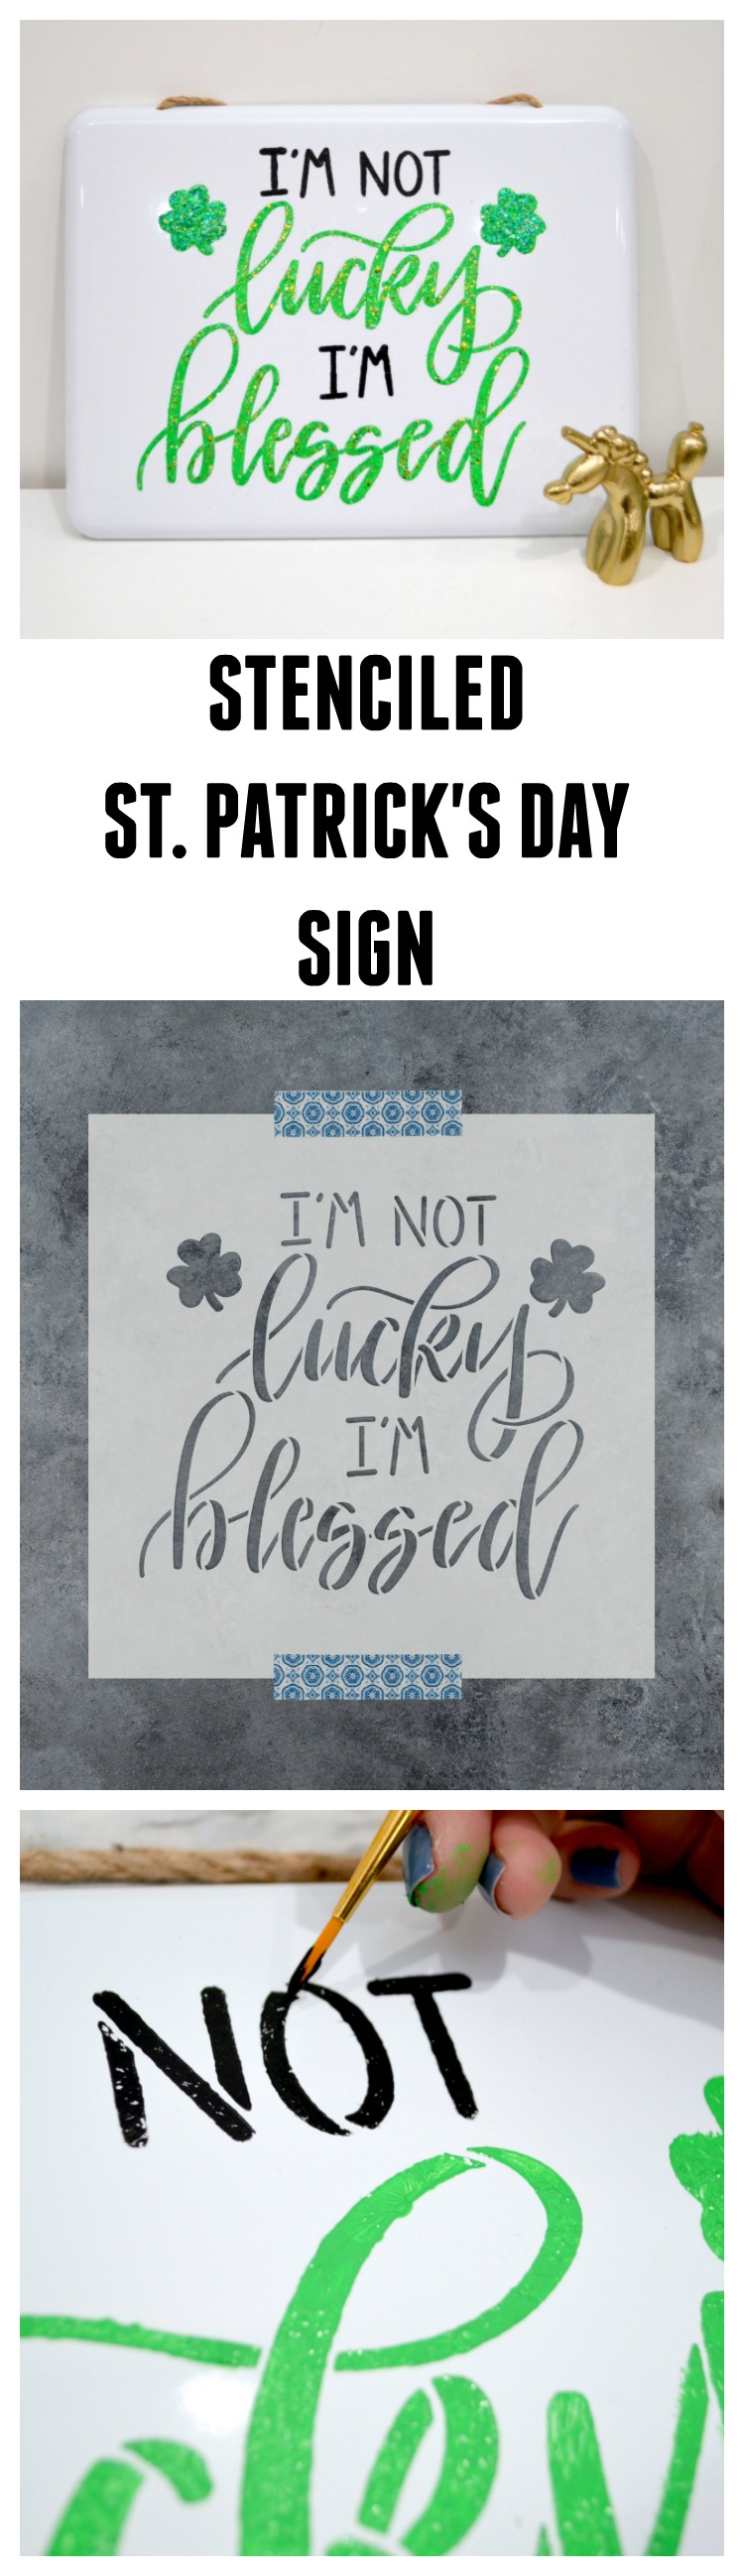
Sparkly Stenciled St. Patrick’s Day Sign
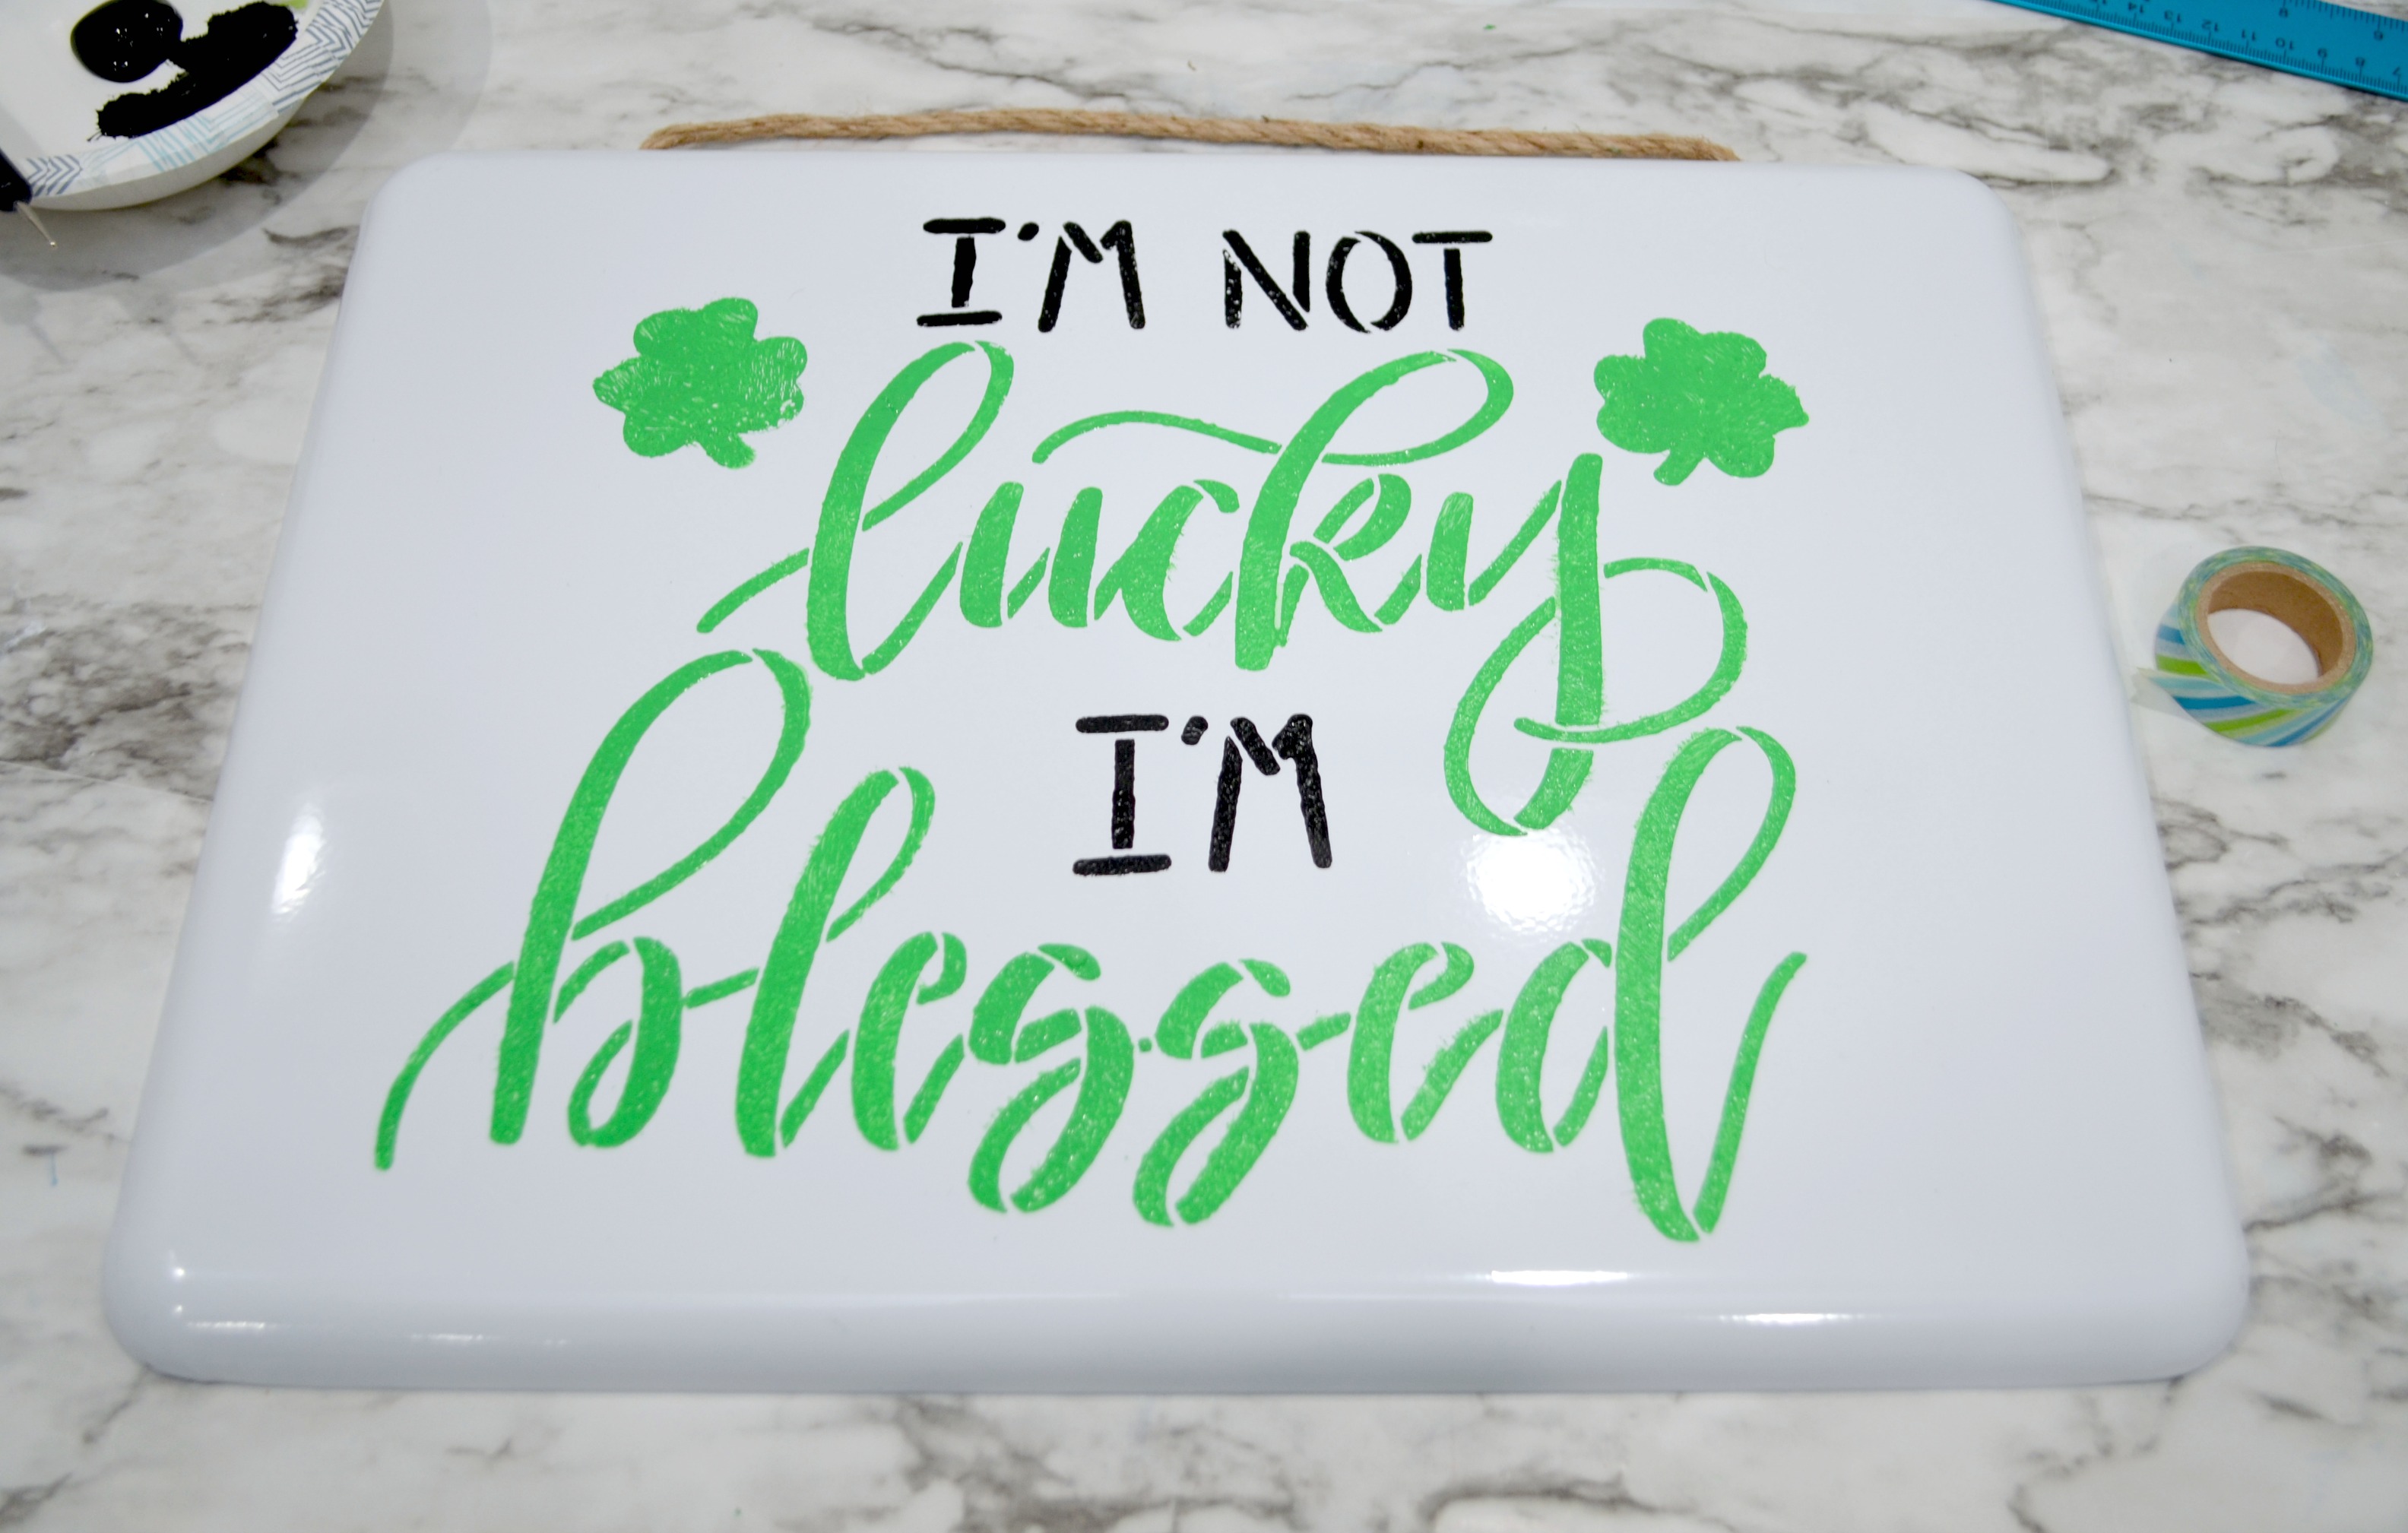
Friends, in case you missed my big announcement this week, I now have my own line of hand lettered stencils available from Stencil Revolution! I thought that since St. Patrick’s Day is right around the corner, it was the perfect time to show you how you can use my “I’m Not Lucky, I’m Blessed” stencil to create a fun and sparkly piece of holiday home decor! Take a look…
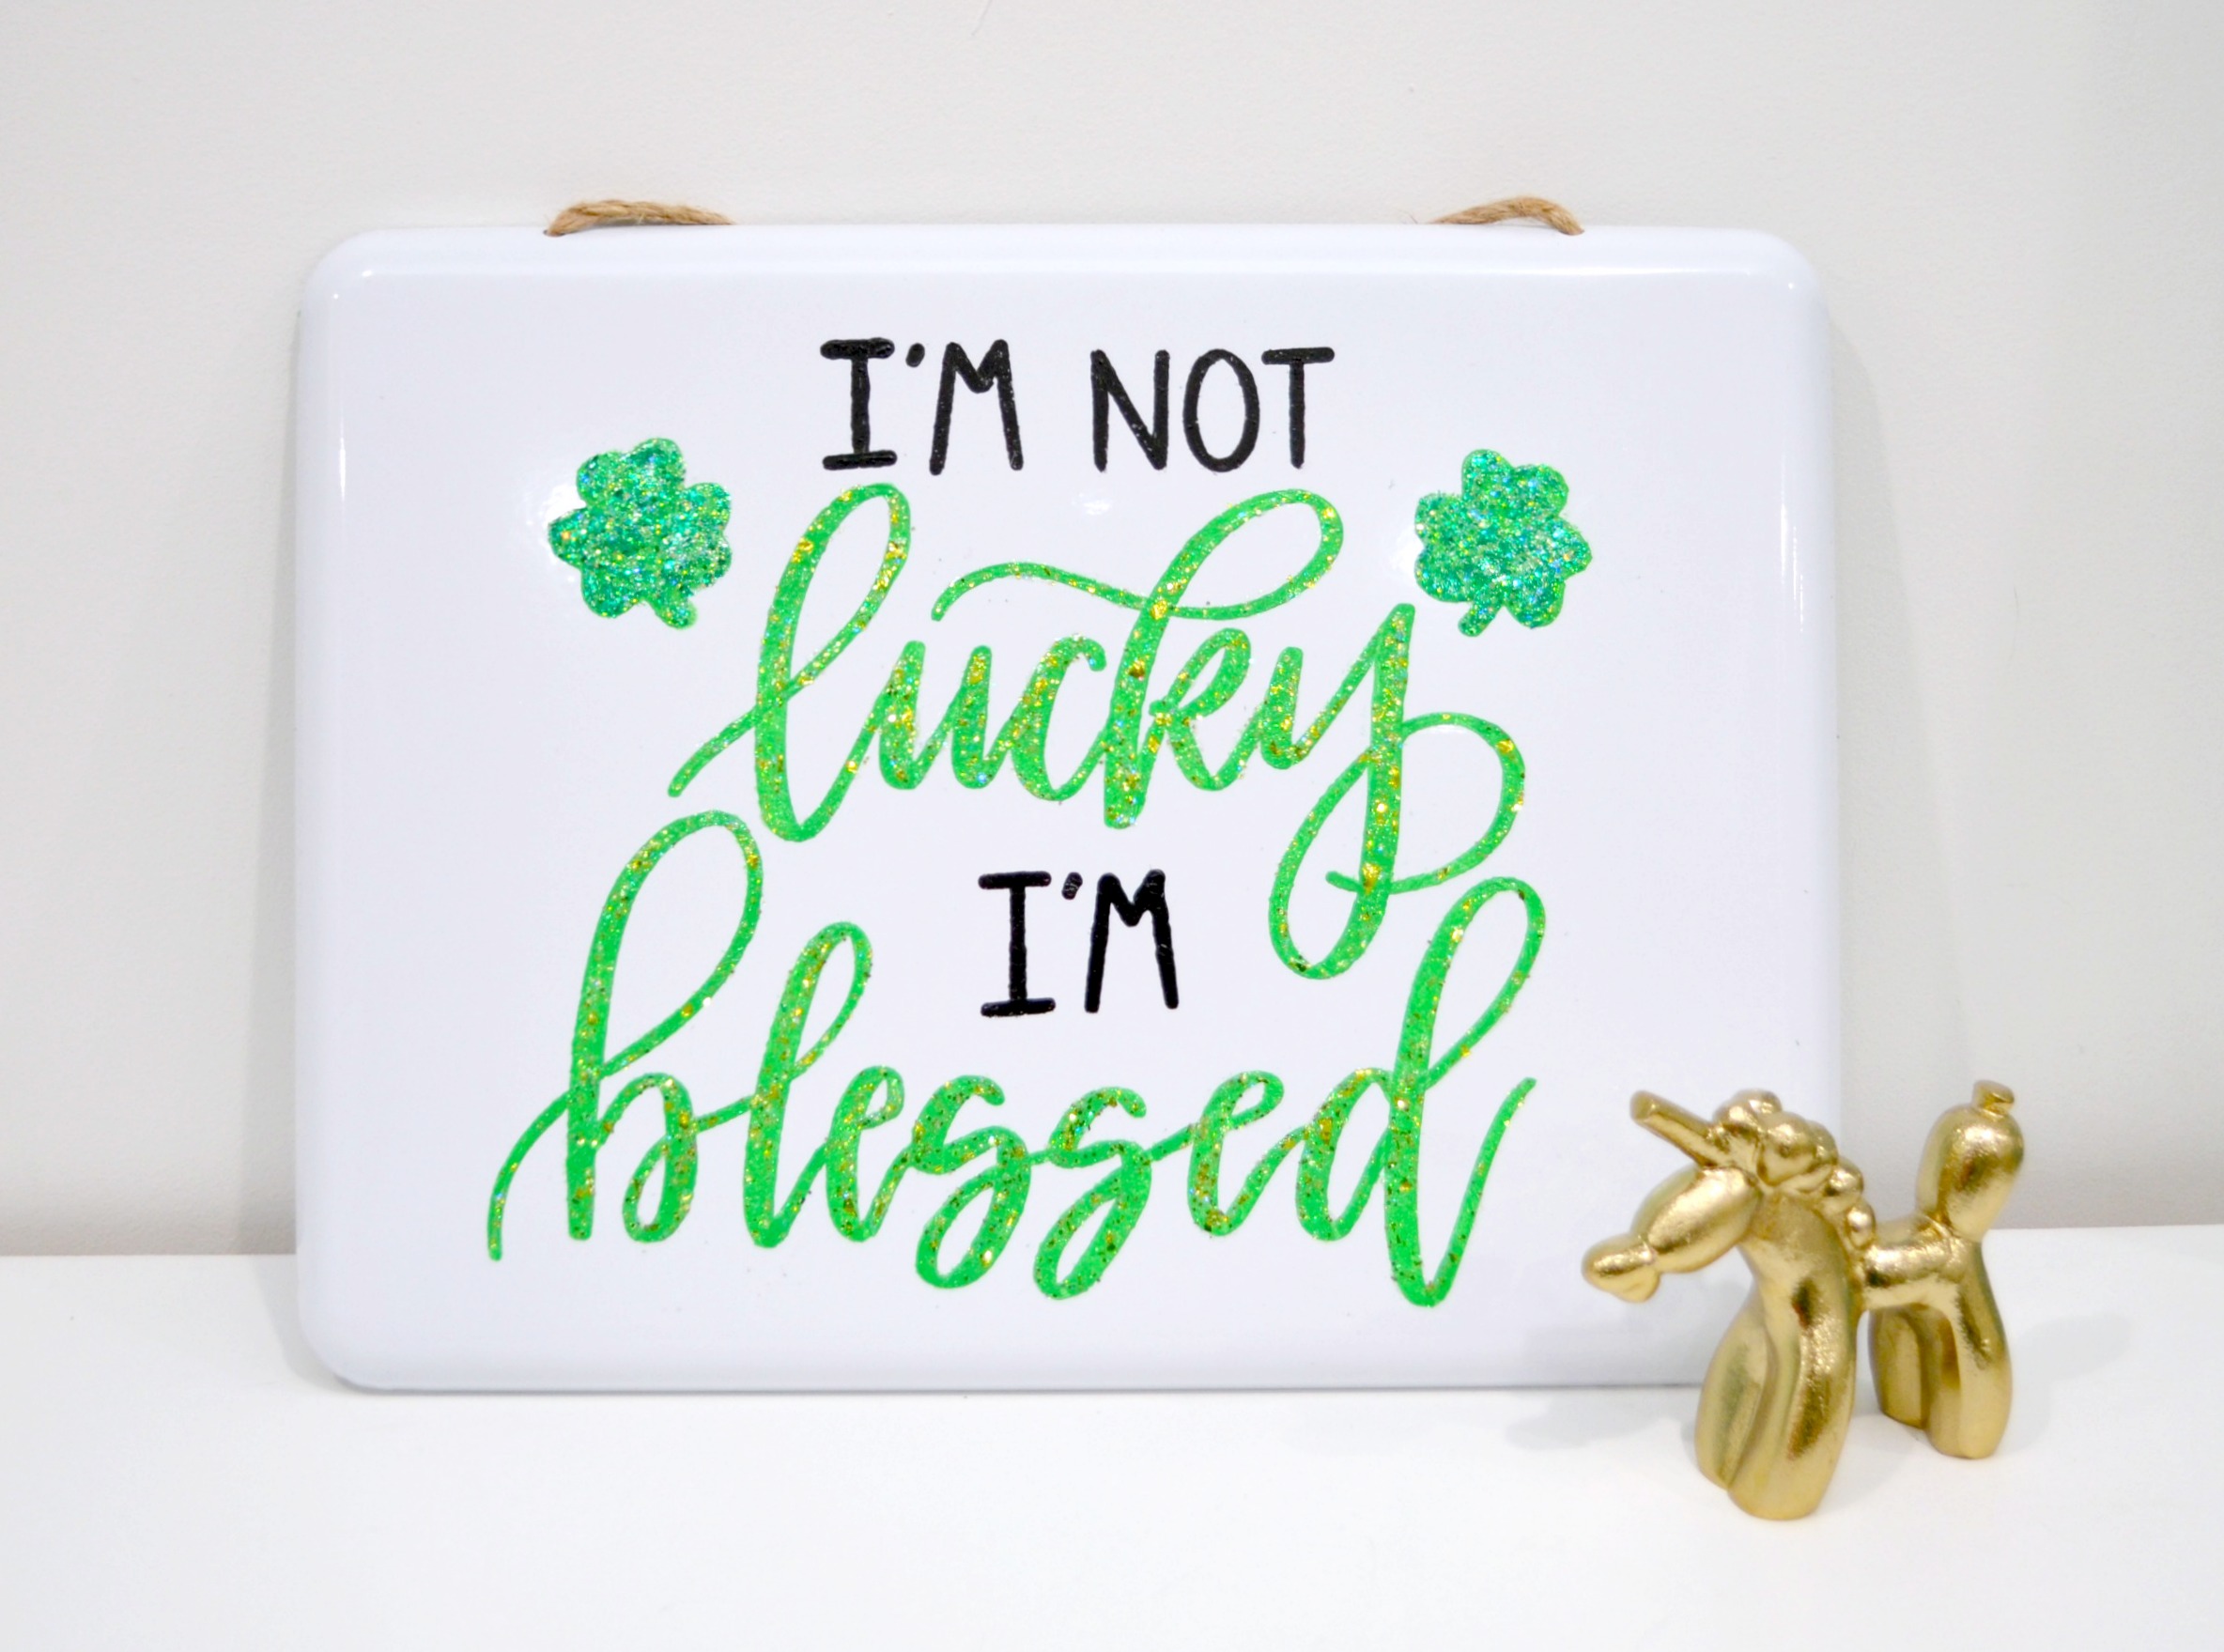
This stencil is available in lots of different sizes: 6″x6″, 8″x8″, 12″x12″, 15″x15″, 20″x20″, 25″x25″, 30″x30″, and 35″x35″, so you can use it on whatever size surface you like! I used the 12″x12″ because it fit perfectly on my metal sign from Michaels. As you look through the tutorial, though, keep in mind that you can do the exact same thing on wood or canvas in all different sizes; whatever works best in your home.
You’ll need:
A wooden, canvas, or metal sign
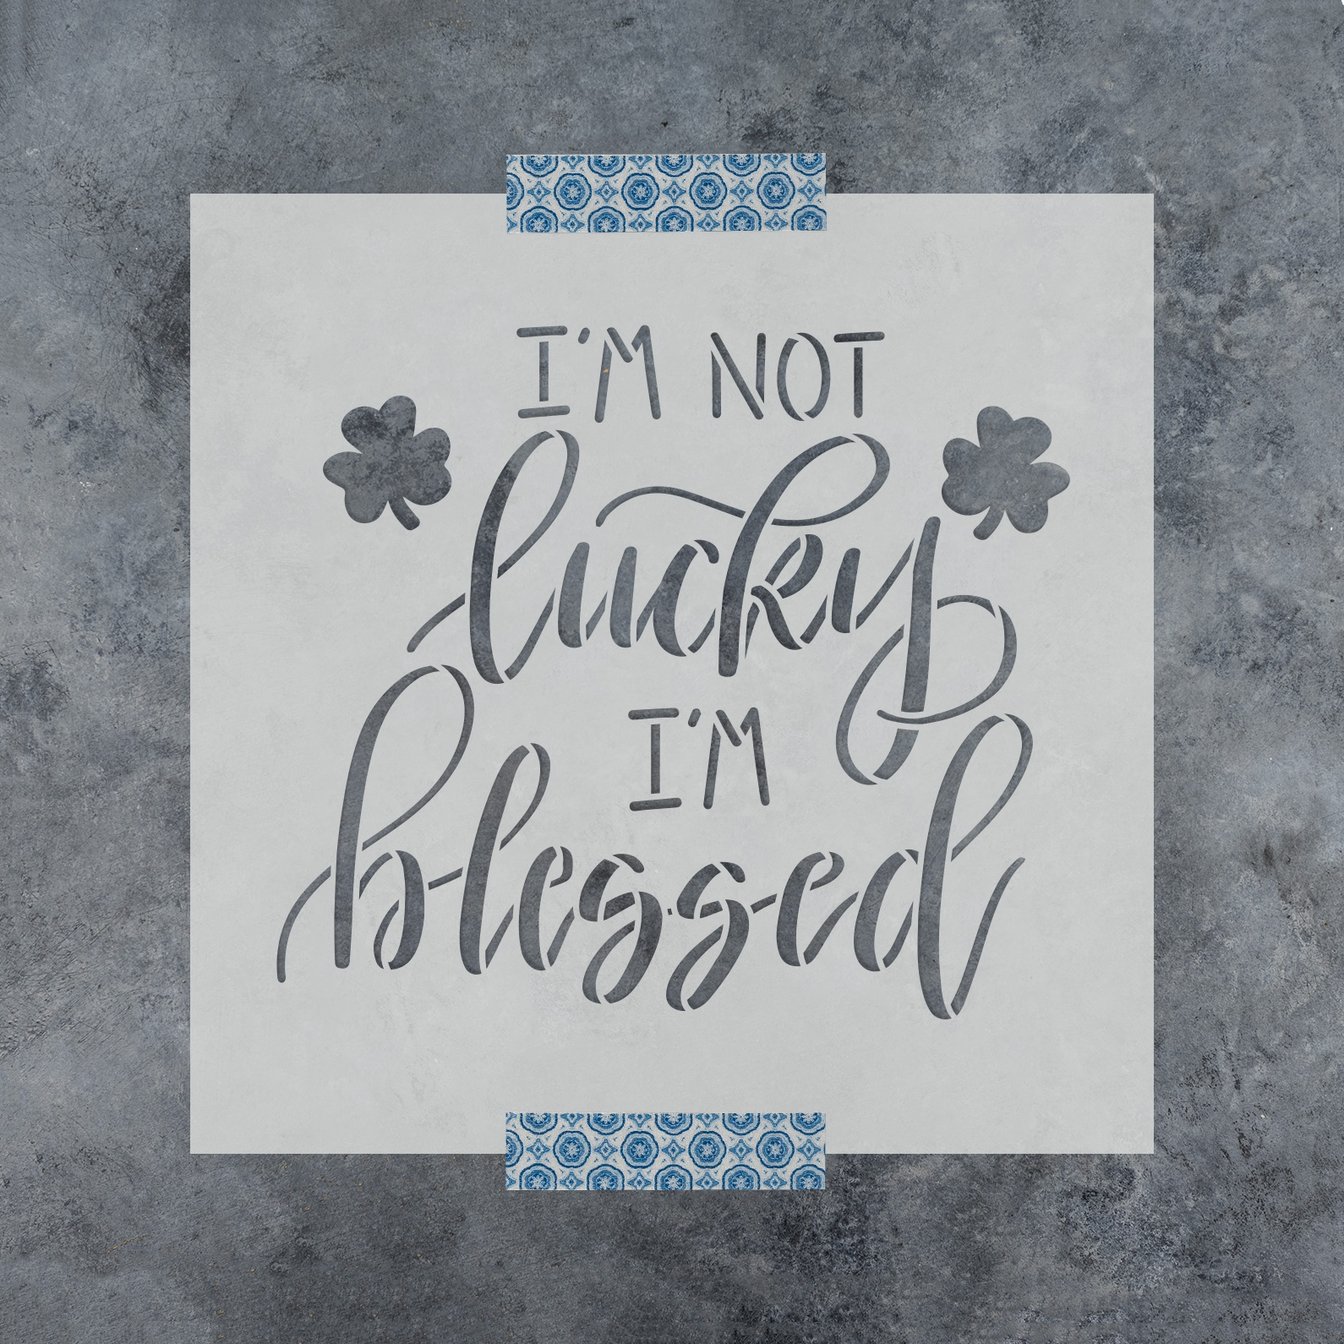
“I’m Not Lucky, I’m Blessed” stencil
Multi-Surface Paints {I used Martha Stewart}
FolkArt Glitterific: Green & Evergreen
Washi Tape

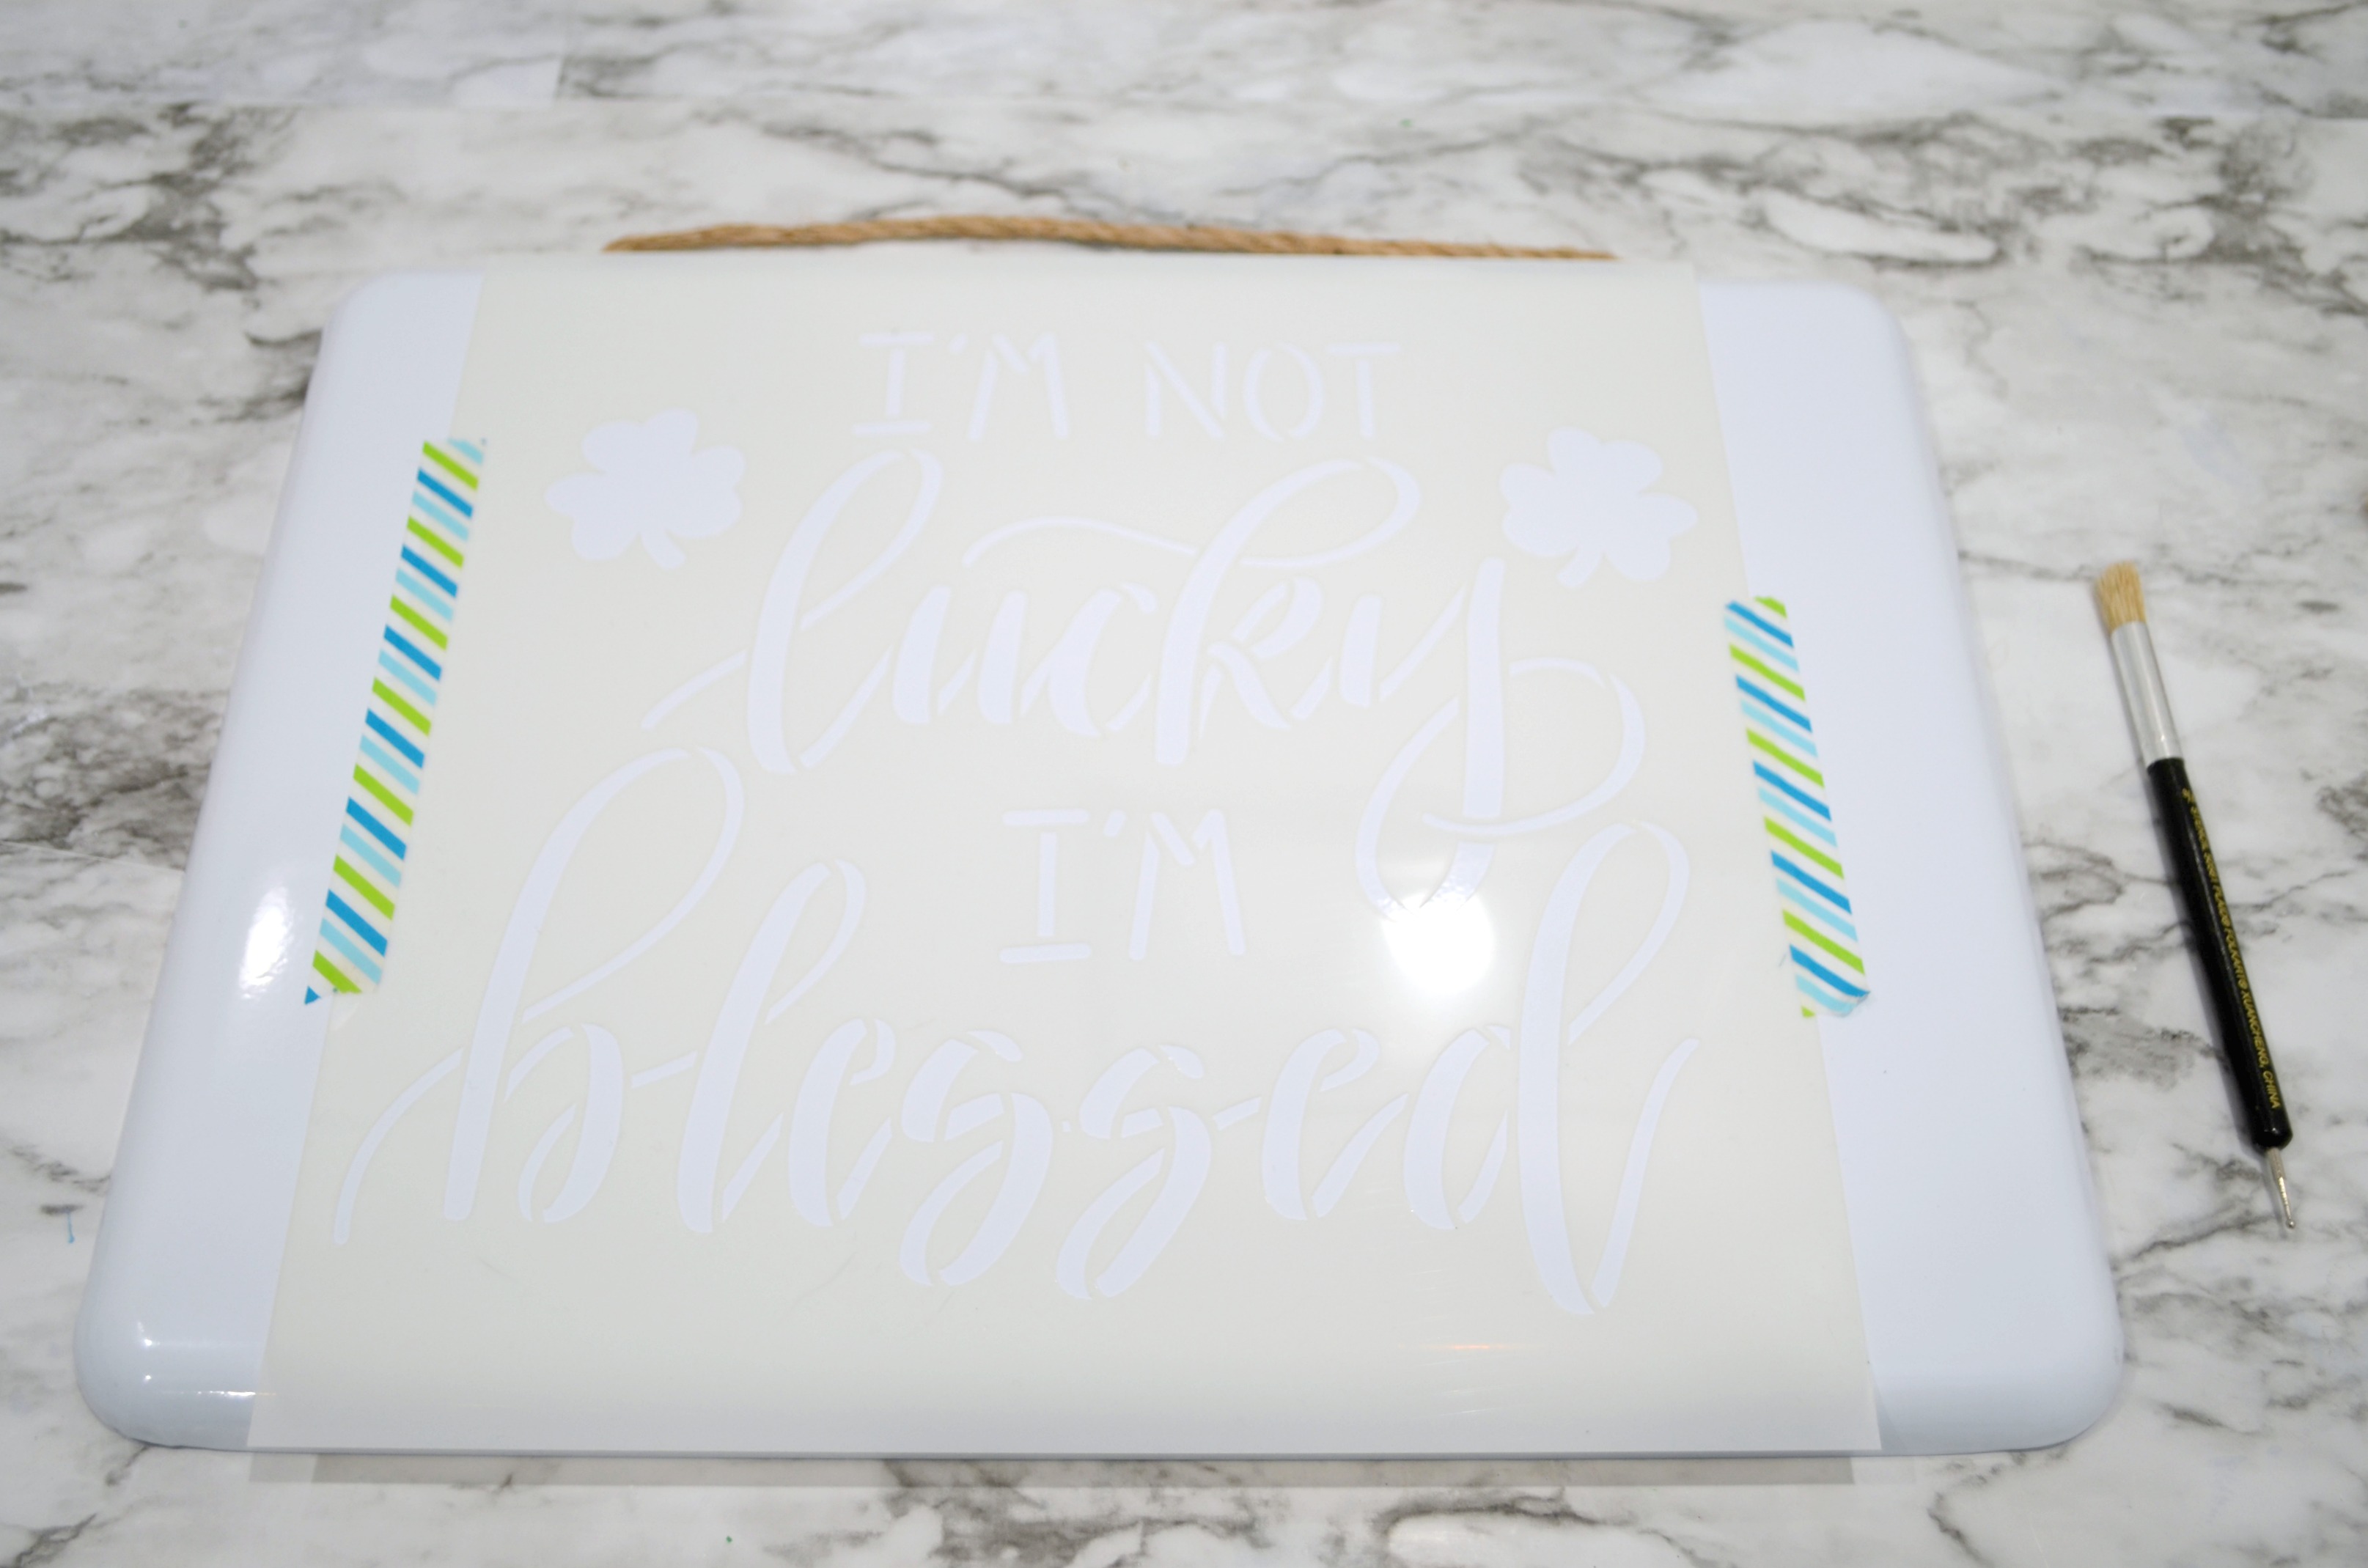
Step 1: Center your stencil, then tape it in place.
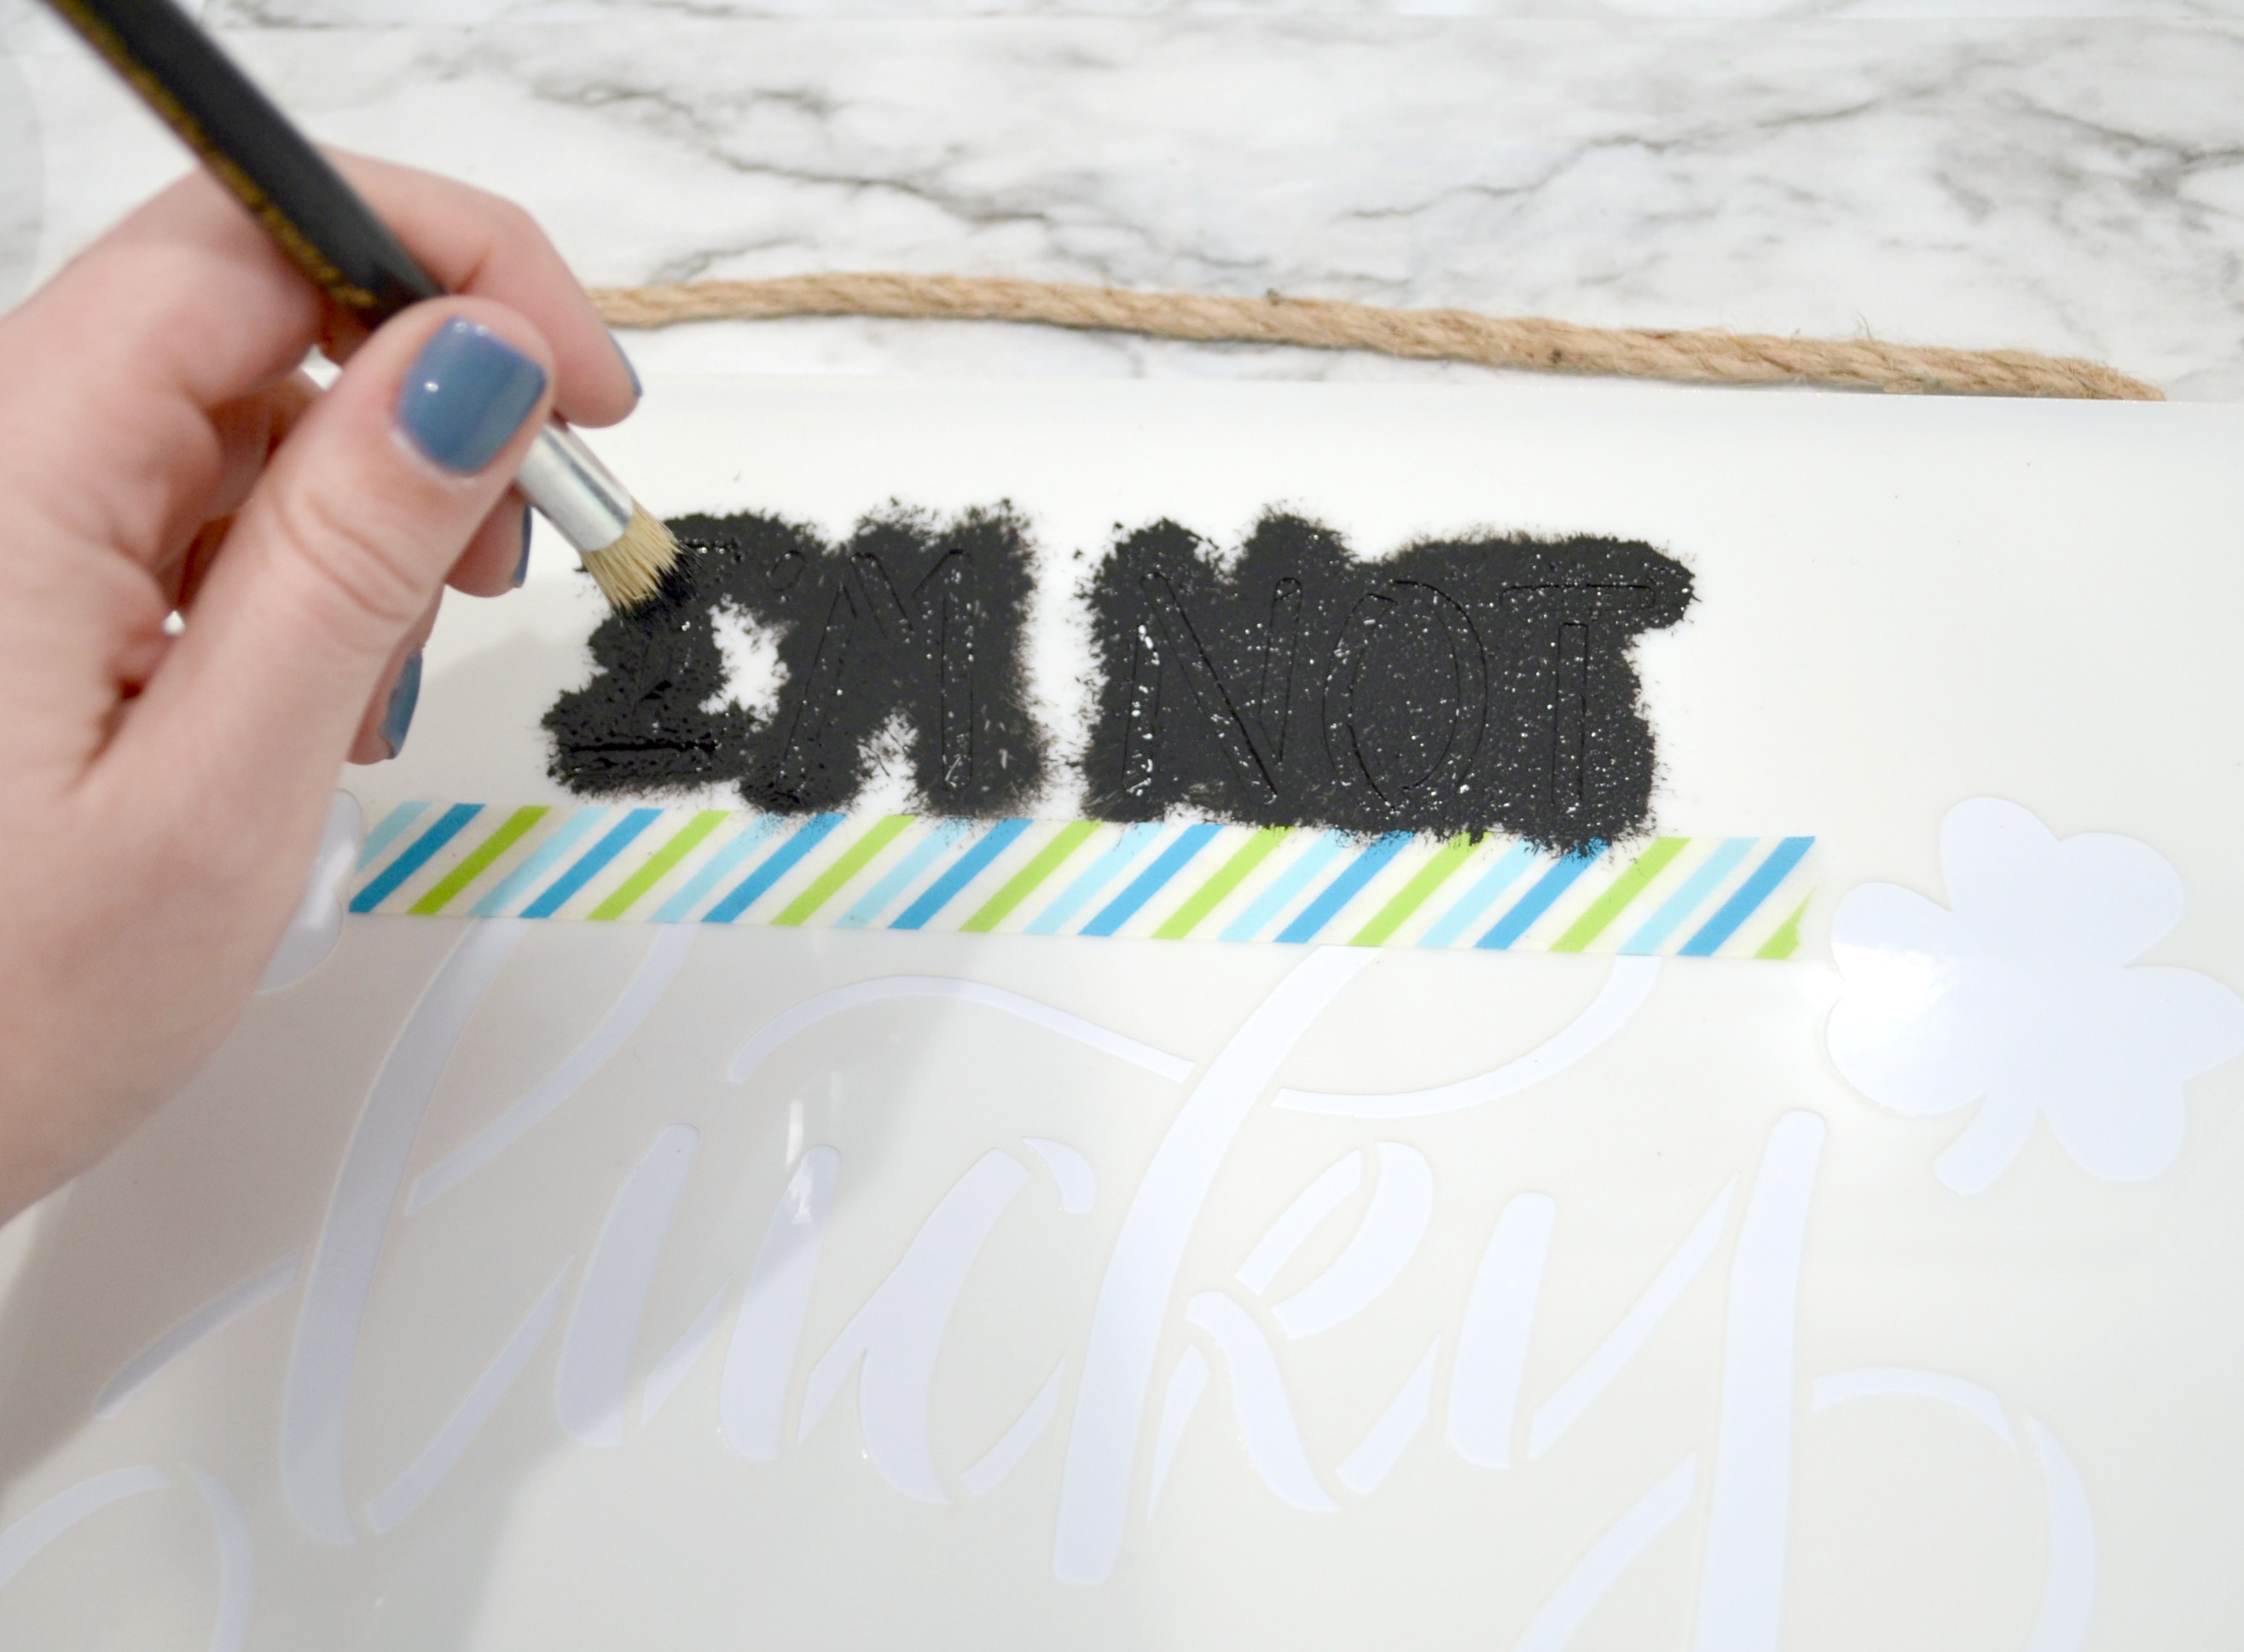
Step 2: Apply paint to the cut-out areas using a stencil brush.
When stenciling, always remember that less is more! Using too much paint will cause it to leak under the stencil and give you an image that isn’t crisp and clean. Gently load your brush, then tap it onto a paper plate or other surface until it’s almost dry before applying it to your project. When filling in the open areas, use a tapping motion or a quick circular motion, rather than the normal up and down brush strokes you’d use when painting.
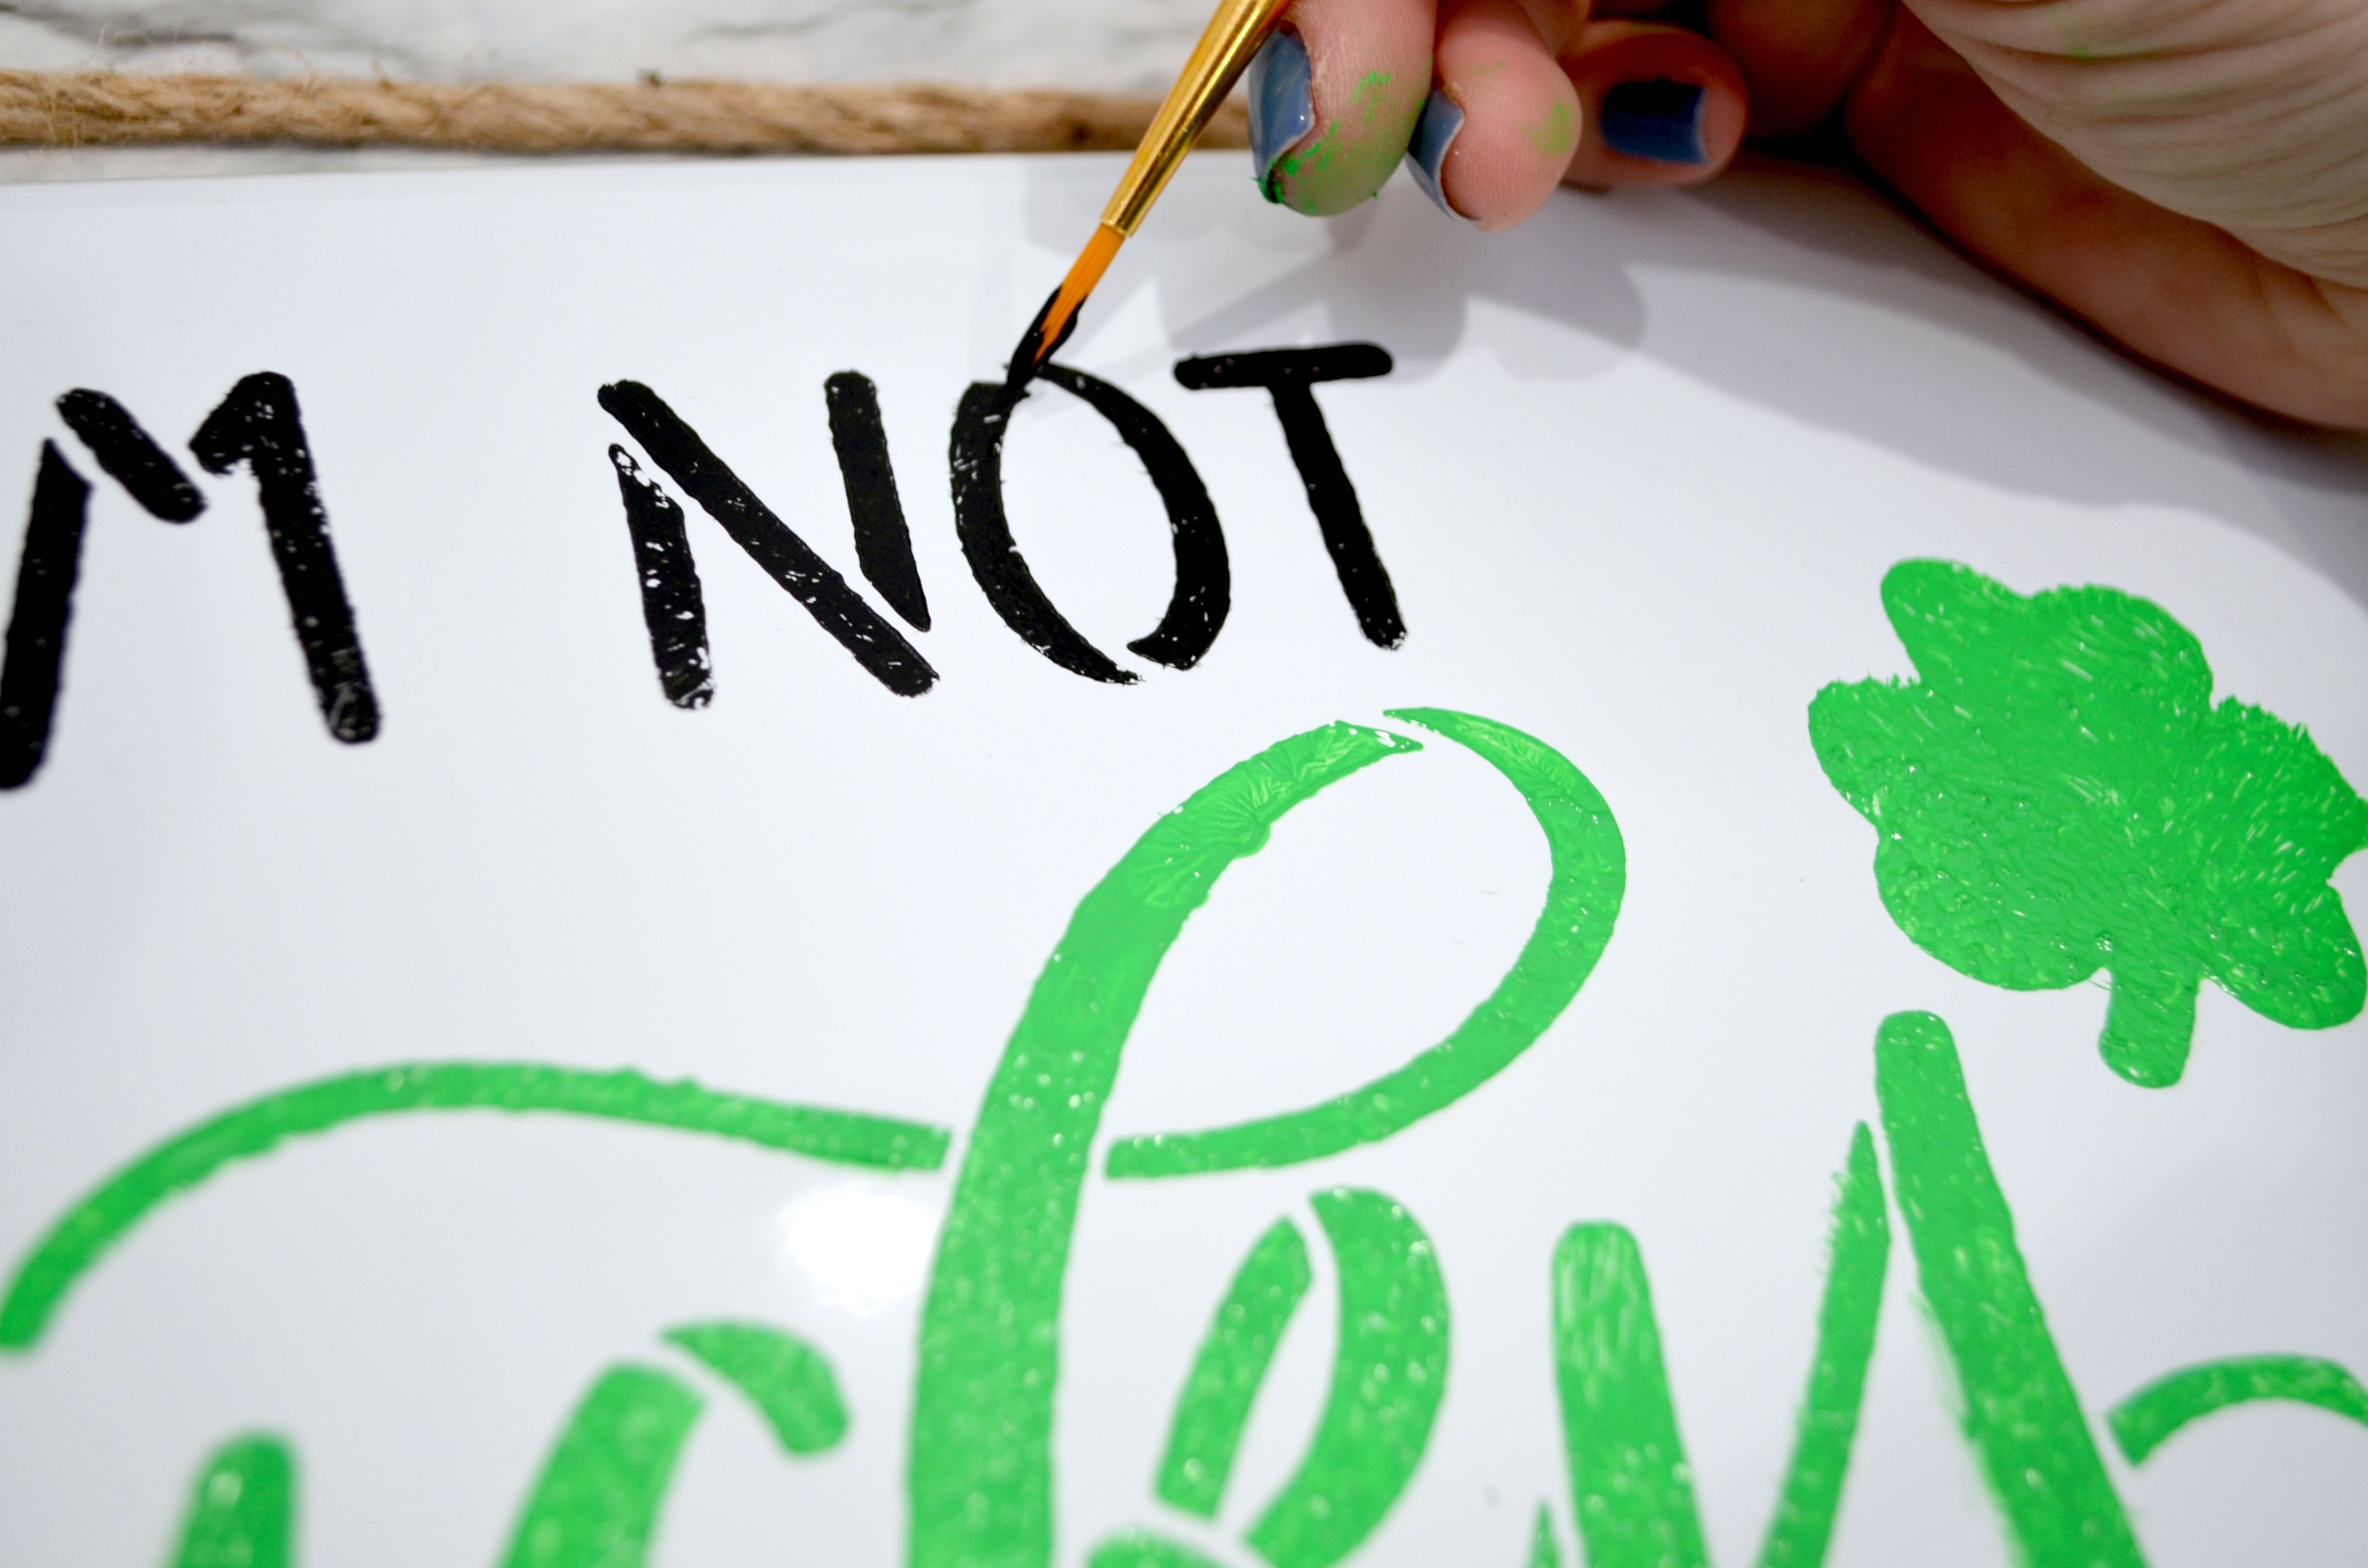
Pro Tip: If you’re using multiple colors in your design, use tape to cover any areas where you don’t want a particular color to appear. Here, I wanted “lucky” to be green, so I taped off the top of the word to keep the black paint from getting into the letters.
Remove the tape and stencil while the paint is still wet. Here’s what your stenciled image will look like! If you’re satisfied with it as is, you can stop now and hang it up as soon as the paint is dry. If not, you can move on to the next steps.
Step 3: Fill in the bridging gaps with paint and a small brush.
Anytime you stencil, you’ll notice those little tiny lines within letters where the stencil material was. That’s called bridging. To make your image look less like a stencil and more like you just wrote the words, you can go back with a fine brush and fill in those gaps with paint. This is totally optional, but I personally like to do it because I feel like it gives my projects a more finished look.
Step 4: Apply Glitterific to the shamrocks and green words.
The thicker you apply it, the more sparkle and shine you’ll get. I put a very thick coat on the shamrocks, but spread it out more on my letters. This part is optional too; if you don’t love glitter, you can skip it. However, since Glitterific totally contains the glitter in a clear acrylic base, it’s totally no-mess.
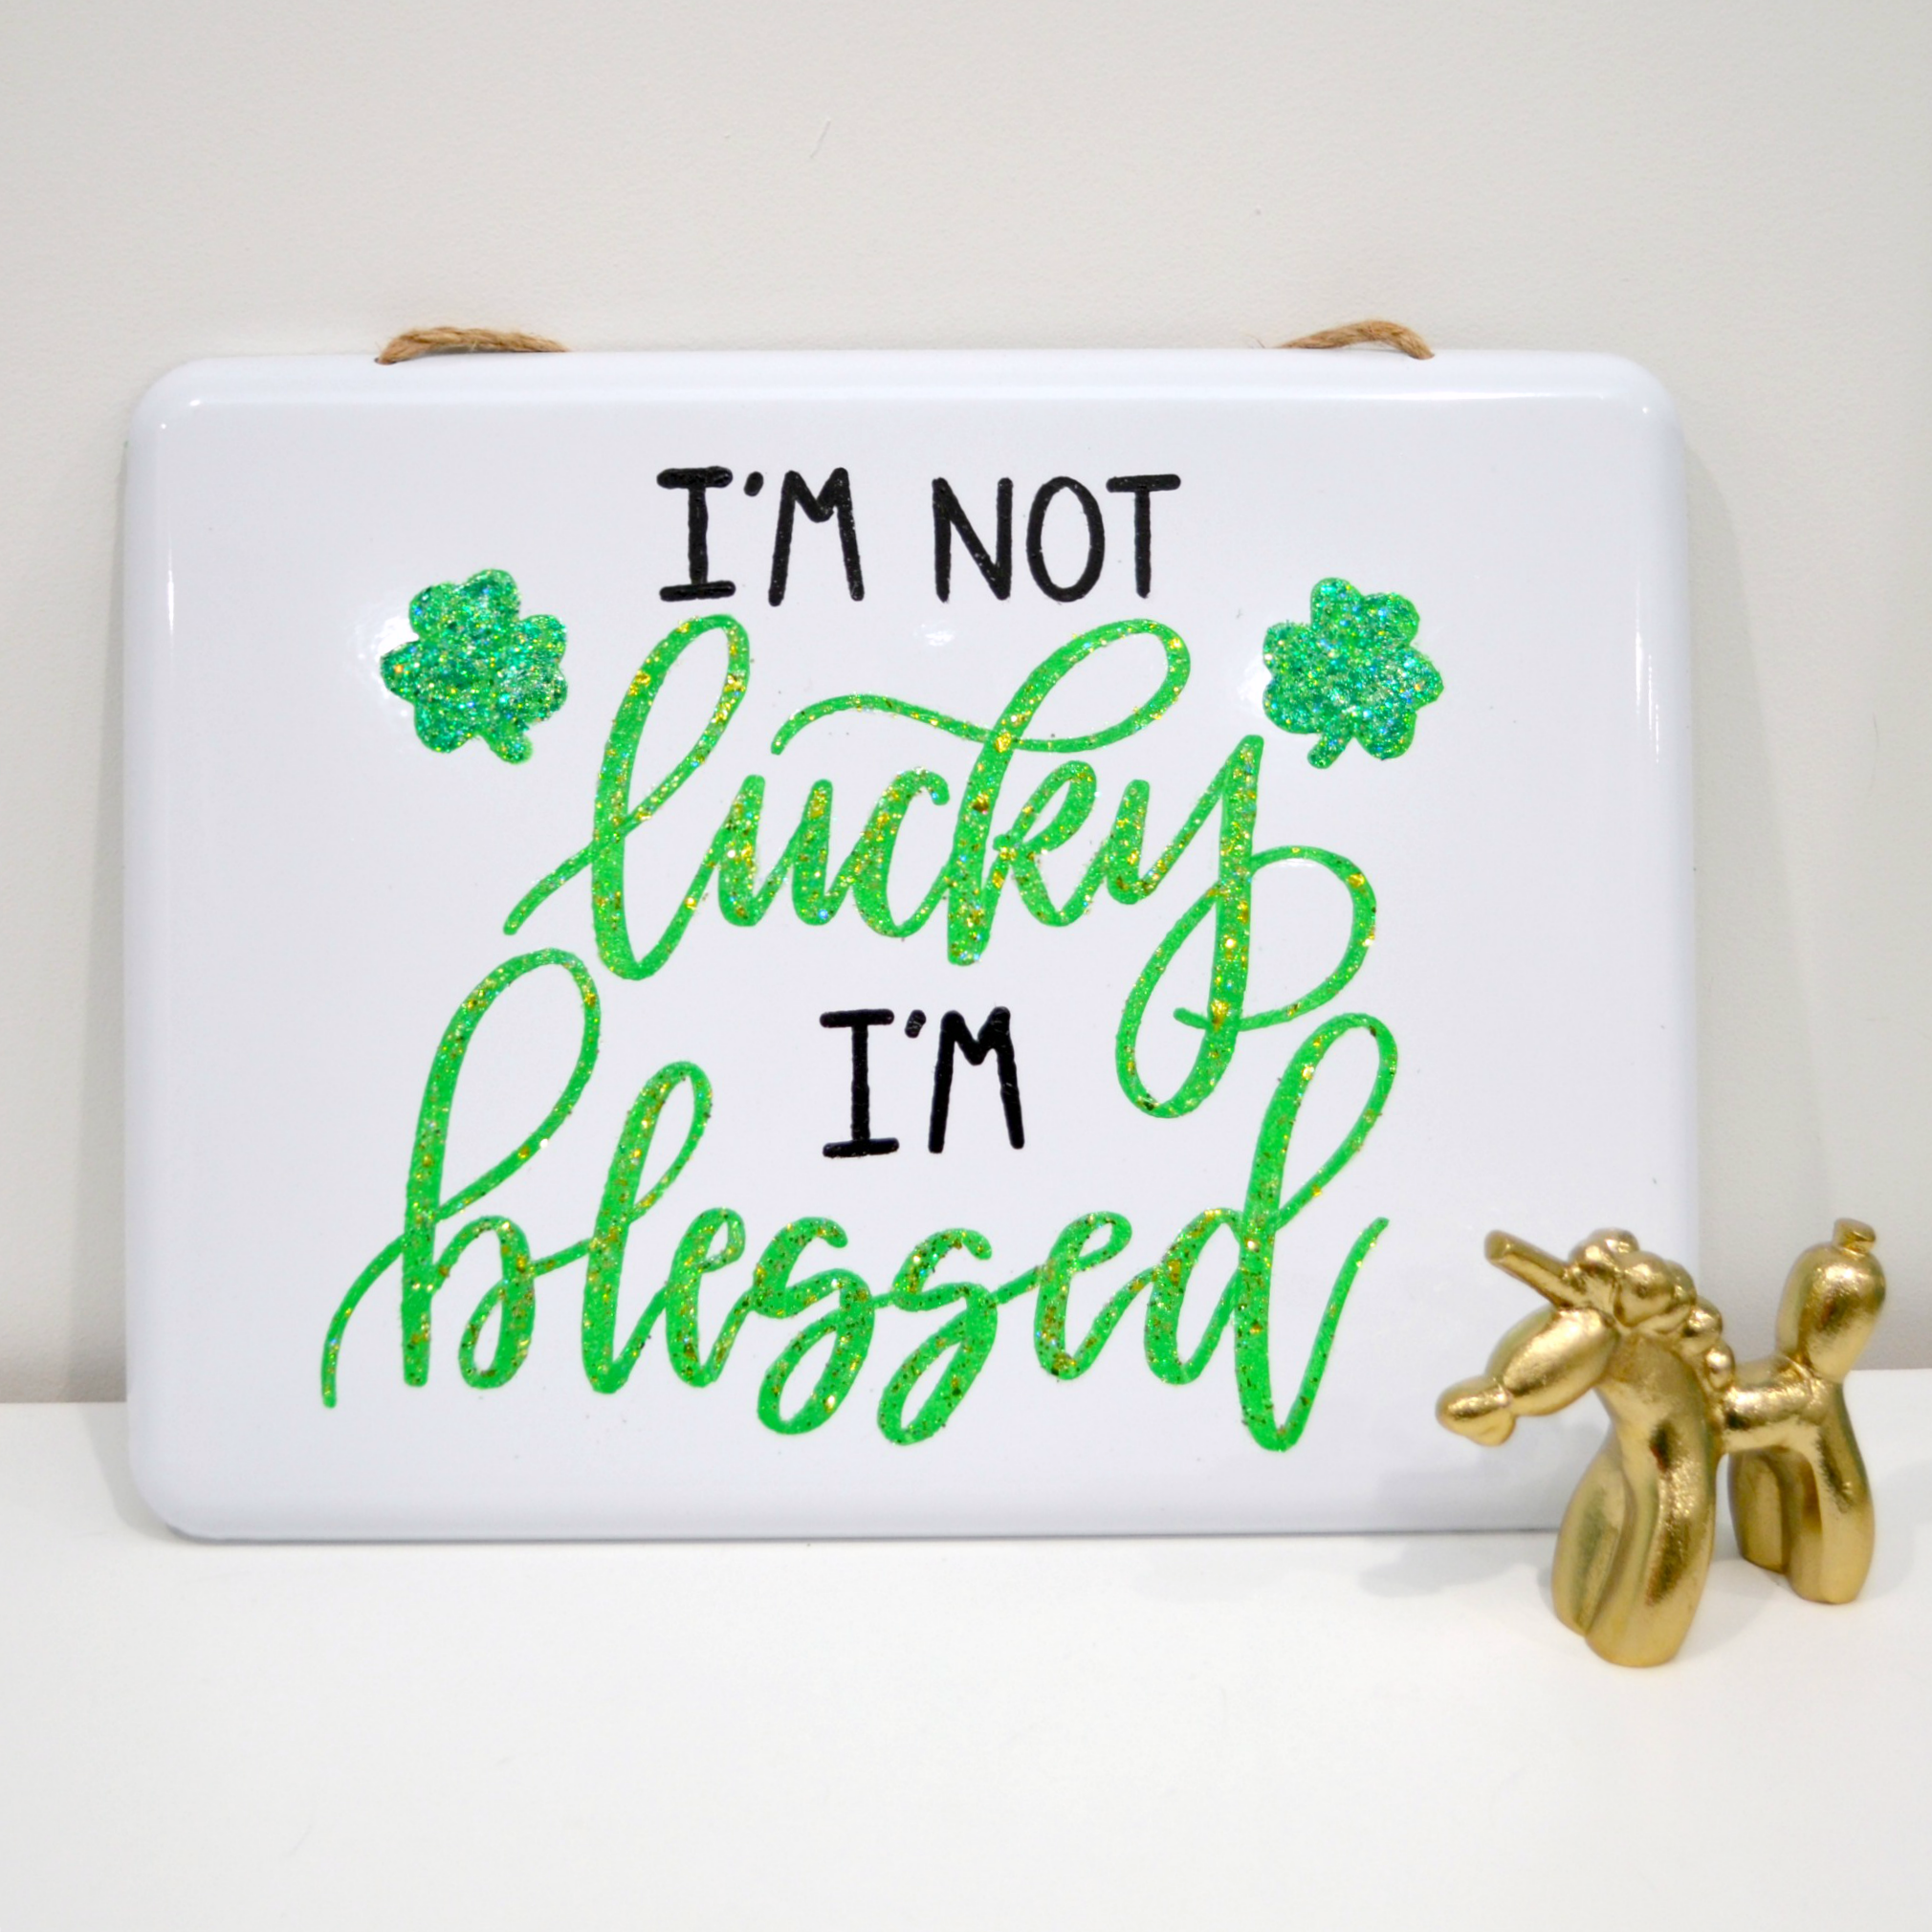
That’s all there is to it! As soon as your paint and Glitterific are dry, your sign is ready to display. Mine is hanging on our front door to welcome our guests in a festive way. What will you do with yours?
Be sure to check out the whole Stencils by Amy Latta collection at Stencil Revolution! There are spring and Easter stencils, farmhouse style stencils, coffee-themed stencils, and lots more. I can’t wait to see how you use them.


Looks great…very festive…
Love it!
Thank you!