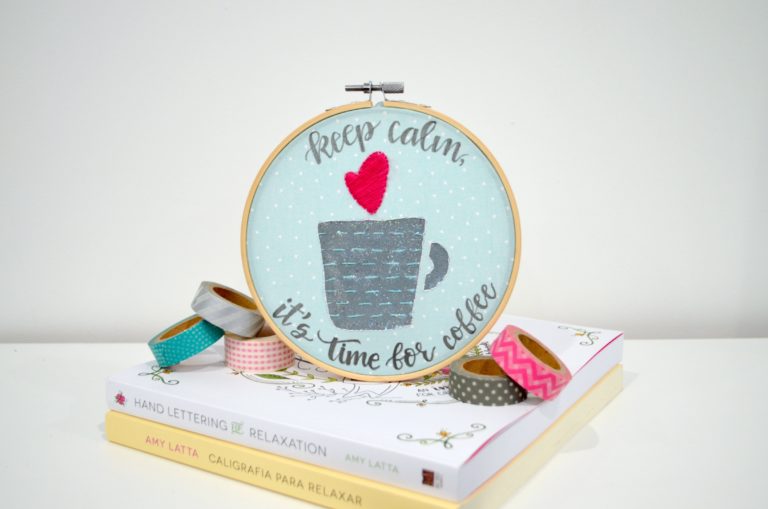
Easy Homemade Cards with Cricut Joy

On Friday, my grandmother will be celebrating her 90th birthday. Unfortunately, due to the crazy circumstances in the world right now, we won’t be able to celebrate with her in person, but we still want her to know she’s loved and in our thoughts. We aren’t able to shop in a store for gifts or a card, so I used my new Cricut Joy to create a one of a kind birthday card I know she’ll treasure. Birthday or no, sending homemade cards is a great way to let those you can’t see right now know you care during these stressful times.
Creating a homemade card is easier than ever before with the brand new Cricut Joy Insert Cards! Each pack comes with 10-12 pre-cut, pre-folded cards, along with the same number of inserts and envelopes to make card-making a breeze. Here’s what you need to get started.
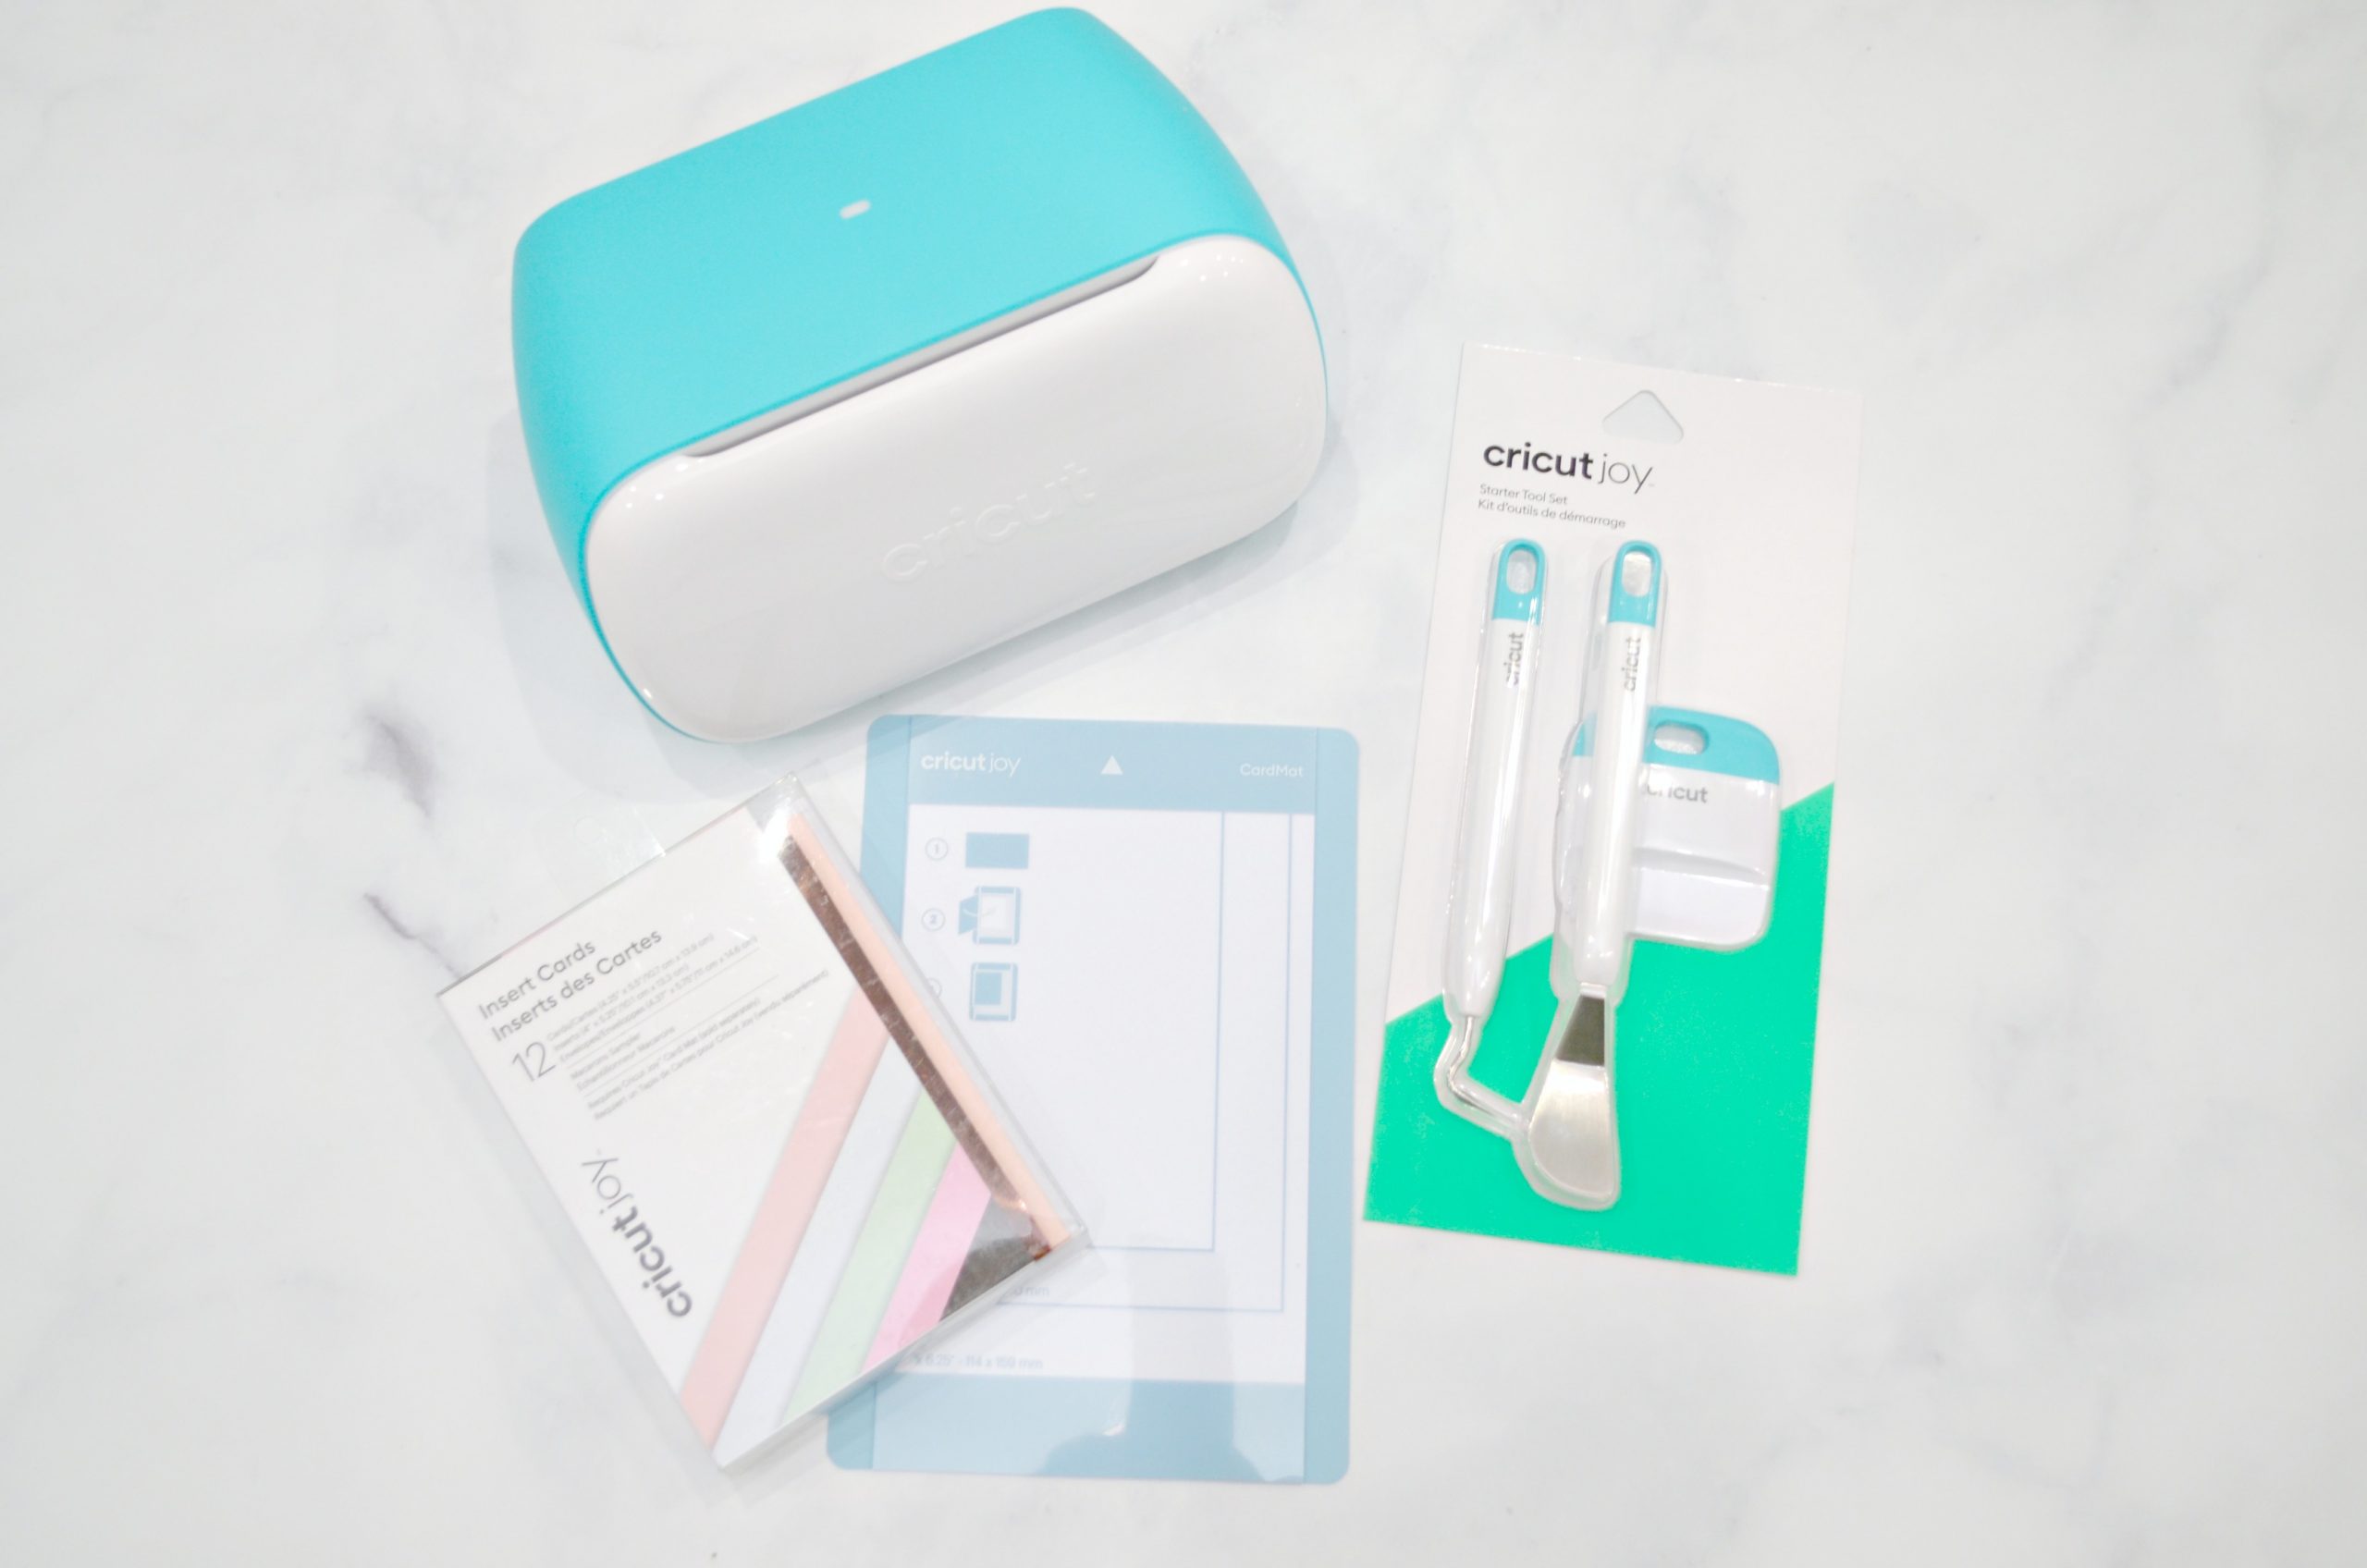
Cricut Joy Insert Cards: your choice of colors
Optional: Starter Tool Kit, Glue
Creating Your Card
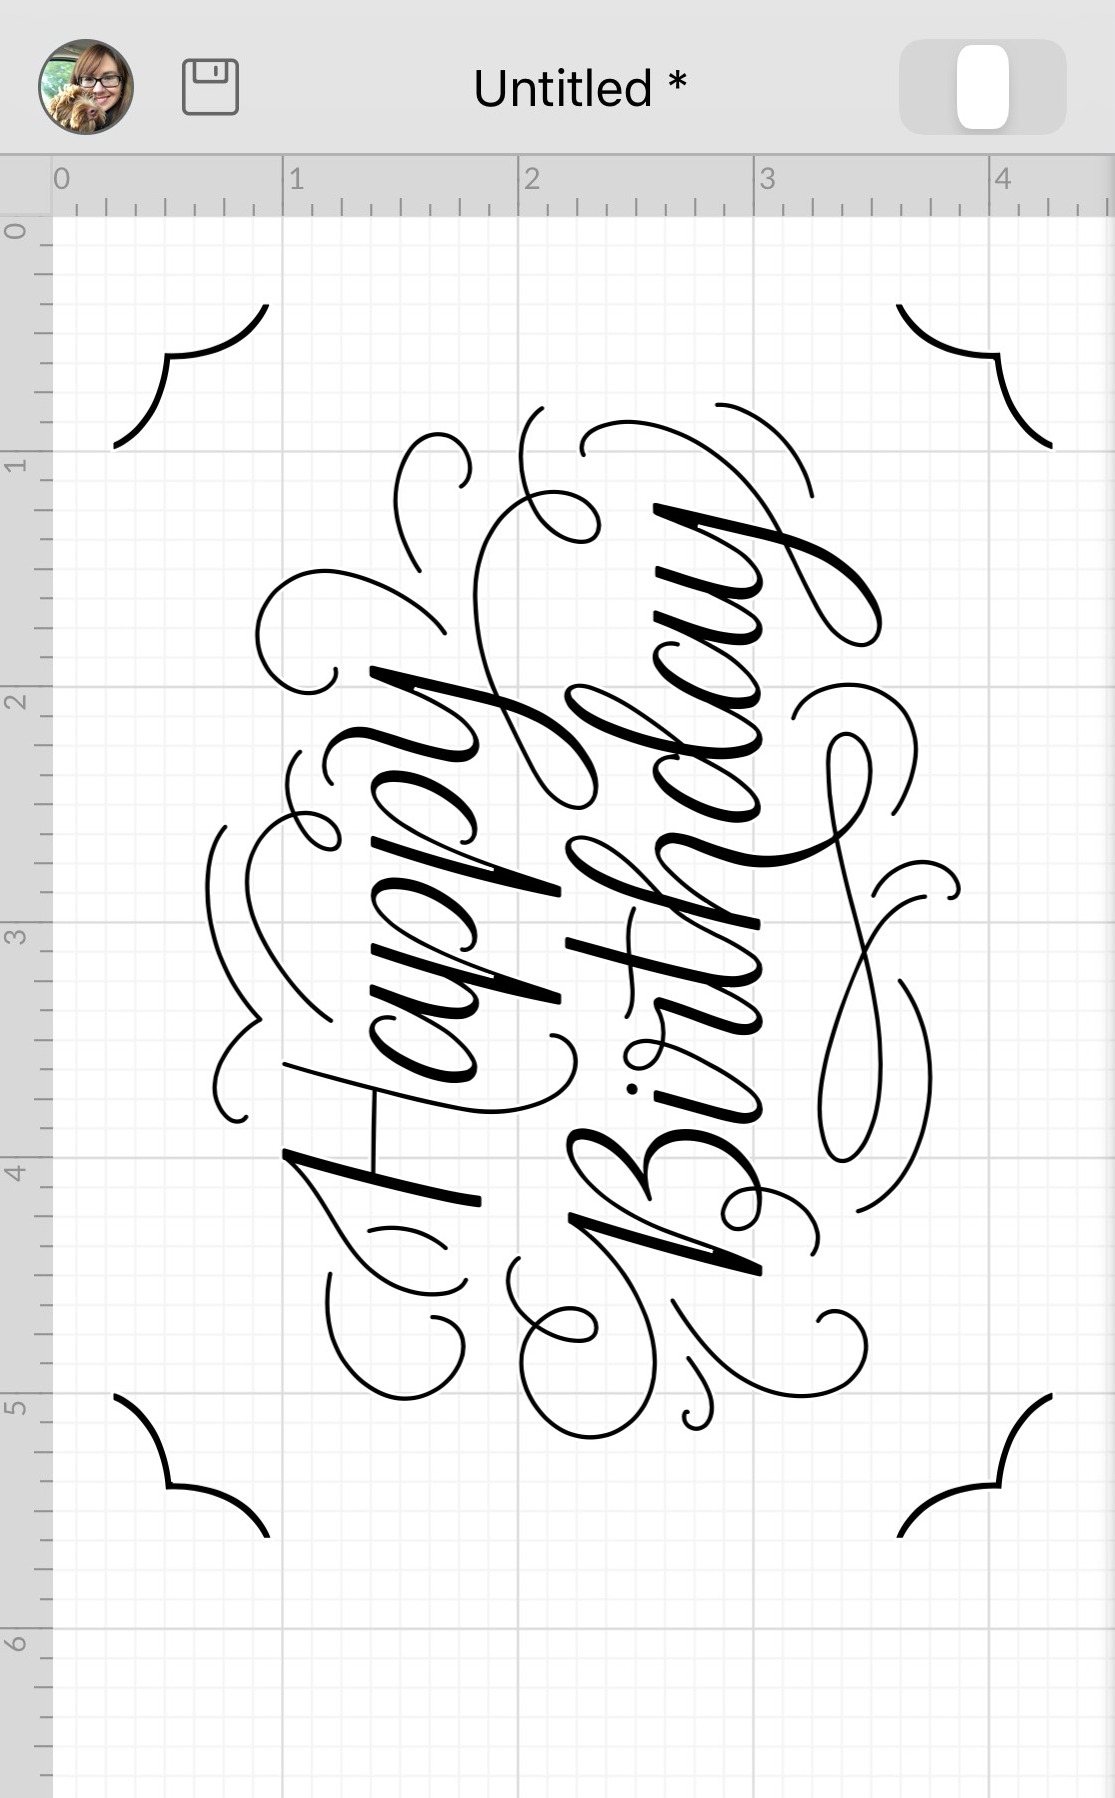
Step 1: Choose your design in the Cricut Design Space software.
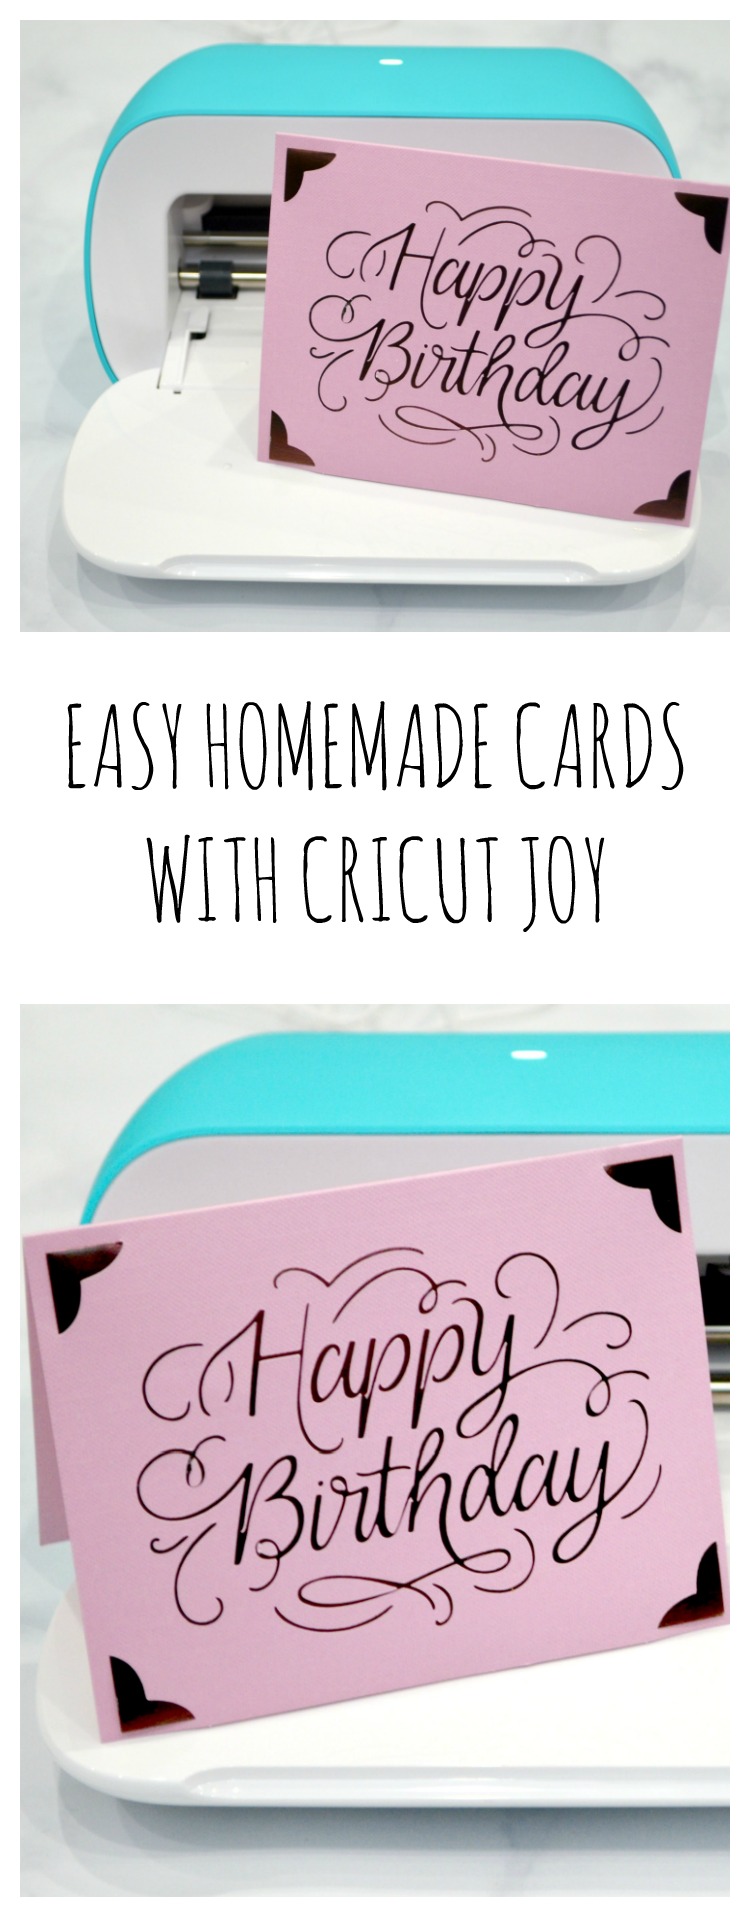
There are lots of designs created just for these new card inserts, so you can choose one you like. Or, if you want to make it more personal, you can create your own, like I did. First, search the Design Library for “card insert corners” and choose a set (Mine is #M139CF7AC). Choose one and add it to your canvas, sizing it to 4″ x 5.25″, which is the size of the insert piece. Then, pick any design from the library and add it in the center. I chose a pretty script “Happy Birthday.” (#M54B9D36)
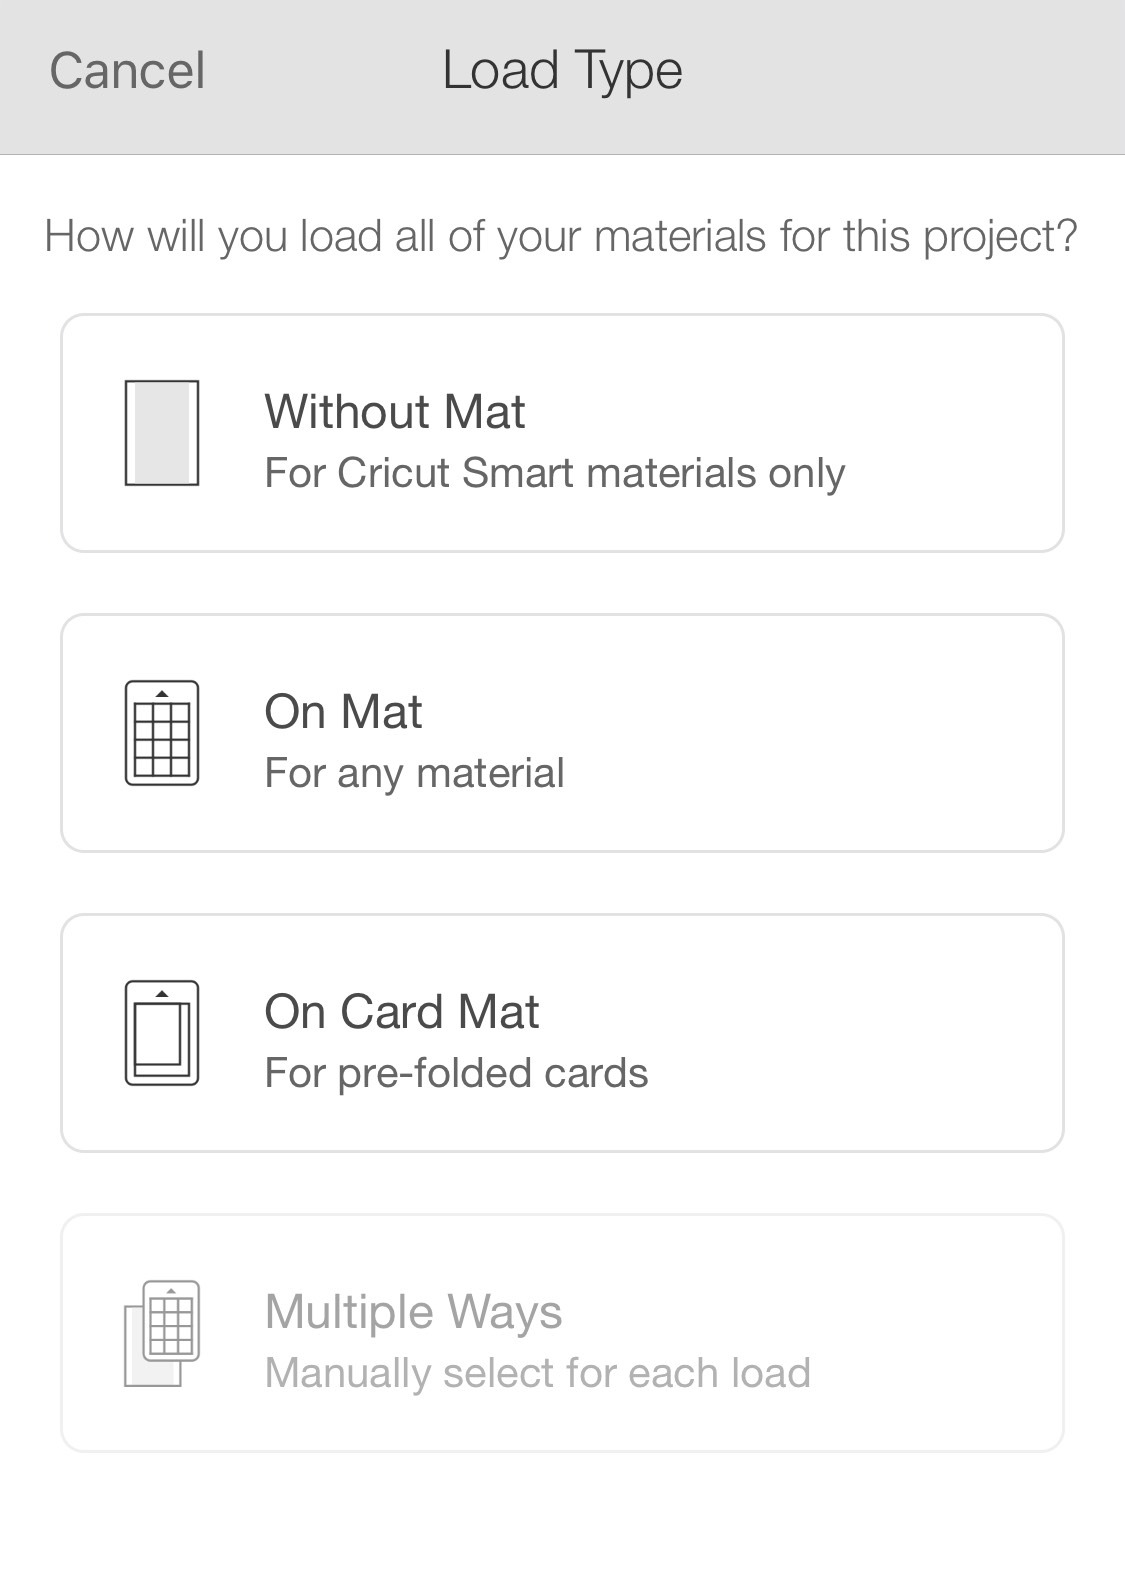
Step 2: Send your design to your machine.
Make sure you have already set up your Cricut Joy in Design Space. If not, you’ll need to start by doing that so the software can communicate with your machine. Then, once you have your design ready, select “Make it.” You’ll get a pop-up asking how you’ll be loading the materials. Choose the option that says “On Card Mat.” Next, you’ll be prompted to load your machine.
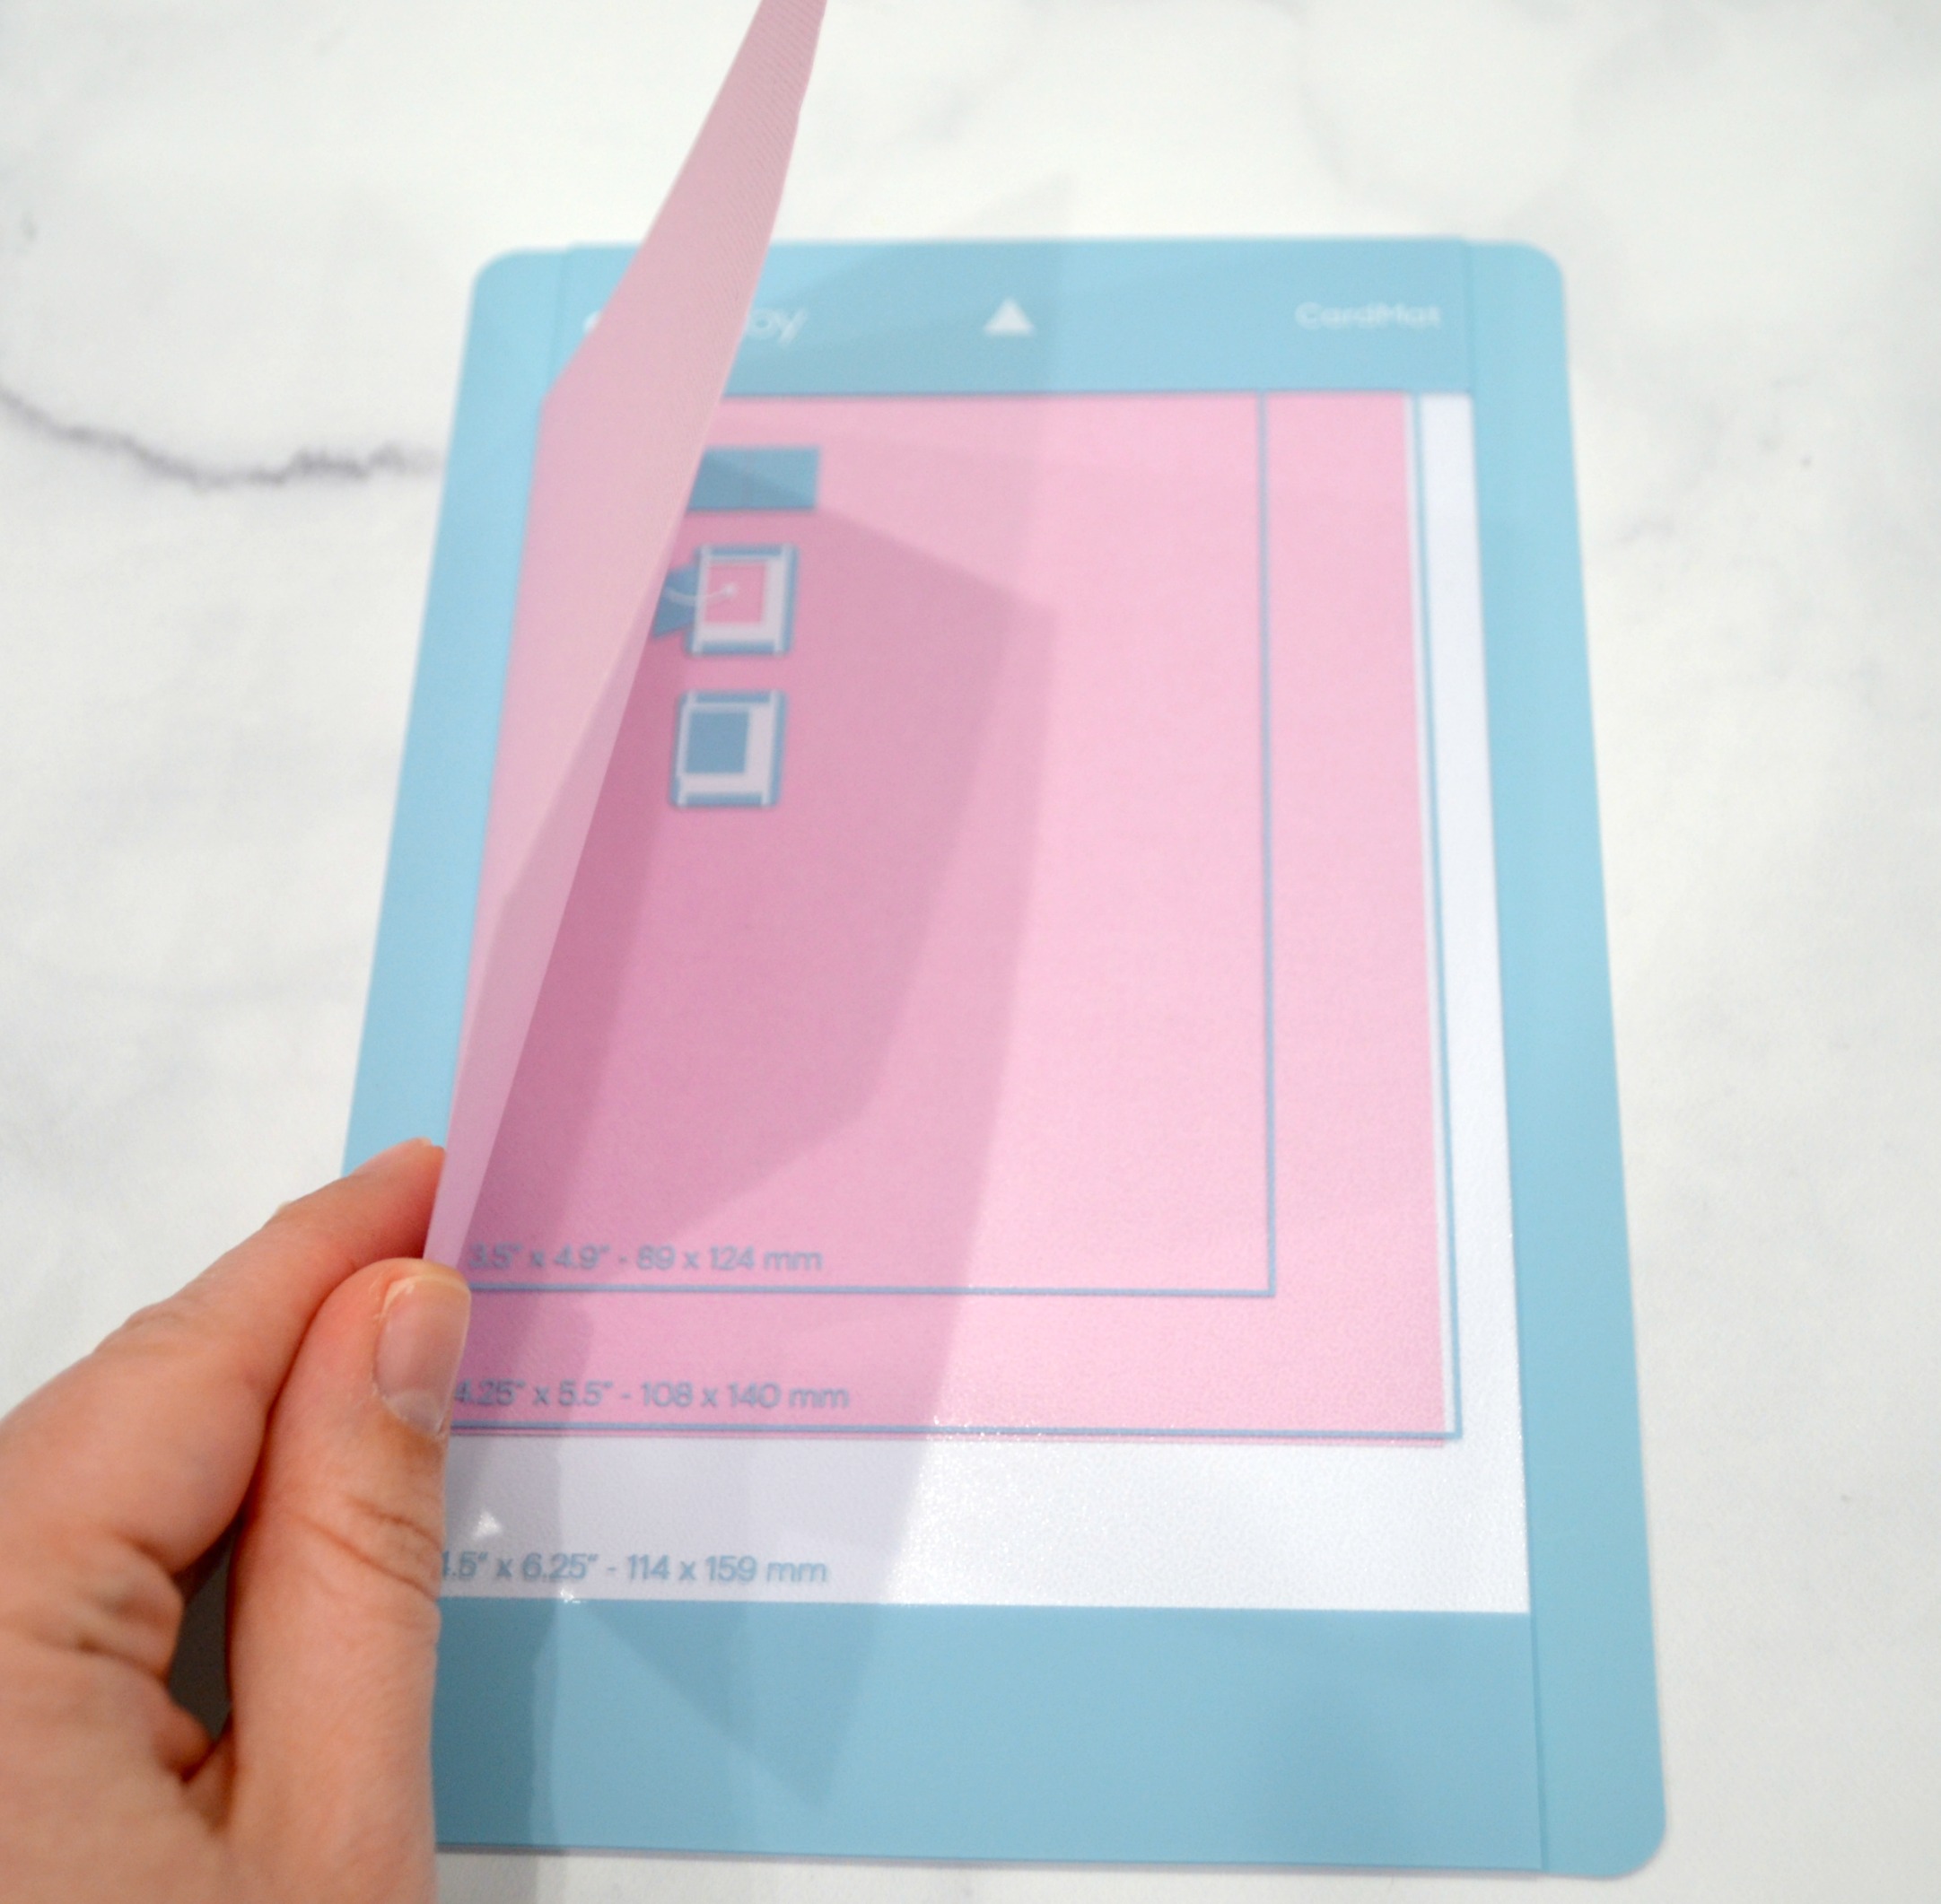
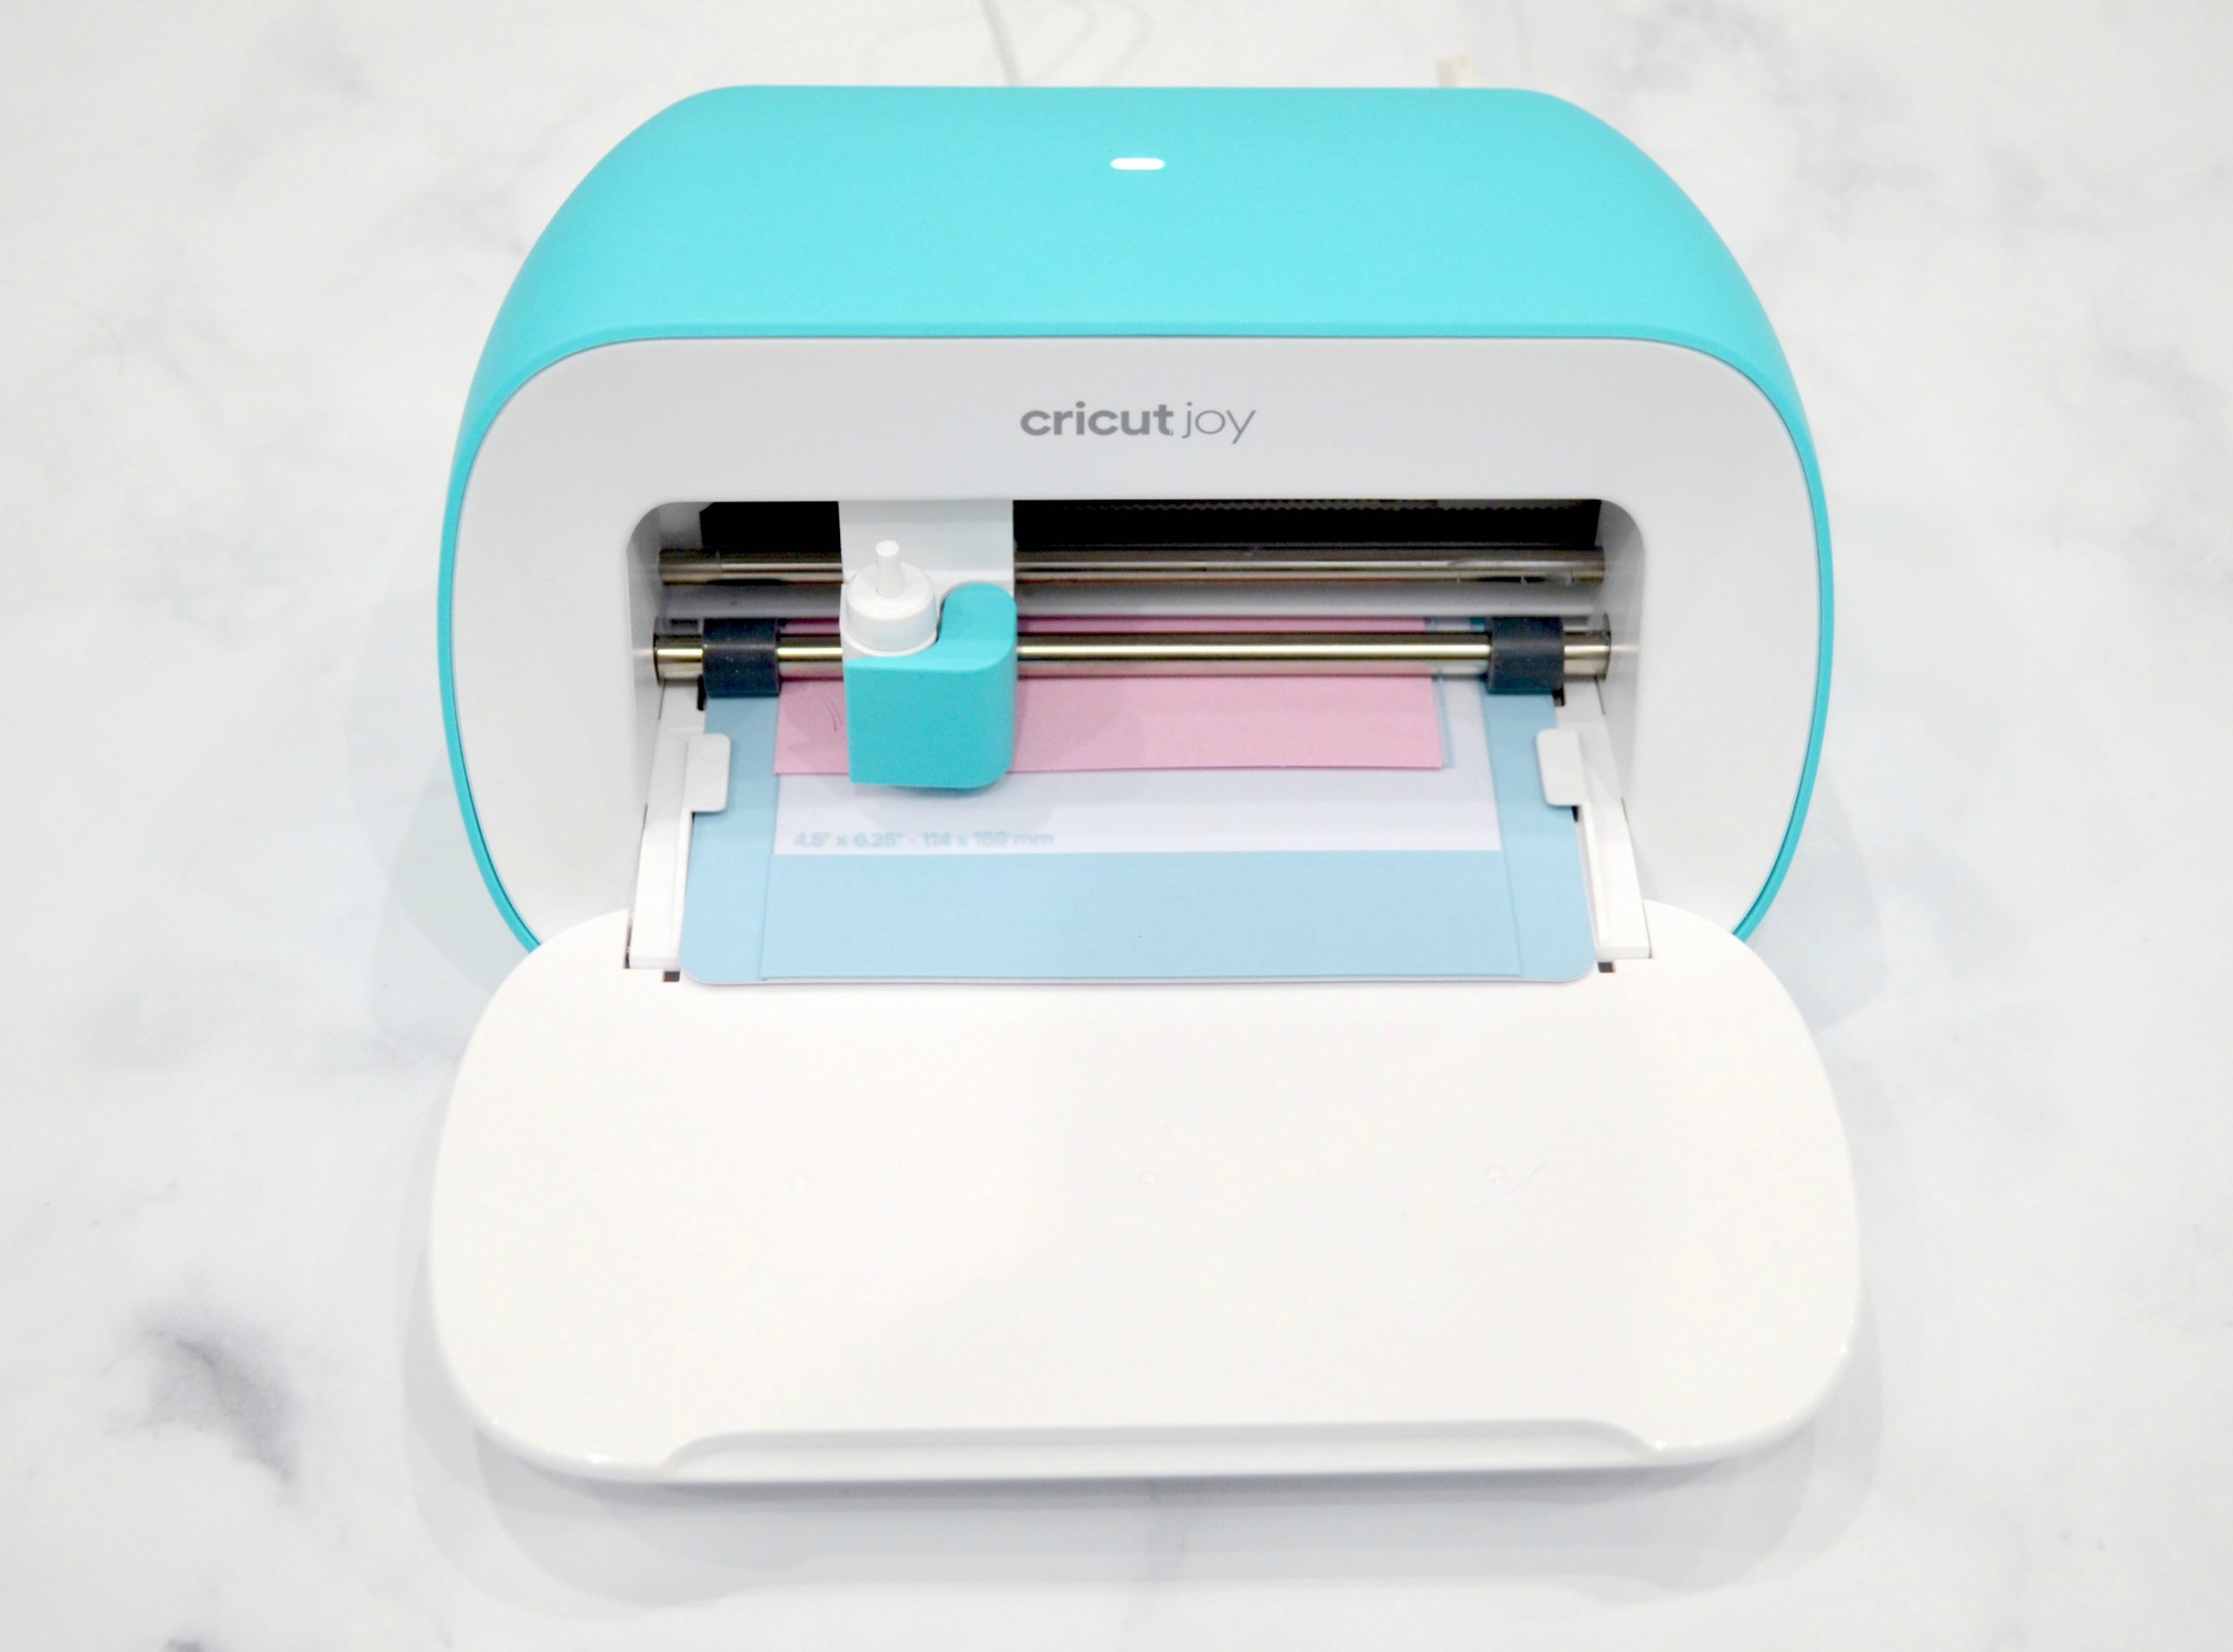
Step 3: Place your card on the mat.
Slide the bottom half of the card under the clear section of the mat and align it with the guidelines for your card’s dimensions. Then, press the top part of the card down, adhering it to the sticky part of the mat.
Step 4: Load the mat into the machine.
There are no physical buttons on the machine, so to do this, simply make sure your Joy is powered on, then use both hands to guide the mat to the rollers. The rollers will grip it and begin the loading process when they sense that the mat is there.
Step 5: Cut your design.
Press “go” when prompted to do so by Design Space, then let your Joy work its magic. When it’s finished, gently peel your card from the mat.
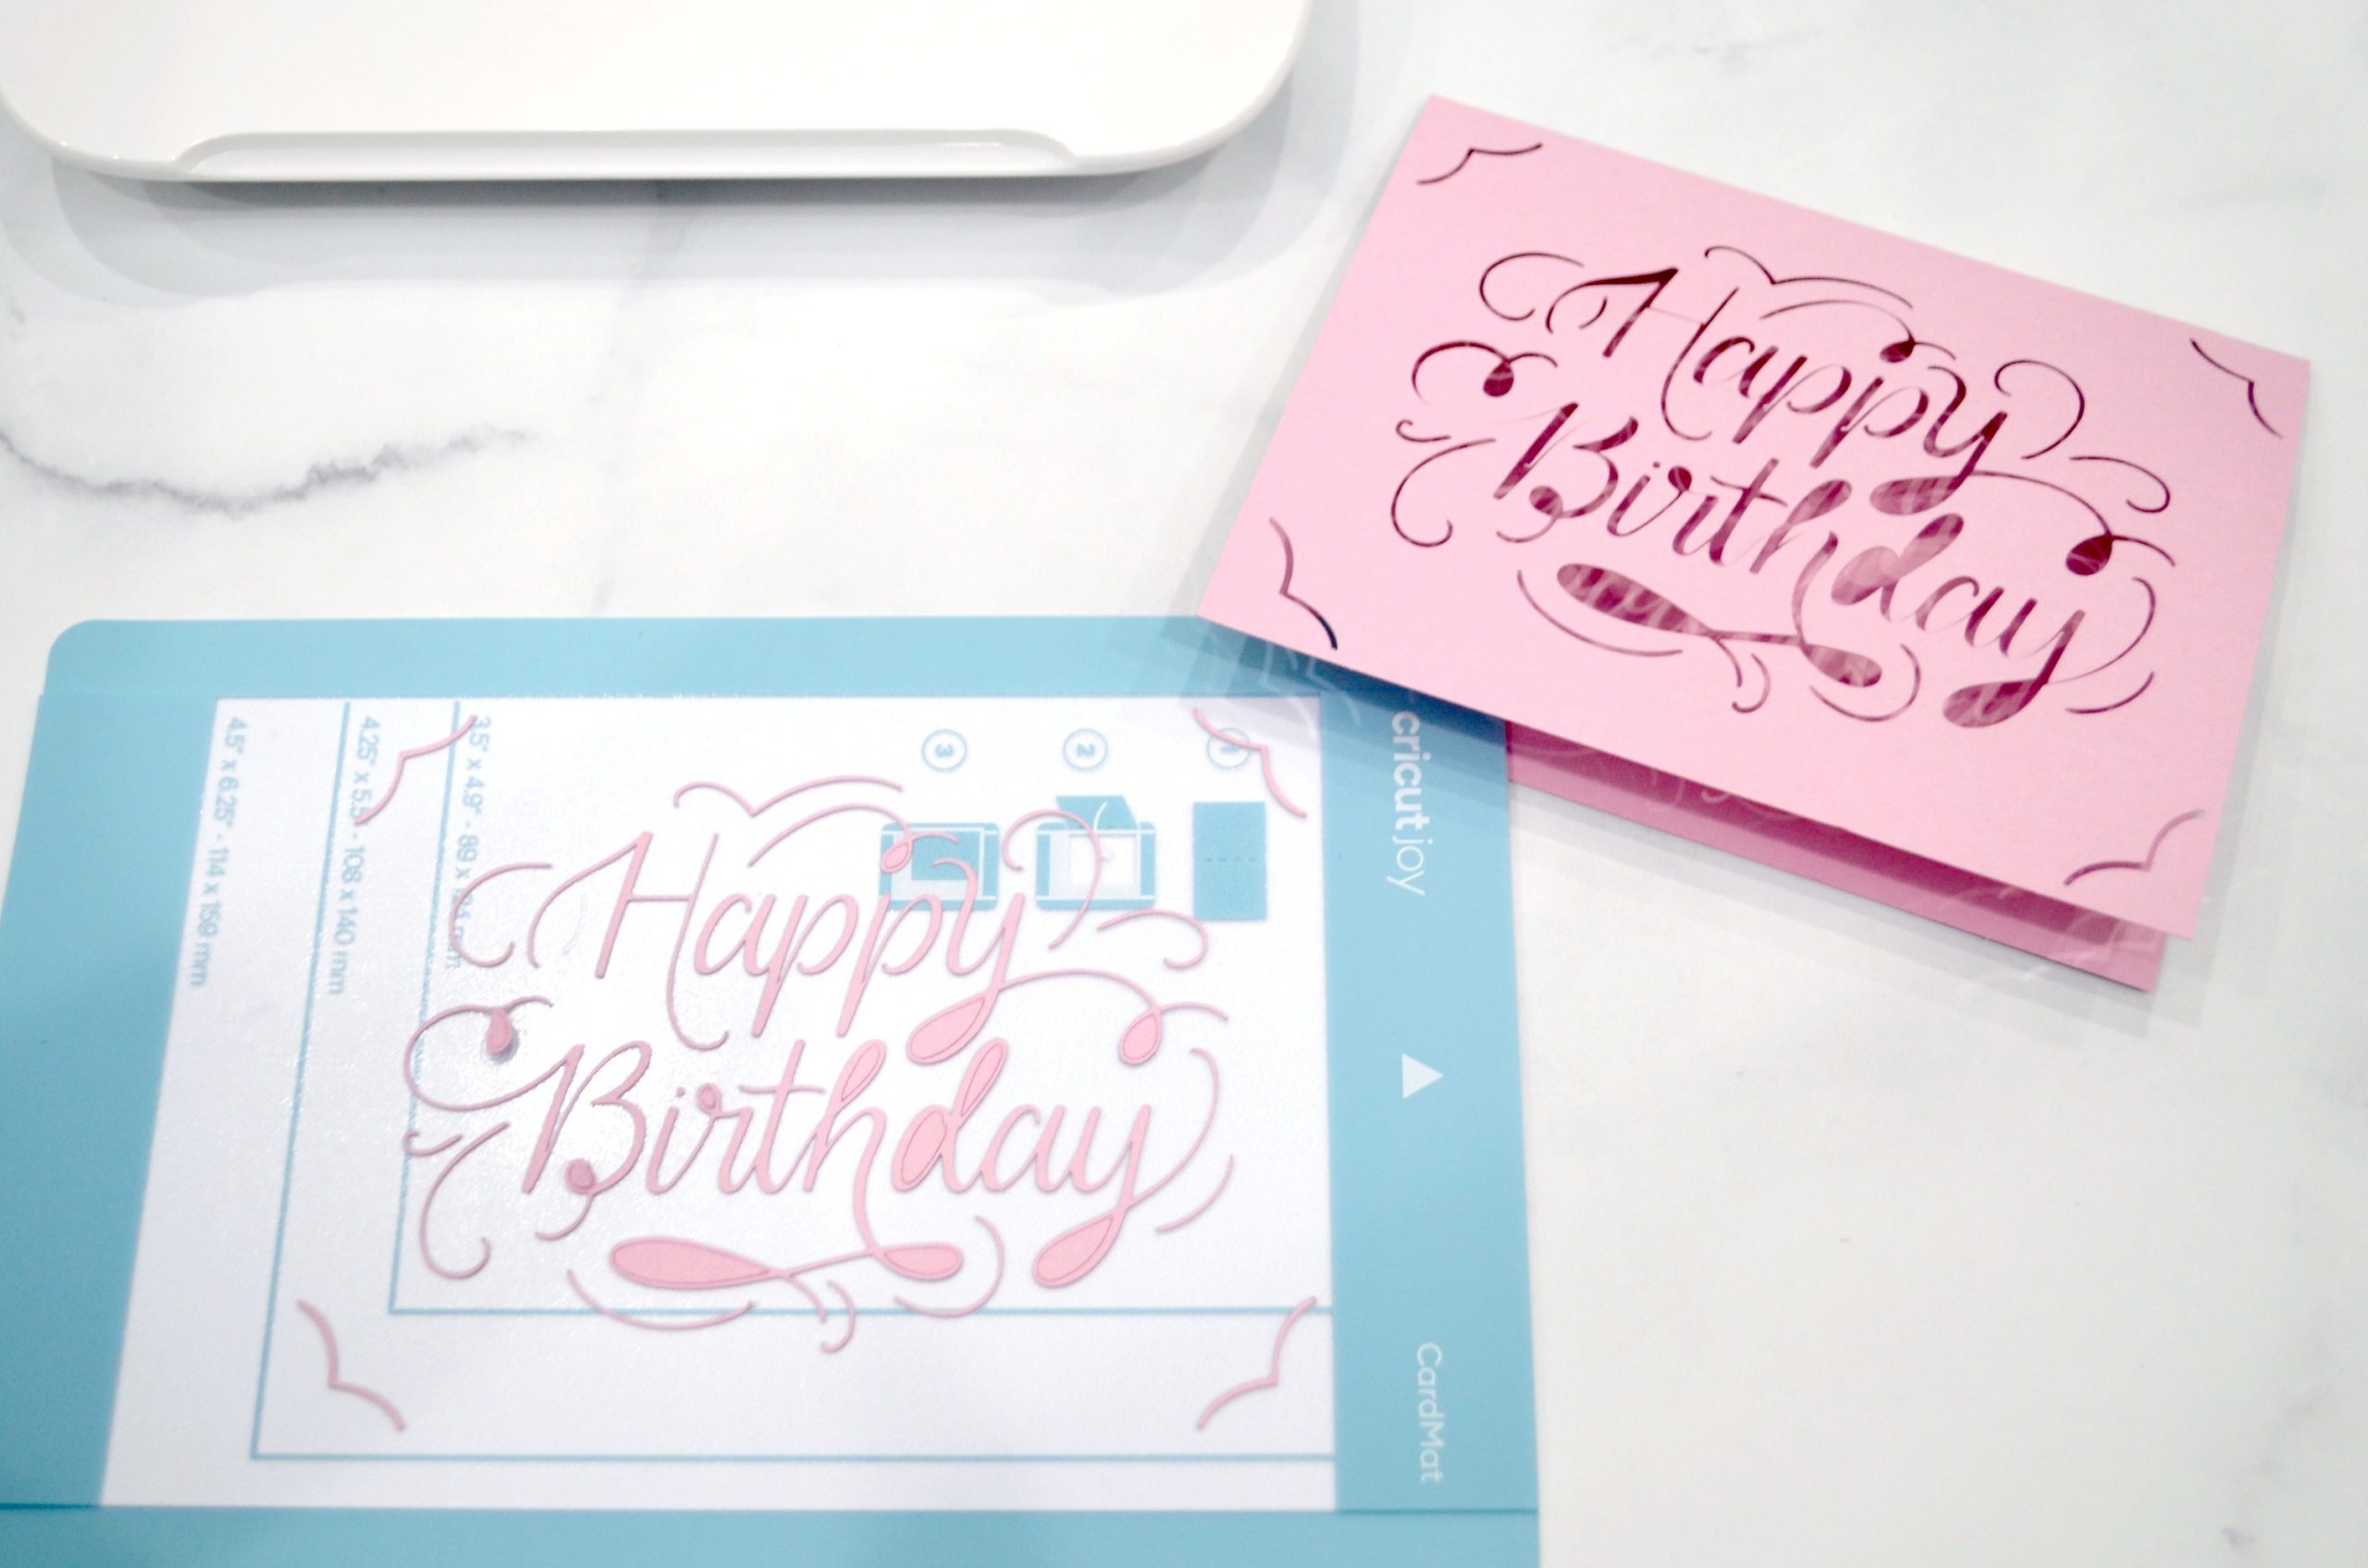
Step 6: Slide the card insert behind your card front and tuck the corners into the cutout slots.
This will cause the cut parts of your design to become the color of the insert.
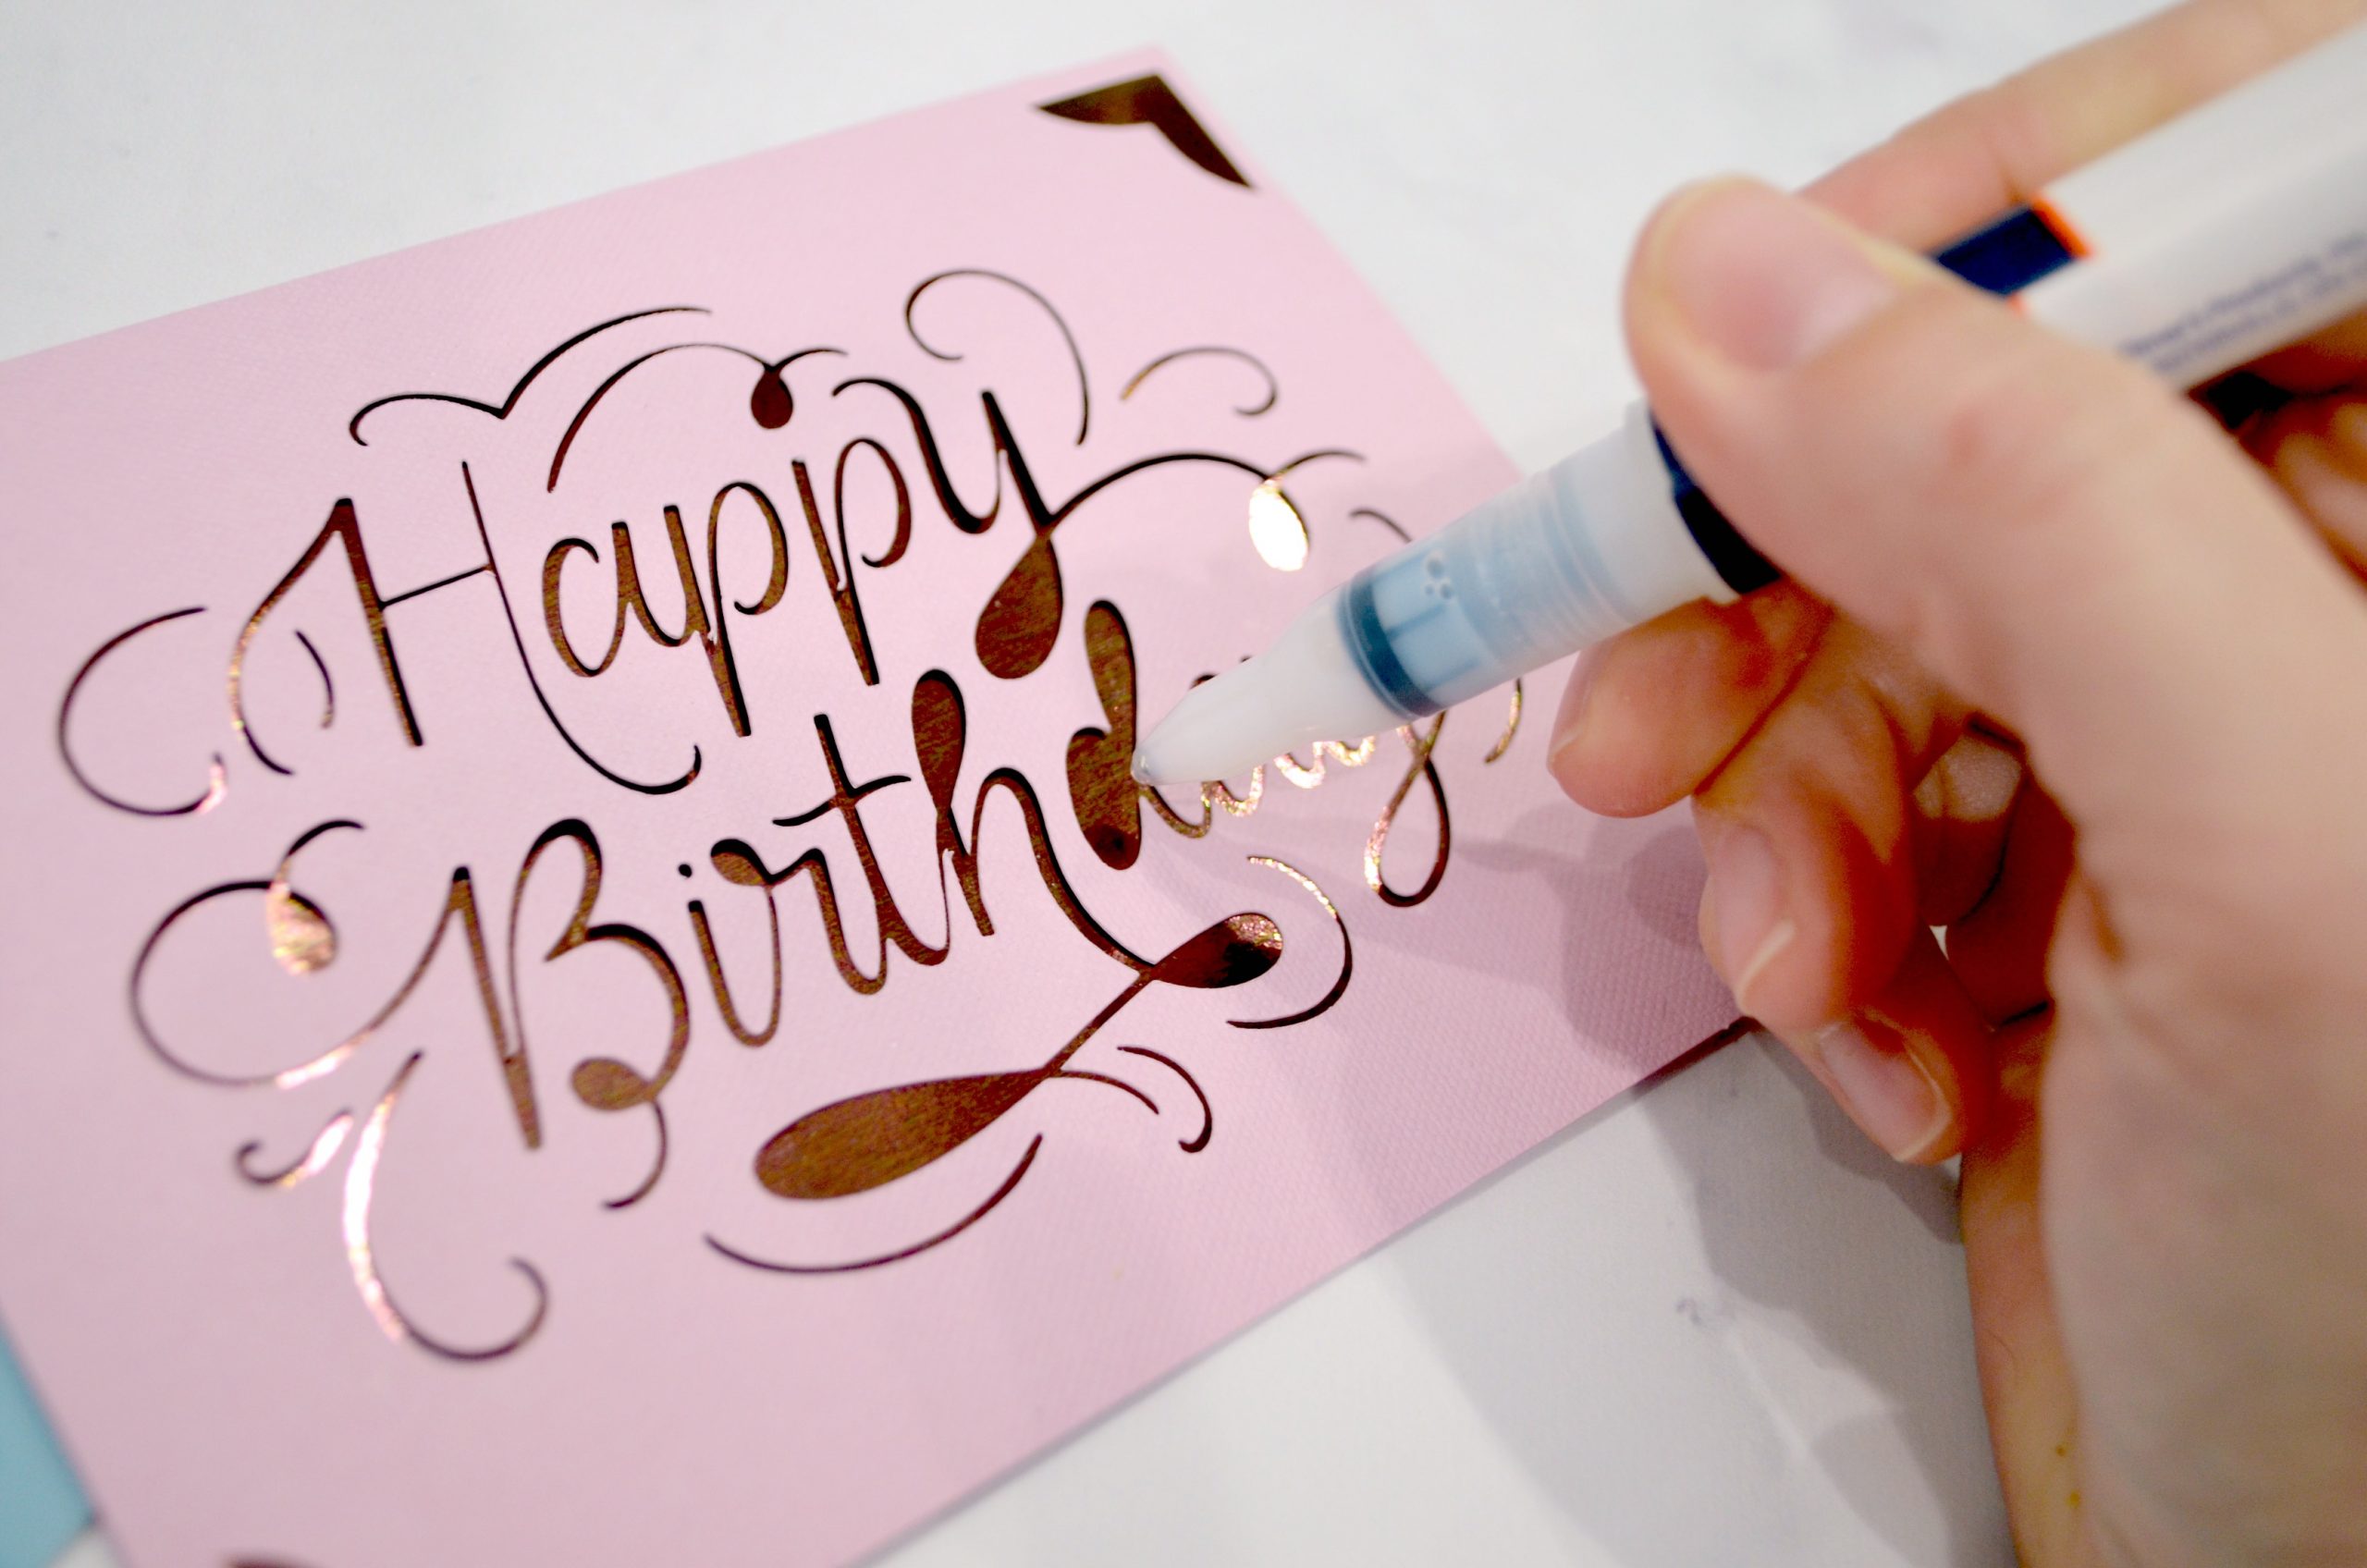
Step 7: (Optional) Glue any small areas that were weeded out onto the card front.
Letters with loops, like “y,” “l,” and “h” will have small parts that came off of the design because they weren’t connected to the main card front. If you want to use them, simply use a fine tip glue pen or other adhesive to carefully stick them in place. I found my tool kit helpful in getting those tiny pieces off the cutting mat and into their proper places.
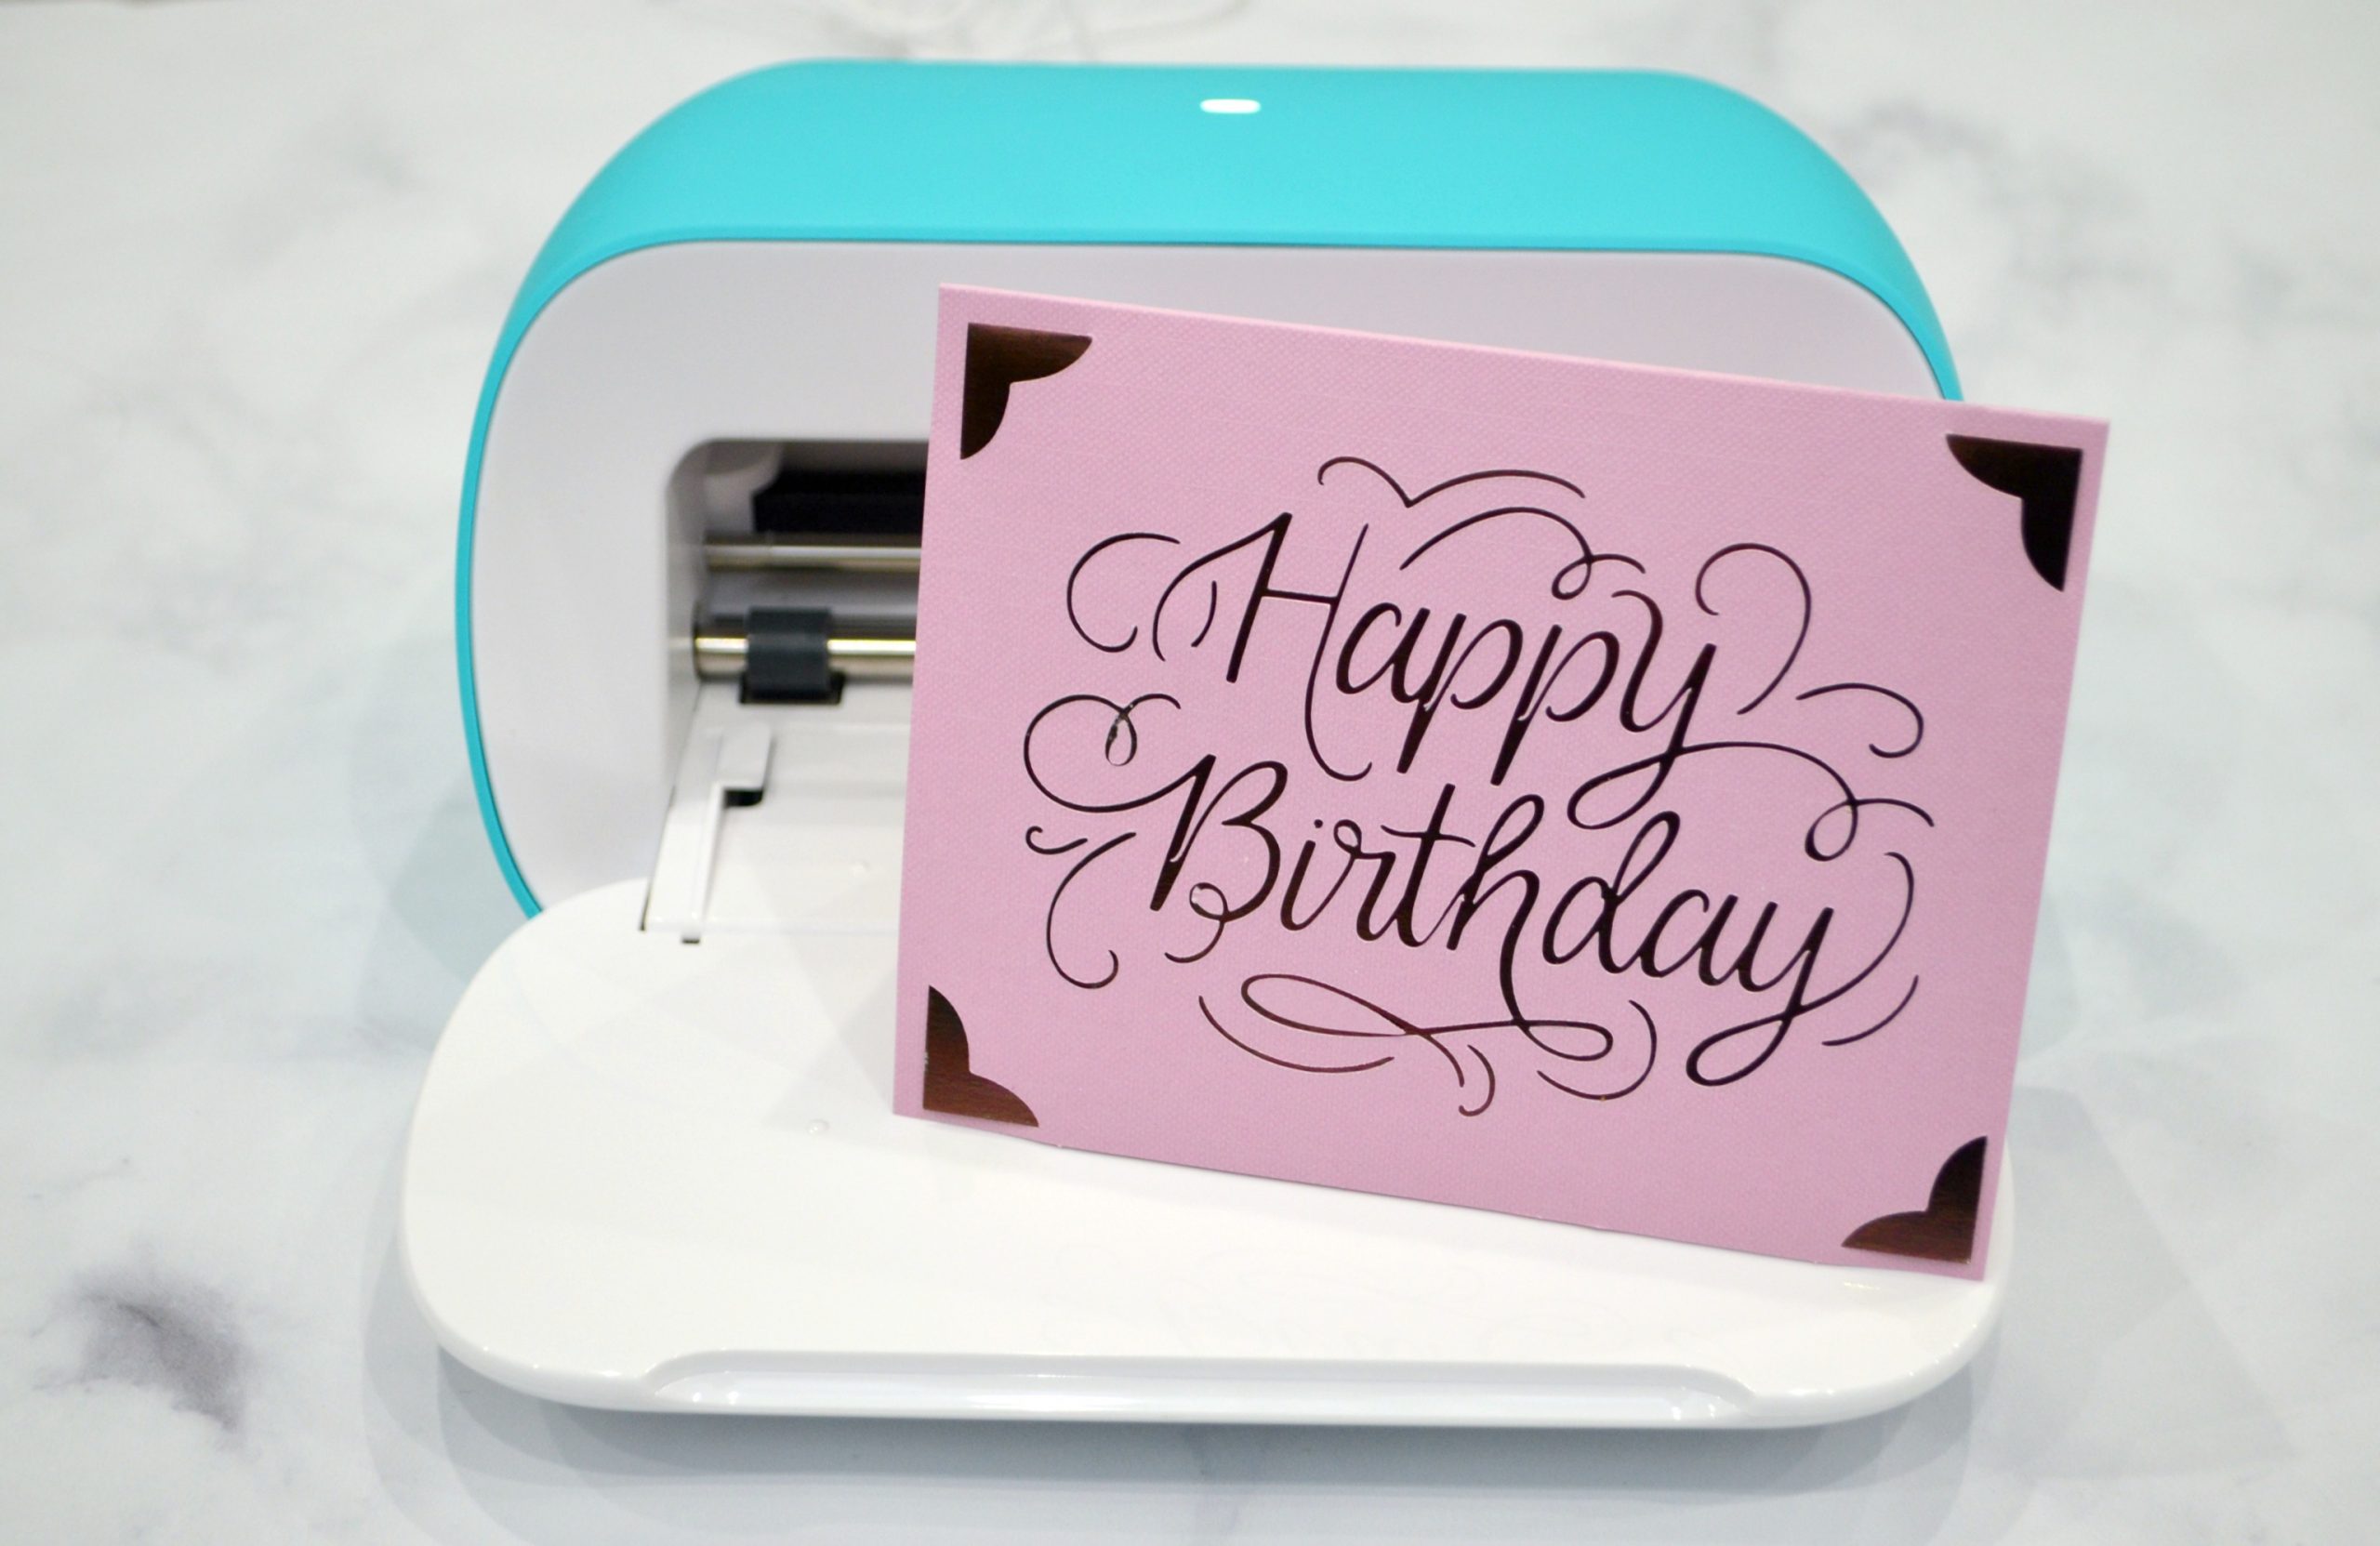
Now, your card is ready to use! Just write your message inside, seal it in one of the envelopes provided in the kit, and get ready to make someone you care about smile. In light of current circumstances and our desire to protect those we’re sending homemade cards to, I would advise thoroughly washing your hands before creating the cards, and sealing envelopes with a damp paper towel rather than licking the seal. Sharing is caring, except when it comes to germs!
These homemade cards are just one of the many exciting new things you can create using the Cricut Joy! Stay tuned for more easy projects I know you’re going to love. And, as always, be sure to share what you’re working on in the Amy Latta & Friends Facebook group so we can all get inspired together.

2 Comments