Bee Kind: Cricut Joy Smart Labels
October is just around the corner: a month full of all the exciting things that Fall brings, but did you know it’s also a month with a positive message? In addition to being the season for cider, sweatshirts, and pumpkins, it’s also Anti-Bullying Month, a time to make sure we are all practicing kindness in every area of our lives. As a little reminder, I decided to make some DIY kindness stickers using a product I’d never tried before, Cricut Joy™ Smart Label™ Writable Vinyl! It was really simple to do, and I hope you love how they turned out as much as I do. Take a look at how easy these are to create:
You’ll need:
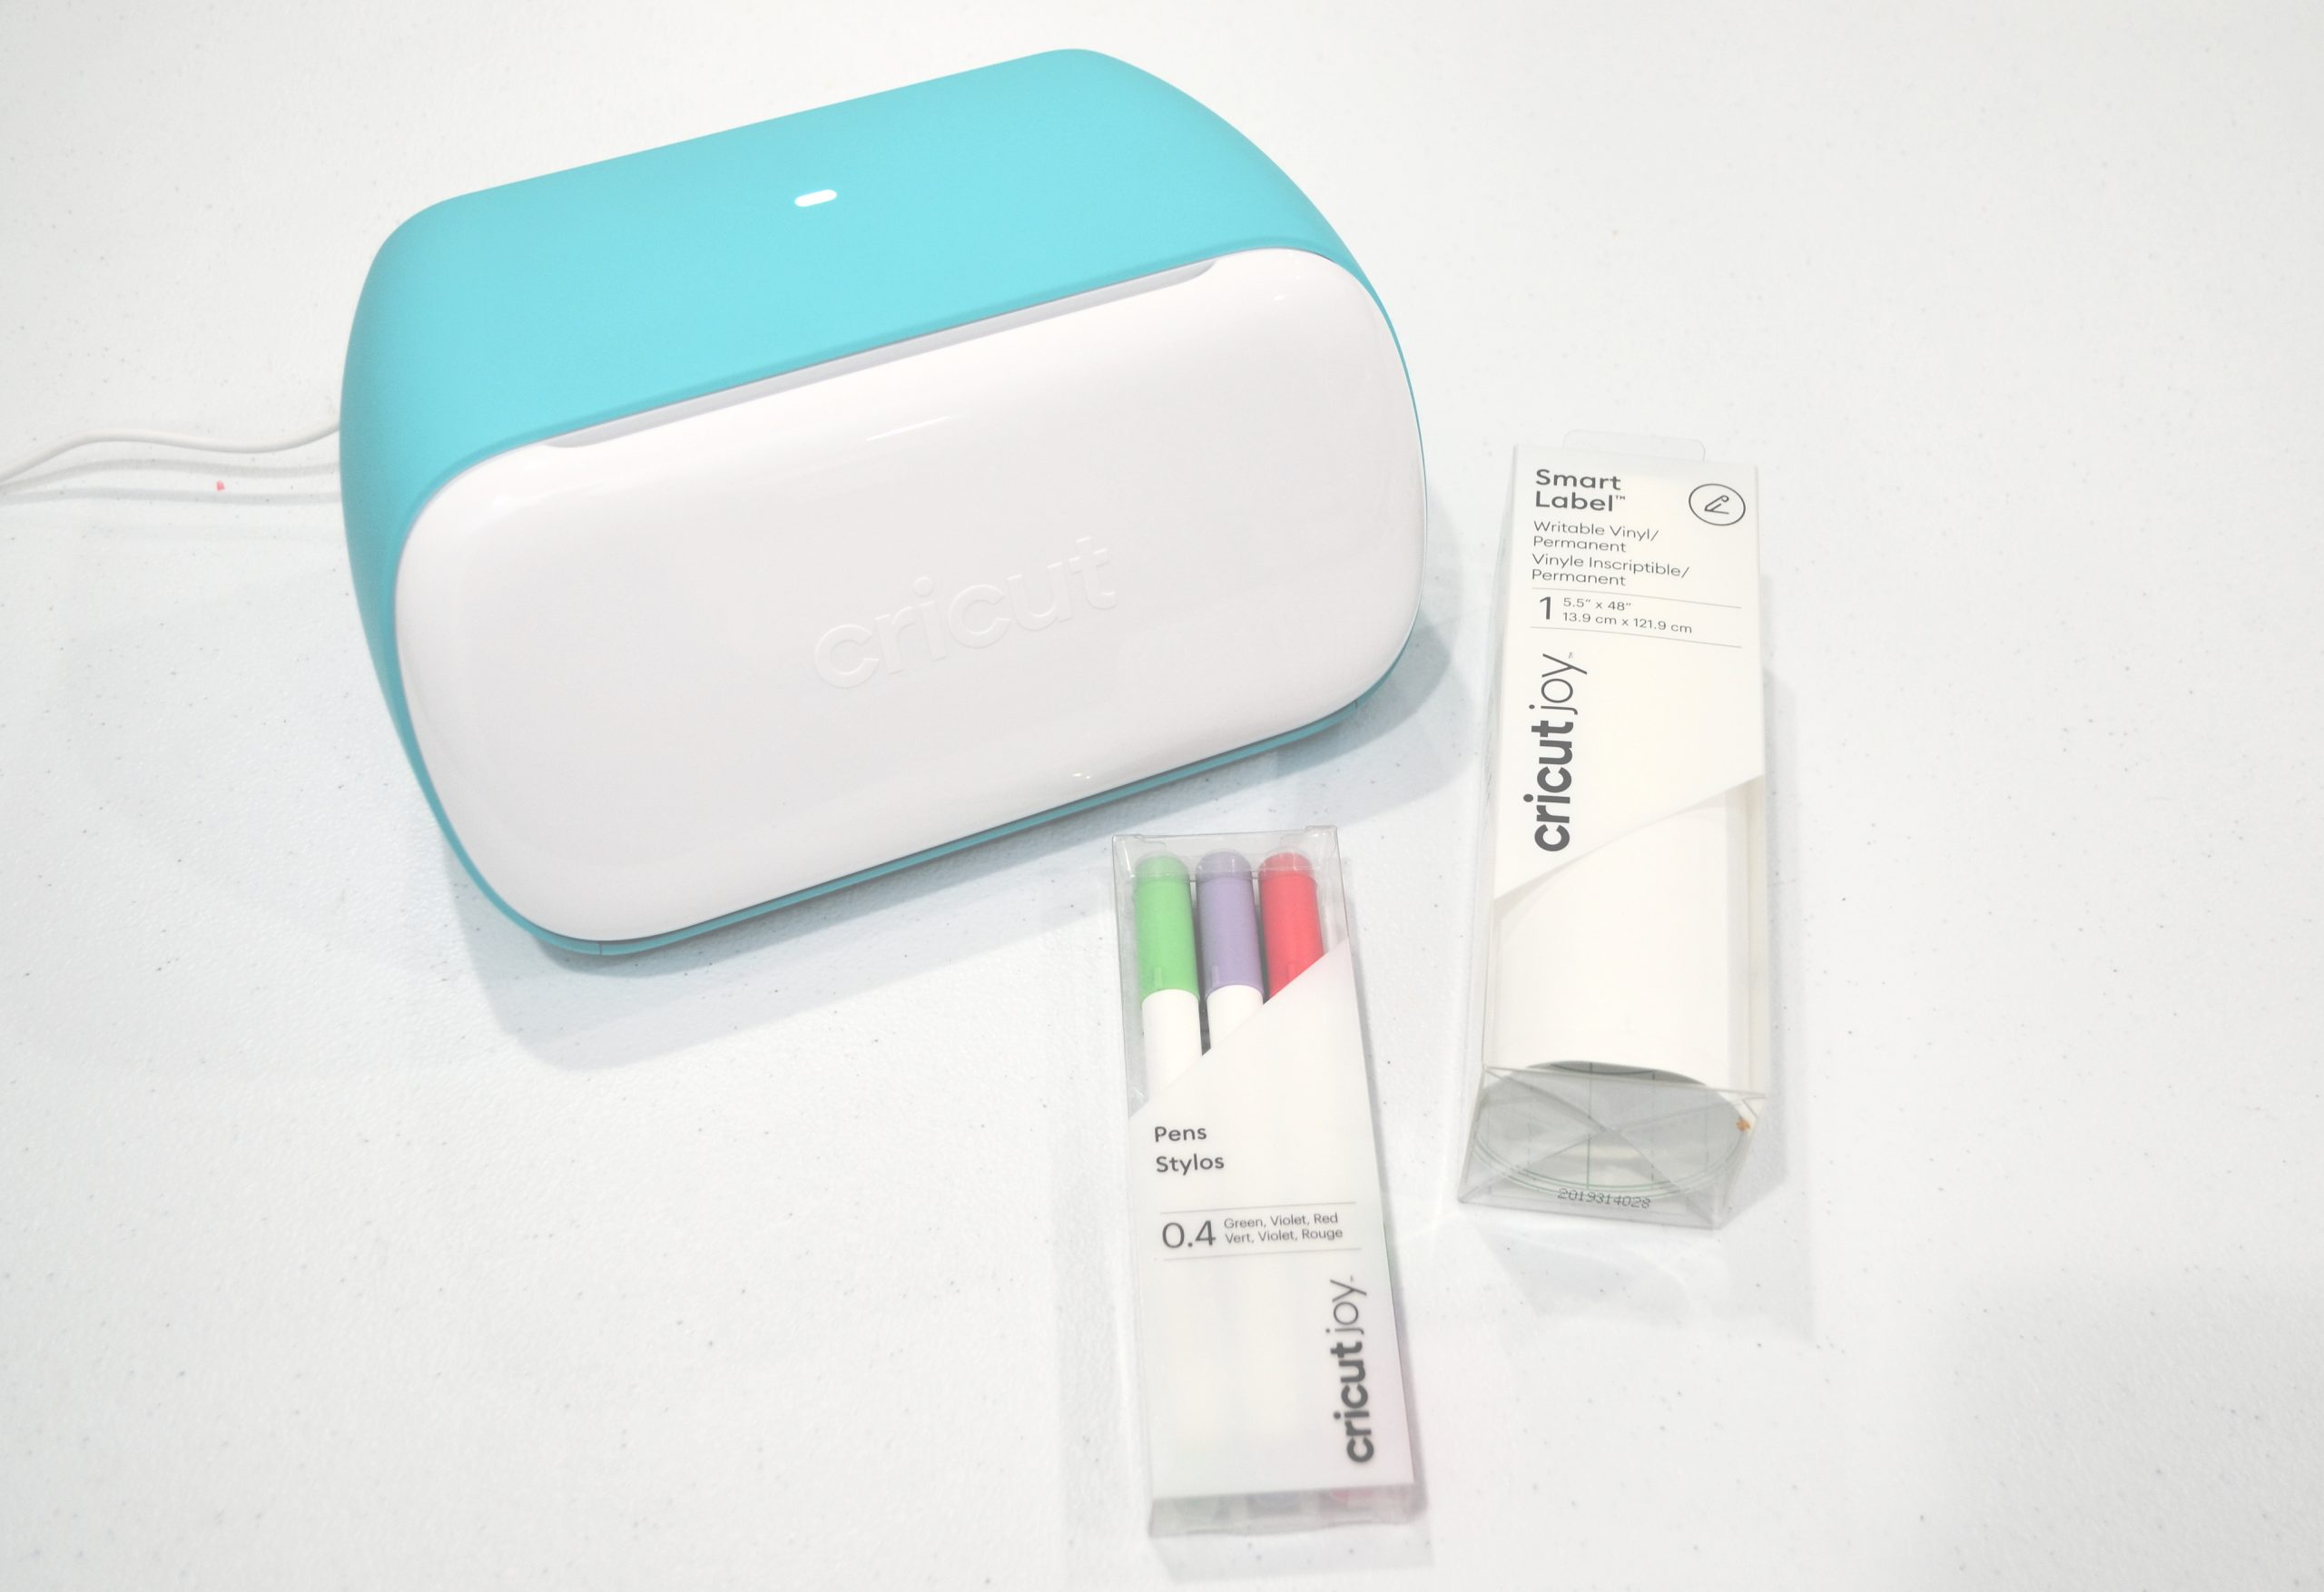
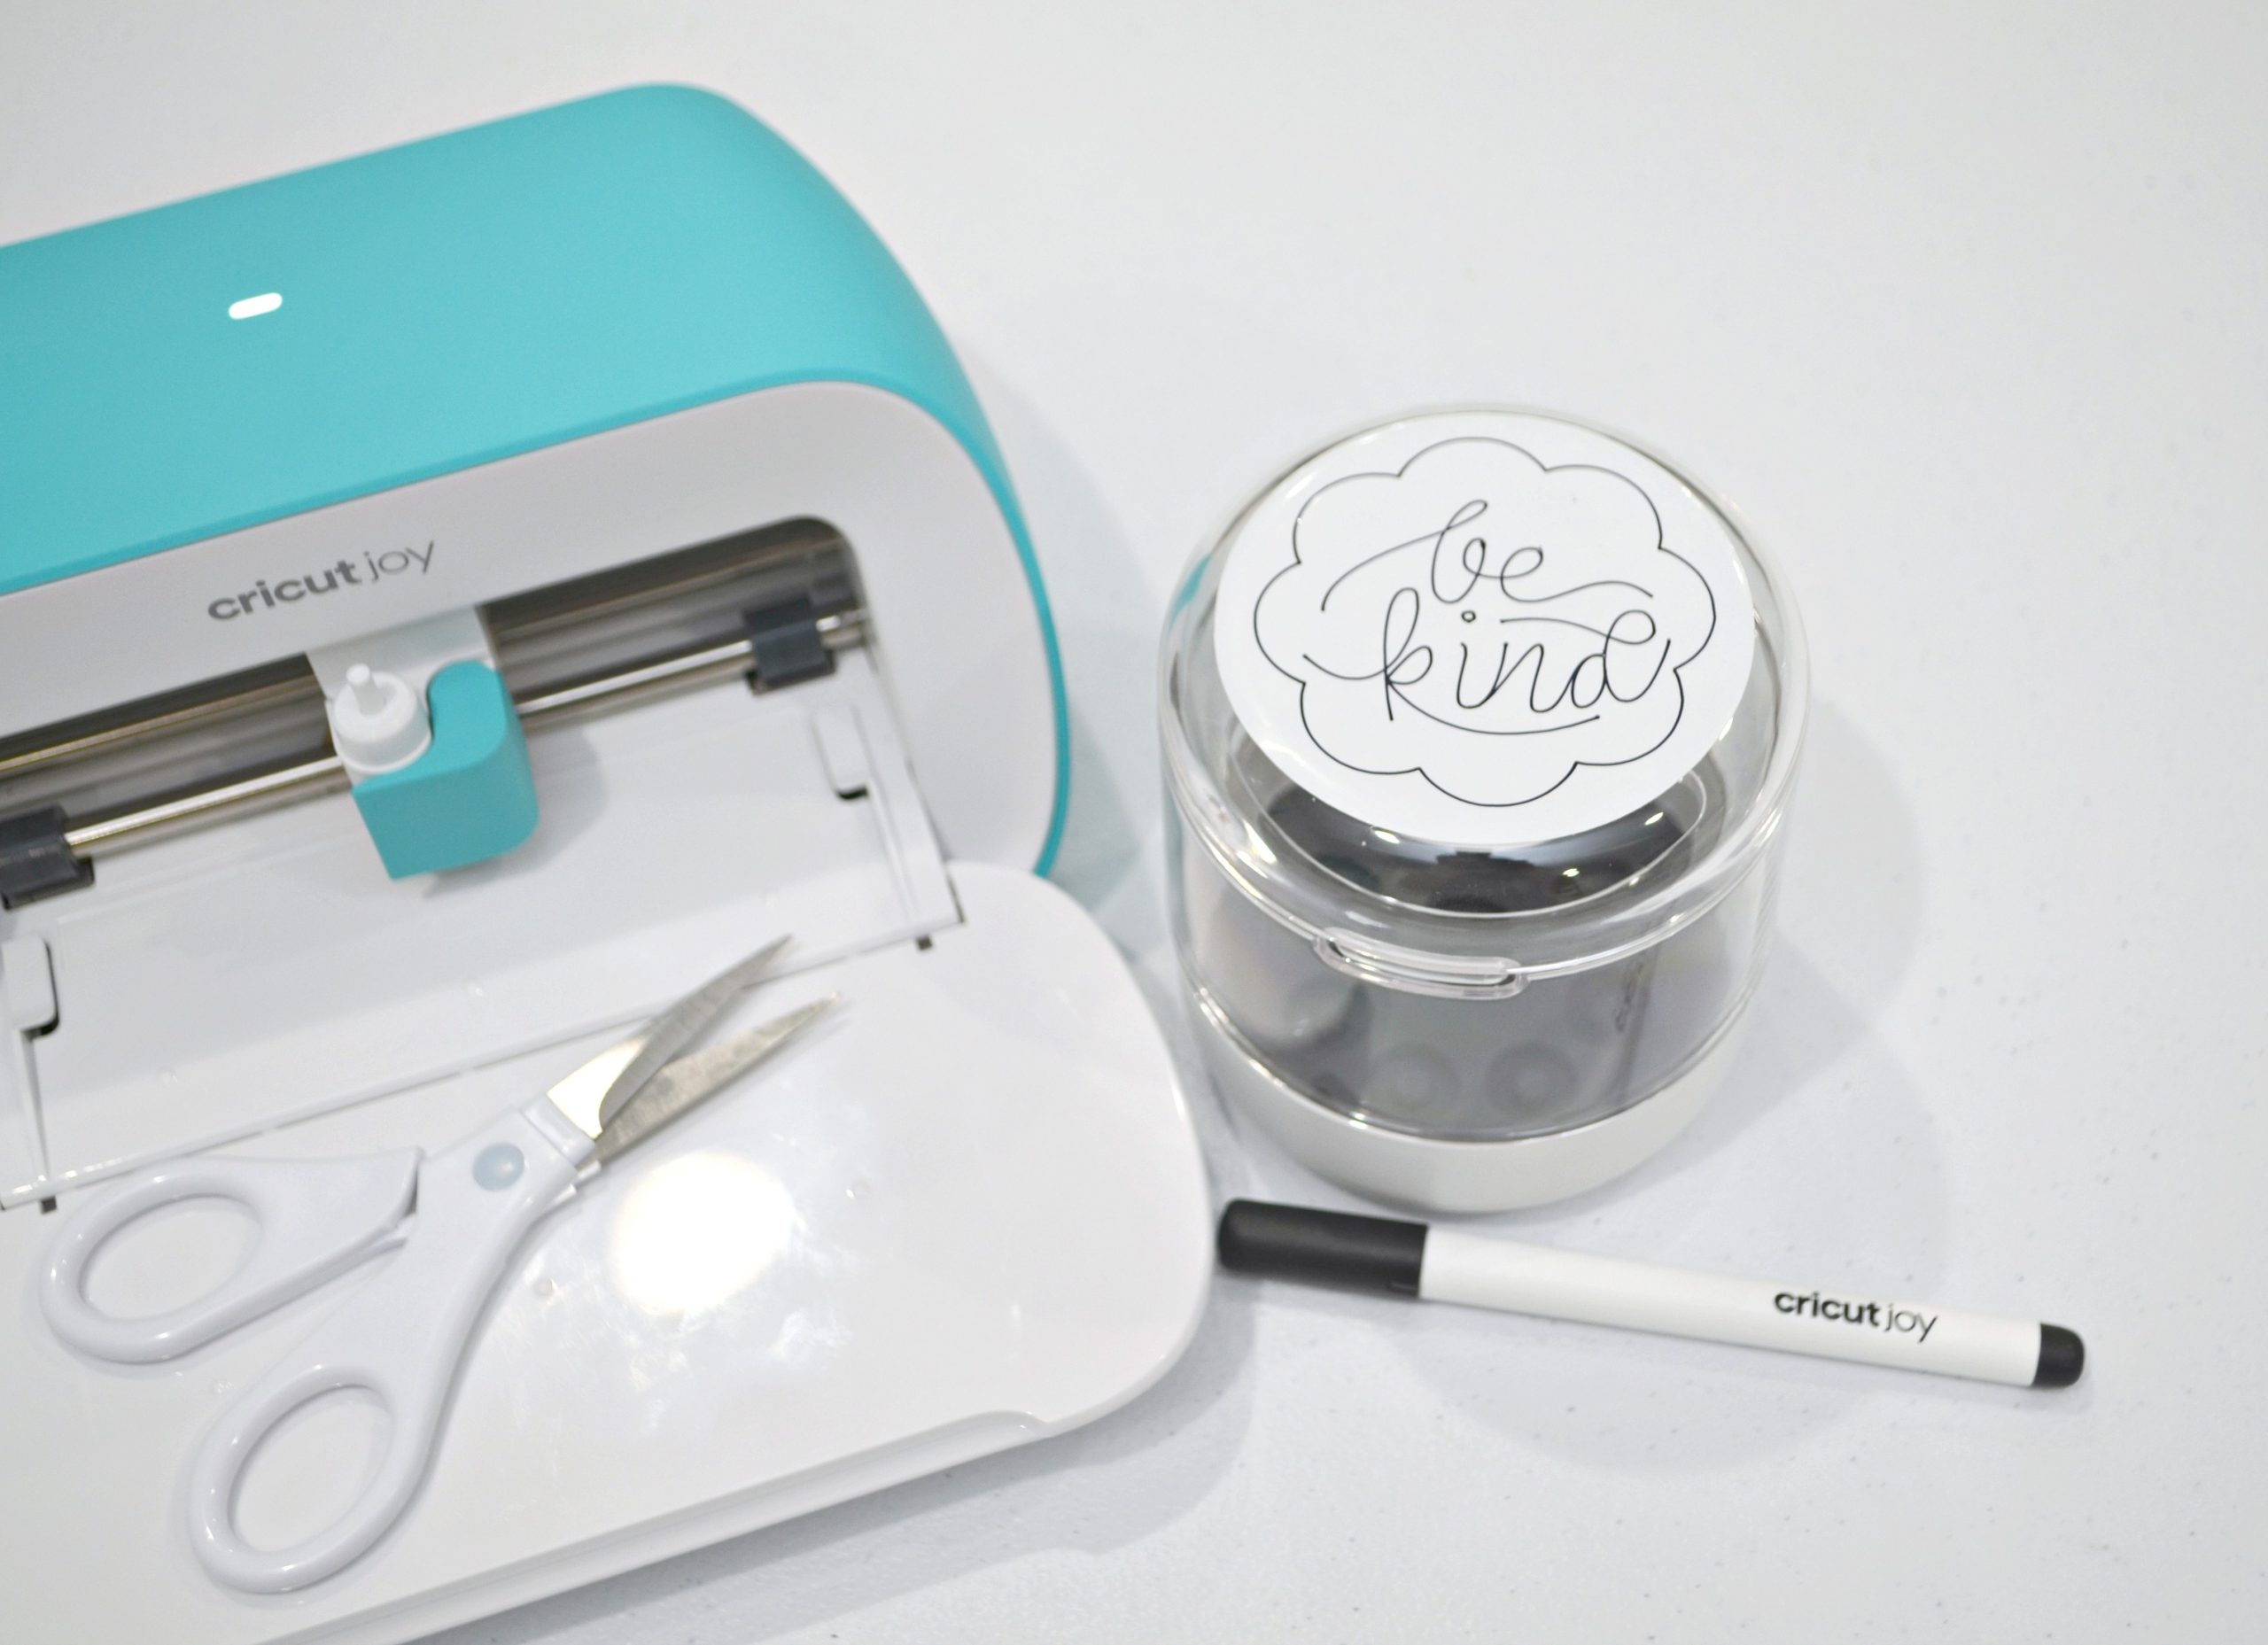
Cricut Joy™ Smart Label™ Writable Vinyl
Cricut Joy™ Fine Point Pen, 0.4 mm, any color
Step 1: Create your design in the Design Space software.
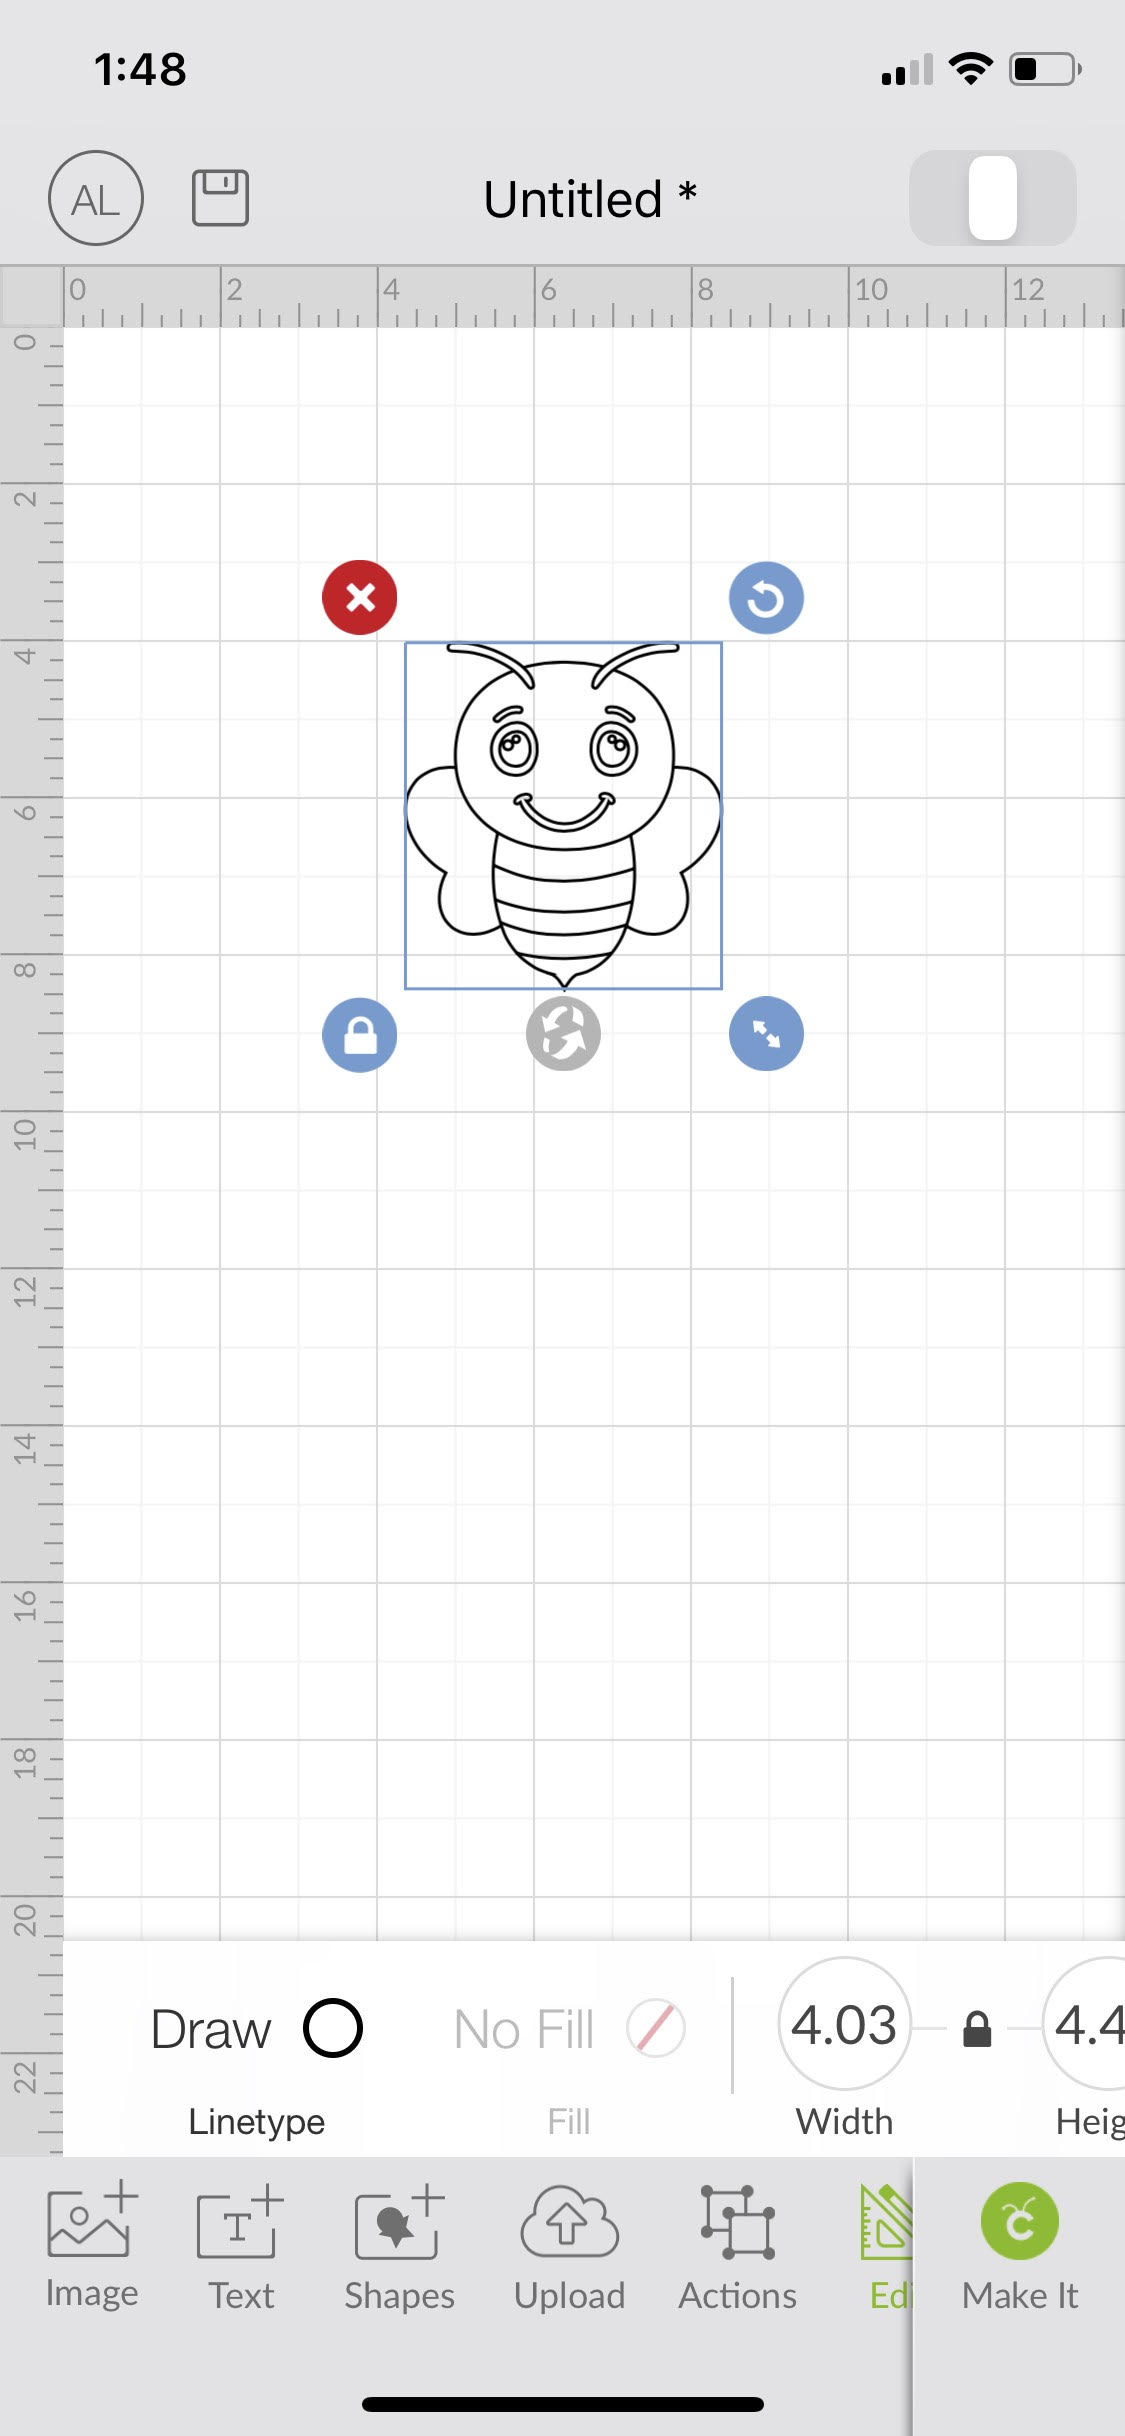
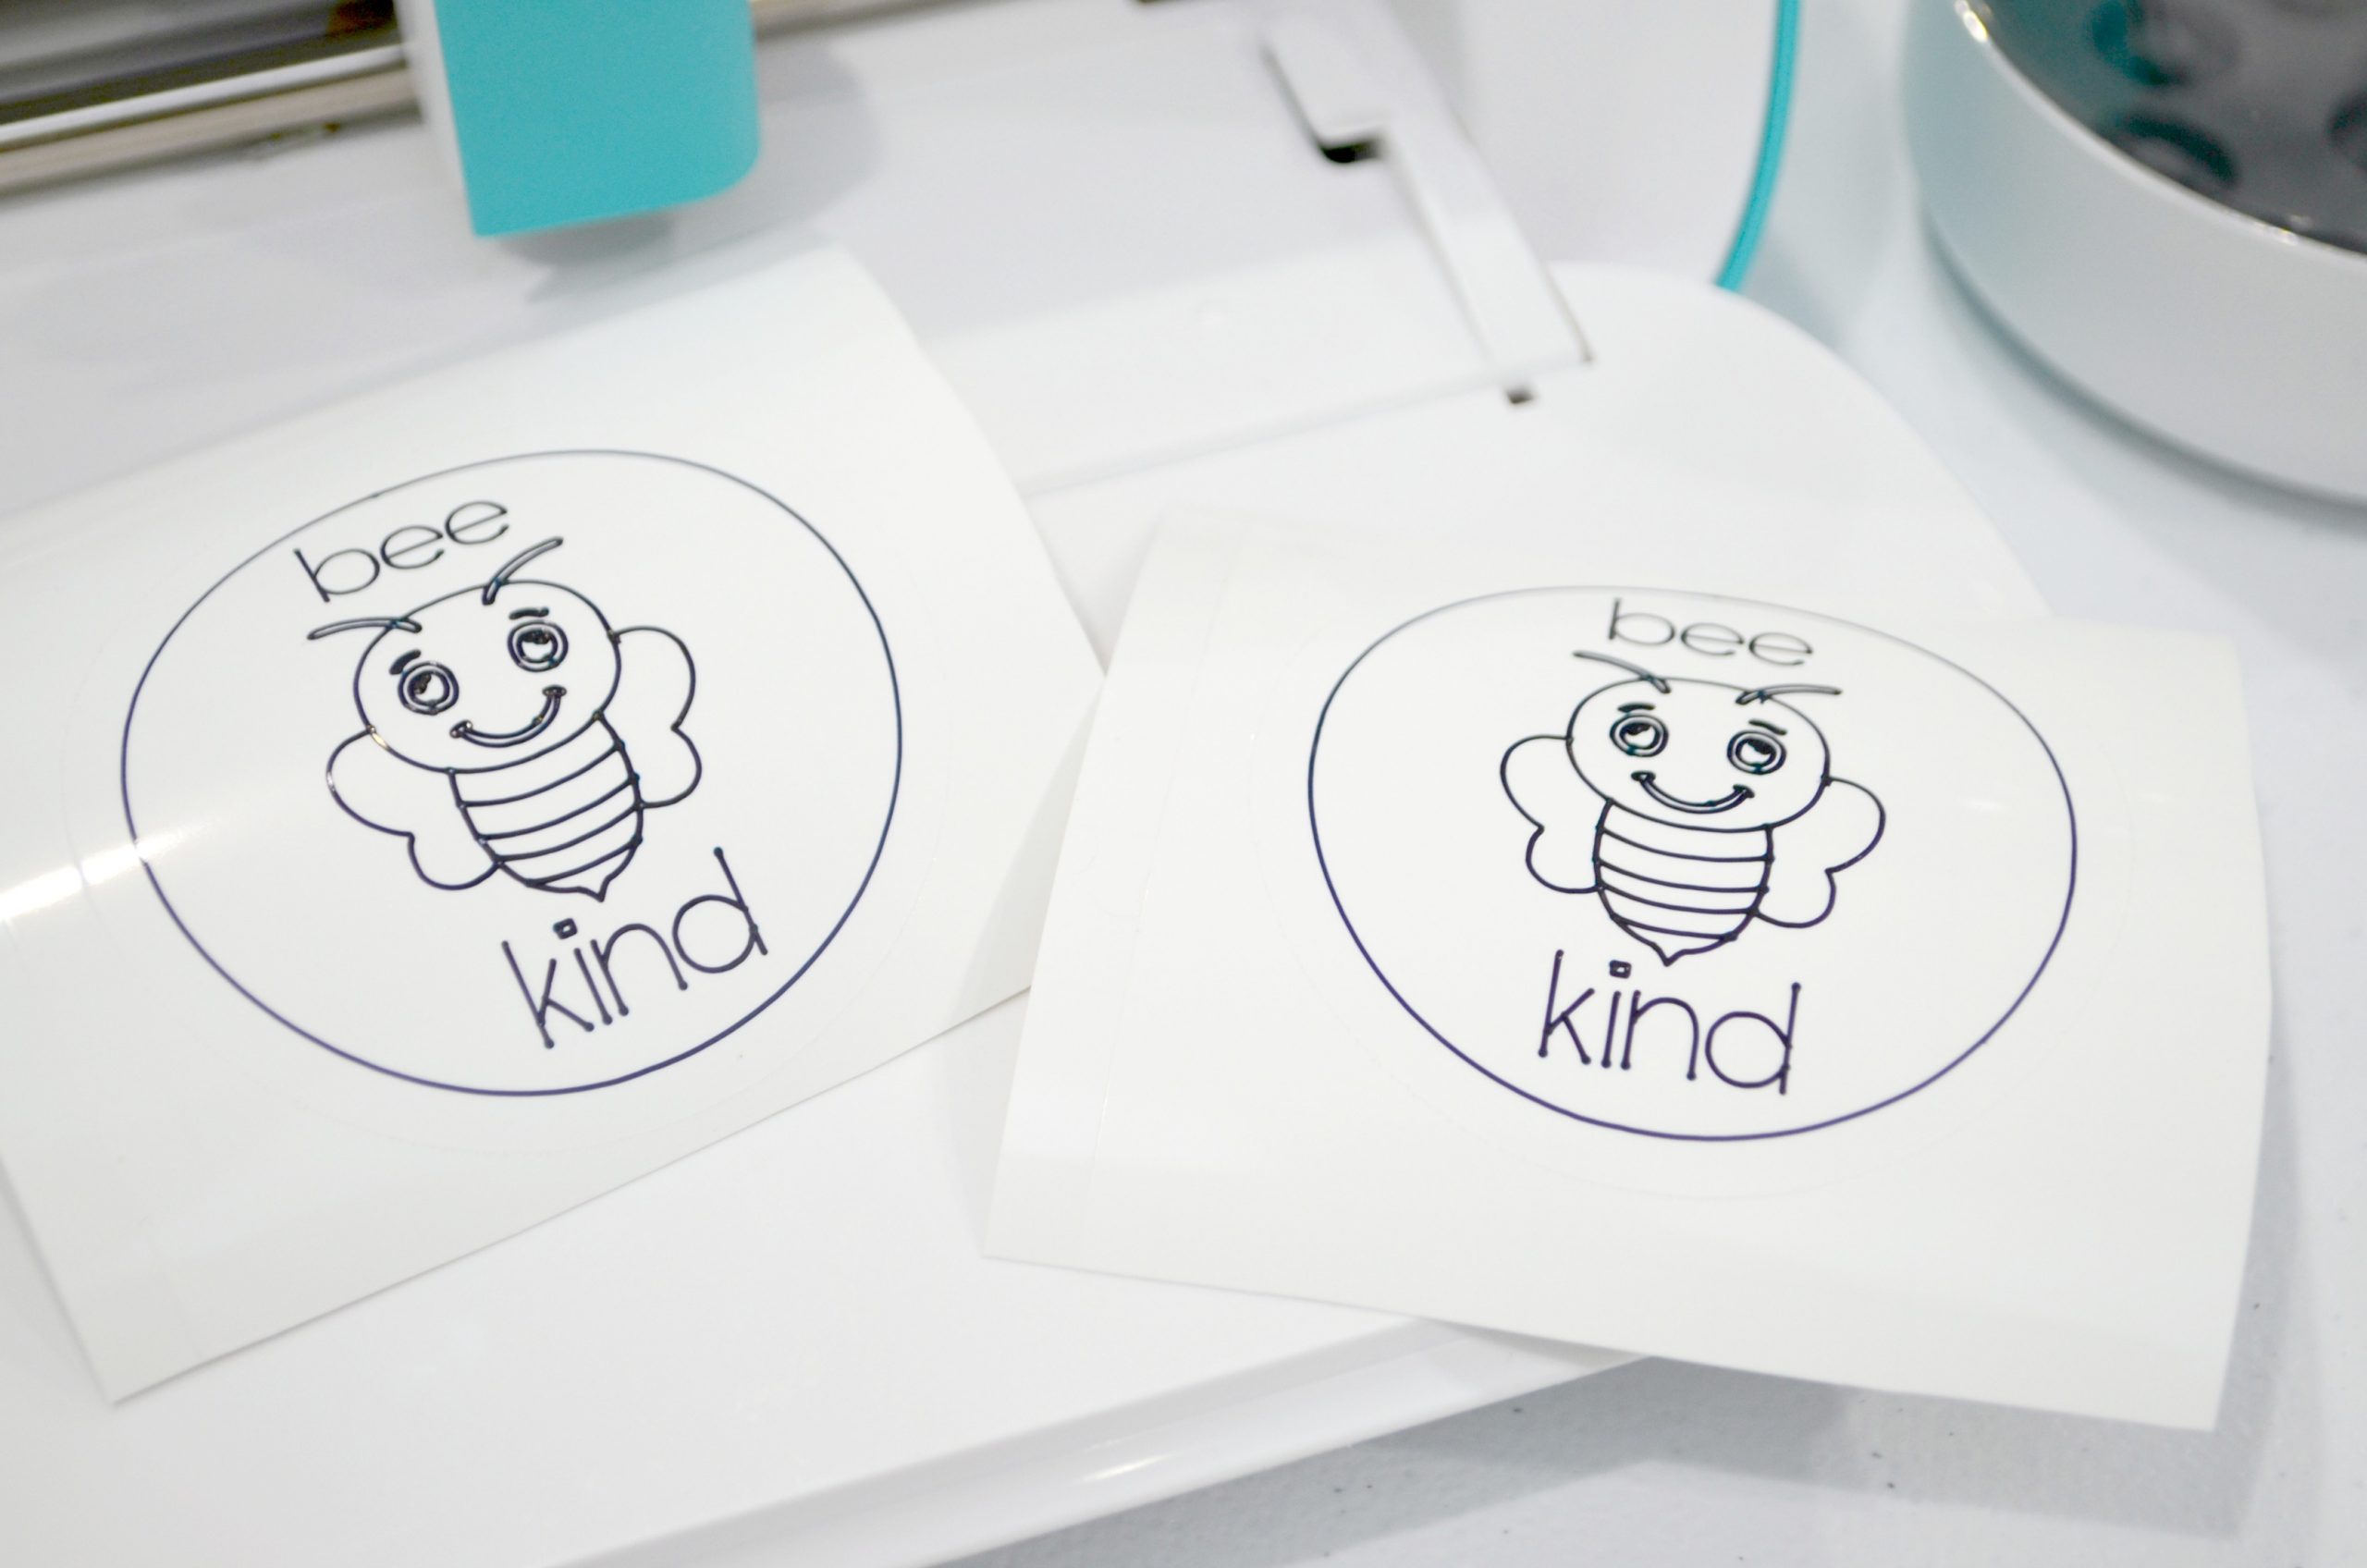
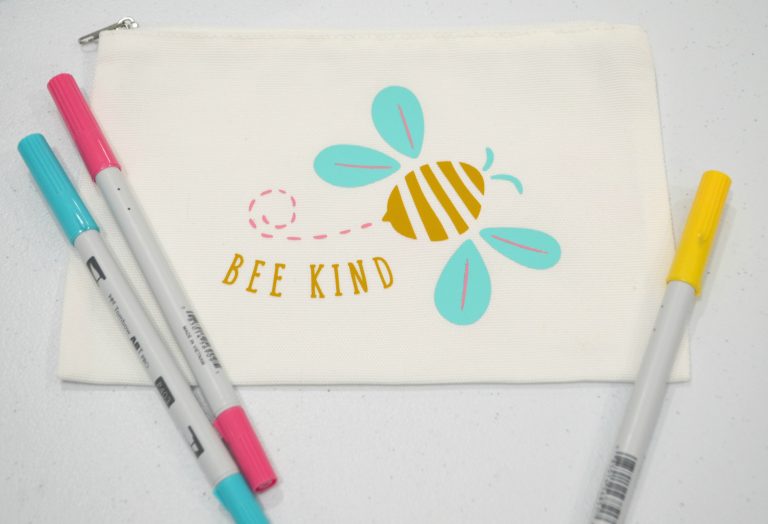
I opened a new canvas and started by inserting the image of this cute smiling bee (Happy Bee, Draw #ME00FEE4). I found it by doing a search of the design library that I filtered by “draw only” images.
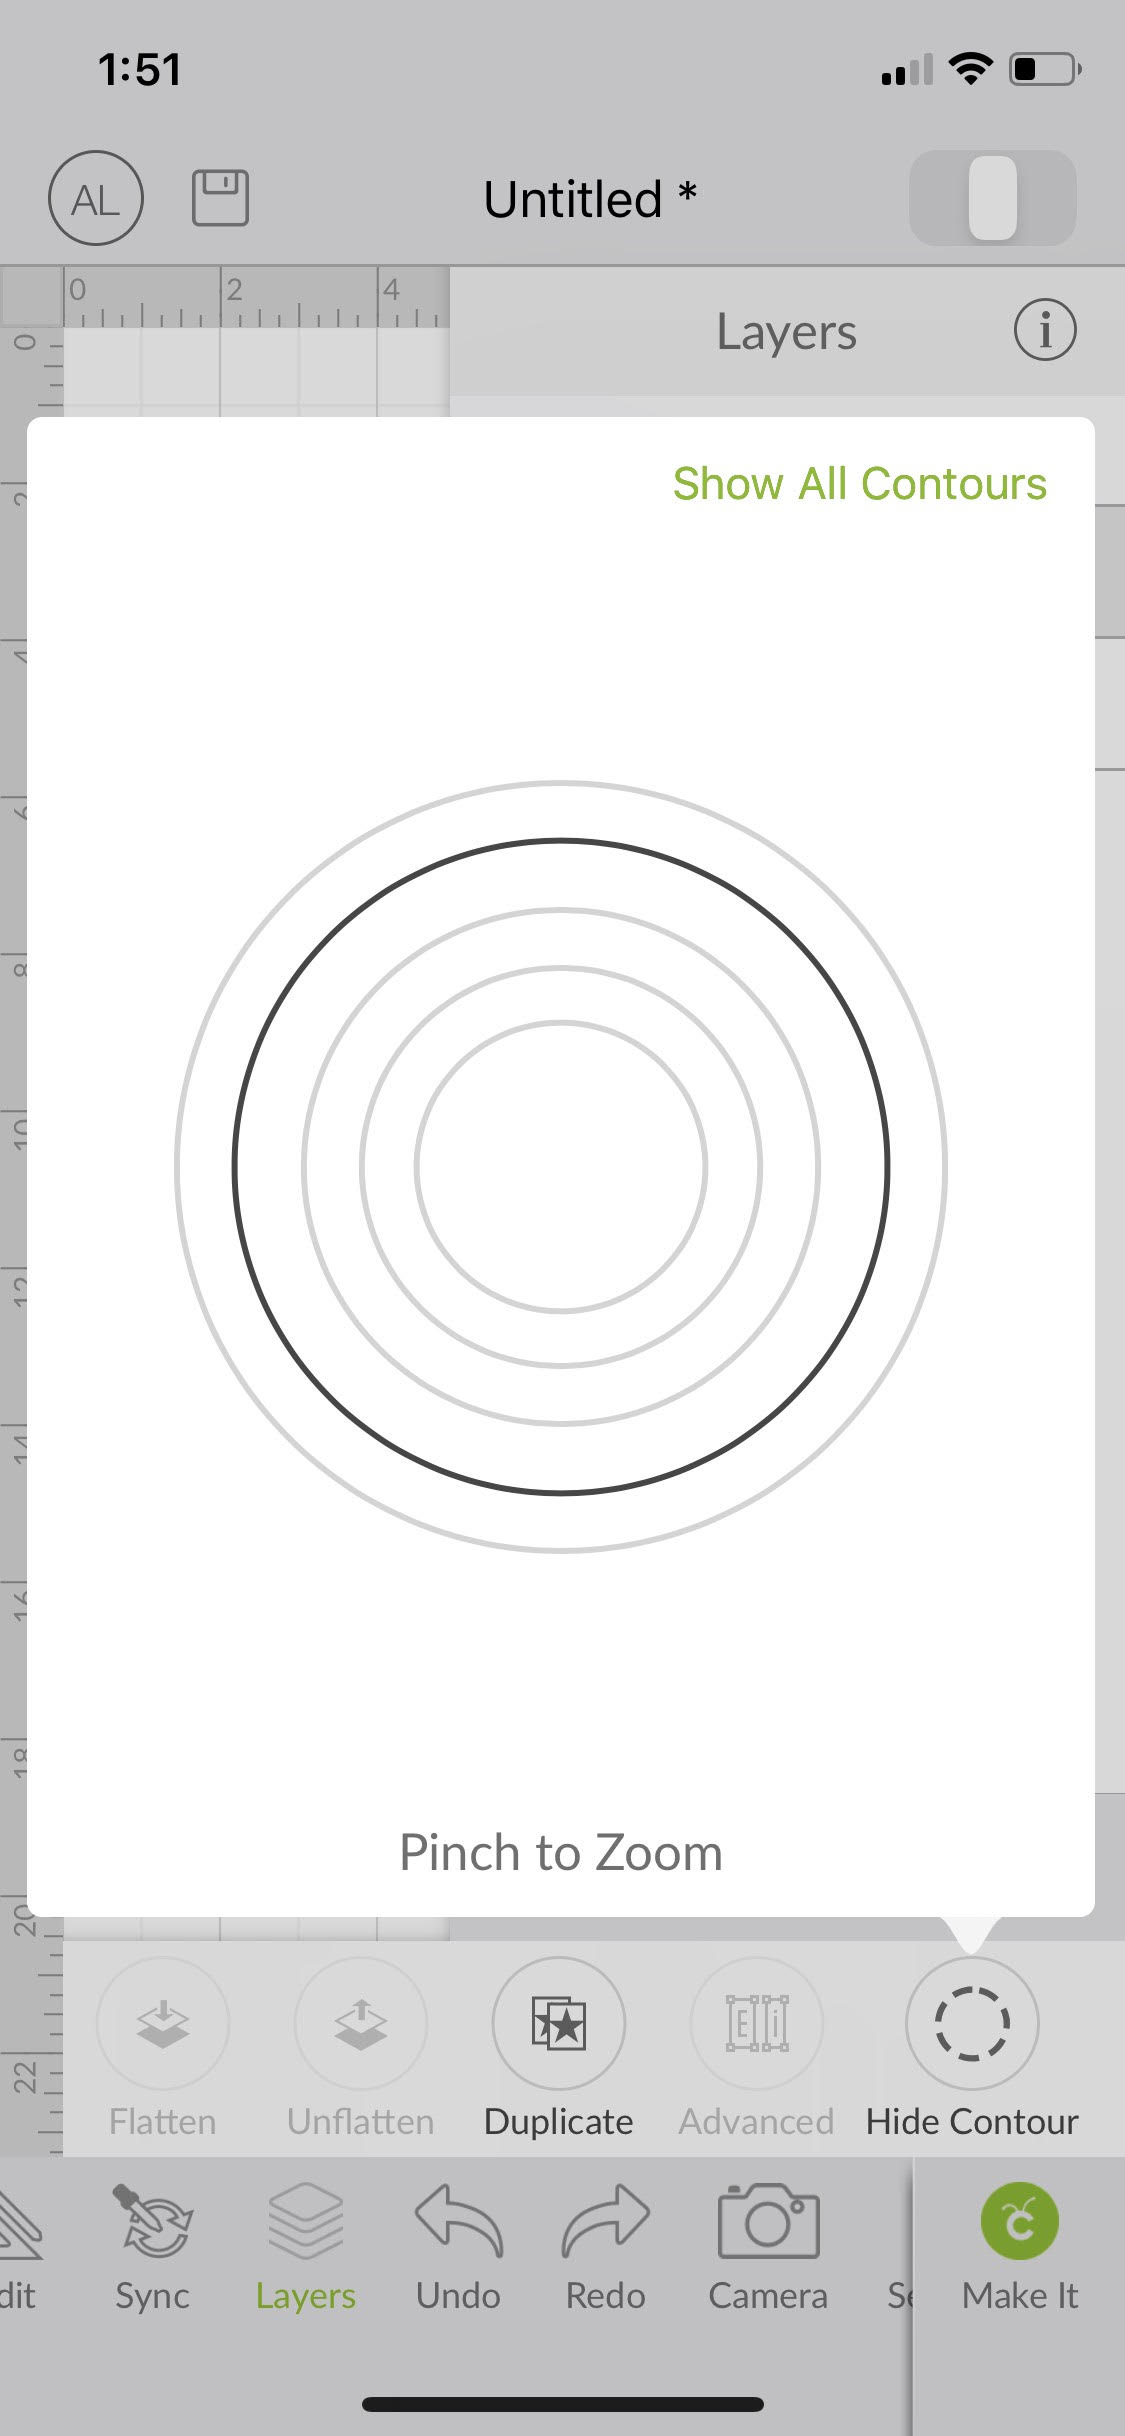
Next, I inserted an image called Circle Doodle, Draw #MC4C9E23 onto the same canvas. This image has multiple layers of draw circles, as well as a cut circle. I left the cut circle as is, but only wanted one of the draw layers to show. To make that happen, I went to “Actions,” then chose “Hide Contour.” I hid all of the layers I didn’t want to use, leaving just the one that I wanted to draw around the bee.
Next, I added text, using the “Elementary” font and typing the words “bee” and “kind.” I used the alignment guides to help me center them in the circle above and below the bee.
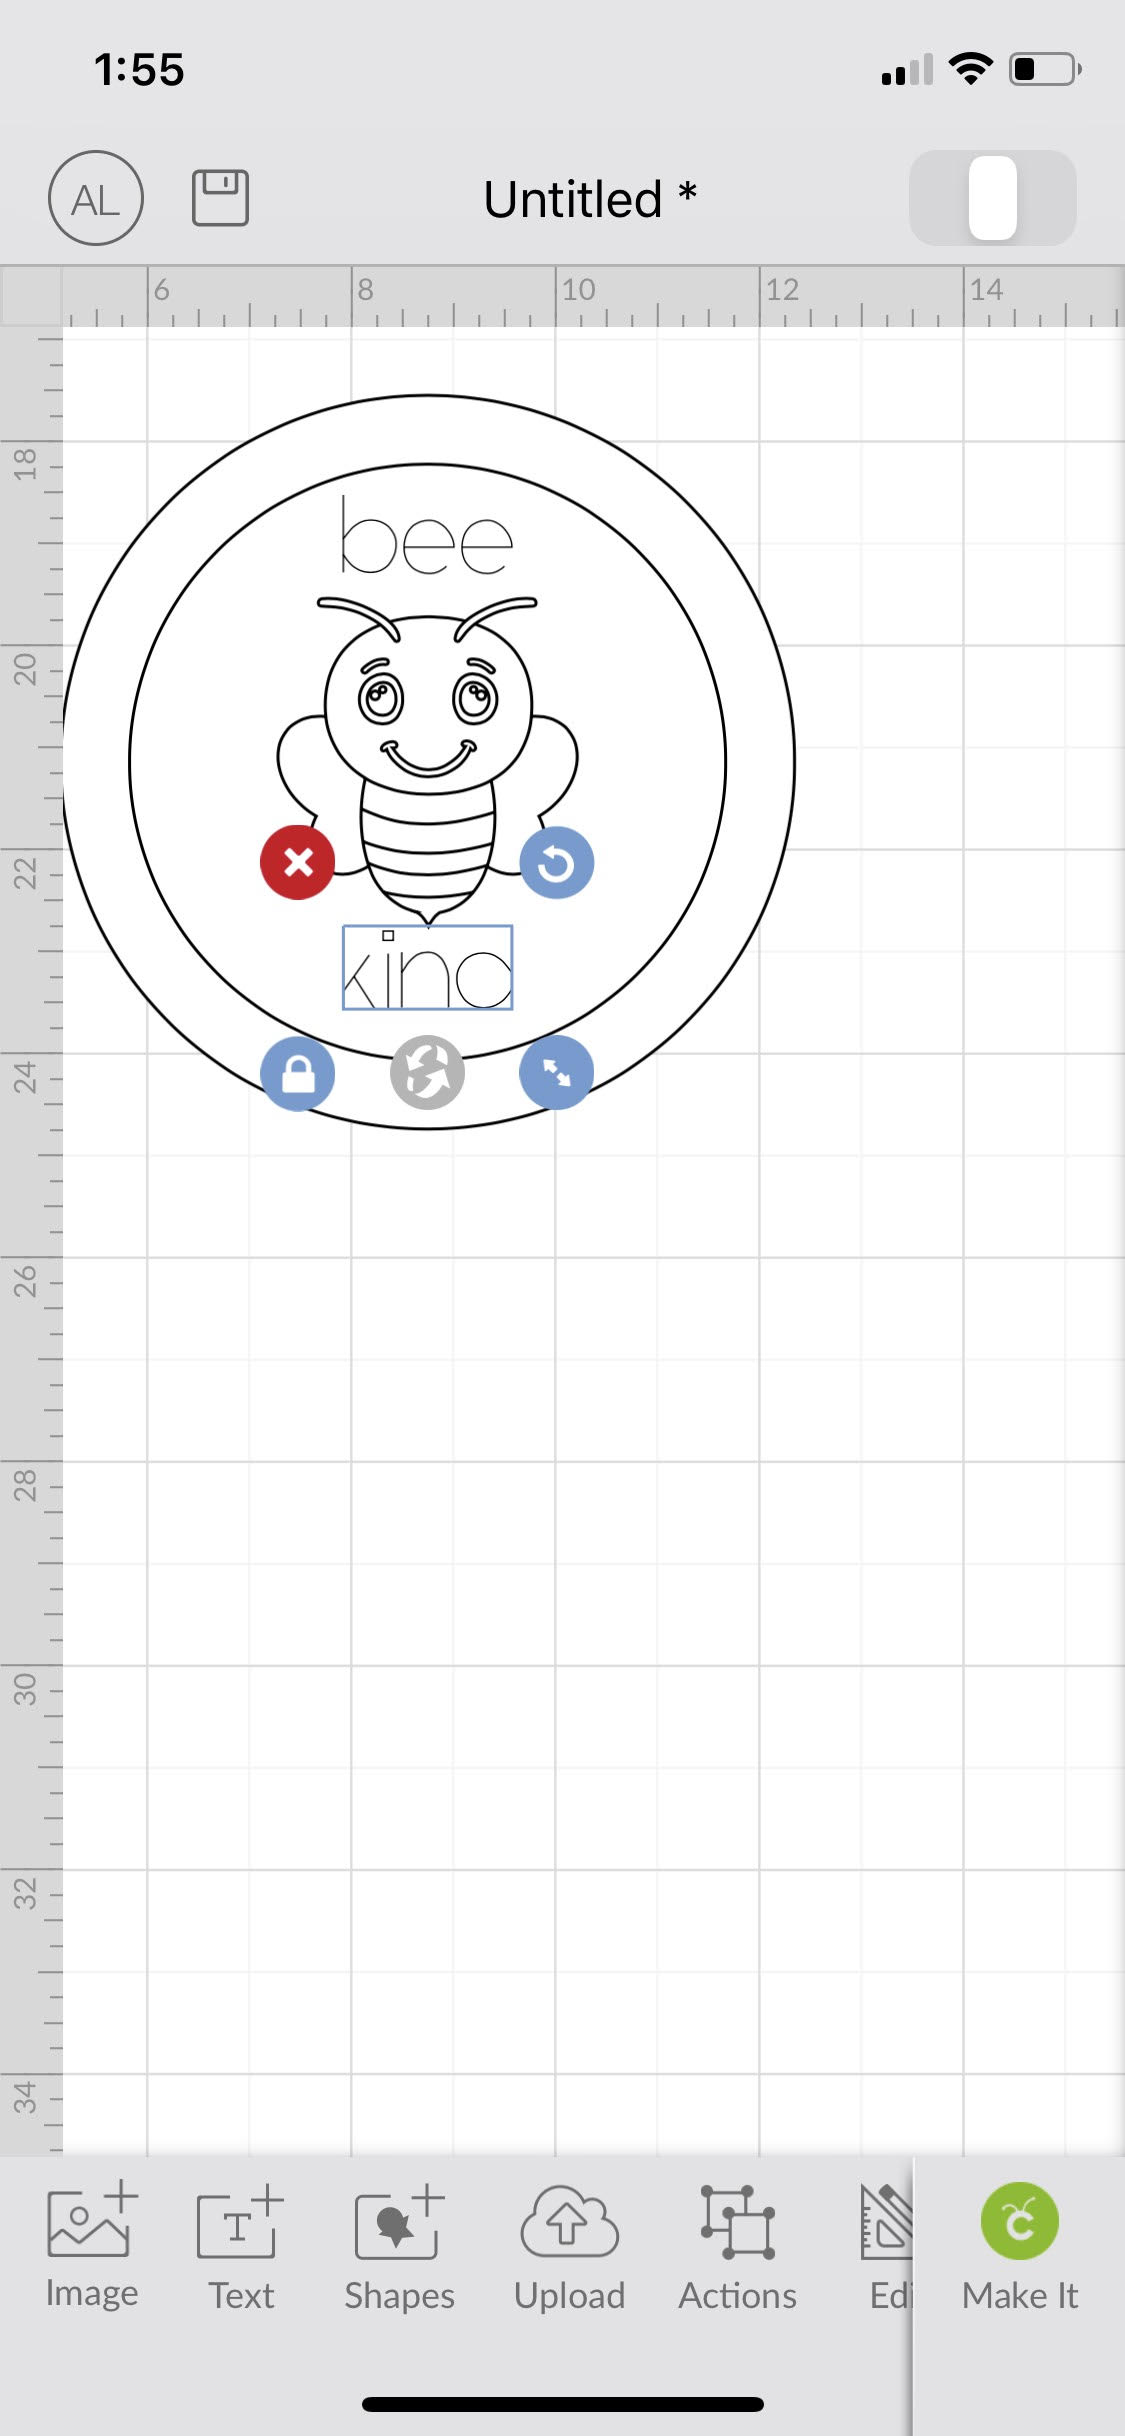
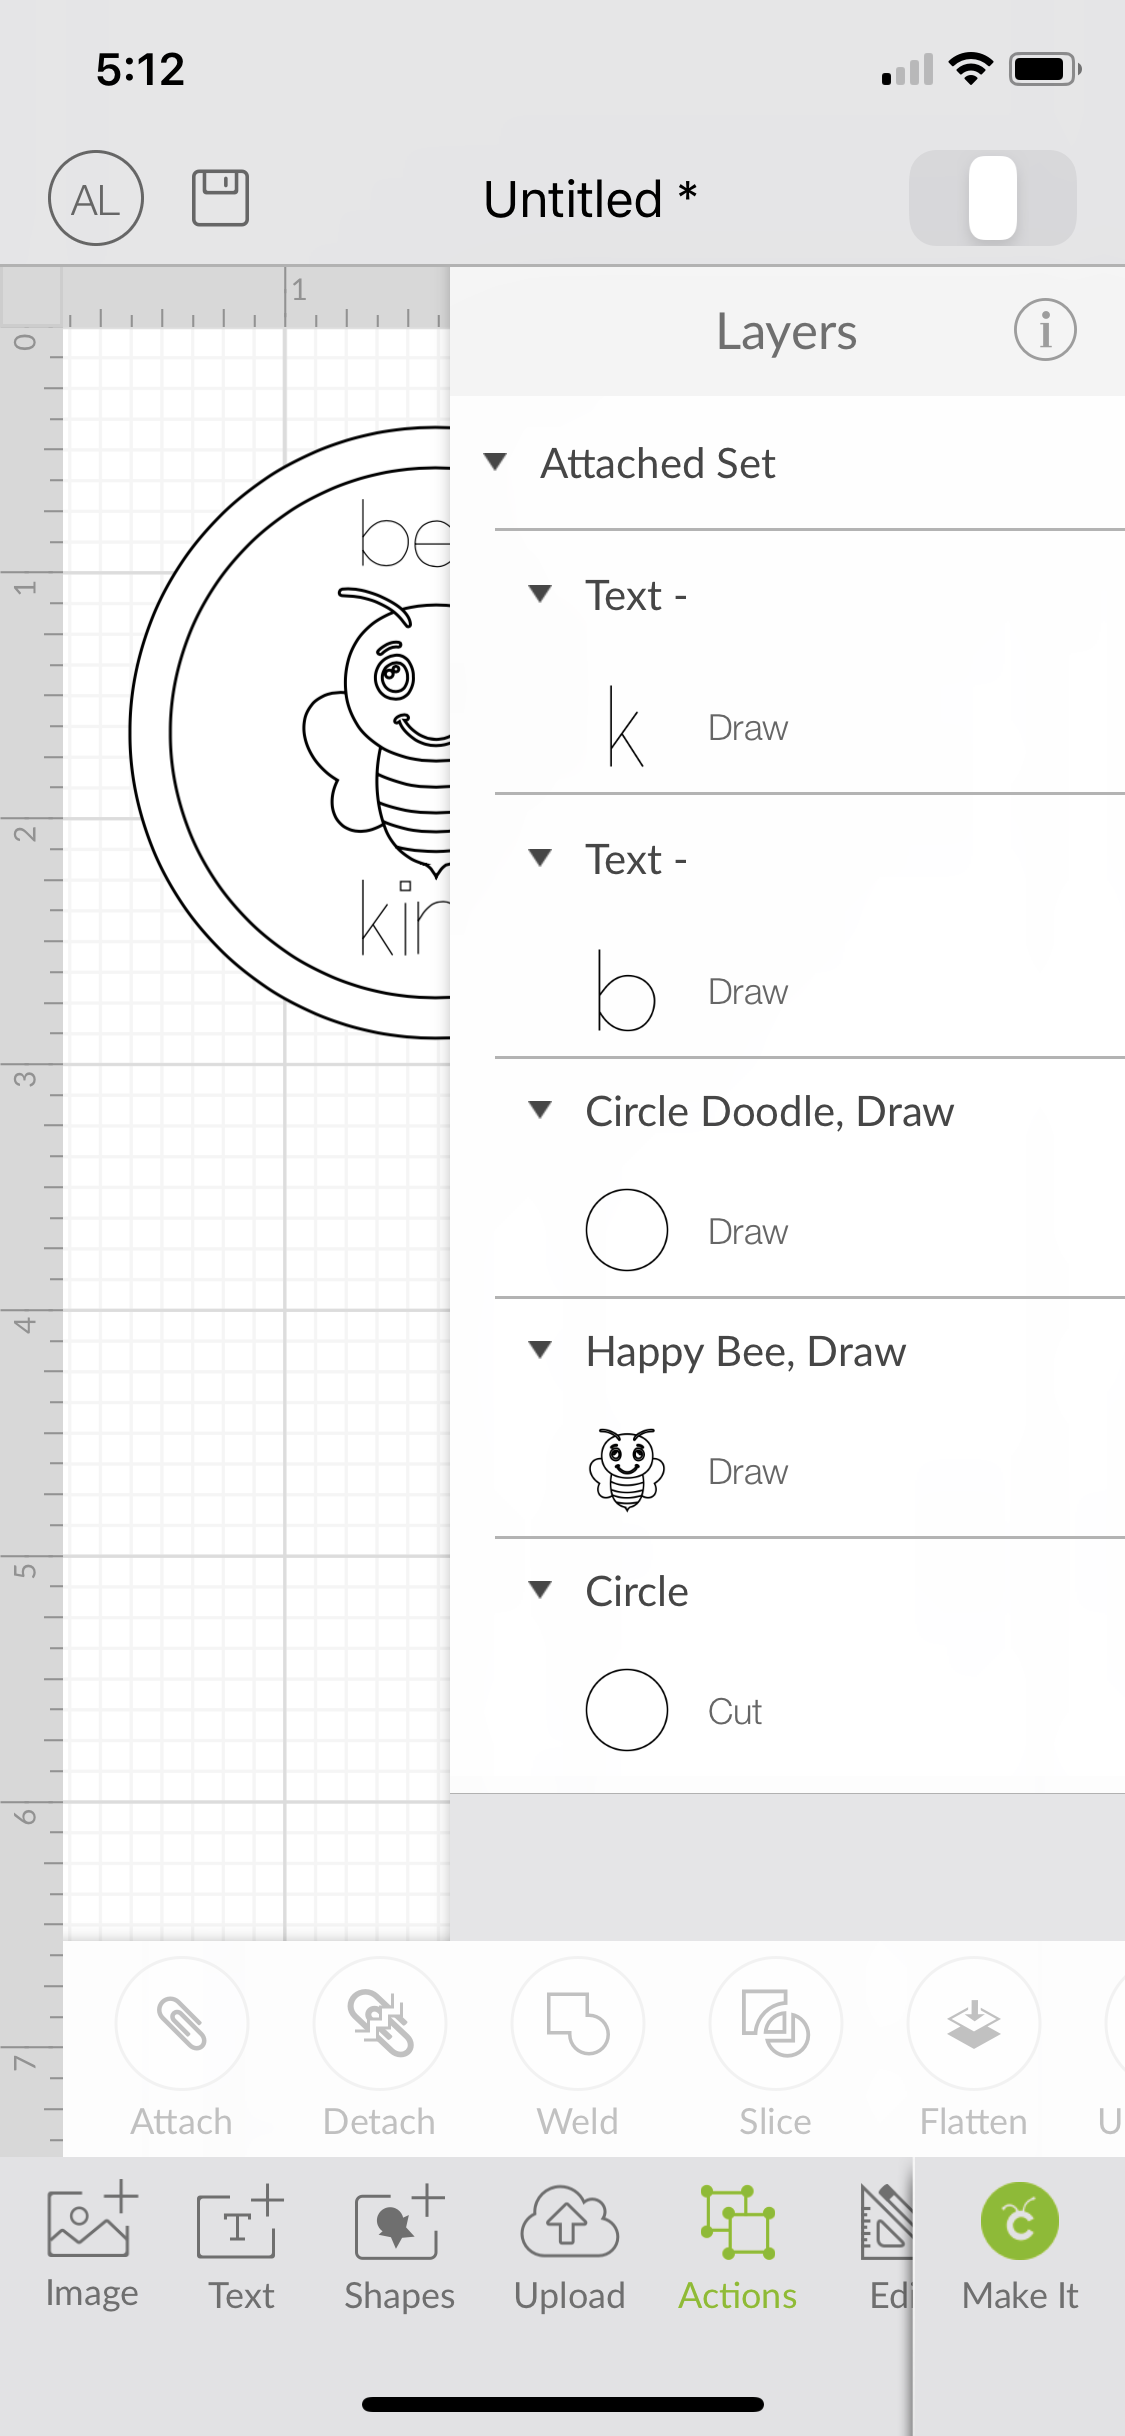
The final step before sending the design to the machine was to attach all of the layers together. To do this, I went to “Layers,” and selected all five at the same time. Then, I went to “Actions” and chose the “attach” function. When done correctly, it should look like the image below, saying “Attached Set” at the top, then listing all of the layers below. Now you can move and resize the entire image as a whole.
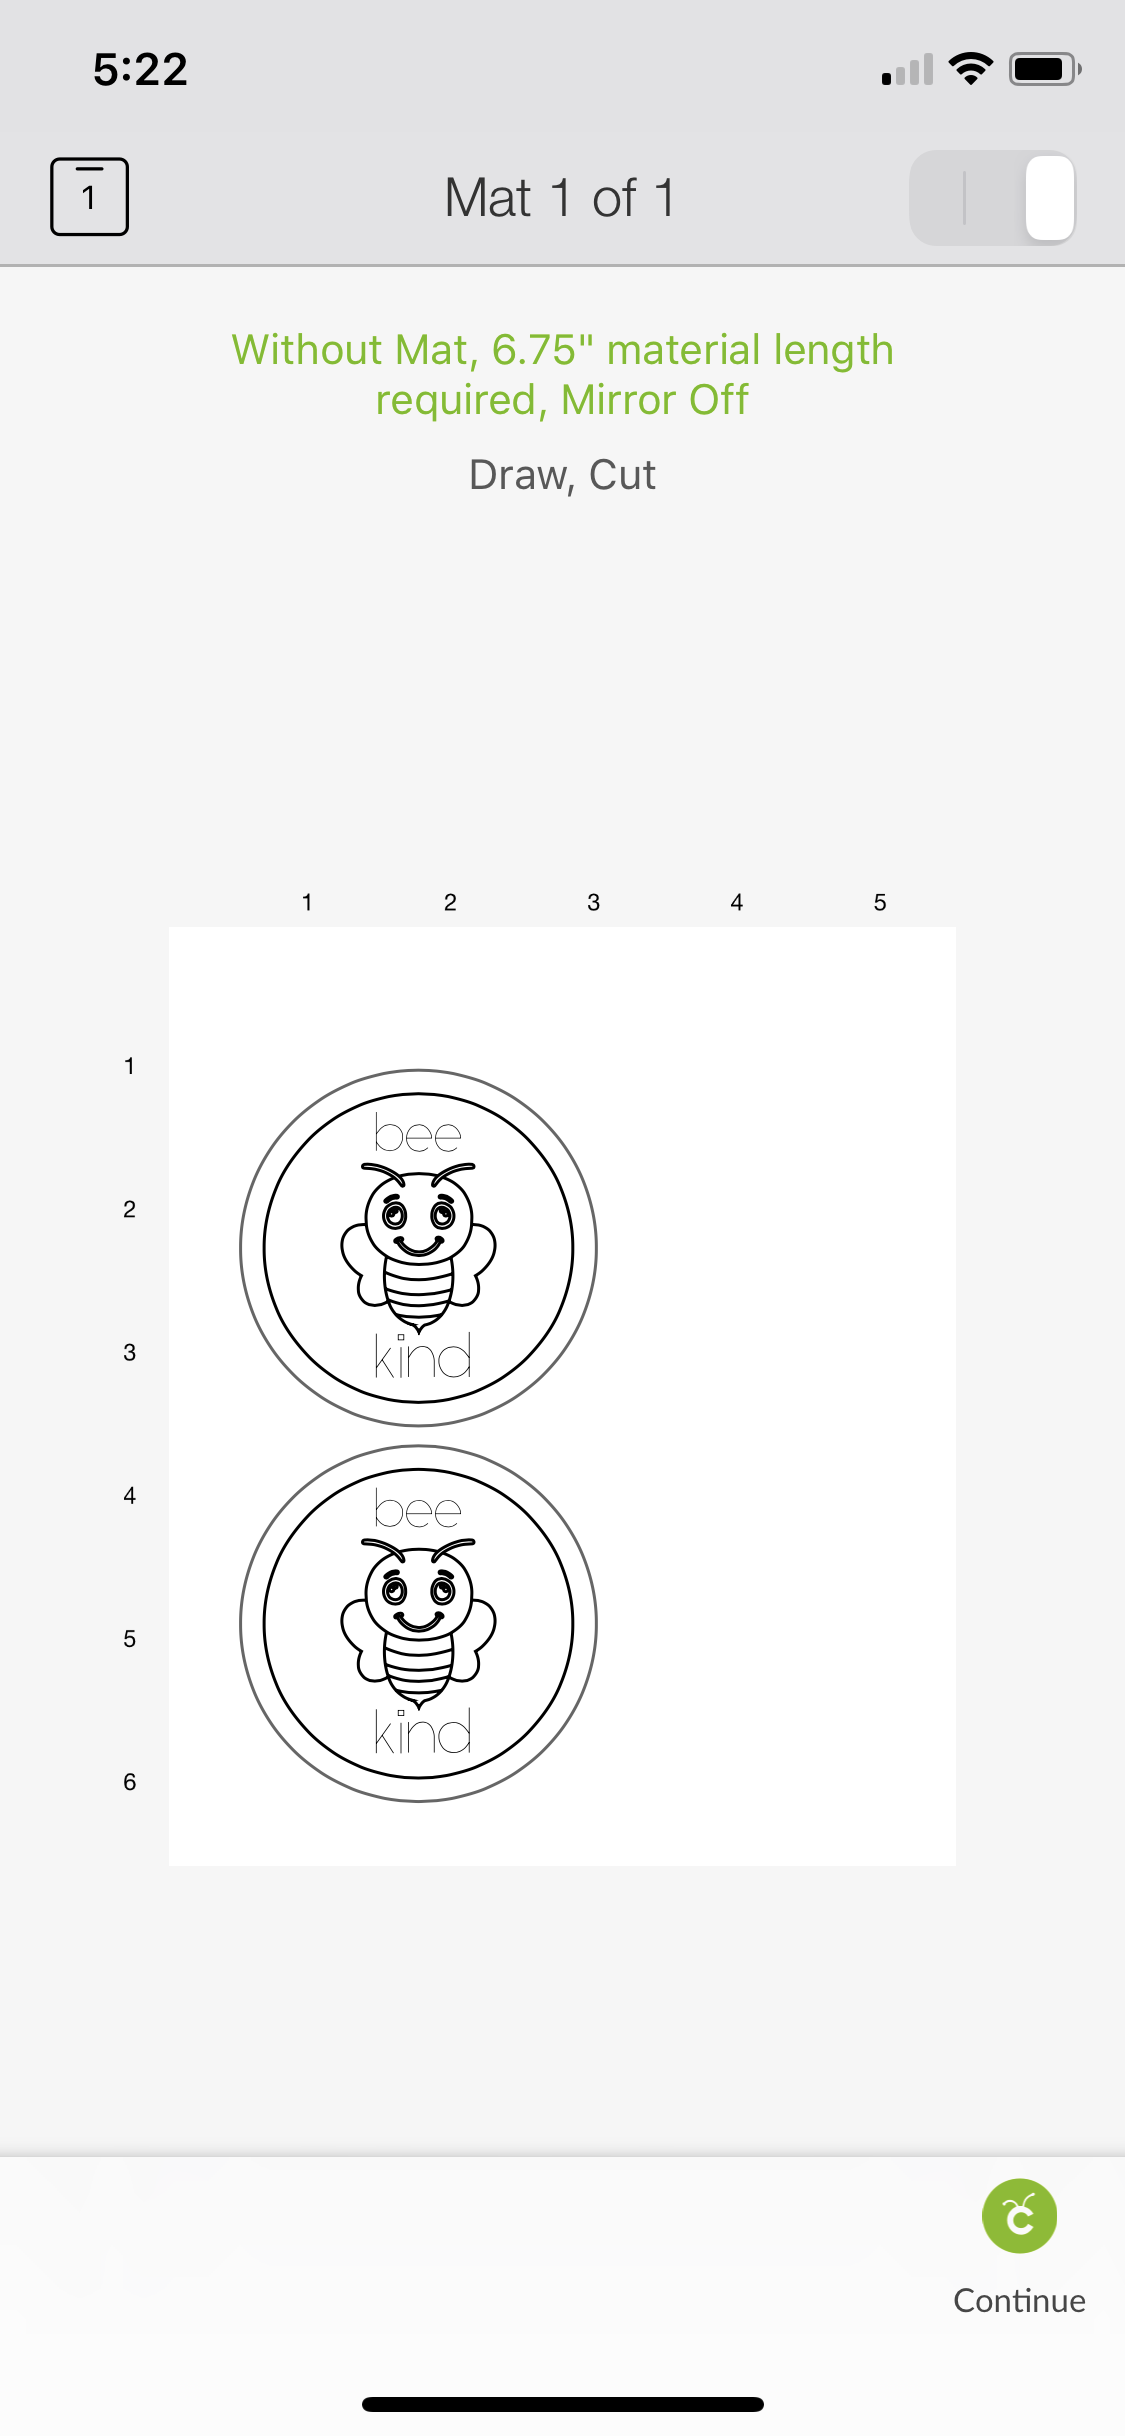
Step 2: Send the design to the Cricut Joy.
After attaching my layers, I adjusted the size of the label and duplicated it, then I chose “Make It” in the bottom right corner of the Design Space app.
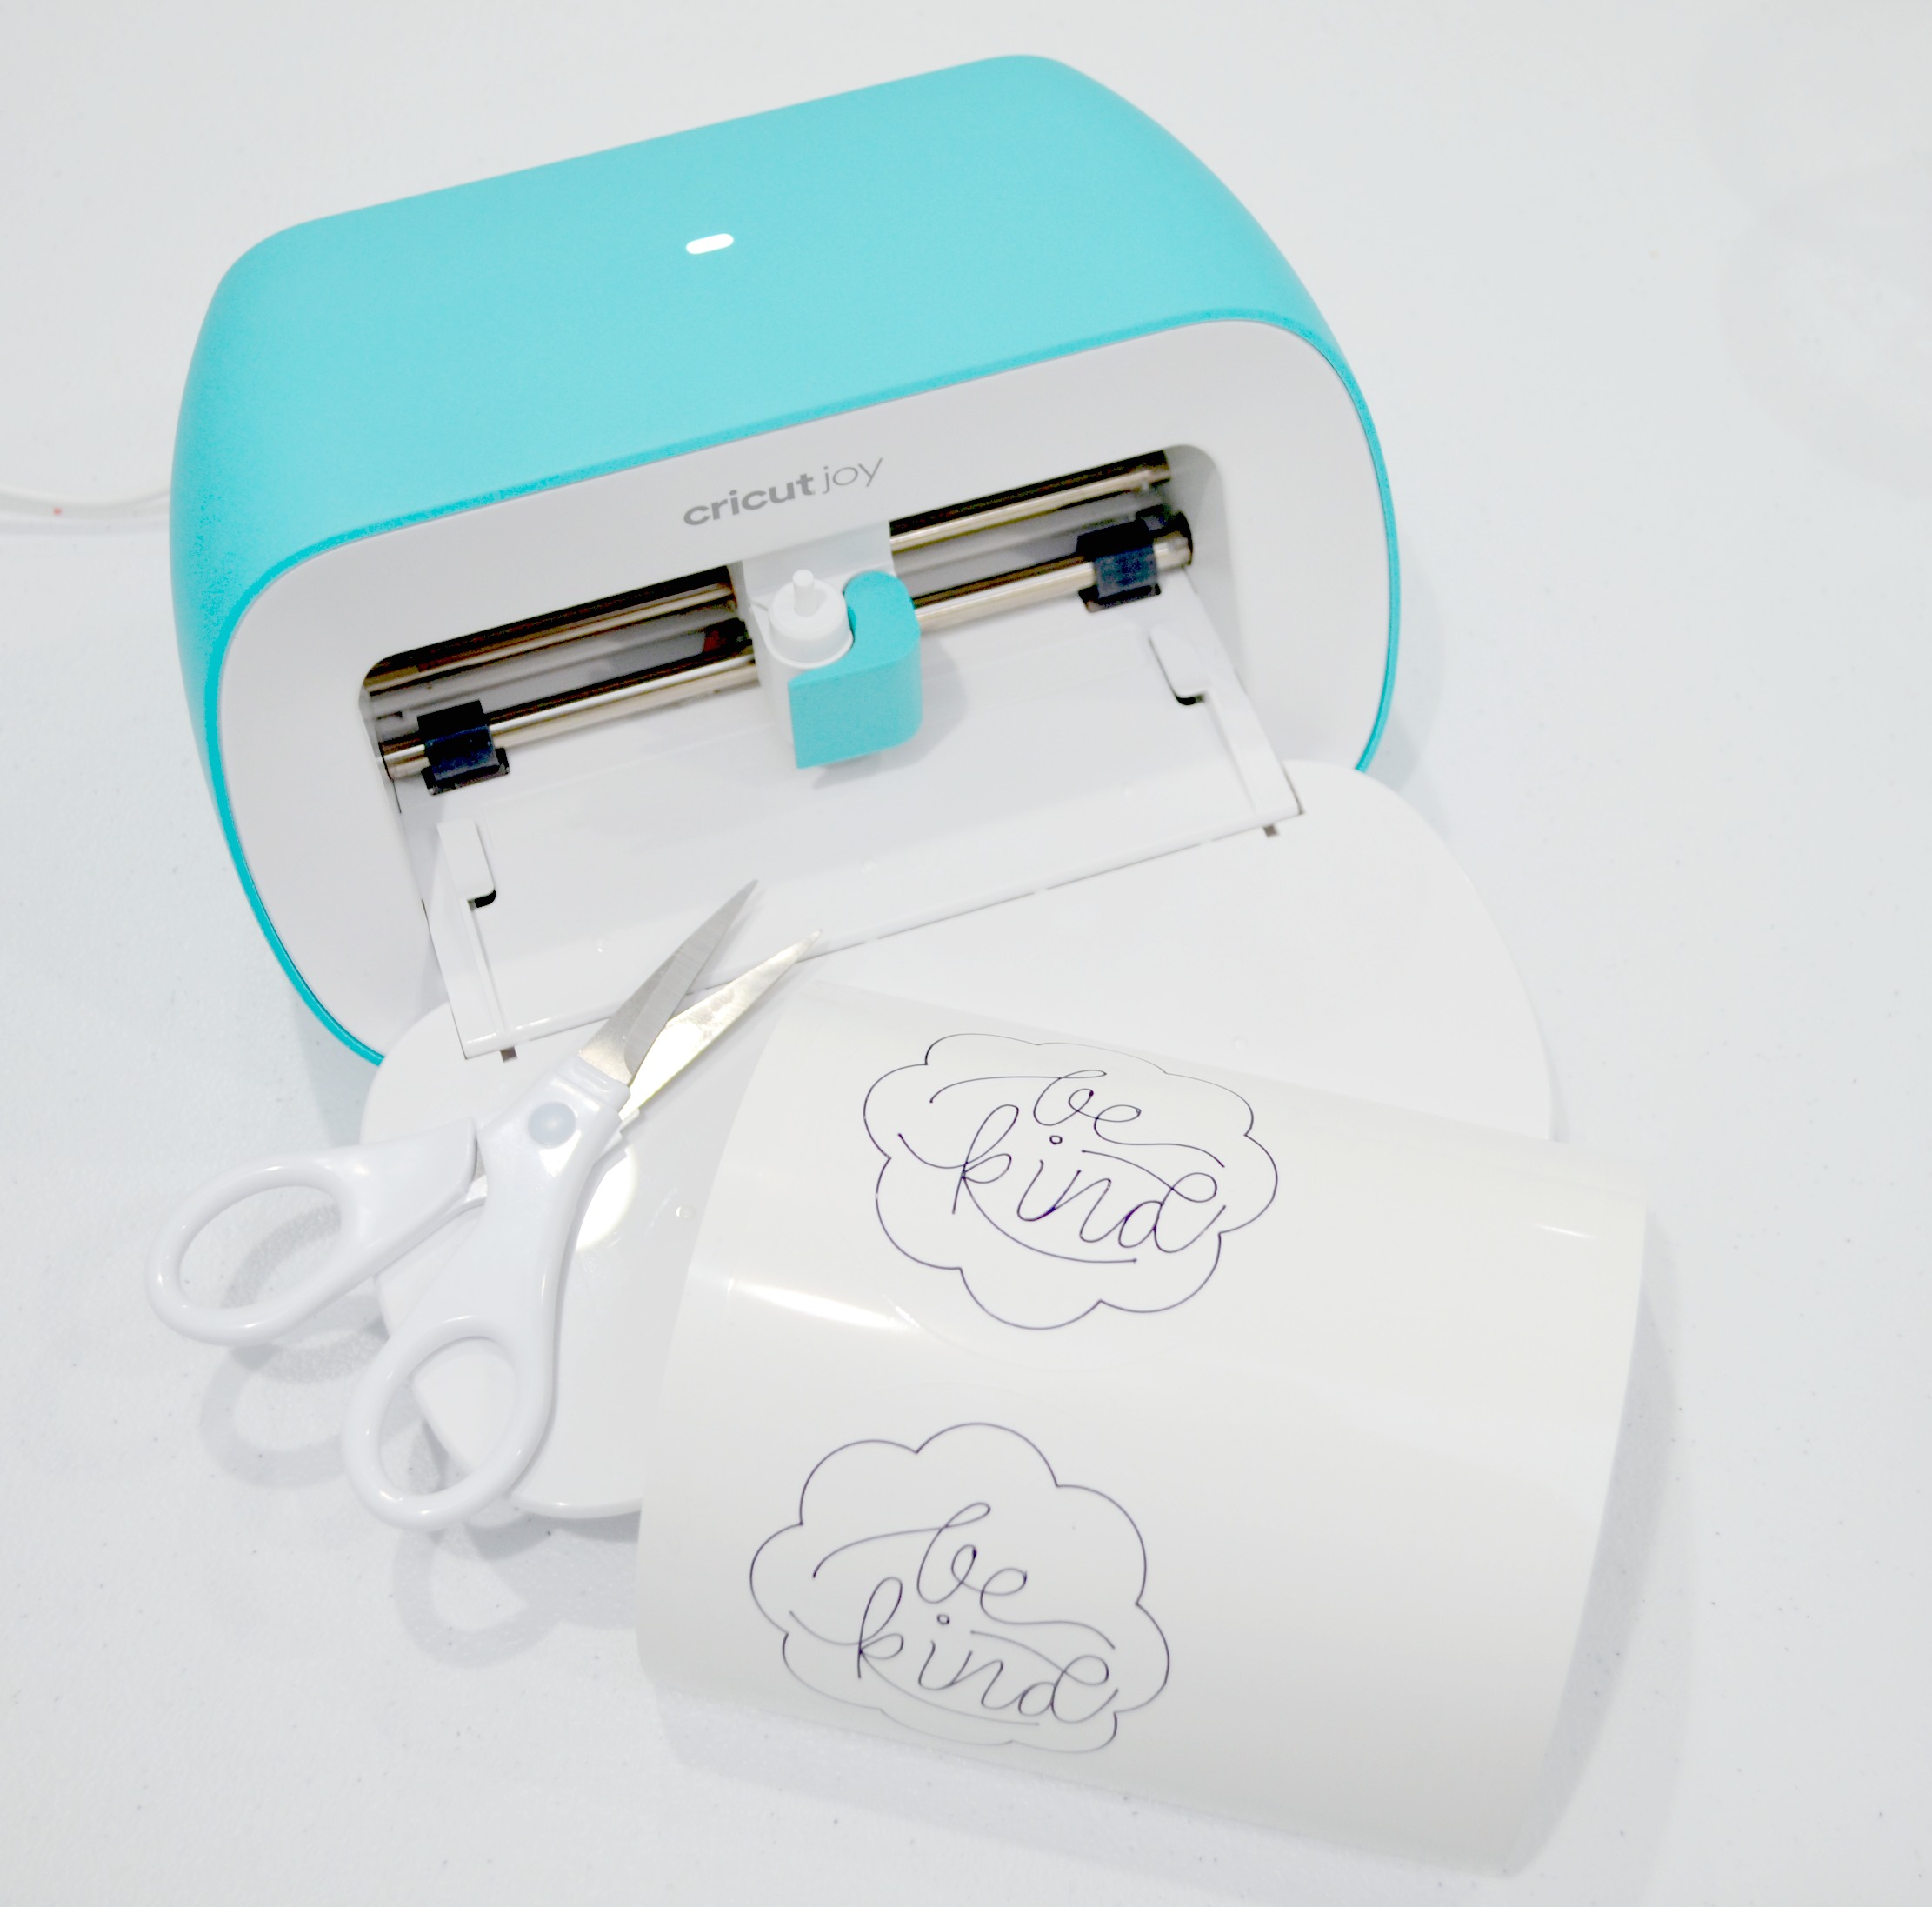
Step 3: Load the pen.
The software will prompt you to load the writable vinyl, as well as to replace the blade with your pen. Make sure to remove the cap!
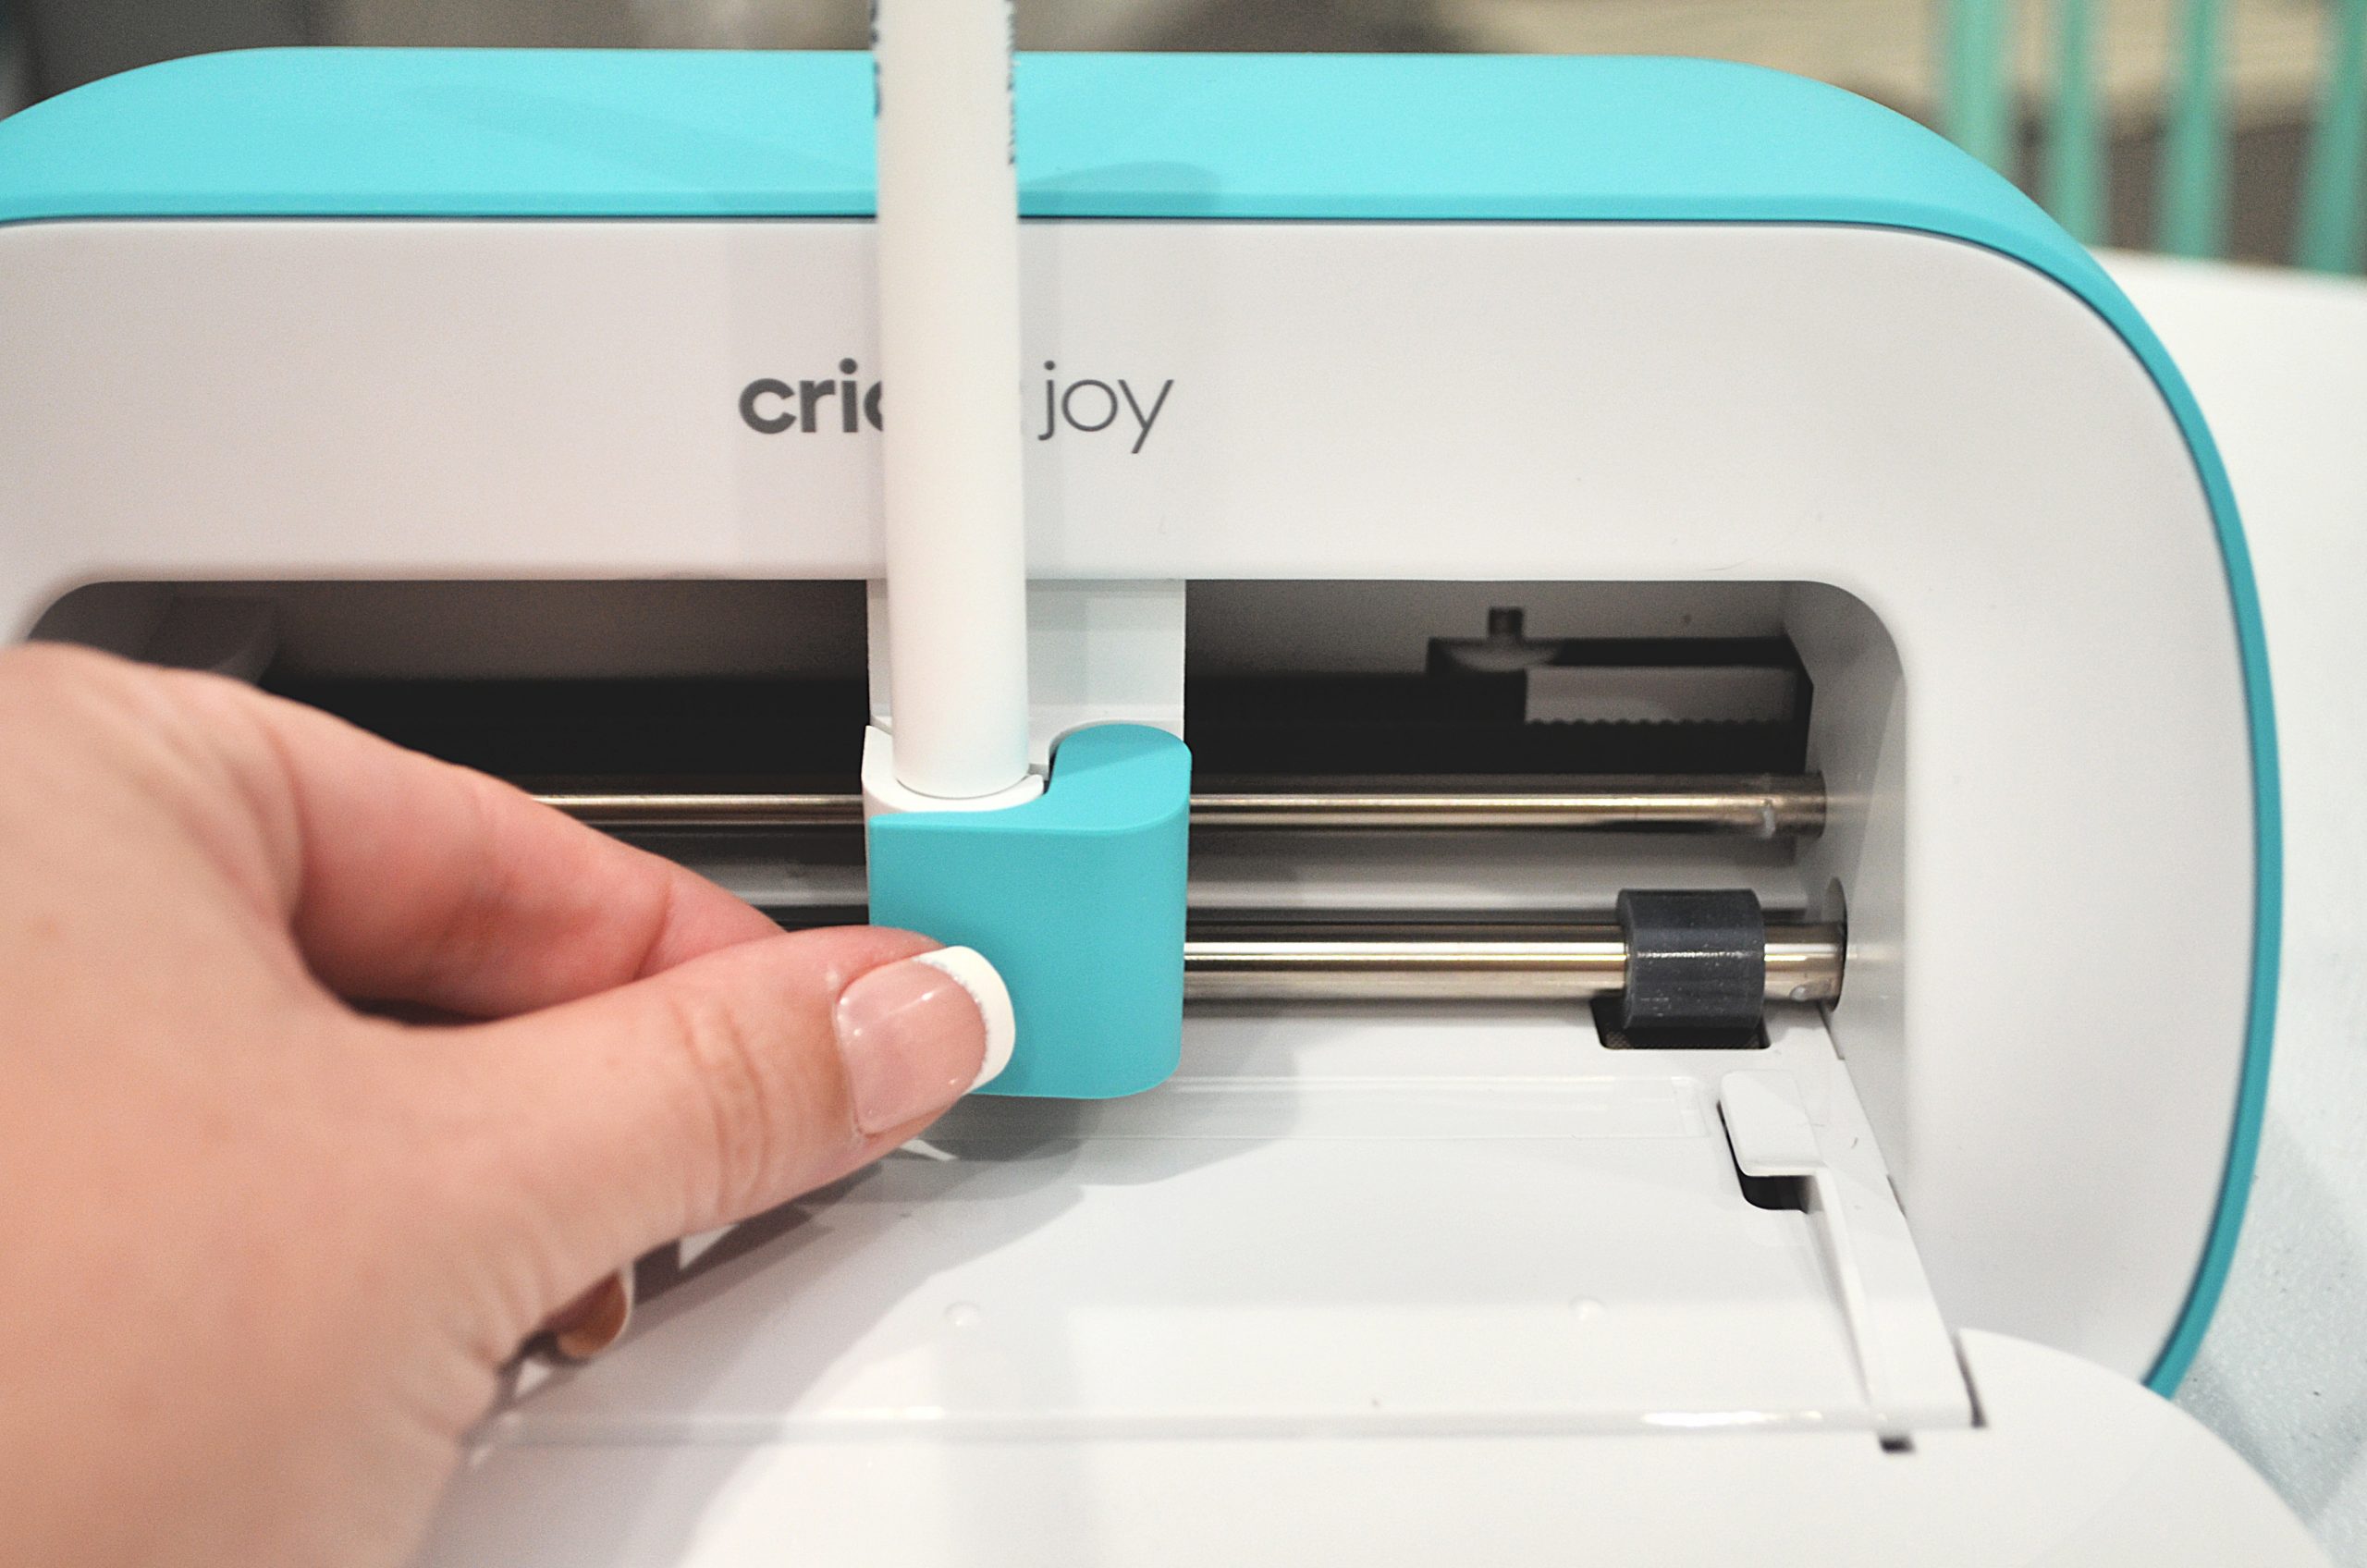
Step 4: Follow the prompts to trade the pen for the blade.
Once the drawing is complete, you’ll be prompted to place the blade back in the machine and remove the pen. Then, the Joy will finish making the cut and you can unload your material.
That’s all there is to it! Now you have adorable, personalized labels!
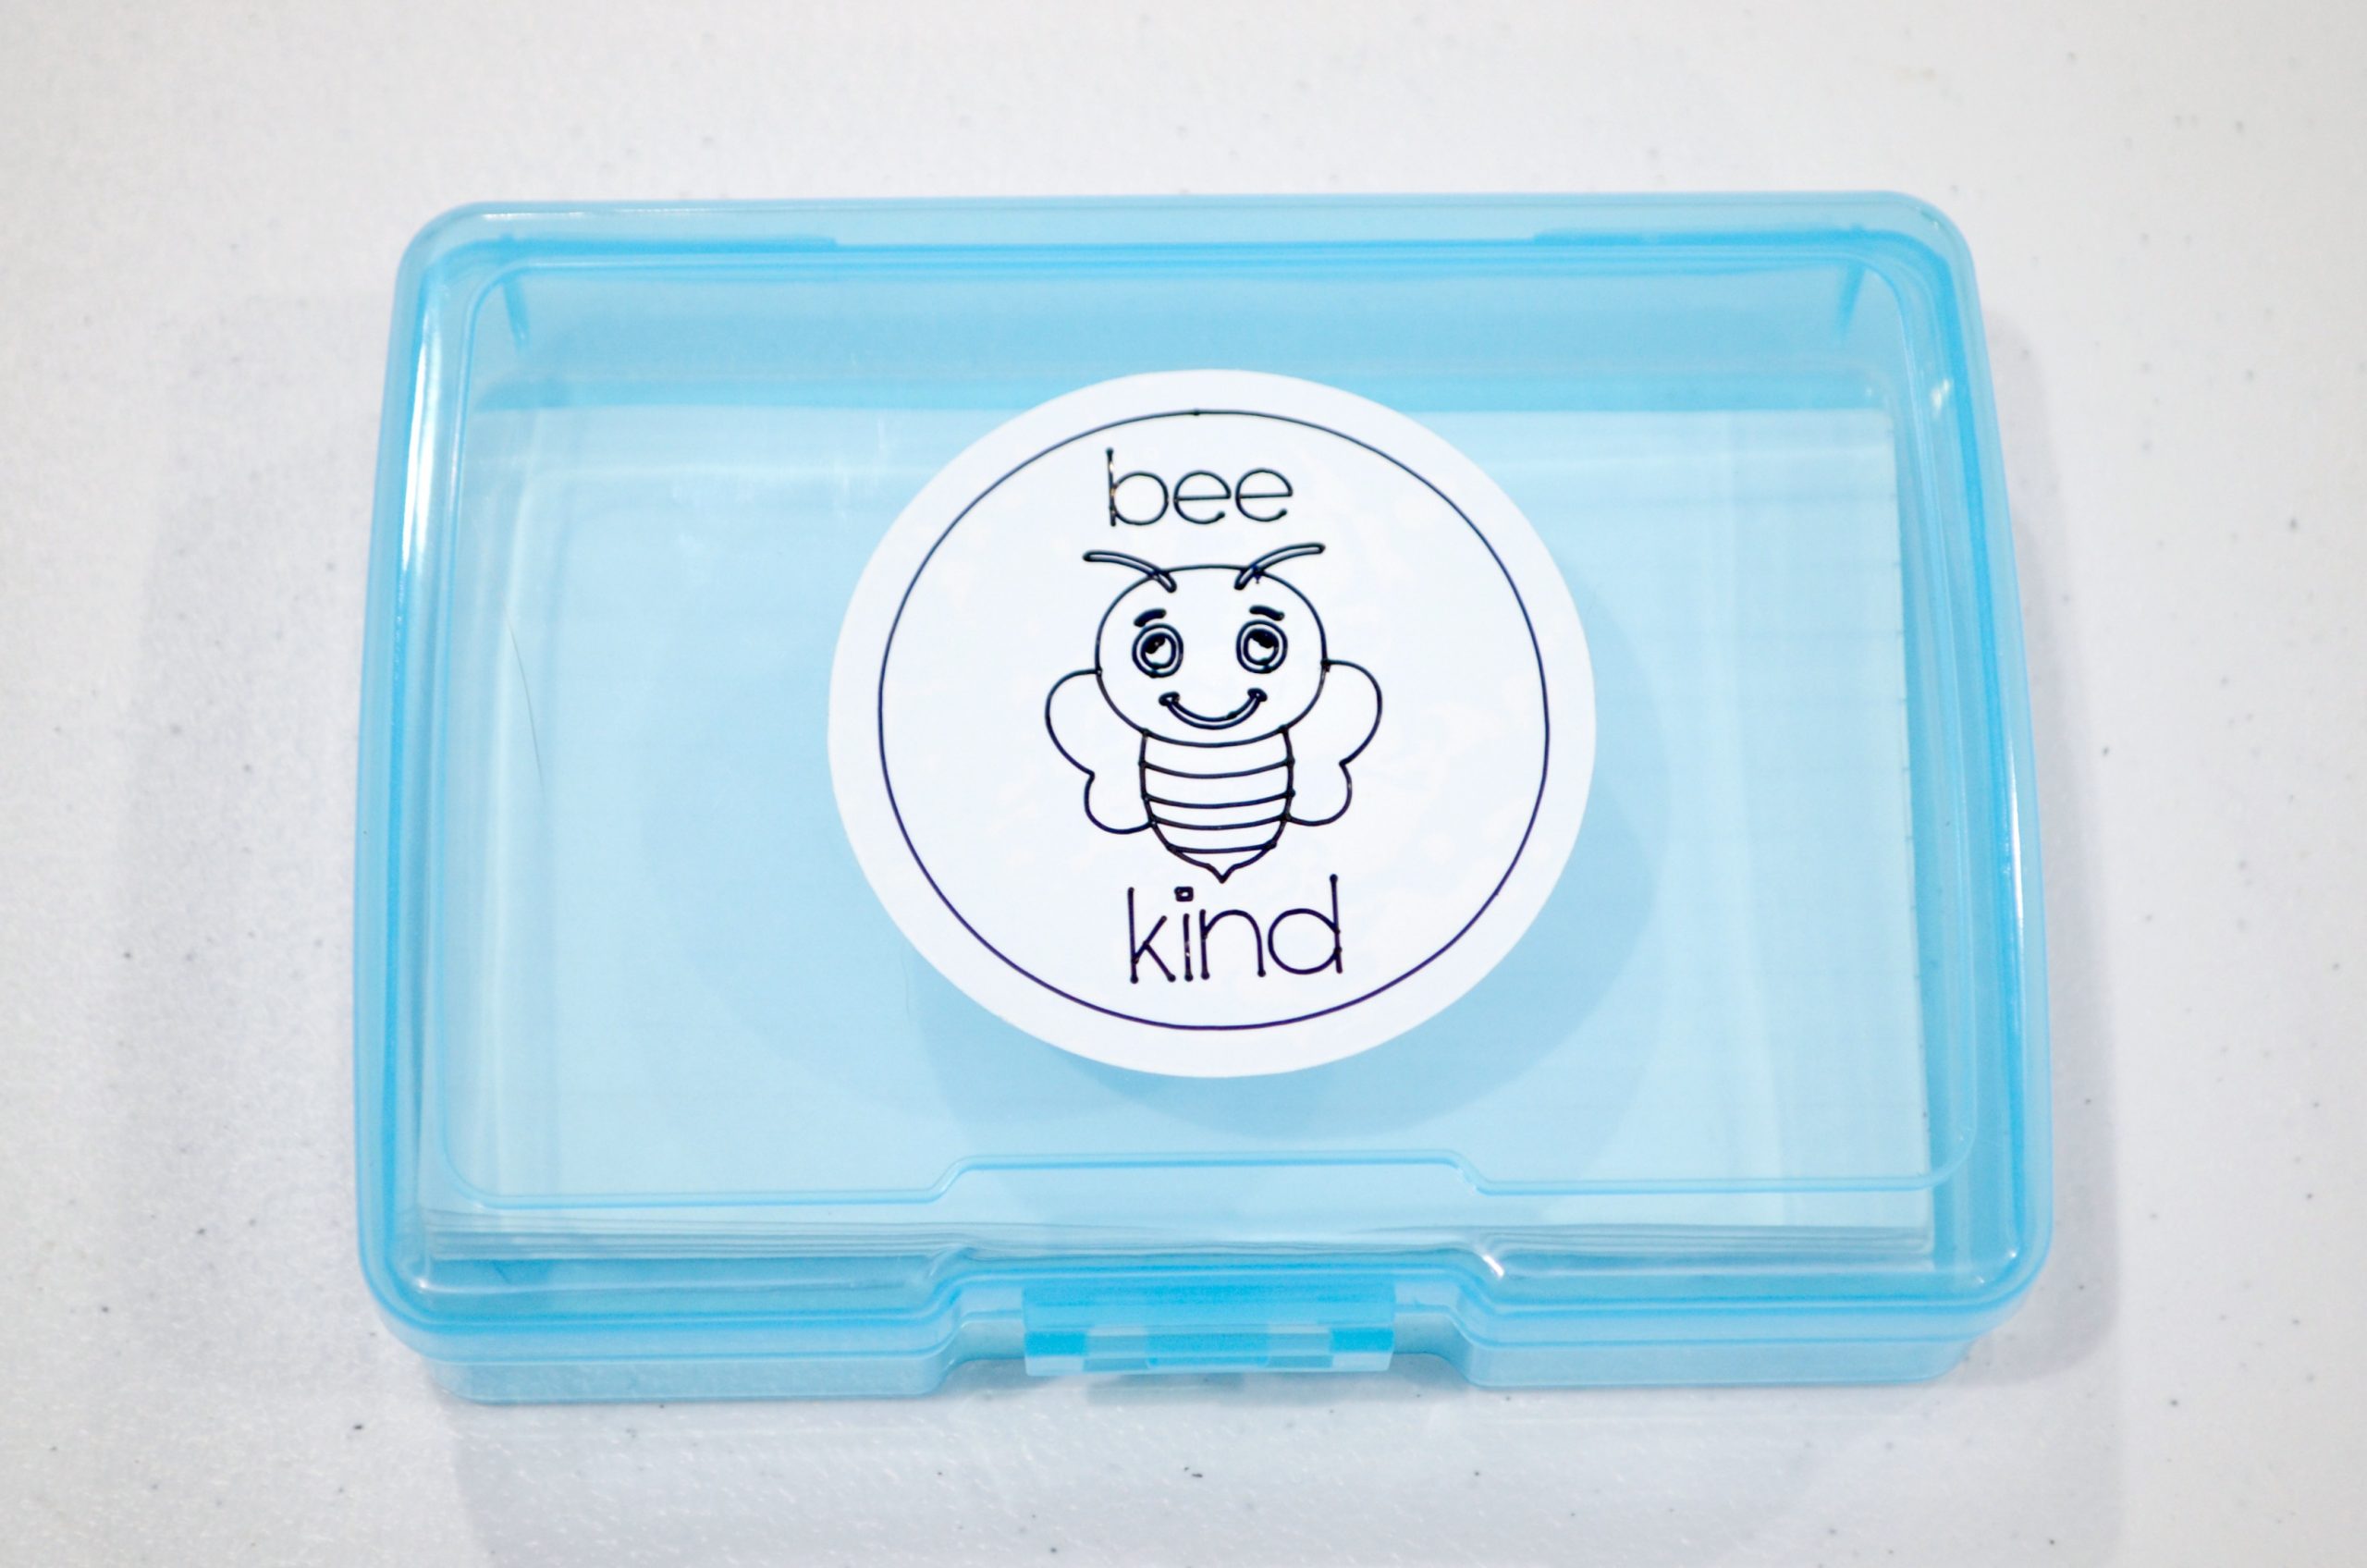
Originally, I made these so that my boys could put them on some of their school supplies, like the little plastic containers they use to hold their flashcards for Spanish vocabulary words.
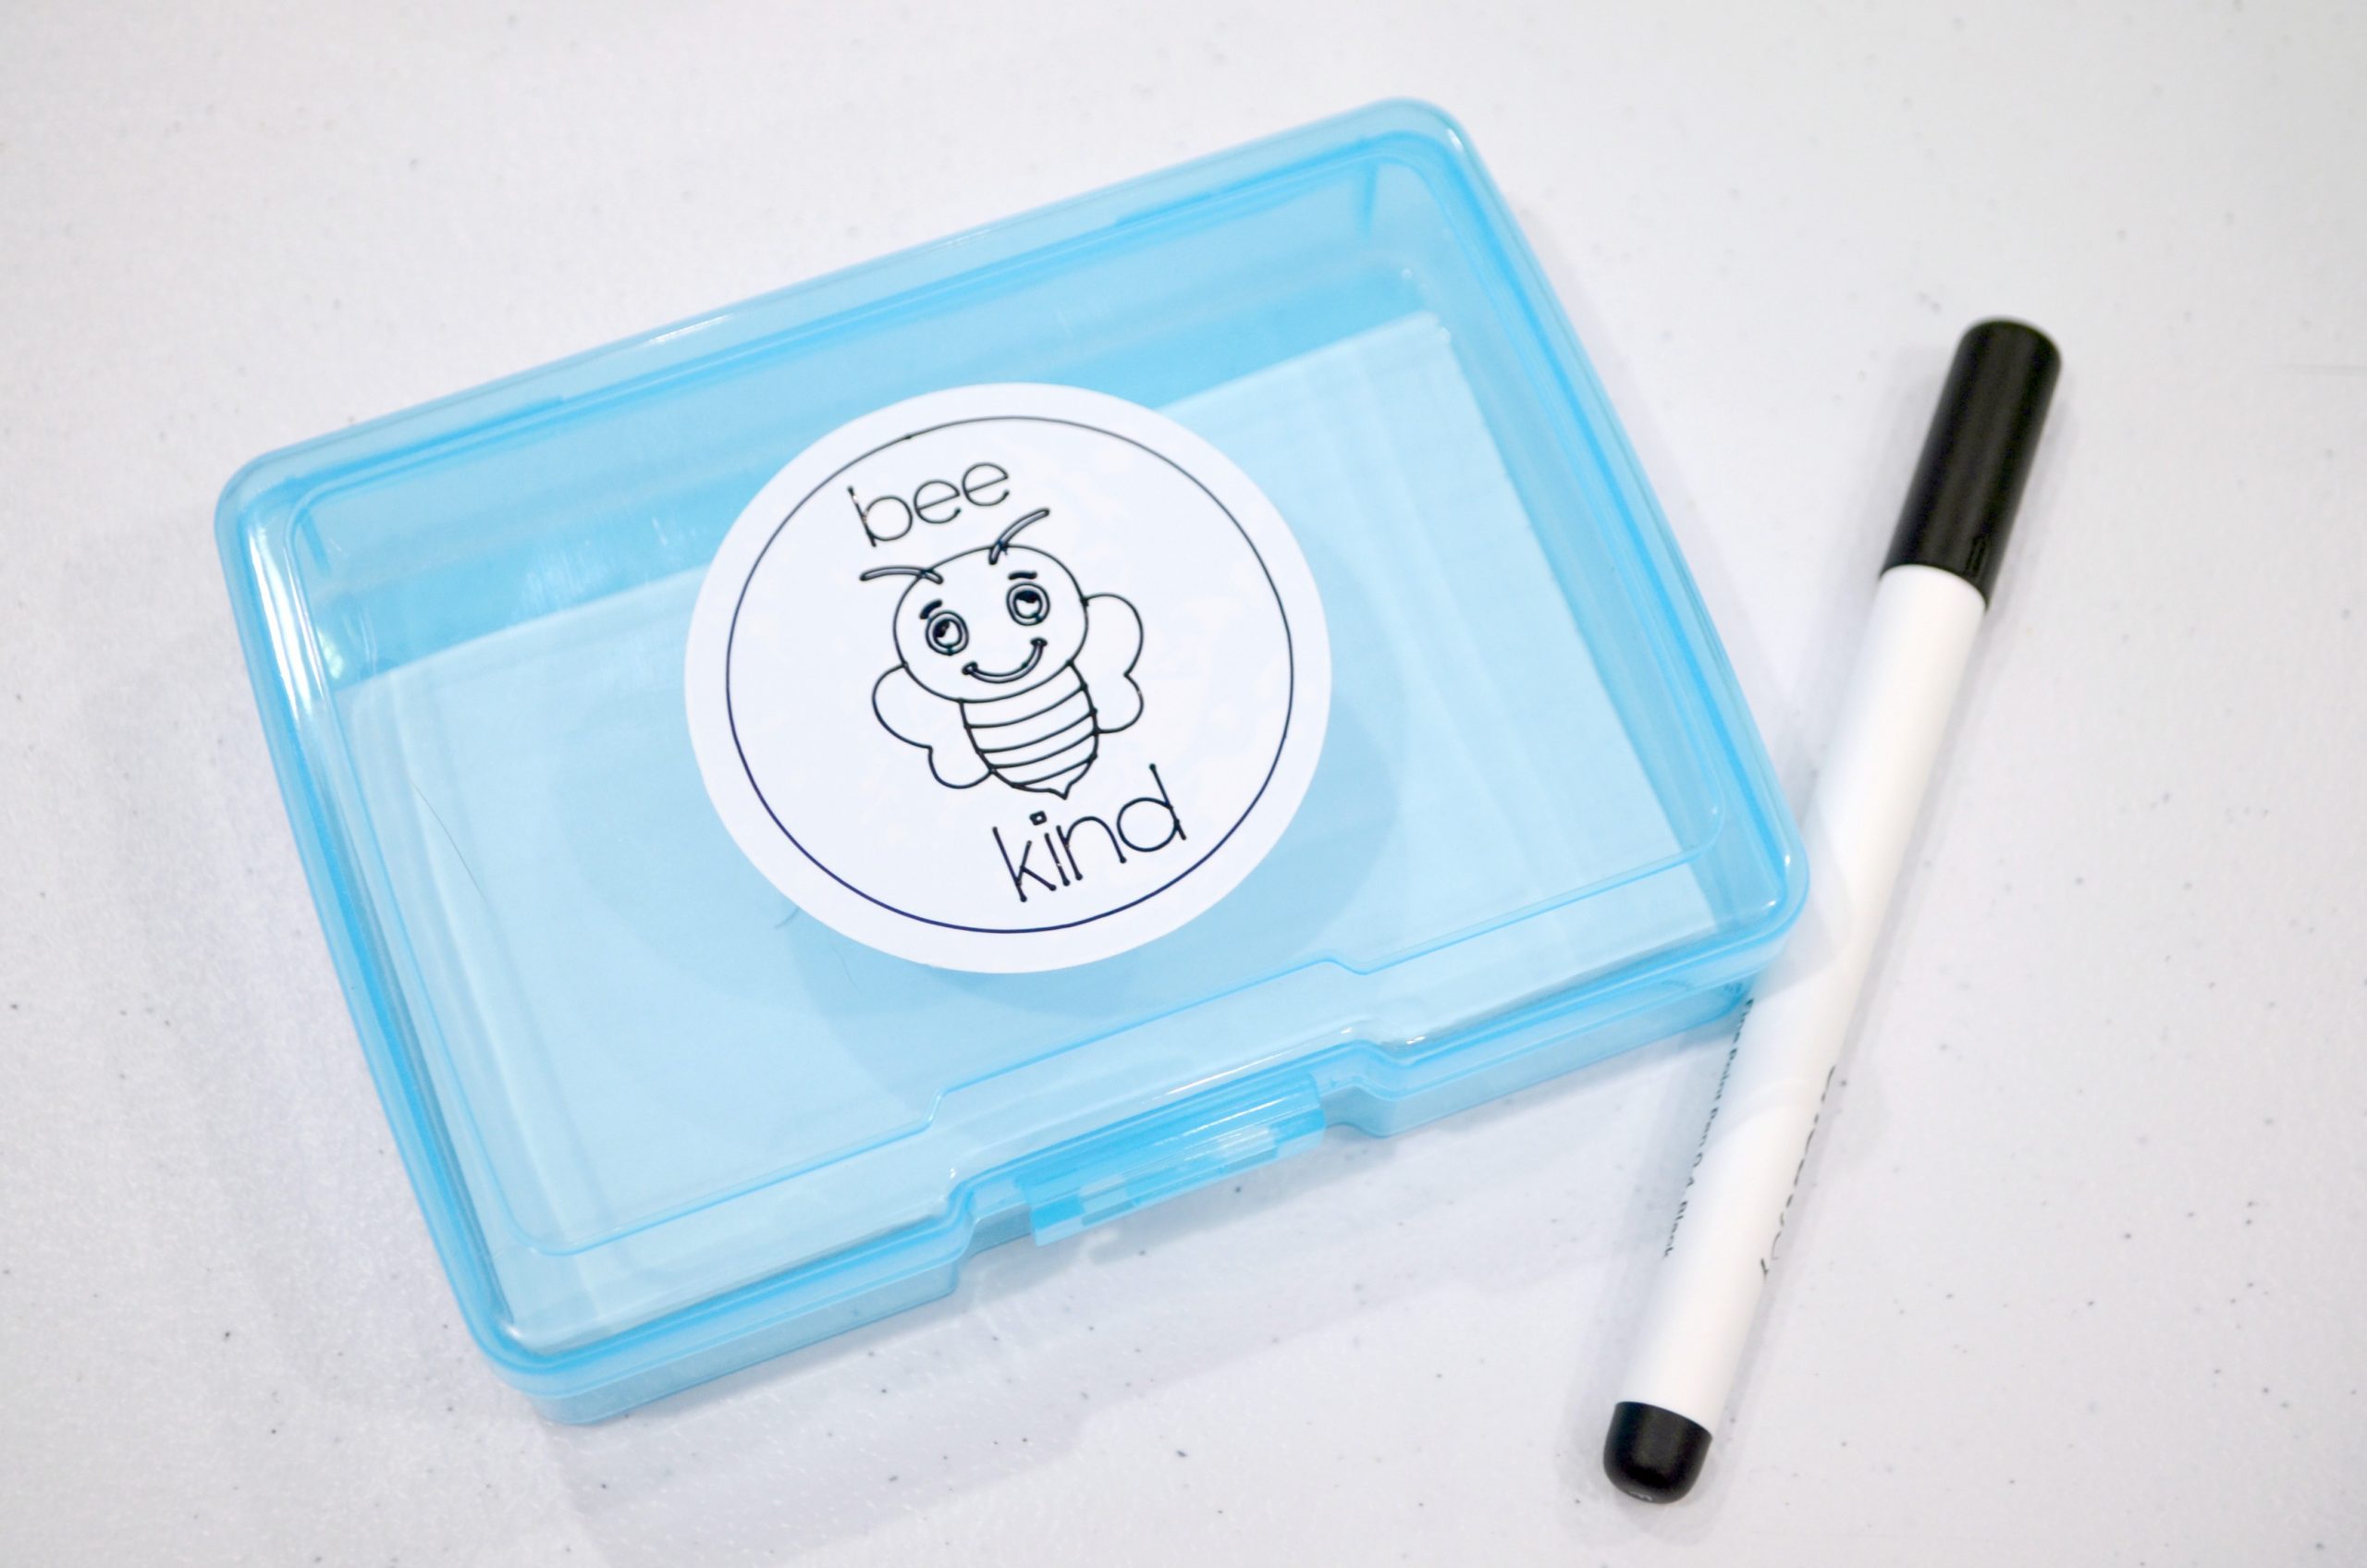
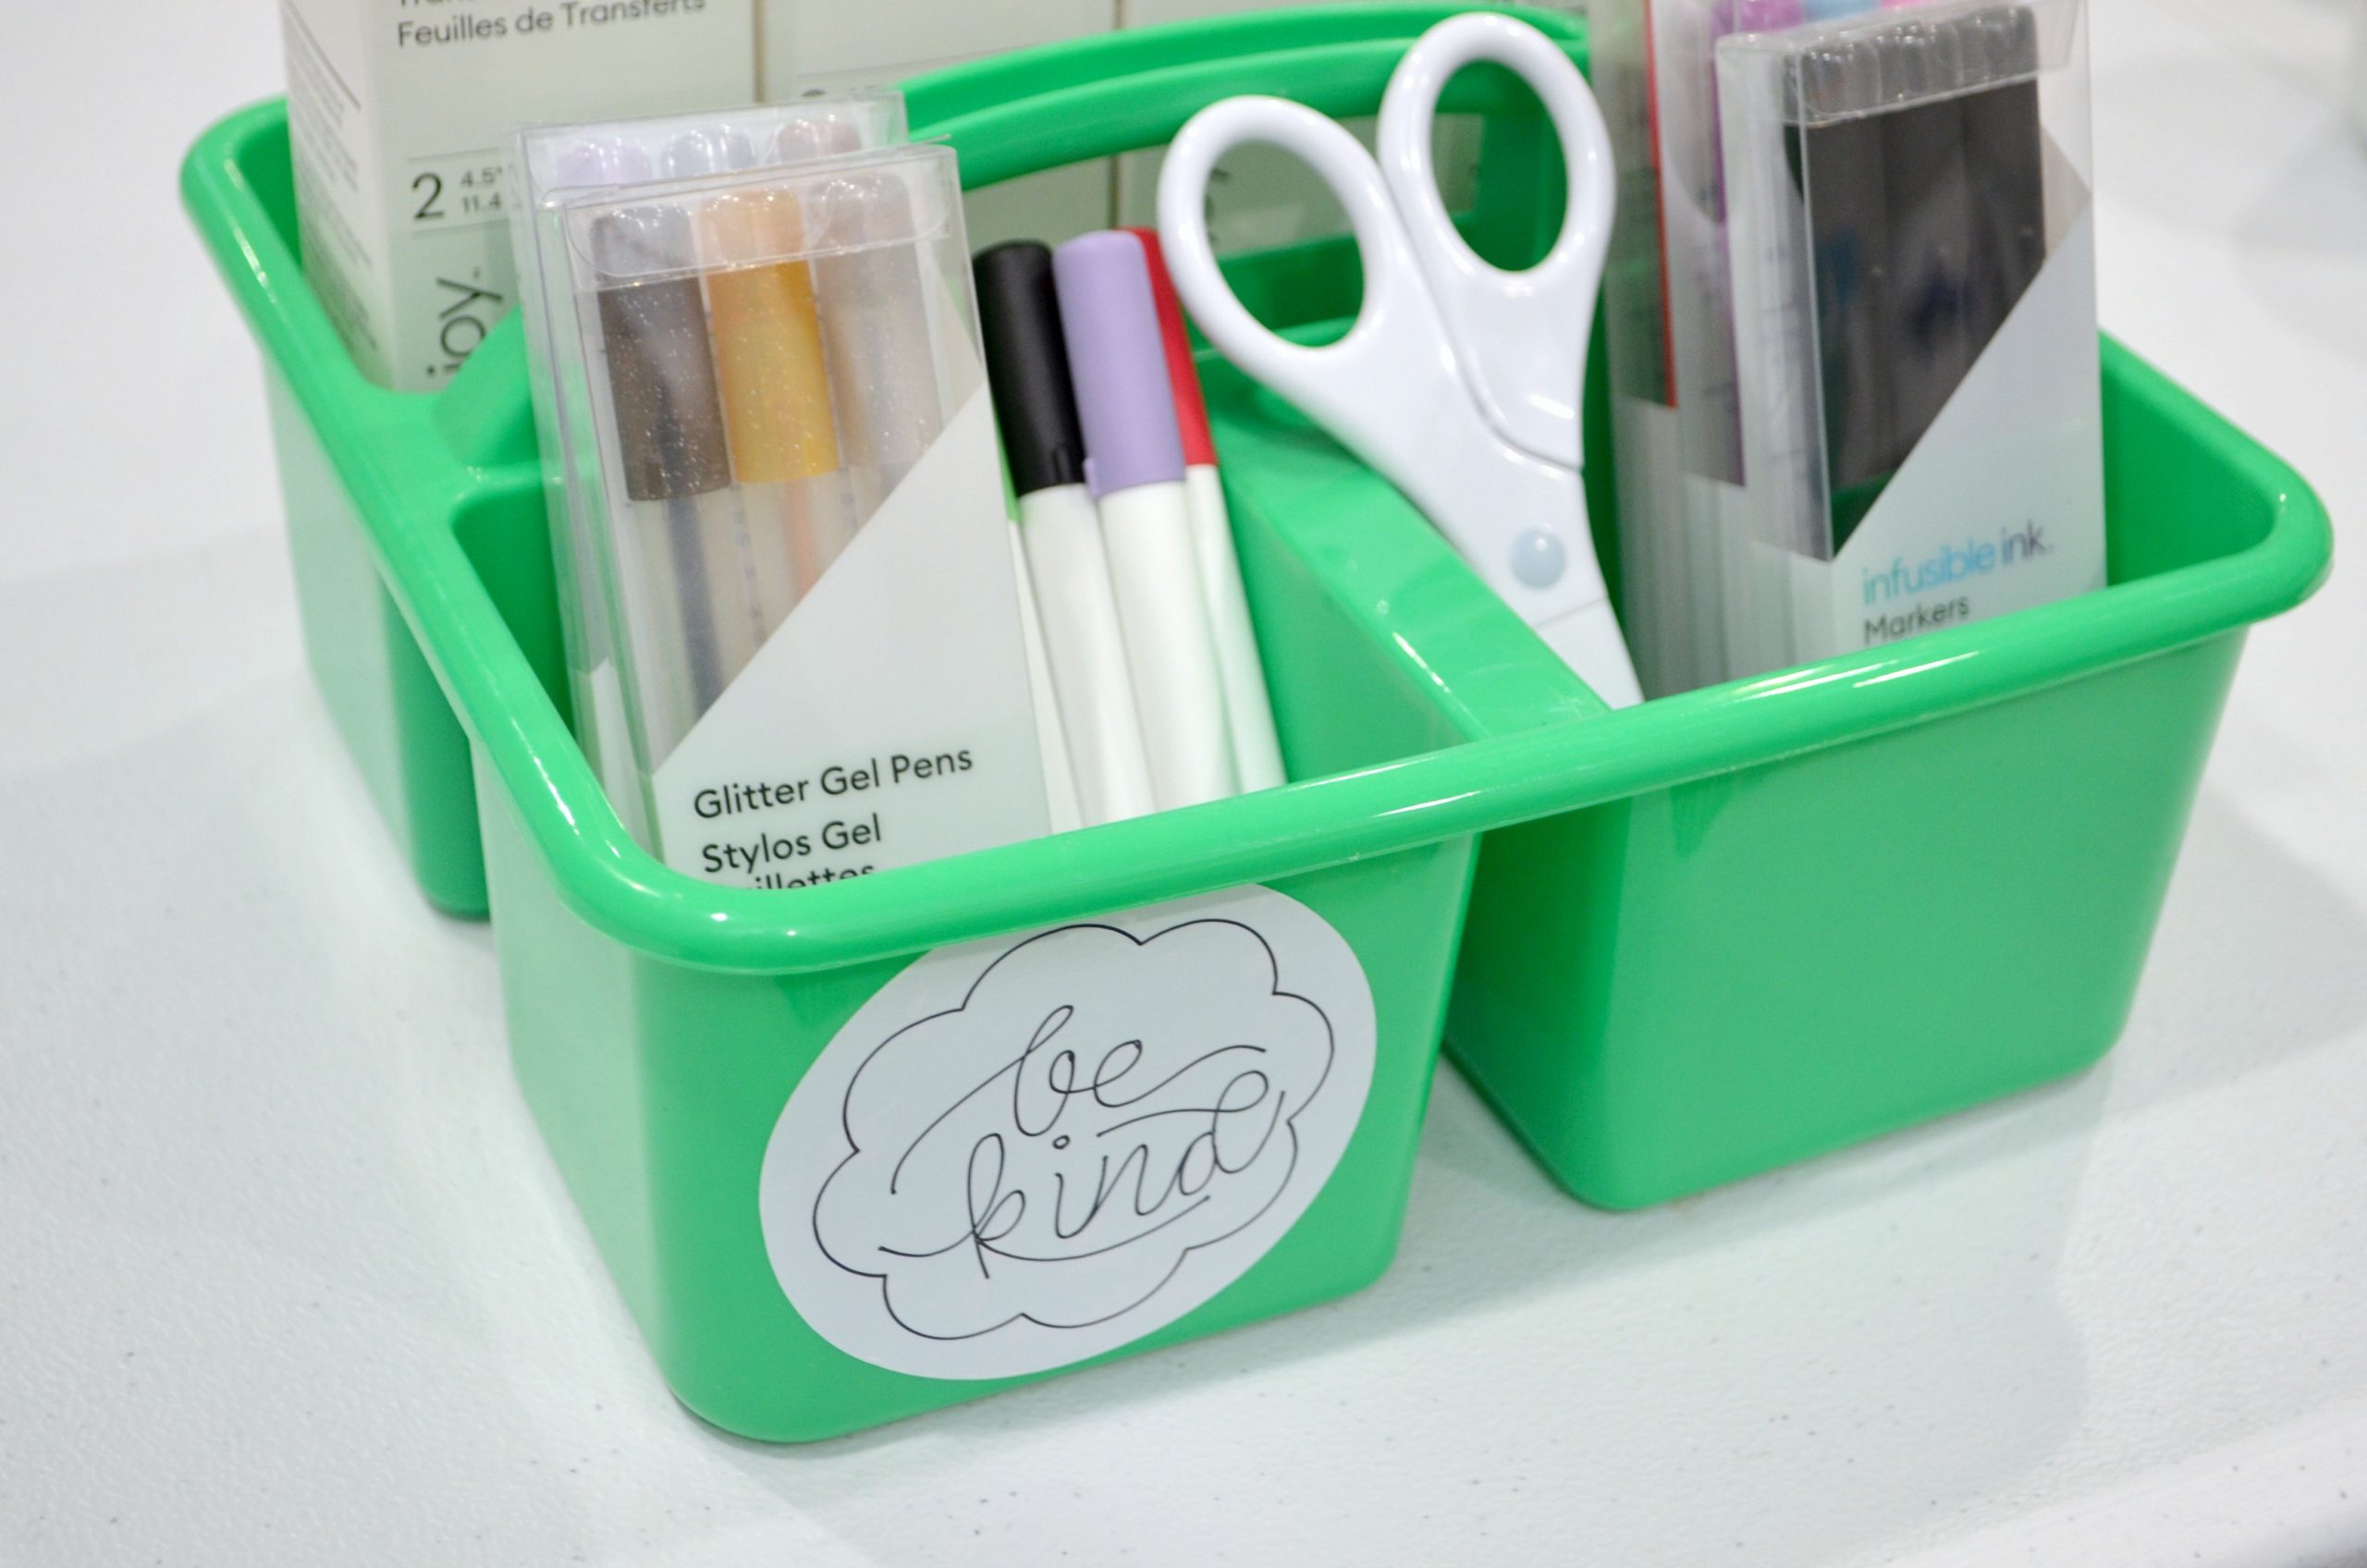
But I confess I was a little jealous! I decided to use the same basic process to make a few Smart Labels for my own supplies. This time, I used the image called Be Kind, #M98BED76 and a scalloped circle.
This label fit perfectly on top of my Machine Tool Organizer, which is a fun little holder for my extra blades and tools when they aren’t in one of my Cricut machines. For example, when making this project, I put the blade in the organizer while the pen was in use to keep it safe and make sure I didn’t lose track of it!
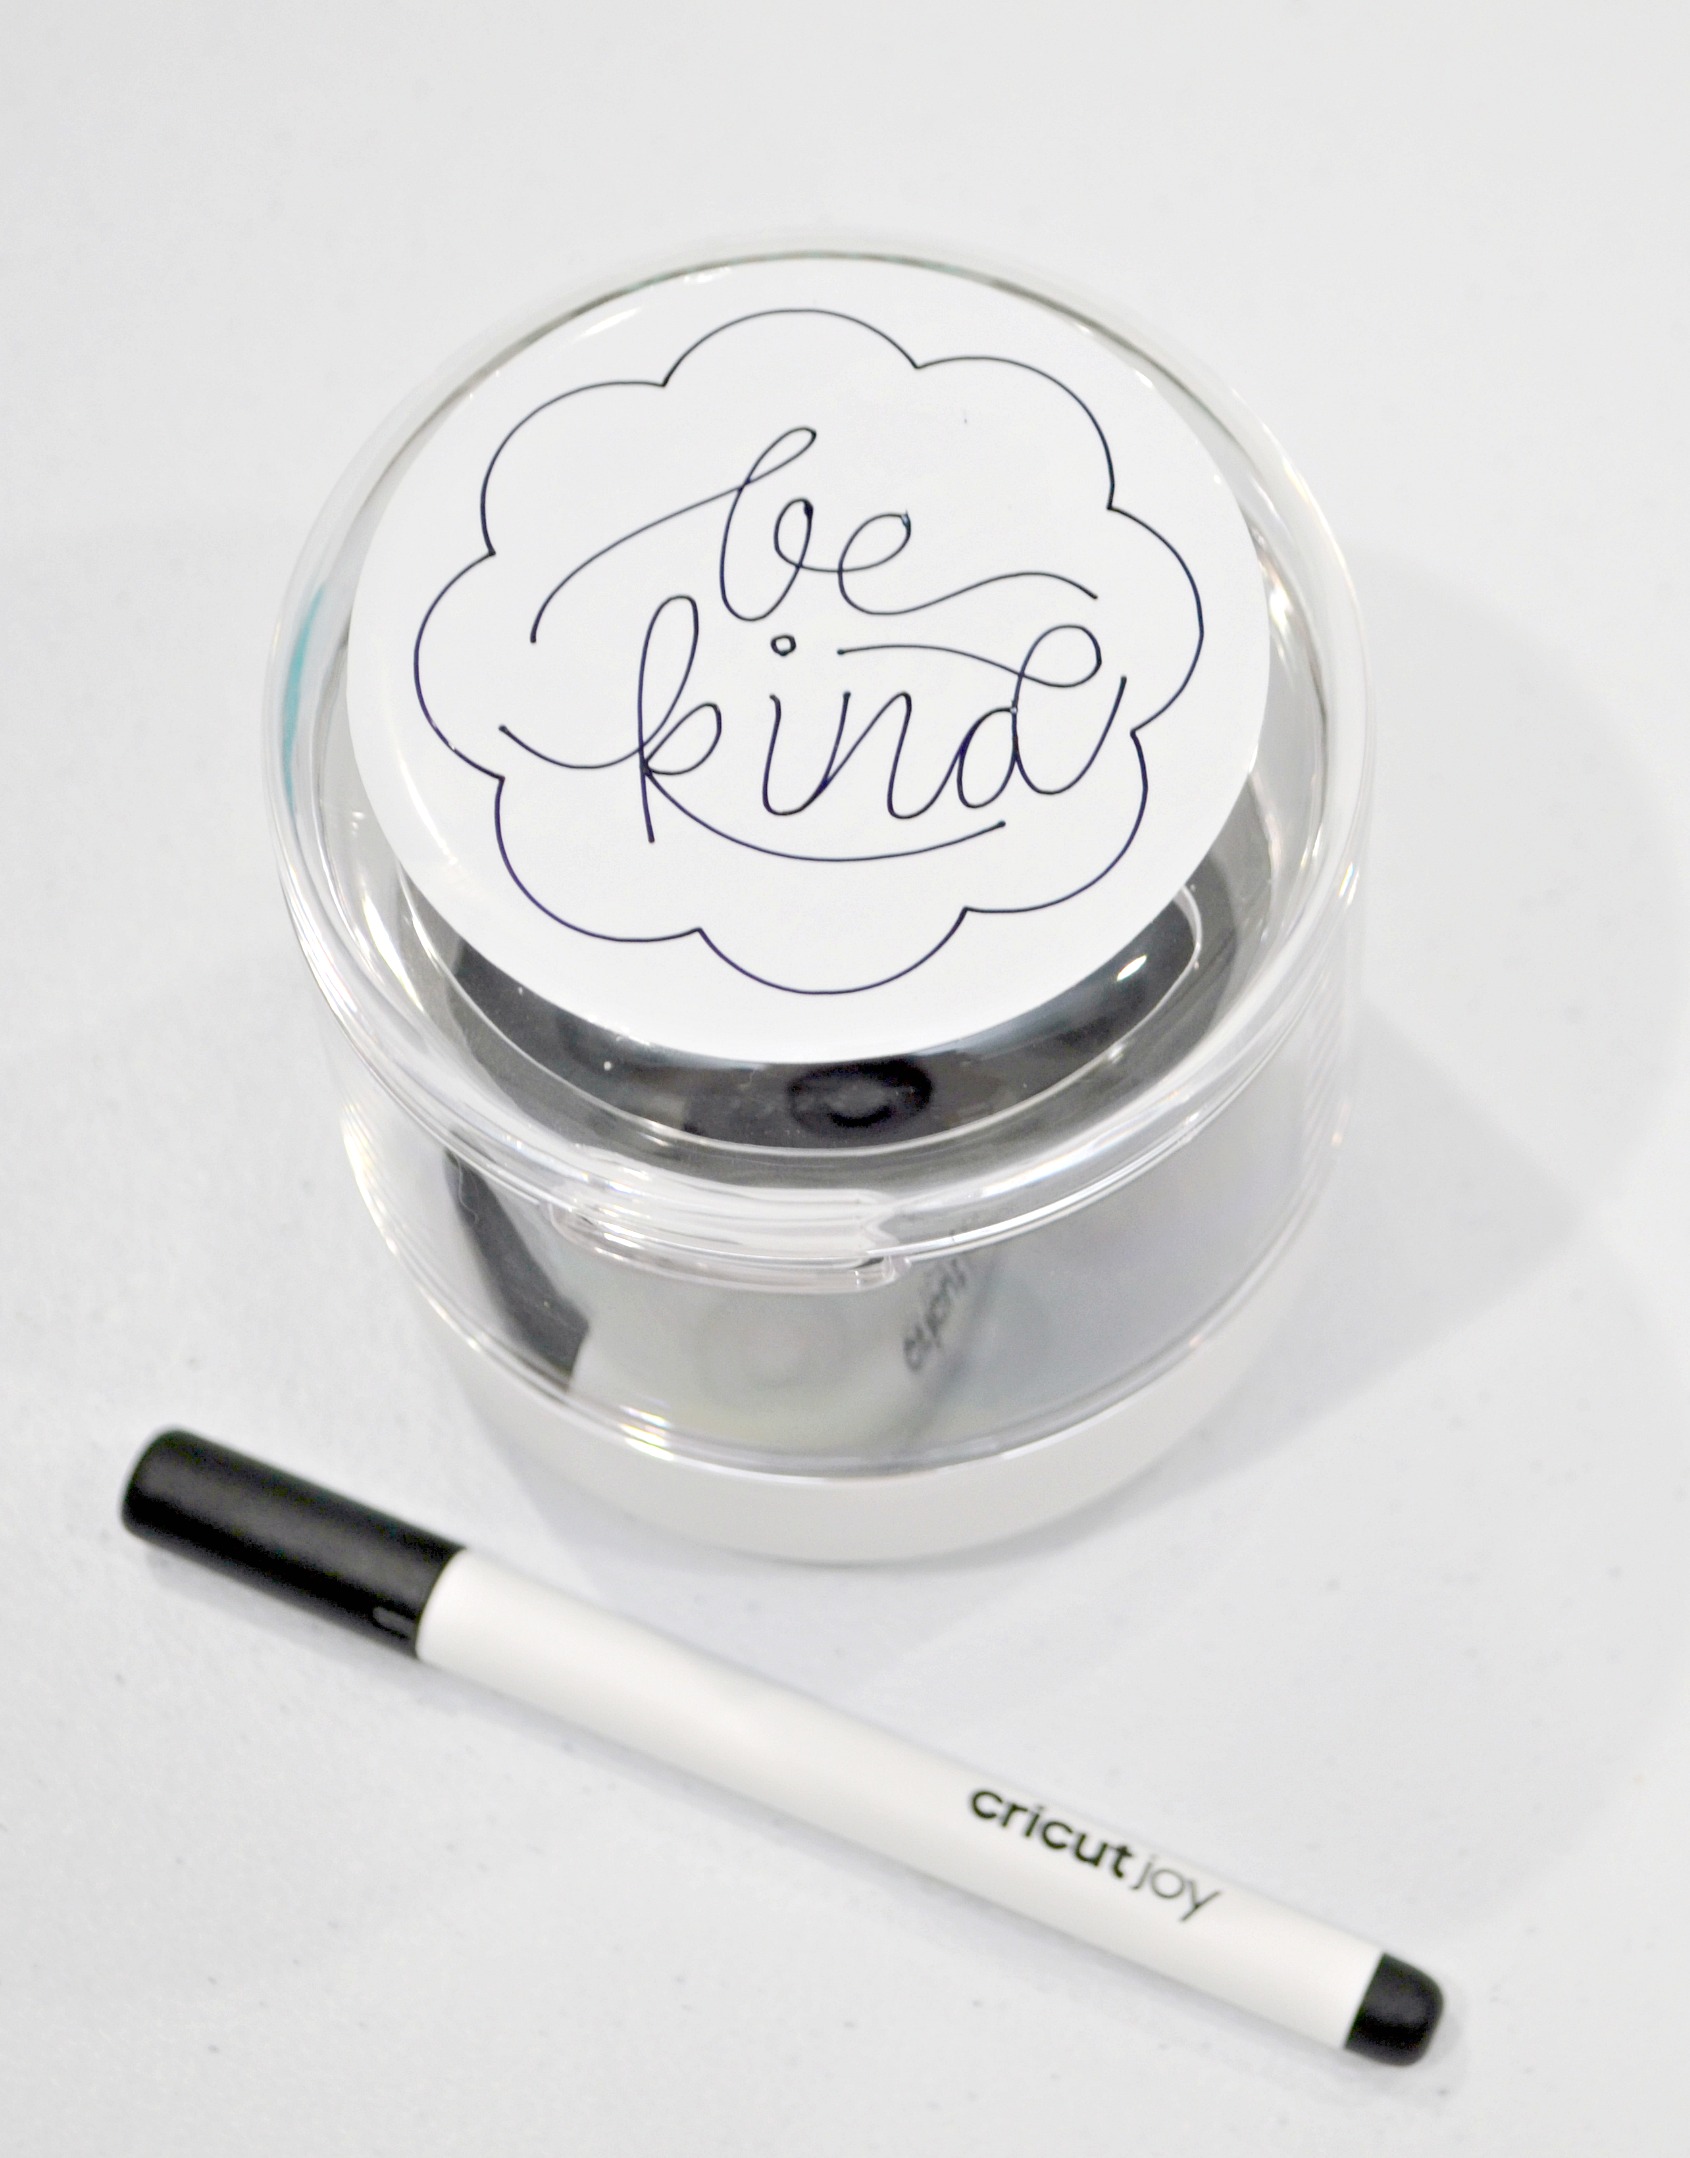
My Smart Labels also fit perfectly on the plastic organizer I use to keep my Cricut pens and markers together.
I love finding new ways to add personalization to the kids’ supplies and my own! What do you think? What kind of projects would you create using this Writable Vinyl? There are so many fun things to create…just watch out, it’s addictive!
If you make some labels of your own, I’d love to see! Be sure to join the Amy Latta & Friends group on Facebook if you haven’t already, then share photos of this or your latest projects so we can all be inspired together. See you there!
Don’t forget, if you like this project, save it to Pinterest and/or share with a friend!


2 Comments