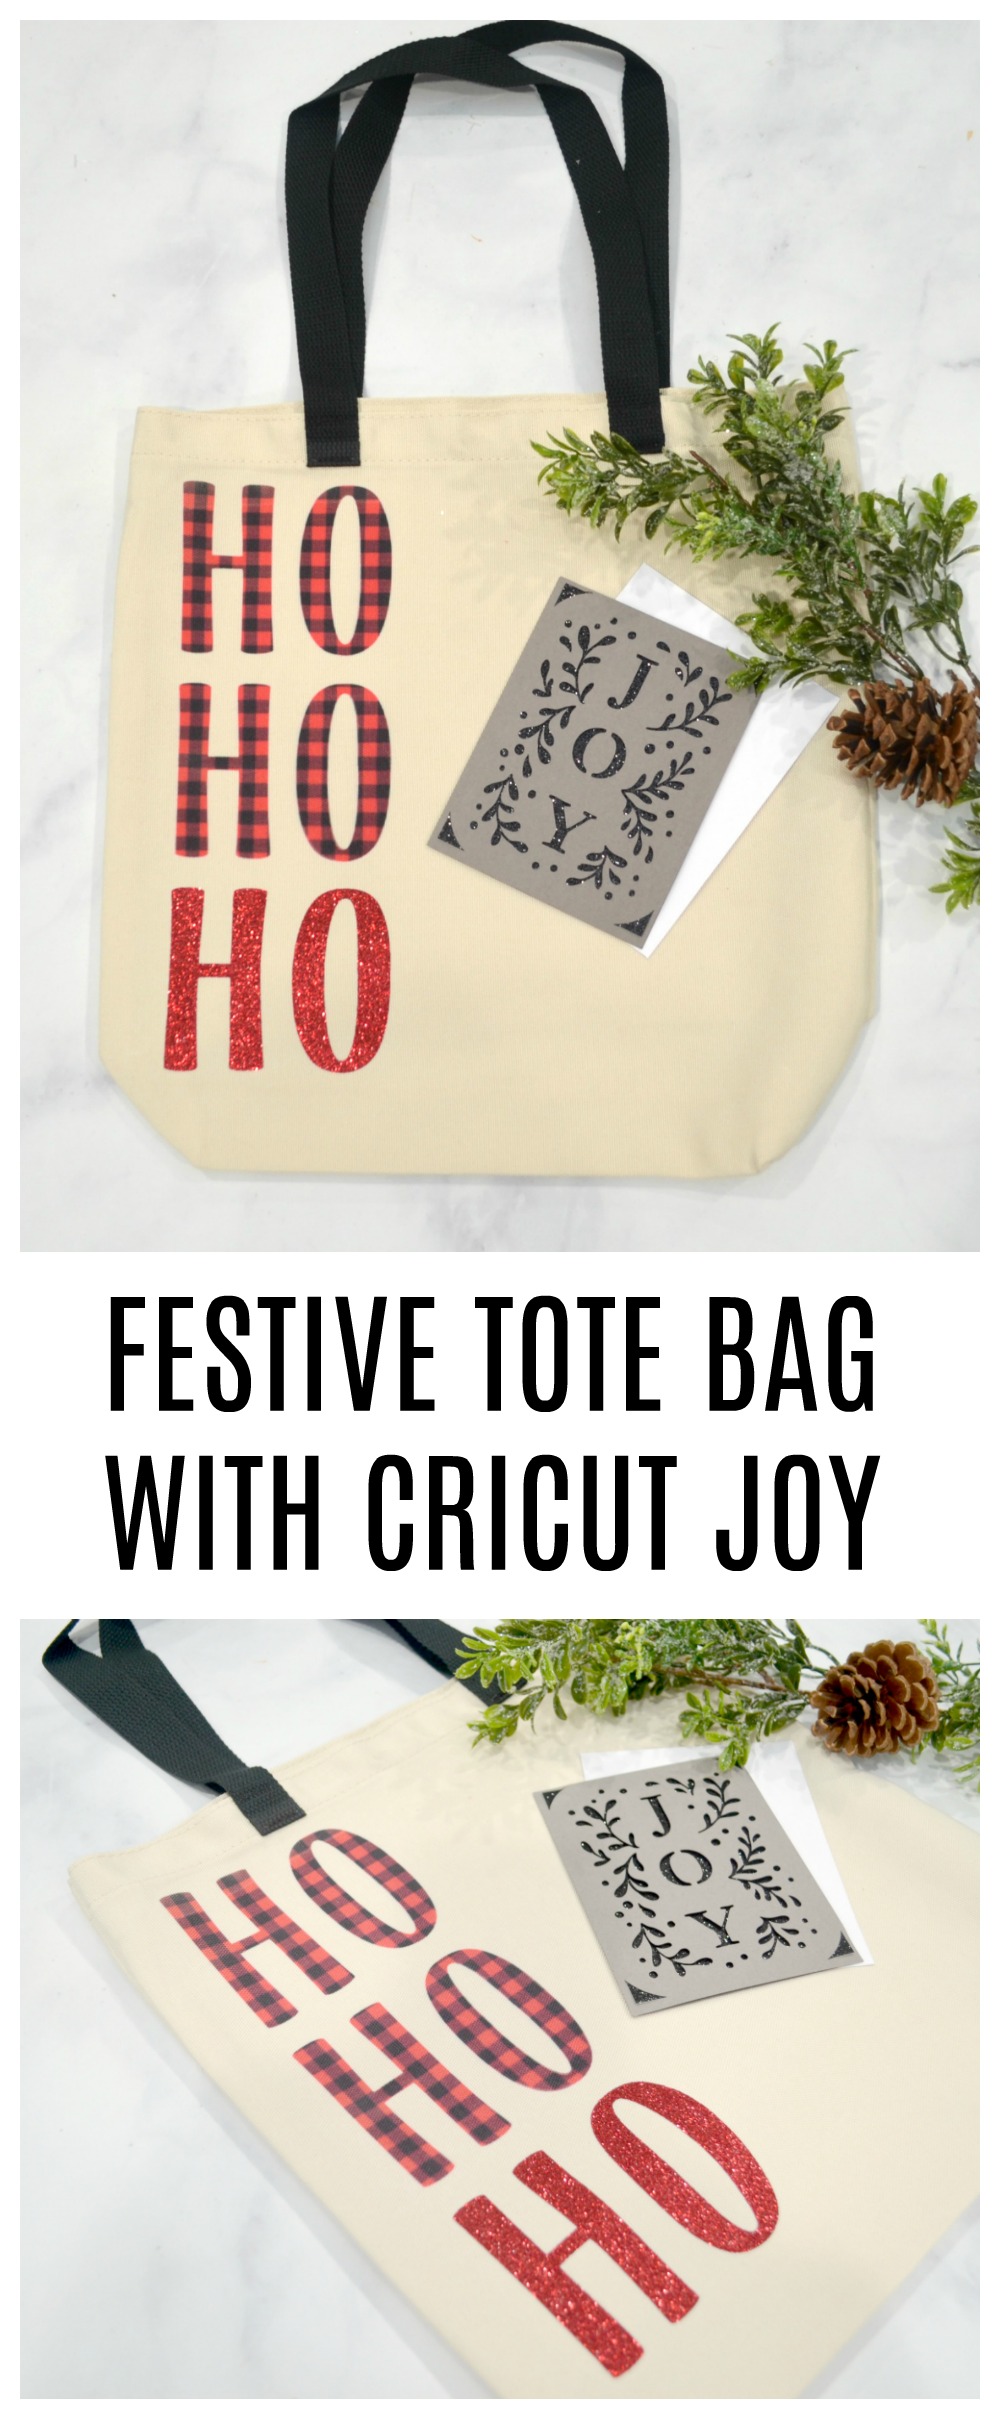
Ho Ho Ho Tote Bag with Cricut Joy
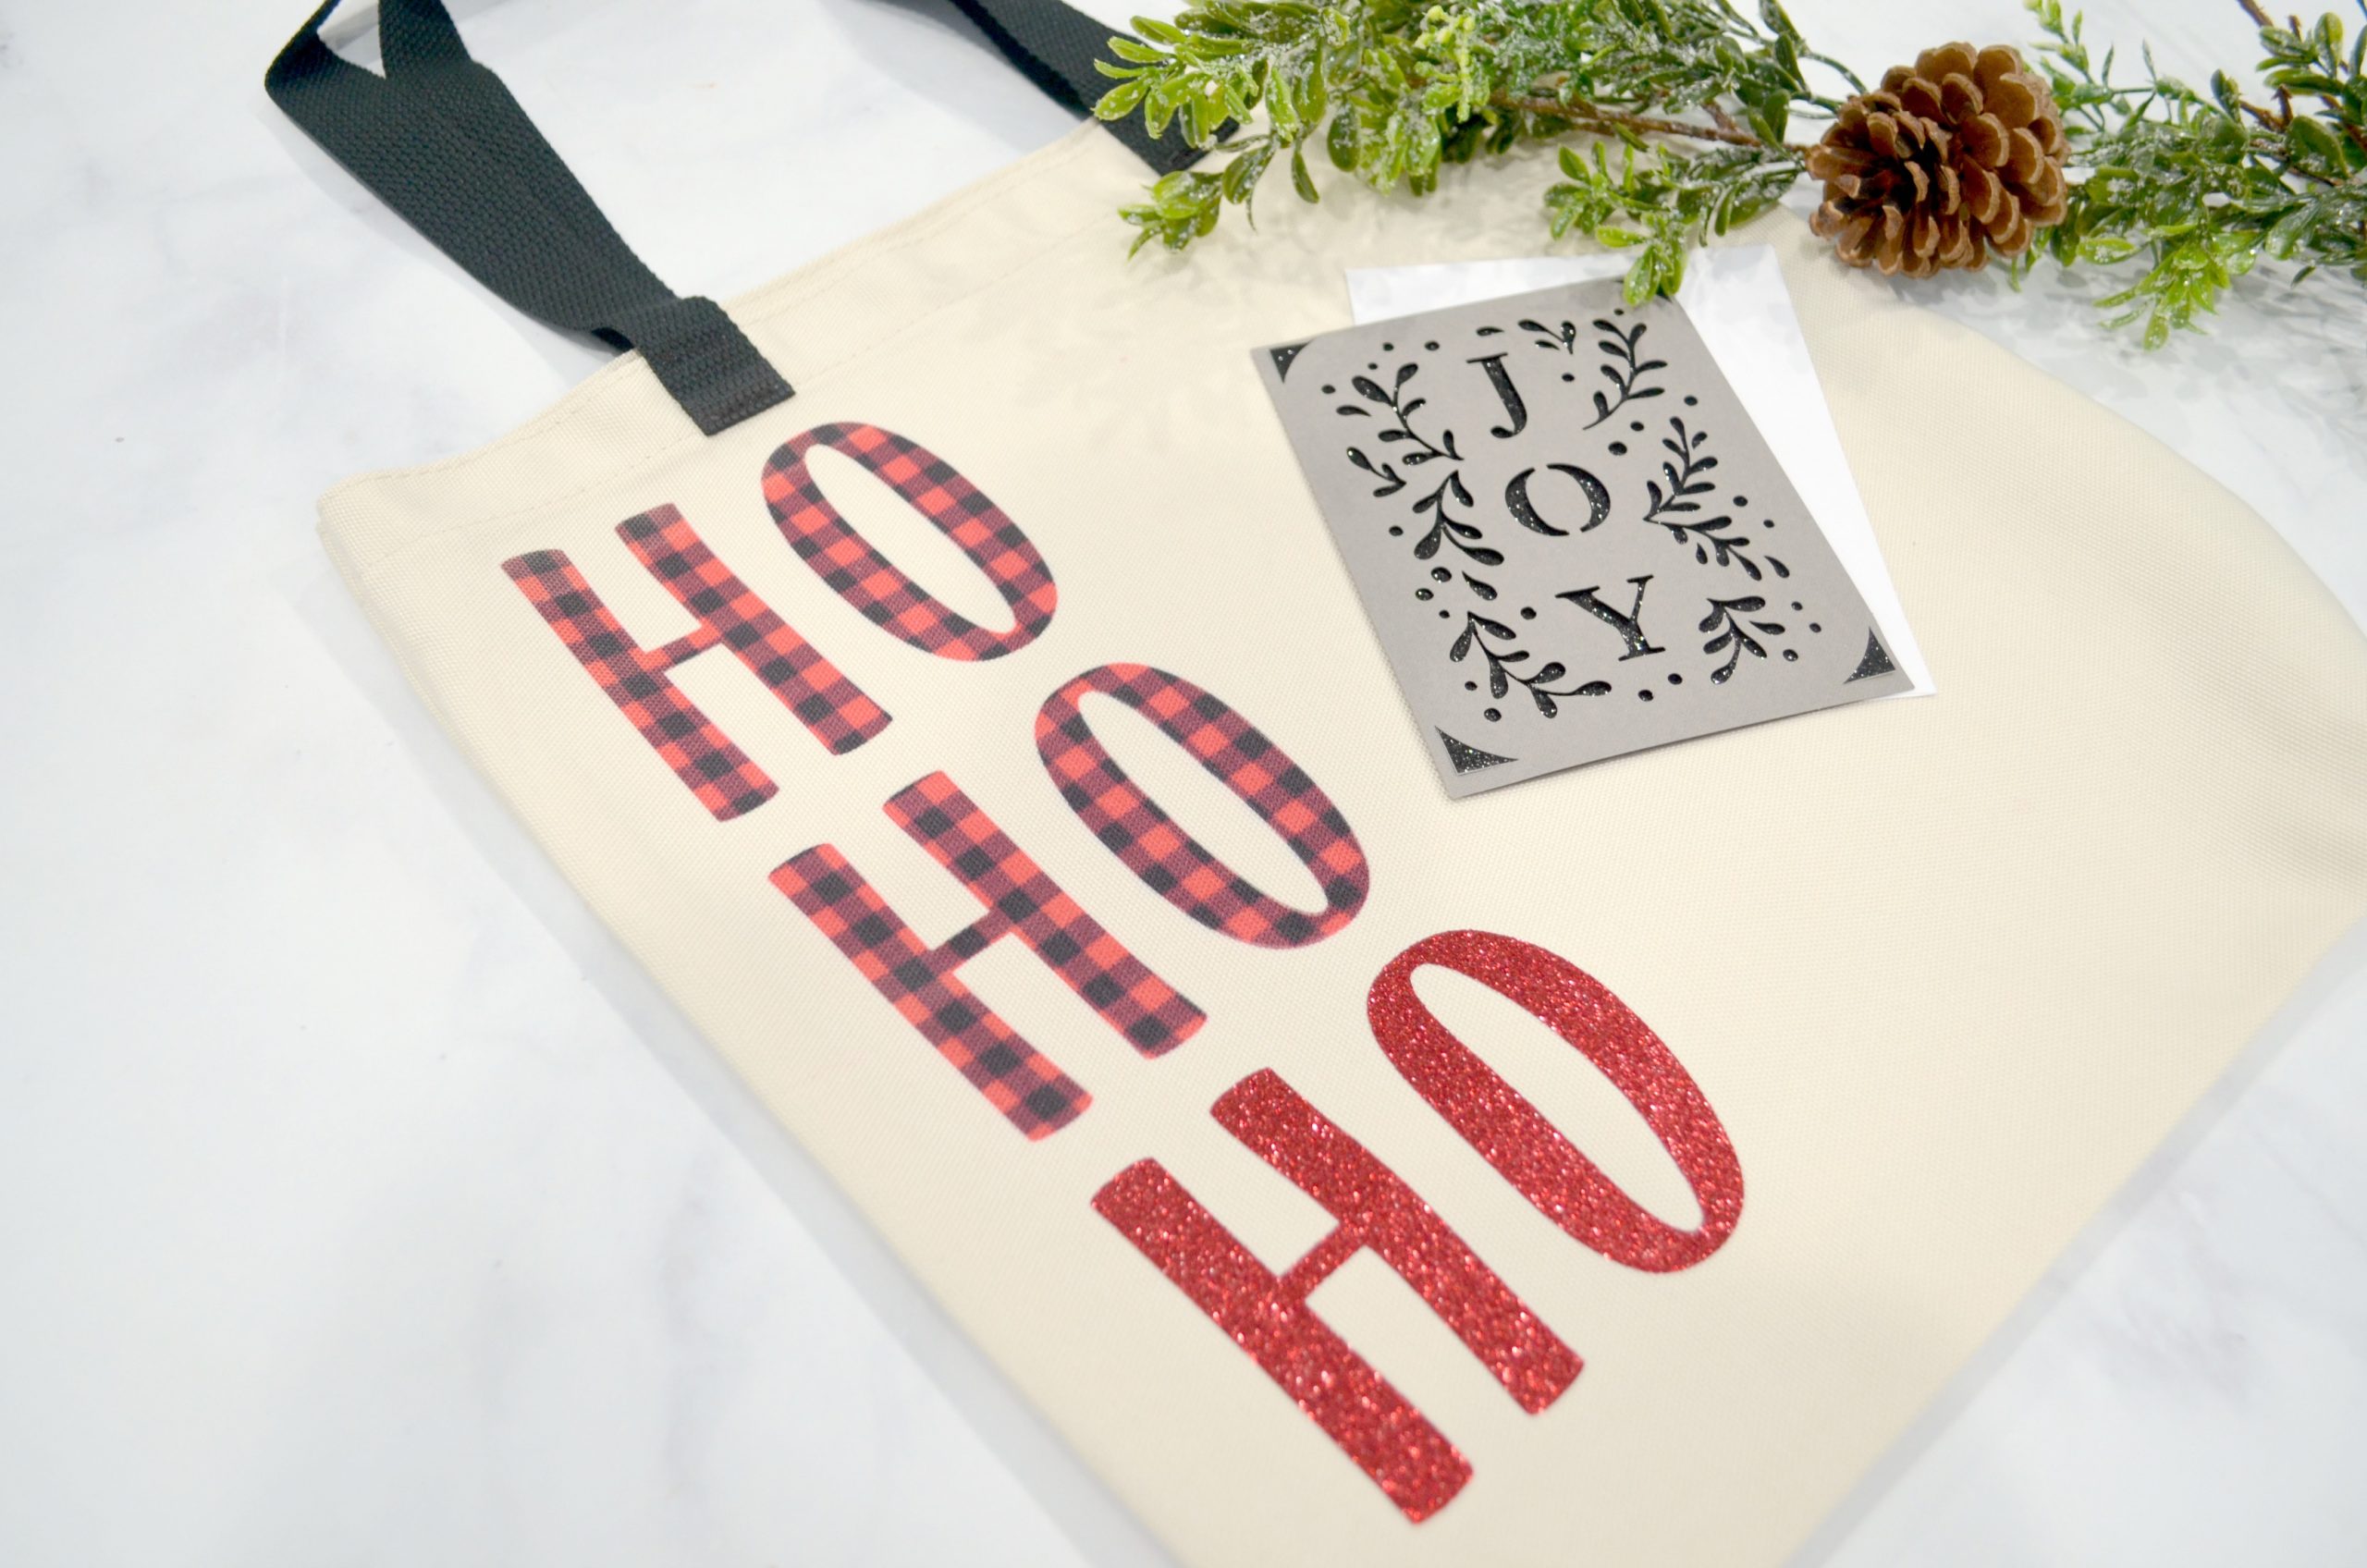
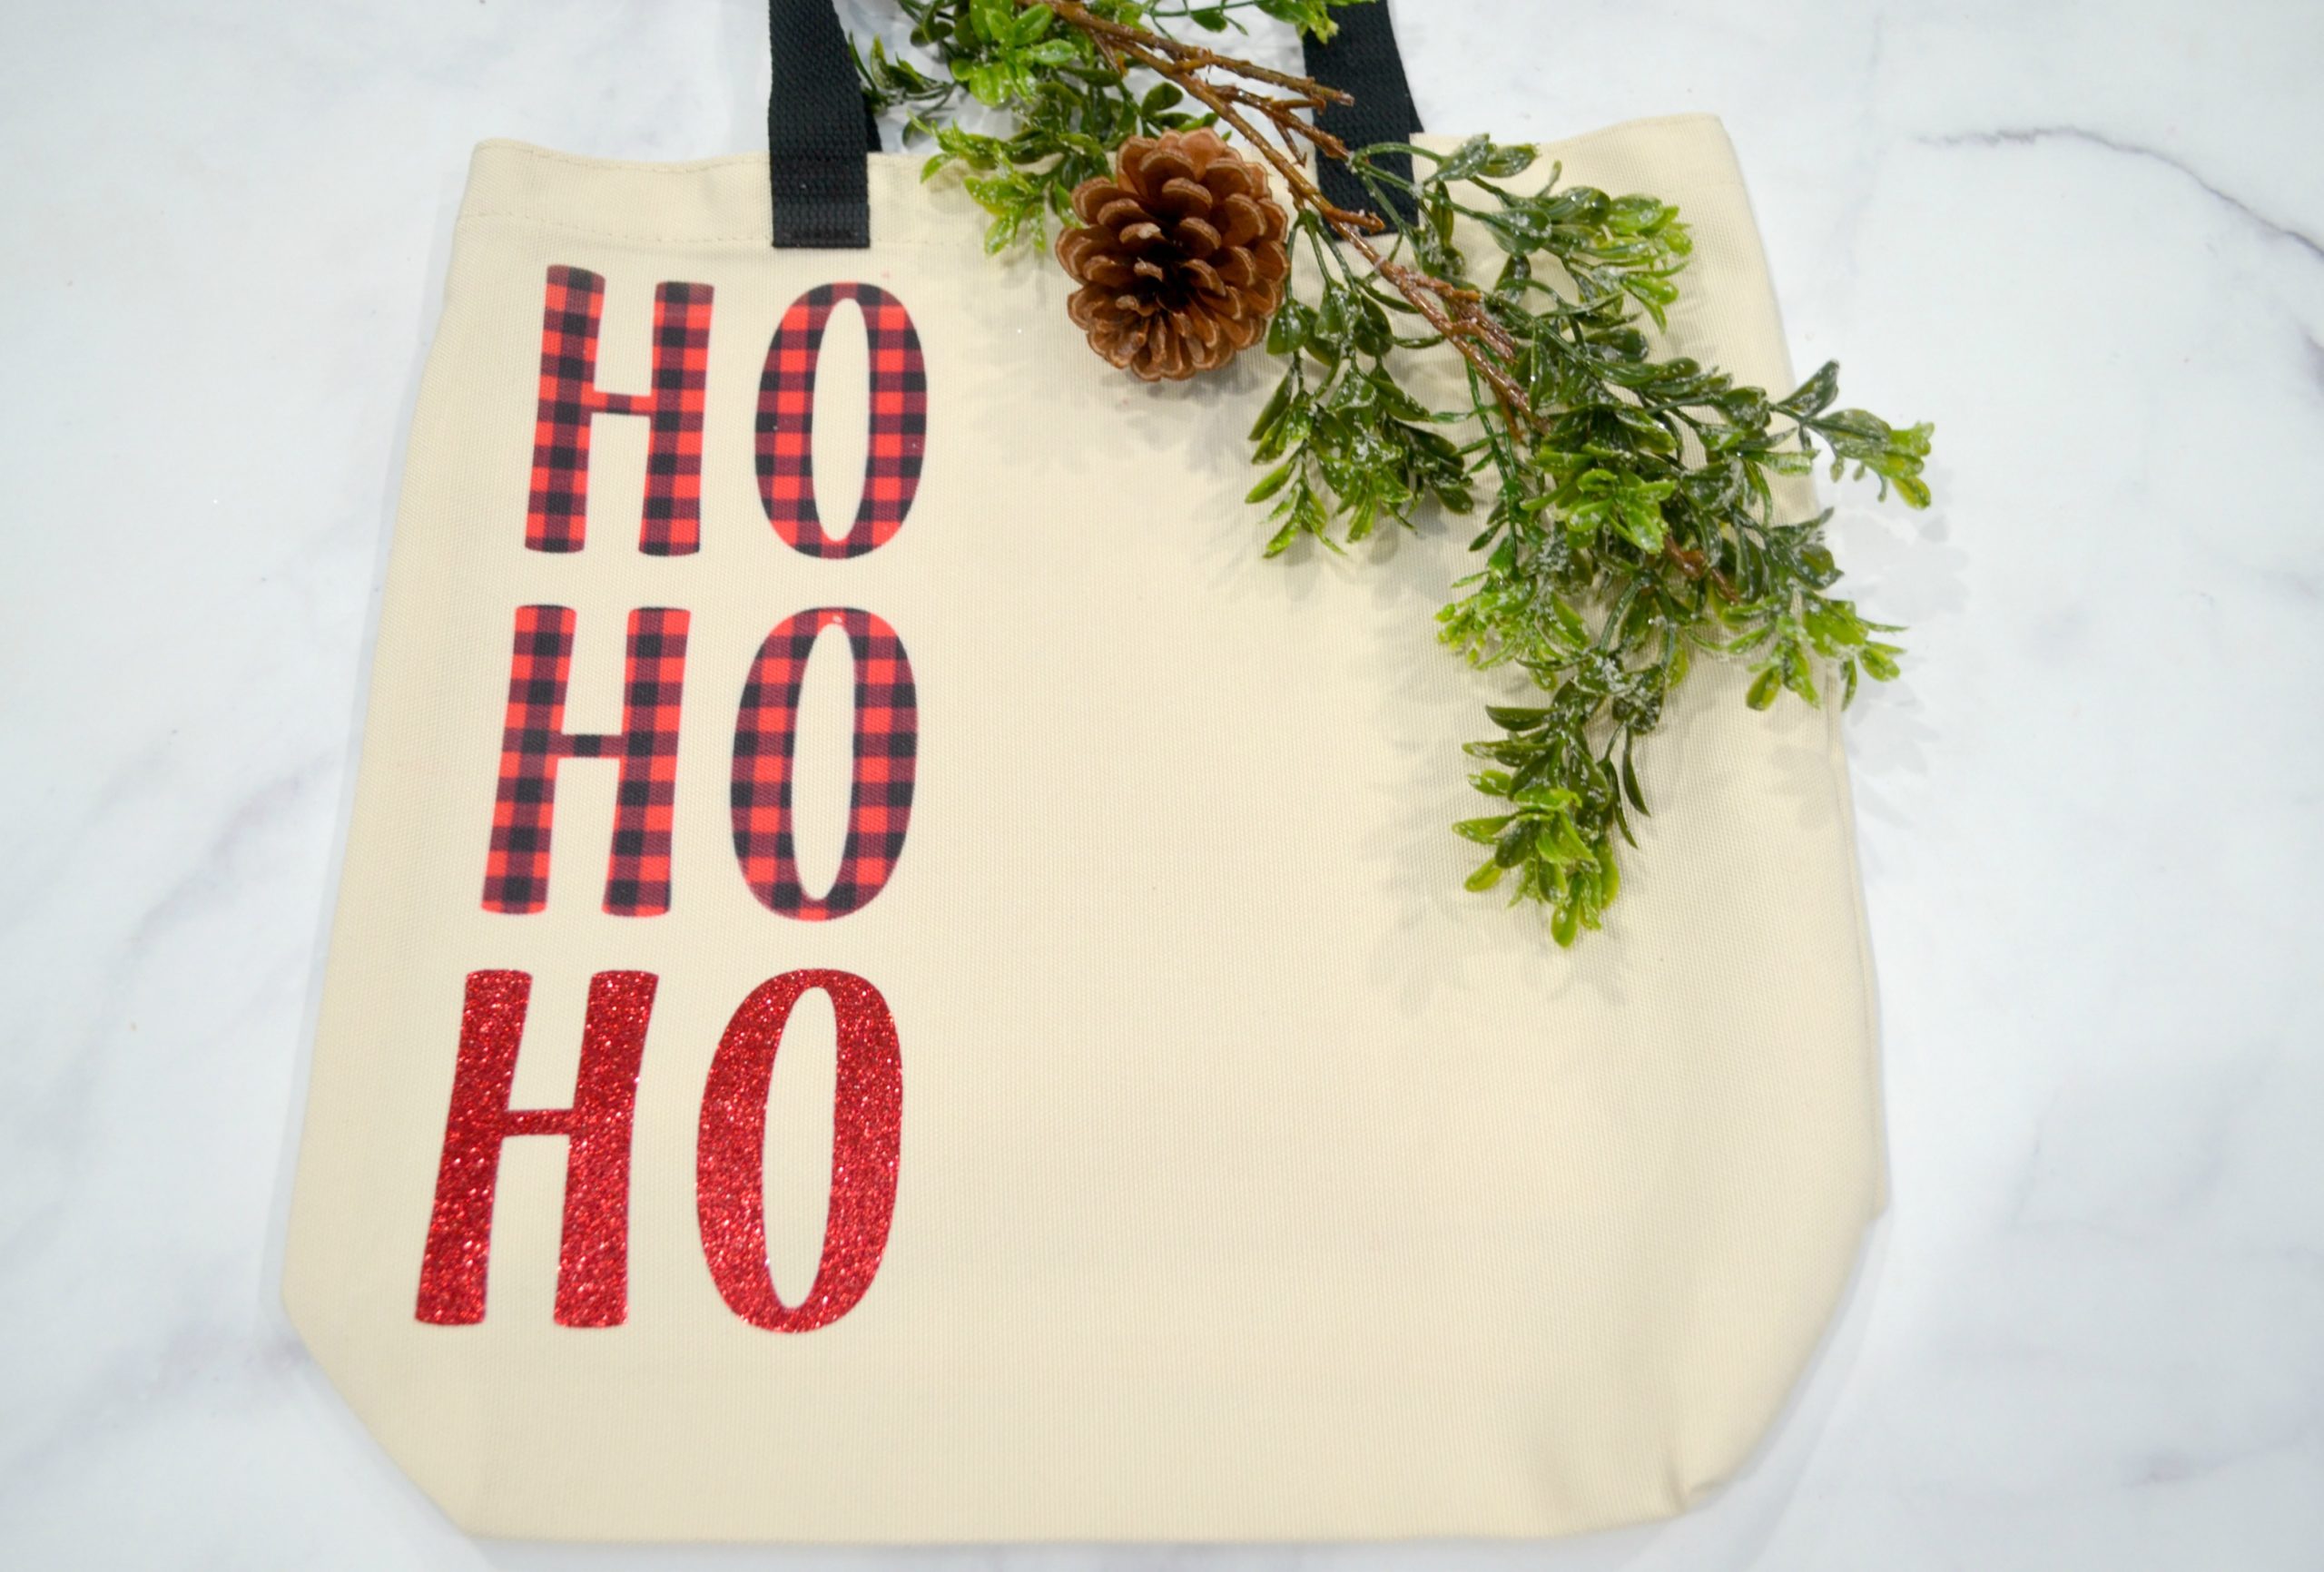
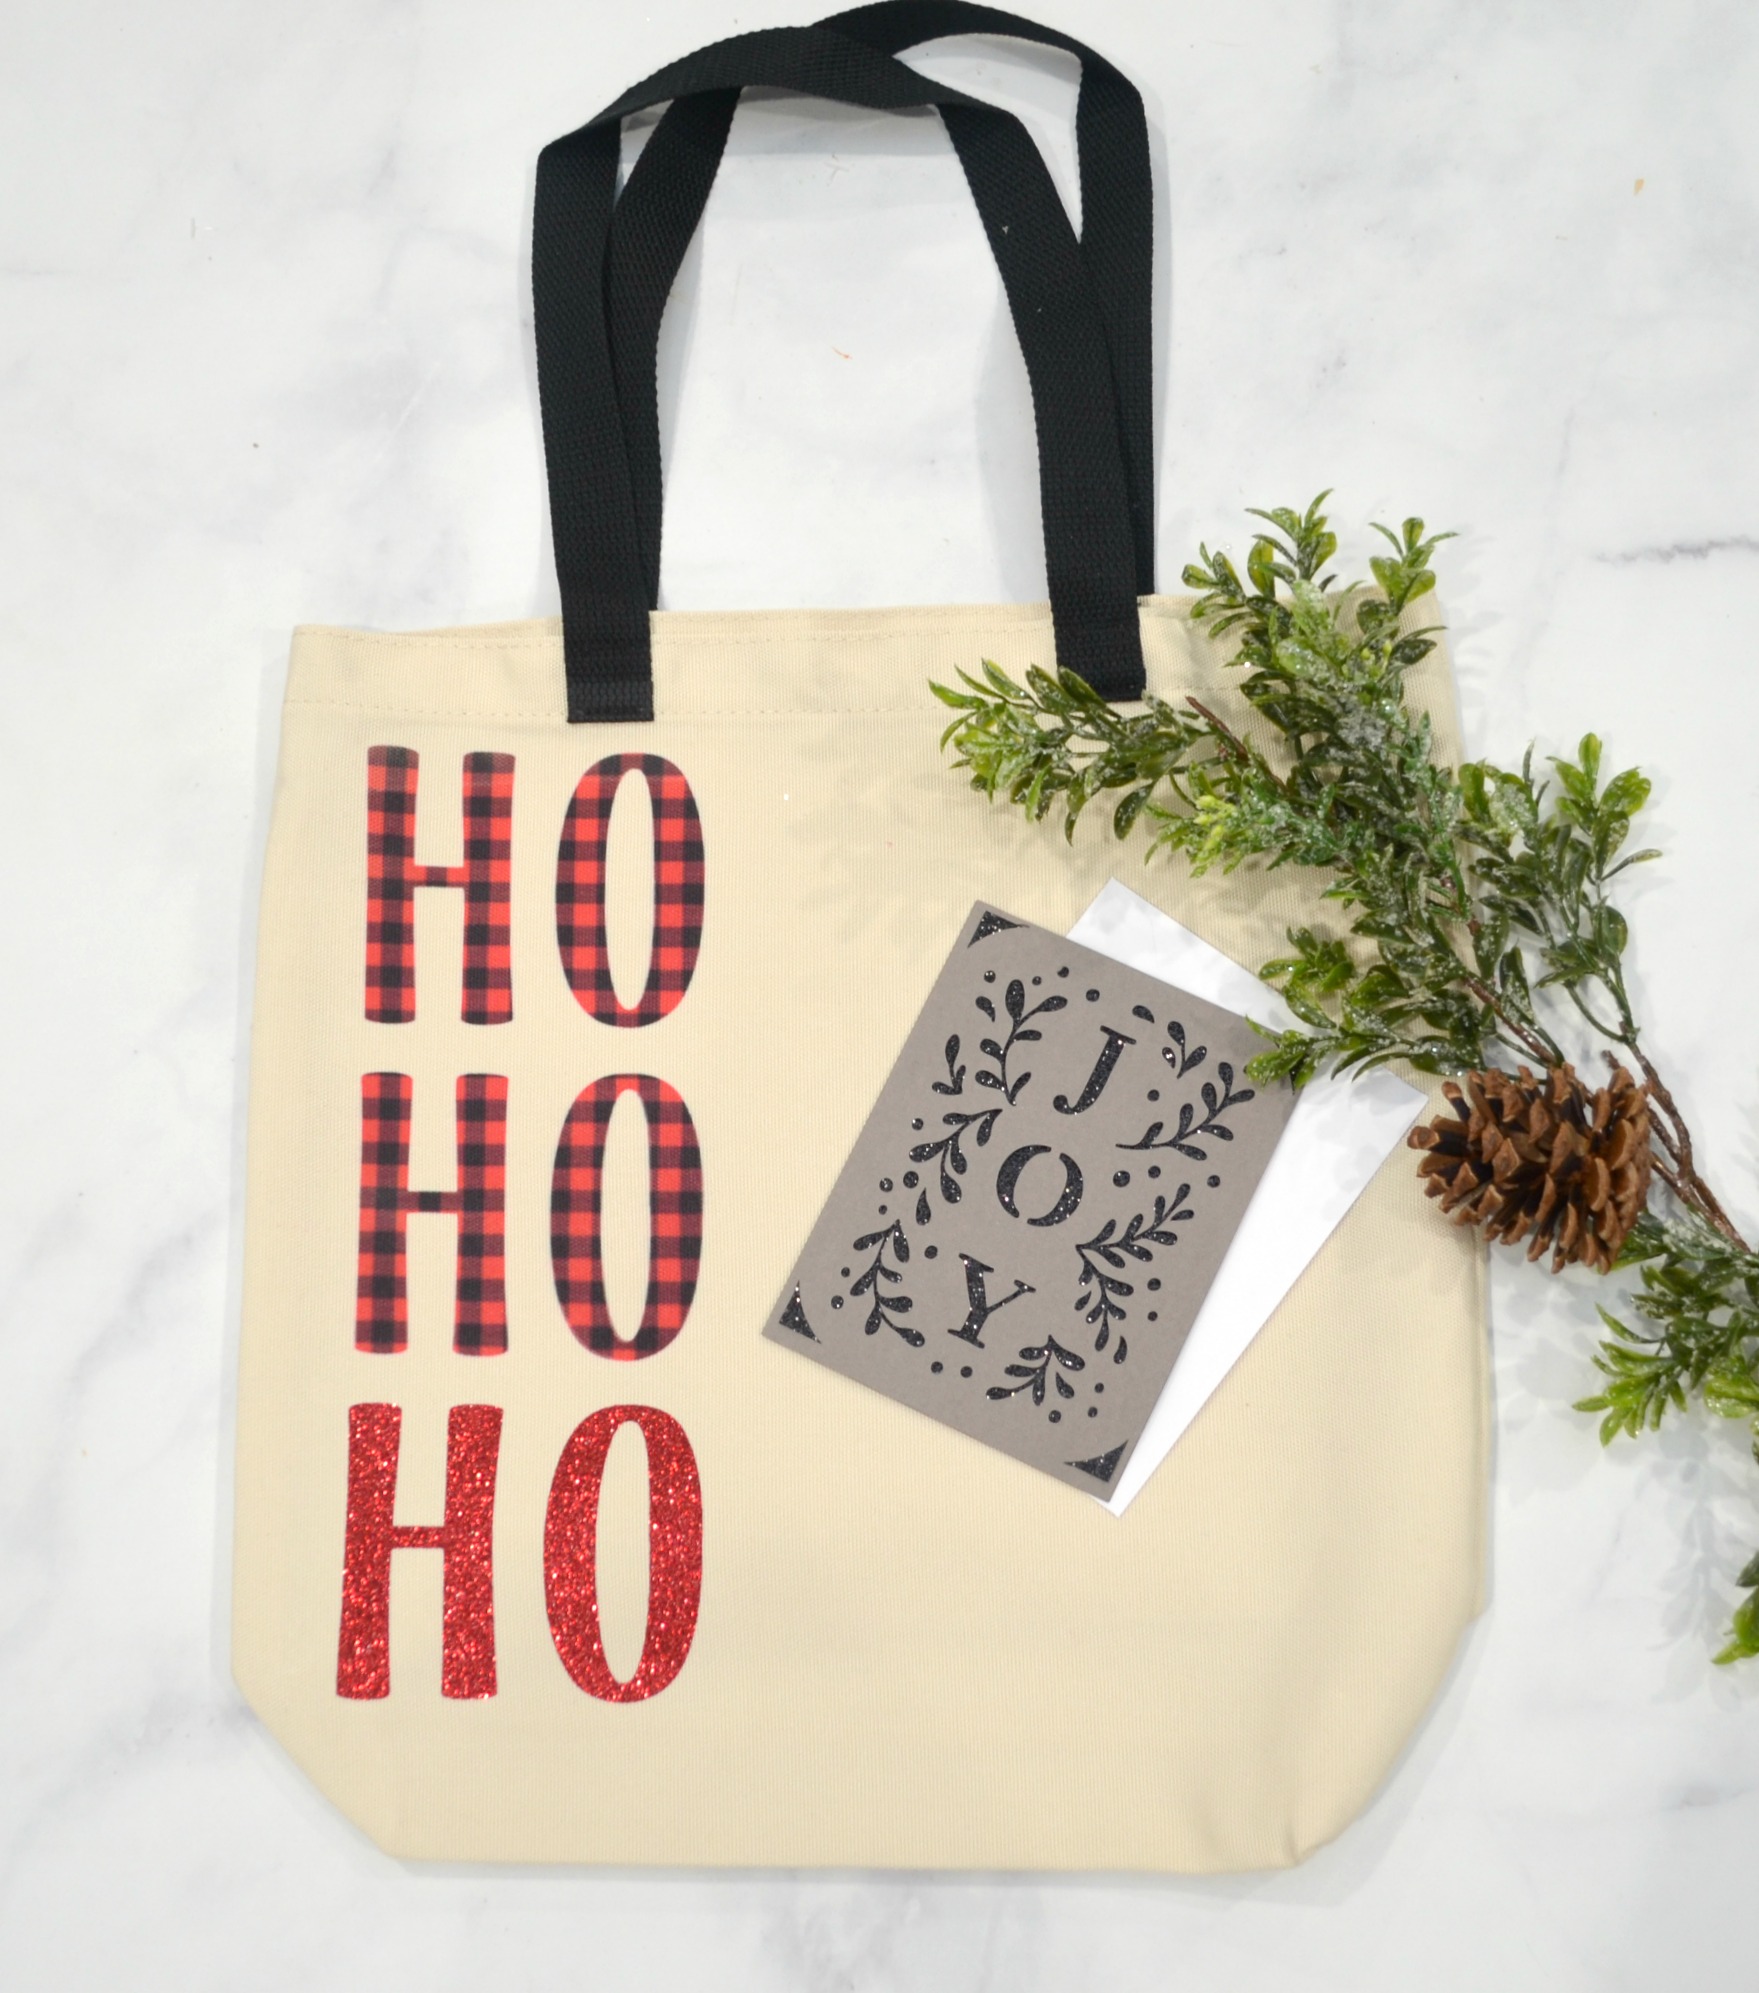
It may seem a little early to start thinking about Christmas, but it really will be here before we know it! This week, I’ve been sharing ideas for celebrating the fall holidays even while social distancing, so I wanted to give you a quick “contact-free” Christmas idea too. This decorated Ho Ho Ho Tote Bag works as a gift, gift wrap, or both, and it’s a great way to surprise your neighbors. Fill it with some festive goodies, then hang it on their door. They’ll enjoy whatever is inside, then they can continue to use the bag all season long. Here’s how to make it.
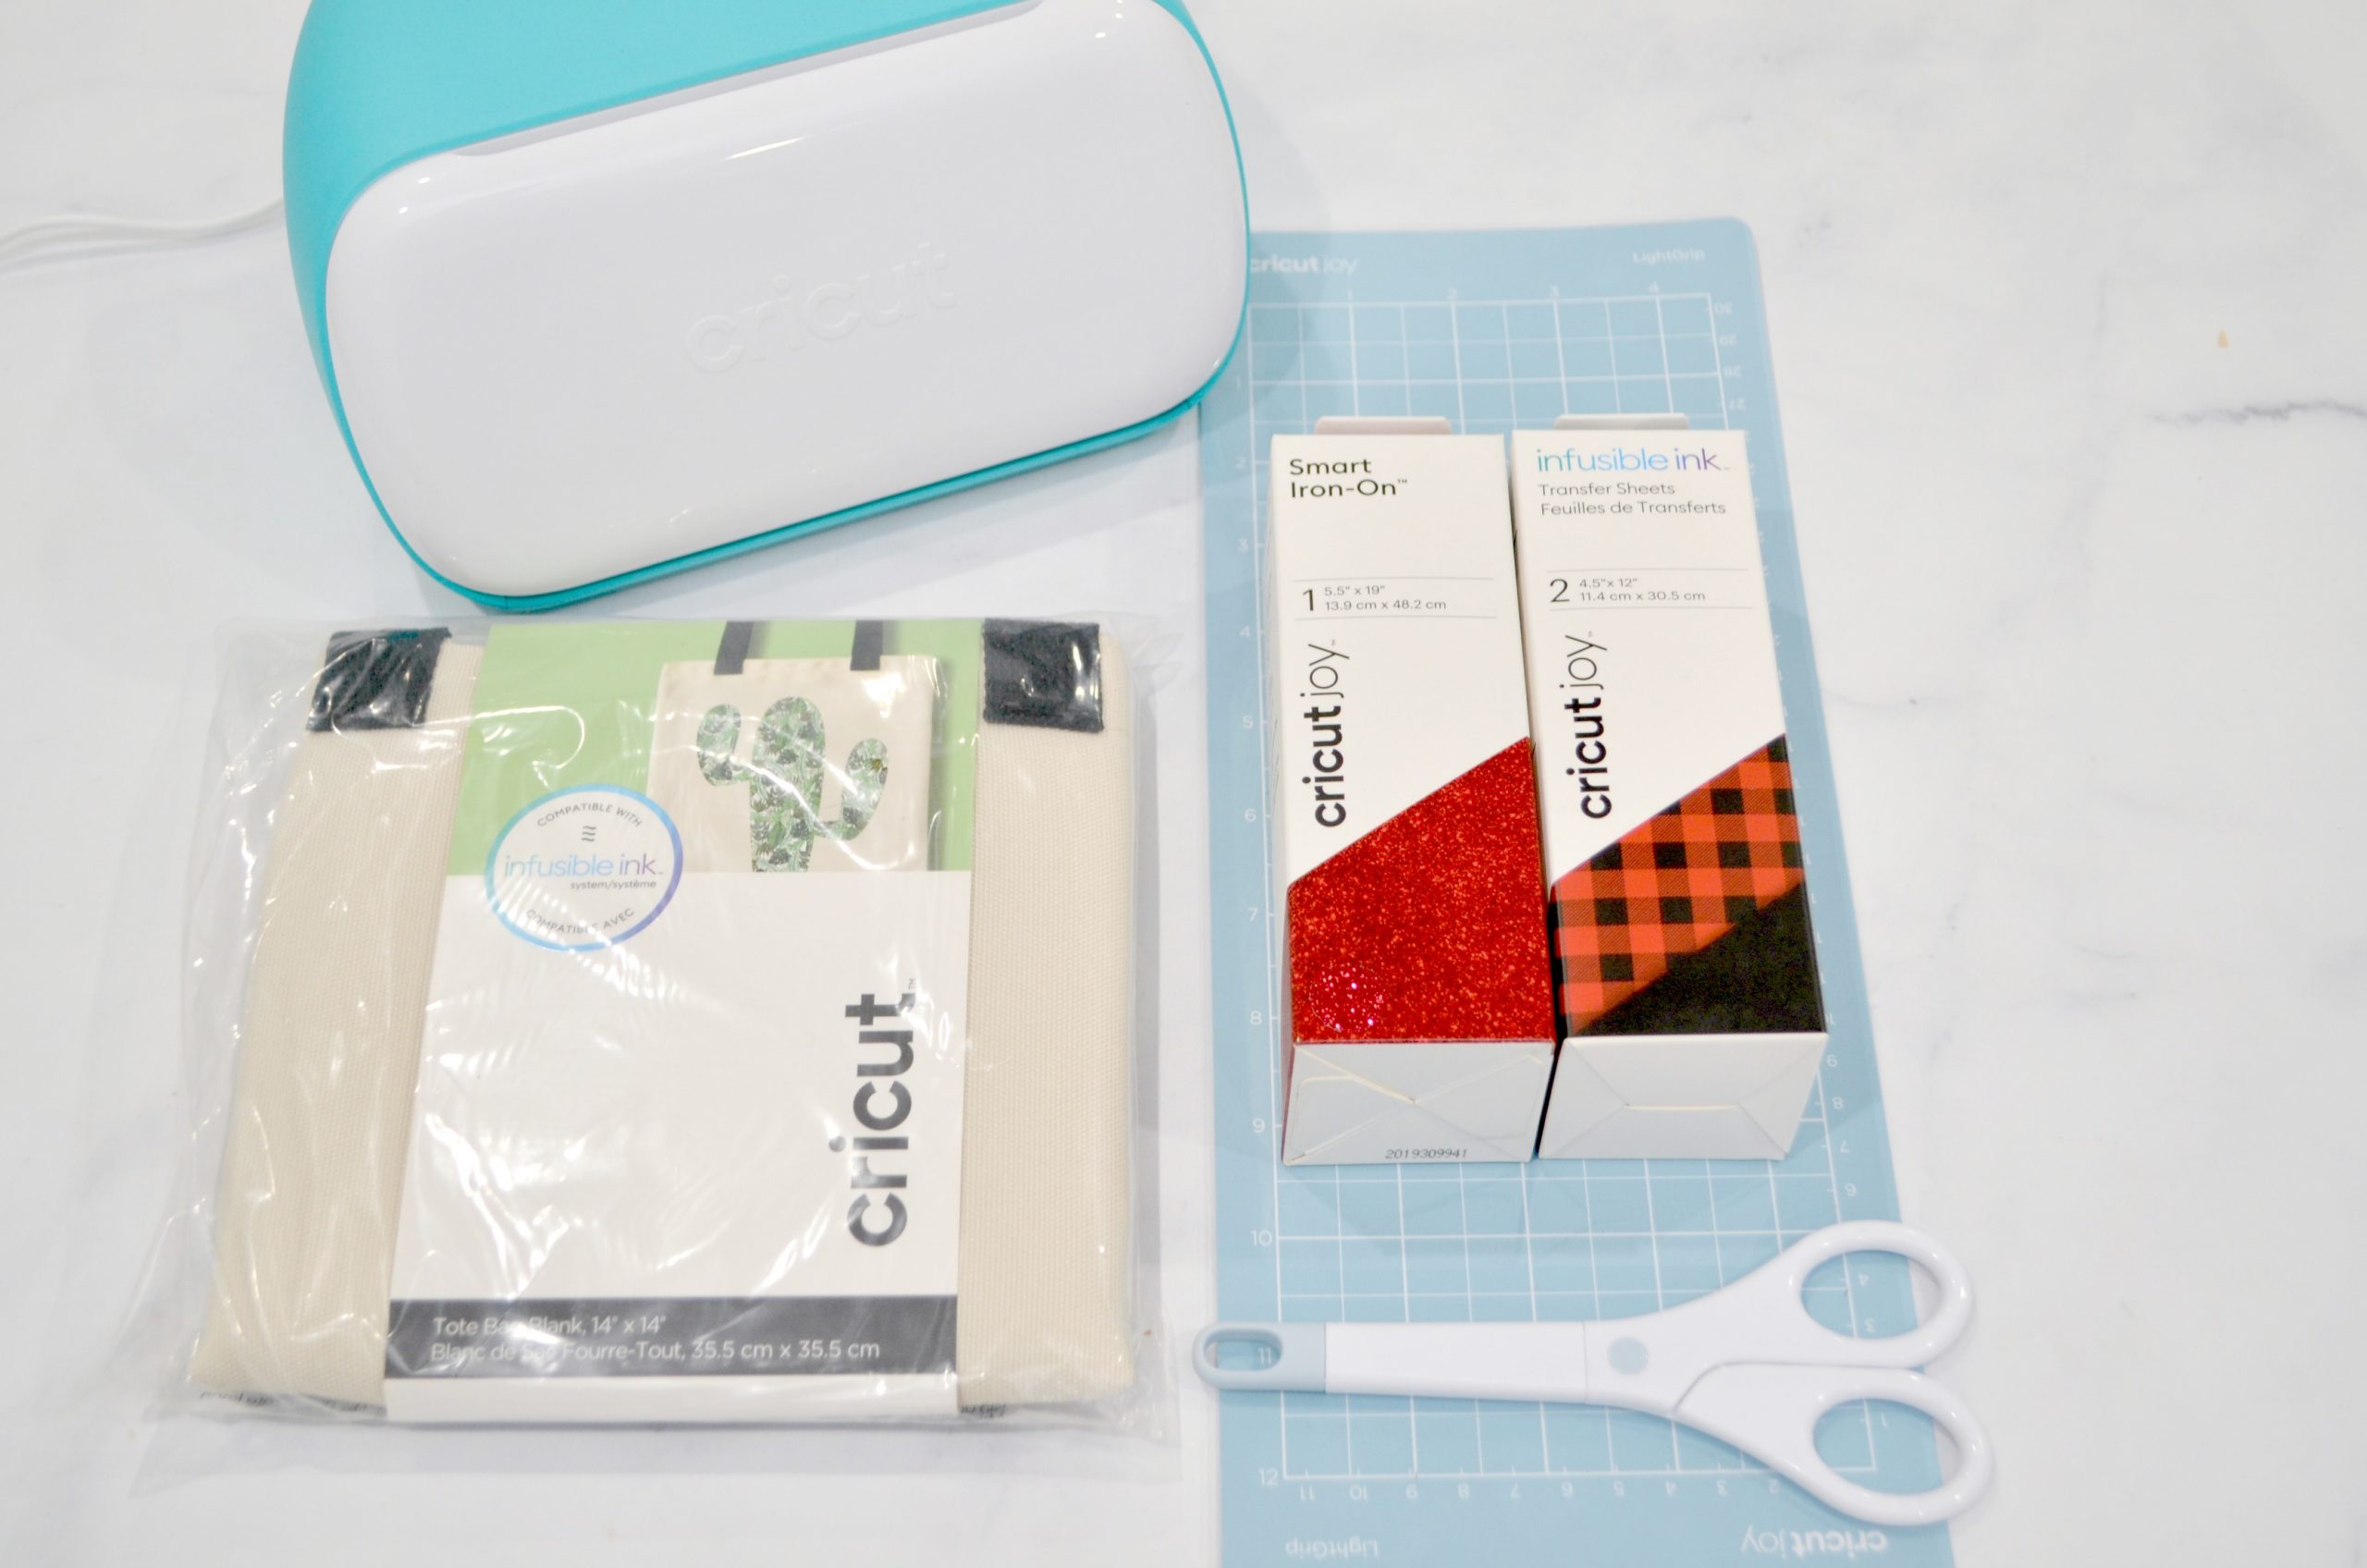
You’ll need:
Cricut Joy (or other Cricut machine)
Smart Iron-On, Glitter (Red)
Infusible Ink Transfer Sheets (Buffalo Plaid)
Basic Tool Set (Scissors, Weeder, Tweezers, etc)
Cricut EasyPress 2 and EasyPress Mat (or folded towel)
Lint Roller or Tape
Step 1: Create or choose your design.
If you’d like to use my exact design, I’ve shared it as a public project in Cricut Design Space! You can access it here; just click the link and choose, “Make it!”
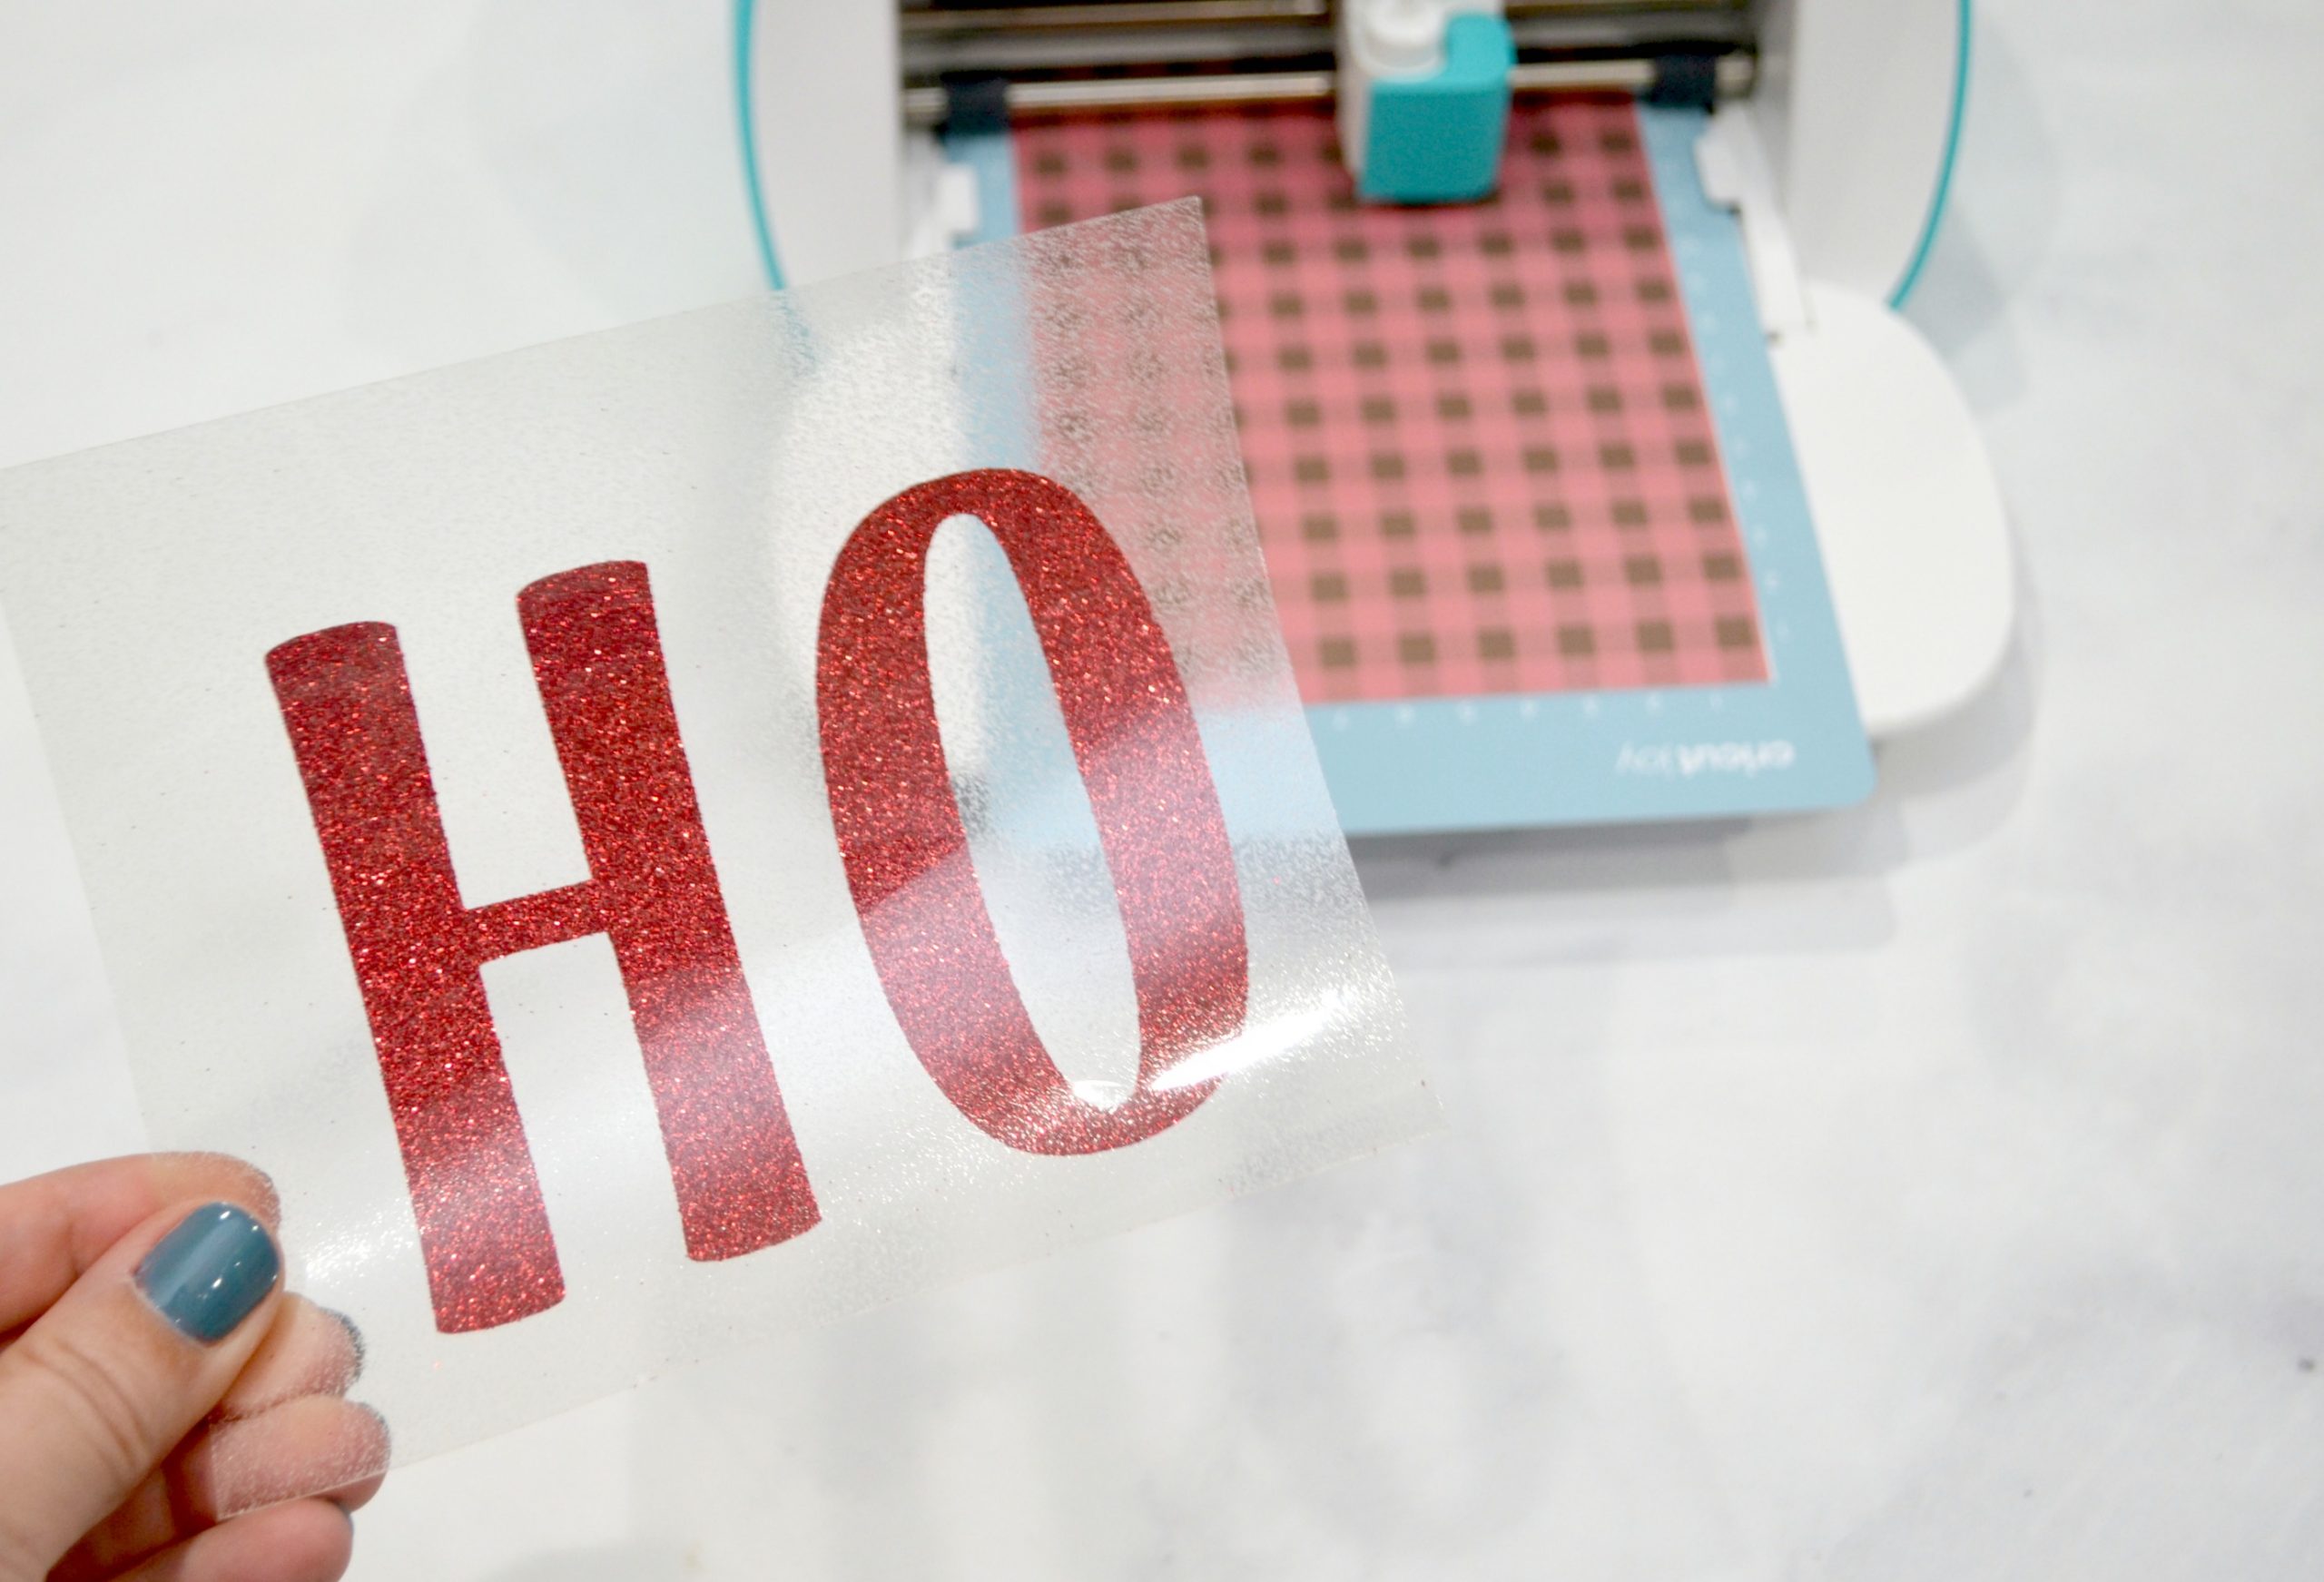
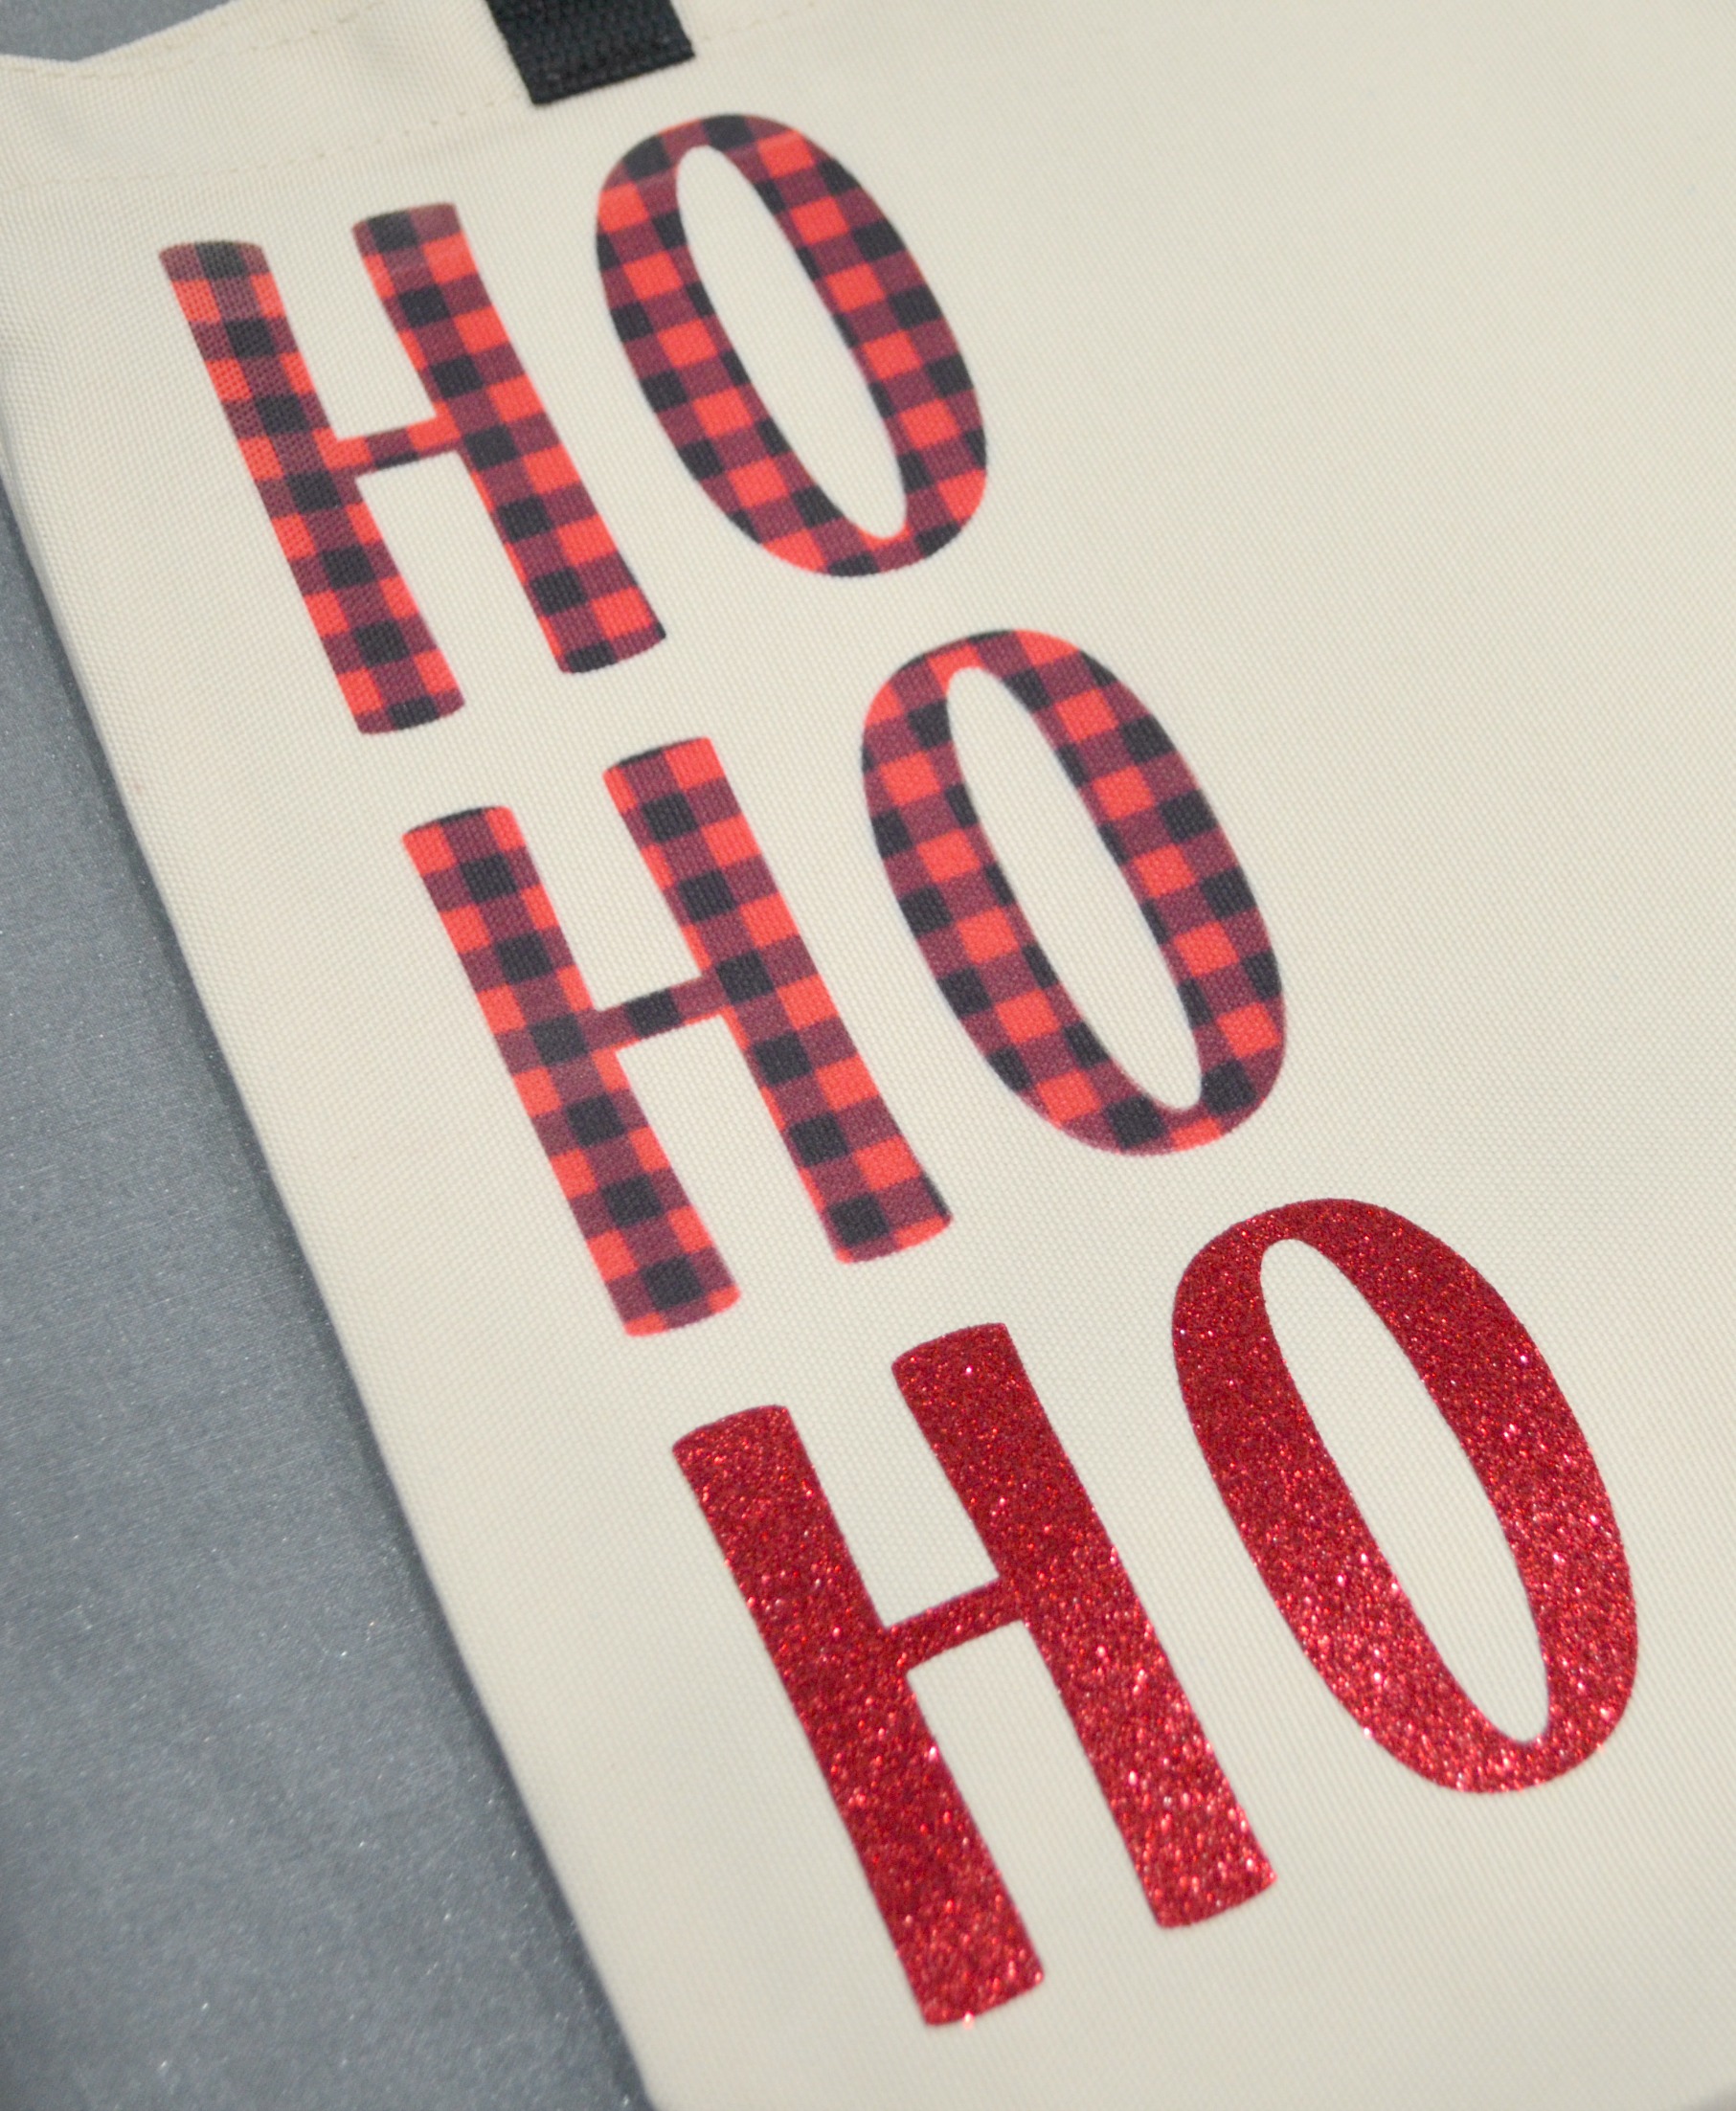
I used the font “Don Juan” in Design Space and chose the “add text” feature. I typed “Ho Ho,” into the text box, then set the material color to black. Because I wanted the last word to be cut from a different material, I opened a new text box and typed “Ho” a third time, setting that one to red.
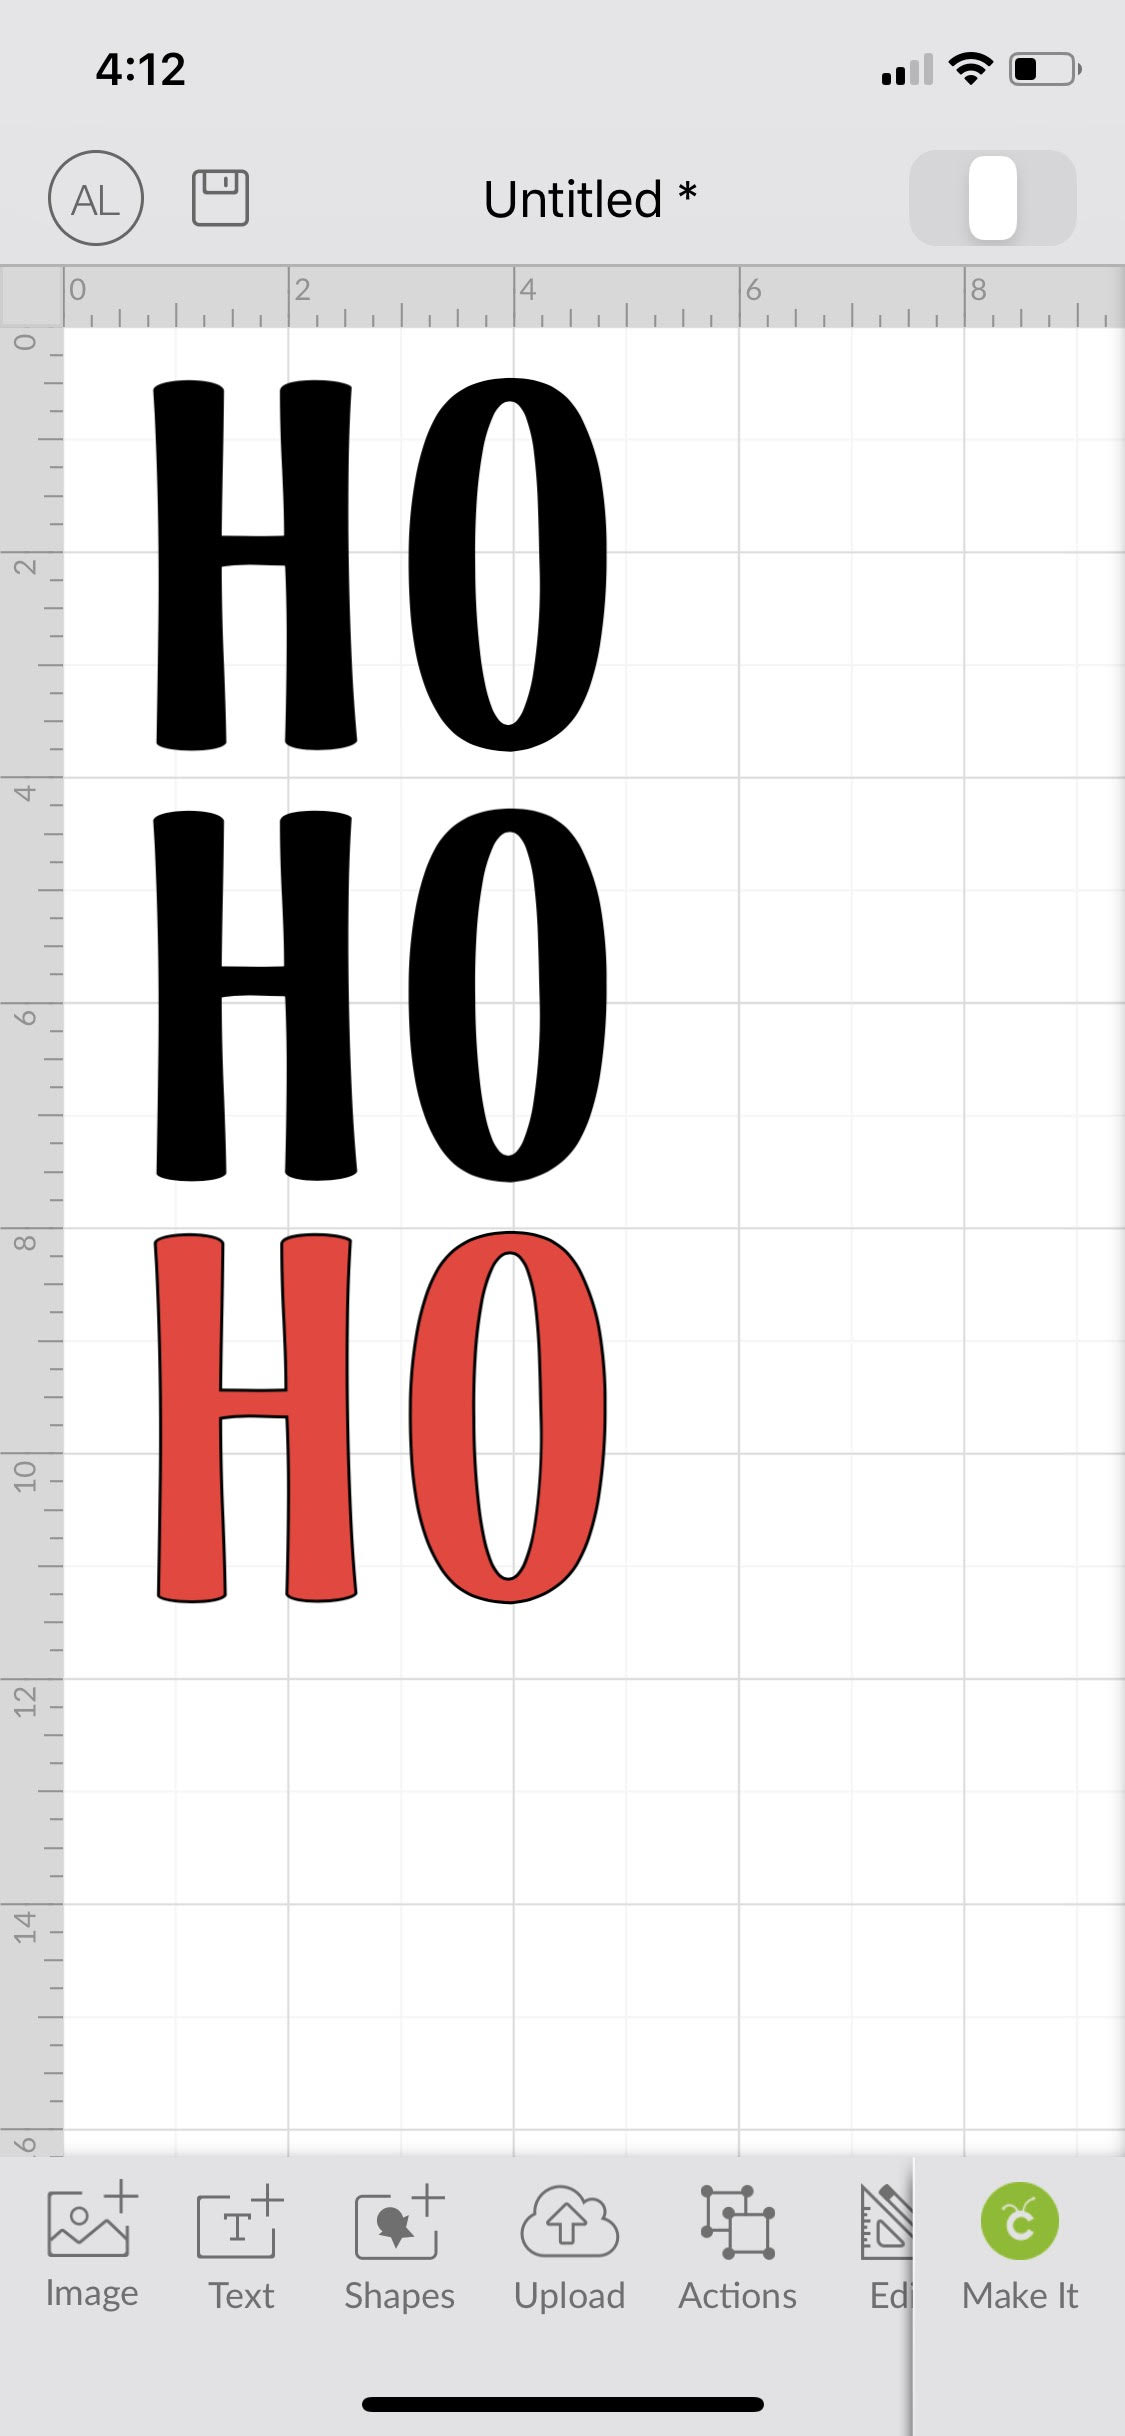
Step 2: Select “Make It” in the bottom right corner of the app.
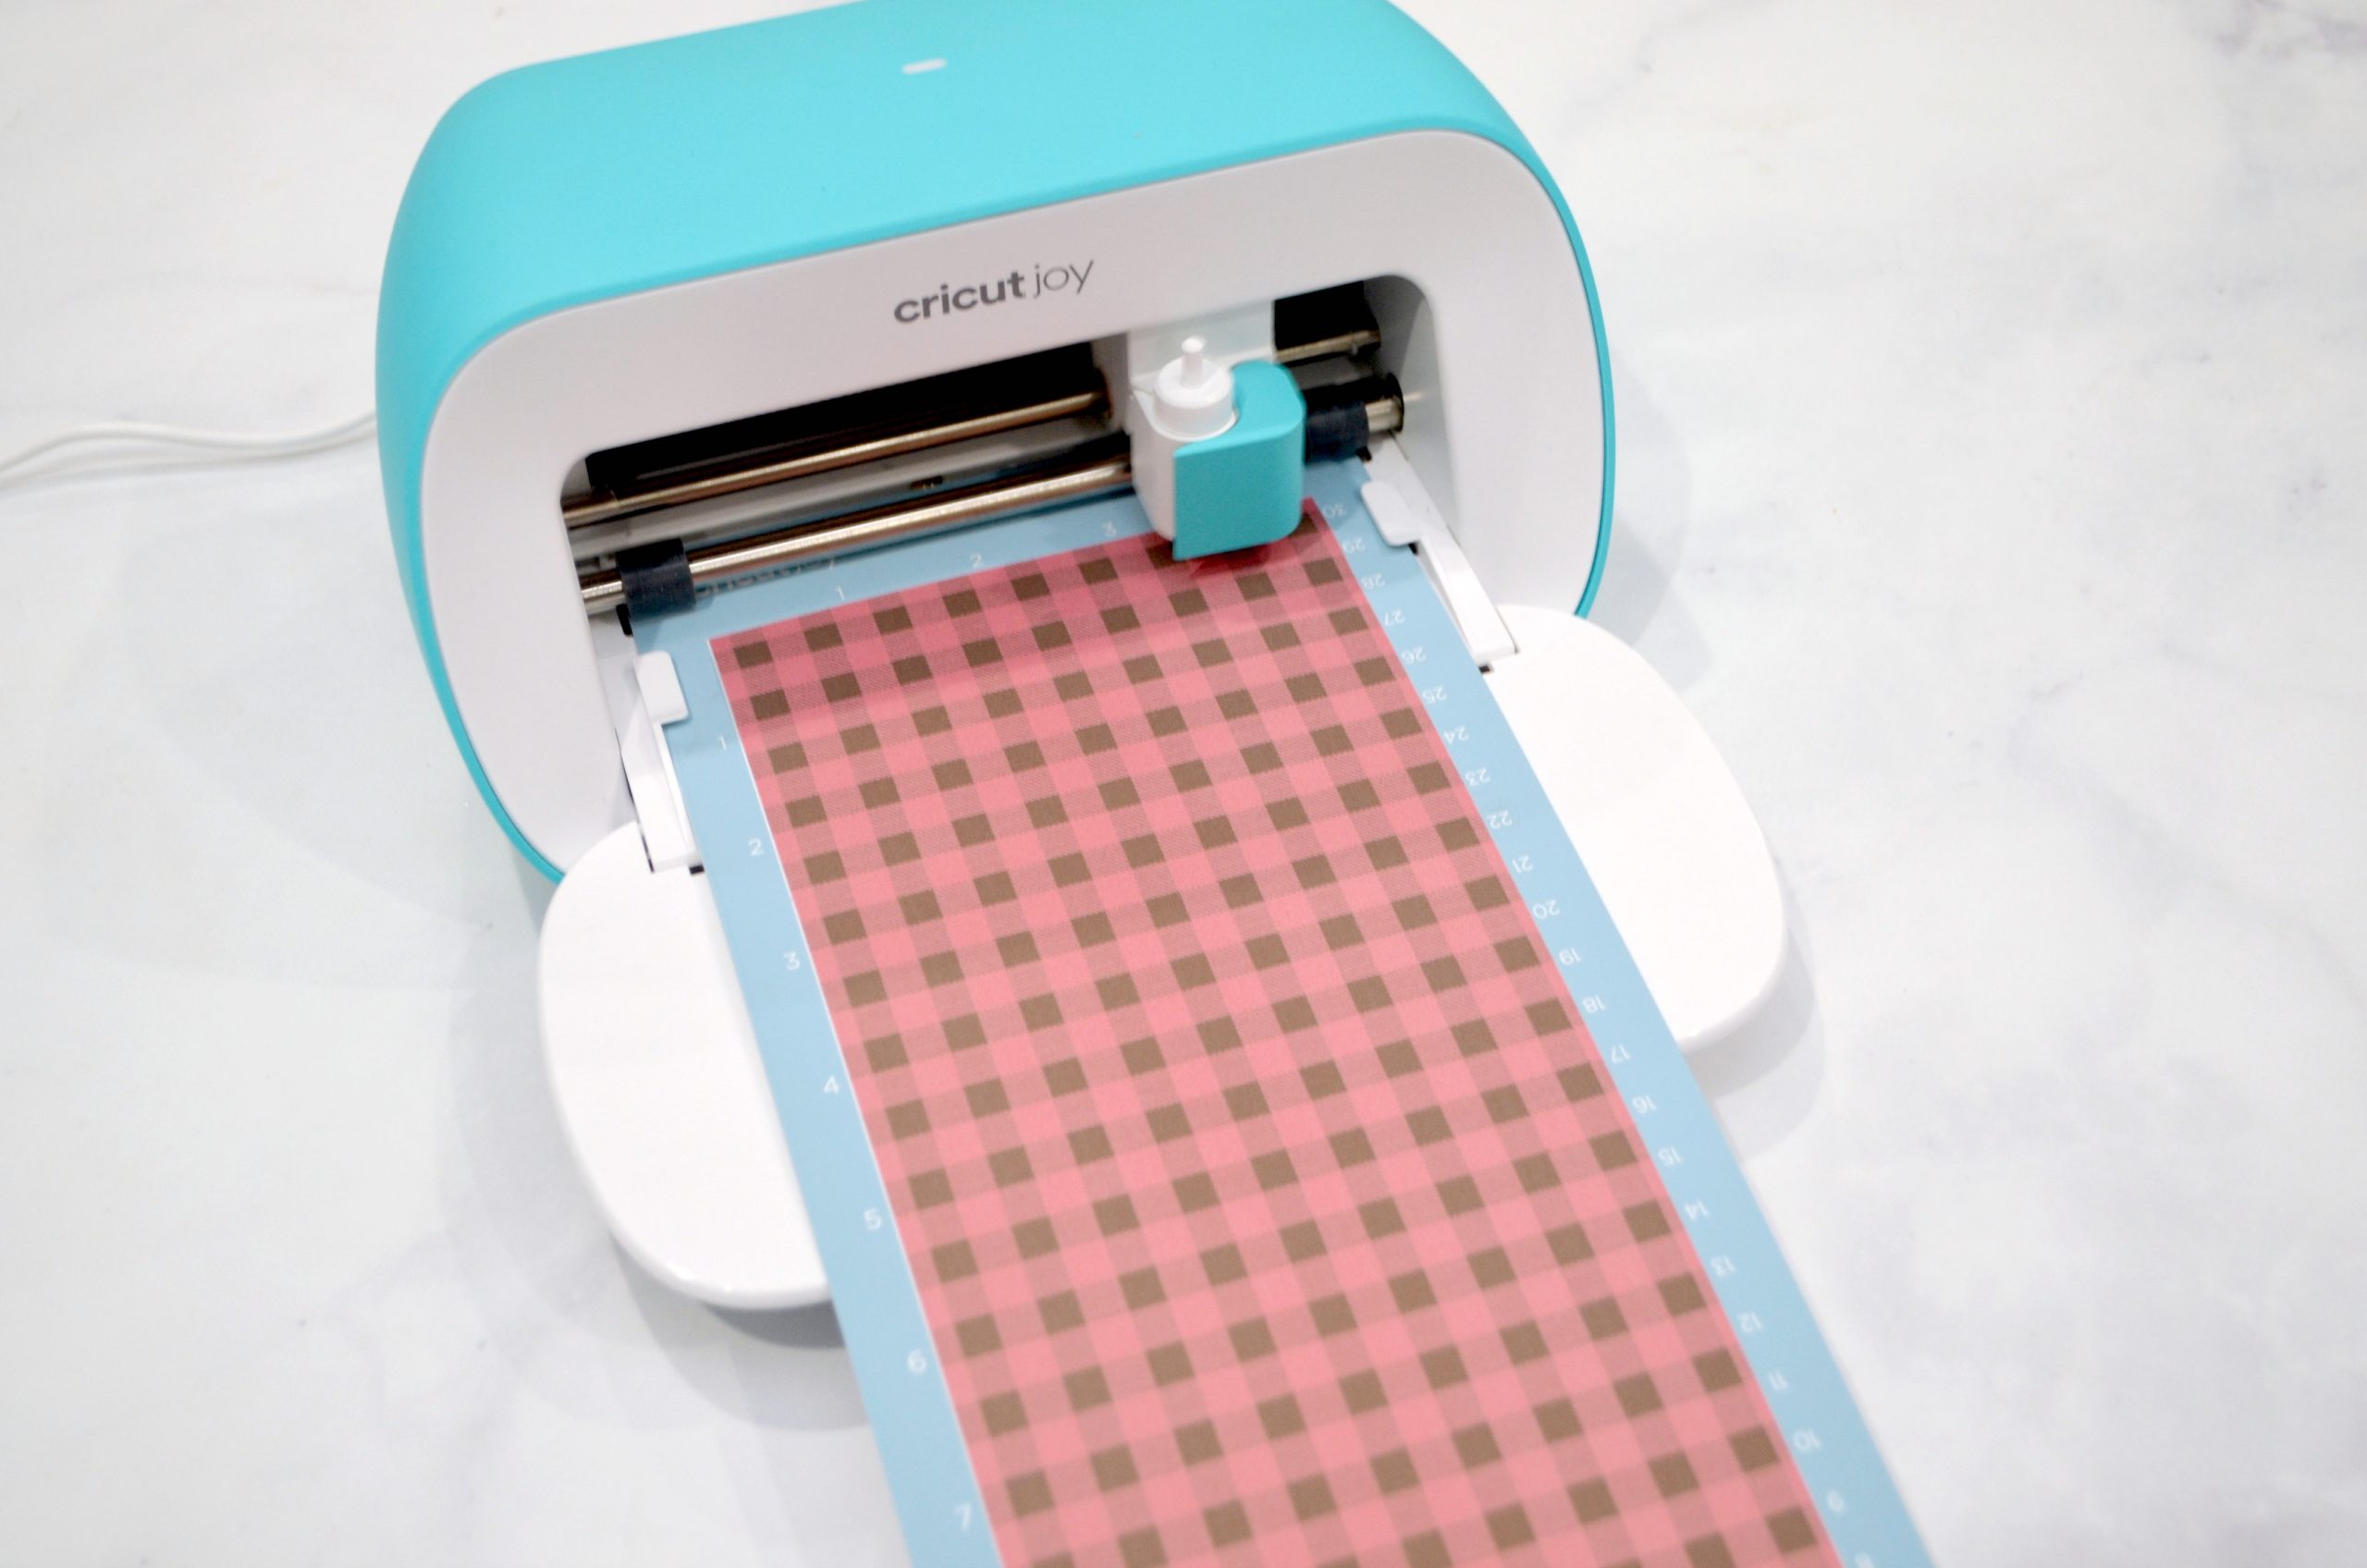
Design Space will split your design into two separate cuts. View the two mats and make sure to select the “mirror” option for both. Manually select the load type for each mat; the Glitter Iron-On will be “without mat,” while the Infusible Ink Transfer Sheet will need to be loaded on a cutting mat.

Follow the prompts in the software to load your materials one at a time, select the material in the app, then let the Cricut Joy work its magic.
Step 3: Weed your cut designs.
Once the cutting is complete, remove everything that isn’t part of your design (including the centers of the O’s) from the adhesive backing.
Step 4: Preheat your EasyPress 2 using the Heat Guide.
Infusible Ink Transfer Sheets take 40 seconds at 385 degrees to transfer and are warm peel.
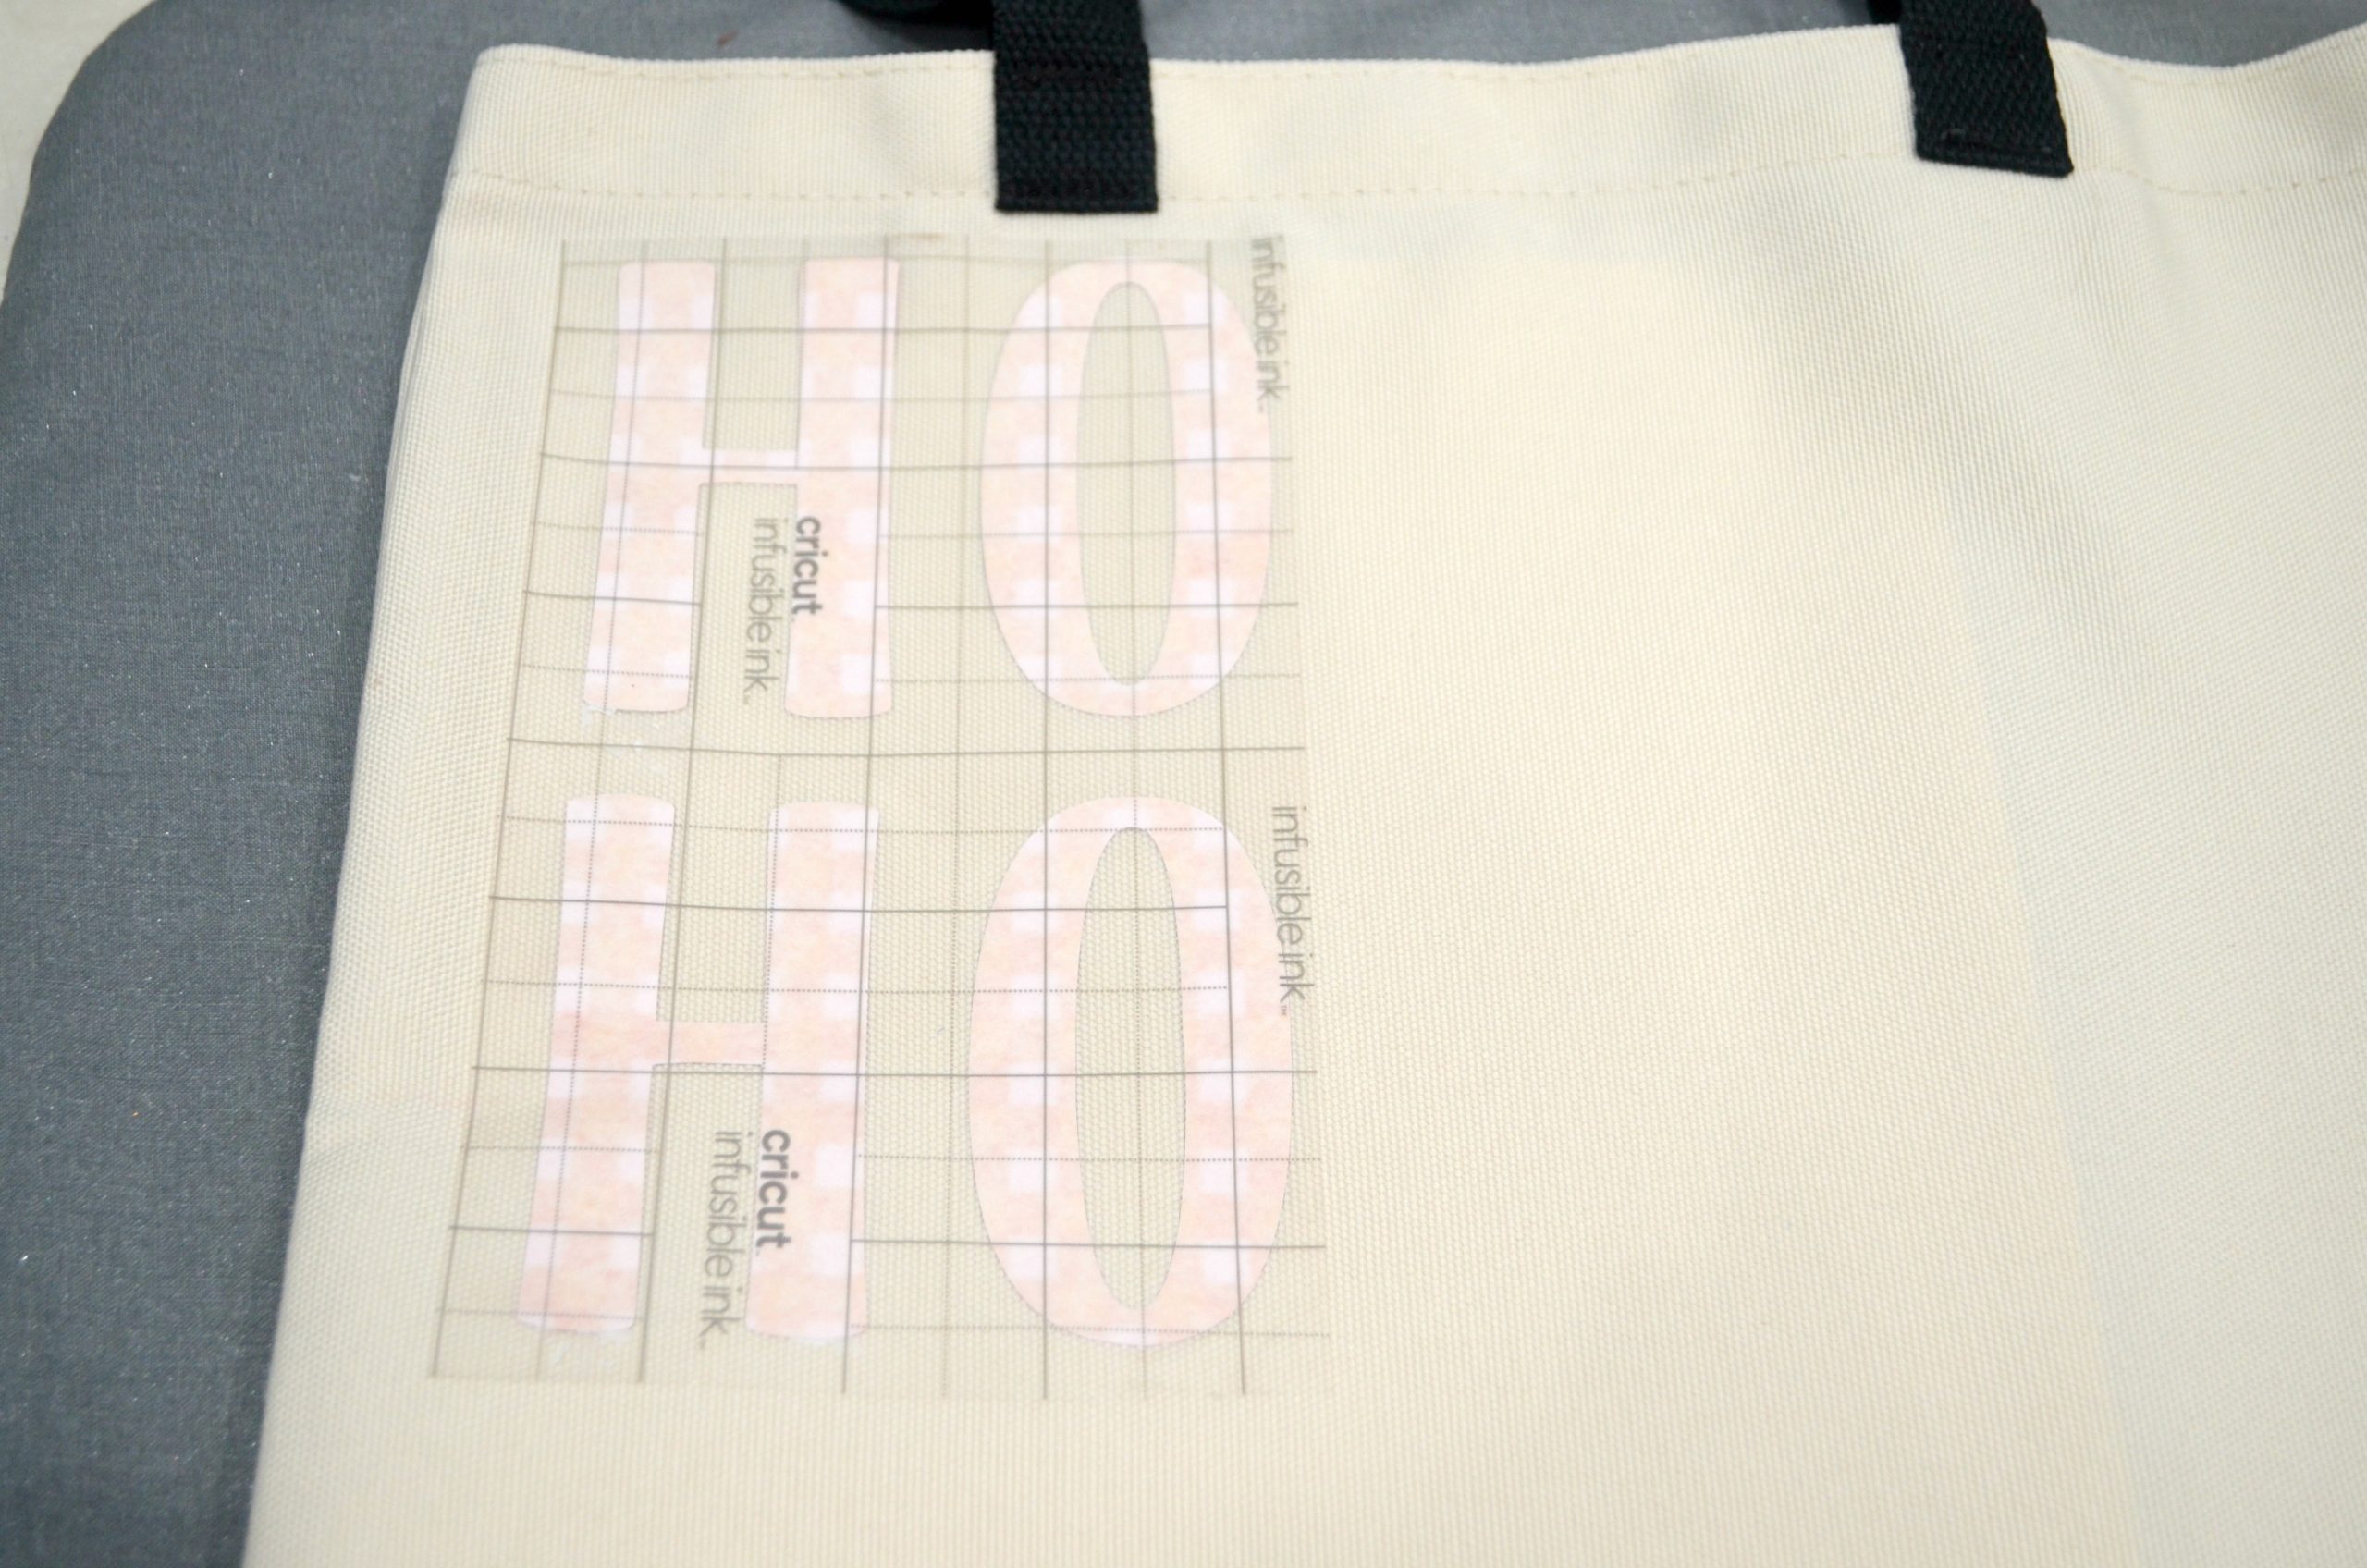
Step 5: Prepare and preheat the bag.
Place cardstock or cardboard inside the bag to prevent any ink from transferring through the fabric and onto the back. Use a lint roller or tape to remove any dust/debris from the surface of the bag. Cover the bag with a piece of butcher paper (included in the box with the Ink Transfers) and preheat for five seconds.
Step 6: Use heat to transfer the Infusible Ink.
Position the Infusible Ink design where you want it to go (mine was on the top left side of the bag) and press gently so the clear adhesive backing holds it in place. Cover it with butcher paper, then apply the EasyPress 2 for 40 seconds.
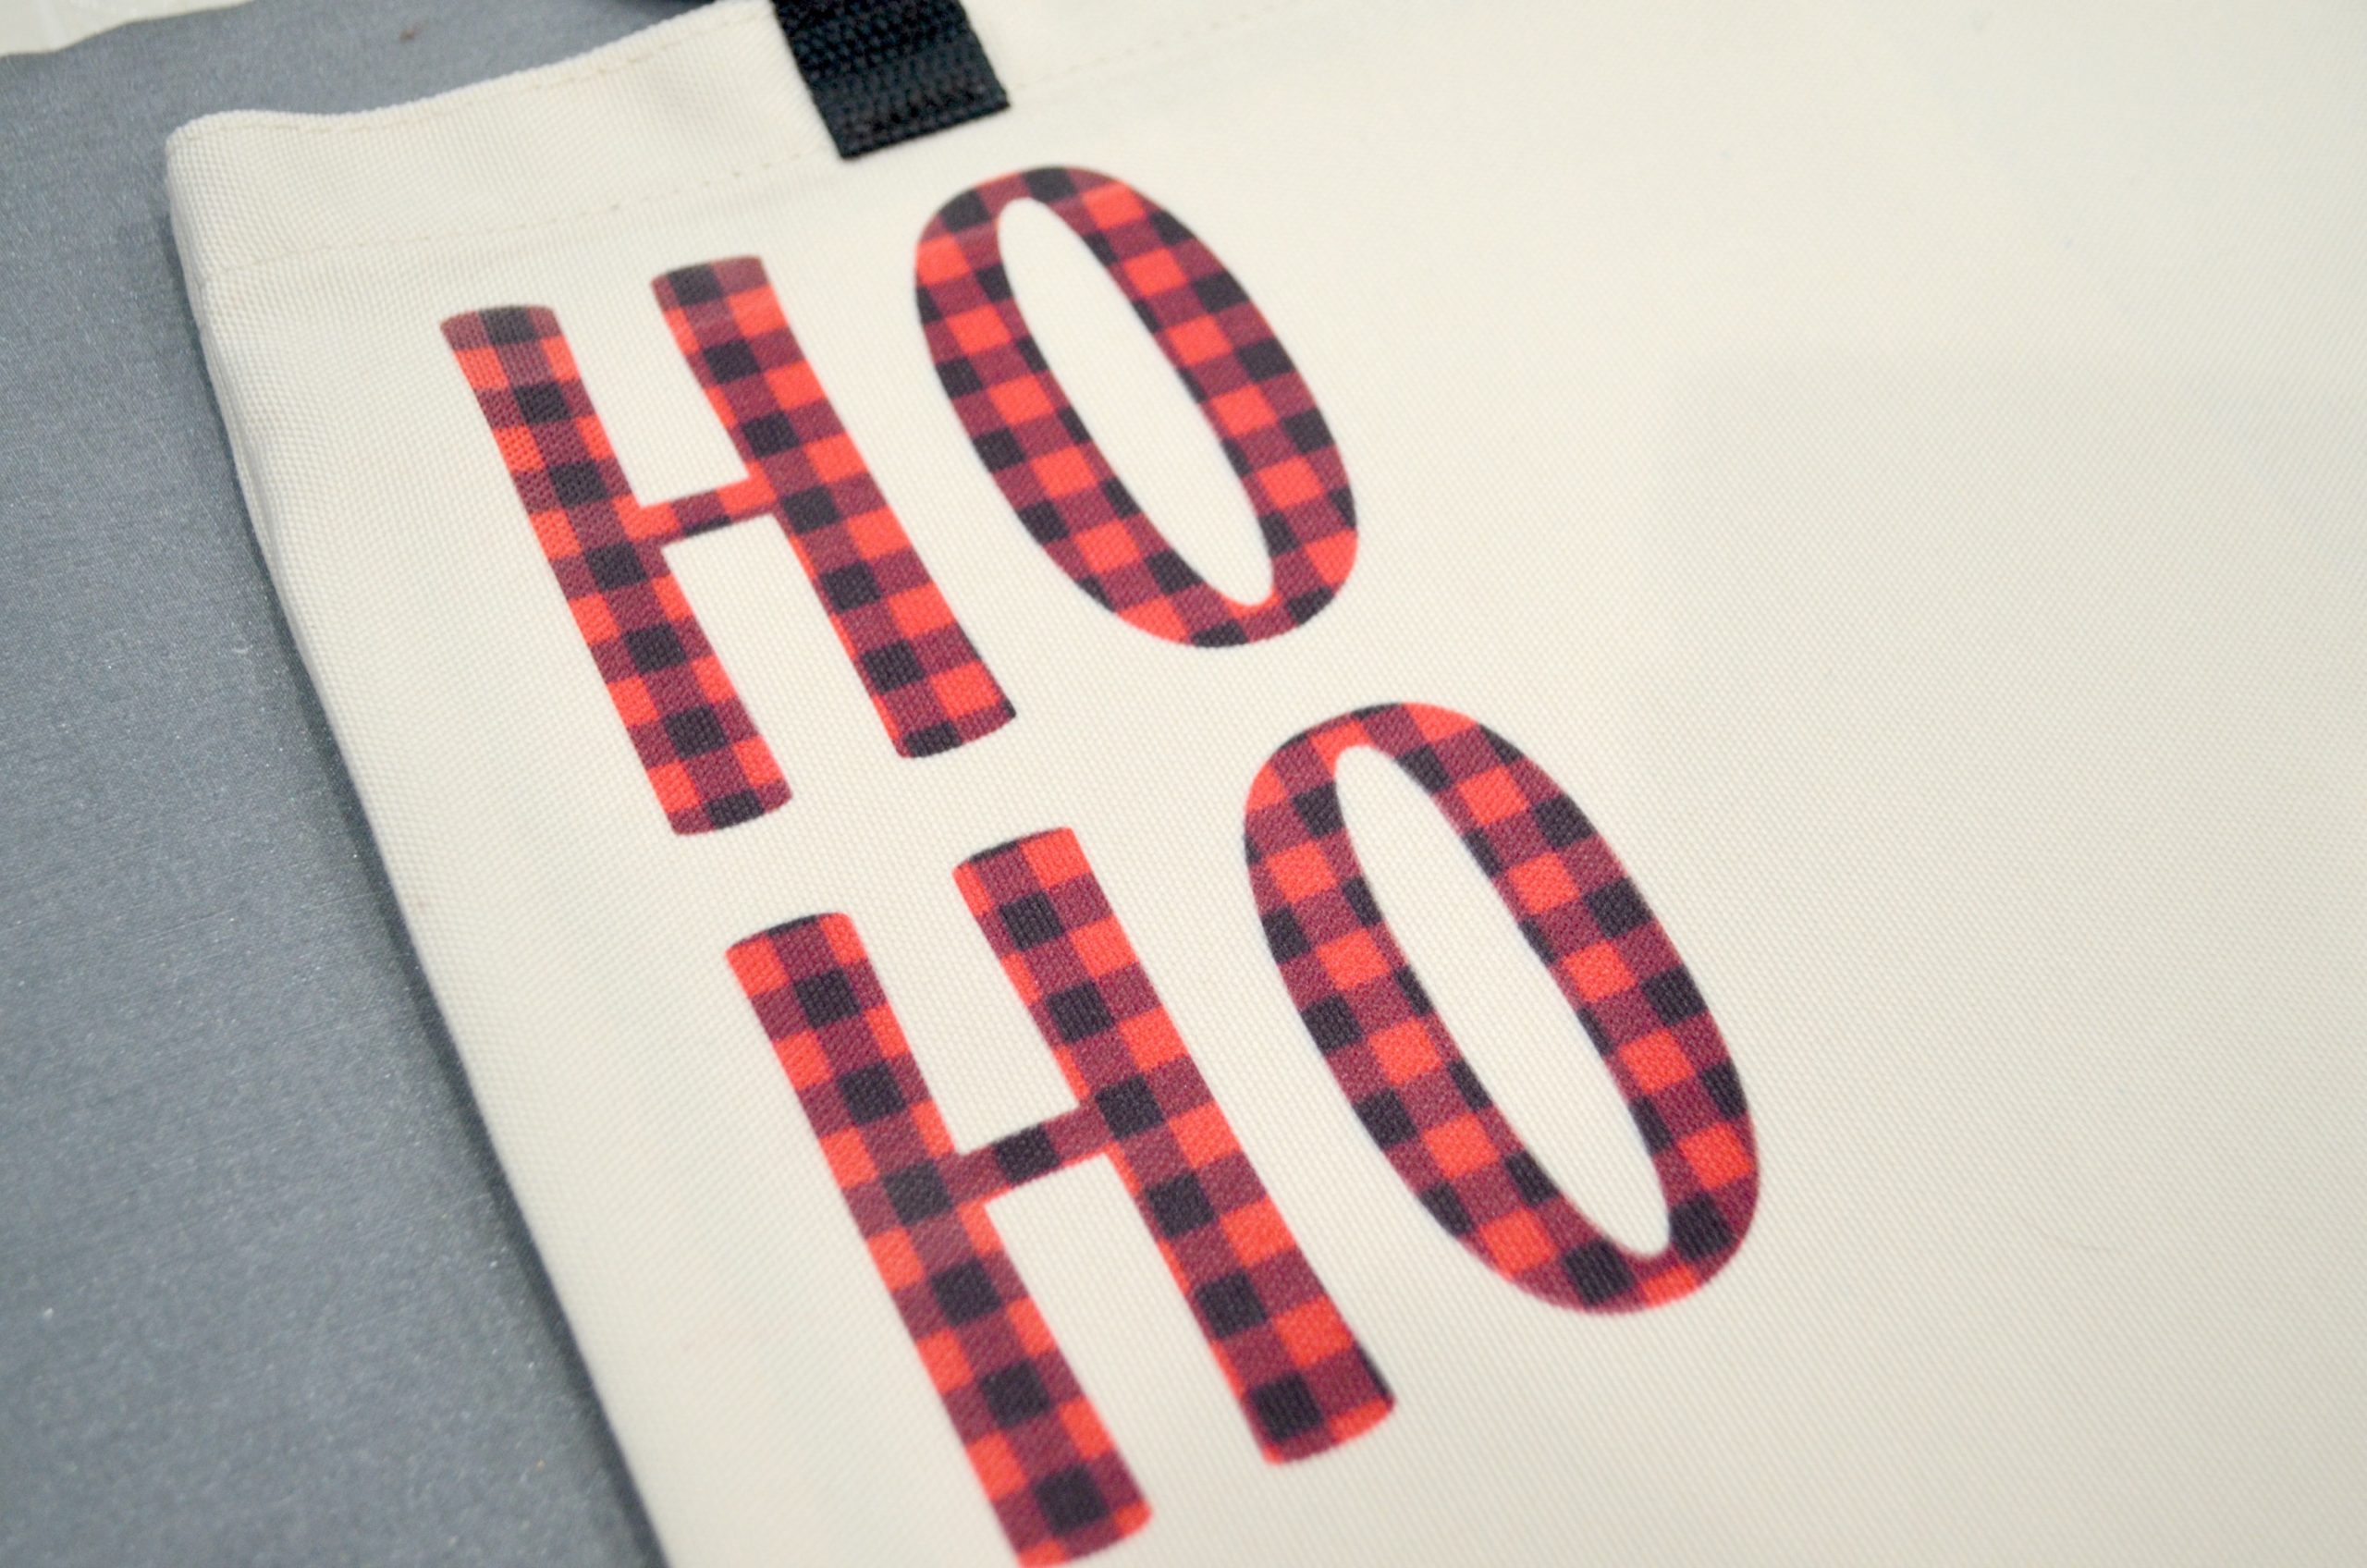
Remove the heat and butcher paper, then gently peel the backing away. The ink should now be fused into the fabric.
Step 7: Reset the EasyPress 2 temperature and time for Glitter Iron-On.
You’ll want the temperature to be set at 330 degrees for 30 seconds this time. Note that Glitter Iron-On is a cool peel material, unlike the Infusible Ink.
Step 8: Use heat to transfer the Iron-On.
Position your final word below the other two and press gently to stick it in place on the bag.
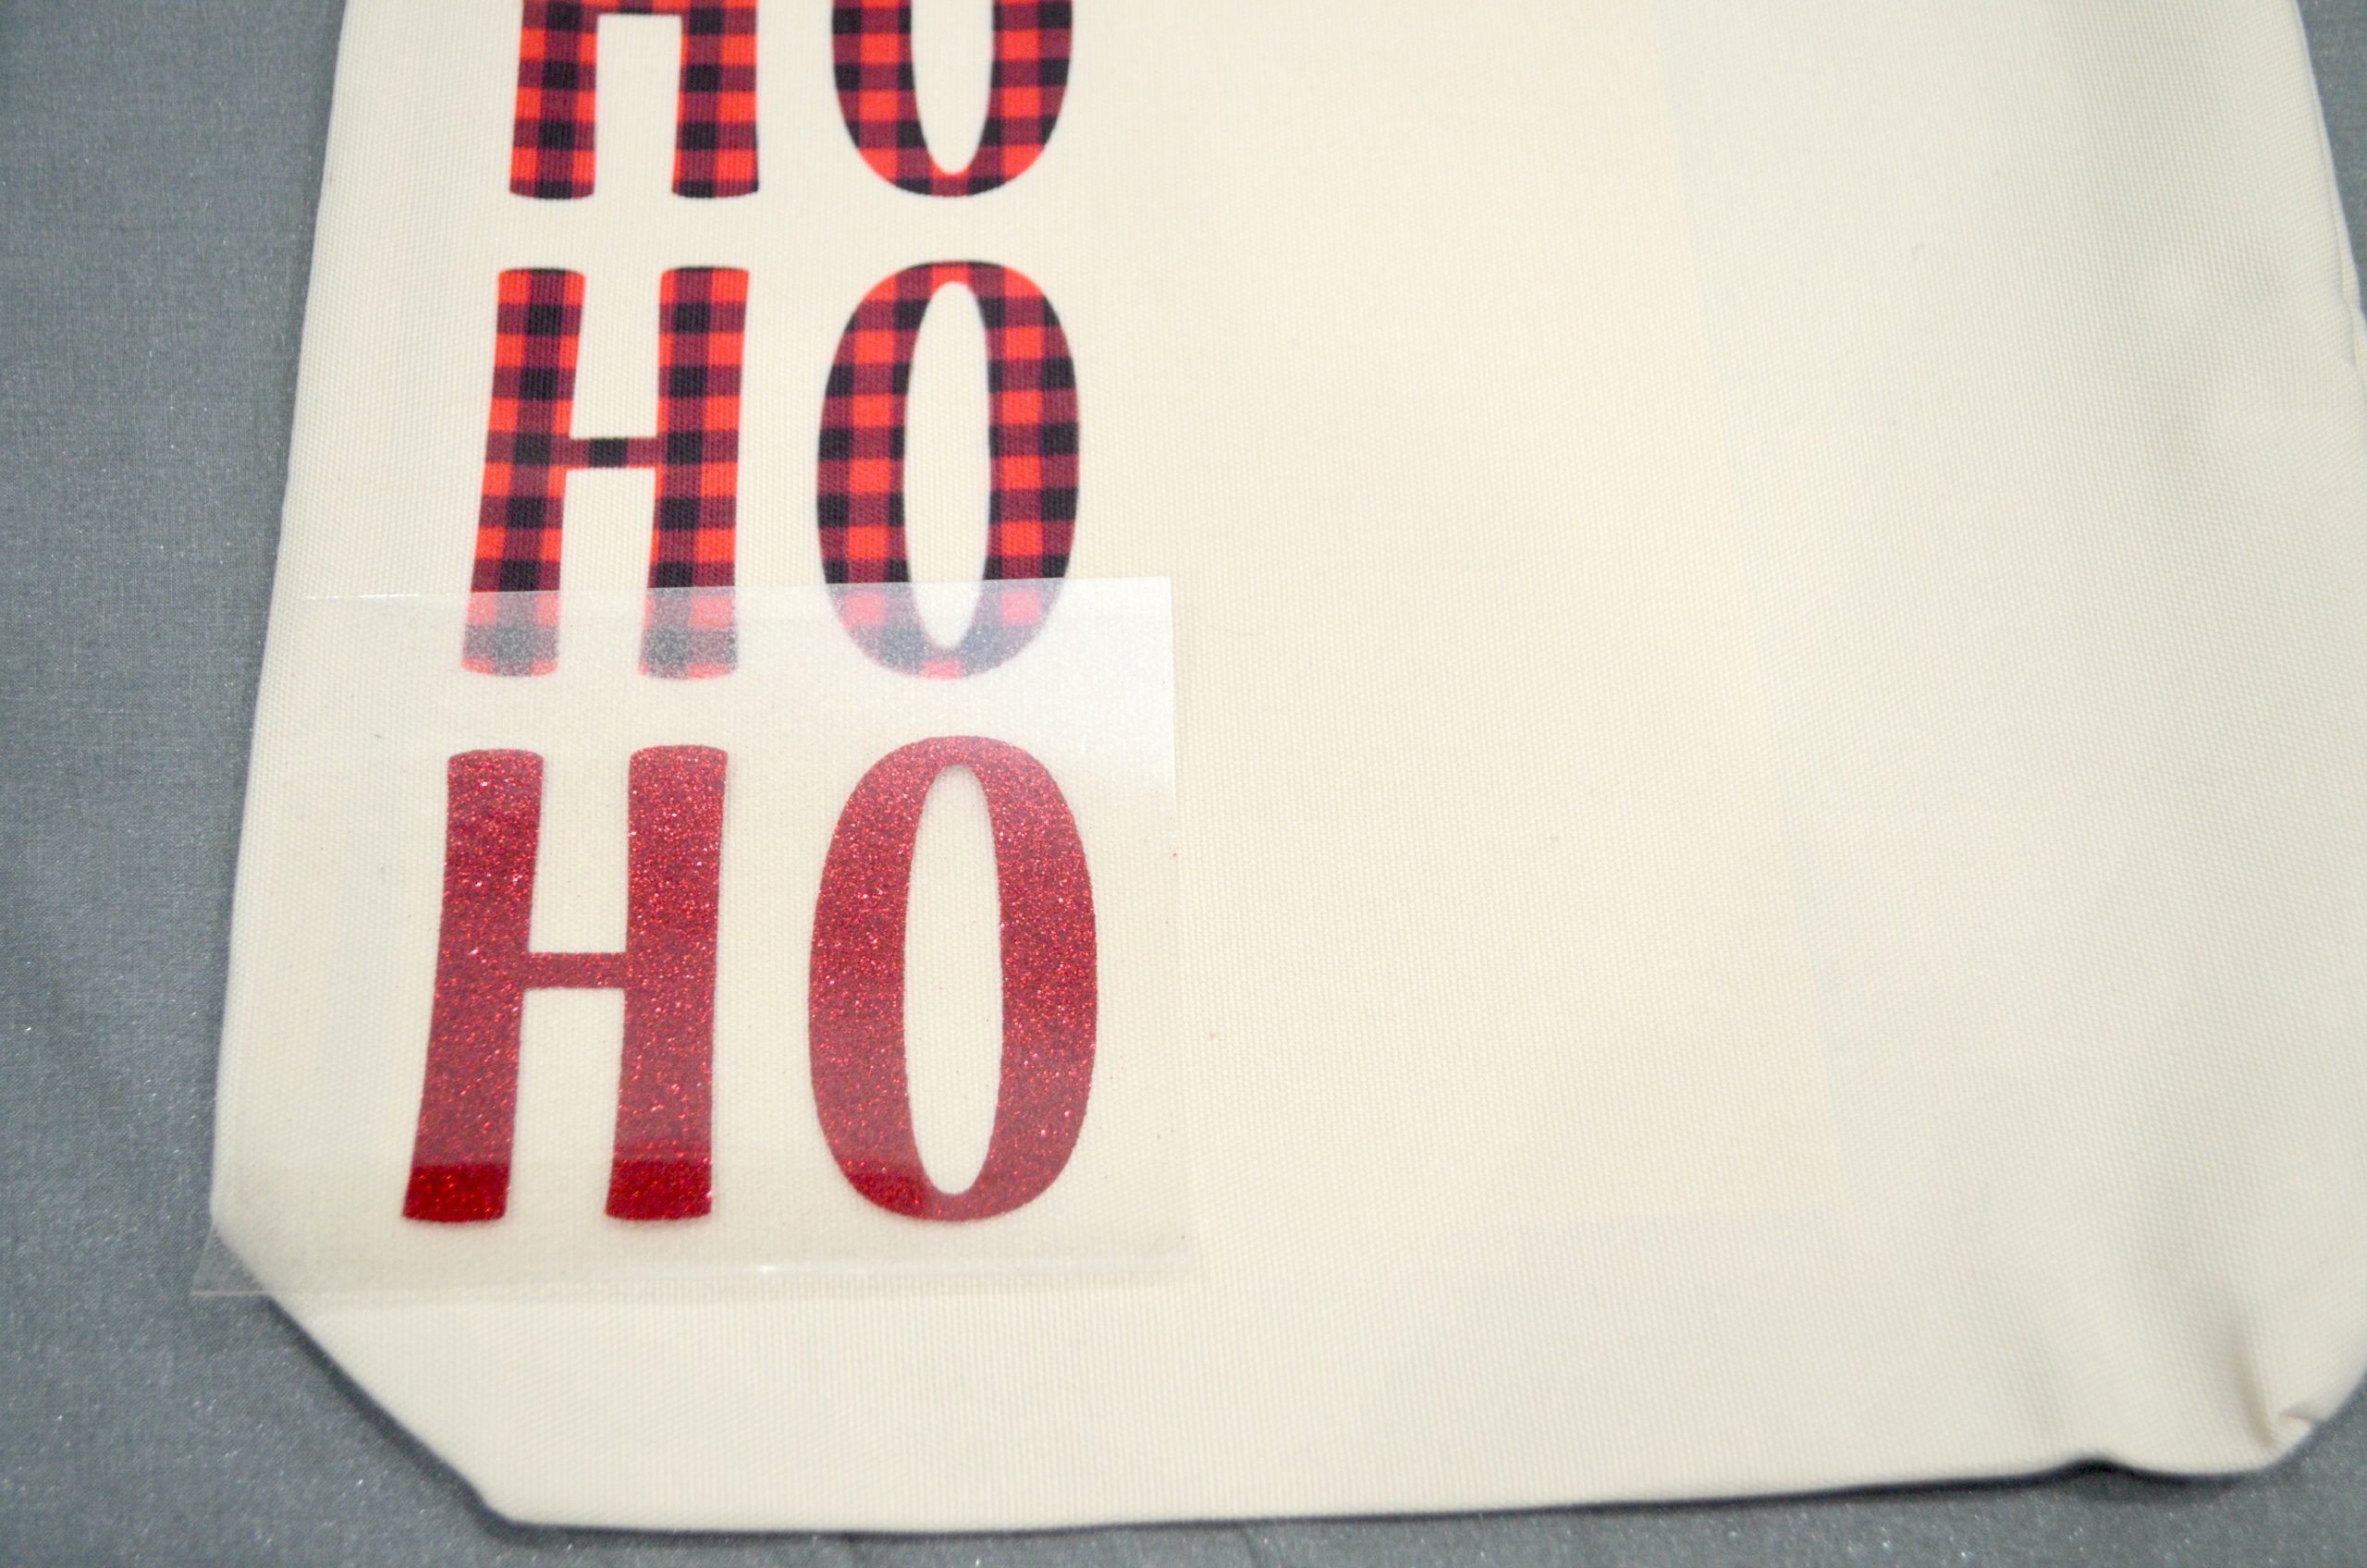
Apply the EasyPress 2 for 30 seconds, then flip the bag over and press gently for another 15 seconds. Make sure not to let the heat plate come in direct contact with your ink words. I covered mine with butcher paper just in case, but tried to keep the heat plate only on the third word. Let the bag cool, then peel off the clear backing.
Once the final word is adhered, your bag is ready to fill with gifts and deliver! It’s machine washable, so it can be used over and over during the holiday season and for years to come.
Can you imagine what a wonderful surprise it would be to find this bag waiting for you on the front porch (or anywhere)? In fact, you may find that you love it so much you want to make one for yourself. This one was intended to be a gift for a friend, but I’m going to have trouble parting with it!
If you try this project, I’d love to see how it turns out; be sure to share your photos of it (or of anything you’re working on) in the Amy Latta & Friends Facebook Group! See you there!
Before you go, be sure to check out my other holiday projects.


One Comment