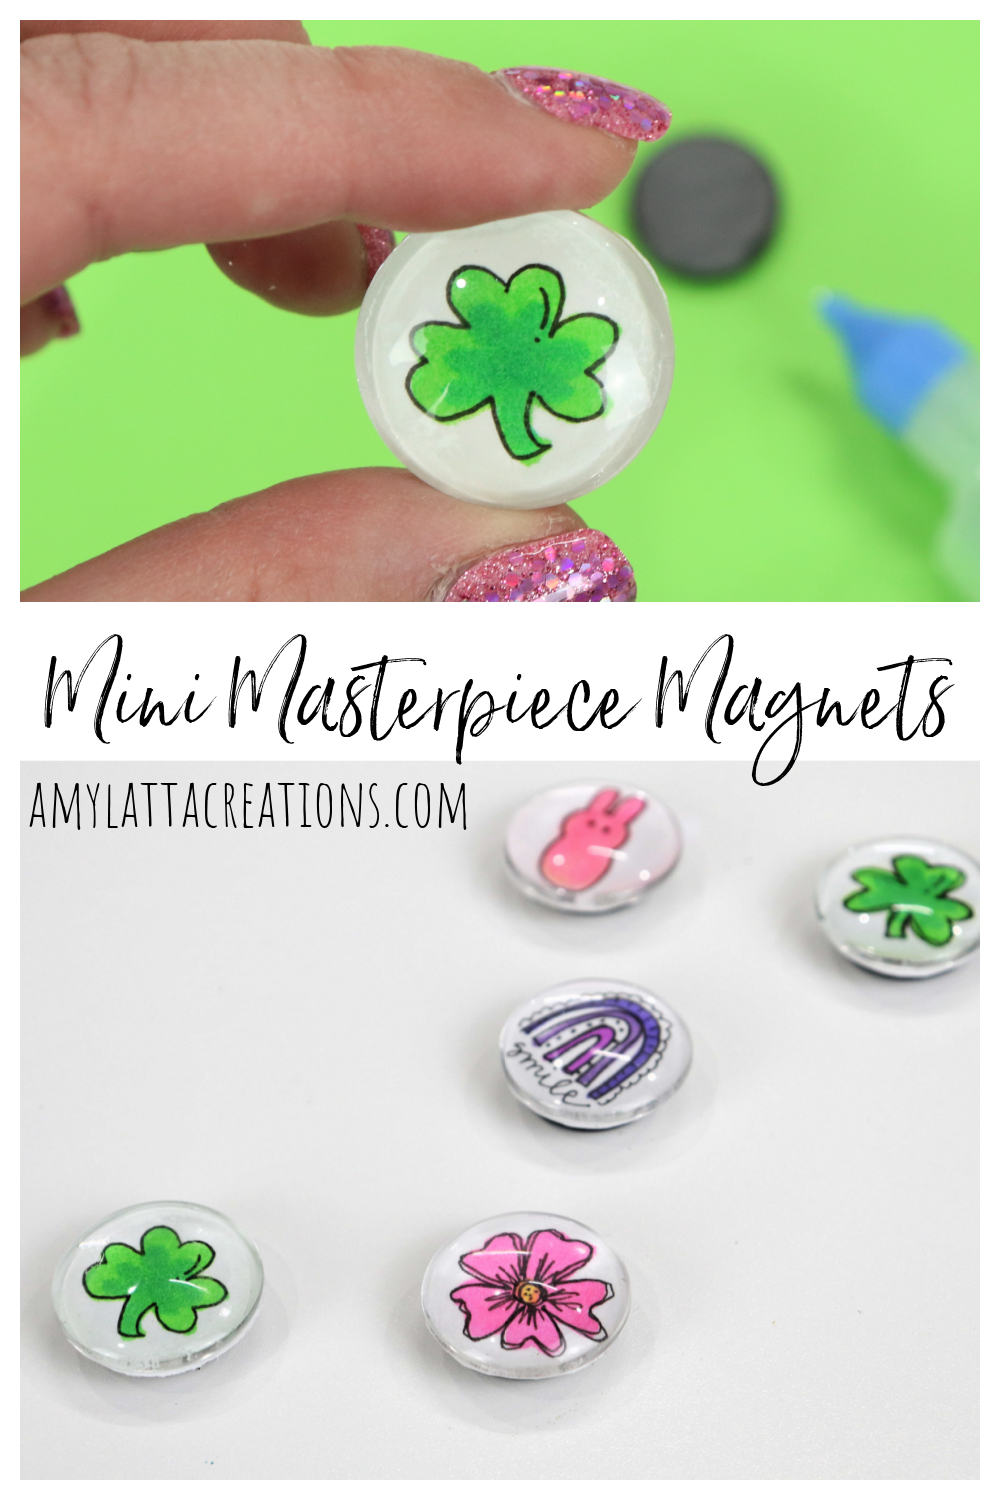
Mini Masterpiece Magnets
You don’t have to create things on a large scale to make great art. In fact, sometimes miniature masterpieces can be even more fun. In this project, we’re going to turn tiny hand-drawn images (less than 1″ in diameter) into pretty little magnets. These Mini Masterpiece Magnets are a fun and easy craft to do, and they’re sure to help get you and your home ready for spring. Take a look.
You’ll need:
Tombow ABT PRO Alcohol-Based Markers
Pencil
Scissors
Glue (I used Tombow MONO Aqua Liquid Glue)
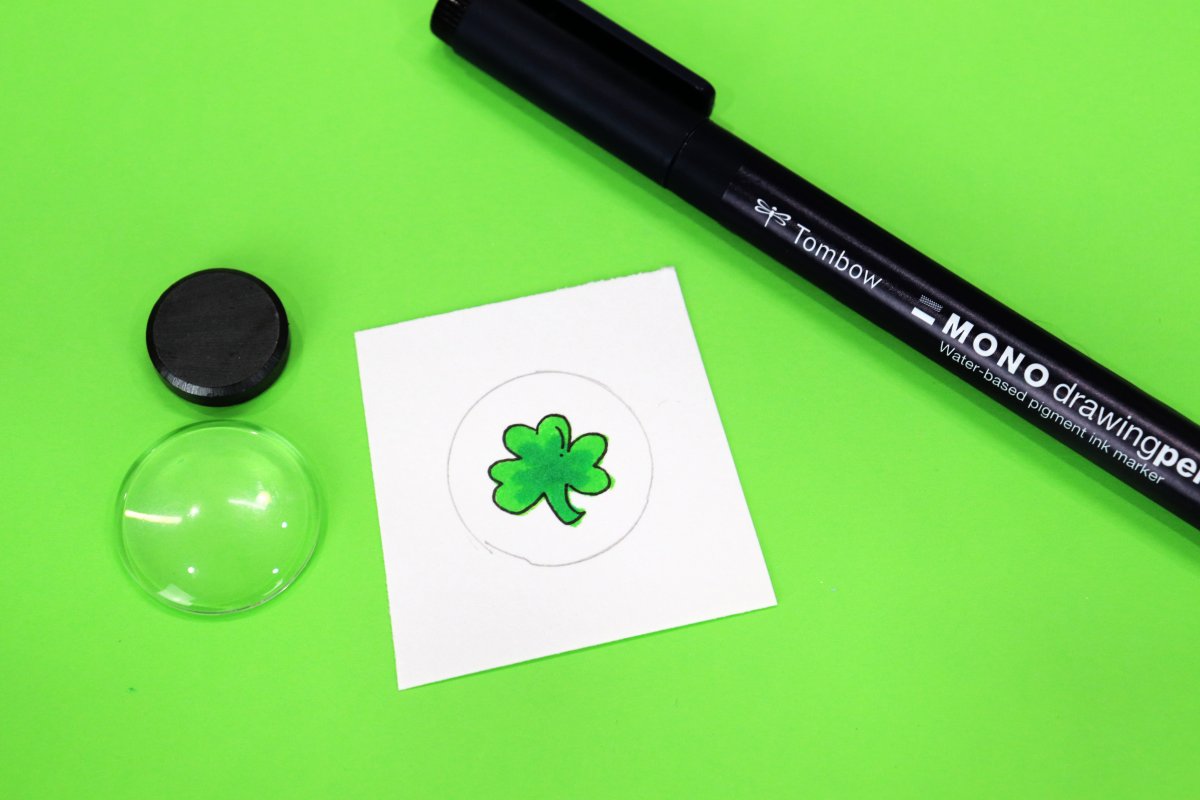
Step 1: Trace your cabochon onto bristol board.
Step 2: Draw the image of your choice inside the circle.
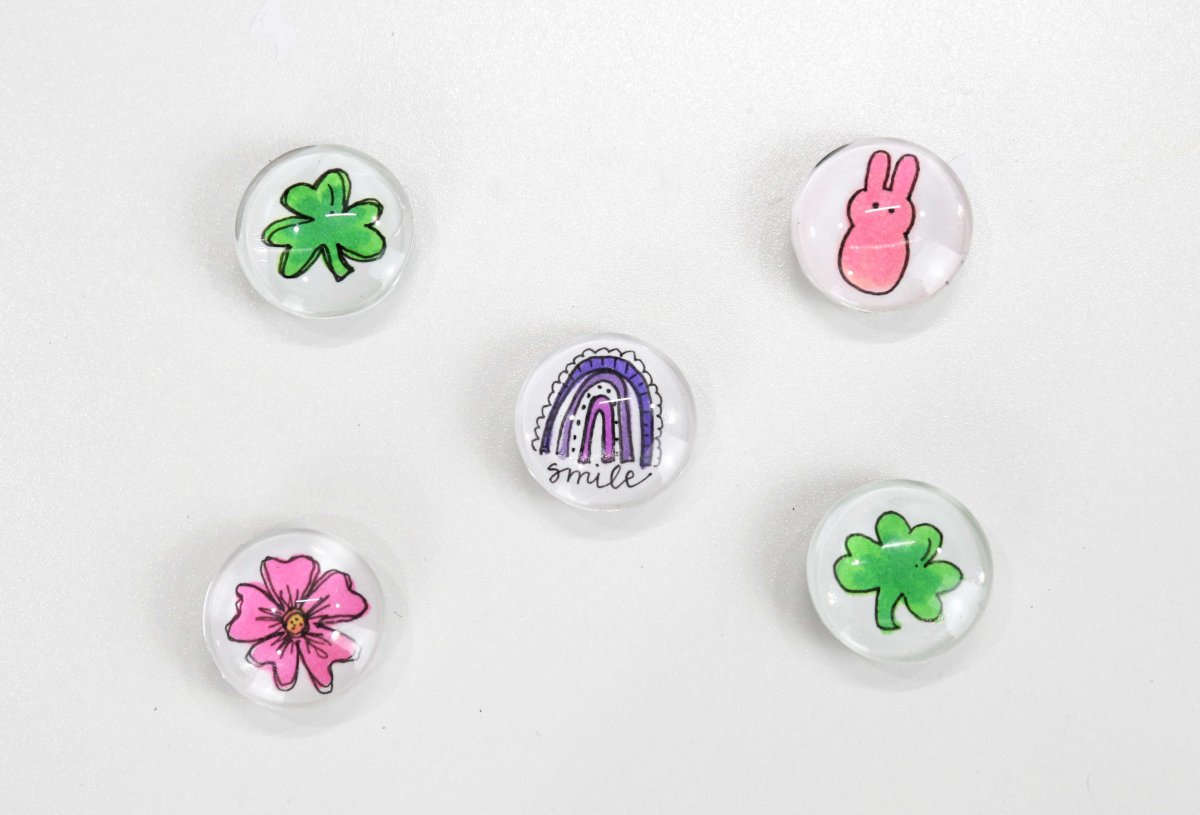
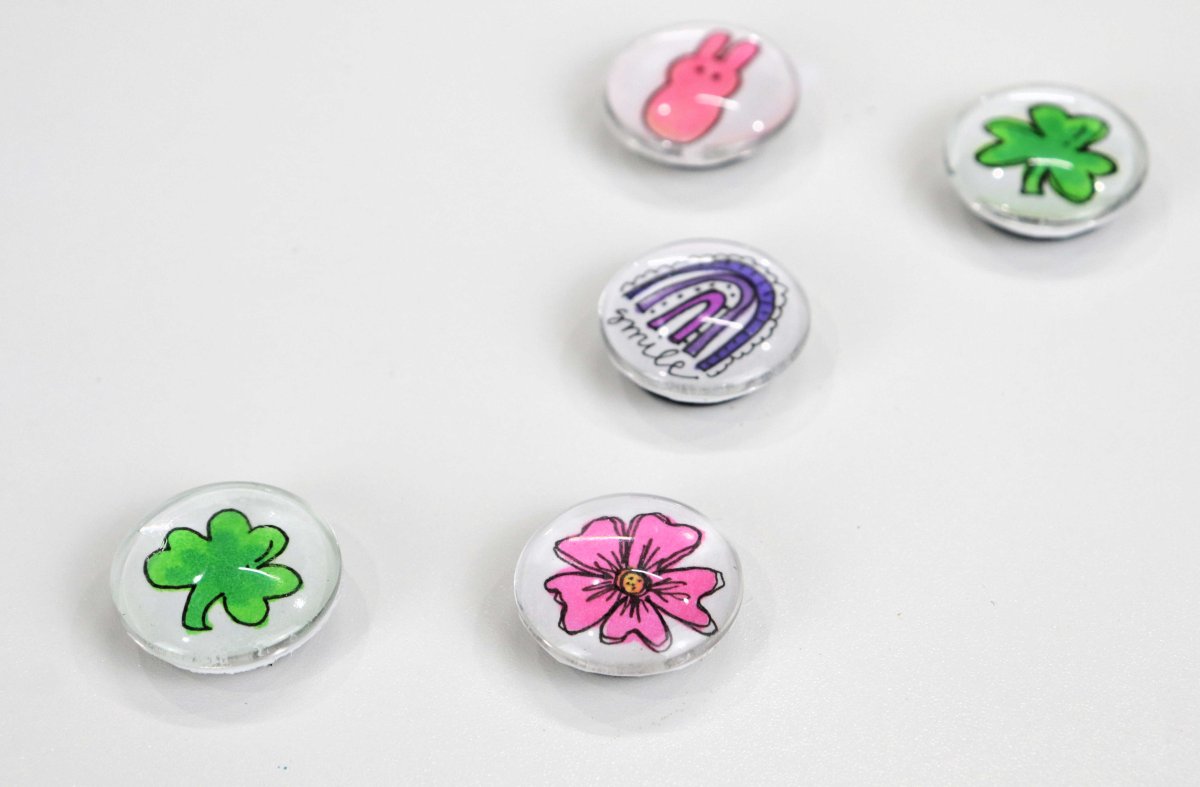
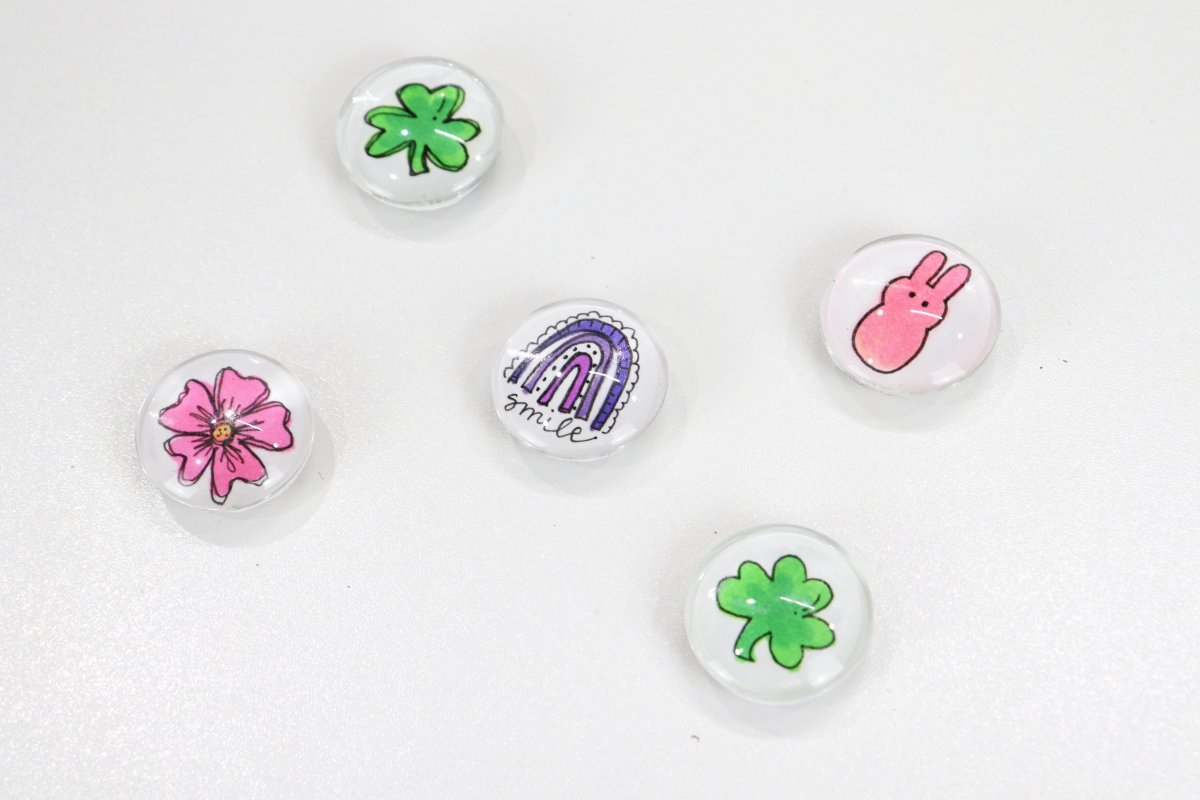
You can pencil it in first if you like, or go straight for your markers. I used Tombow ABT PRO Alcohol-Based Markers because they’re permanent and come in 108 vibrant colors. They also blend really well, which I took advantage of in my shamrock. You can draw anything you like: I tried a shamrock, a flower, a rainbow, and a marshmallow bunny. Some other ideas include monograms, short phrases, and even just filling the circle with colors or a pattern.
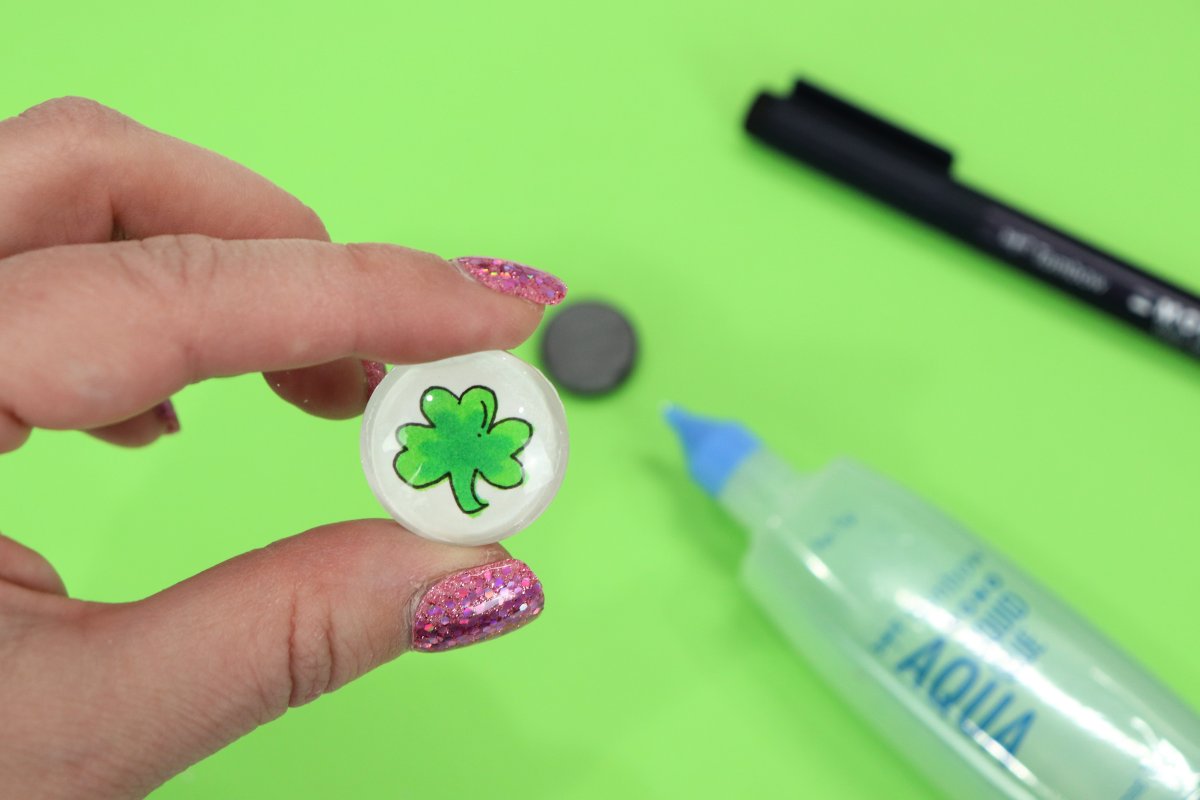
Step 3: Cut out the circle.
You’ll want to trim slightly inside your pencil line so that the paper isn’t larger than the back of the cabochon.
Step 4: Adhere your art to the flat back of the cabochon.
I used clear Tombow MONO Aqua Liquid Glue for this step. I just squeezed some onto the cabochon, spread it with my finger, then placed my picture on top.
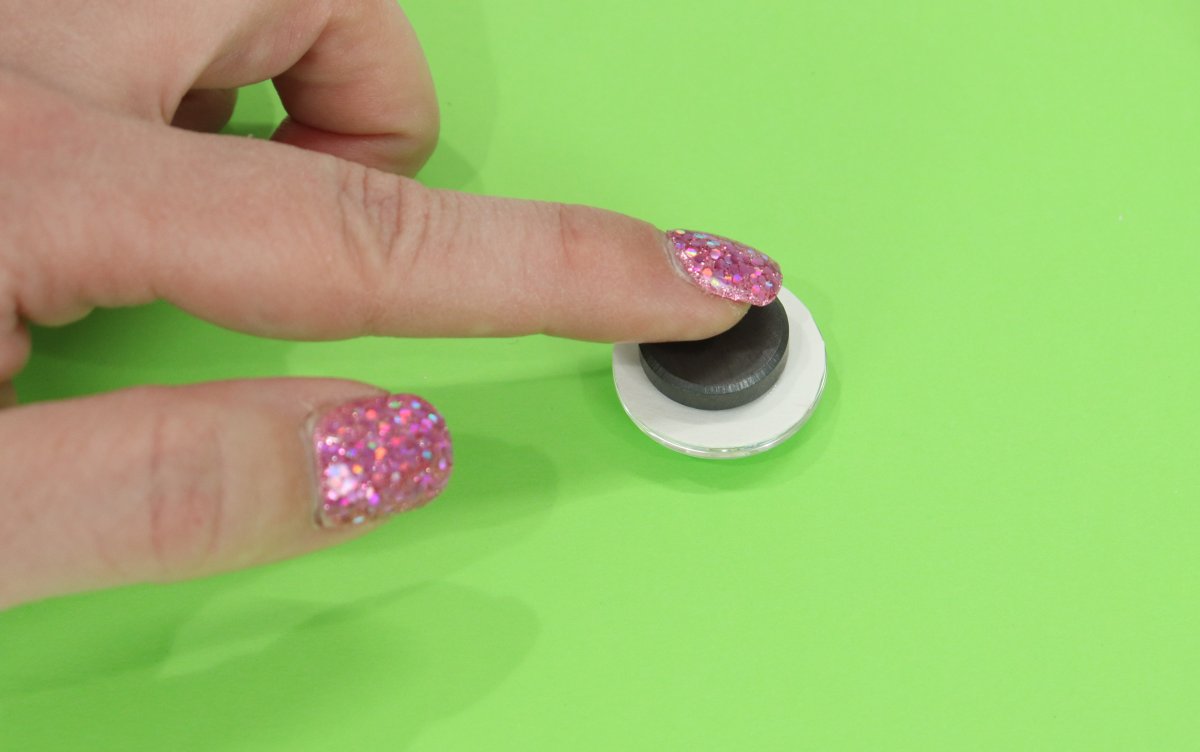
Step 5: Glue a magnet to the back.
My magnet was about .7″ in diameter, which was perfect for my 1″ cabochon. Let the glue dry, then your magnet is ready for display.
These are so quick and easy to create, and it’s a ton of fun to try drawing lots of different things. If you’re not a huge fan of your own artwork, you can also use cut out images from magazines, greeting cards, book pages, and more.
These are fun to keep, and also make a nice little “thinking of you” present to give away! Use them at home, at school, at work, or anywhere you can think of.
Happy creating! If you try this project, I’d love to see how your Mini Masterpiece Magnets turn out. Share your photos in the Amy Latta & Friends Facebook Group so we can all be inspired.
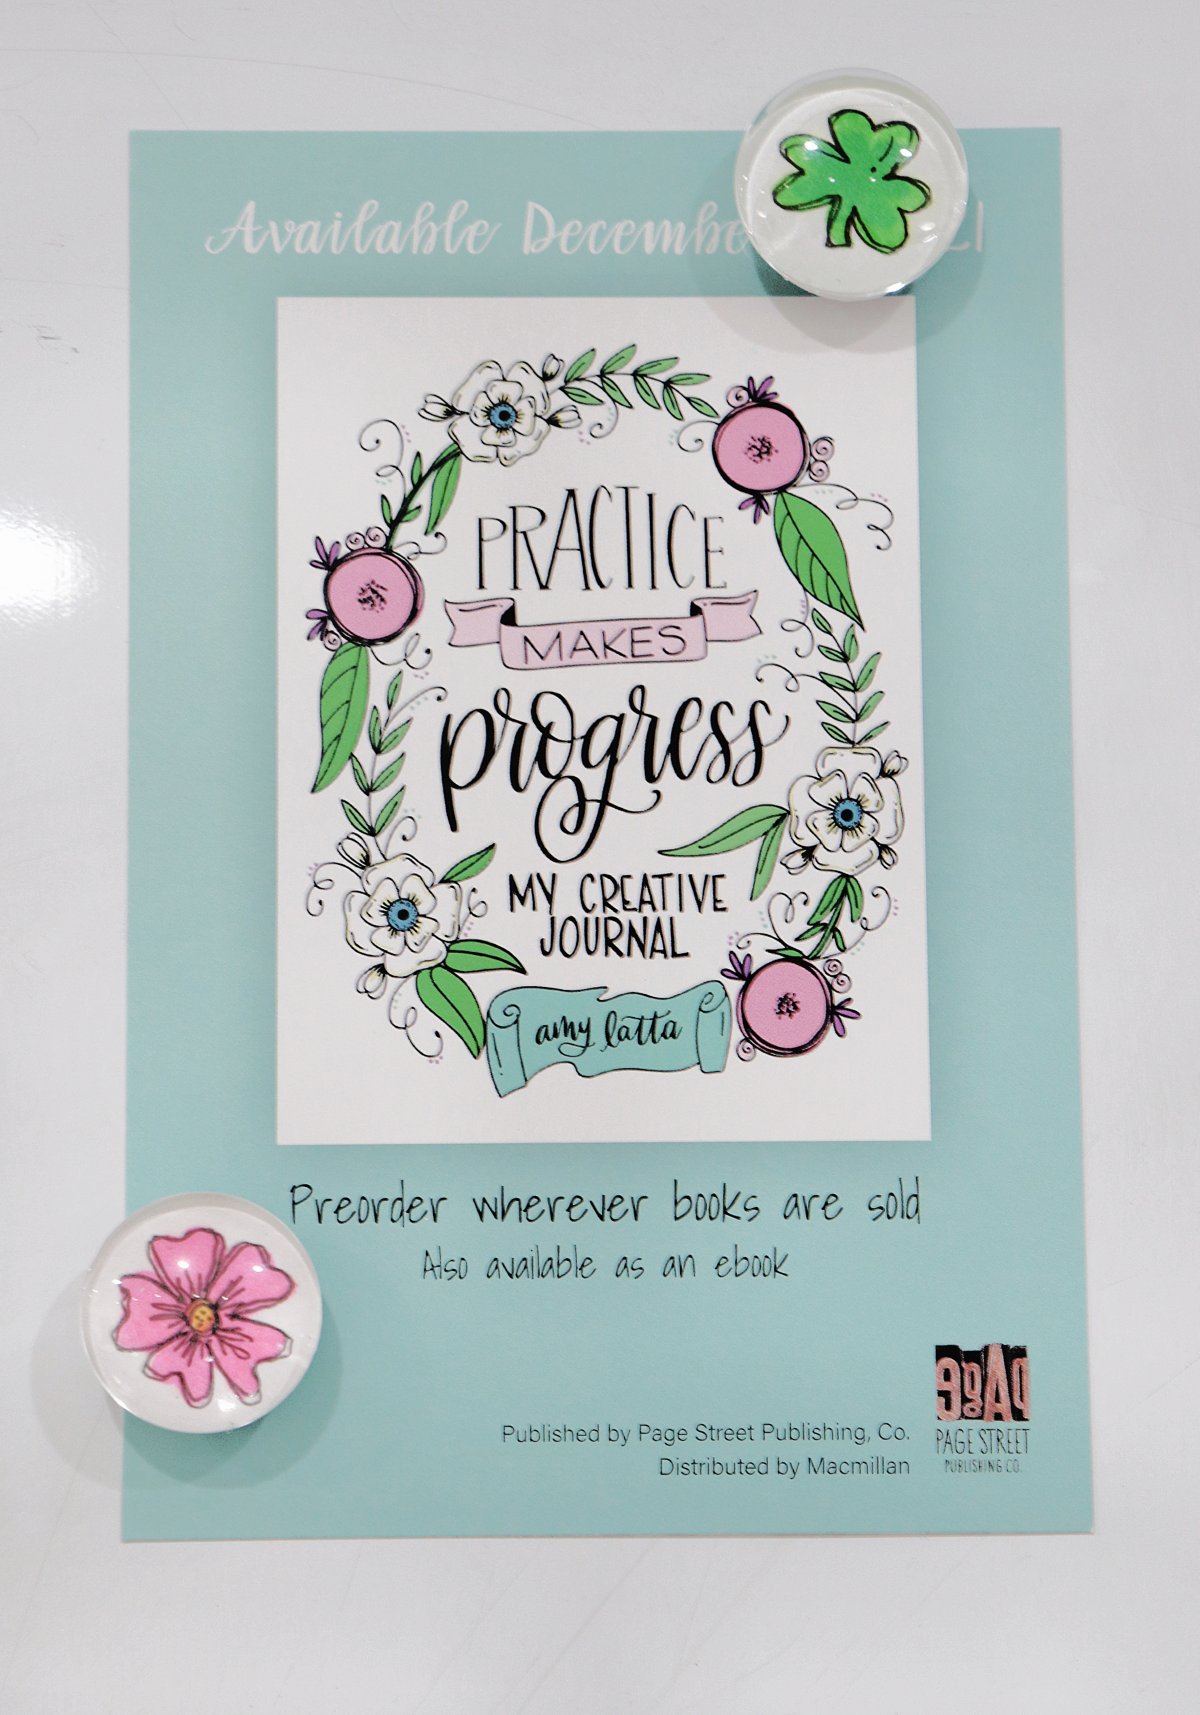
And don’t forget to pre-order/buy your copy of my brand new creative journal, Practice Makes Progress, which releases on 2/22/22.
Be sure to save this project and/or share it with a friend…creativity is contagious!