Organizing My Craft Studio with DreamBox!
Special (and huge) thanks to CreateRoom for partnering with me and sponsoring this post. All opinions are 100% my own.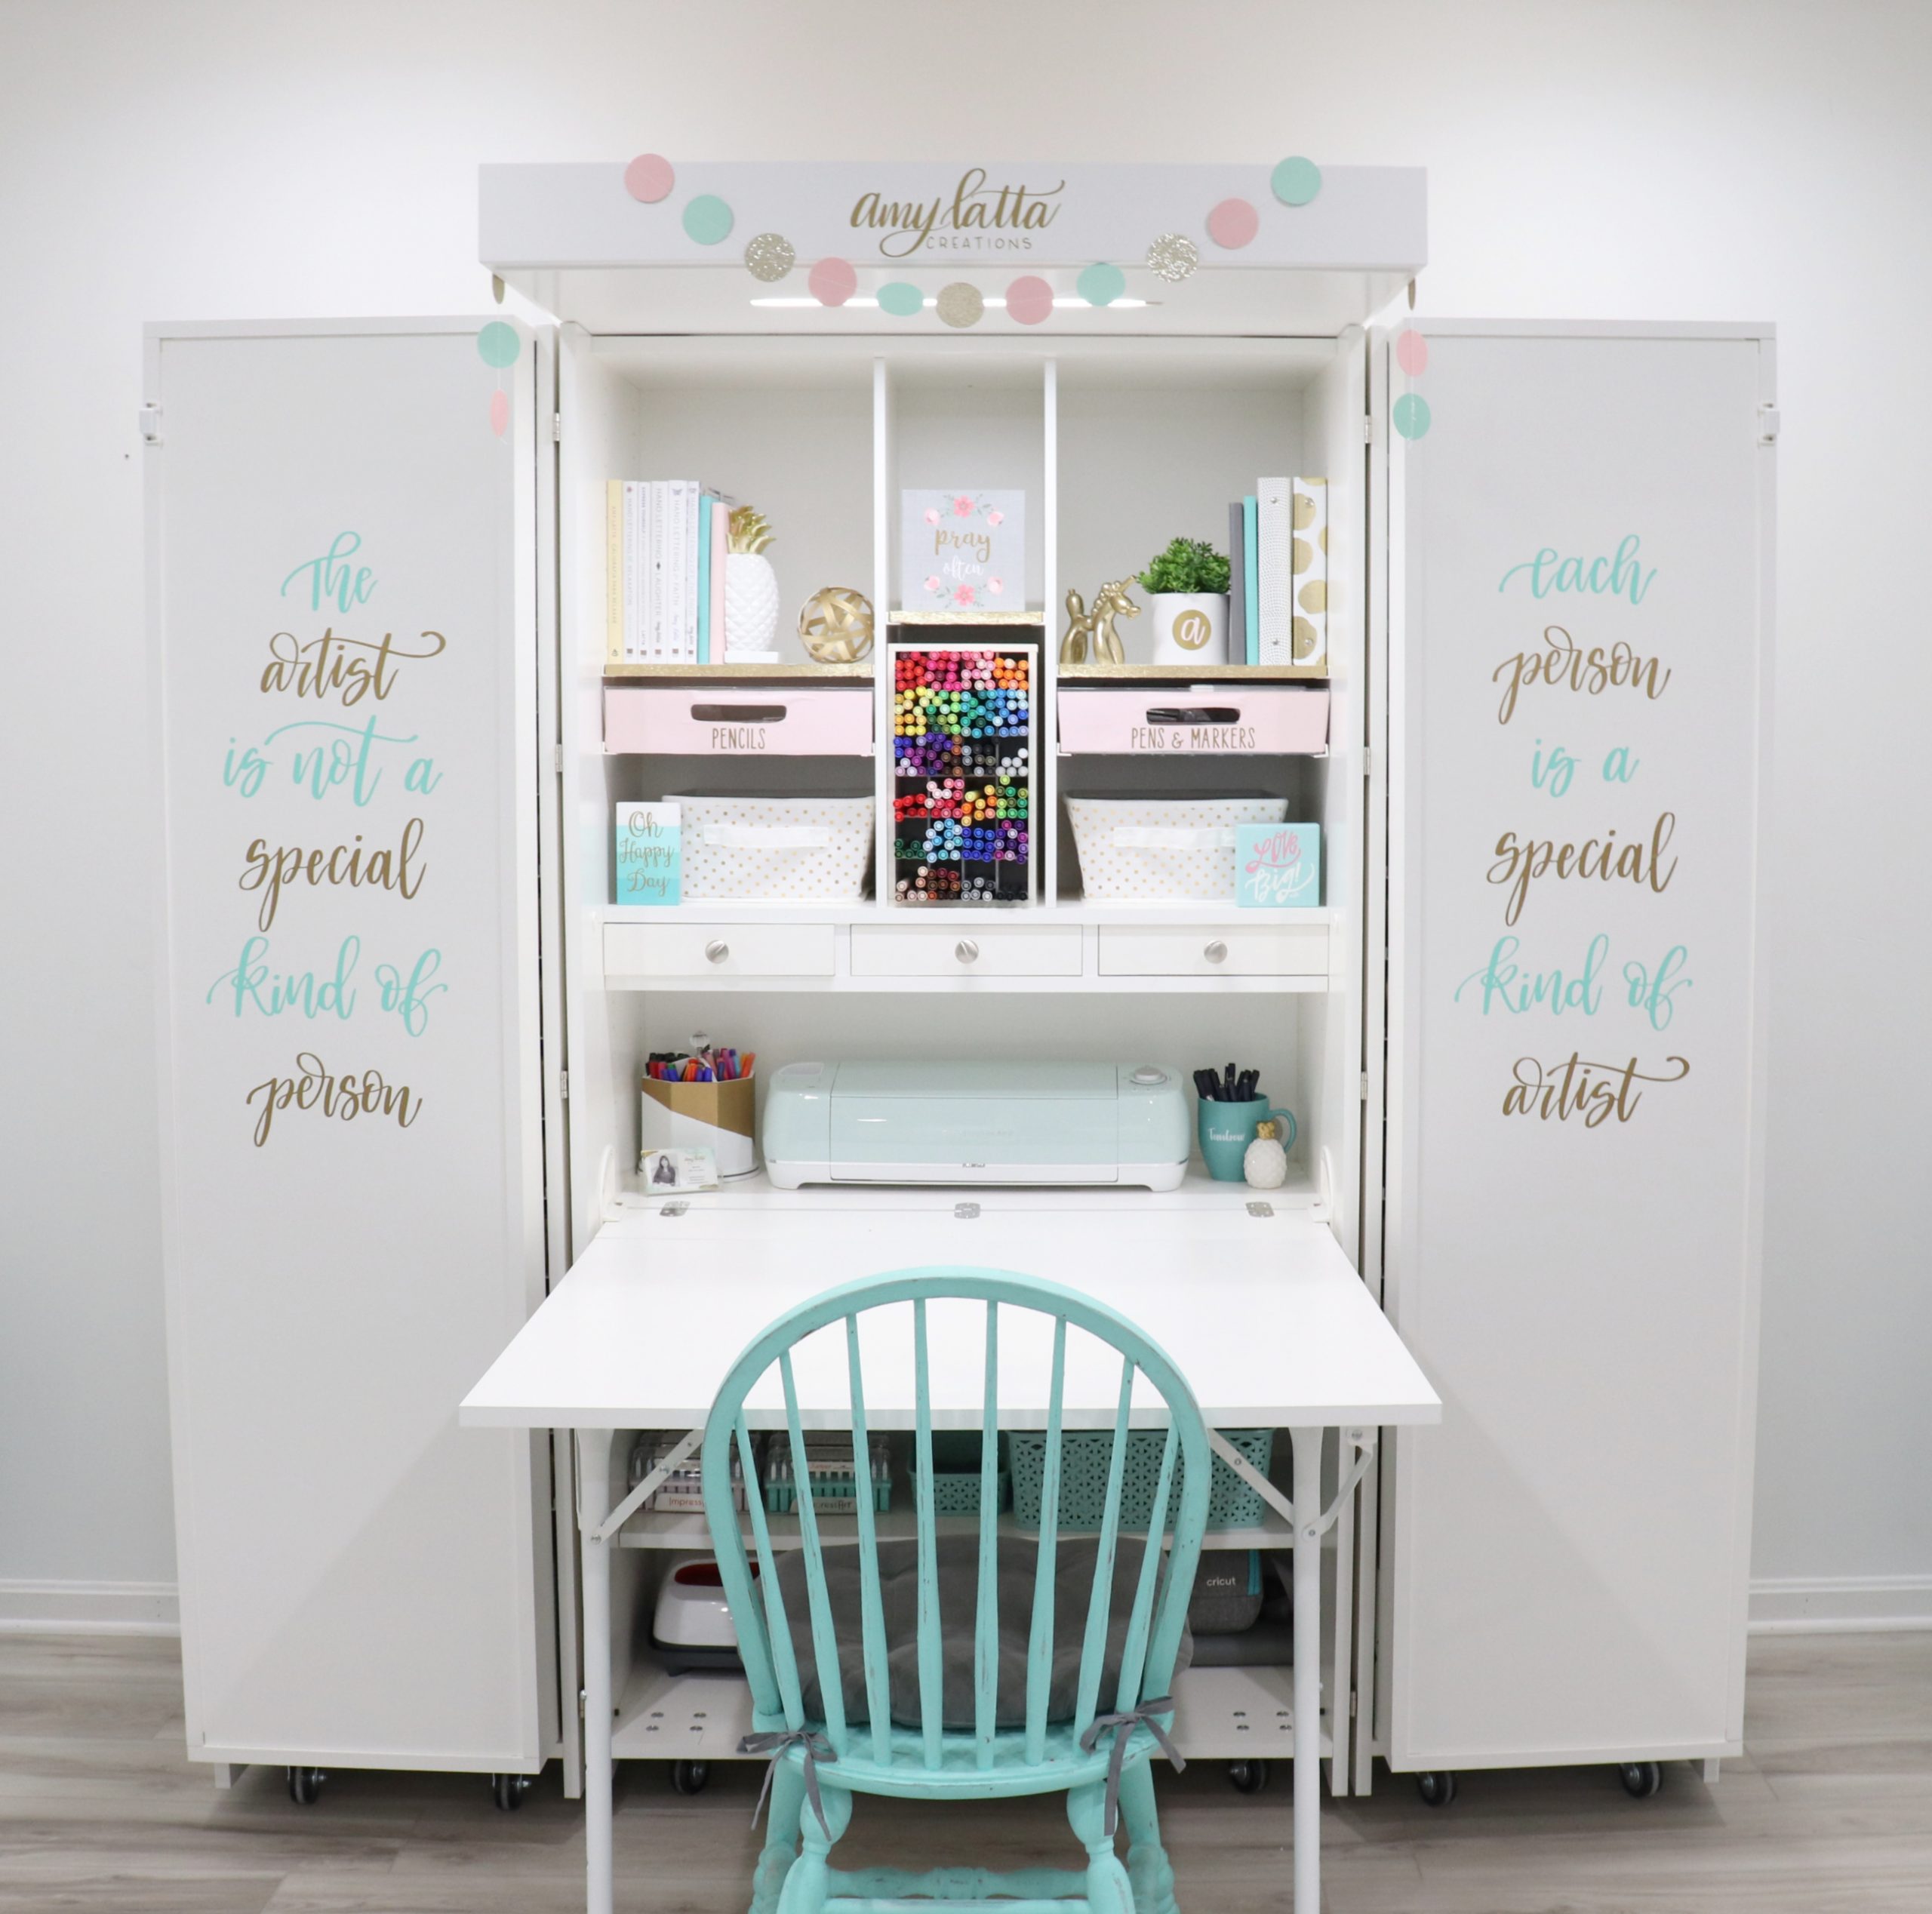
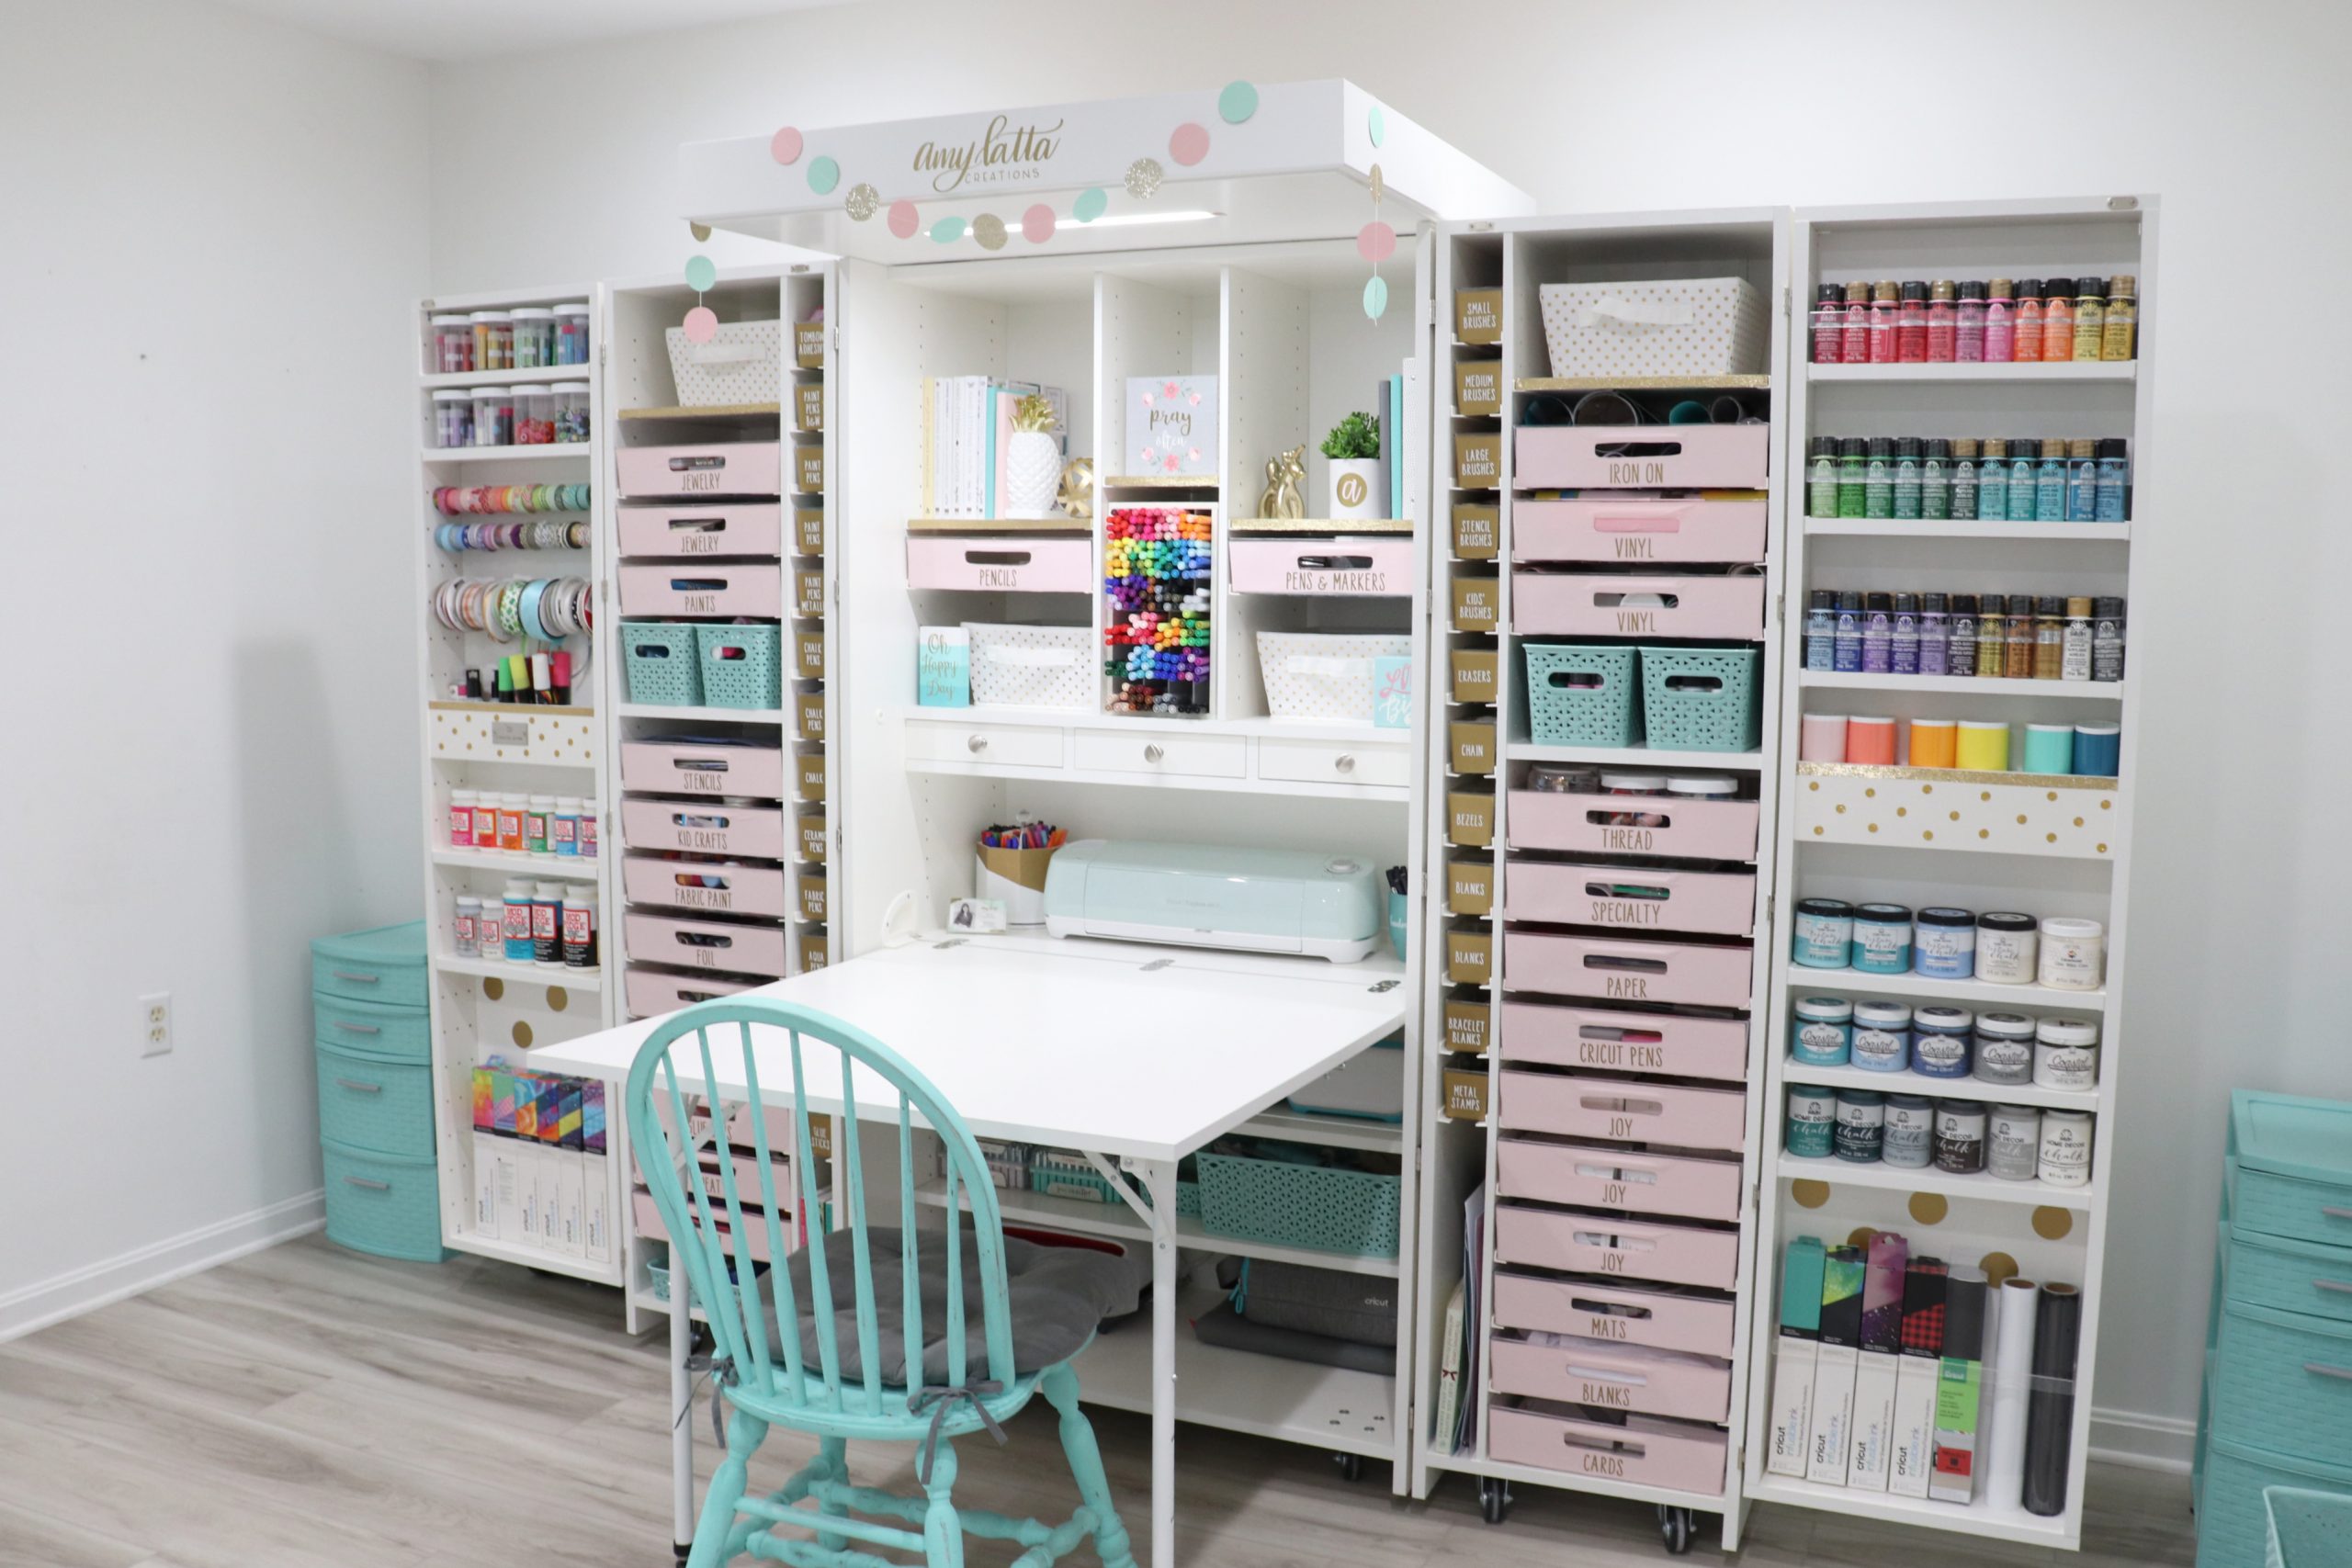
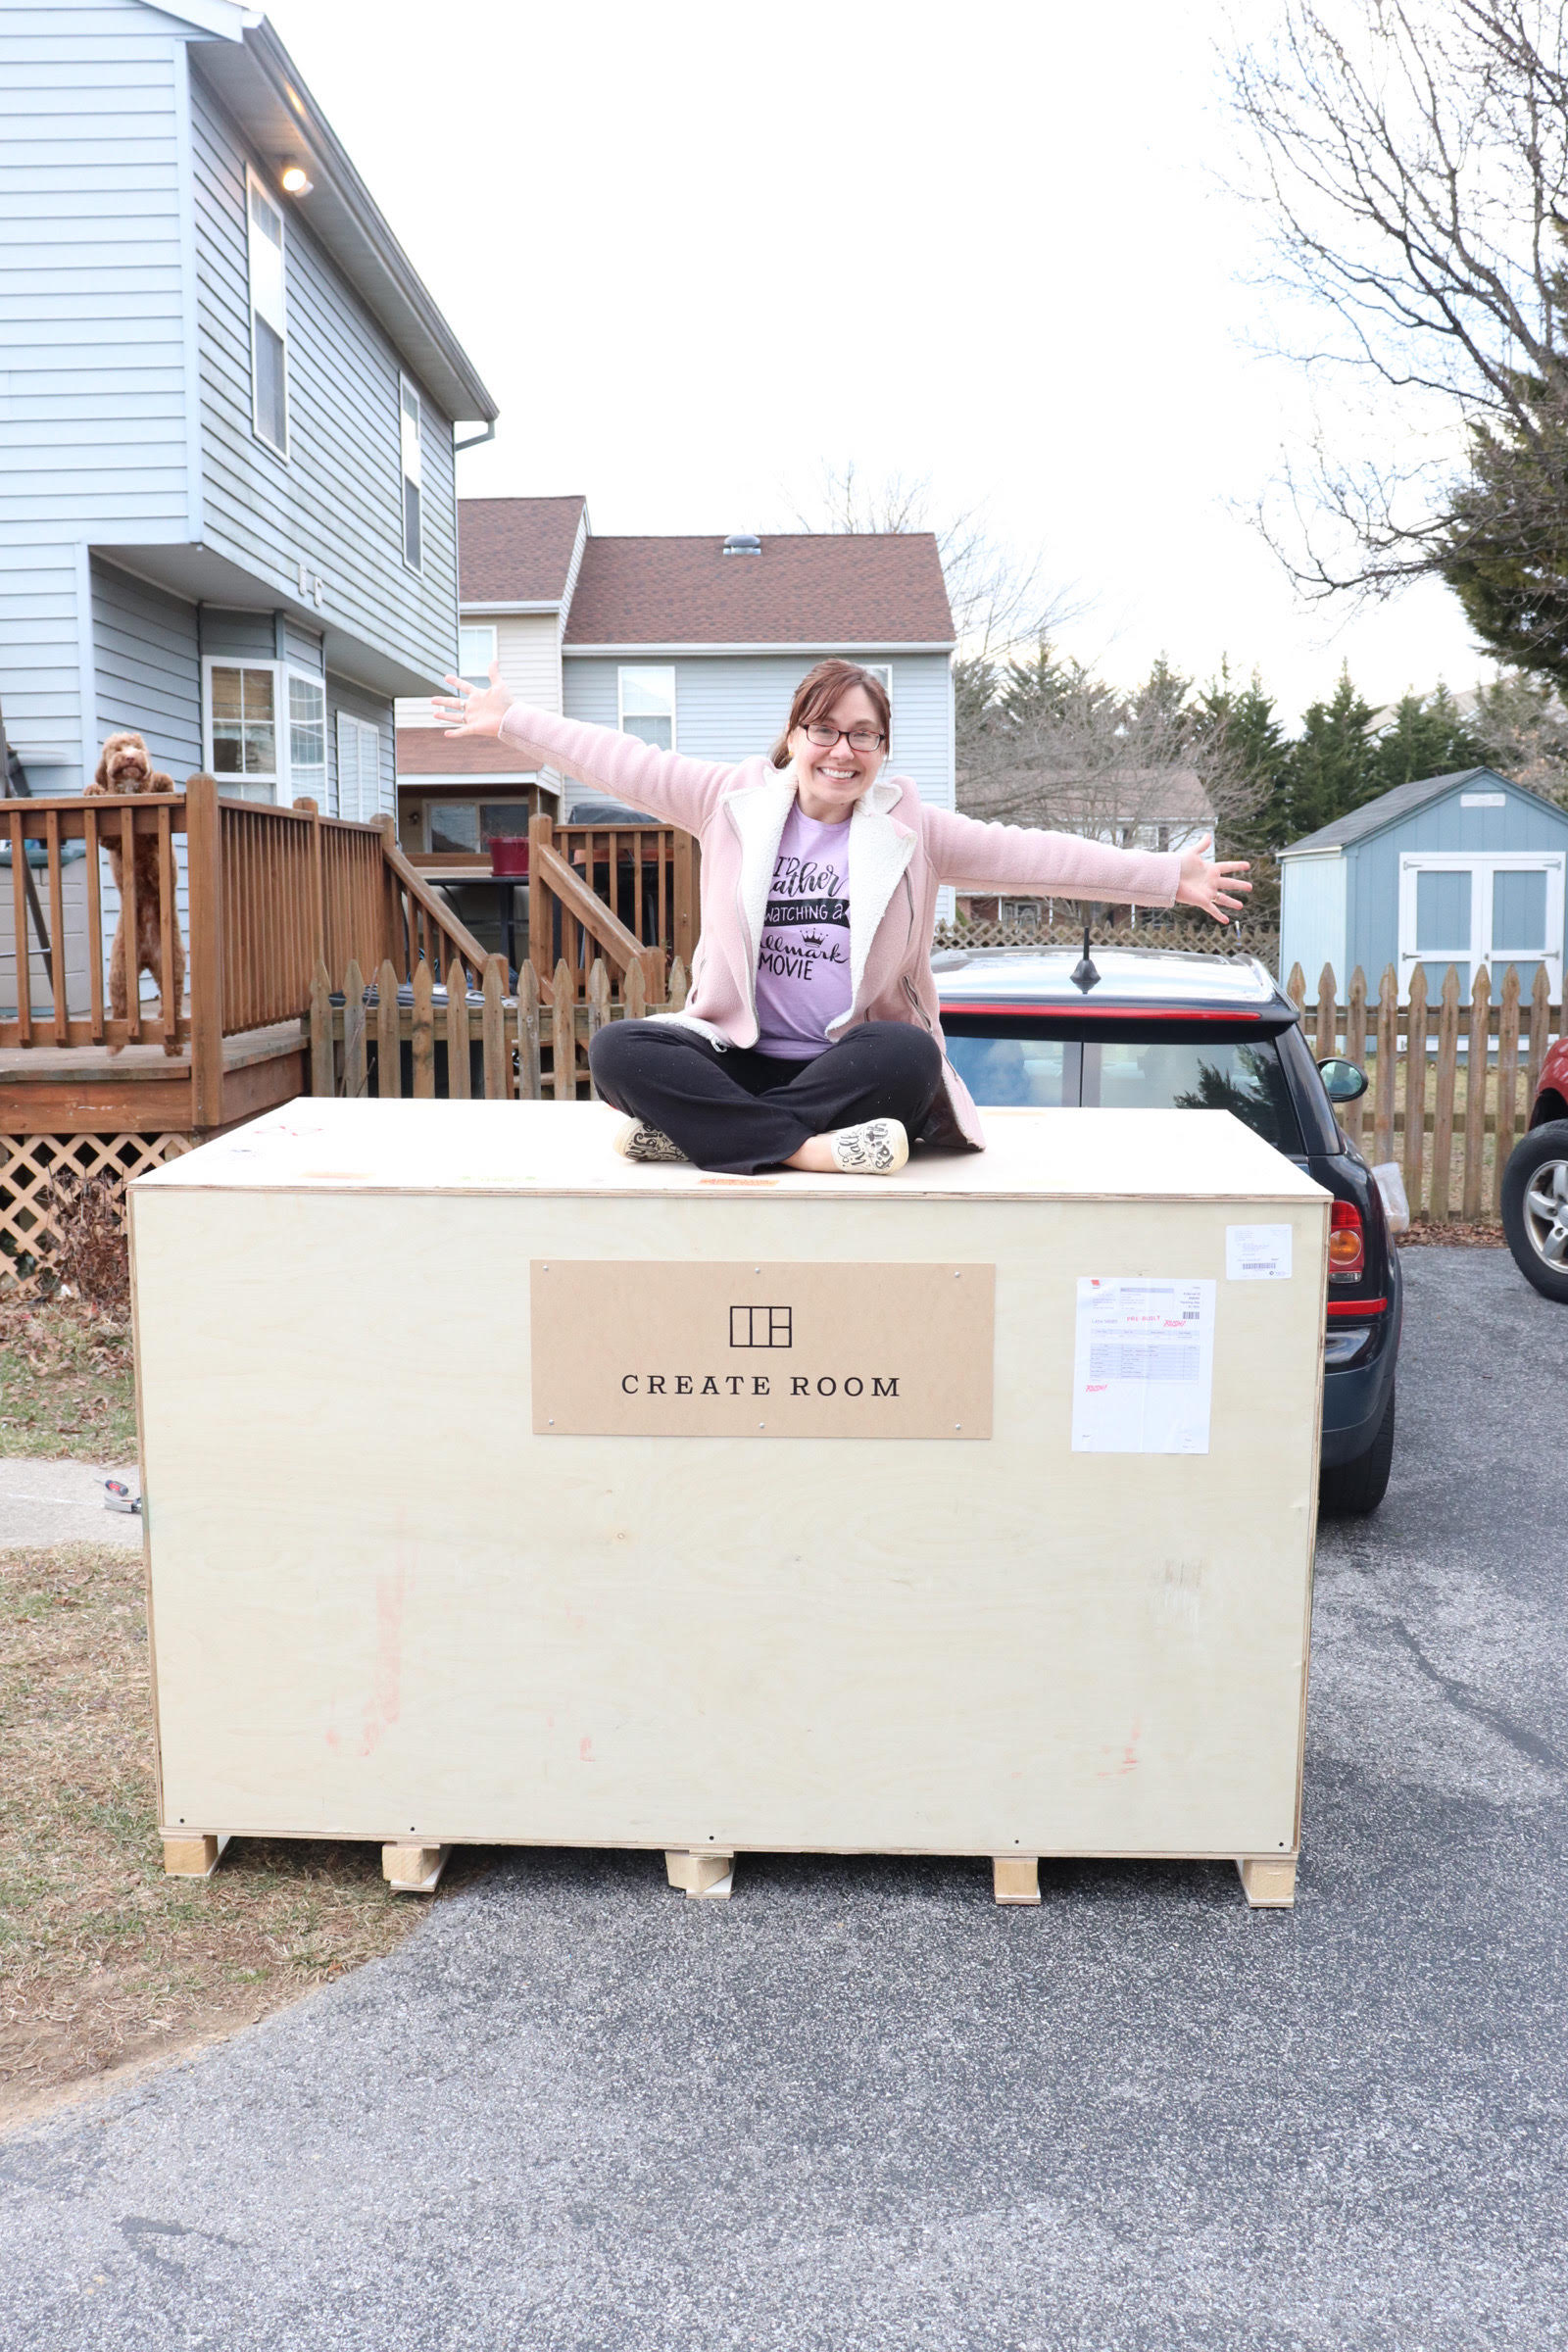
Friends, I am SO excited to finally give you the grand tour of my new DreamBox! This piece of furniture has completely transformed my craft studio, and I have never been more organized. You’ve seen how it looks partially folded, but now it’s time to take a look at how everything fits inside! Ready? Ta da!!!!
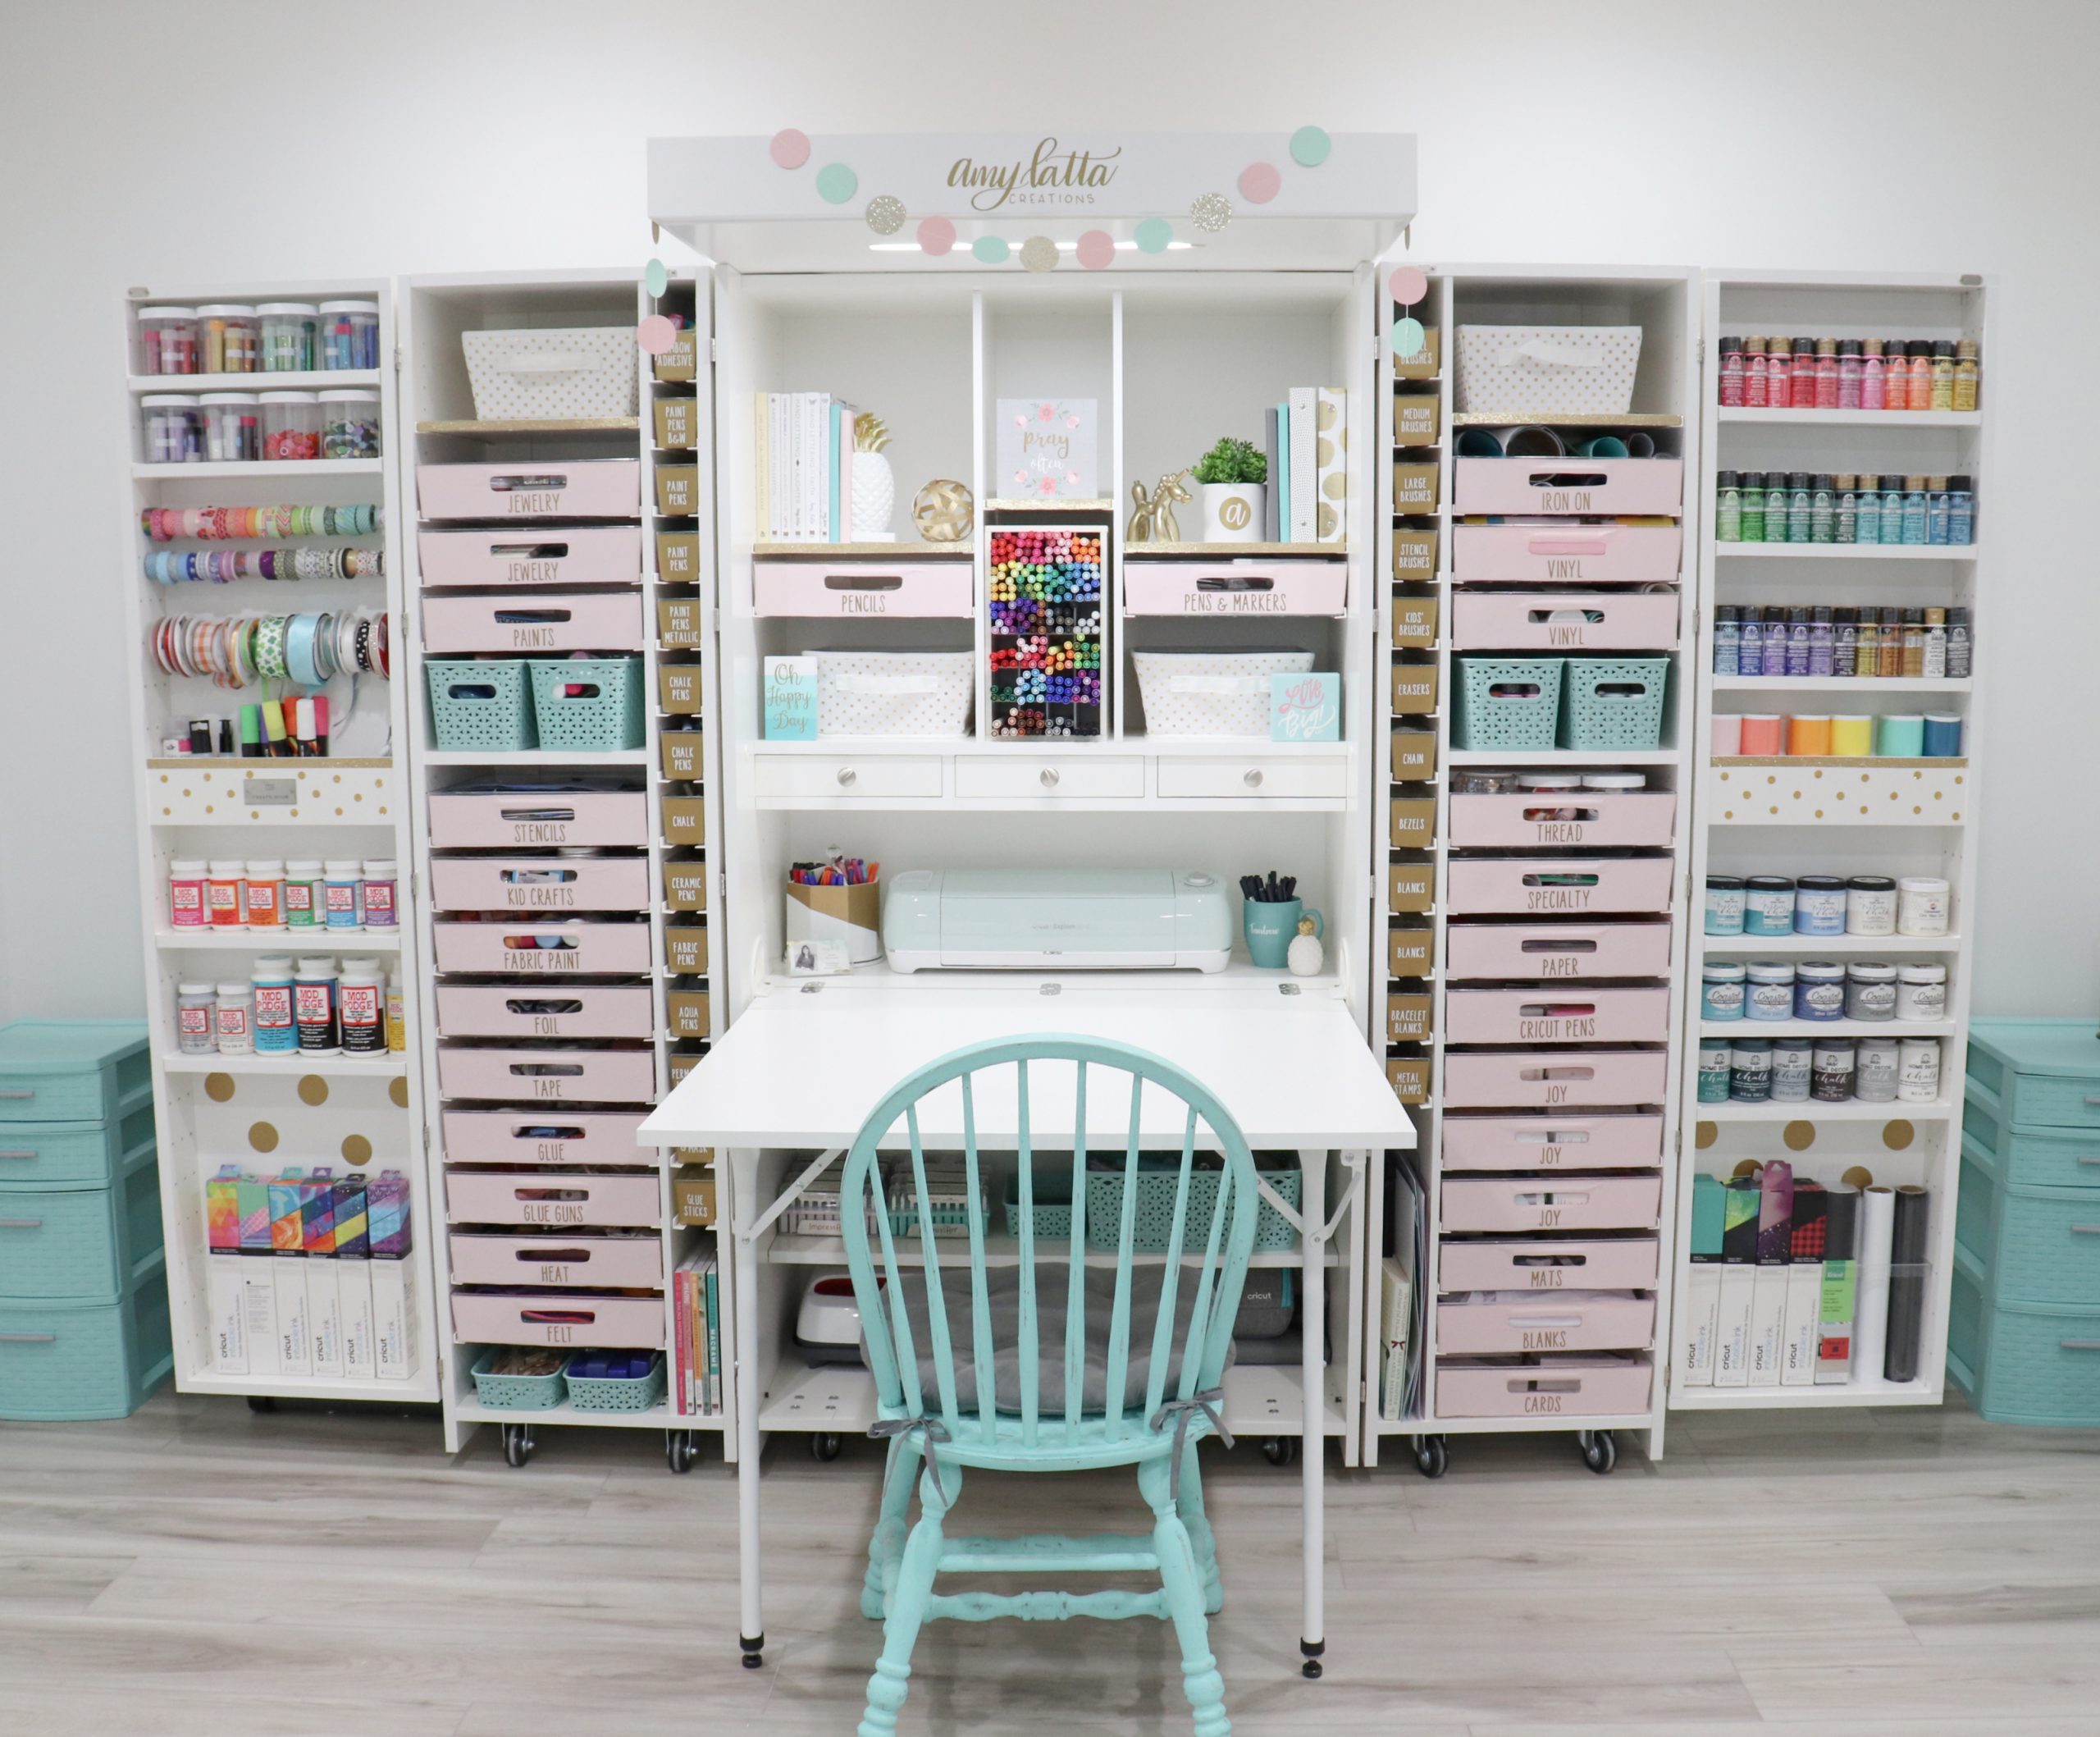
There’s a LOT to see here, I know, so let’s split it up and take a look at what I did with each section of the DreamBox one at a time, starting in the center.
The Center Section
This is the focal point of the DreamBox and the part most likely to be seen when I use it as a backdrop for video segments, workshops, and classes. The crown top was the perfect spot to put my logo, which I cut out of gold vinyl with the Cricut.
I wanted to use this center space for the items I create with most often so they’re always within easy reach, but I also wanted to make sure I didn’t over-fill it. I wanted something inspiring that expresses my personality, so I used a combination of craft supplies and decorative pieces.
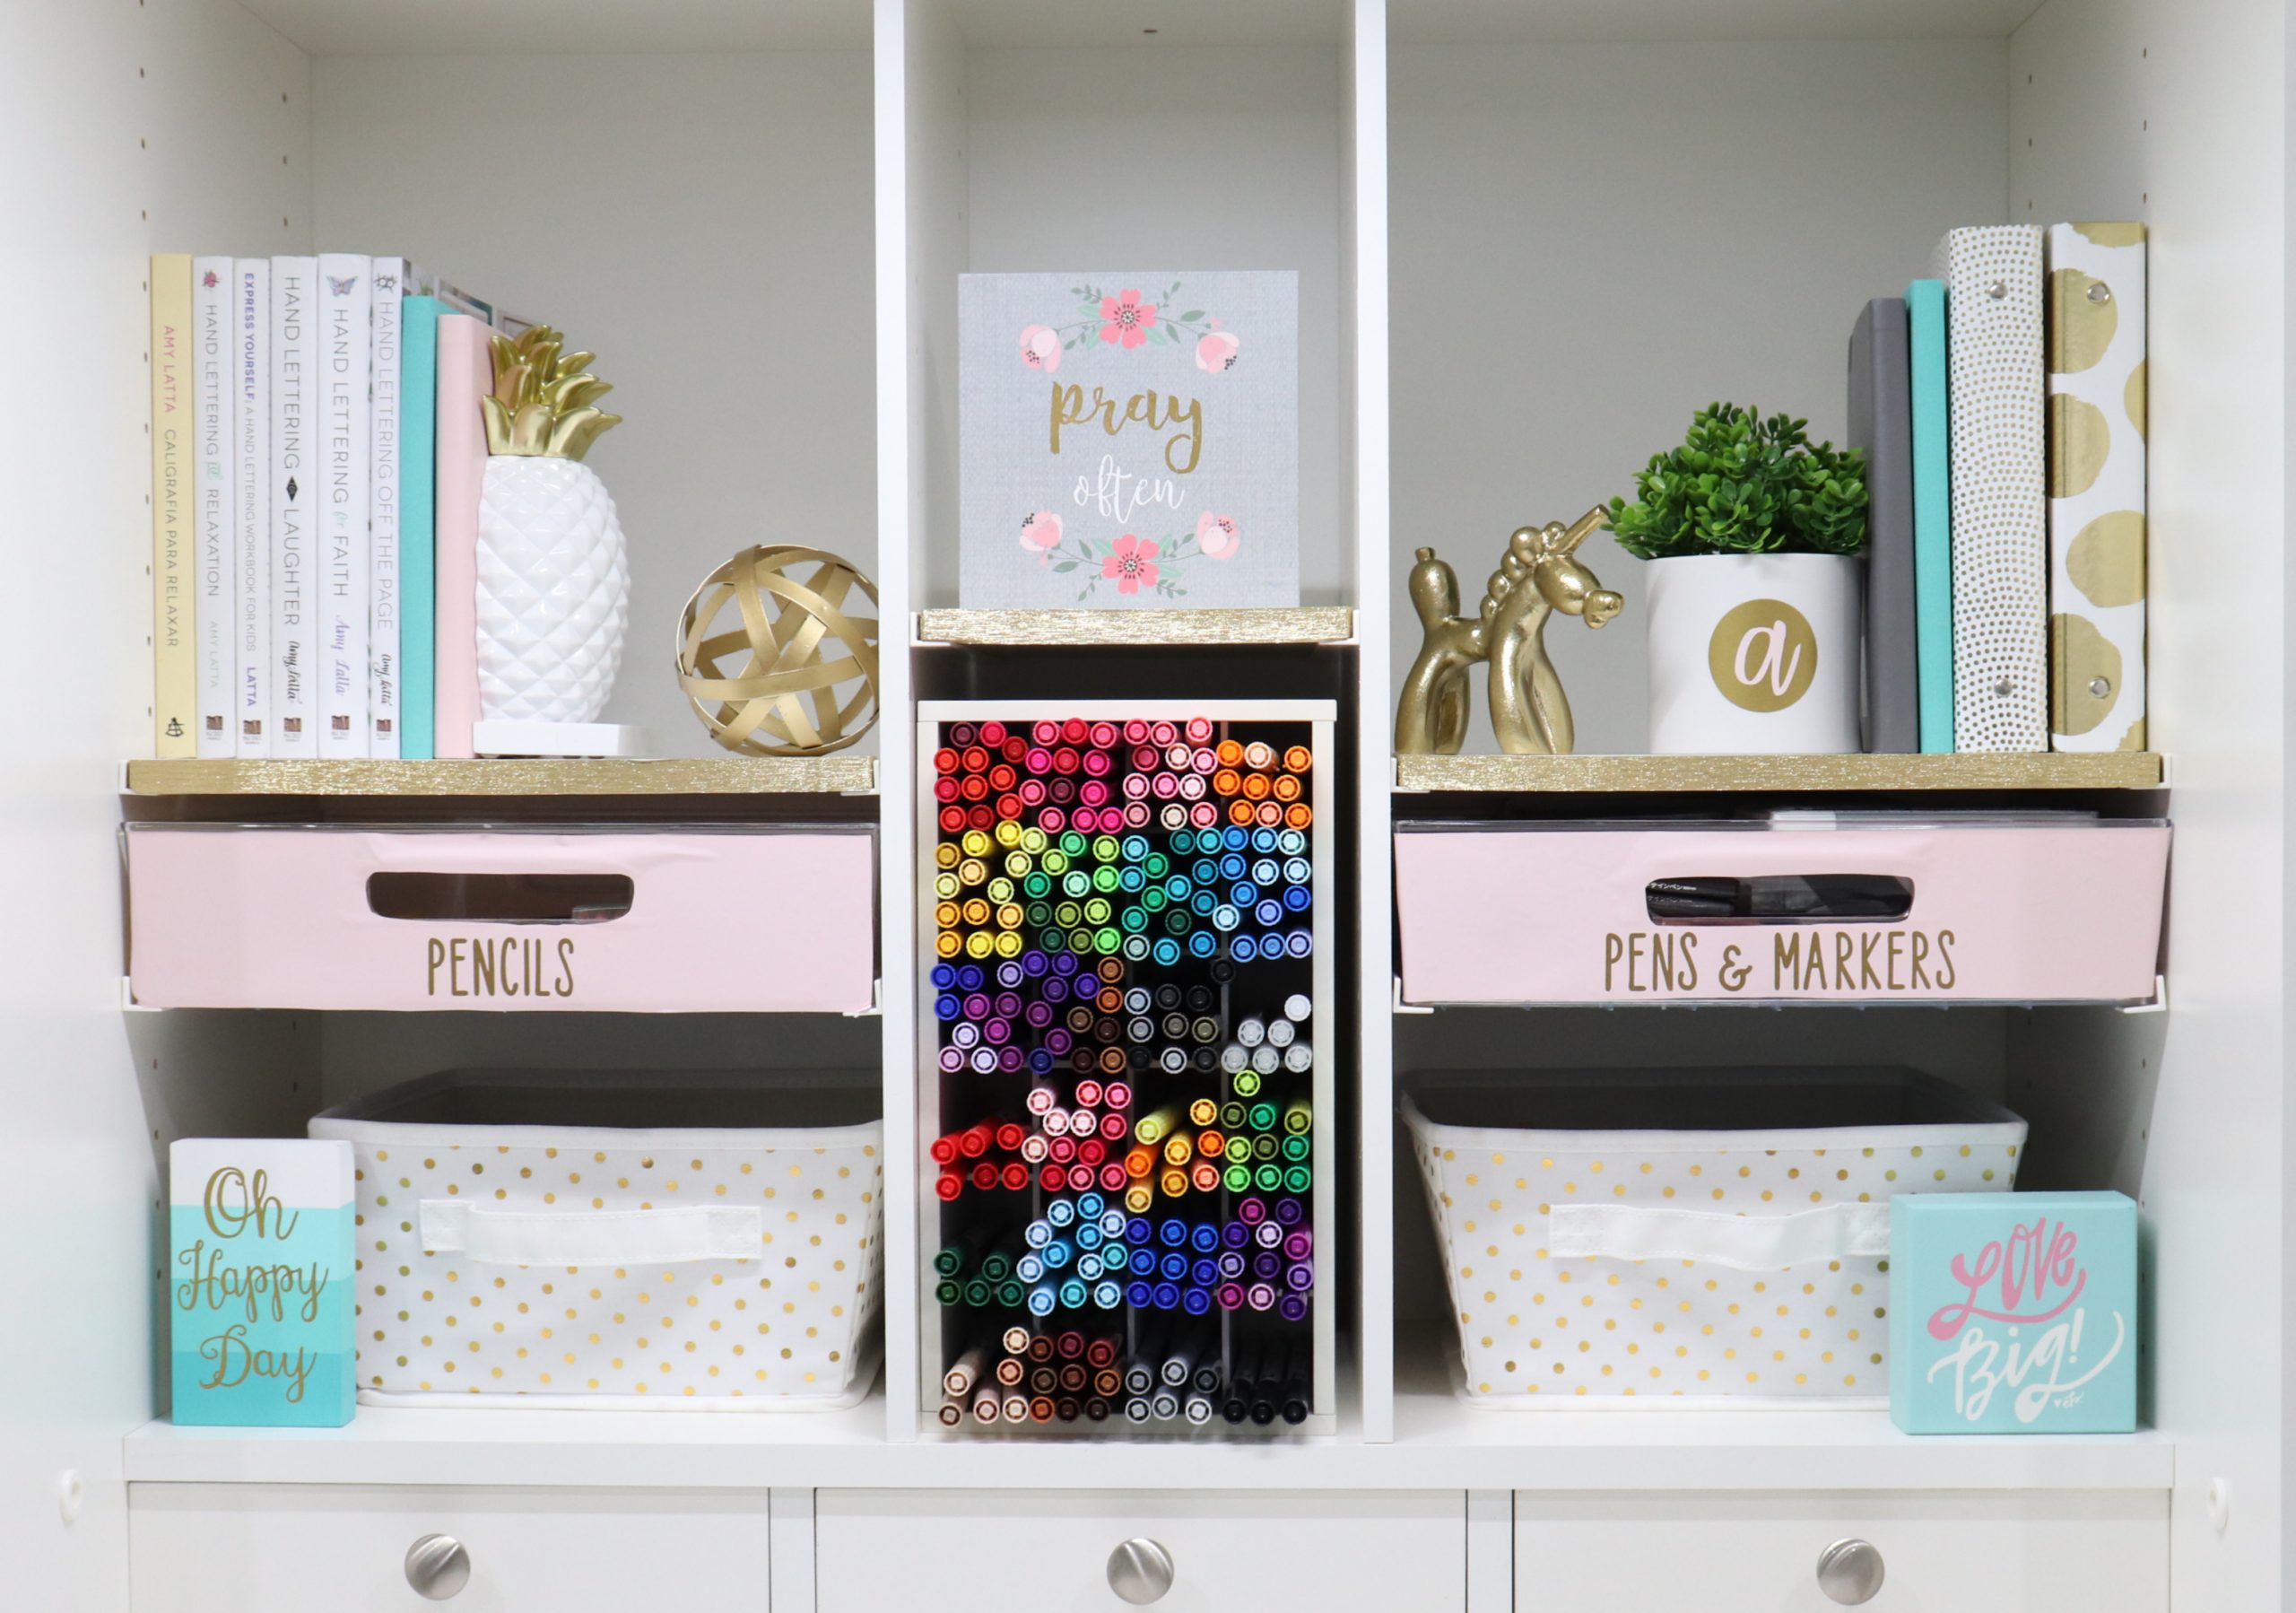
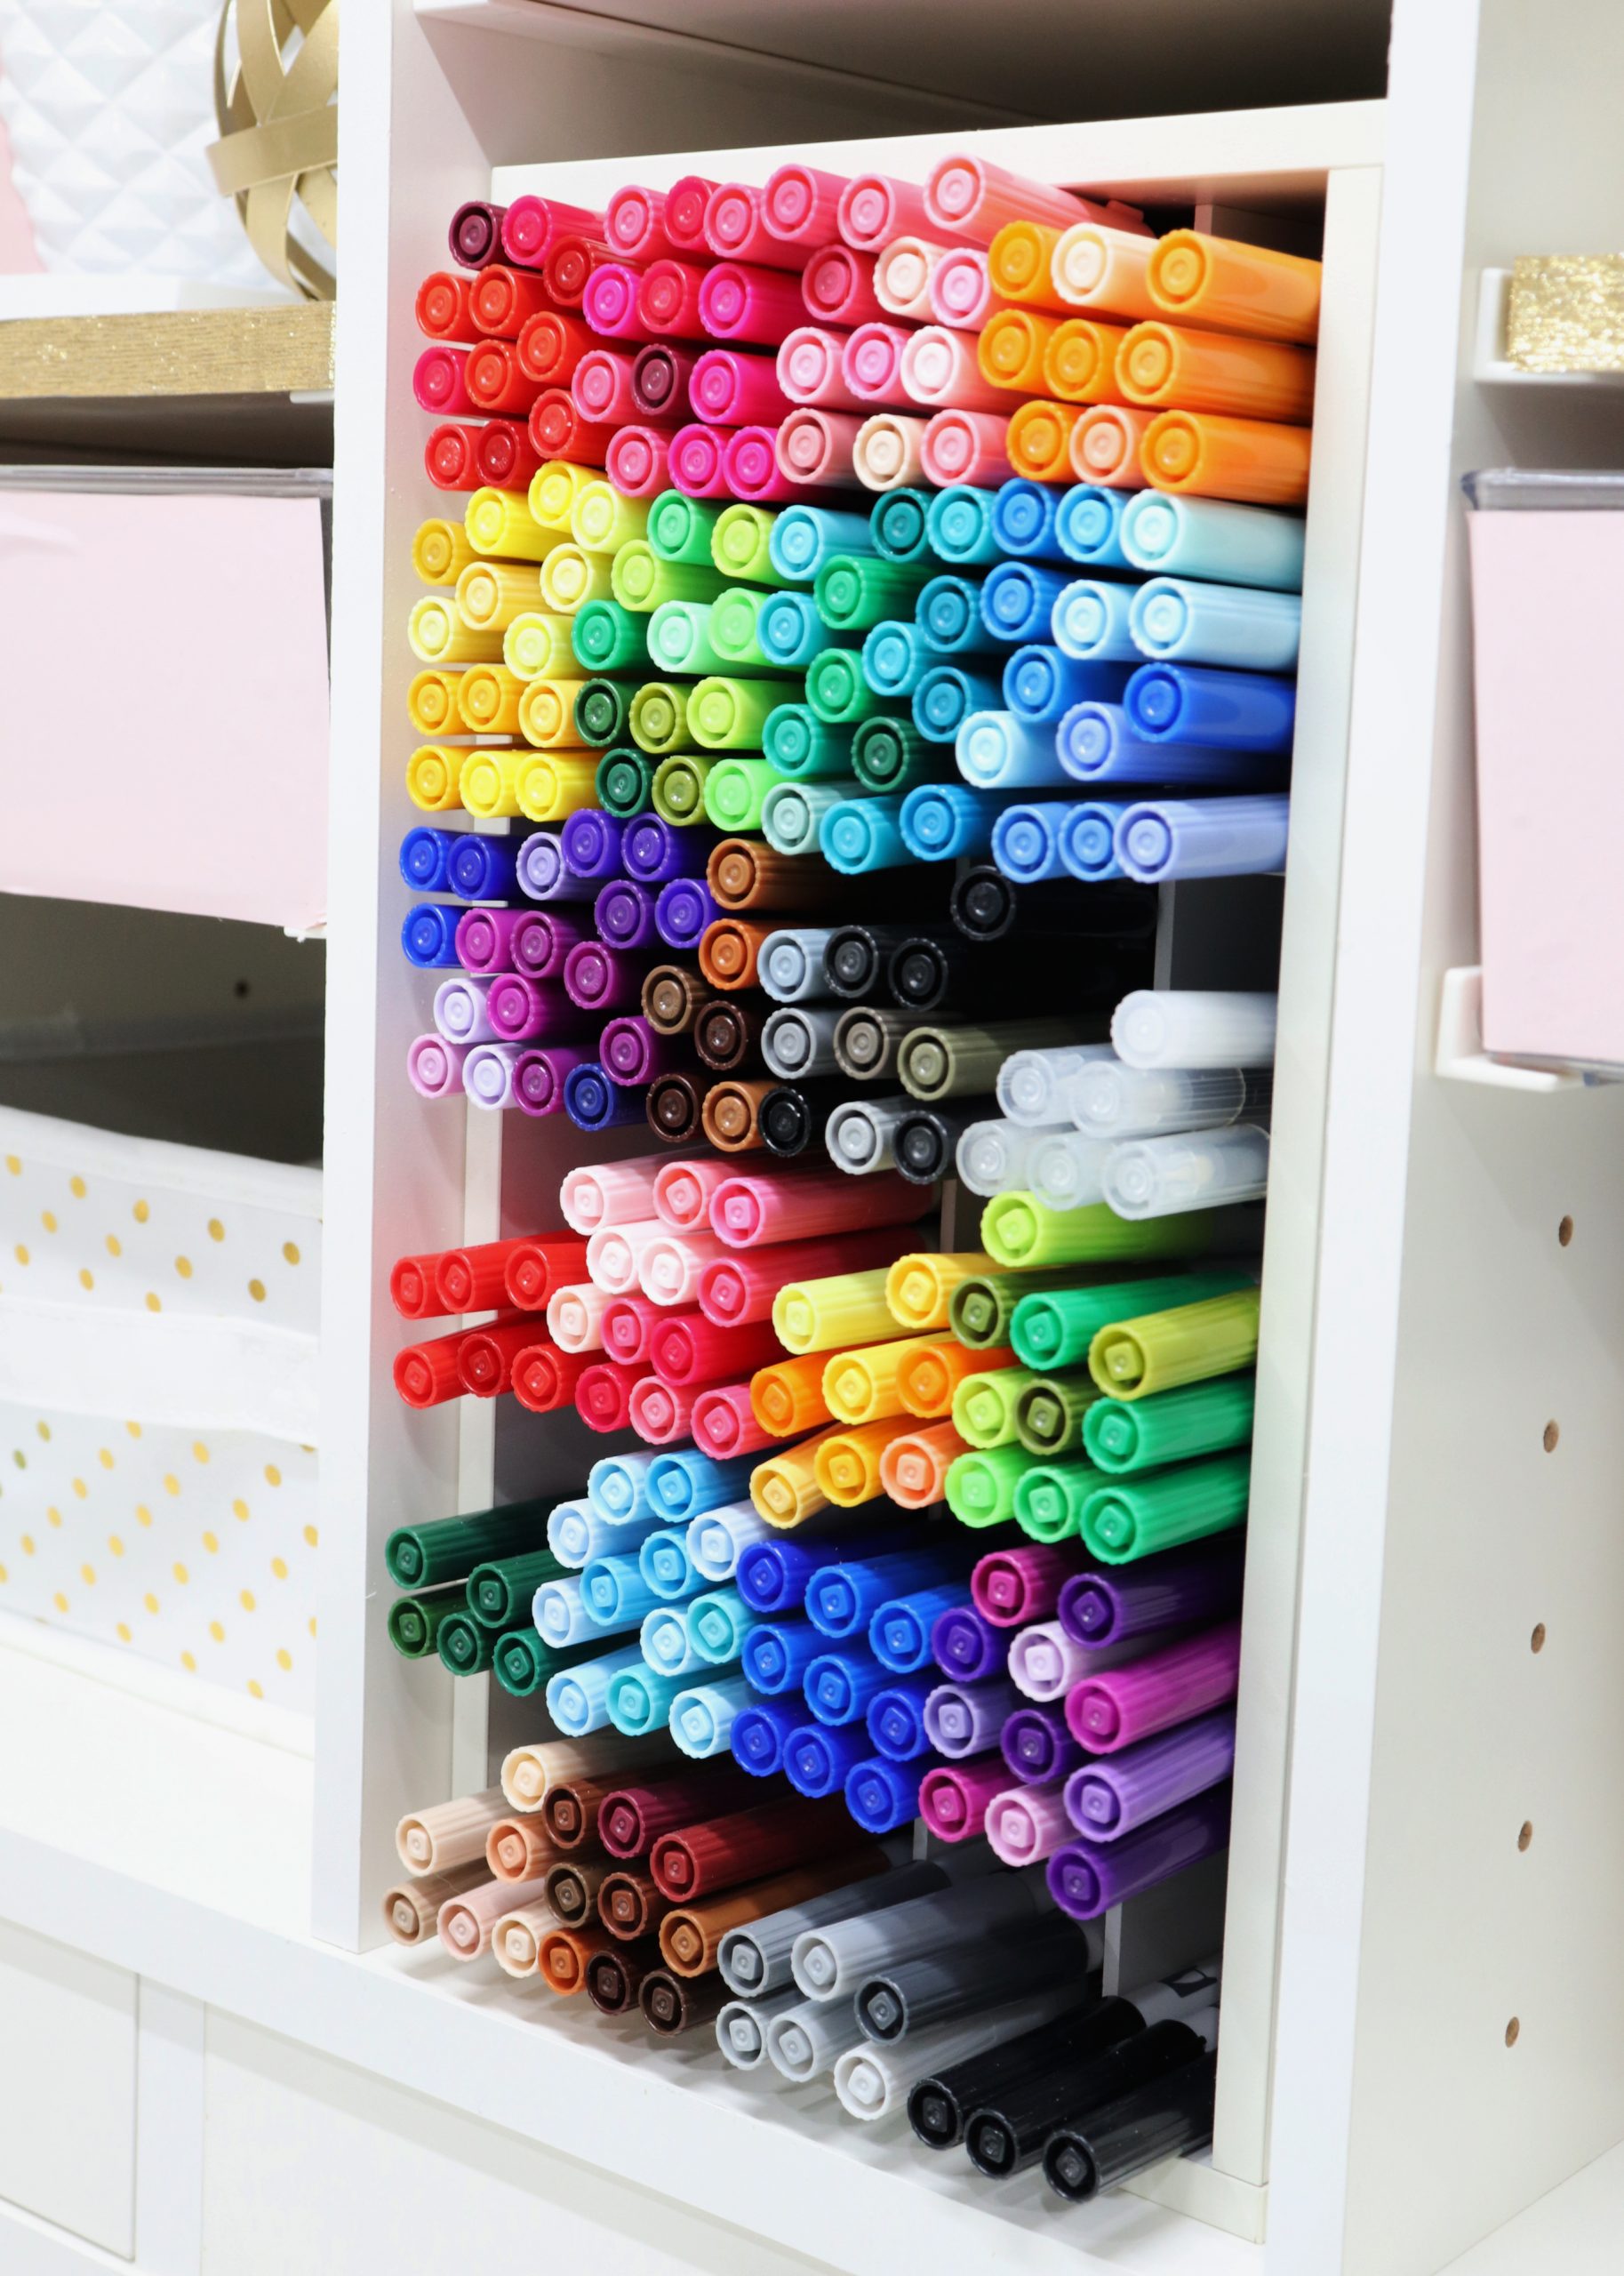
Front and center, I have my Tombow markers; the Dual Brush Pens are on top, organized by color, and below them are my alcohol-based Tombow ABT Pro markers. These markers should always be stored horizontally, so the Tool Cubby from CreateRoom was the perfect solution. It fits perfectly and now I can see all of my color choices at once!
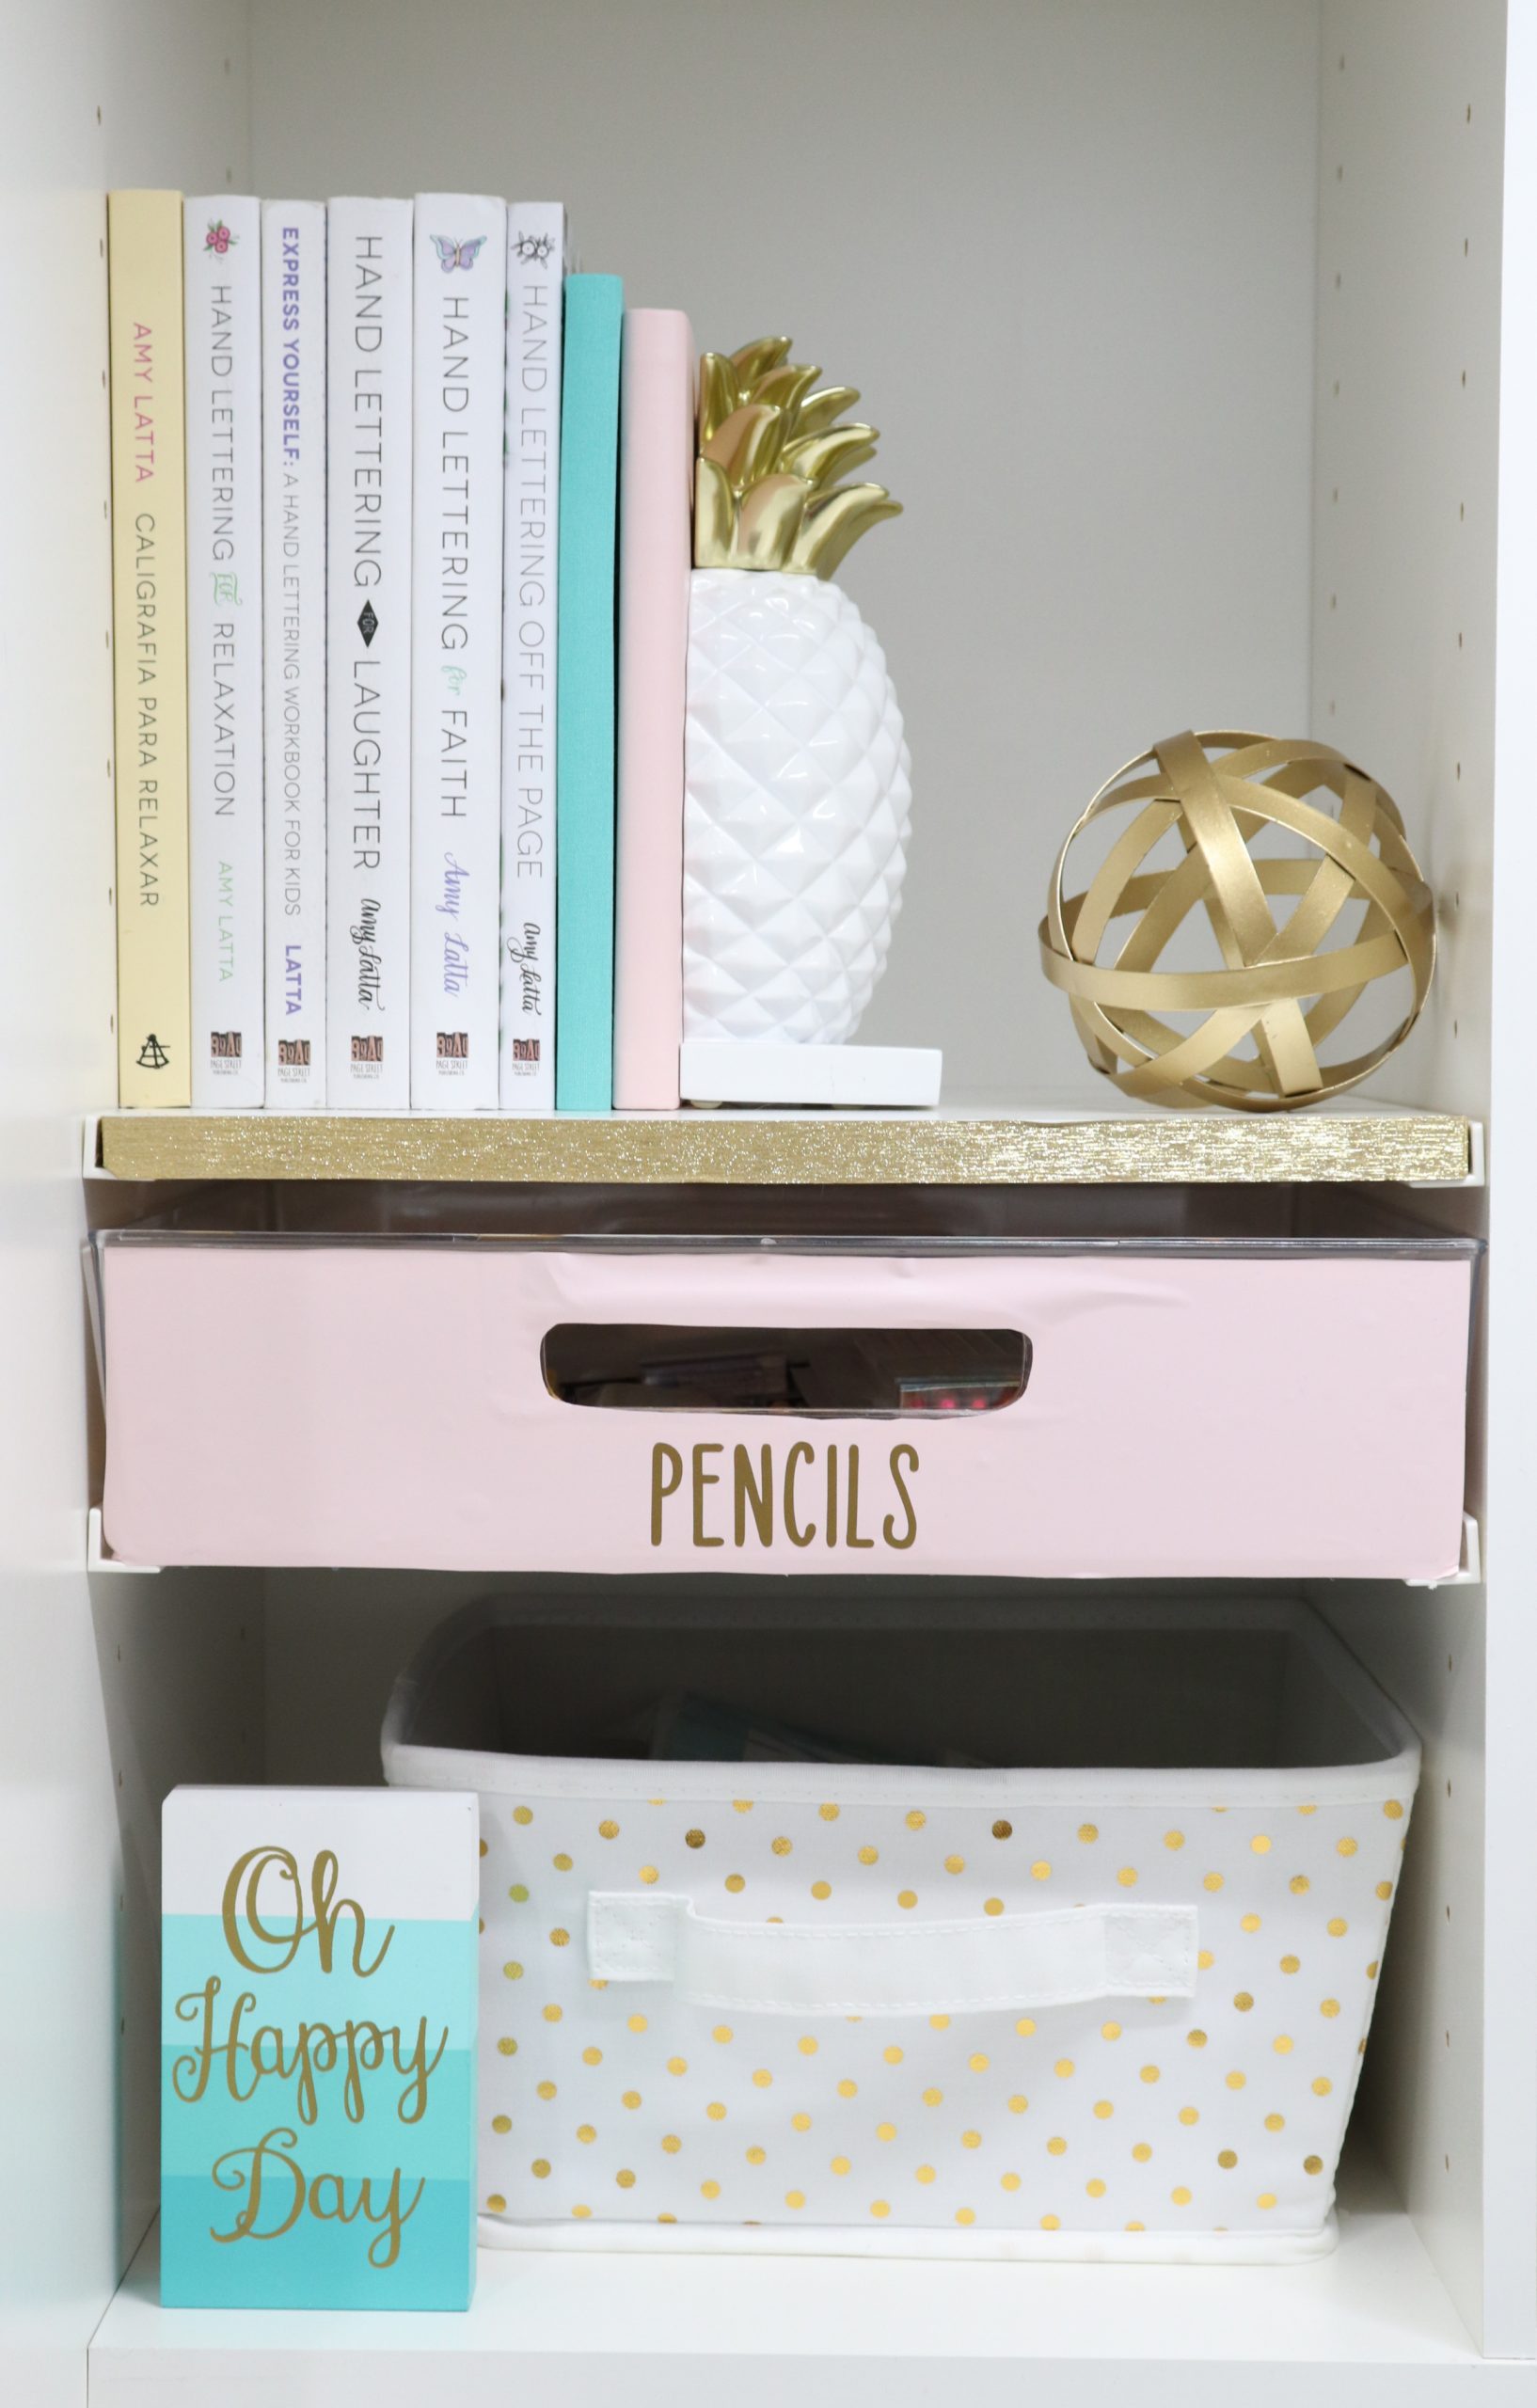
Of course, I wanted to display my books, so I placed them on an upper shelf, along with two blank lettering journals and one of my pineapple bookends. Below them, I have a drawer for all my drawing pencils and colored pencils. The polka dot bin holds supplies for whatever project I am currently working on so that I can keep them all together, but they aren’t just laying out on the table until my project is complete.
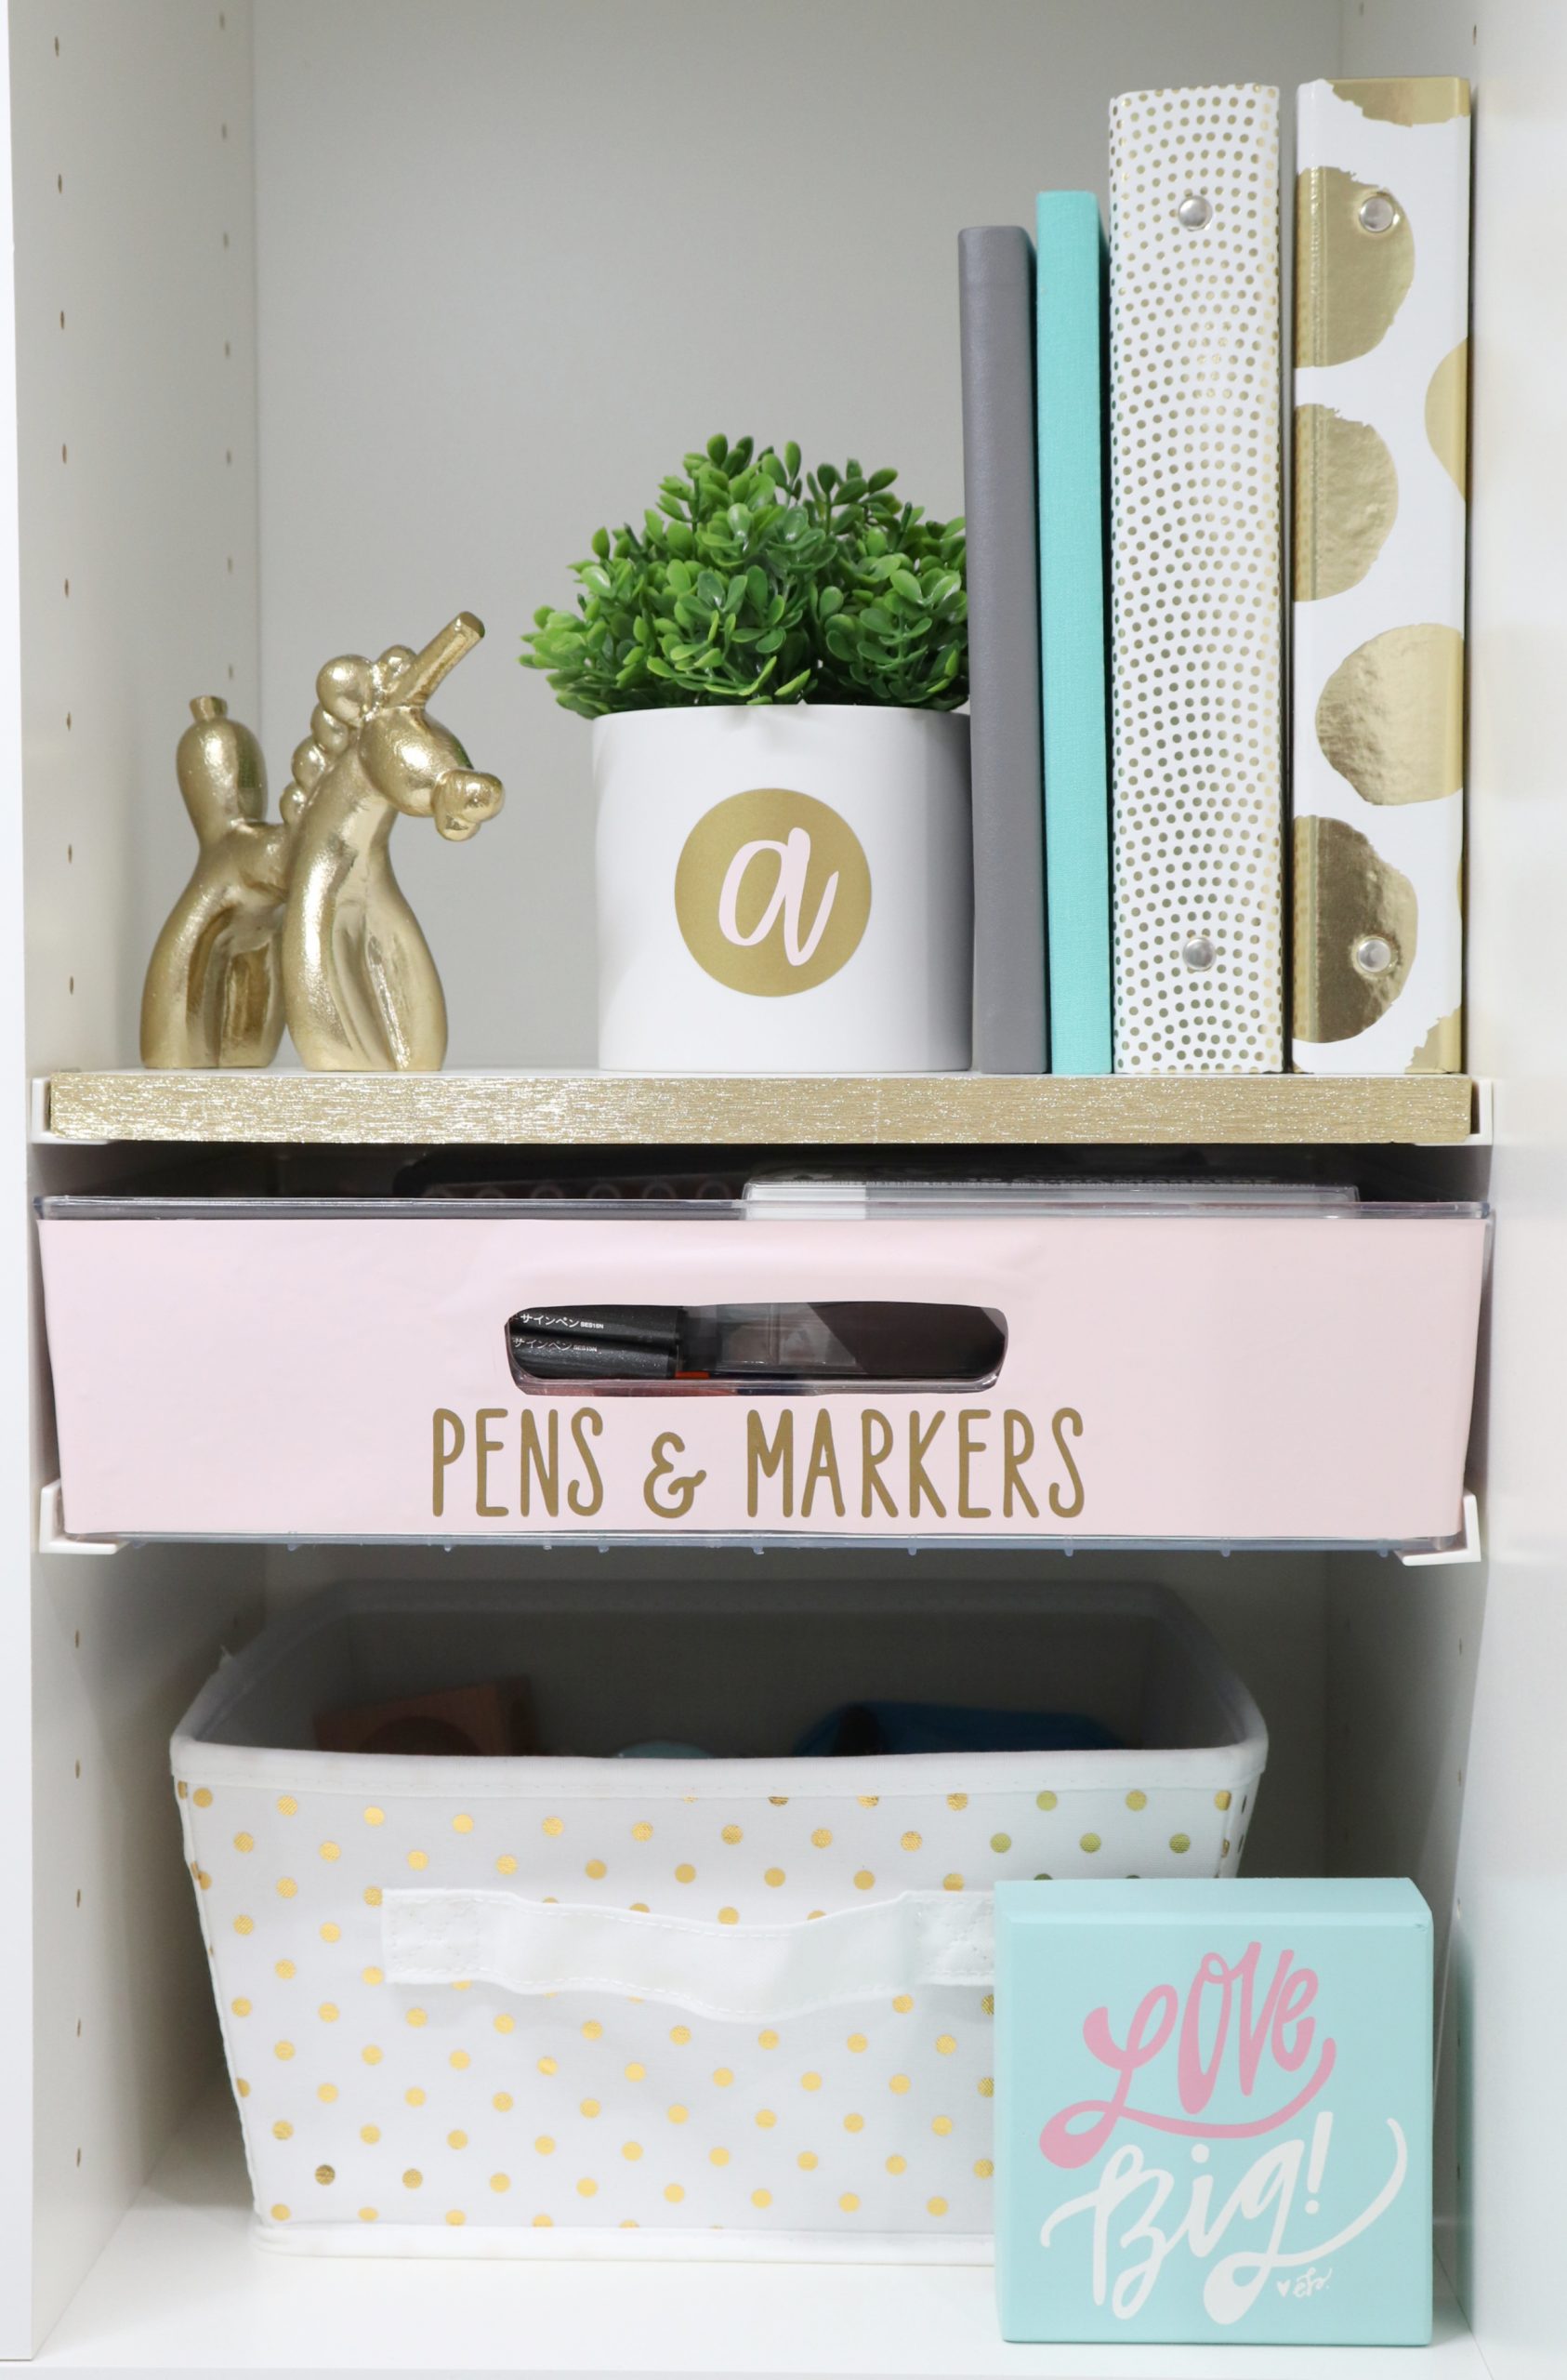
On the upper right shelf, I balanced out my books with two more journals for lettering practice and two little decorative binders. I added a faux succulent and, of course, my balloon unicorn. The bin below holds other types of brush pens and markers that I use less often than my Tombow ones. The polka dot container has jewelry making tools inside, like pliers, wire cutters, etc.
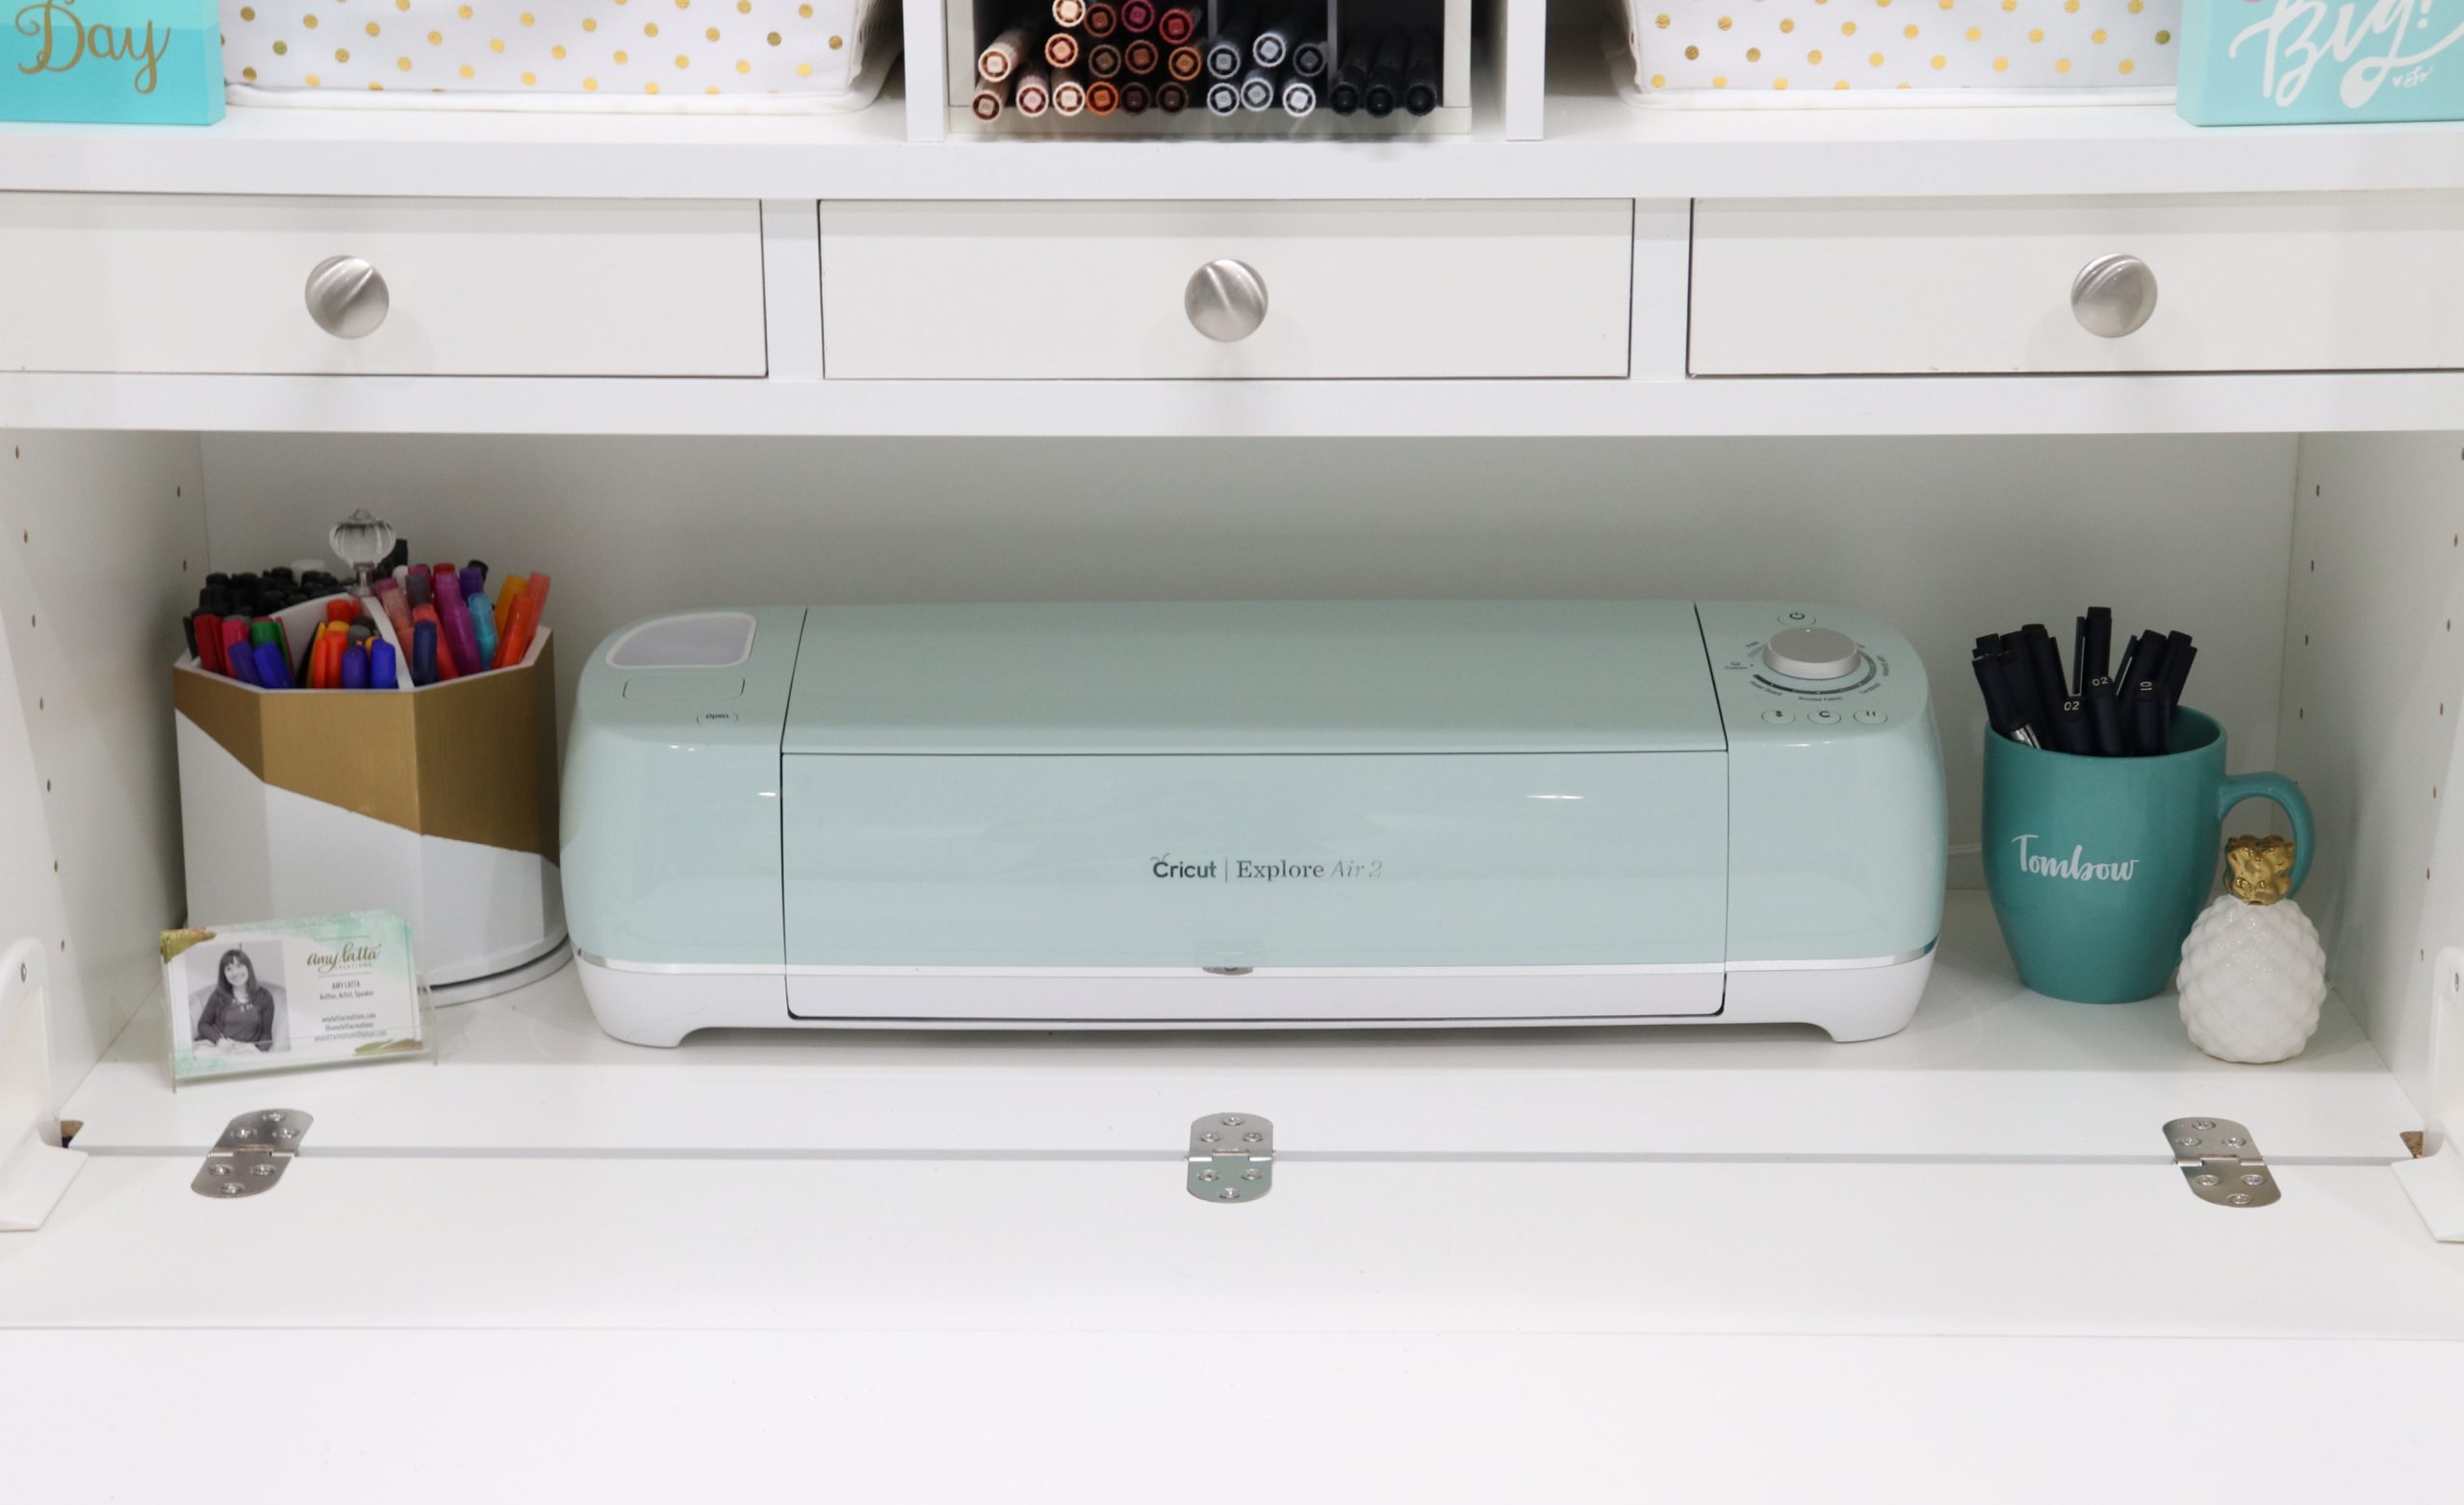
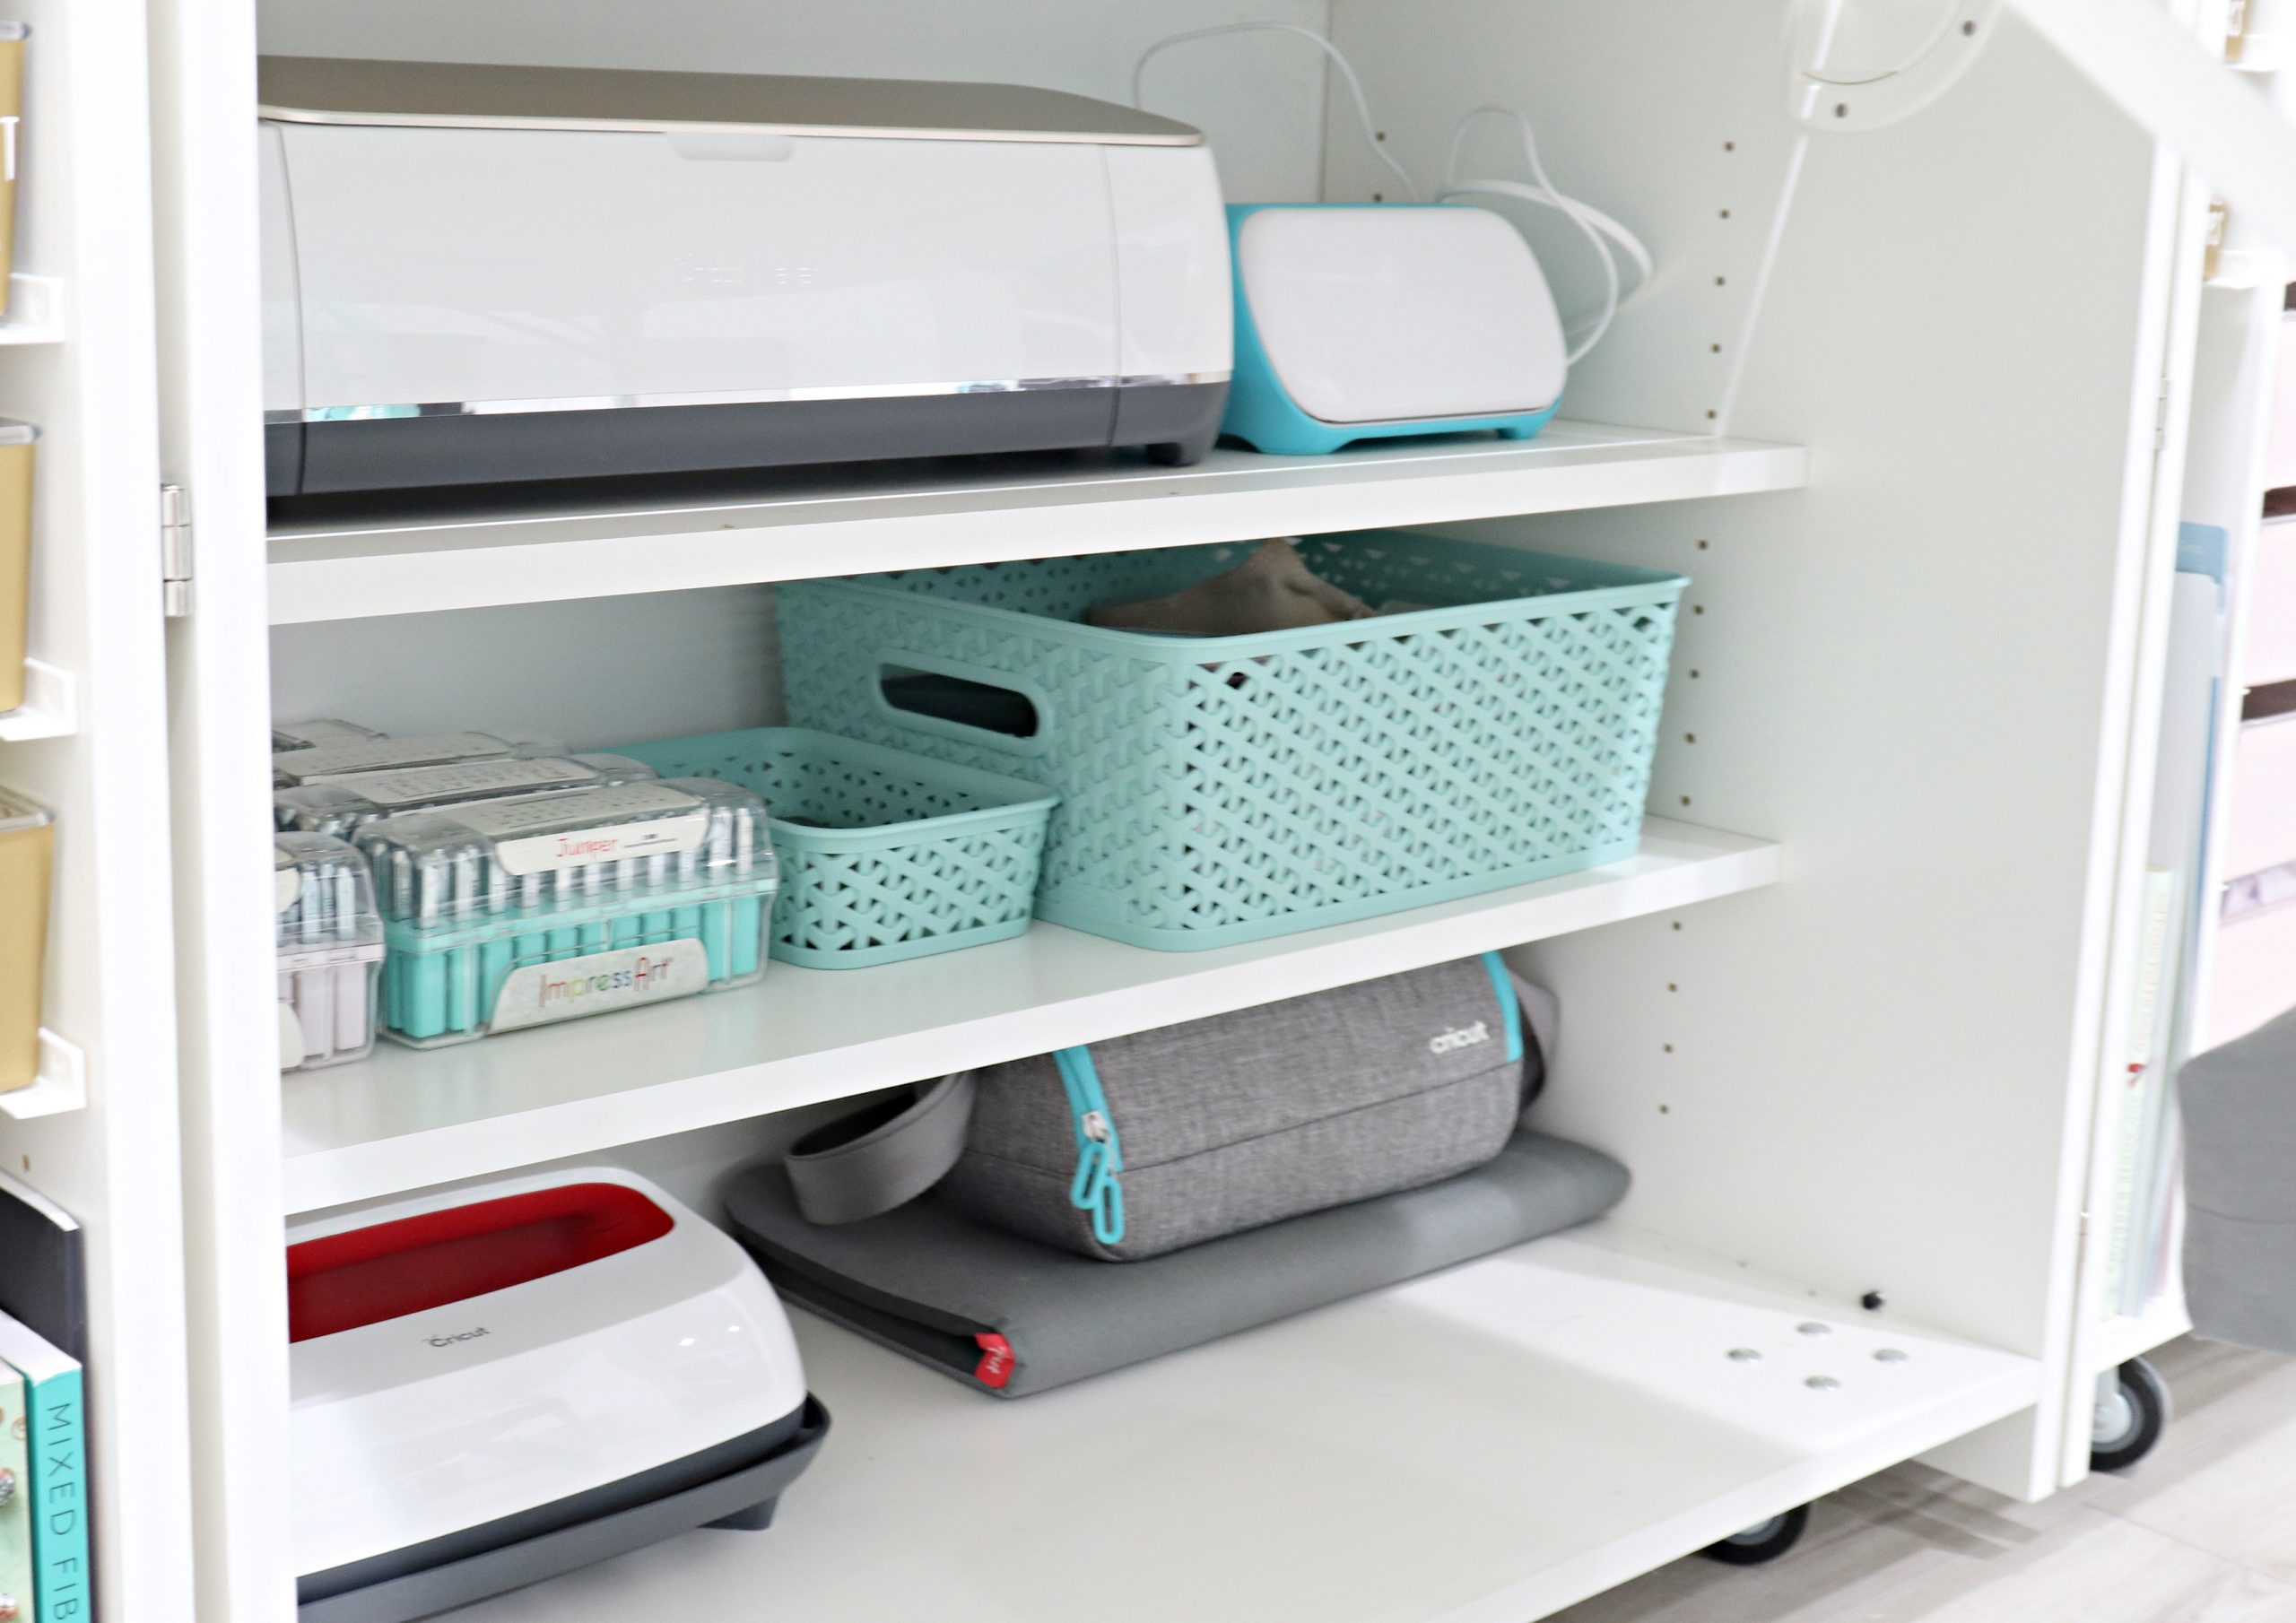
The three drawers below the shelves are important too! The left one holds my scissors, the center one has my hand lettered stickers and promotional postcards for my books, and the one on the right is for small but very important electronics and tech supplies…my webcam, my lapel mic, my mini tripod, etc. The space directly behind the fold-out table is the perfect spot for my Cricut Explore Air 2. There’s a hole (covered by the mug) for the cord that runs through the back, so it’s always ready to go at a moment’s notice. On either side of the Cricut are more of my must-have Tombow markers; my Tomow Fudenosukes, colored Fudenosukes, and Twin Tones, and on the other side, my Tombow Mono Drawing Pens.
Did you know there’s storage below the table too? It holds my Cricut Maker, Cricut Joy, EasyPress 2 and the EasyPress mat. Not only that, I was able to store some very heavy metal stamping supplies I’ve always had trouble finding a good storage solution for!
The Left Side
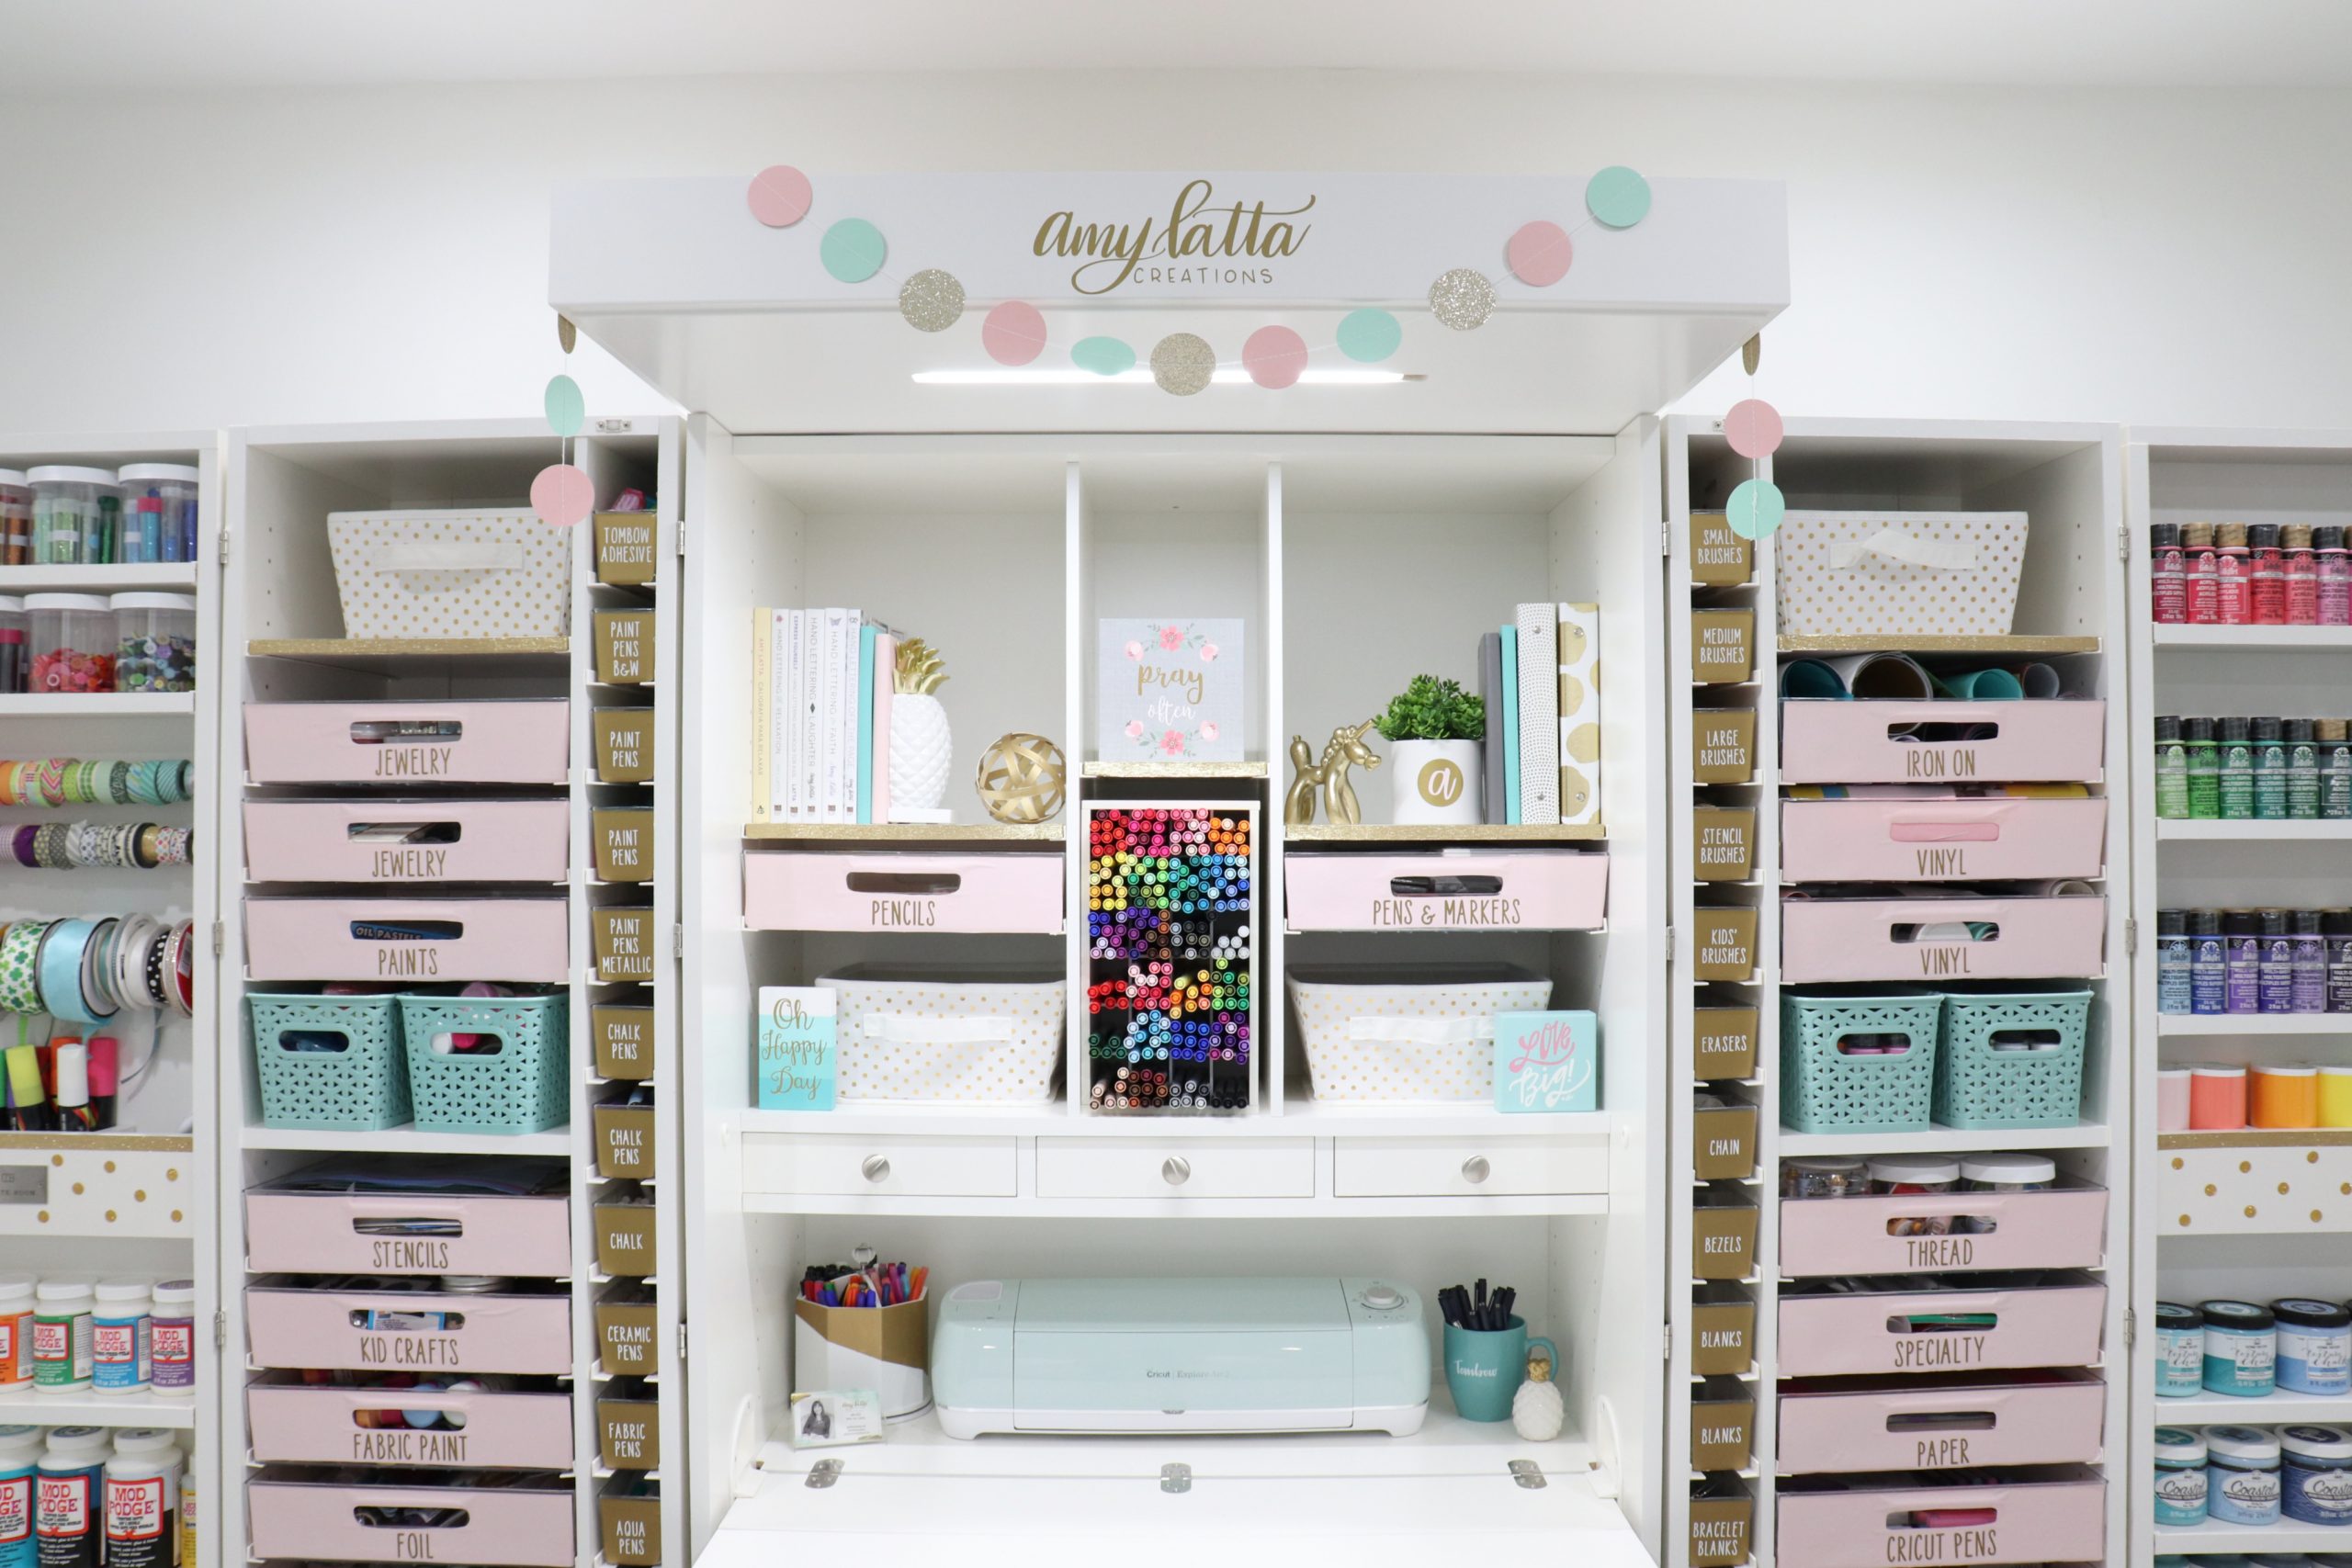
The pink bins on the left are focused on jewelry supplies, adhesives, and fabric projects. In the tiny gold bins, I have every variety of markers and pens you can imagine: paint pens, ceramic pens, chalk pens, fabric pens, aqua pens, embossing pens…I might have a slight obsession.
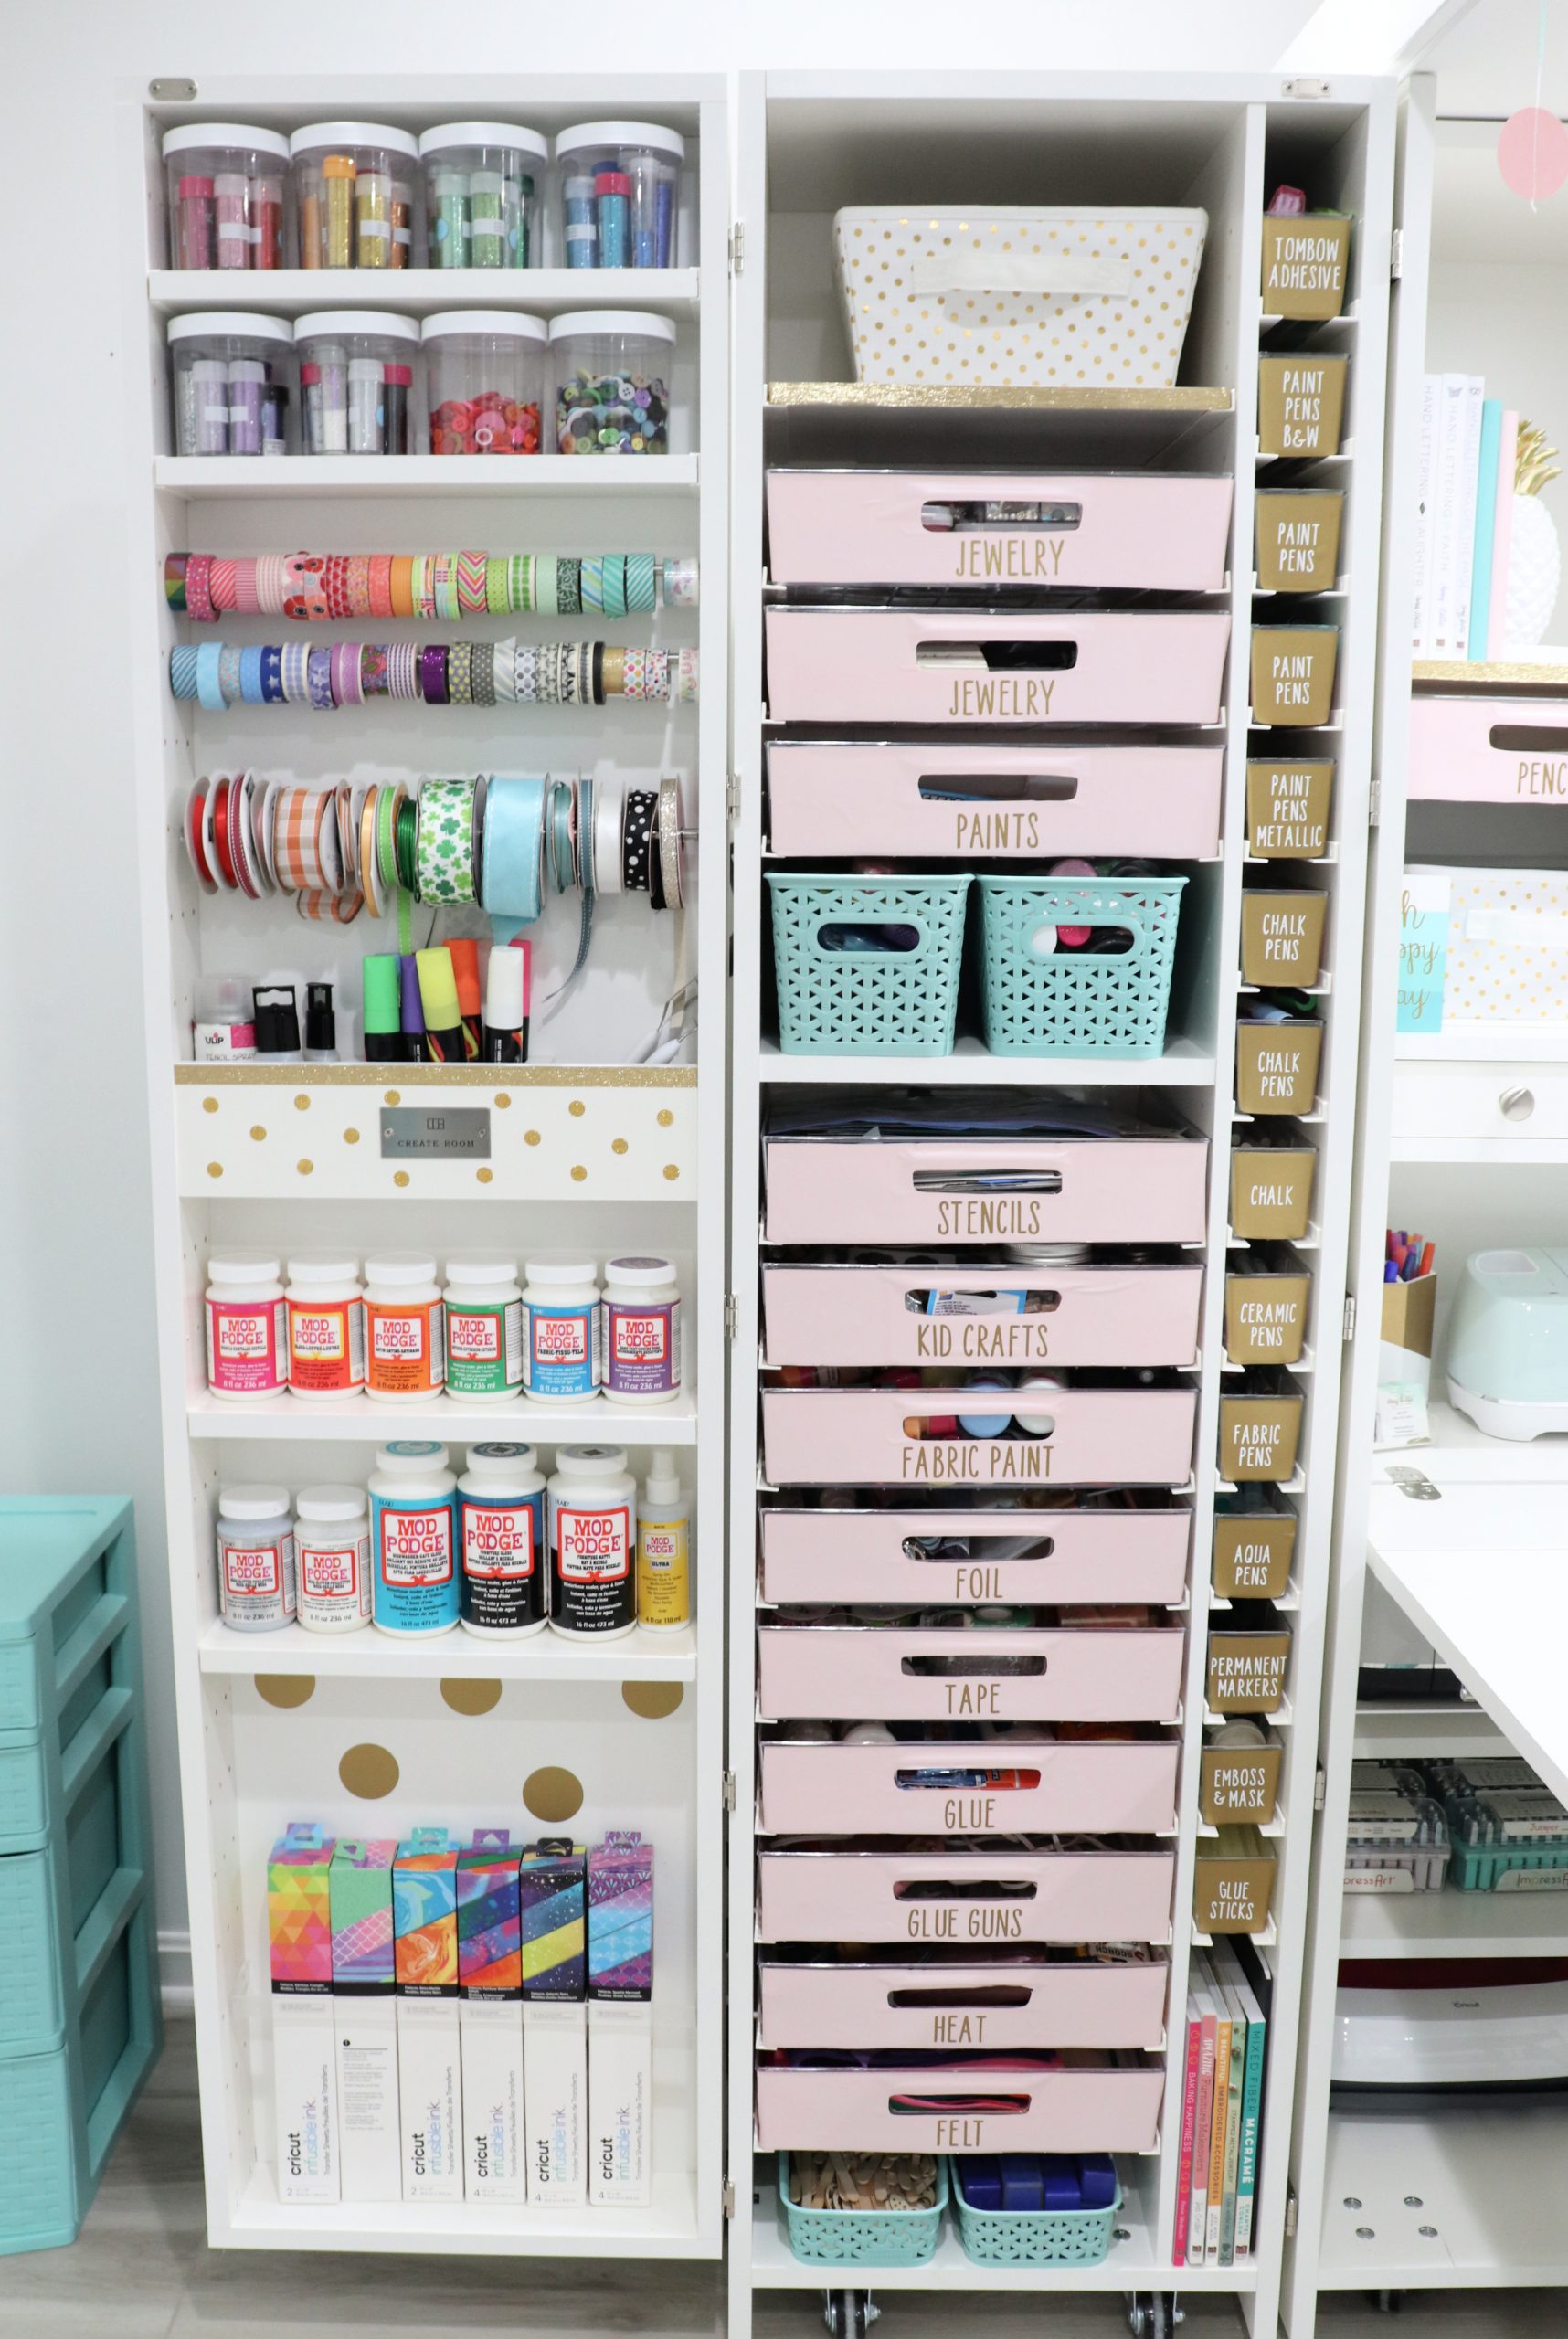
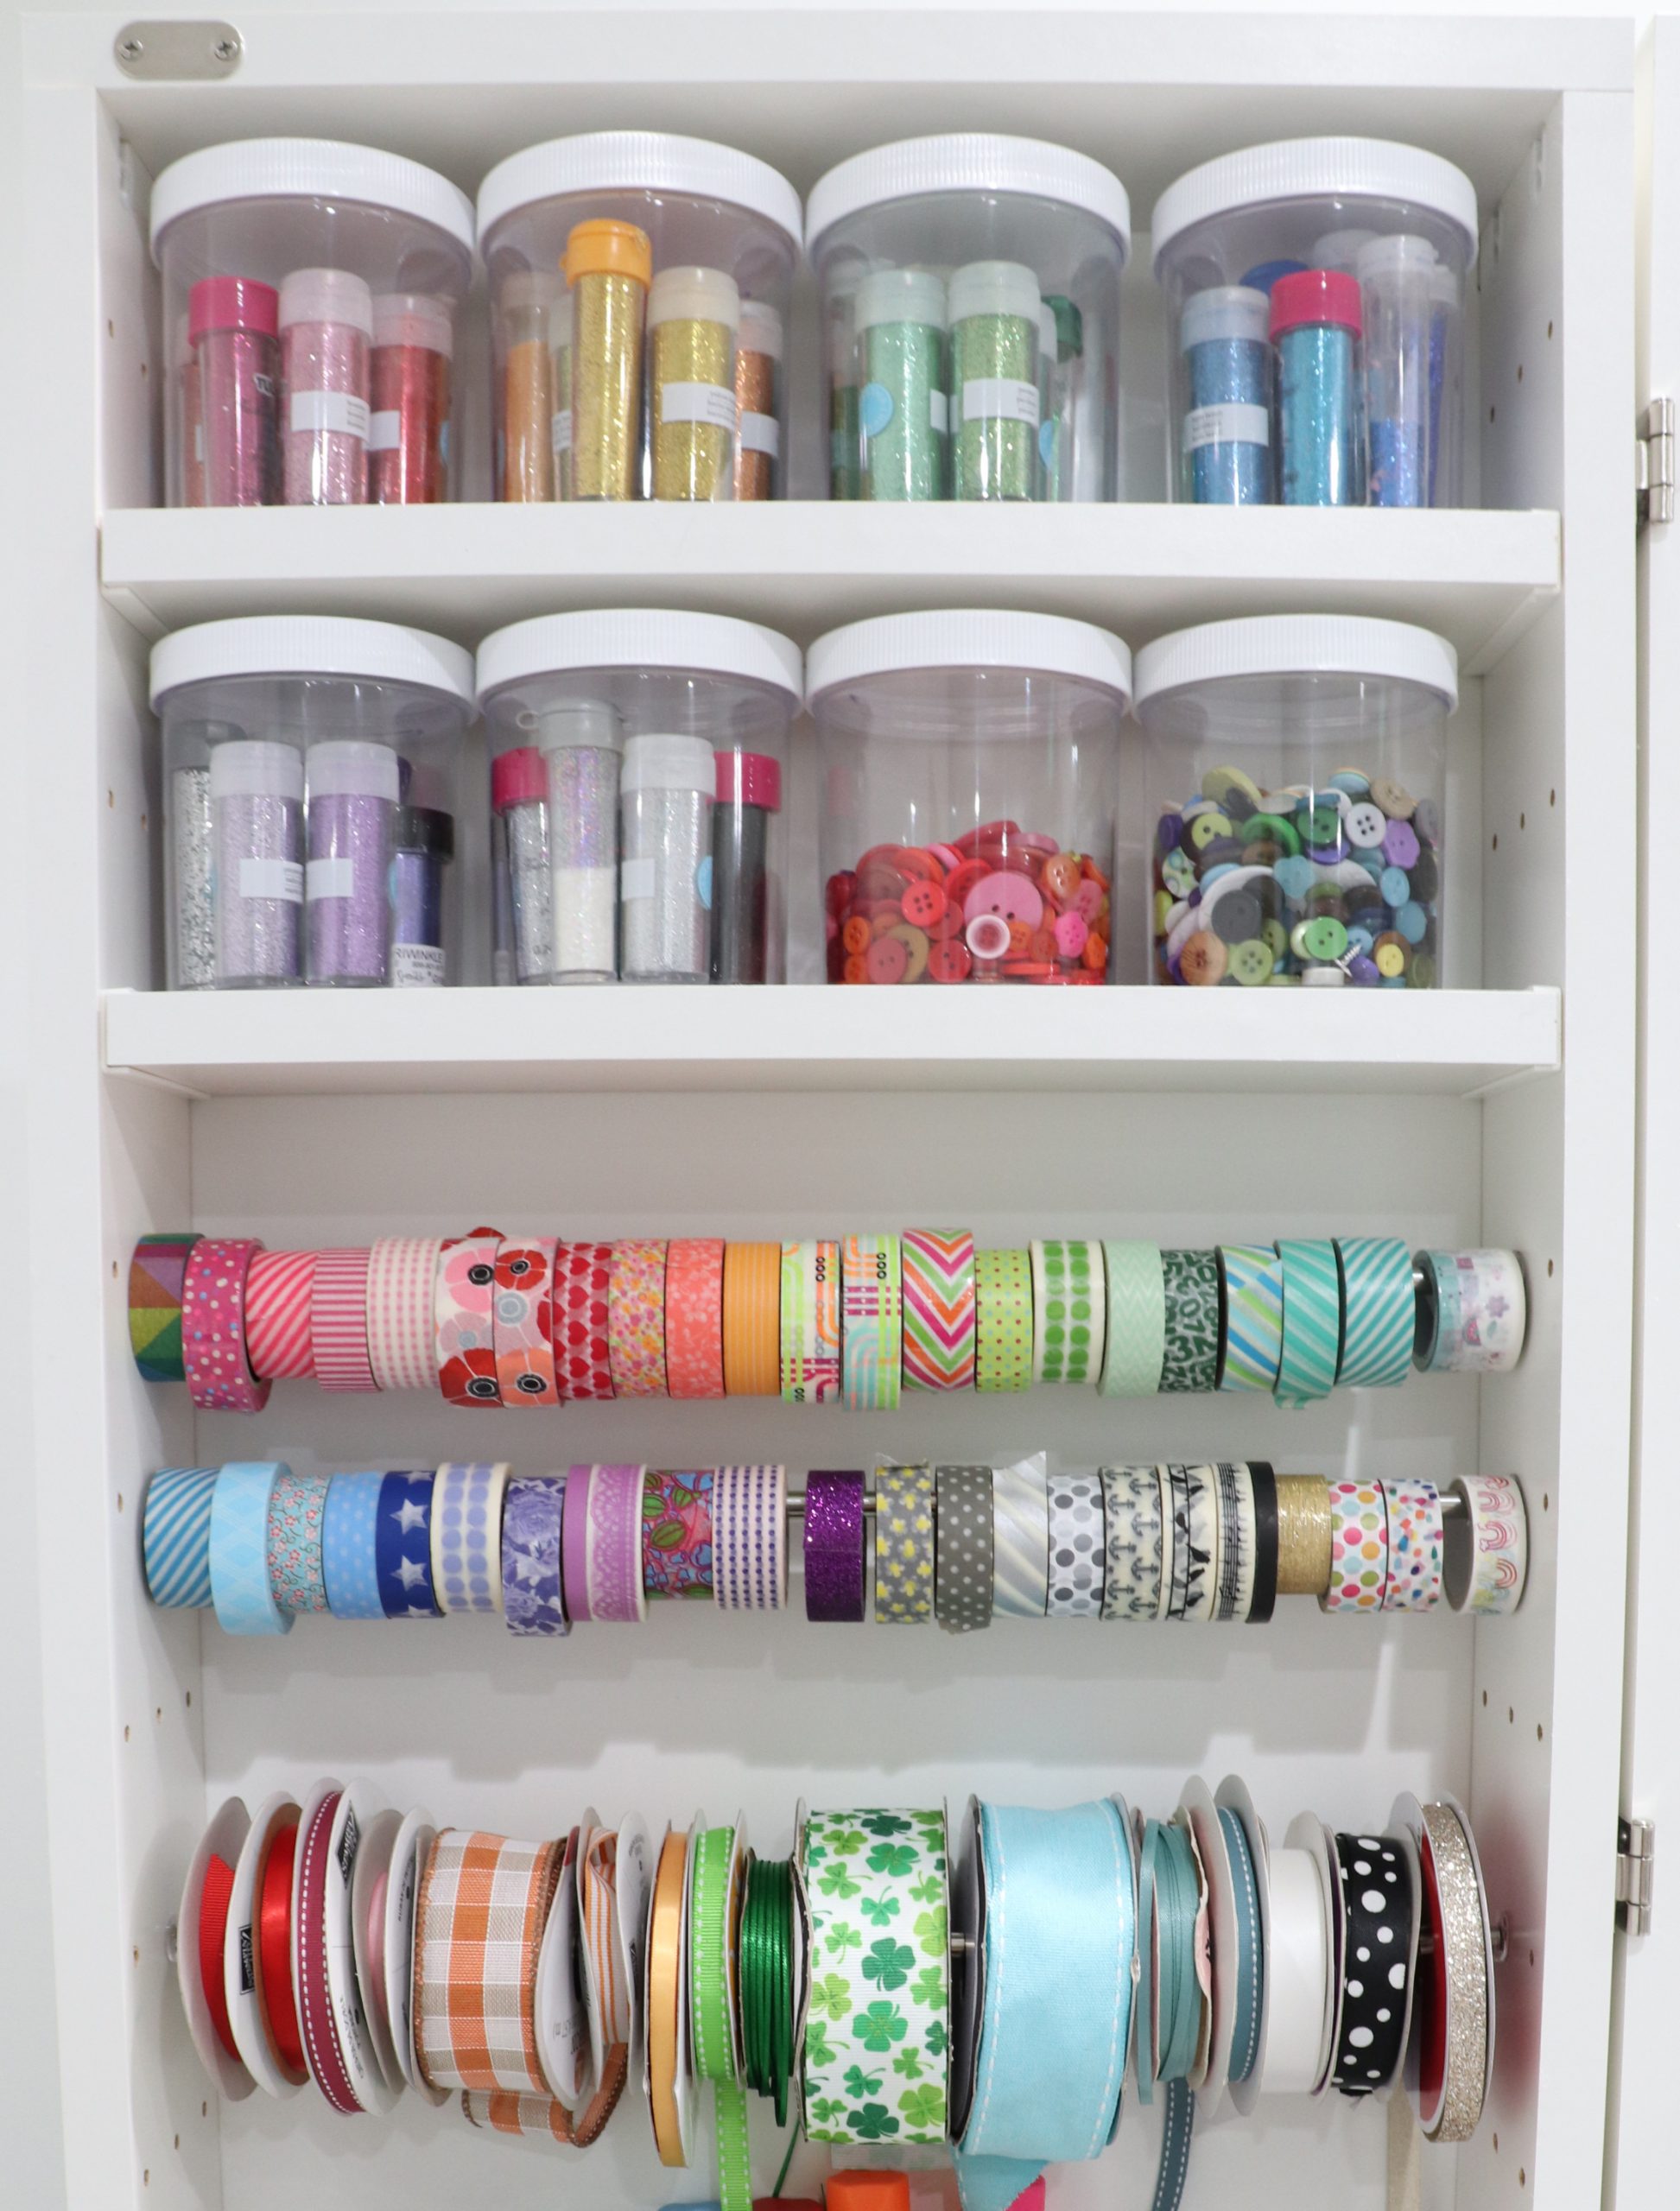
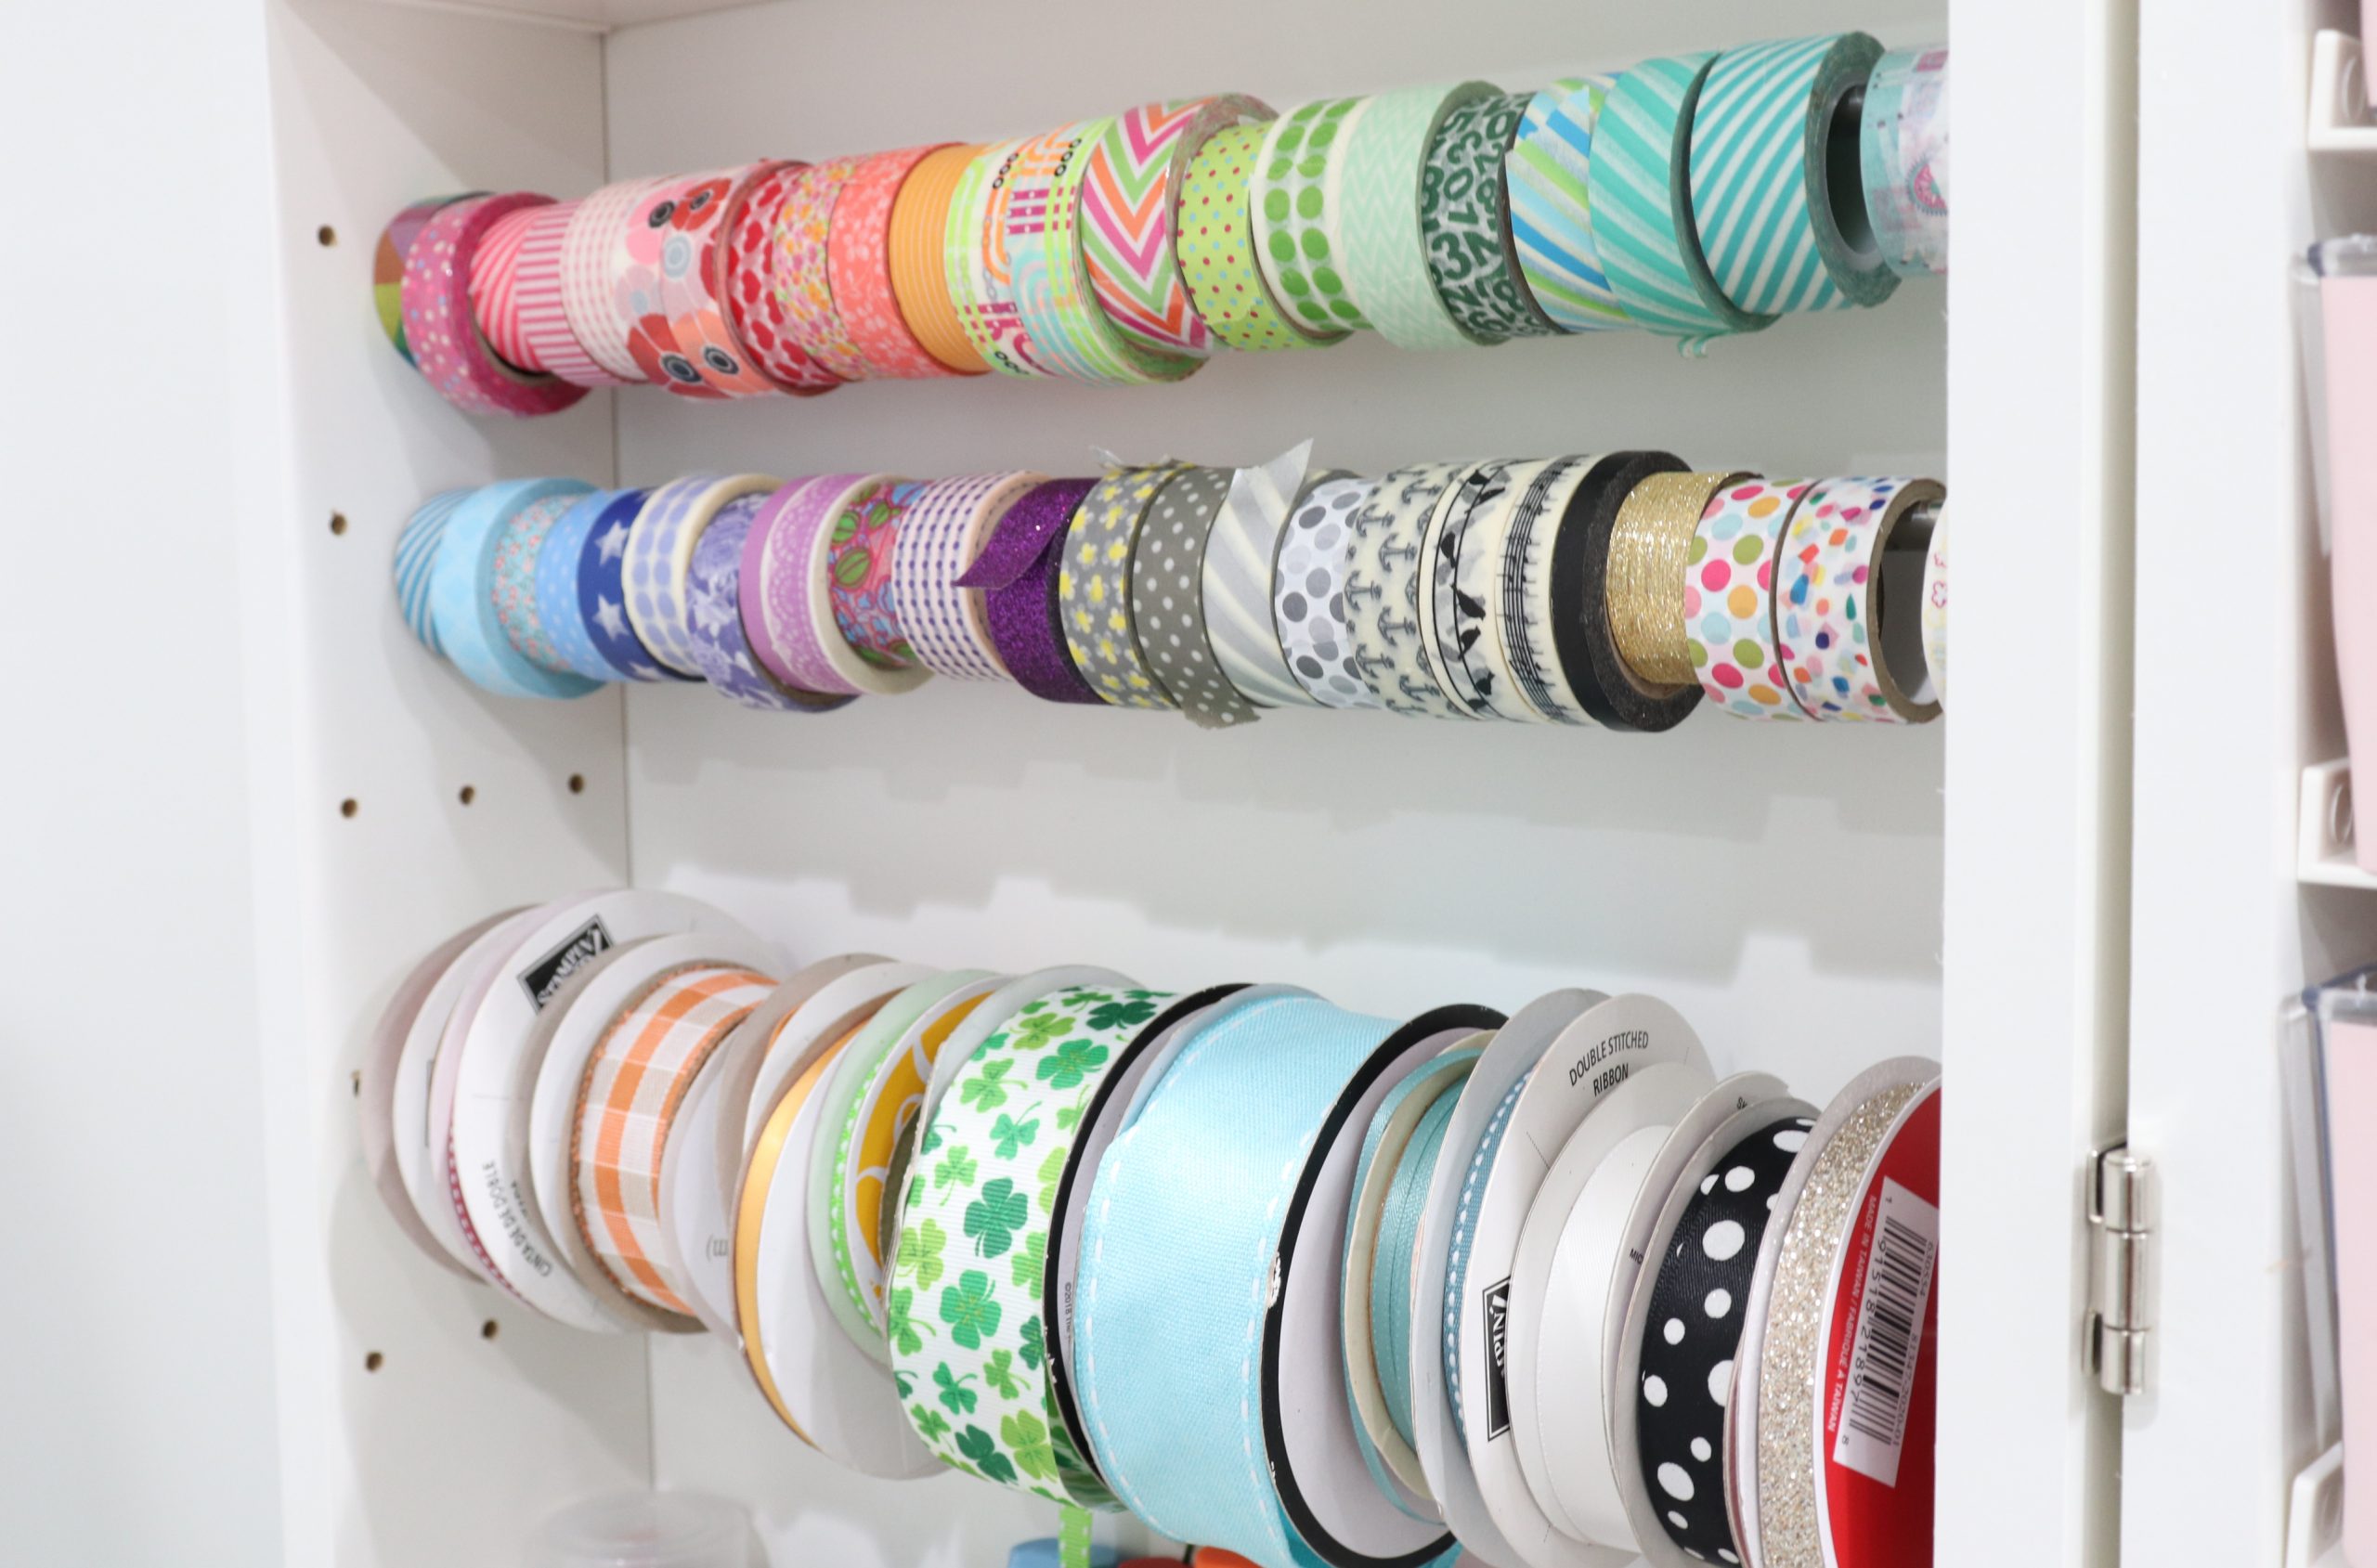
In the left side door, I stored my loose glitter and buttons, all arranged by color so it’s easy to find exactly what I want. Below that is my washi tape and ribbon, which I was able to hang on metal rods that clip into the sides of the door.
The entire system is set up so that you can arrange shelves, rods, and bins in any configuration you like and at whatever heights you want. It is 100% customizable so you can have your supplies stored however it works best for you, instead of trying to fit them into someone else’s system.
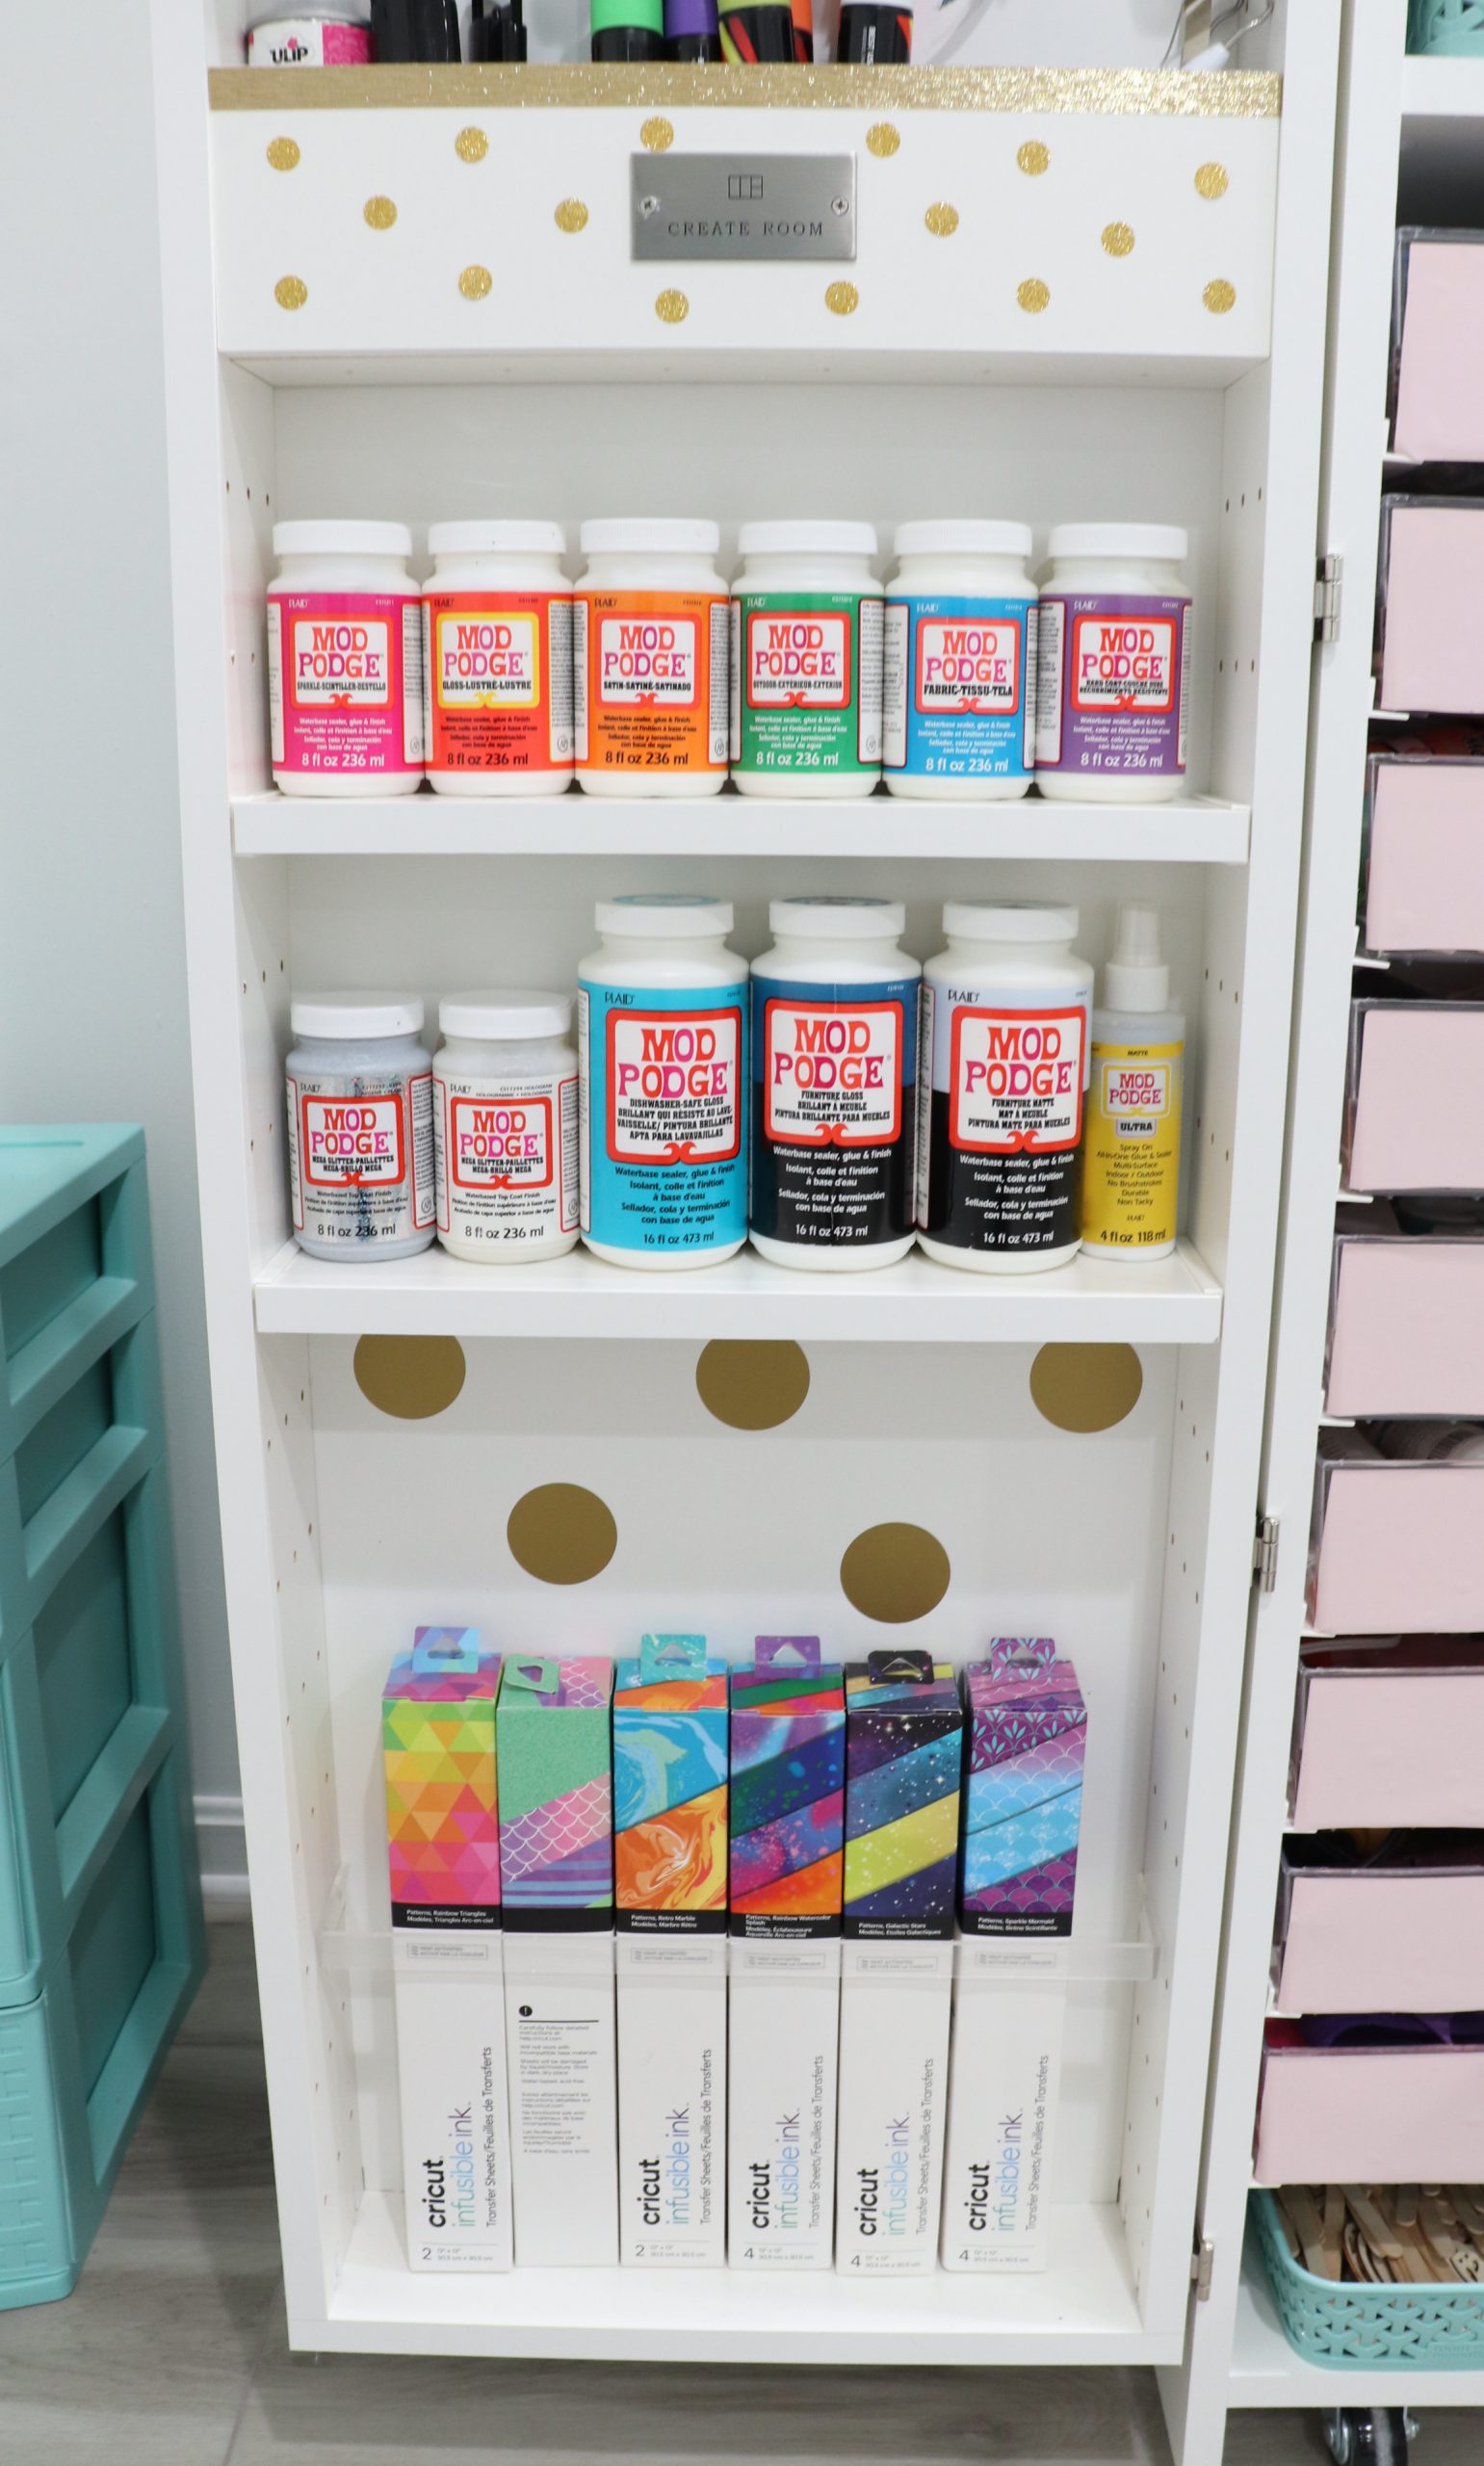
The lower section of the door holds various forms of Mod Podge, as well as some of my Infusible Ink for the Cricut.
The Right Side
The bins on the right focus on Cricut supplies; I have storage for my vinyl, as well as for specialty materials like leather, faux leather, holographic vinyl, sticker paper, and more. There’s a bin for cardstock, one for the Cricut Joy Insert Cards, and several just for the special “smart” materials that work in the Joy machine. The cutting mats are also stored on this side below the small gold bins. The bins themselves hold all sizes and kinds of paintbrushes as well as jewelry and metal stamping supplies.
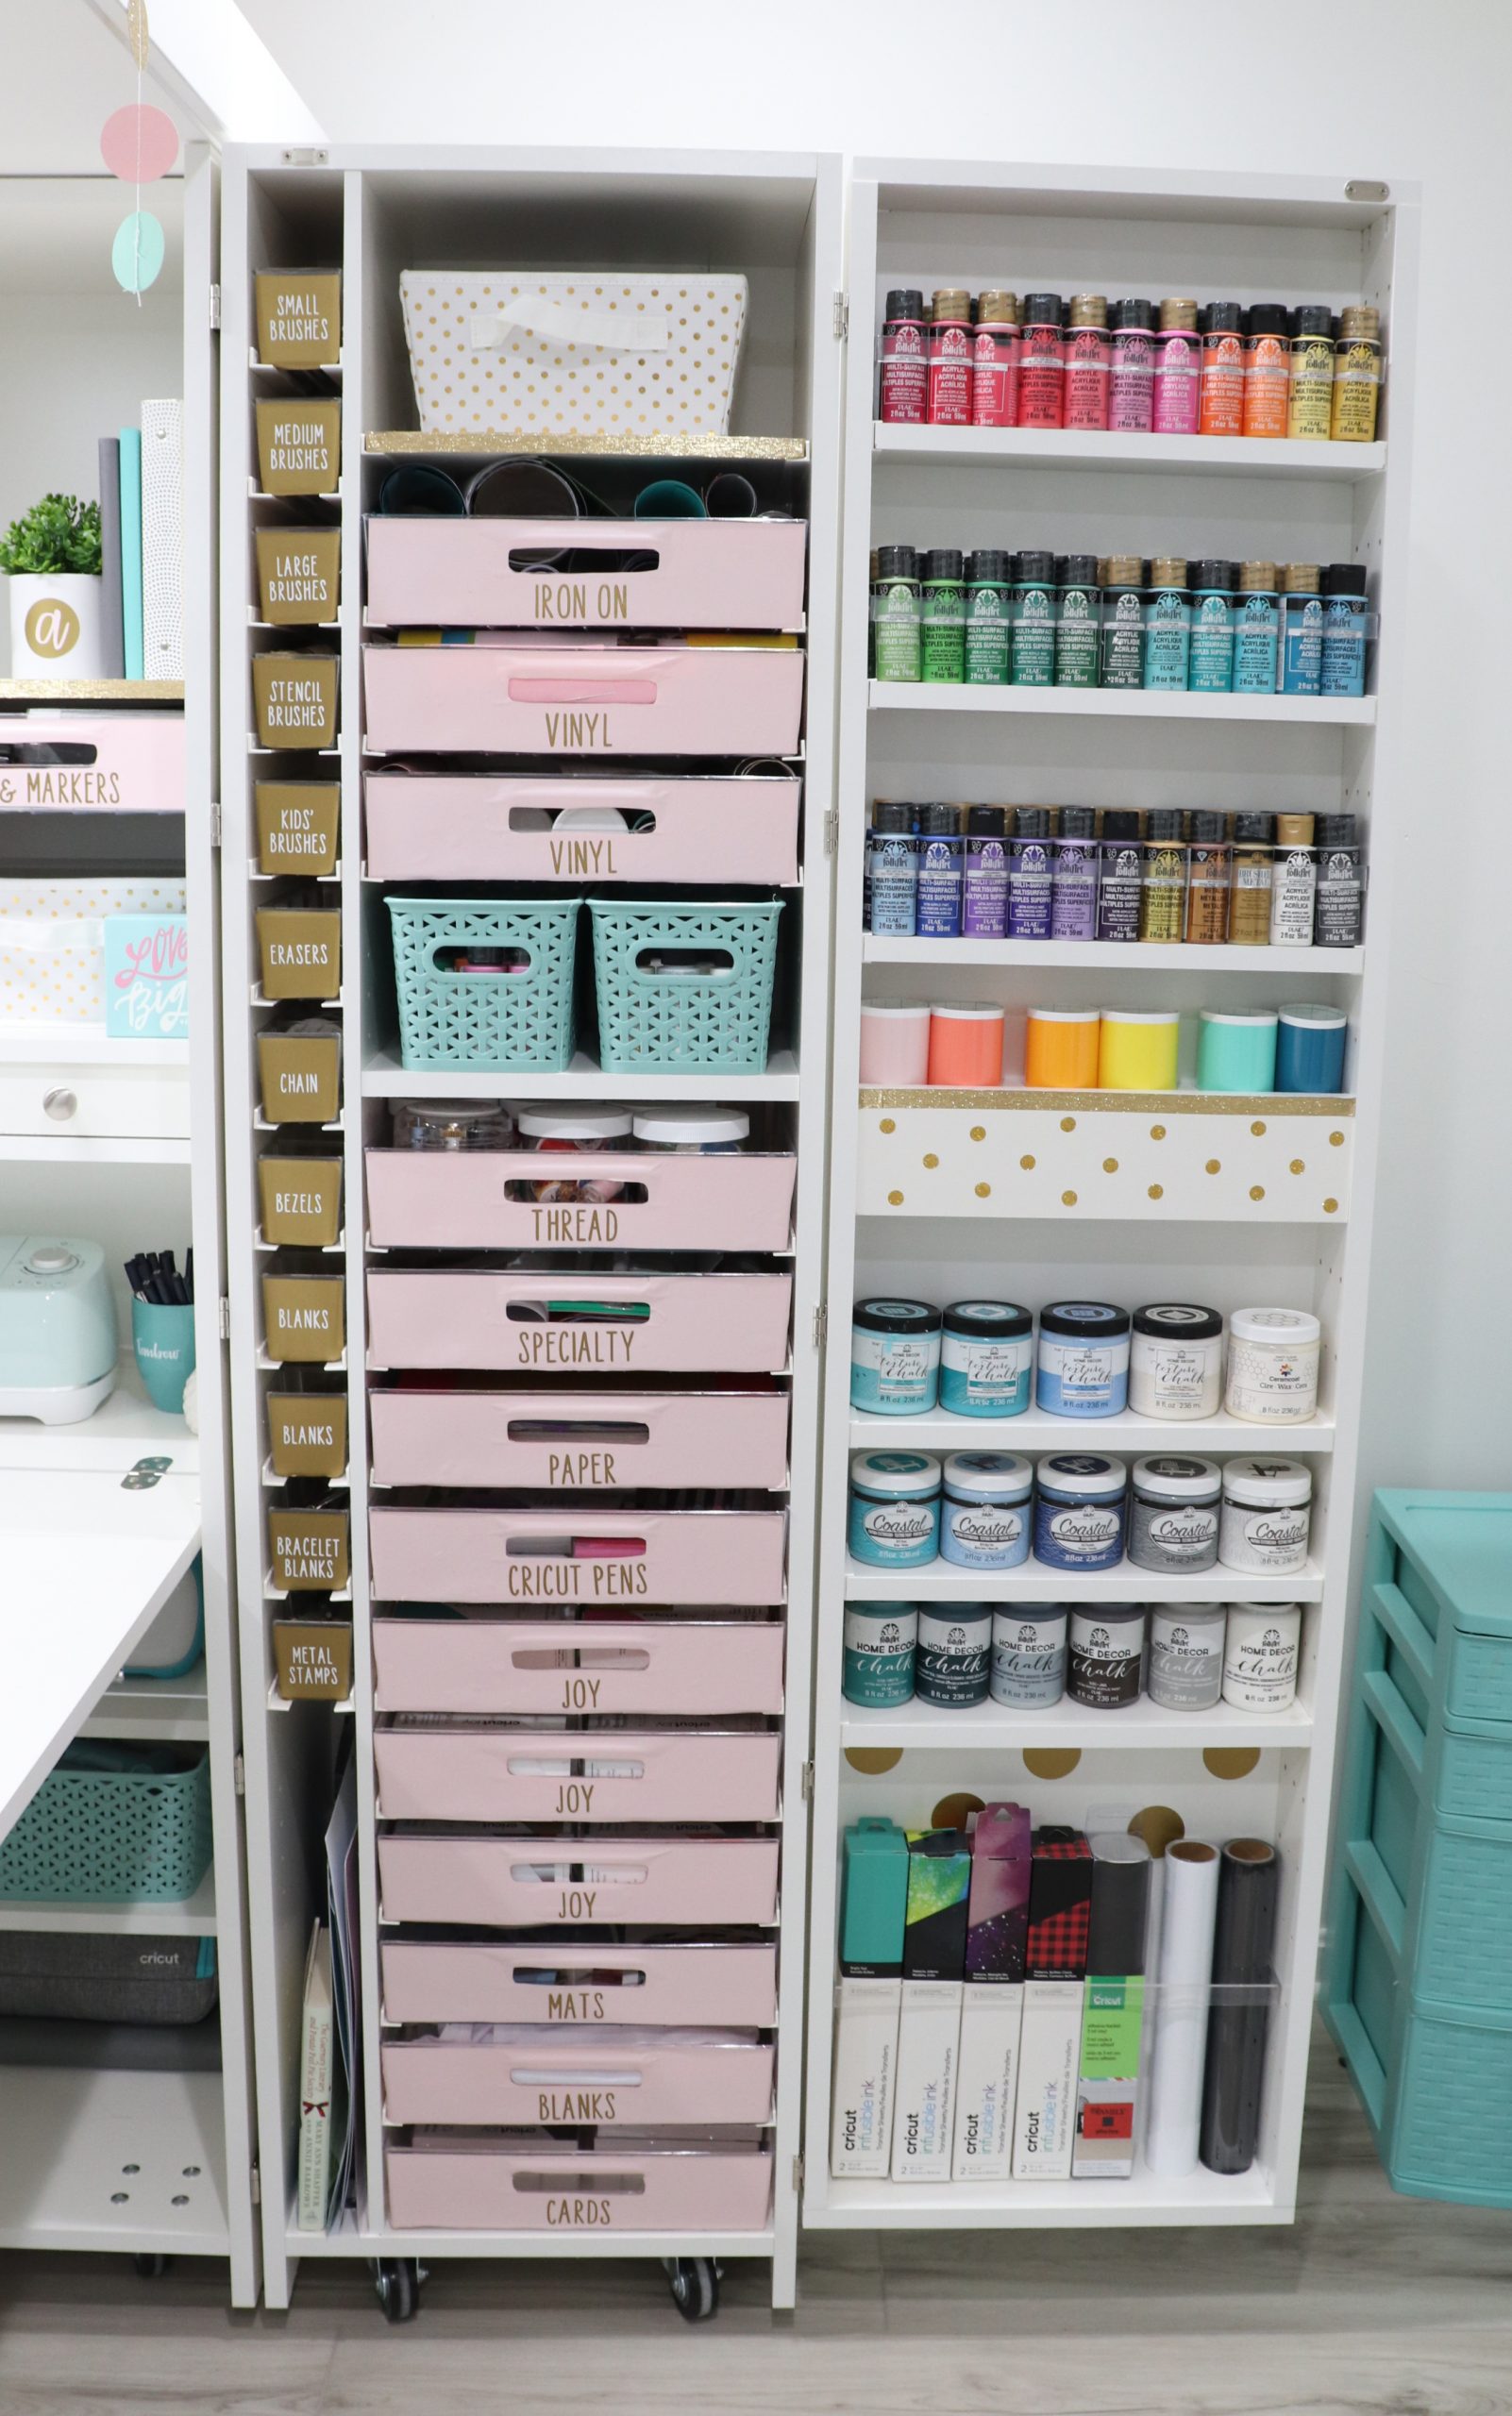
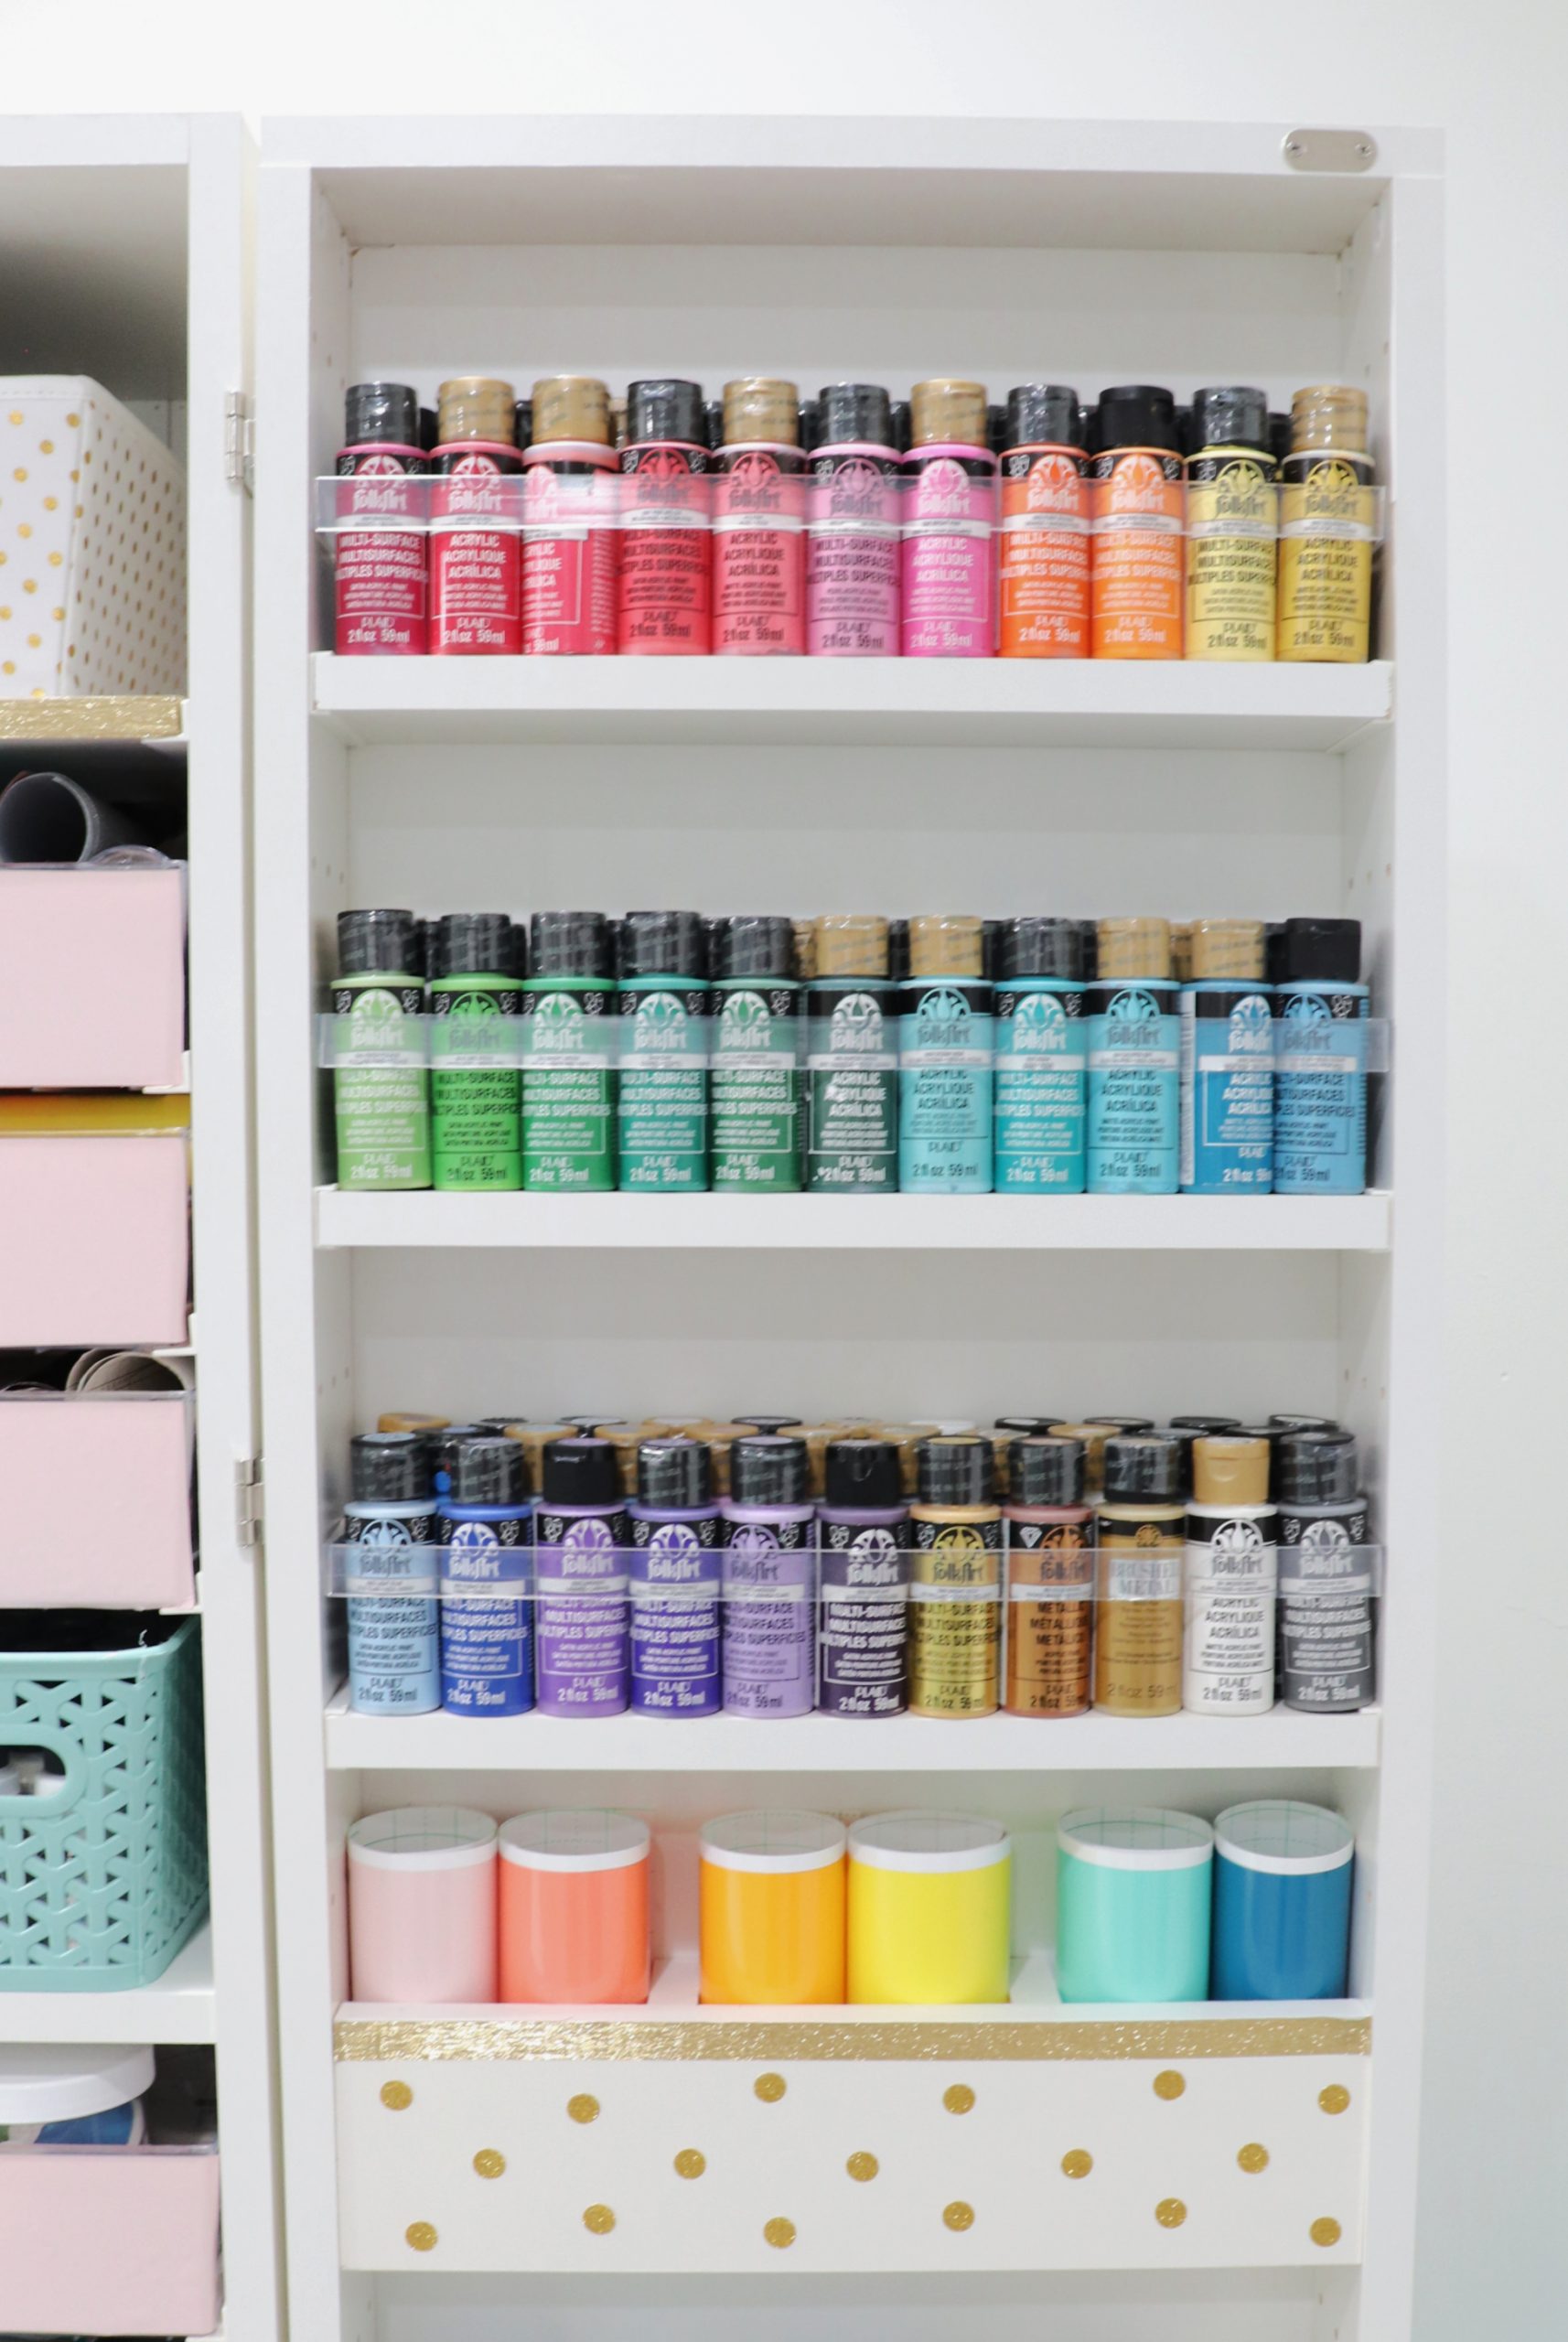
In the door, I started with an assortment of acrylic/multi-surface paints.
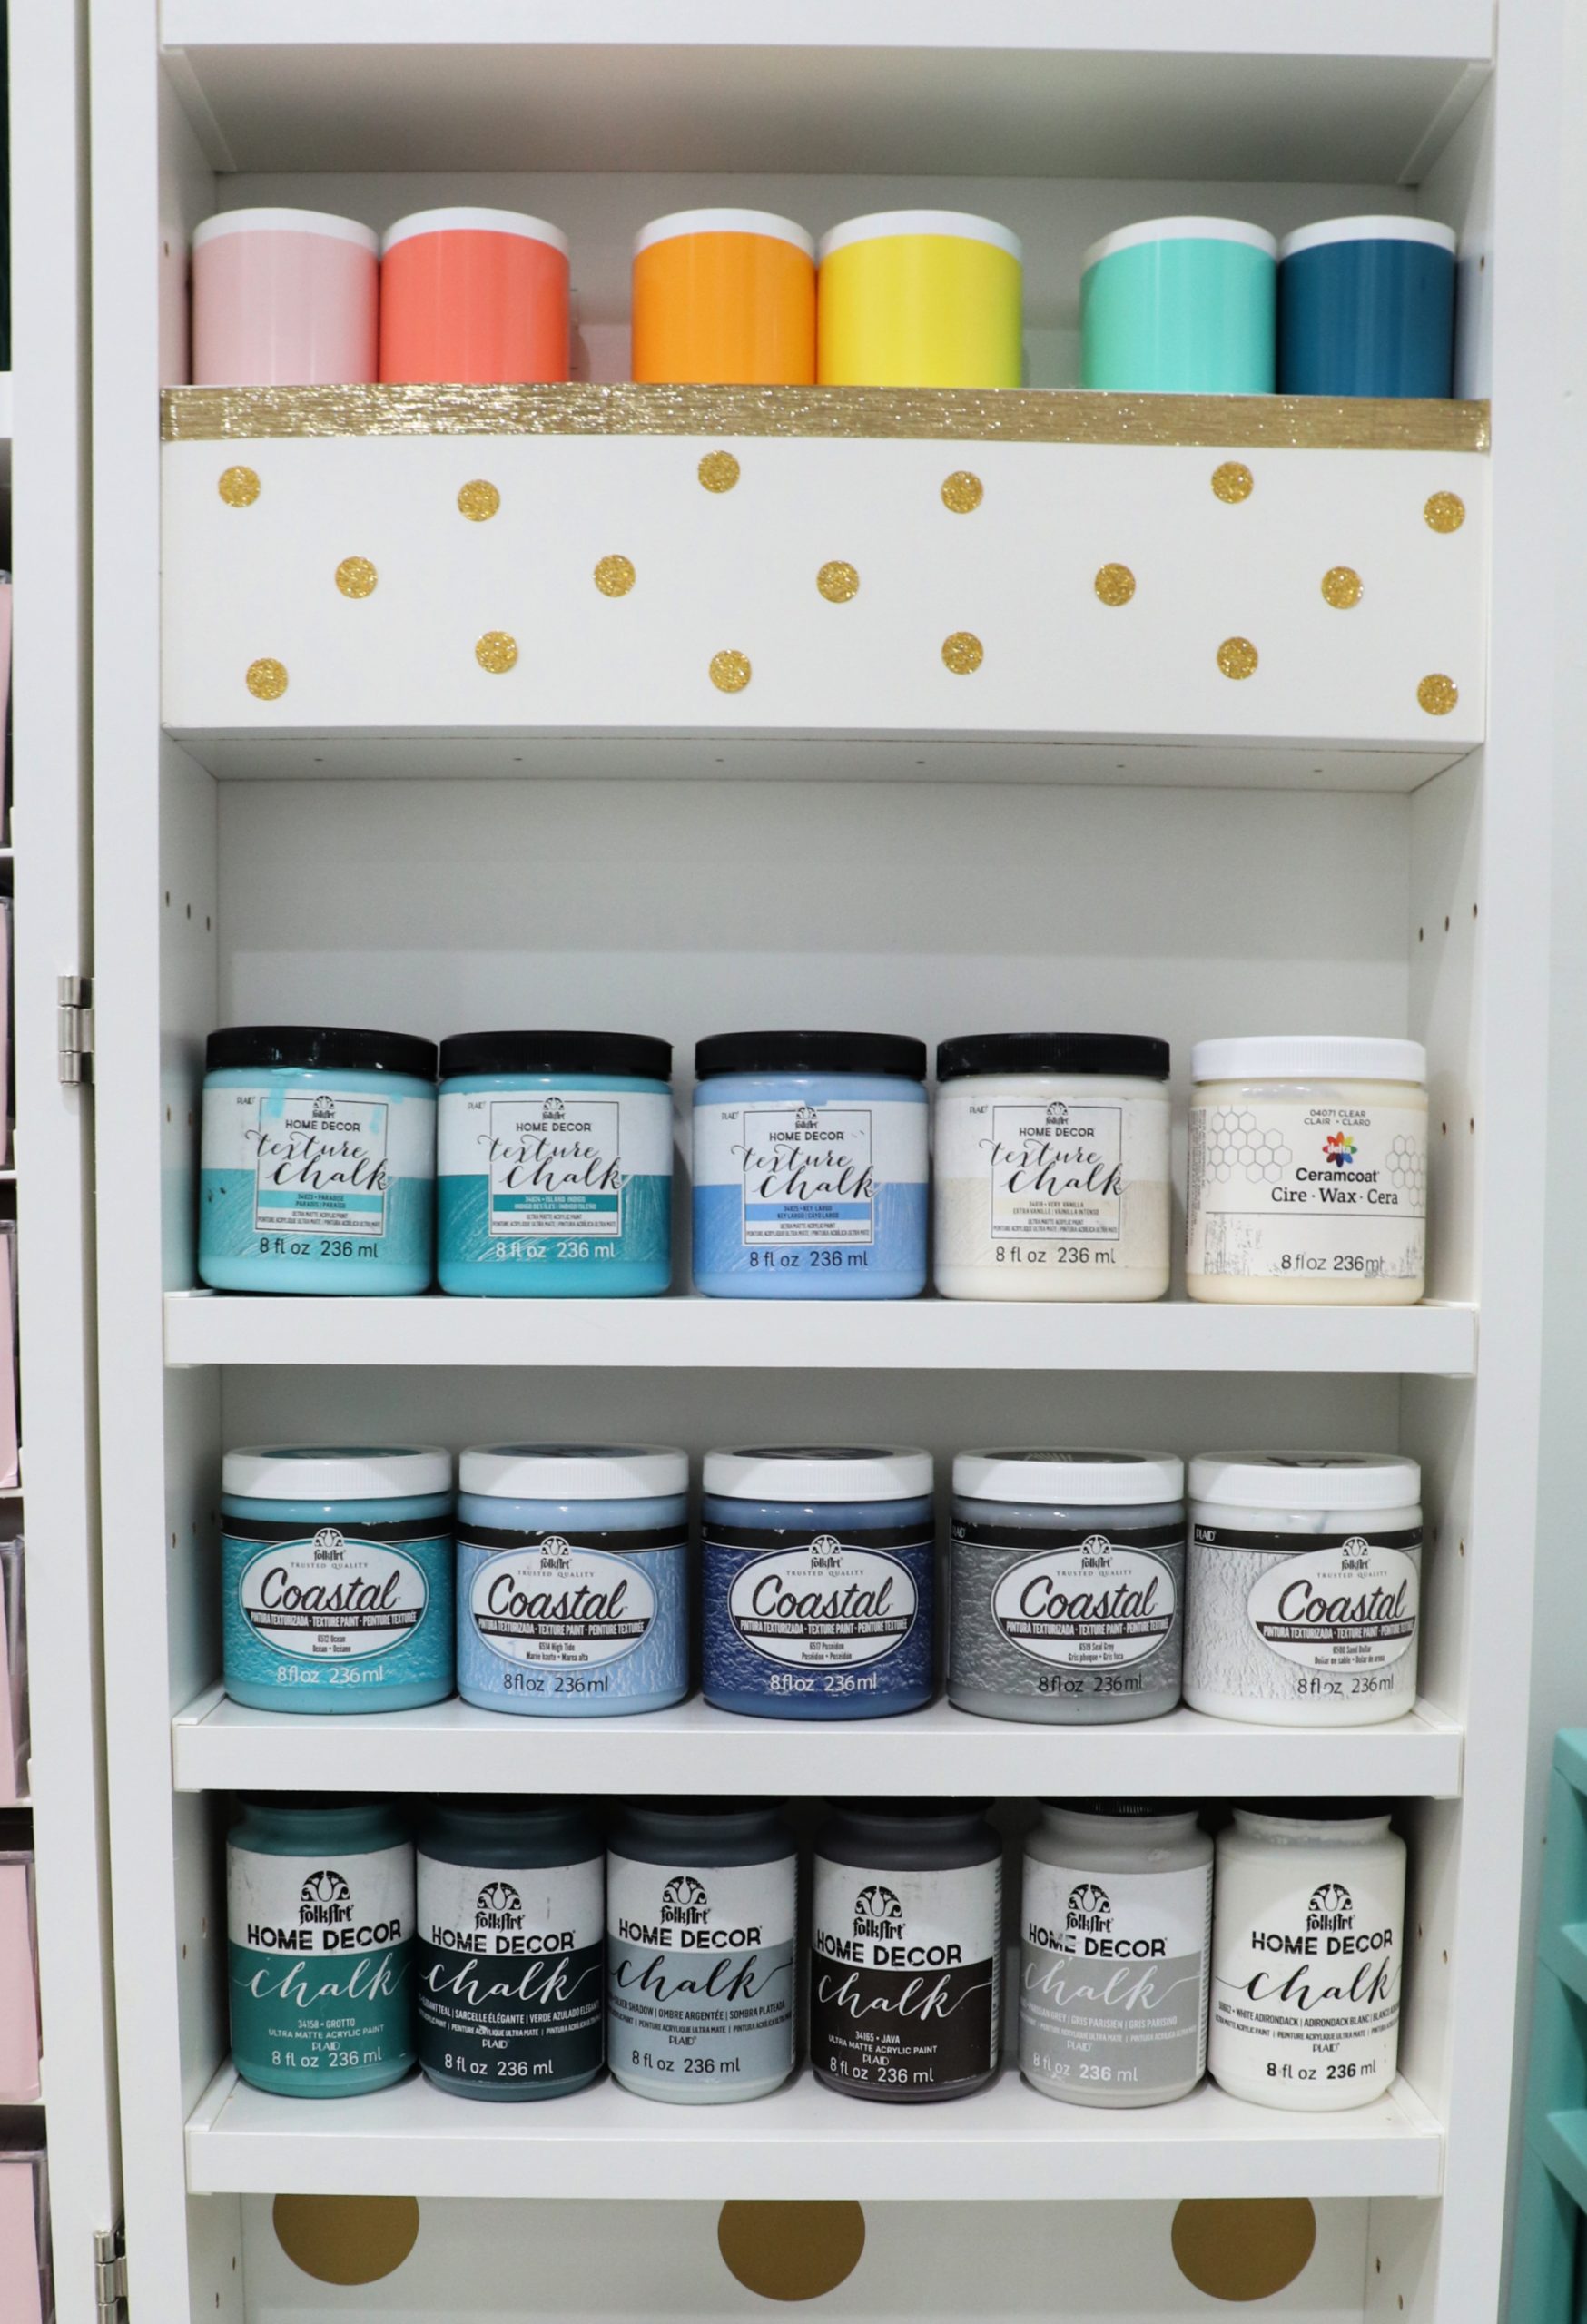
The bottom section features some specialty paints, like chalk paint, textured chalk paint, and coastal decor paint.
Below those, I have the rest of my Infusible Ink.
I was astounded to realize just how many supplies this one piece of furniture can hold! Because of it, I was able to remove several other things from my studio, including a cube storage system with nine empty cubes, two three-drawer storage towers, a four-drawer storage tower, a double door cabinet, and a tall bookshelf! I could not be more pleased with how my DreamBox turned out. It’s a beautiful, inspiring workspace, and the perfect backdrop for my filming endeavors. It’s like a home base for my business, and I absolutely love it!
Although it comes with what can be an intimidating price tag, keep in mind that the DreamBox is basically a craft room on wheels. You’re getting a ton of storage and organization, and it’s an investment in your hobby and/or business. It does the job of multiple other pieces of furniture and takes up far less space, especially when it’s closed up in cabinet form. There are also monthly financing options that can help out with the payment piece, AND I have a very special offer I get to pass along to you; you can save $100 with the code AMYLATTA at createroom.com. How would you use and personalize your own DreamBox?
Be sure to check out my post about how I customized this one to be uniquely my own!
If you like this, don’t forget to save it to Pinterest and share with a friend!


Wow, this is, literally, my dream craft room! Maybe someday! In the meantime, though, I’ll just gaze longingly at yours! Absolutely love your color scheme. Did you paint your chair? And if so, what color? It’s so hard to find just the right aqua paint color and this is gorgeous. Matches your drawer units in the corners! Absolutely beautiful room!
I sure did paint it! I forget the name of the color, but I’m pretty sure it was a textured chalk paint by Plaid.
Thanks for the reply! Will check out their paints!