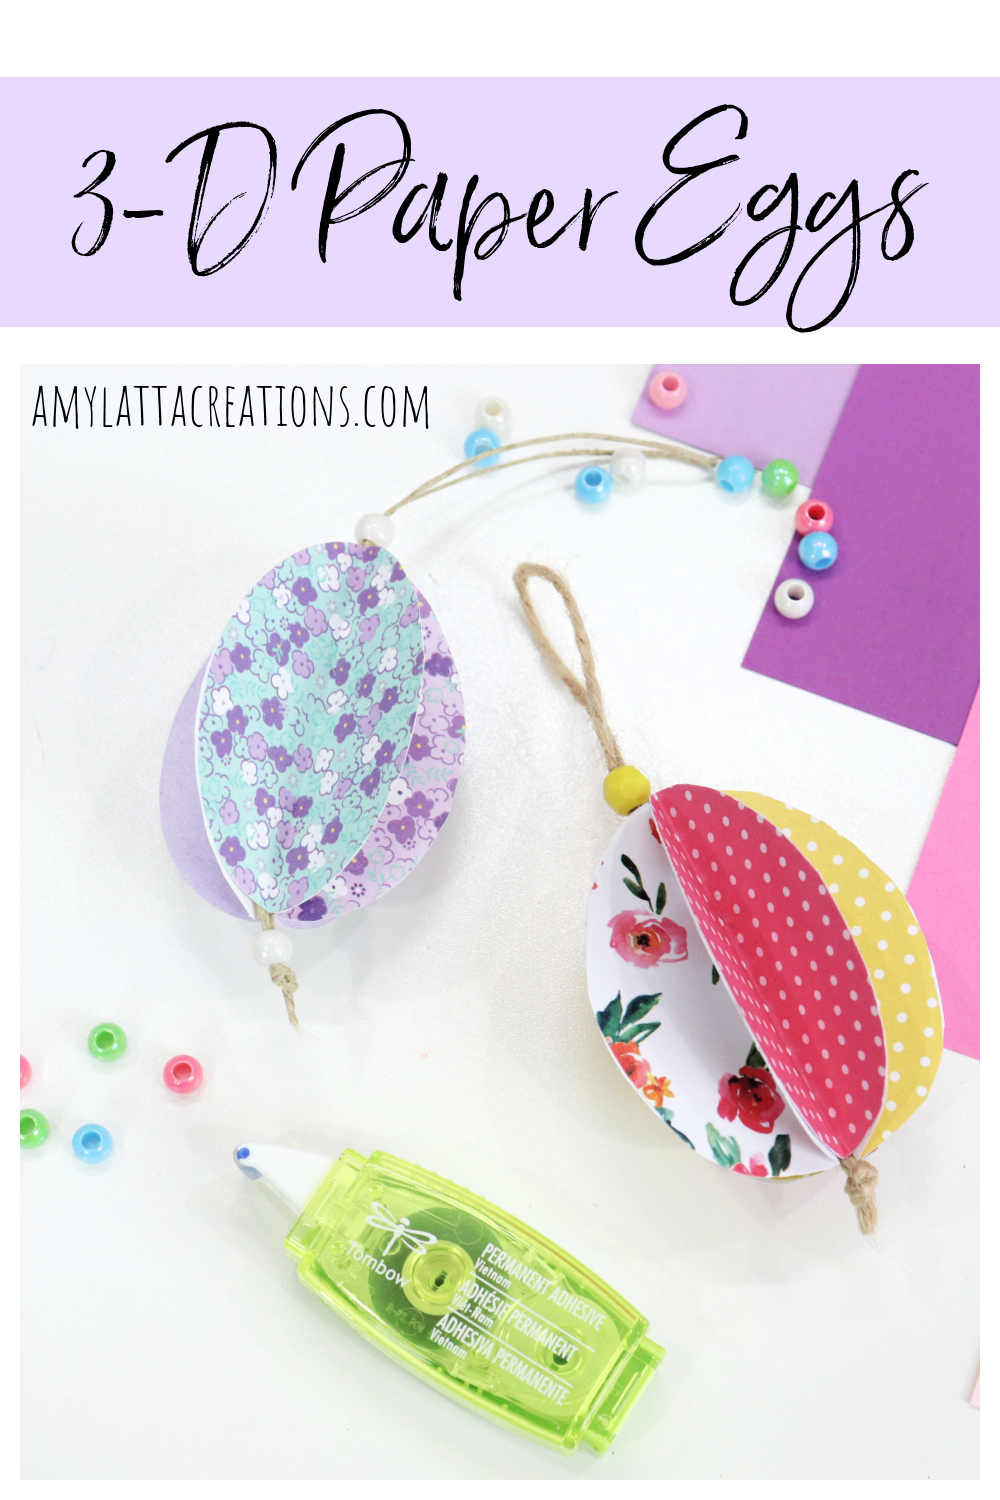
3-D Paper Eggs
Spring is just around the corner, and it’s also National Crafting Month! Let’s celebrate by making this super-simple 3-D paper egg project. You only need a few basic supplies, and it’s quick and easy to create. Take a look:
You’ll need:
patterned/colored scrapbook paper
scissors (or your Cricut machine)
adhesive (I used Tombow Power Mini Glue Tape)
jute/twine/string
beads (optional)
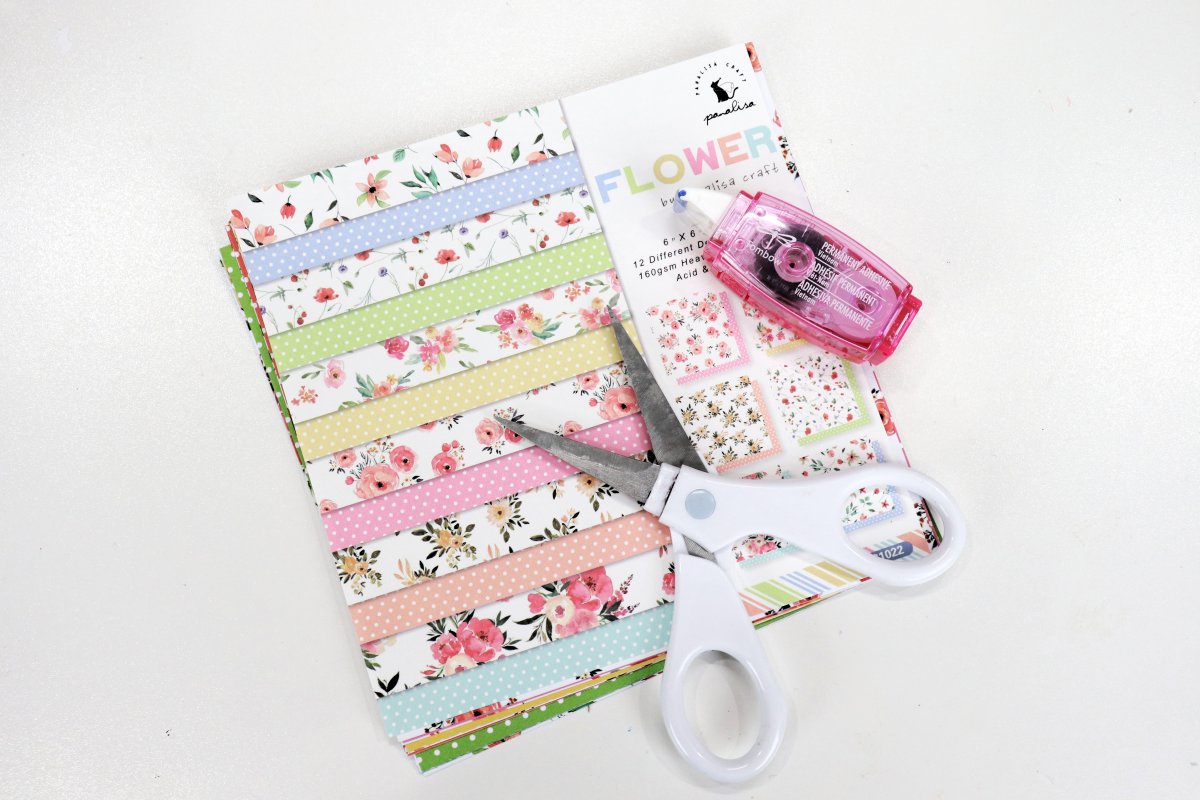
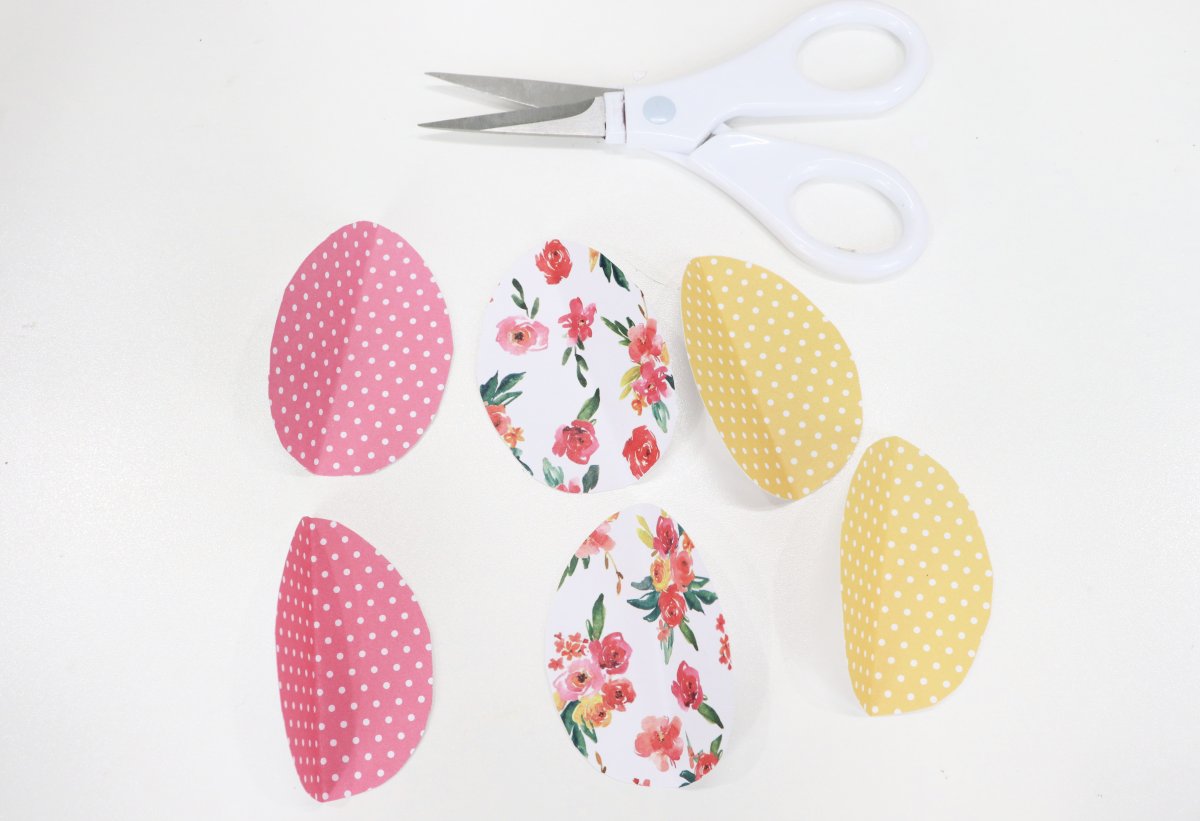
Step 1: Cut 6 identical egg shapes from patterned paper.
I like doing two each of three different but coordinating colors/patterns. You can cut them by hand, drawing or printing a pattern and cutting it out with scissors, or you can use your electronic cutting machine if you prefer.
Pro tip: While I like using colorful papers for spring, you can also do this project with book pages, sheet music, or any other type of paper you have on hand.
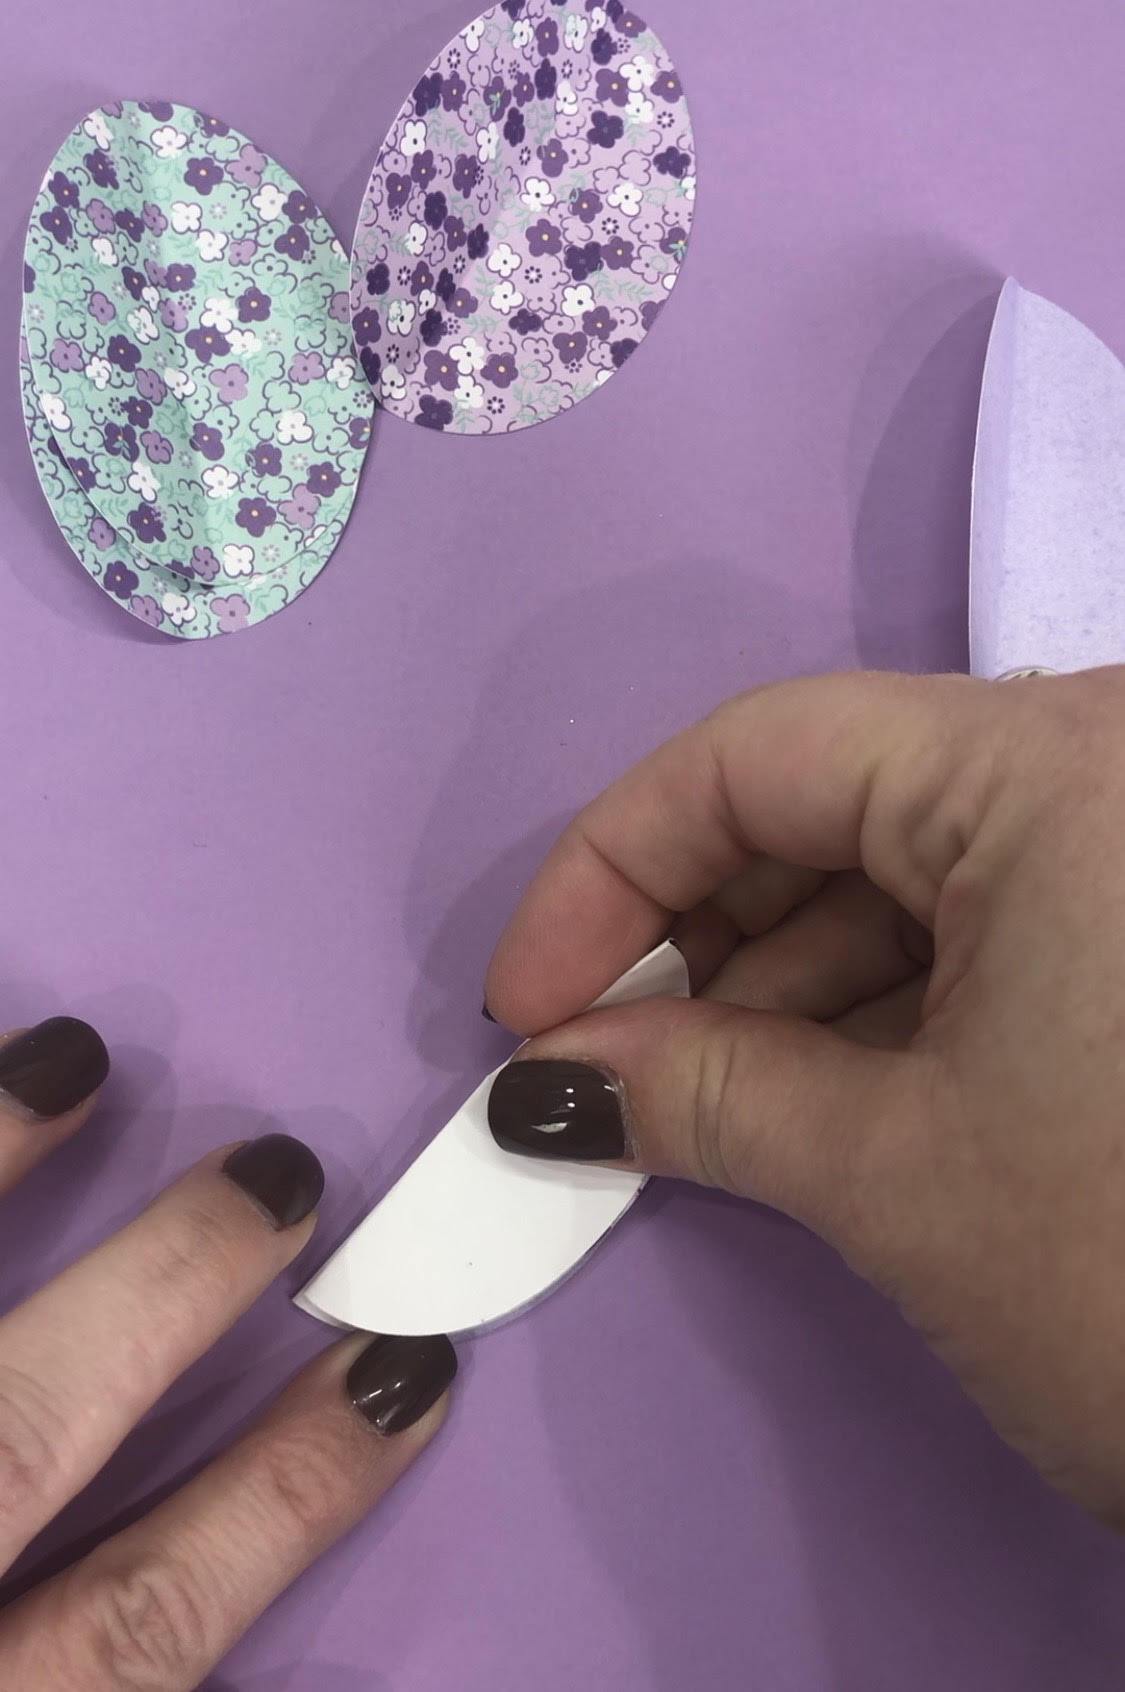
Step 2: Fold each shape in half lengthwise, with the right sides of the paper facing inward.
Step 3: Stack the folded shapes.
Start with one folded egg. Attach a second folded egg on top of it, adhering it to the one below. Continue stacking all six, adhering each one to the egg below it. I like to stack mine in a pattern, so I alternated the three designs: teal flower, purple flower, solid purple, repeat.
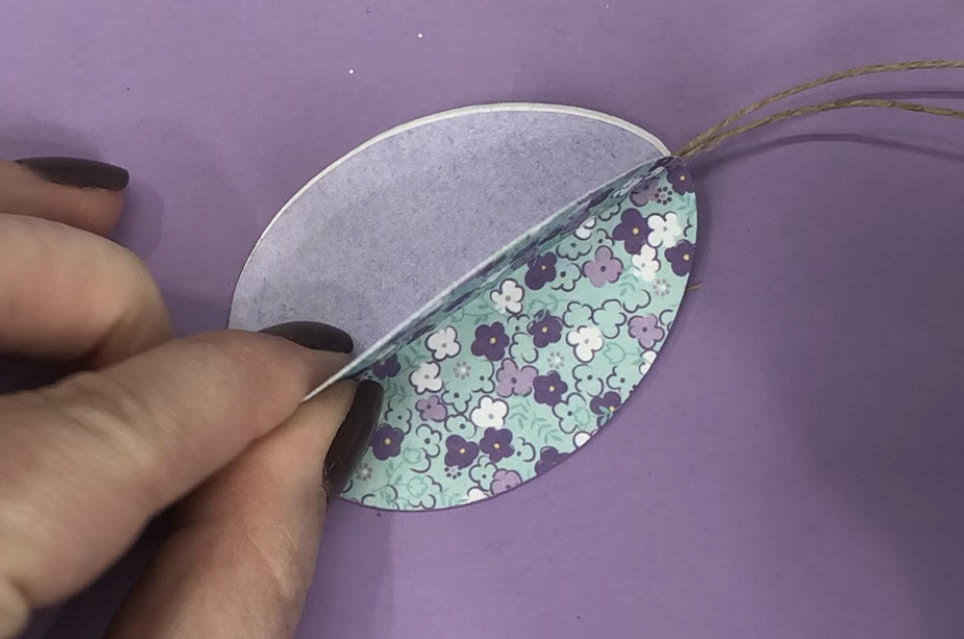
Step 4: Carefully open the stack and lay it flat so that the top and bottom parts of the stack are side by side.
Now, instead of a semi-circle, you should be looking at a full egg shape. This should be the BACK side of the patterned paper.
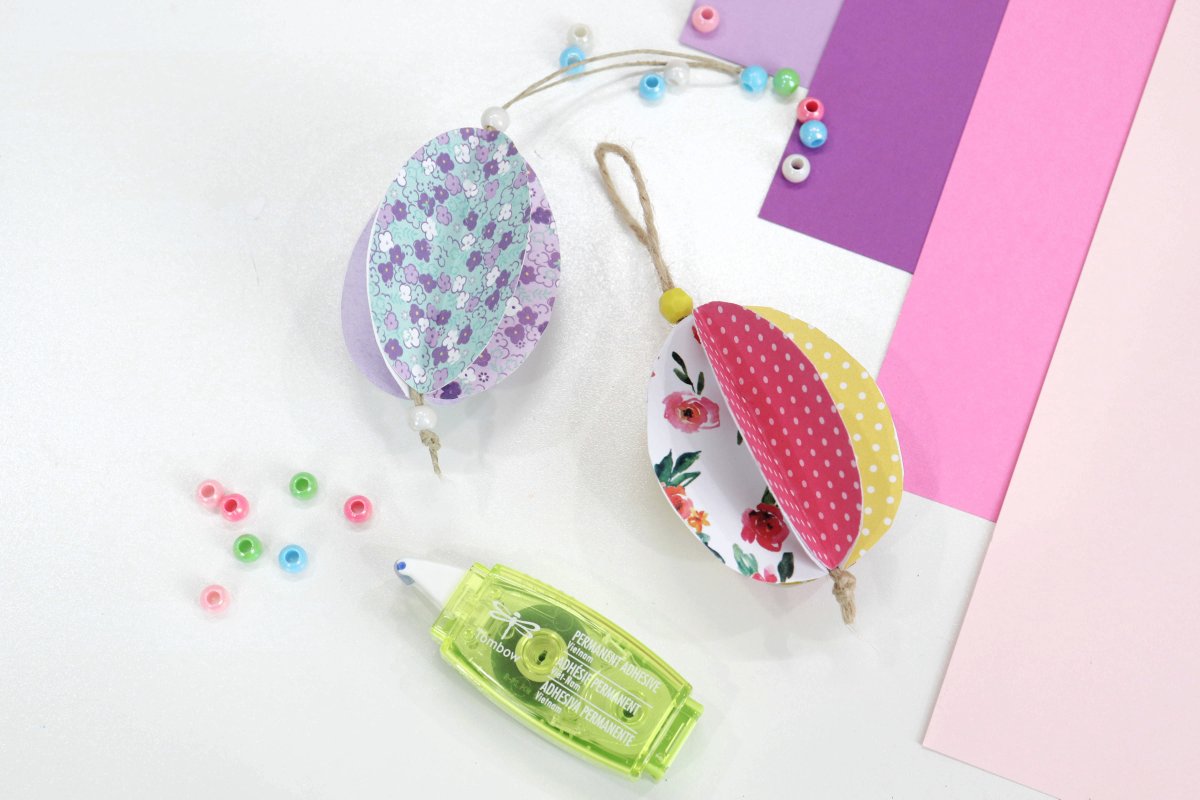
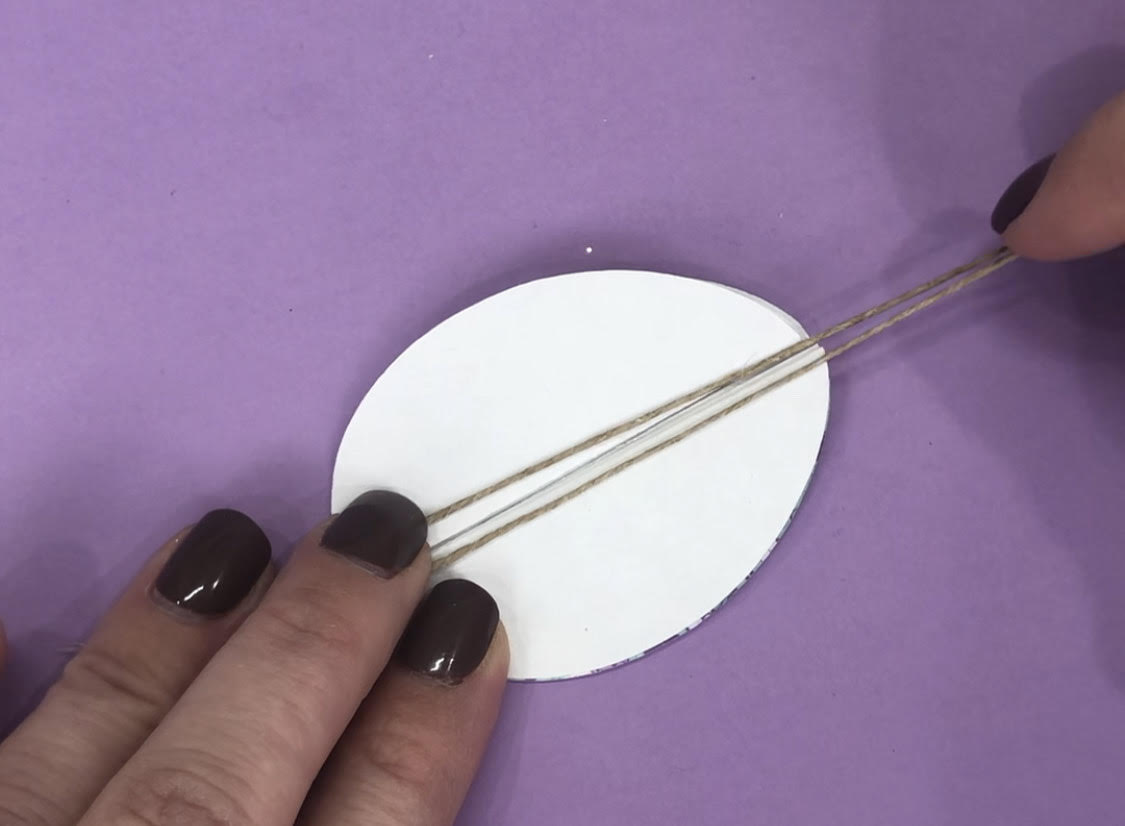
Step 5: Add a hanger.
Fold your piece of jute in half and tie a knot at the bottom. Place it in the center of your shape. If you like, you can add a bead to the jute and slide it down to just above the knot.
Step 6: Apply adhesive to the paper and fold along the center line.
This will secure the jute inside and give you a three-dimensional egg.
Optional: Add a bead to the top.
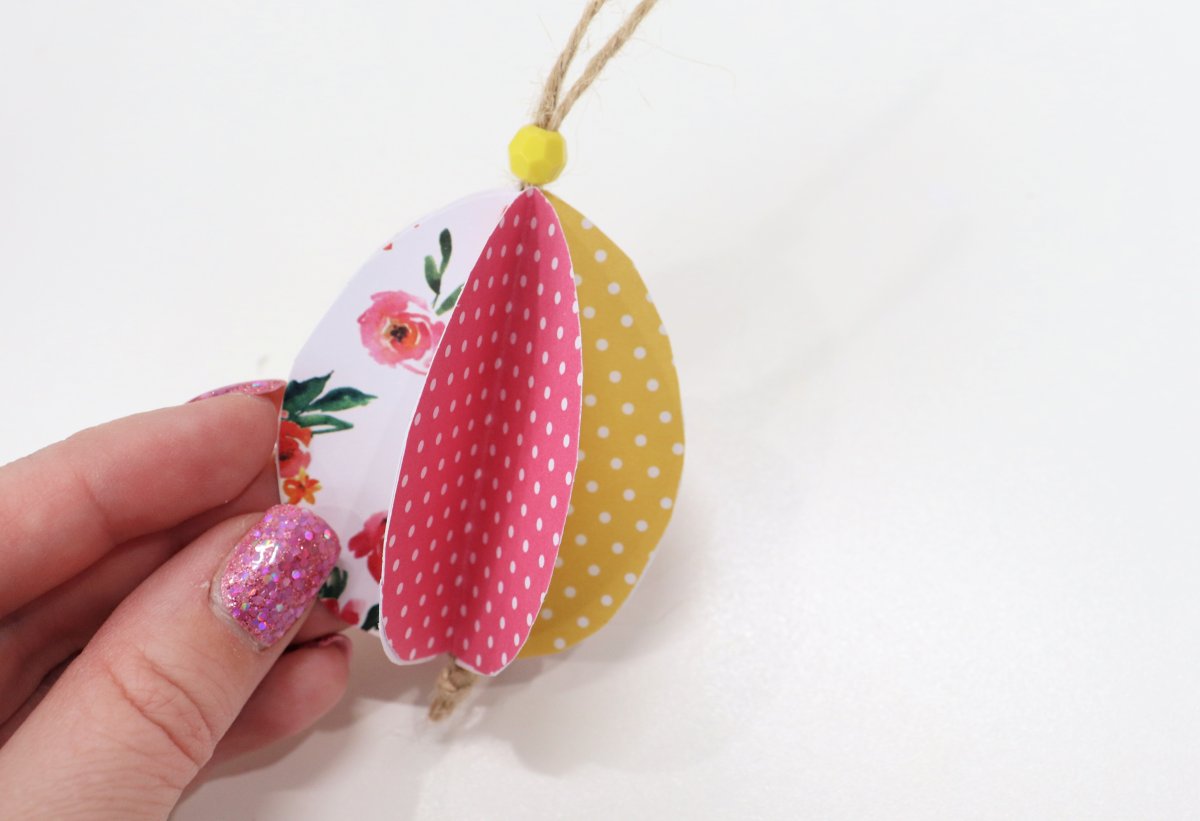
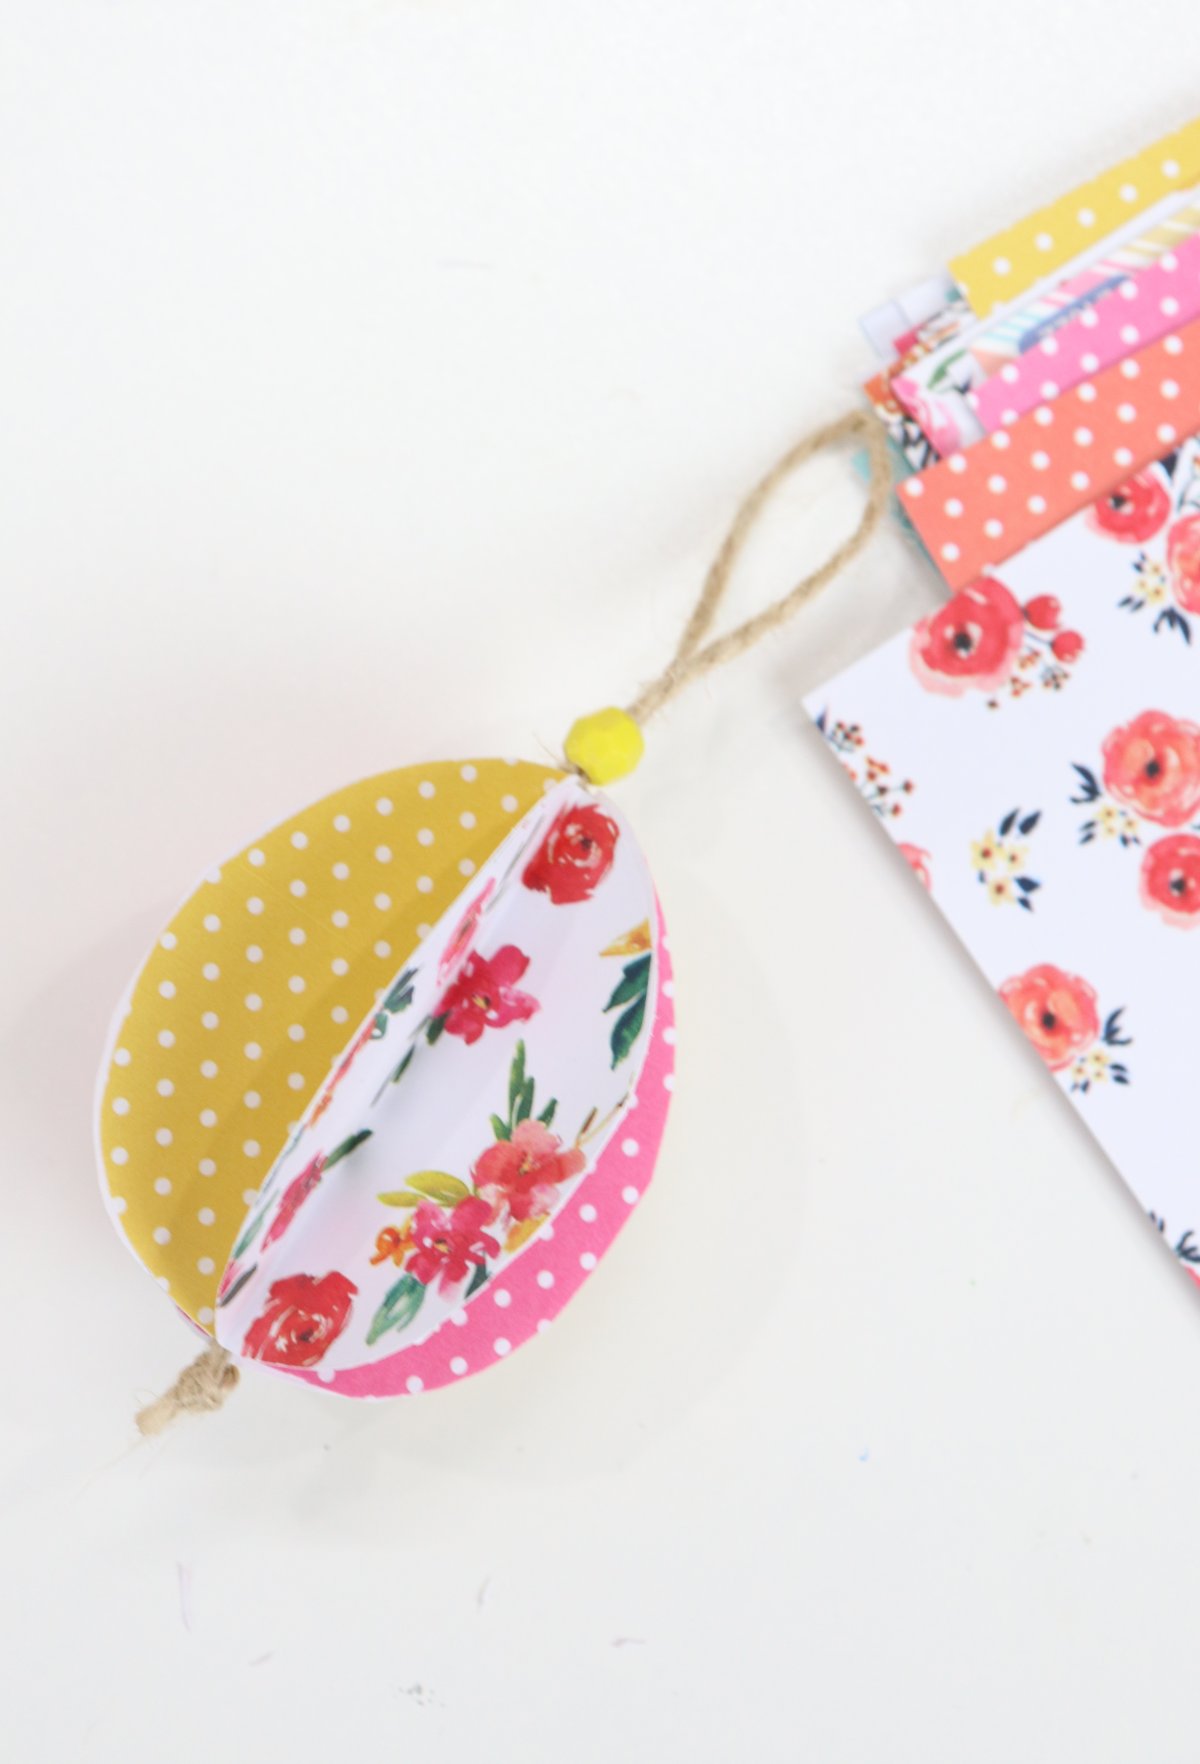
Now, your festive little egg is ready to display! Hang it anywhere you like, or string several of these together to form a fun garland for spring.

These are so simple to create, and I love seeing how many fun combinations I can create by using paper in different patterns and colors. It’s also a great way to use up your paper scraps that are left from other projects. To add even more variety, you can use different shapes, like we did for the 3-D Paper Hearts project. Feel free to be as creative as you like to make it your own.
What do you think? If you try this project, I’d love to see how yours turn out! Be sure you’re part of the Amy Latta & Friends Facebook Group so you can share your photos and we can all inspire each other. See you there! Before you go, check out my other spring and holiday projects here, then let’s get creative.
3 Comments