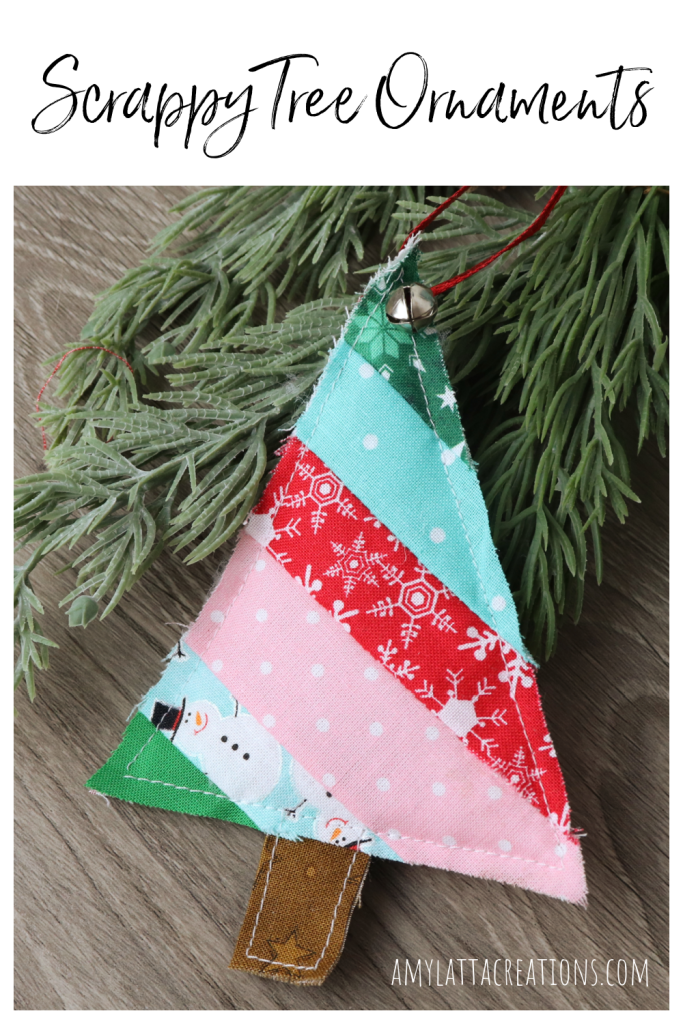
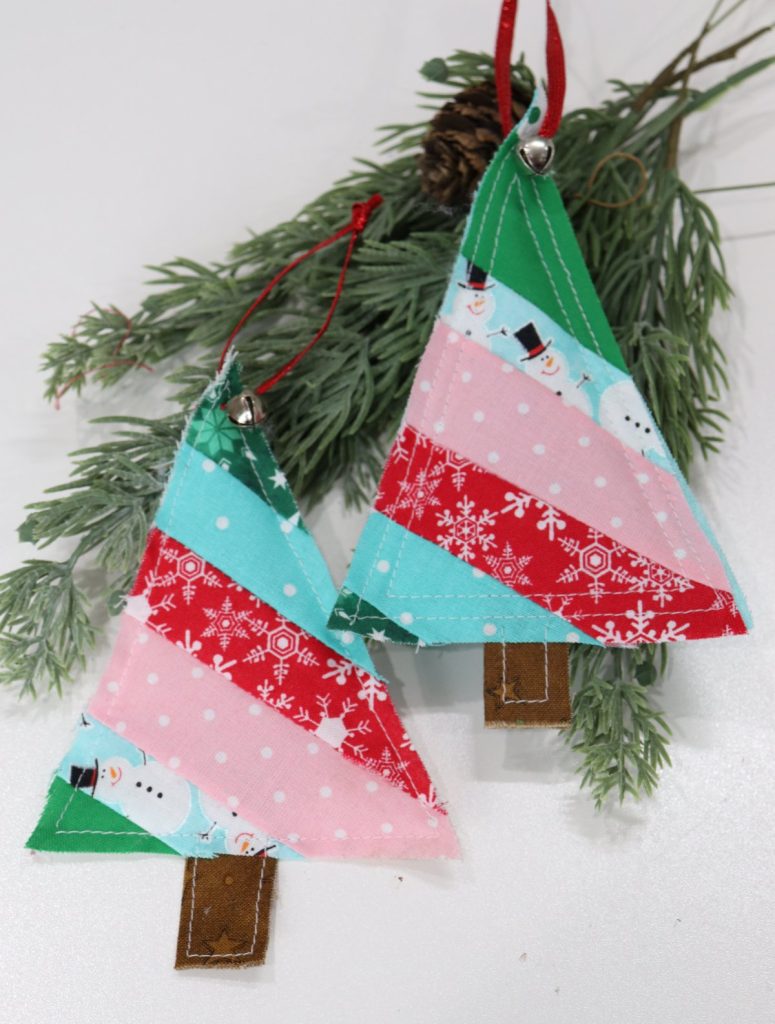
Scrappy Trees Ornament
If you’re anything like me, you have a bunch of fabric scraps laying around from other projects you’ve been working on this season. Here is a quick and fun idea for how to use them to create Scrappy Christmas Tree Ornaments you can tie onto packages and hang on your tree.
Materials:
assorted fabric scraps, cut into strips
batting
ribbon/twine
optional: small jingle bells
simple wedge template (optional)

Step 1: Cut your fabric scraps into long, thin strips.
It’s totally ok if they are different lengths and widths.
Step 2: Sew your strips together with 1/4″ seams.
This will give you a large striped piece.
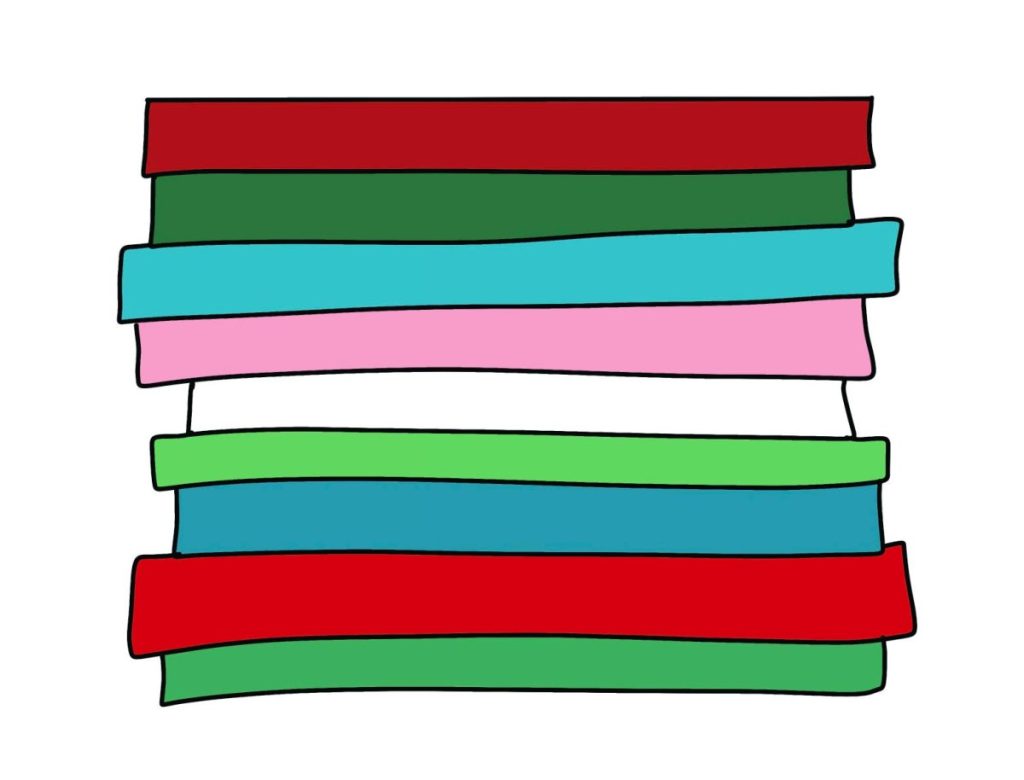
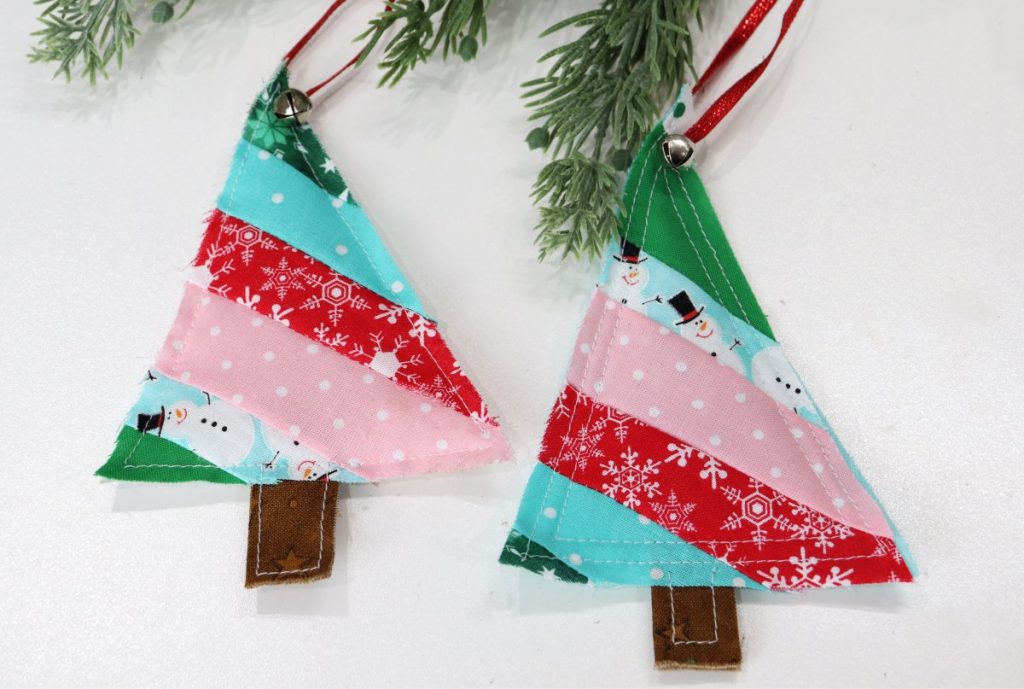
Step 3: Turn your piece on an angle and cut it into triangle pieces.
I used a triangle template to help shape mine, but you can also cut them freehand if you don’t have a template to use. Each triangle will make a separate ornament, so it’s ok to have some that are smaller, taller, etc. to use up your fabric.

Step 3: Cut a backing for each ornament.
Use your tree front as a pattern and cut a piece of fabric that’s the same size.
Step 4: Cut batting for each ornament.
I used low loft batting. Cut a piece that’s the same size as your front and back triangles.
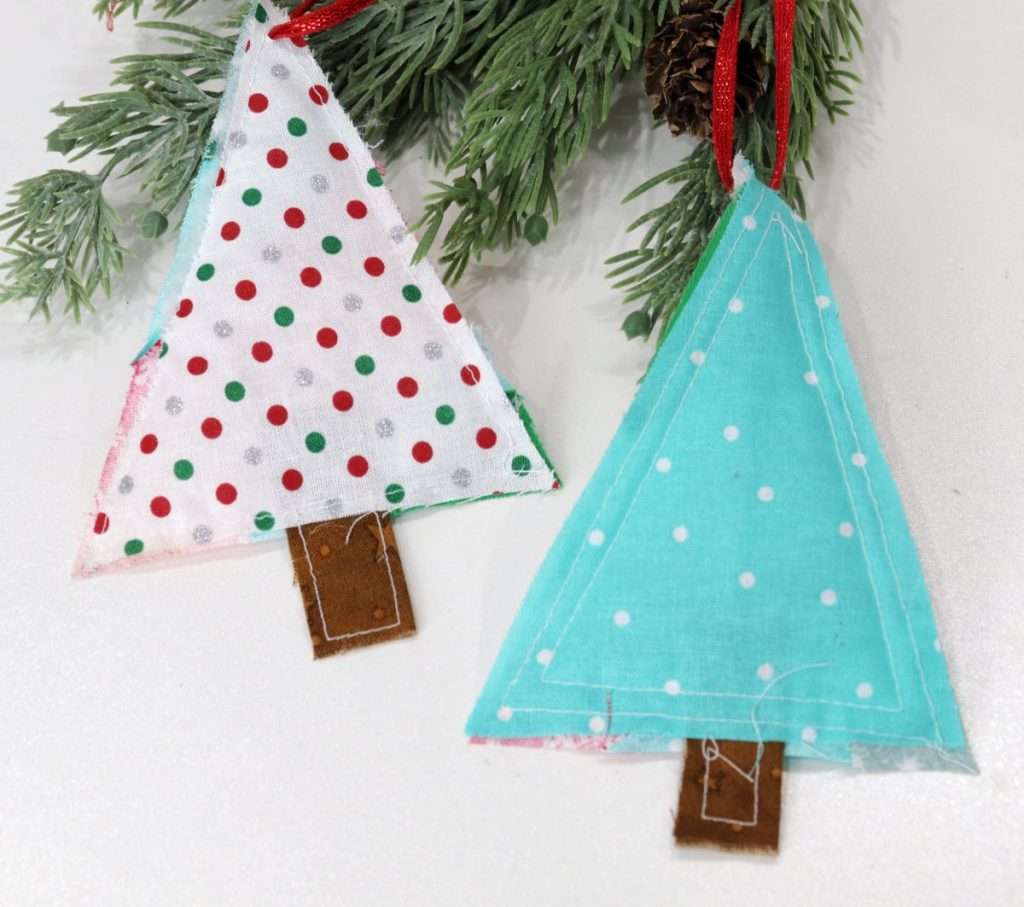
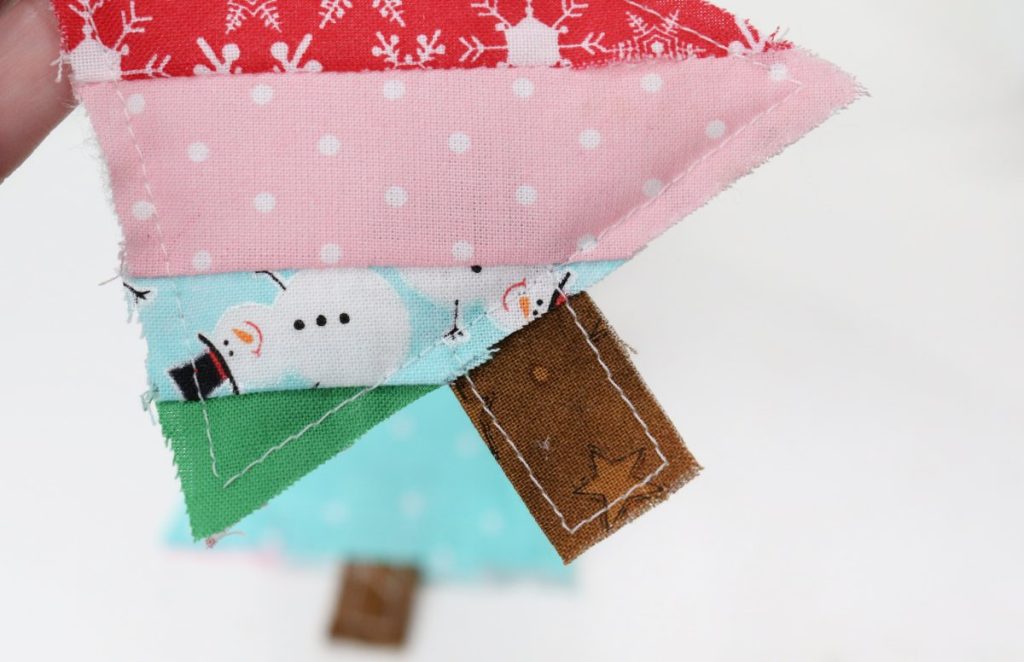
Step 5: Cut a small rectangle for the trunk and fold it in half.
Step 6: Assemble your “tree sandwich.”
Place your scrappy triangle on top, the batting in the center, and the backing on the bottom. Stick the folded trunk rectangle up inside the bottom of the “sandwich.”
Step 7: Sew around the outside edges of the triangle and the trunk.
I did a 1/4″ seam around everything. For some of my trees, I did a second seam, 1/4″ in from the first for an extra decorative touch. You can do the stitching in any way you like, and even add a quilted pattern if you want.
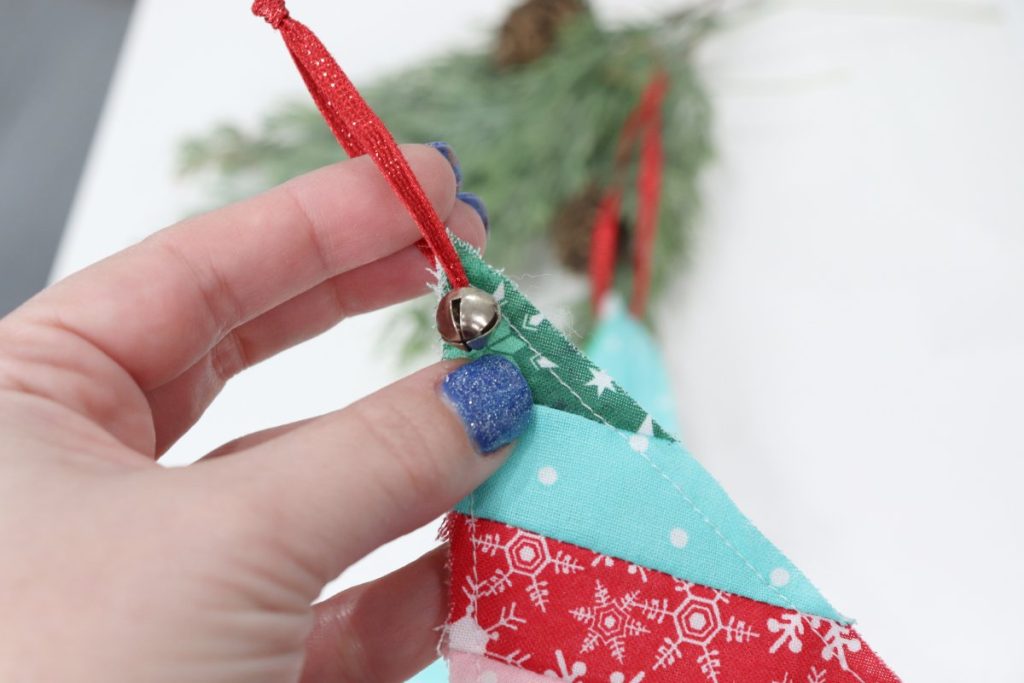
Step 8: Add a hanger and a jingle bell or other topper (optional).
I used a big tapestry needle to thread a piece of ribbon through the top of each tree, then added a small jingle bell for a topper.
I love this project because it’s a great way to use up scraps of Christmas (or any) fabric, and because each finished tree looks unique! These are quick and fun to create, and add a colorful touch to your tree and/or packages.
If you try making this Scrappy Trees Ornament, I would love to see how yours turn out! Different fabrics and patterns will create very different styles of trees, and I’d love to see them all. Be sure you’re part of the Amy Latta & Friends Facebook Group so you can share your photos and we can all be inspired. See you there!
Also, be sure to check out these other fun and easy holiday craft project ideas!