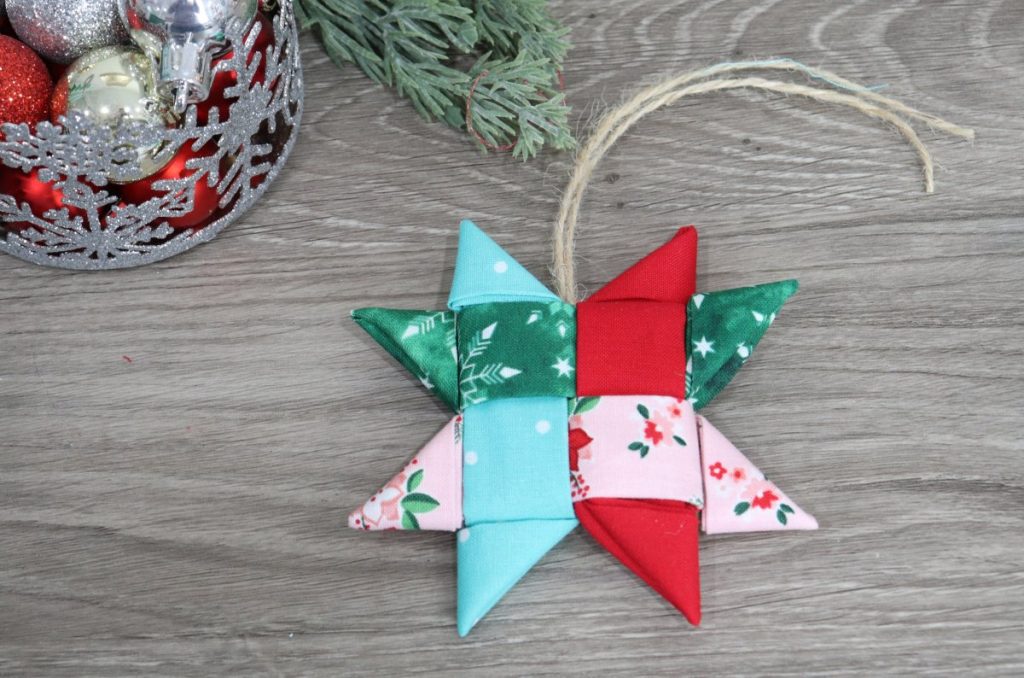
Folded Fabric Star Ornament
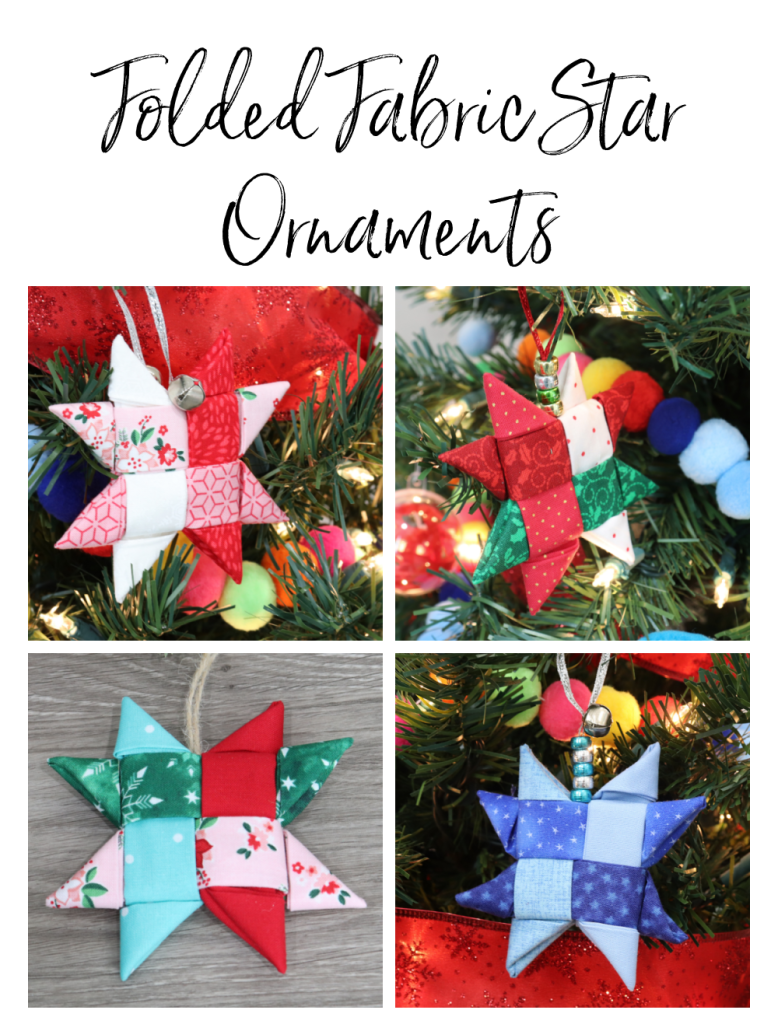
Here is a fun ornament project that is also a great way to use up fabric scraps! The first time I tried it, I felt like I was all thumbs, but then I got the hang of it, and it’s one of my favorite kinds of ornaments to create. My son was able to create them too (his is the blue one in the image above), and they make wonderful little gifts for just about anyone on your list. Here’s how you can create your own Folded Fabric Star Ornaments.
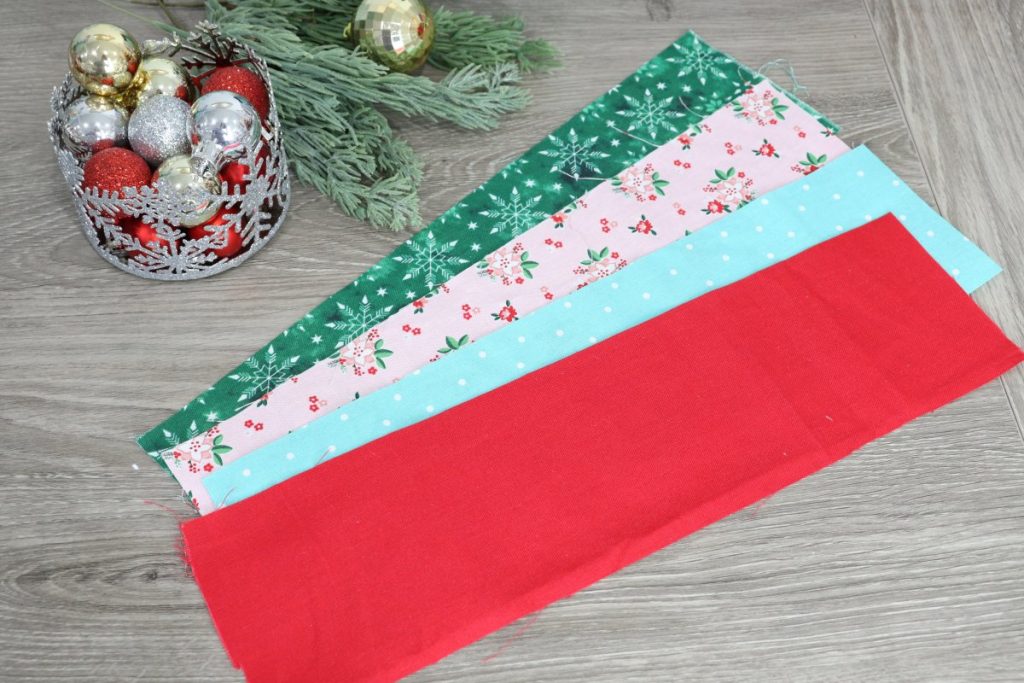
Materials:
4 fabric strips – 3 1/2″ x 13″ each
String/Ribbon
Tapestry needle
Iron
Optional: jingle bells or beads
Making your Folded Fabric Star
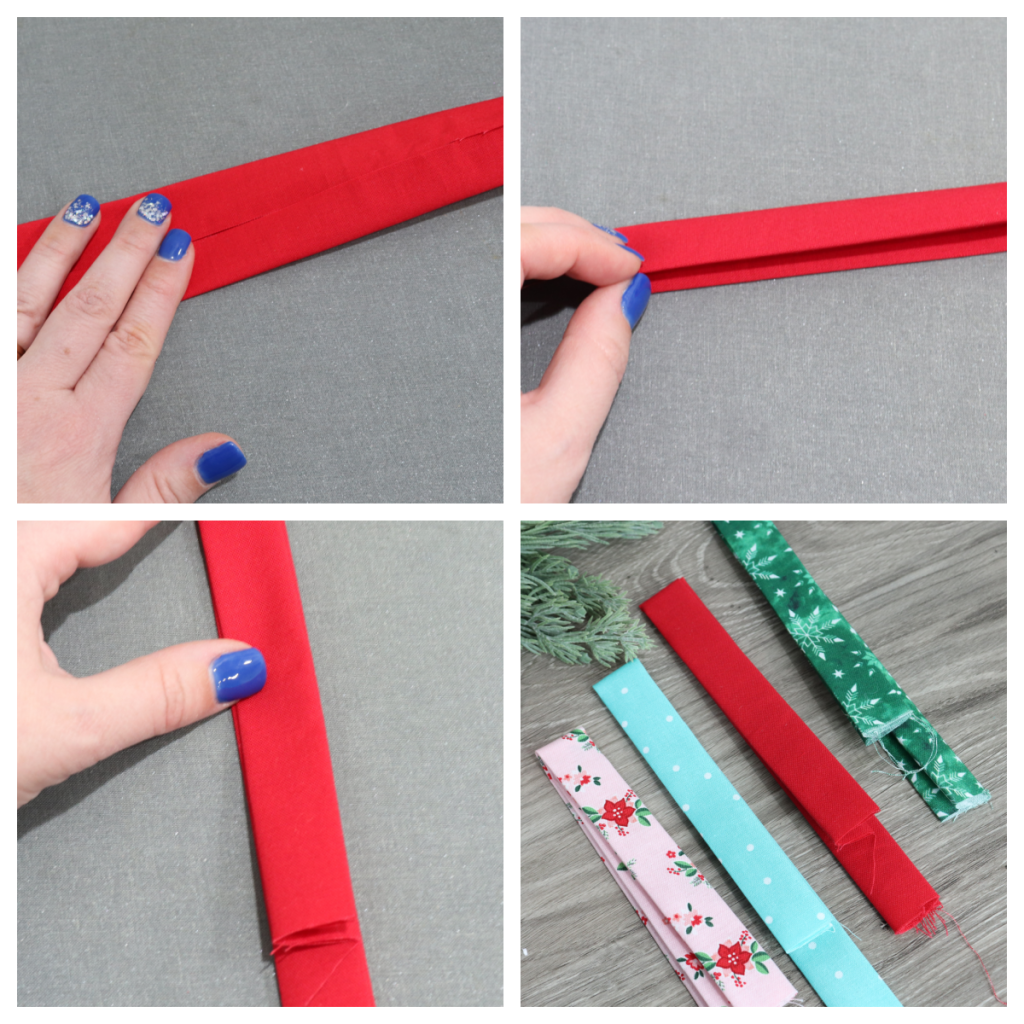
Step 1: Fold your fabric.
First, fold your strip in half longways and press with the iron to mark a crease down the center. Then, open the strip back up with the right side of the fabric facing down, and fold each of the sides in to meet at that center crease (top left image). Next, fold that piece in half longways again and press (top right image). Fold the strip in half the other way, leaving the top about 1 1/2″ shorter than the bottom (lower left image). Repeat this with all four strips of fabric.
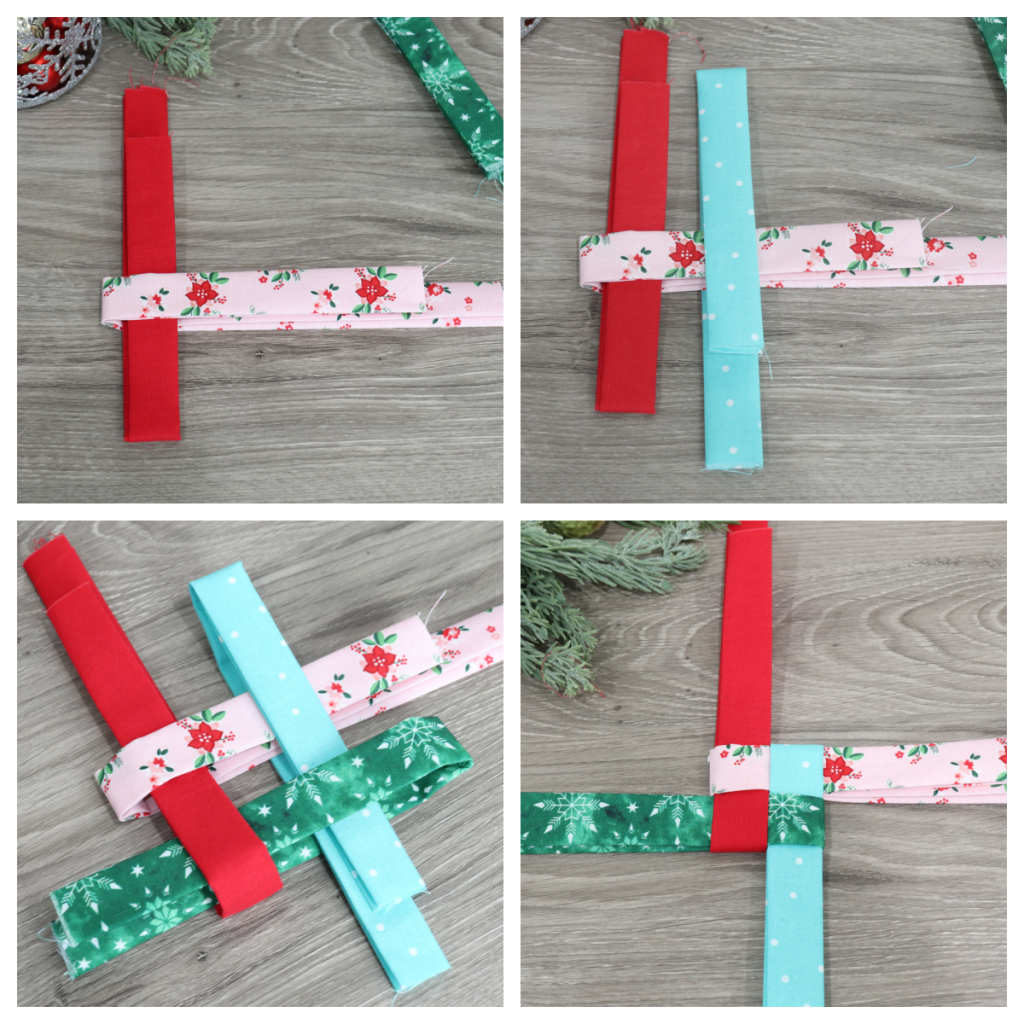
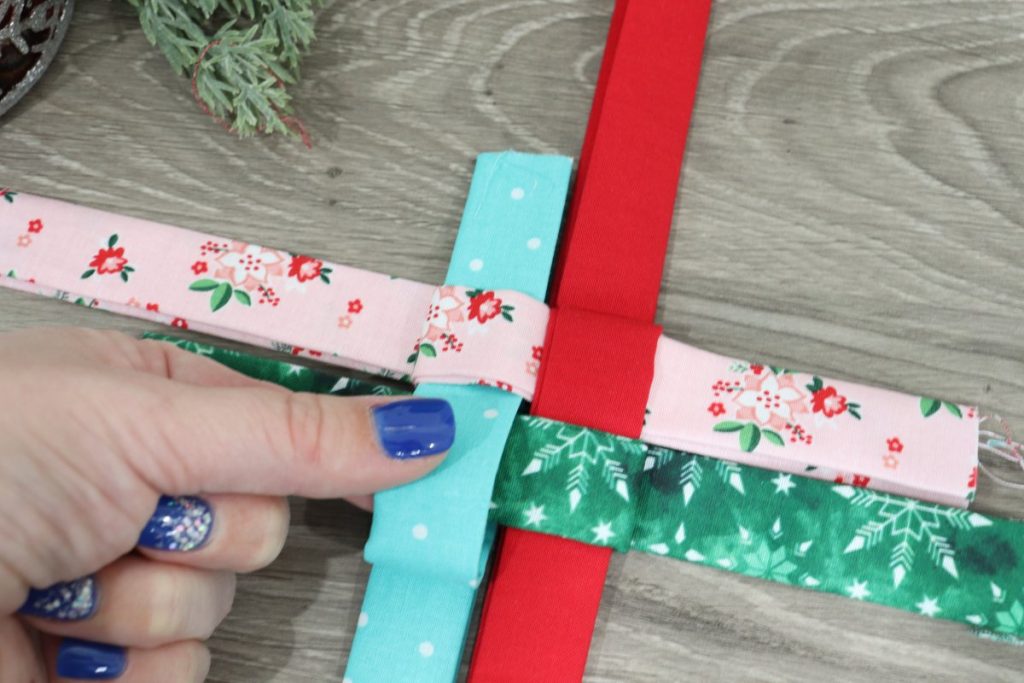
Step 2: Weave your fabric.
Choose a starting piece (I picked the pink one) and lay it horizontally with the fold on the left. Open it up and place your second piece (mine is red) inside, positioned vertically with the fold at the bottom. Both halves of the red piece should be sandwiched inside the pink one (top left image). Now, take your third piece and open it up. Position it vertically to the right of the second piece, with the fold at the top and sandwich both parts of the pink strip inside (top right image). Finally, take your last strip and open it up. Place it horizontally, below the first strip, with the fold to the right. Sandwich both halves of the previous strip inside. Then, tuck both halves of this final strip inside the two halves of your second strip (red, for me), as shown in the bottom left image below. Then, adjust the strips, pulling them closer together until you have a woven center like in the bottom right image.
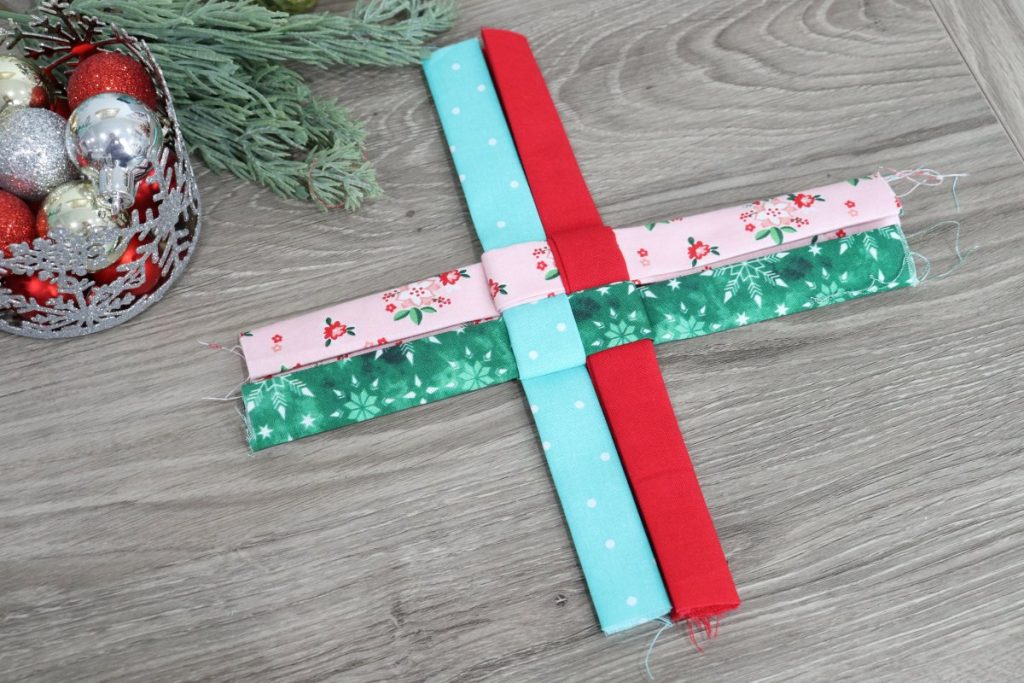
Now, flip the whole thing over. On the back, starting with your first strip (mine was pink), fold the top half of the strip over the center. Repeat, going clockwise, with the other three strips. When you get to the final strip (teal, for me), weave the end under your first strip. This will give you a woven pattern on the back as well. Now, your ornament should have a woven center with each color extending out to both sides.
We want the lengths of the strips to be as even as possible, as shown below. If yours are uneven, like mine sometimes are, you can loosen and tighten the woven areas until the ends are all about equal in length.
Flip your ornament back over so that the original side is on top.
Step 3: Fold and tuck your points.
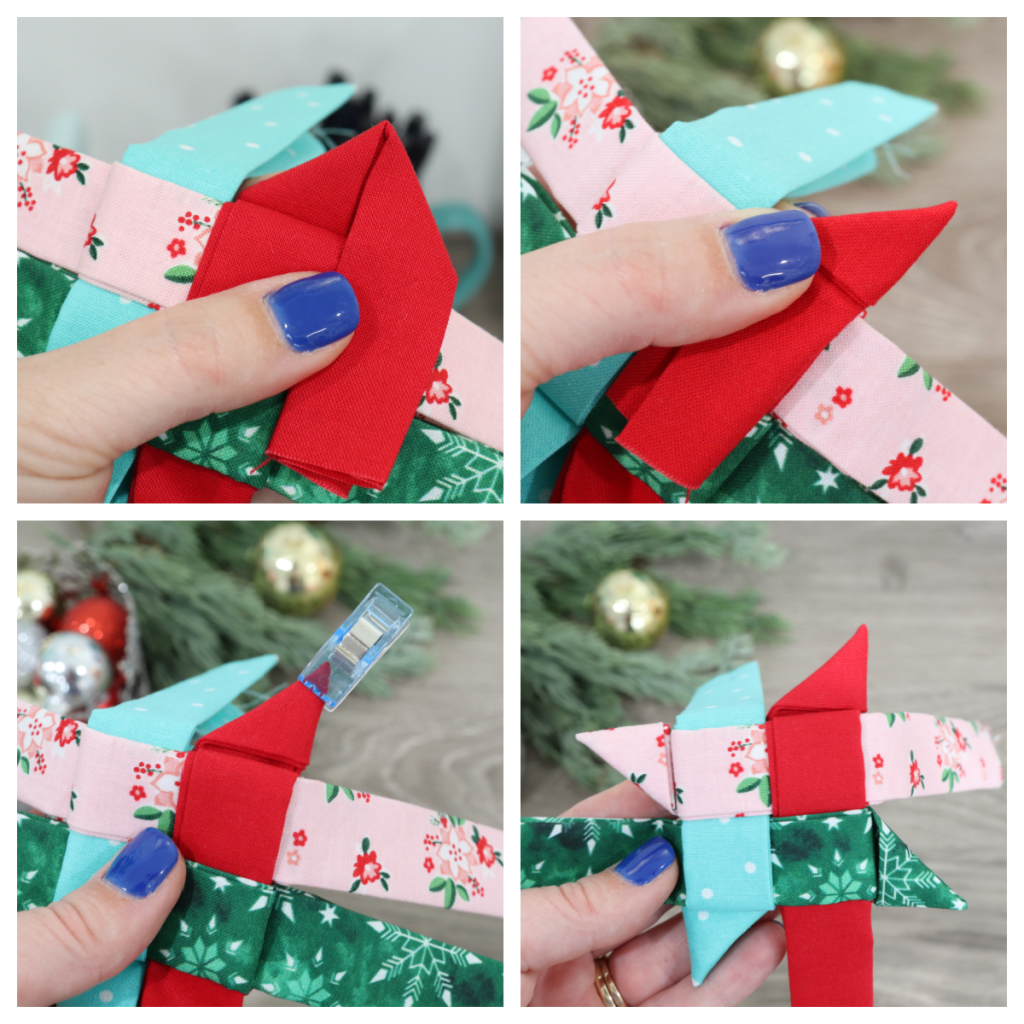
Now it’s time to make the points of our star. Start with the strip on the top right side. For me, this was the red one. Take the extra fabric and fold it backward, away from the ornament at a 45 degree angle. Then, fold it forward at another 45 degree angle to form a triangle as shown below (top left image). Now, fold this larger triangle in half in the center to form a right triangle (top right image). Tuck the excess fabric down into the center of the woven area. For this part, I like to place a quilting clip at the top of my point so that it doesn’t move while I tuck. It’s also helpful to have something to help with the tucking, like a popsicle stick, or another long, flat object. Repeat this for every other strip, working clockwise. This will give you four points, alternating with four long strips. (lower right image). Flip the whole thing over and repeat, folding the four strips that are left in the same way.
Step 4: Add a hanger.
Use a tapestry needle to thread string, twine, or thin ribbon down through the woven section and back up to create a hanger. If you like, you can add beads or jingle bells to embellish.
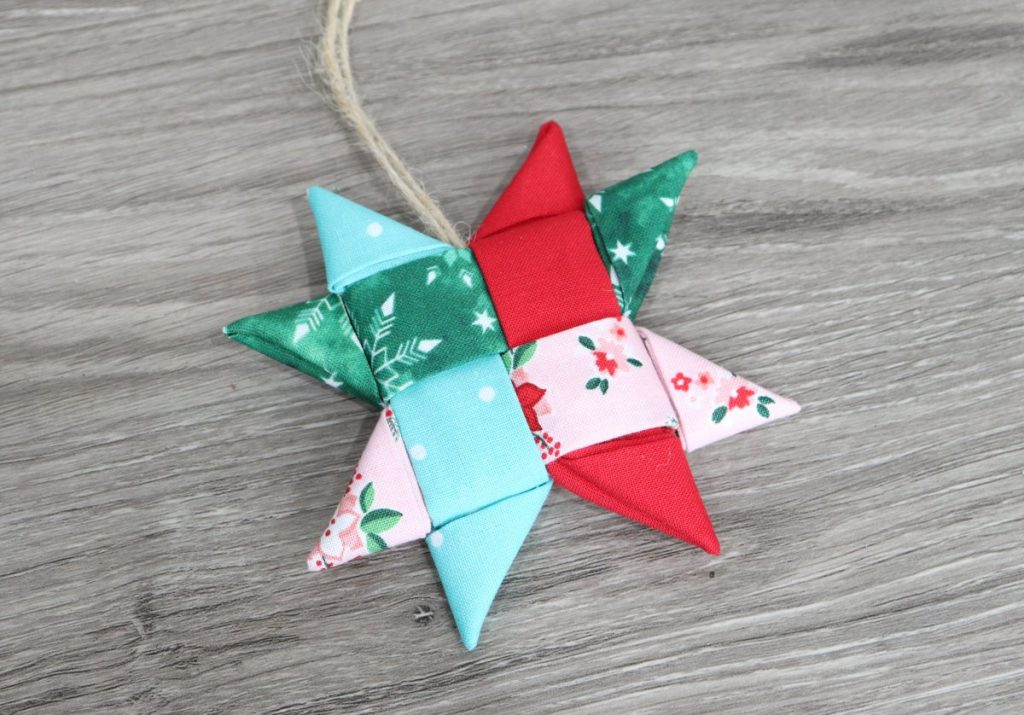
Now your ornament is ready to hang on the tree! This is a great way to use up fabric scraps, and every ornament will look unique as you try out different combinations of colors and patterns. These ornaments make great gifts for just about anyone, and they also look adorable tied onto a wrapped package.
If you try this project, I’d love to see how yours turn out! Be sure you’re part of the Amy Latta & Friends Facebook Group so you can share your photos and we can all be inspired. See you there!
Be sure to check out these other holiday ideas for decor, gifts, and more. Happy creating!

Thank you for such good instructions!! I am sharing with my guild!!
Wonderful!