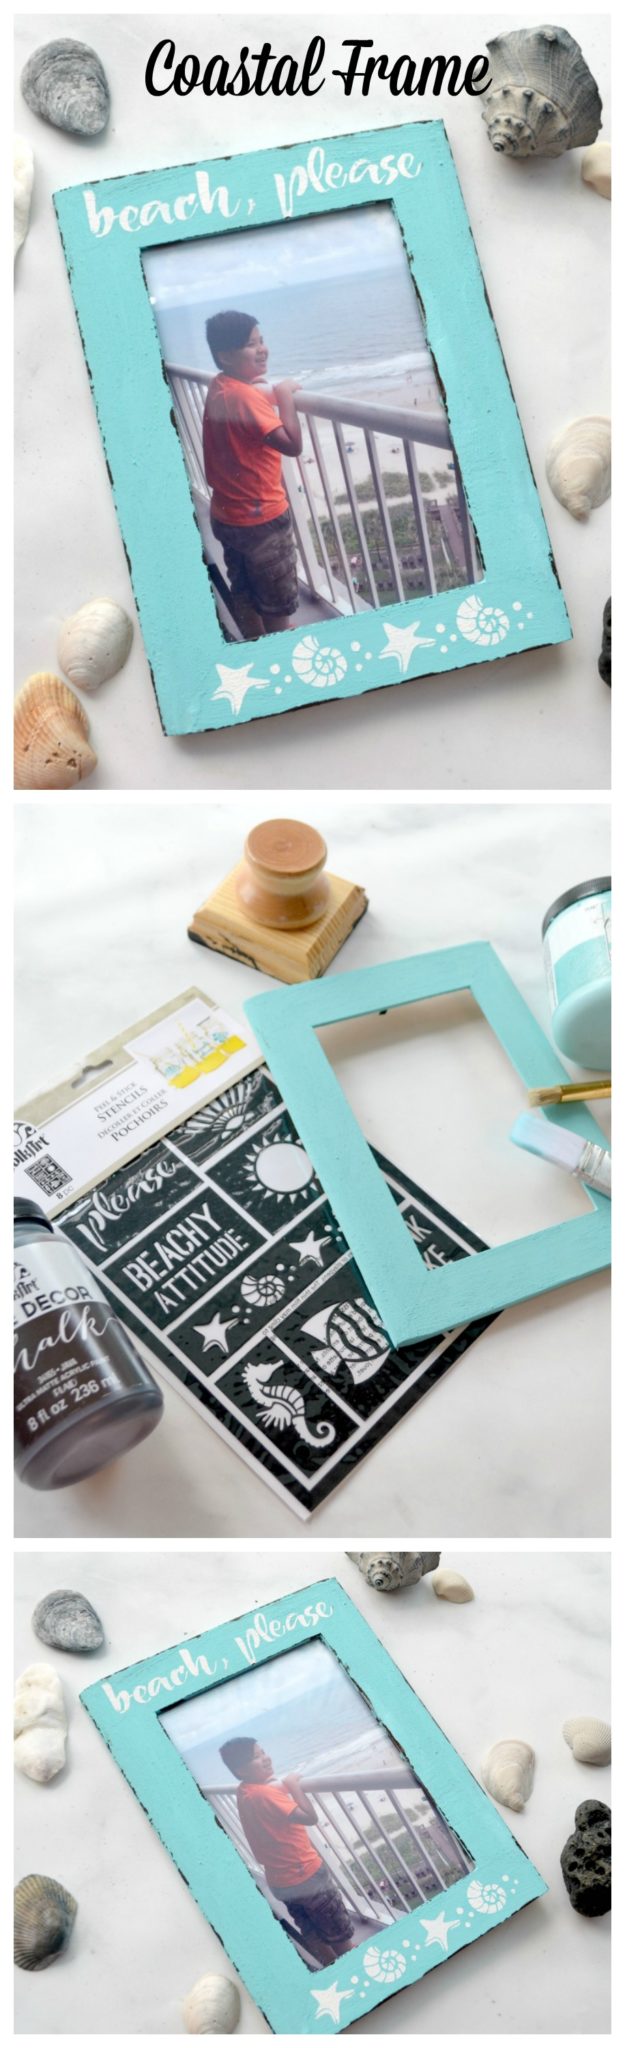
Coastal Beach Photo Frame
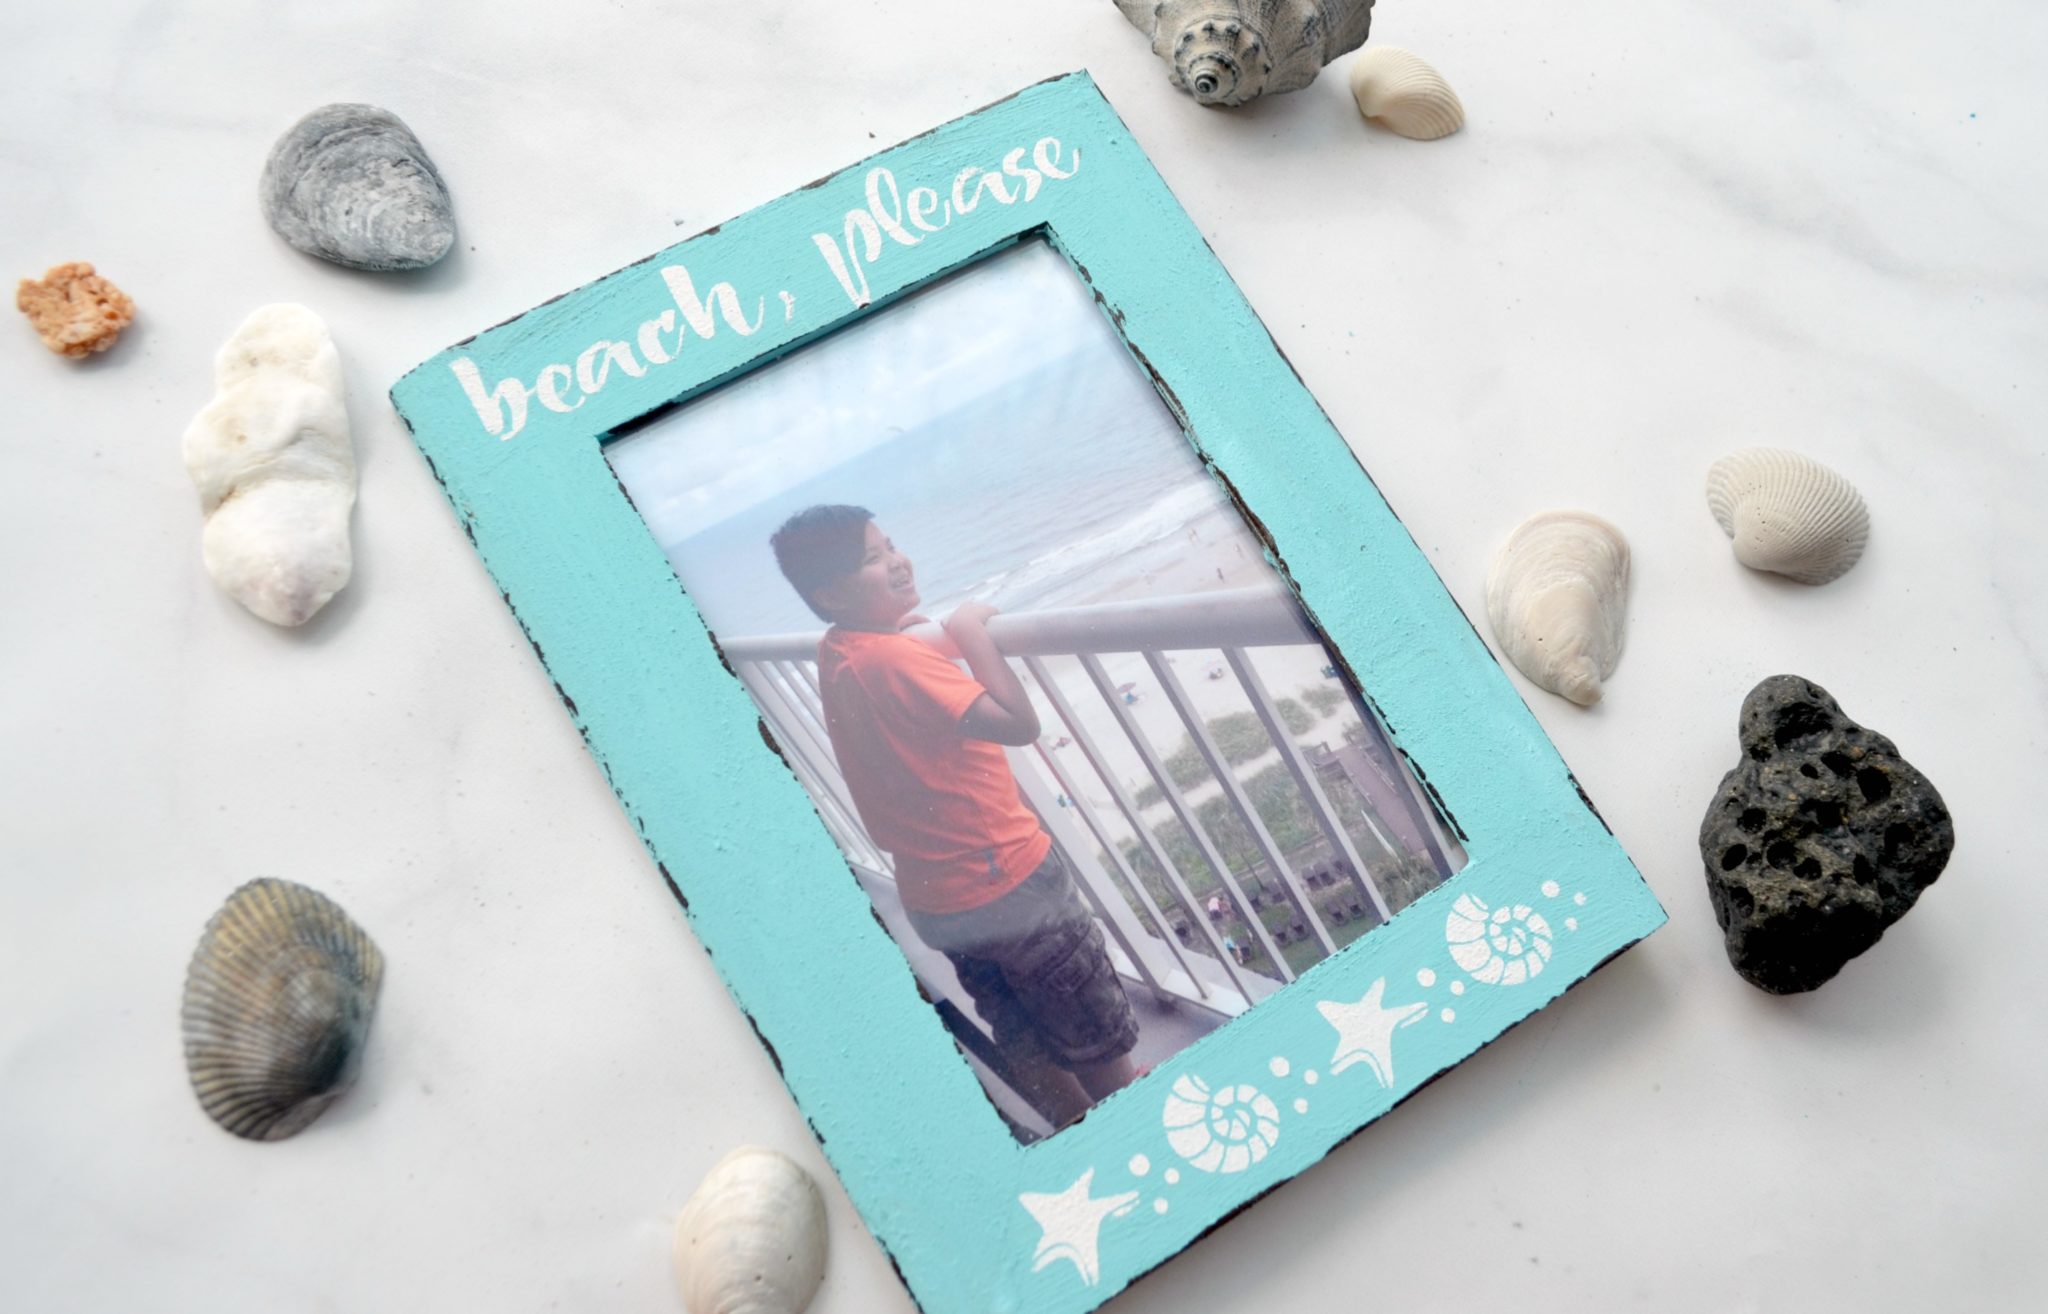
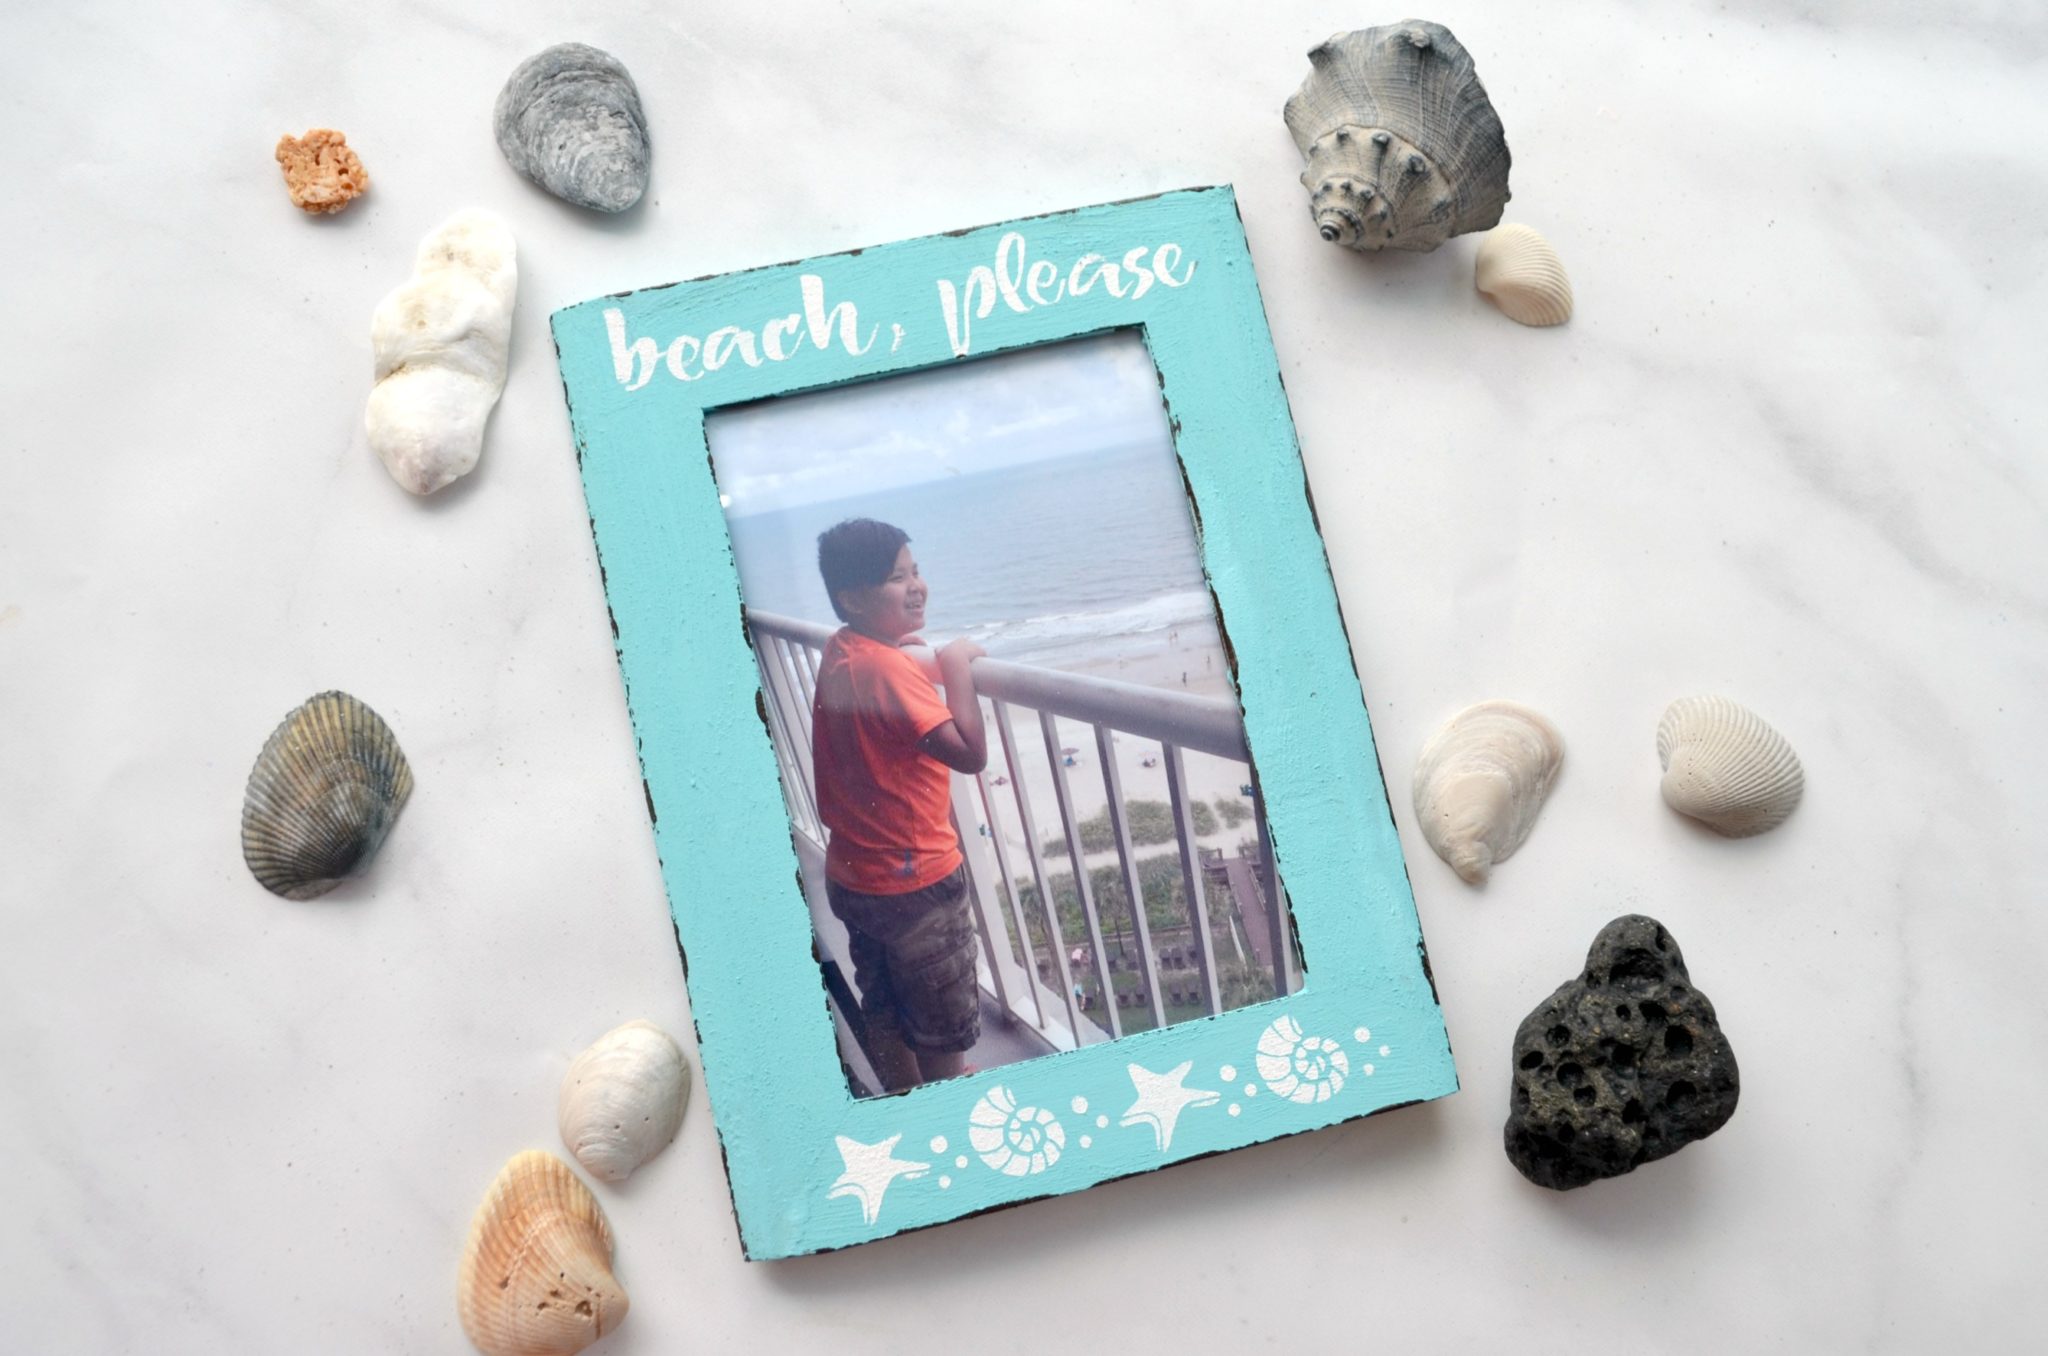
Friends, I absolutely love it when I’m able to give my friends and family gifts that I’ve created. Of course I also buy “regular” gifts sometimes too, but there’s just something about being able to personalize something 100%! My mom’s birthday is coming up next week, and I’m anxious to show you what I made for her. The three things she loves most are her family, Jesus, and the beach. I was able to combine two of them to make her a coastal photo frame…take a look.
Here’s a look at how I made it; check out this quick video:
For those of you who want to create your own, here are some more detailed step-by-step instructions.
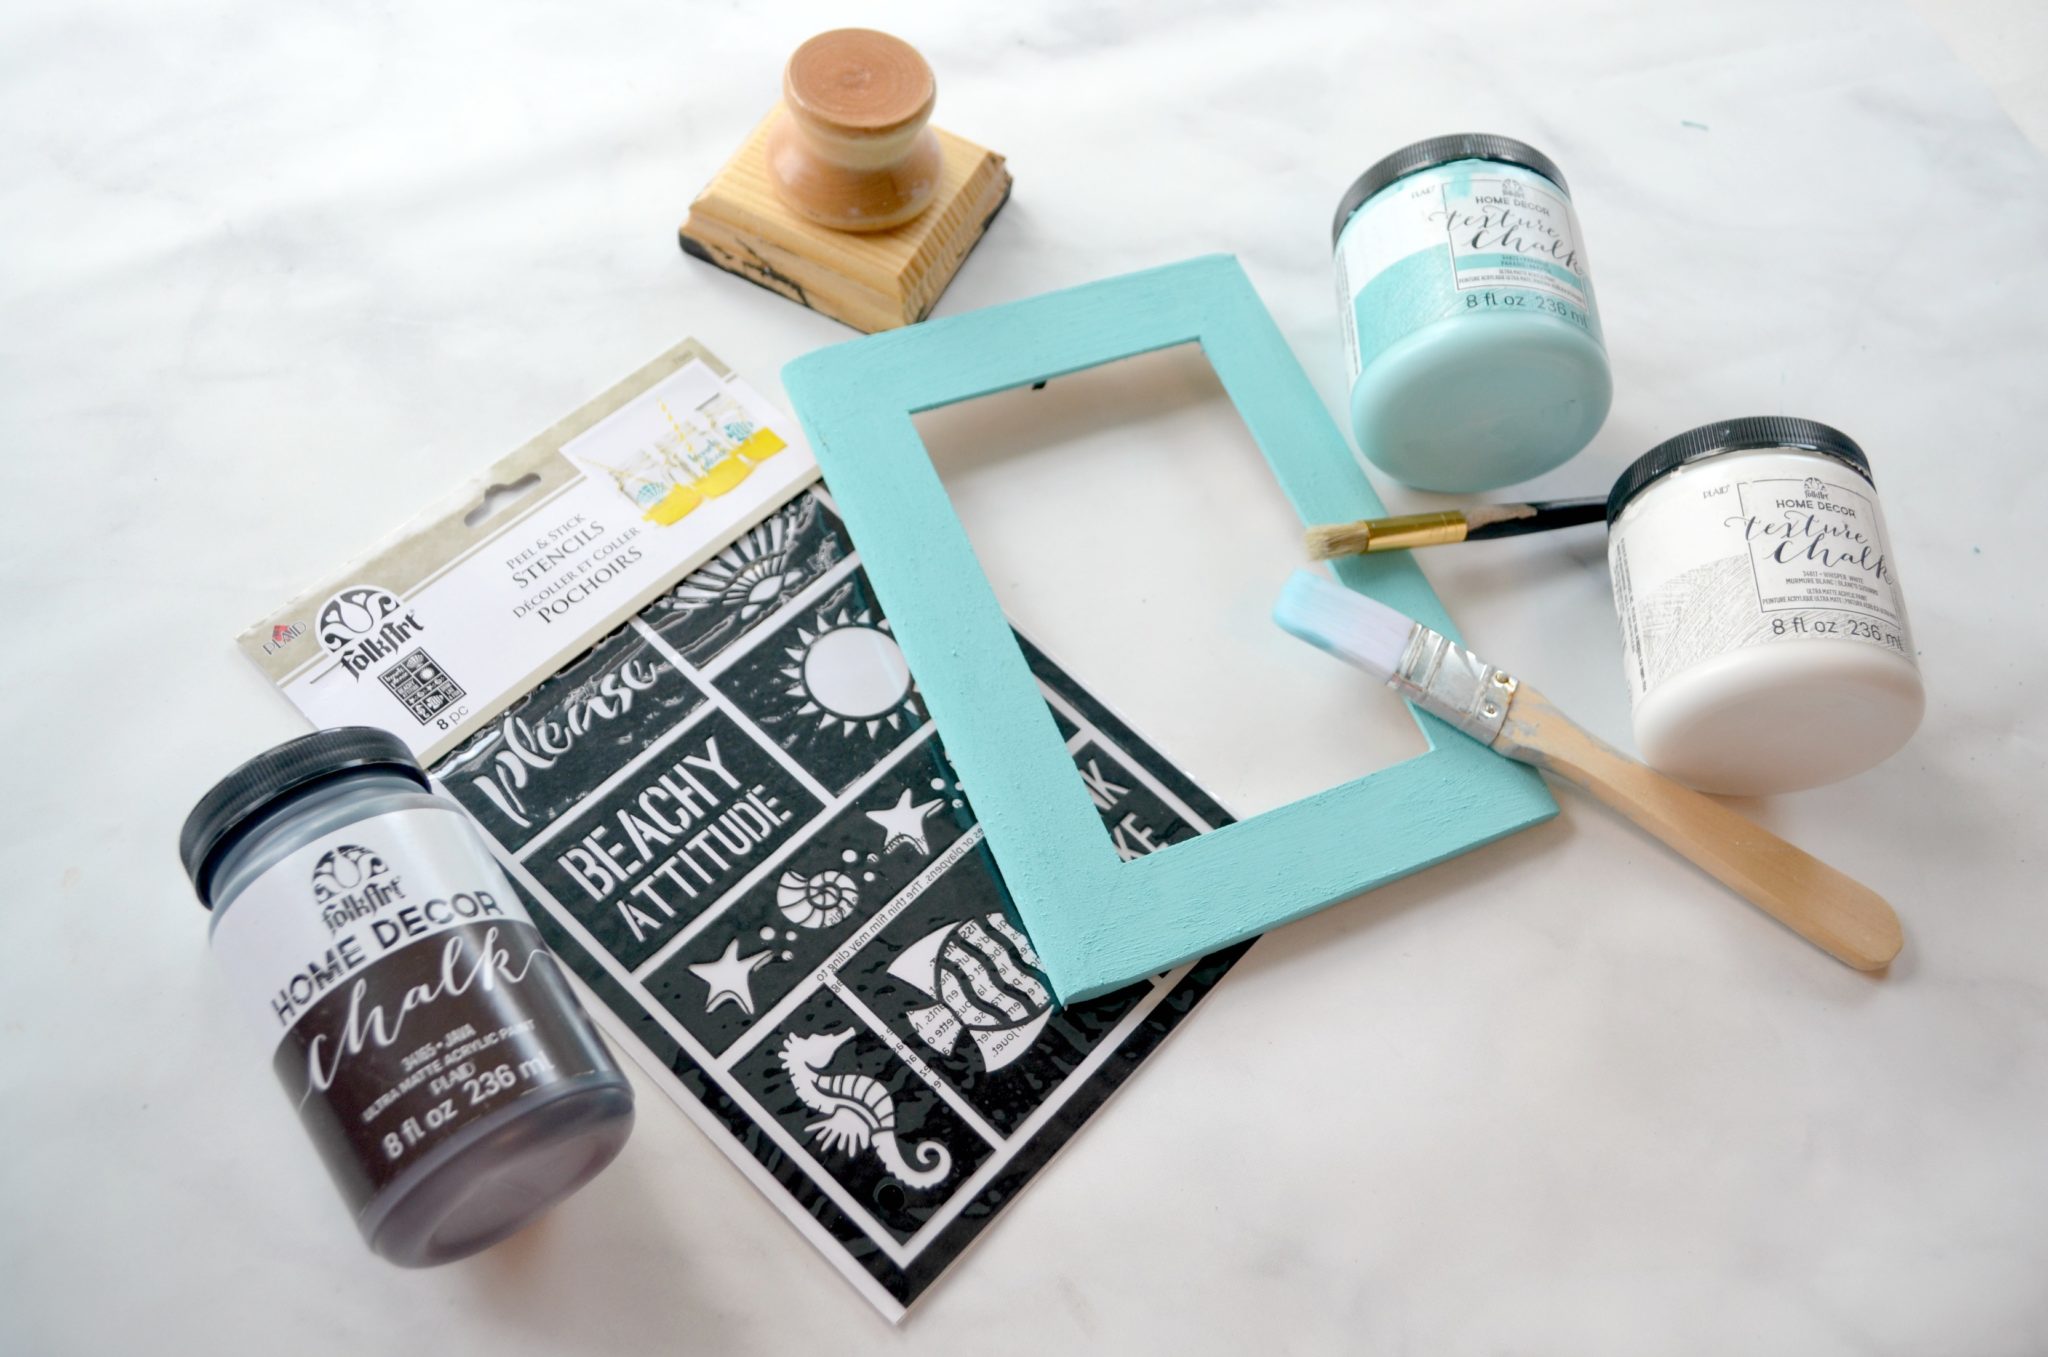
YOU’LL NEED:
an unfinished wooden photo frame
FolkArt Home Decor Textured Chalk Paint: Paradise, Whisper White
Paintbrushes: Medium and Liner
FolkArt Home Decor Chalk: Java
FolkArt Peel & Stick Stencils
FolkArt Home Decor Layering Wood Block
Step 1: Paint your frame with a coat of FolkArt Home Decor Texture Chalk paint.
The color I used is called Paradise, which seems just right for a project that’s all about the beach! One coat was plenty to give me total coverage. This paint gives the ultra matte finish you’ve come to expect from chalk paint, but also has texture added to give the piece a vintage feel. It’s perfect for layering, distressing, and more.

Step 2: Choose and apply your stencils.
These Peel & Stick stencils are adhesive, which is awesome because you don’t have to tape them down or worry about them moving at all while you work. Then, when you’re done, you just peel them back off and they’re ready to reuse again and again.
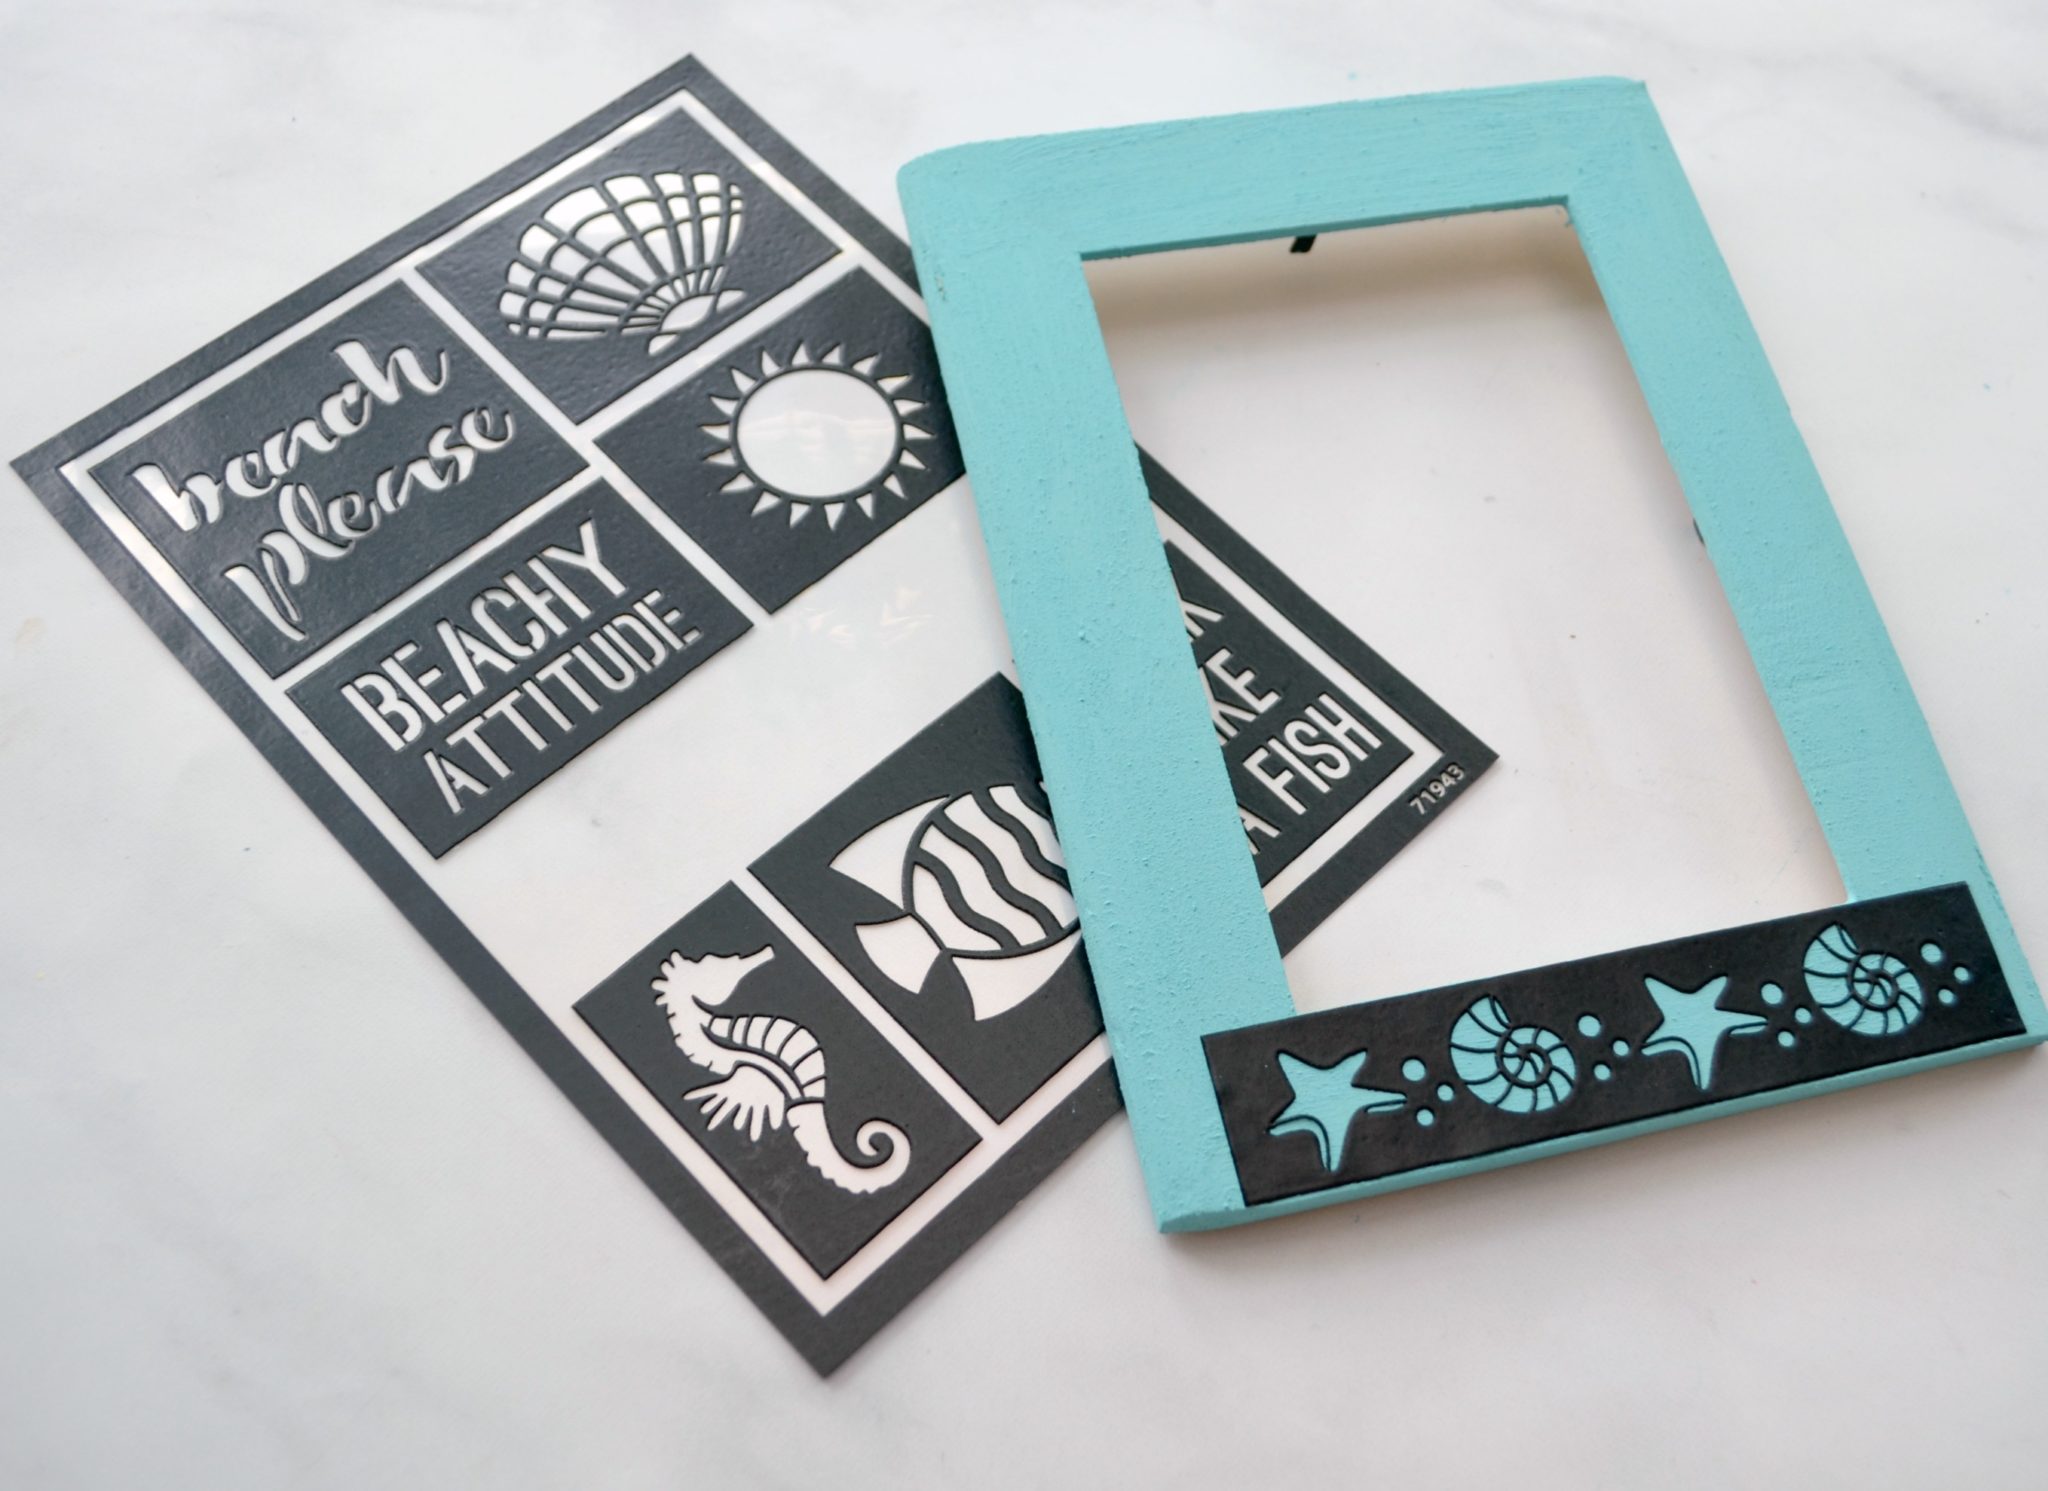
Step 3: Stencil your images.
To get the cleanest, best possible image, you’ll want to use a brush that’s specifically made for stenciling. Place it in your paint, then offload it so your brush is almost dry. Then, tap it on the surface of your project with an up and down motion rather than using a back and forth painting motion. This will help keep the paint from bleeding underneath the stencil.
You can see more pro stenciling tips here.
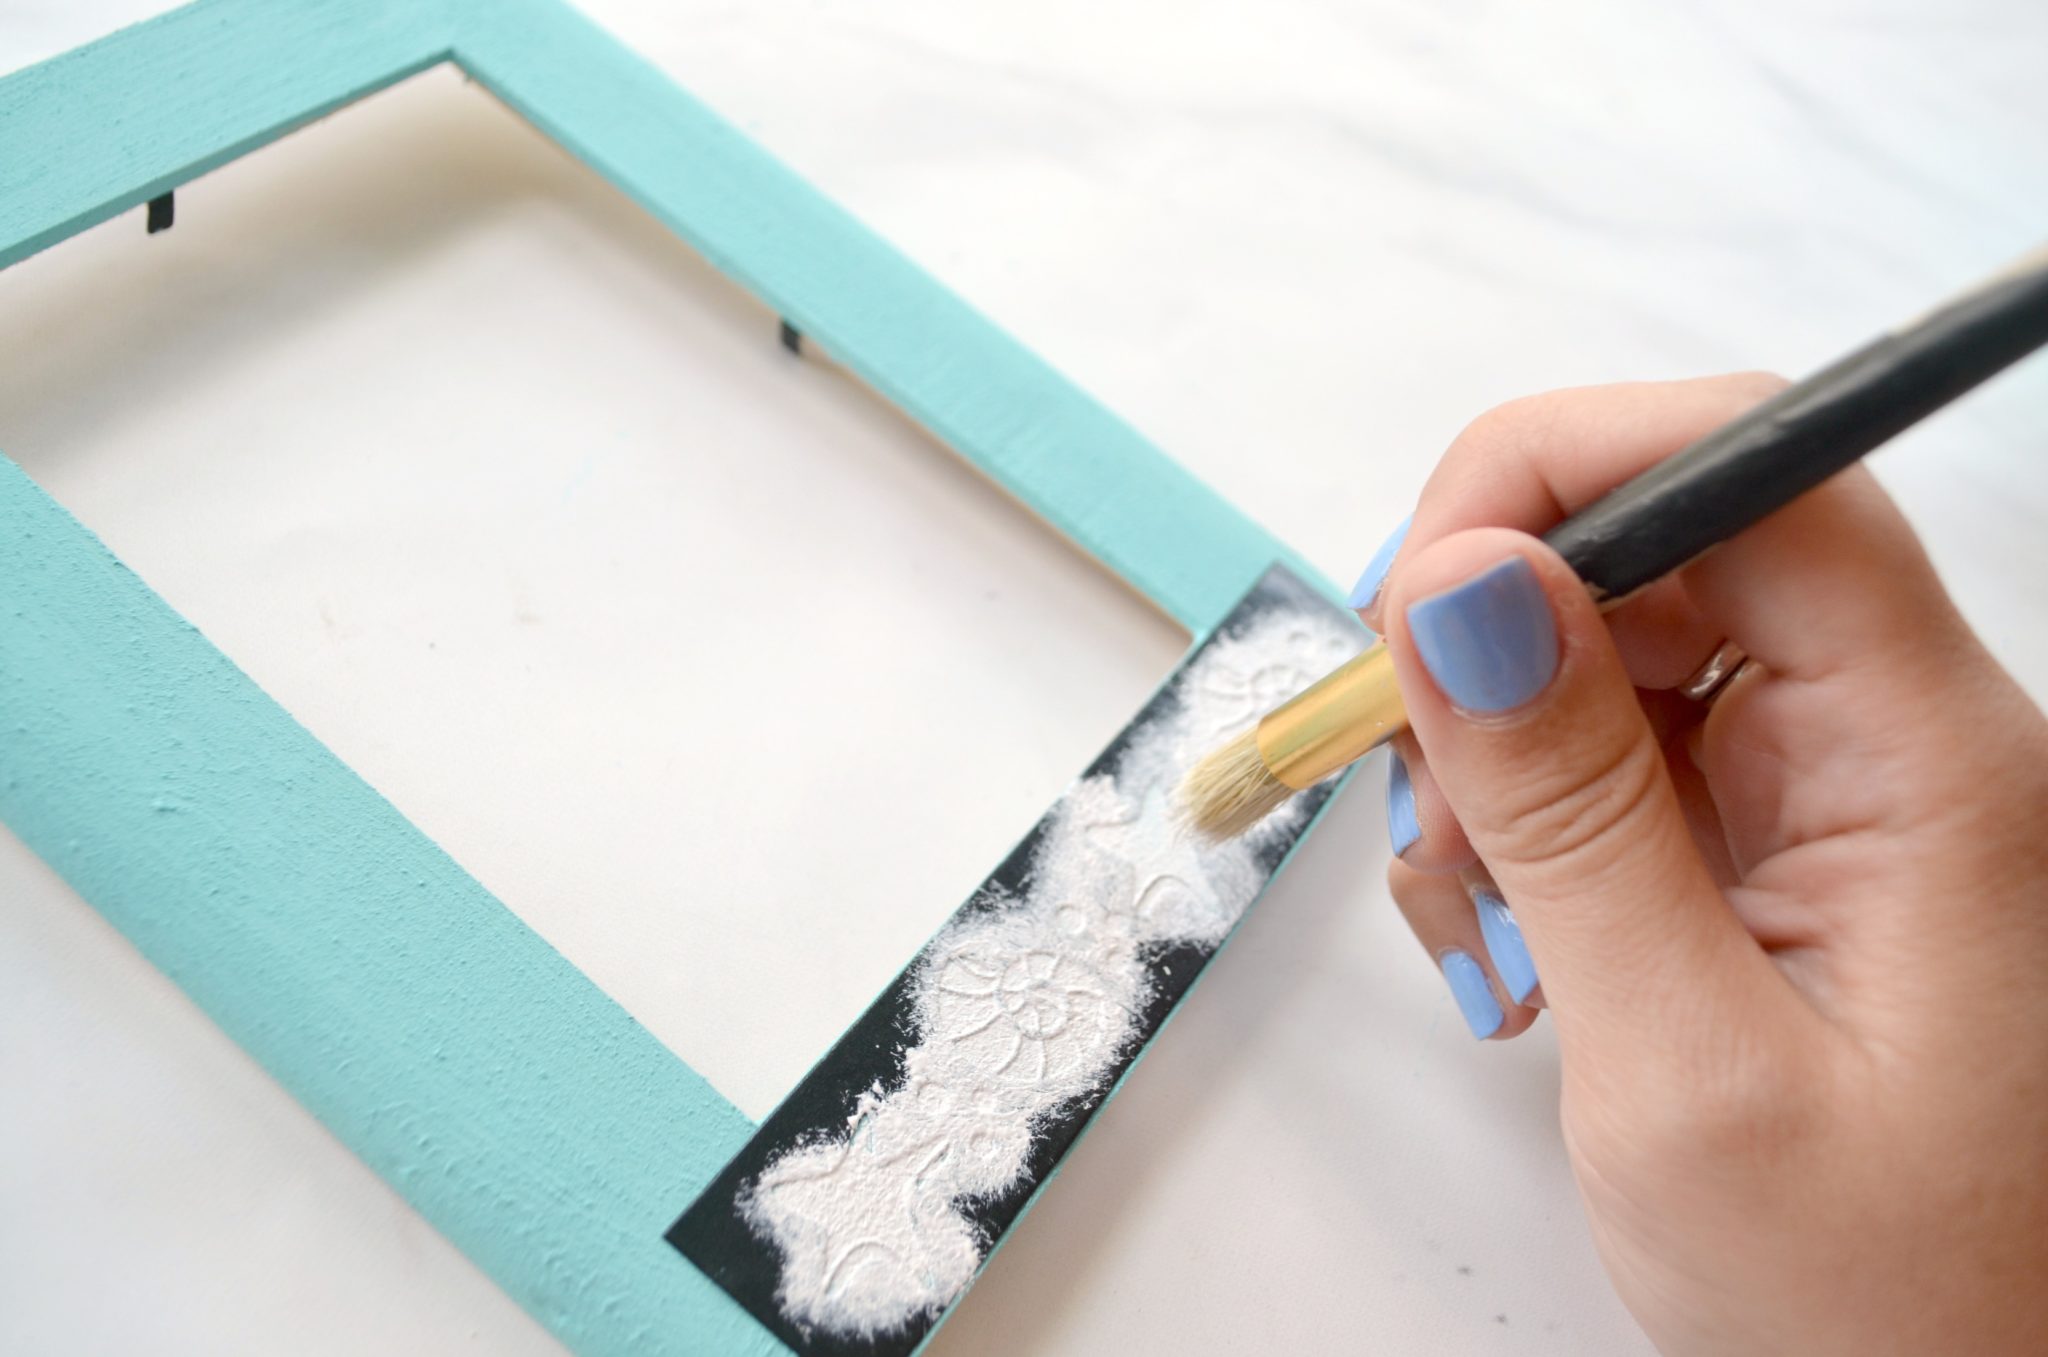
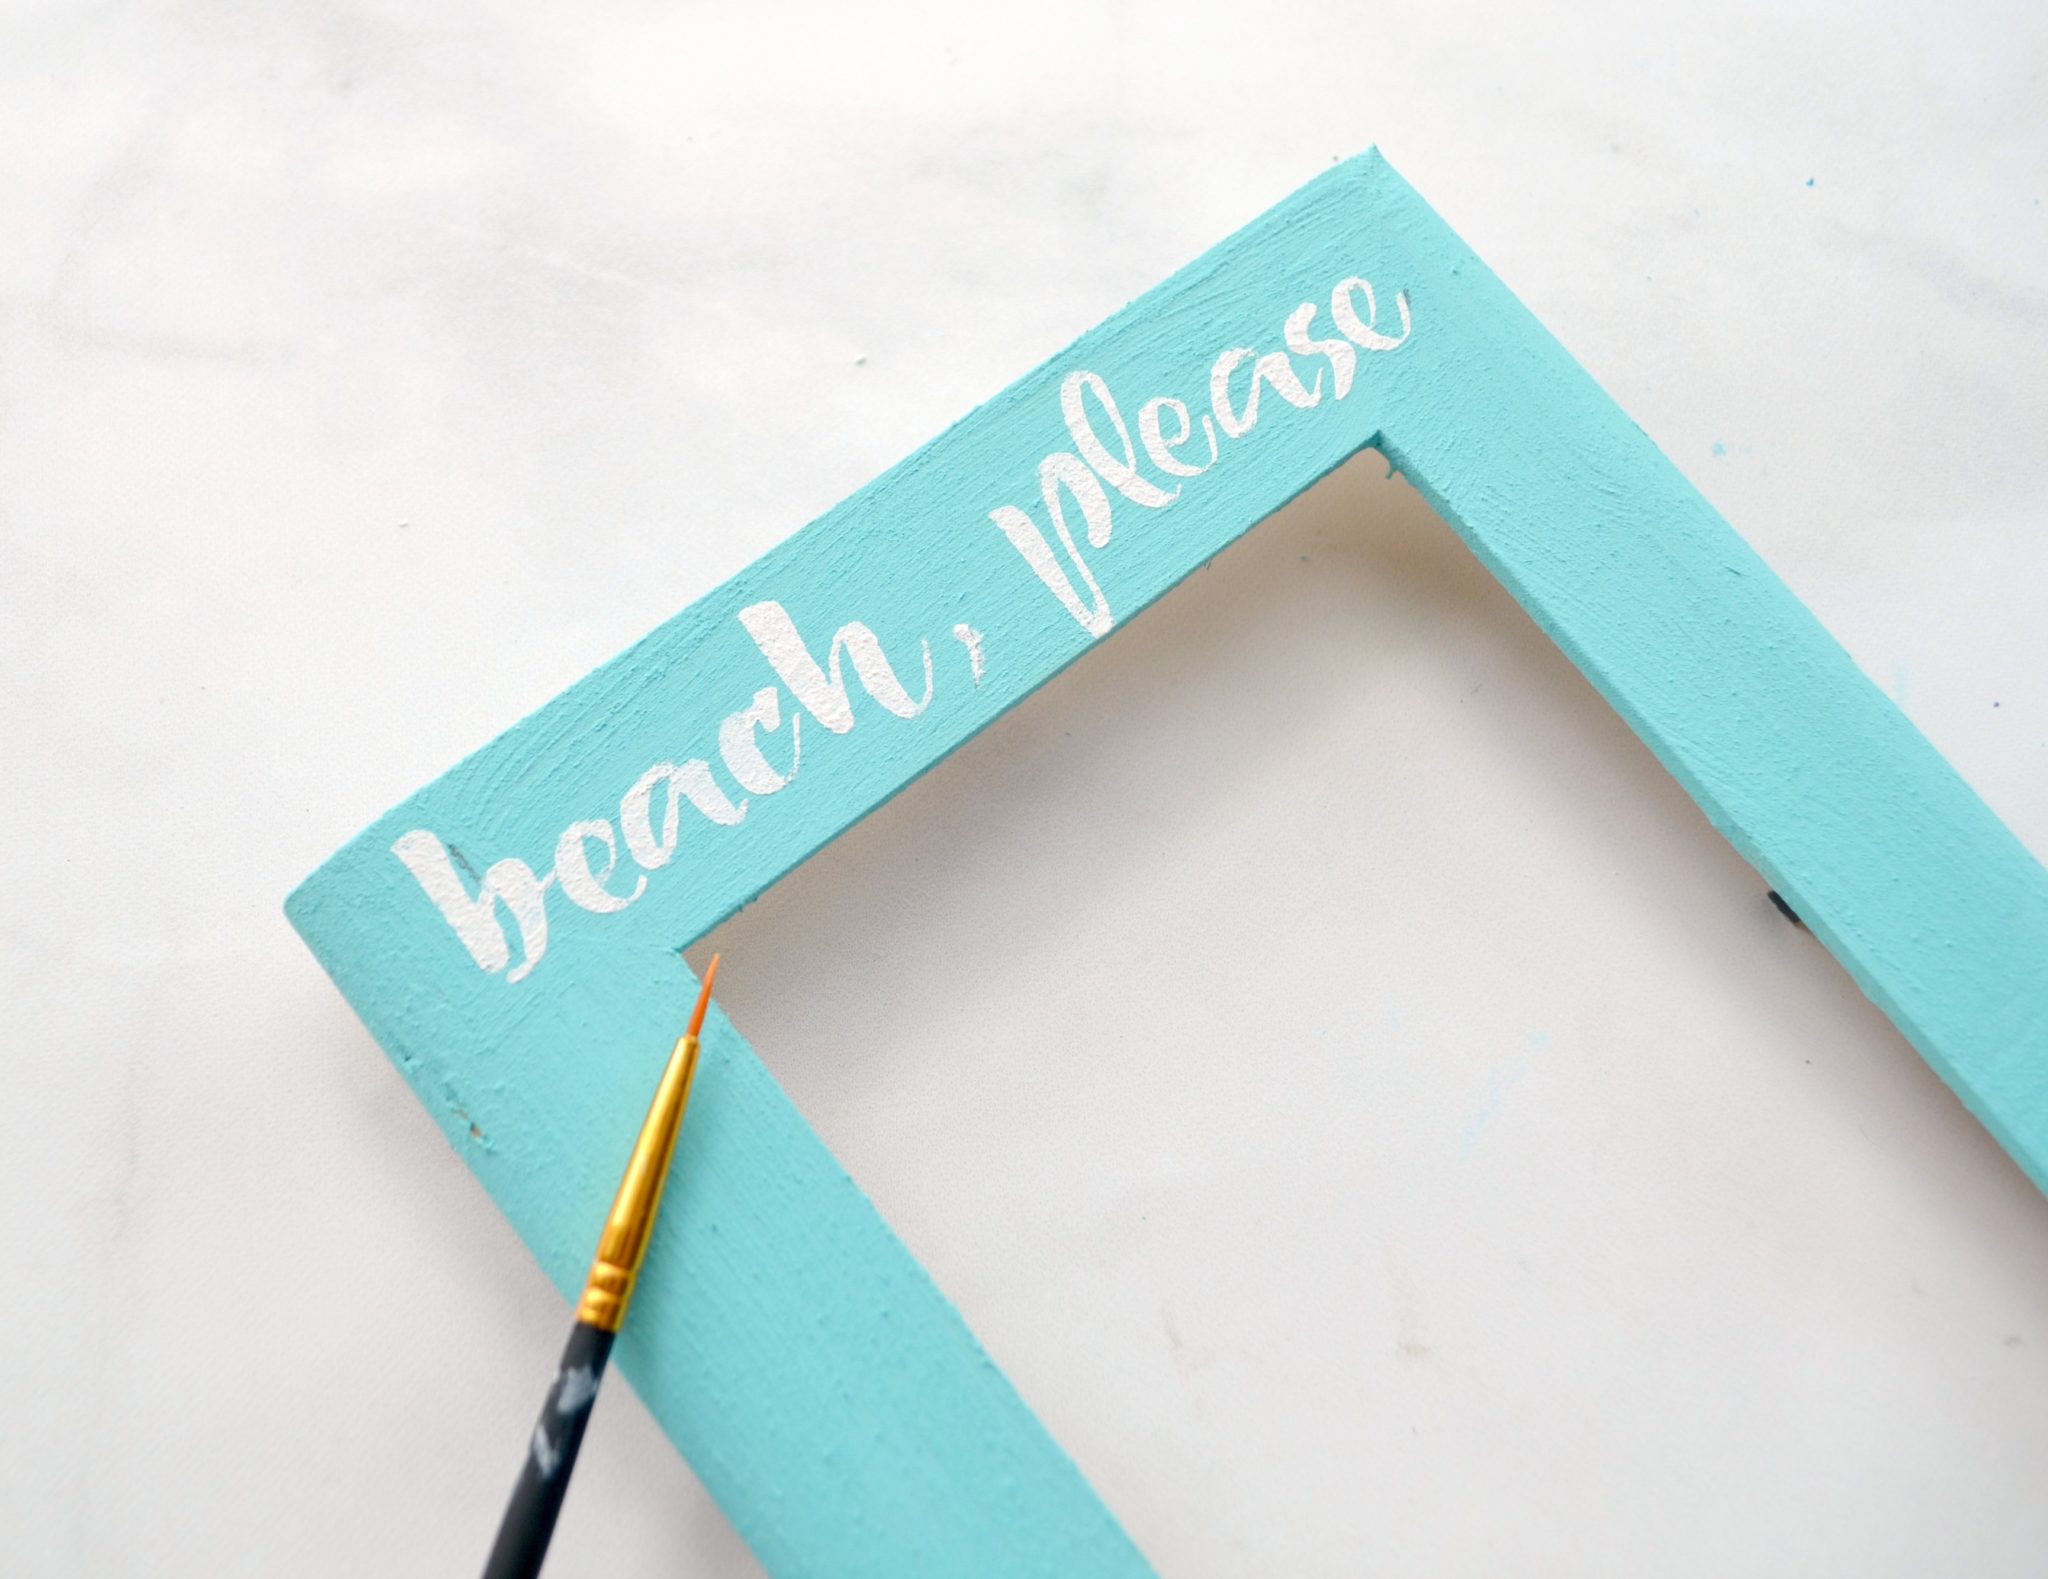
Step 4: Touch up your stenciled images and add any details with a liner brush.
I chose to use the phrase, “beach, please” at the top of my frame. After the letters were stenciled, I went back and added a comma between the words. Then, I used a tiny brush to carefully close up the spaces in the letters. Did you ever notice how stenciled letters have those little gaps where the stencil was? Filling them in with paint makes them look more like actual writing and less like they were stenciled.
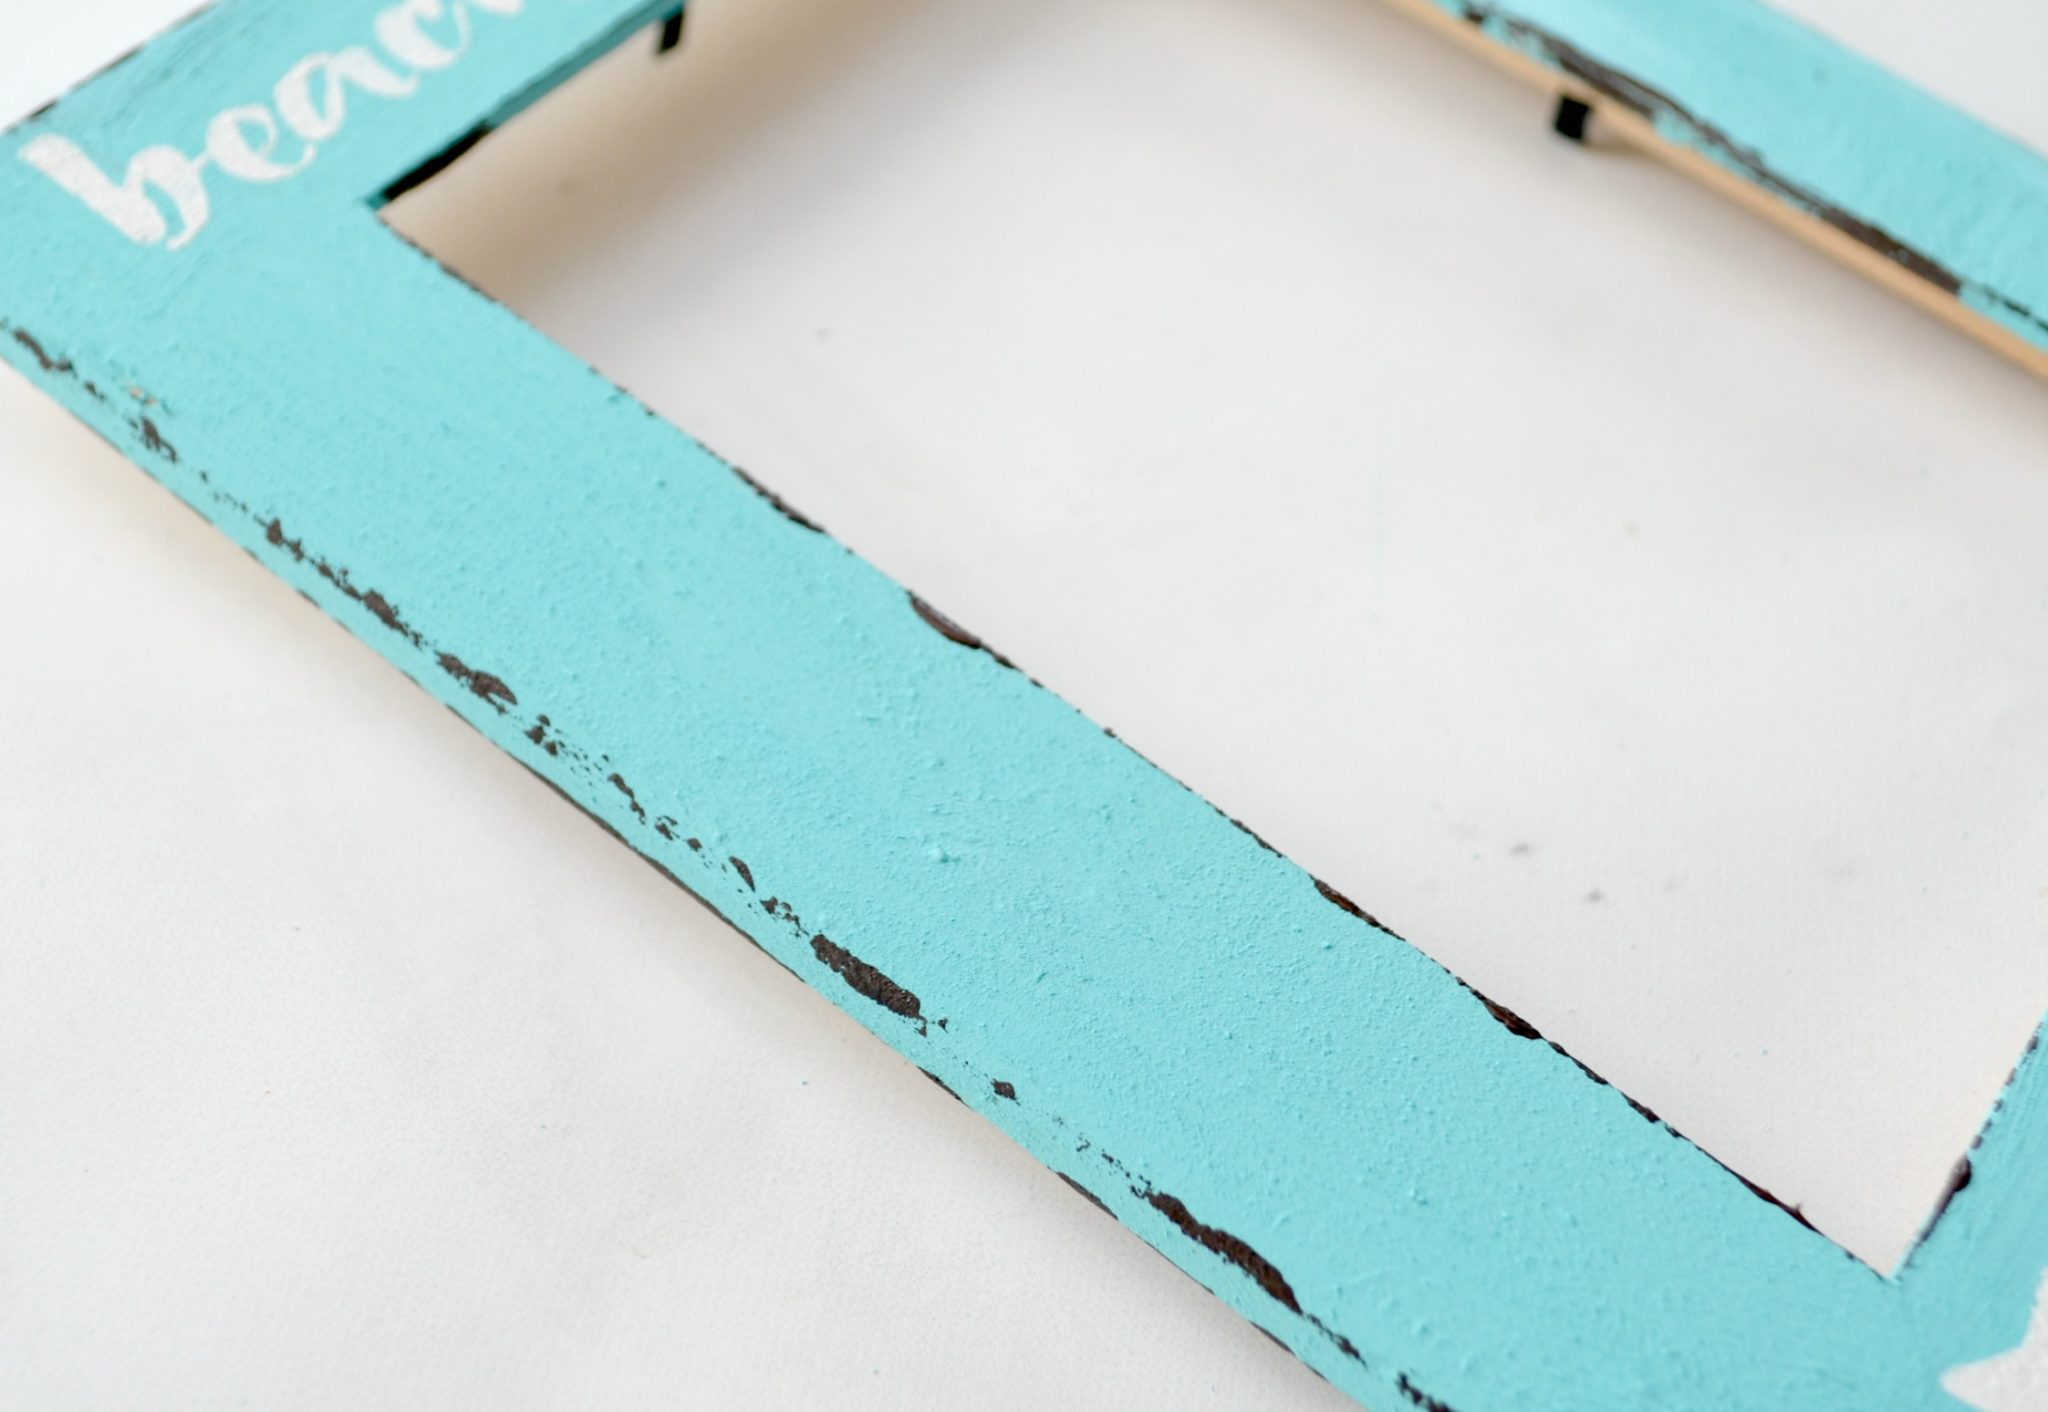
Step 5: Add Java paint using the wooden block to create a distressed, time-worn look.
I recently learned this technique and it fascinates me! I used to sand paint off to get this look, but believe it or not, this can be done by adding paint instead! You get a thin layer of paint on the block, then rub the block along natural edges of the wood. Check out the video at the beginning of the post to see this in action!
If you like, you can add a coat of FolkArt Home Decor Clear Wax to seal the paint, but since it’s just a small frame rather than a large furniture piece, it’s not necessary.
What do you think? I love how it looks and it definitely helps to bring a little of the beach back home. I can’t wait to give it to my mom next week.
Is this a project you’d like to try? I’d love to see how yours turns out! Share a photo, ask questions, or tell us all about your latest creations in the Amy Latta & Friends Facebook group. See you there.
PS. Don’t forget…if you like it, then you oughta put a Pin on it!