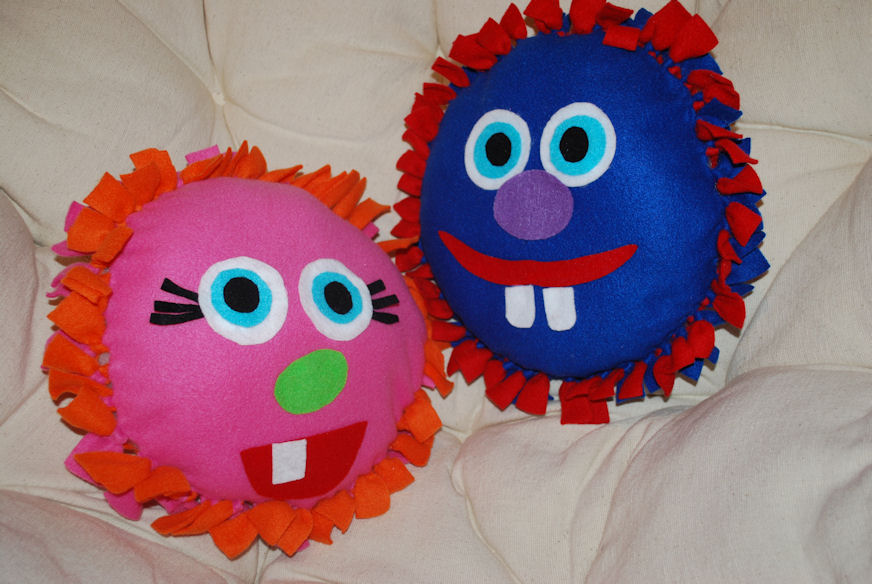
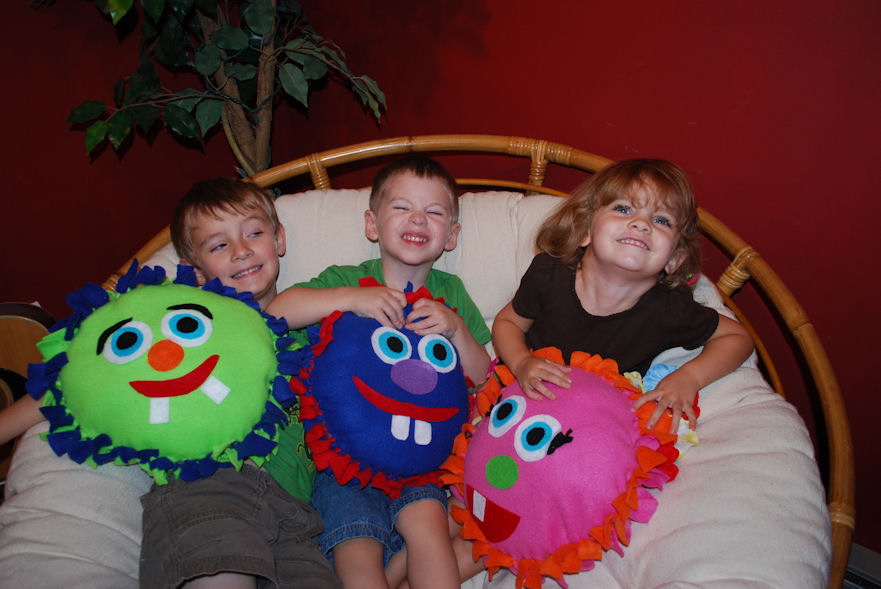
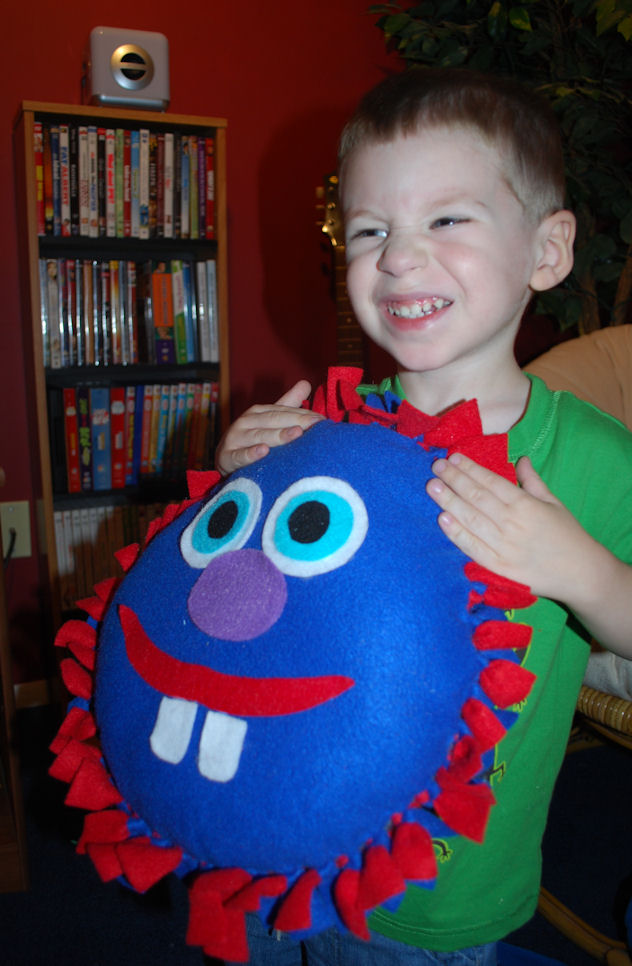
Since this week’s challenge is all about fun kids’ activities, I thought I’d share with you one of my recent favorites. We had another of our famous craft playdates with the M Family because we all wanted to make…MONSTER PILLOWS!
And yes, by we, I do mean Brandee and myself included! I have plans for our leftover fleece…:)
In the September issue of
Family Fun magazine {the same one where we got the idea for our
pom-pom trees}, I saw this no-sew fleece pillow project. Theirs was to celebrate the new video release of the Lion King. I thought it was so clever and would be really fun! We dog eared the page, but never got around to it; Little Crafter has never seen the movie and is kind of indifferent to lions in general.
Then, I came across this variation from
Greene Acres Hobby Farm; she had taken the original idea and adapted it to be a monster. Genius! Little Crafter may not care about lions, but you and I both know he looooooooves monsters! And so do his little buddies. Plus, they’re perfect for this time of year.
Naturally, we made it the project for our next crafting playdate. Here’s how you can make one too!
NO-SEW MONSTER PILLOW
Materials per pillow:
Two colors of fleece, 1/2 yard of each {this will actually make more than one, but you need the 18″}
Assorted colors of felt
Scissors
Craft glue
Polyfil
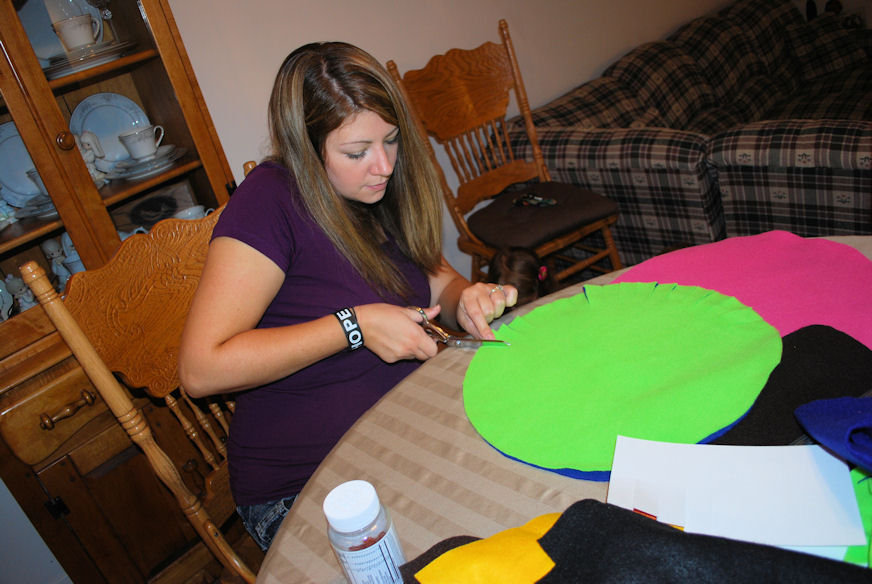
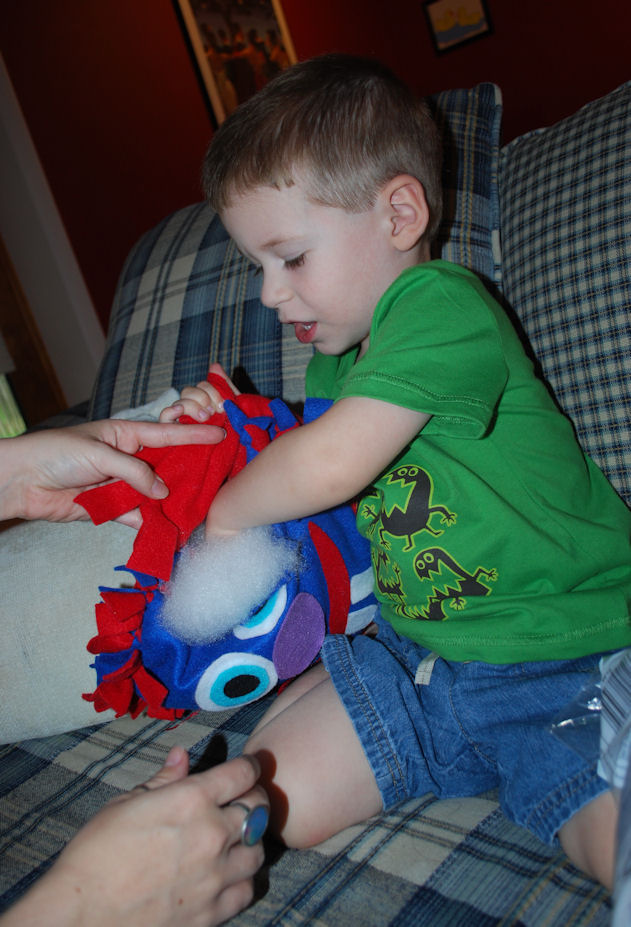
STEP 1: Cut two circles of fleece. The original lion pillow said to use 20″, Greene Hobby Farm used 18″. The biggest thing I could find to trace was 17″, so that’s how big ours ended up.
STEP 2: Cut slits around circle that are approximately 1″ wide and 2 1/2 to 3″ long, depending on how long you want the monster’s “hair” to be.
{Brandee is making her serious face. I just love this girl.}
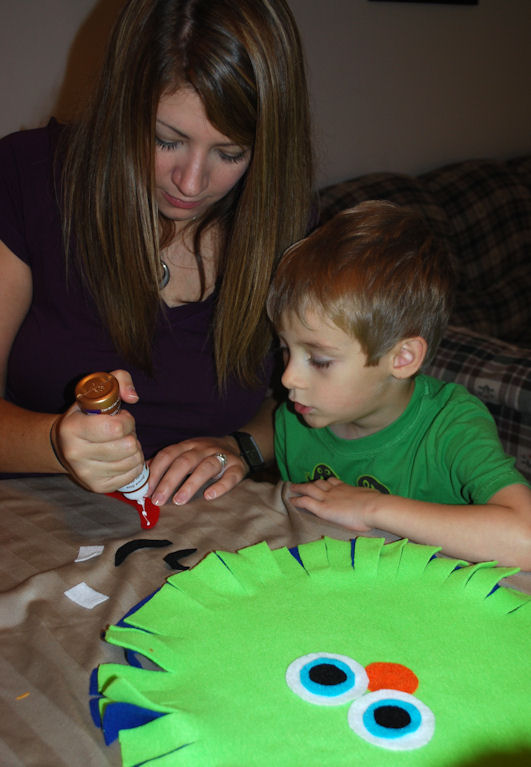
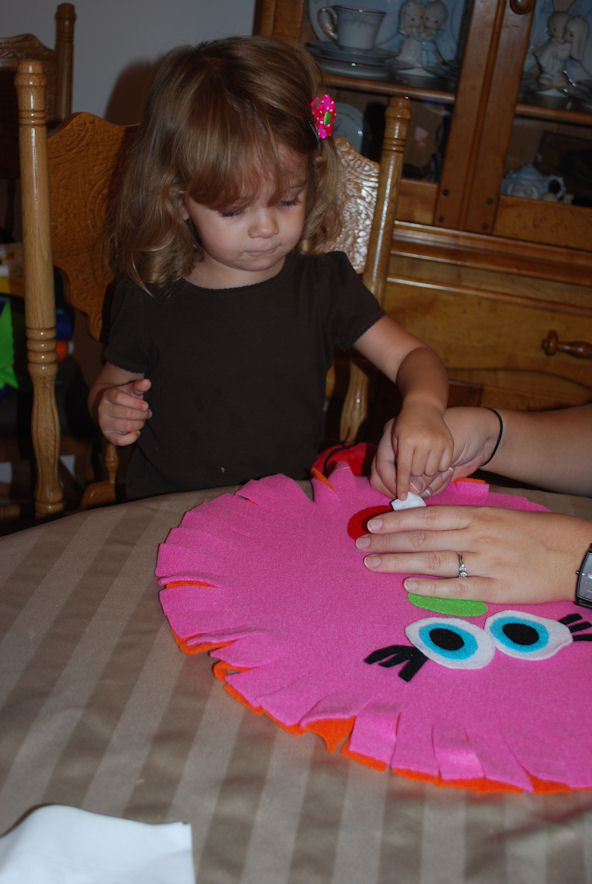
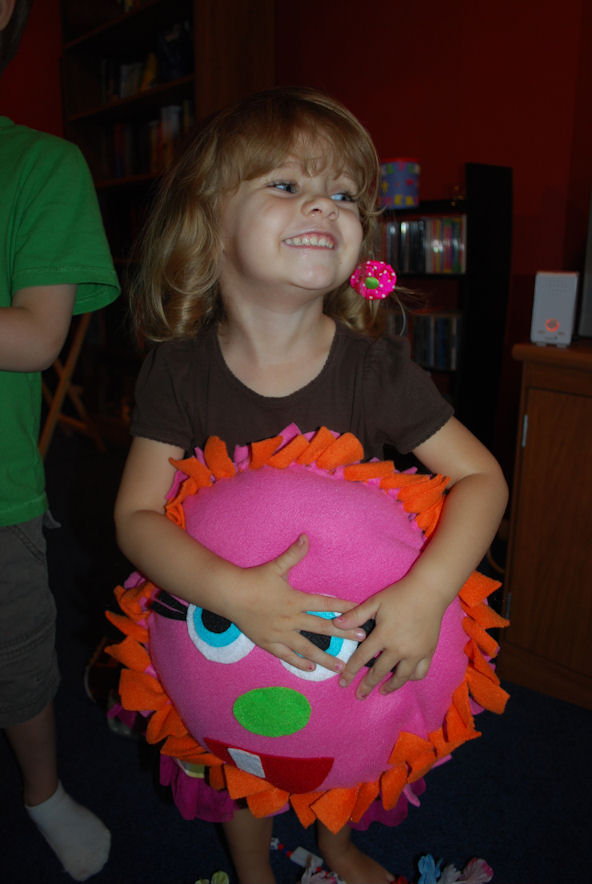
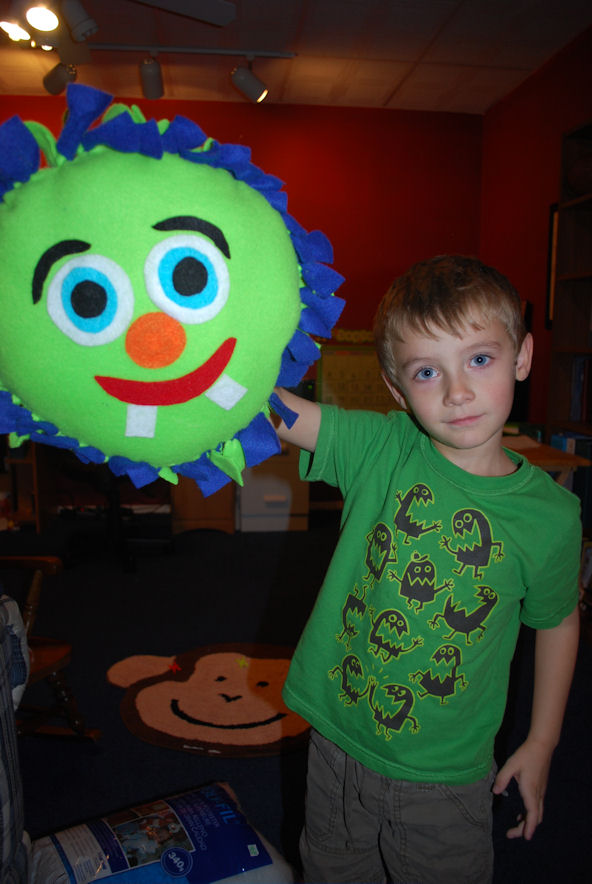
STEP 3: Cut out felt shapes to make eyes, nose, and mouth for your monster. Consider eyebrows, eyelashes, and teeth too!
STEP 4: Choose which color will be the monster’s face and glue the felt shapes in place.
STEP 5: Begin tying the top and bottom circles together. If you’ve ever made a no-sew blanket, it’s the same technique. Just double knot each fringe. Depending on how you tie it, you can get either the top or the bottom color to be in the front. We chose to have the contrasting color on top. Stop when you have about 3/4 of the circle tied.
STEP 6: Stuff pillow.
STEP 7: Finish tying the rest of the fringes. Then, name your monster and let it ROAR!
I thought these were so fun to make! This project does require a good bit of adult assistance; we moms did all the cutting and the tying; the kids did the gluing and the stuffing. Want to know the best part? They cost less than $5 a piece. I got my fleece 50% off, and I already had felt at home. Even if I’d paid full price, it would have been around $10 for the supplies and that makes at least two monsters plus felt left over. Hooray for thrifty kiddo fun!
What’s your latest kids’ project {or project you have done that a kid could do too?} I’d love for you to share it at
this week’s challenge party!
PS: Speaking of kids’ activities, don’t forget to enter the Craftprojectideas giveaway for your chance to win a Halloween Melty Bead Kit!


My little man was just “reading” over my shoulder and said “Mama look at THAT very fun thing to do, can we do that?” Looks like we will be making some monsters this week 🙂
There’s a possibility here that I could do this. A no sew is awesome. These are adorable!
Thanks for sharing on the Holiday Kid Craft Link Up!
Lori
Can’t wait to try these! Thanks for featuring my fall trees on your fb page! Lorie
These are way cute, I would love to do these with my girls.
These look like so much fun to make!
I am pinning this one to do with my nephew the next time he visits. I love this idea,…so cute and love the tying instead of sewing. Awesome!
No sew- Love it and am sharing it on fb! Thanks for linking up to The Sunday Showcase!
These make me smile. Thanks for linking to Things I’ve Done Thursday!
Melanie
bearrabbitbear.blogspot.com
Amy I am delighted to see this post! You have given me a great idea for the little cosy hamper I always make for the children on Christmas Eve.
These are fabulous! Like a Halloween version of a pillow pet! You are such a fun mom!
These pillow are so fun! And I love how the kids were able to help you make them! Thanks for sharing this at my What’s In The Gunny Sack? link party!
Such a cute craft, perfect party activity and favor! How fun! ~April
I love this idea. Especially that it is no sew! I want to make some that look like angry birds for my kiddos for Christmas. I think they would fall in love! Thanks for sharing.
we’ve got to get some fleece and make one of these! sooo cute! and thanks for linking up!
Thanks so much for sharing a picture or our monster pillow. Yours turned out adorable!
How beautiful!!