If you’ve been reading One Artsy Mama for awhile, you know I’ve been
crazy about
Cutting Edge Stencils ever since I had the opportunity to review the
Cassablanca Craft Stencil back in March. Since then, I’ve used that same stencil to make
three different pieces of canvas art {which you can see here and here} as well as
redoing my bathroom vanity and a night table. After seeing my last project, Gabi from Cutting Edge jokingly told me they needed to send me
something new to play with before my entire house was nothing but Cassablanca!
I was thrilled when I realized she was serious and even more so when I was able to have my first choice, the
Zinnia Grande 3 piece set {each size flower is also available individually}. So, a few days ago, I got an exciting delivery! There was a box on my porch containing the
3 piece Zinnia stencils, one of their stencil brushes as well as a
mini roller, and a little bonus stencil. Here’s the first project I made with my new toys:
I used:
– 3 16×20″ canvases {Michaels had a value 5-pack for $19.99 and I had a 40% off coupon!}
– acrylic paint {the pink and yellow are Martha Stewart: Camellia Pink & Jonquil}
– paintbrush
– painter’s tape
STEP 1: I put my canvases side by side on top of a plastic tablecloth {leftover from LC’s party}.
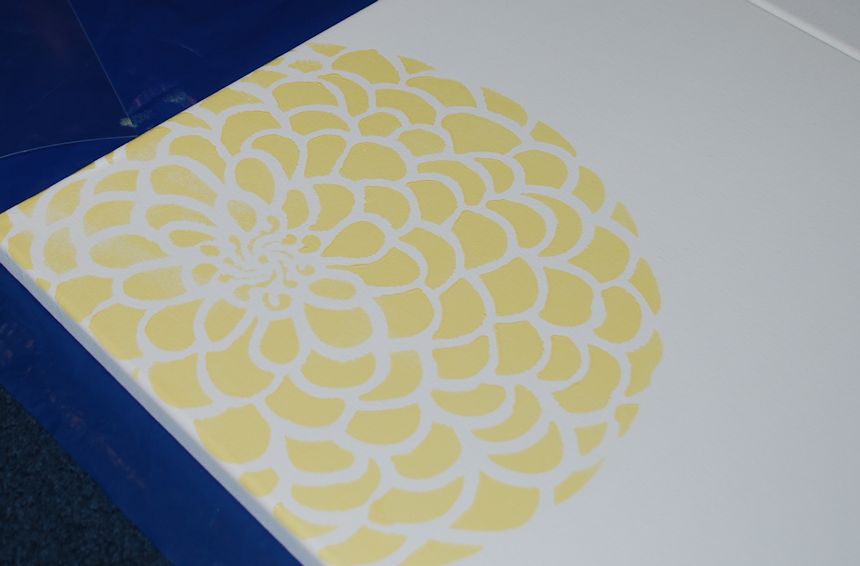
STEP 2: I started with the medium size zinnia and taped it onto the corner of the first canvas.
The largest of the stencils was too big for this project, but I can definitely see that it has a future on a wall in my house somewhere!
STEP 3: I decided to try out the roller for the first time on this project. So, I loaded it…on a Christmas plate. Don’t judge.
STEP 4: I rolled the paint onto the canvas. Oh. my. goodness. Friends, I’m never going back to the brush!
Seriously. It was so stinkin’ easy! The paint goes on so smoothly and has such a nice, even texture…and the roller cleans like a dream in between colors. I totally am kicking myself for using the brush on my other projects, especially the furniture pieces when I could’ve rolled them instead…ah, hindsight!
STEP 5: Peel off the stencil and place it somewhere else {after admiring your beautiful zinnia}!
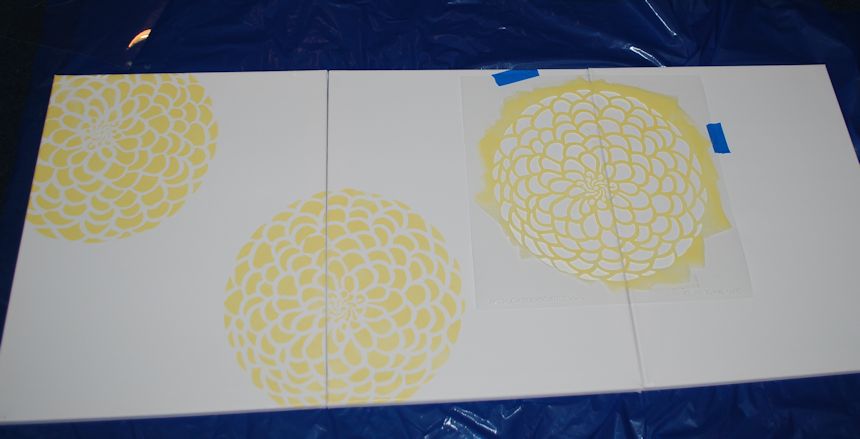
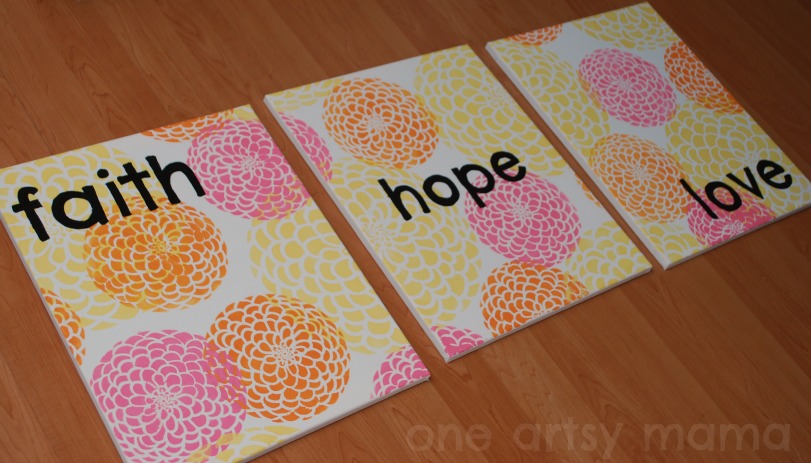
I continued stenciling yellow medium-size zinnias, allowing them to span over all three canvases.
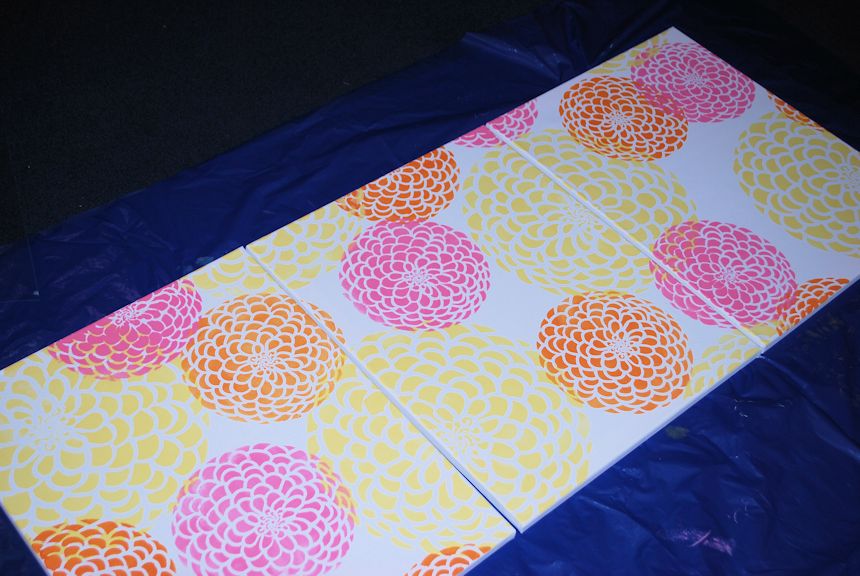
Once those were dry, I stenciled pink and orange extra-small zinnias over top, still using the roller. I did learn to be careful not to roll past the edges of the smaller stencil…oops!
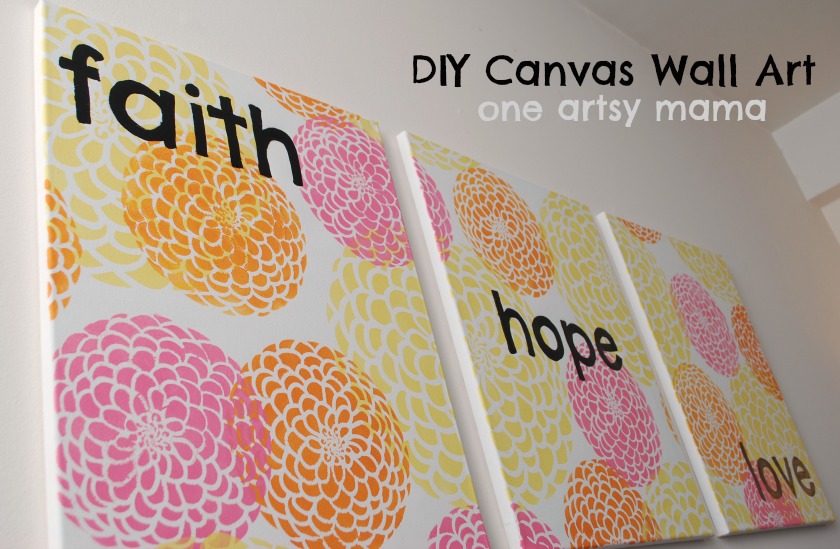
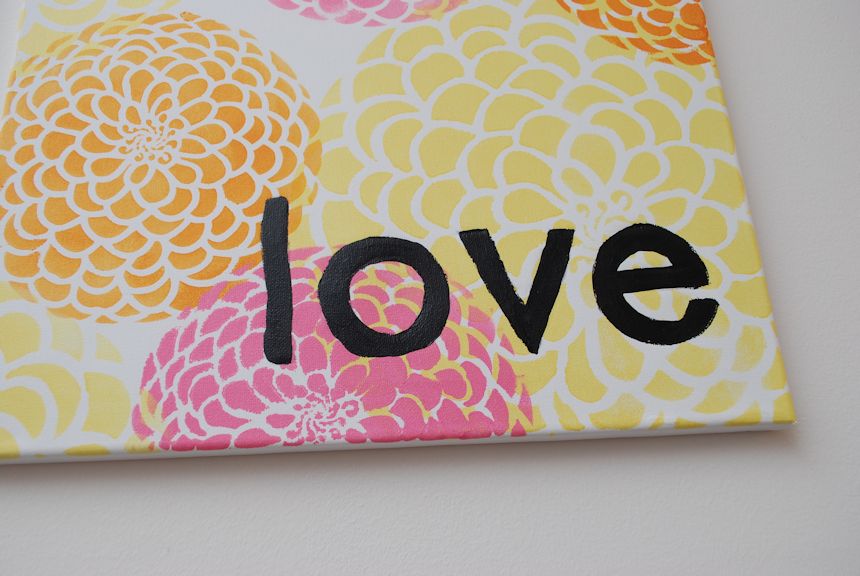
The final step, once all the flowers were dry, was to add the words. I went into PicMonkey and typed out what I wanted, then printed it on computer paper. I taped the paper on top of the canvases and used pencil to trace the letters onto the canvas, then painted inside the pencil lines using a small brush. {This is what we non-Silhouette owners have to do…haha}.
This is how they looked as they finished drying. I have to give hubby credit for the idea of staggering the placement of the words. Nice one, honey!
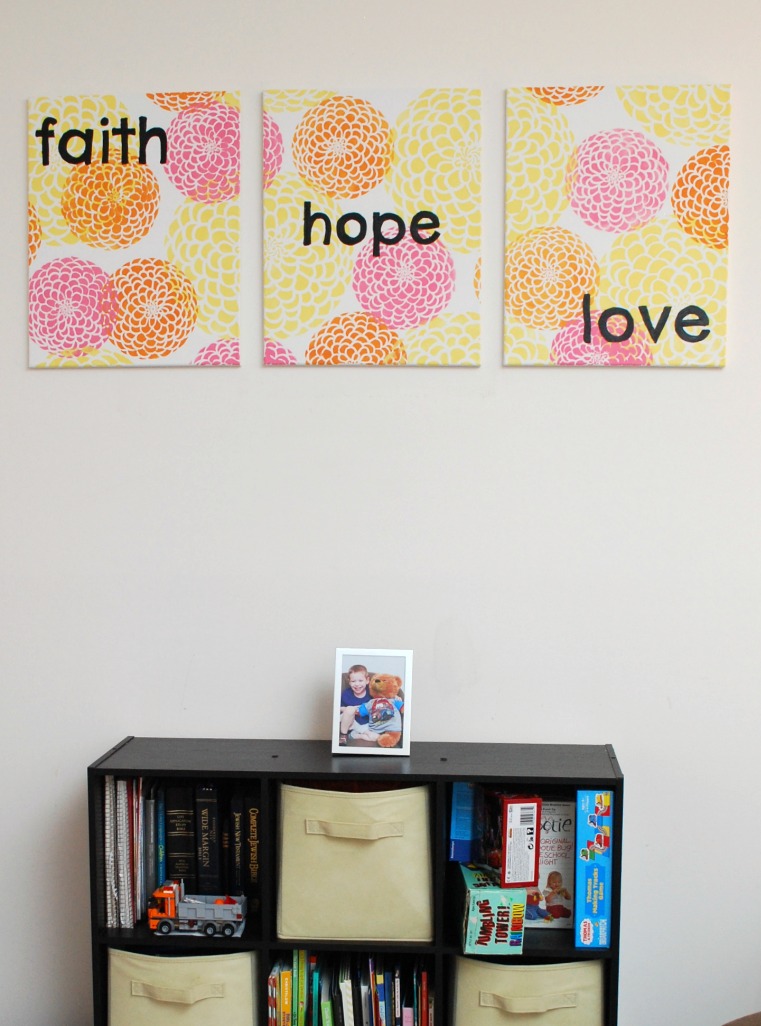
And, here they are on the wall. Originally, I intended to stagger them in the stairwell, but then decided they needed a more prominent home.
I really really
reeealllly love the way they turned out. Thanks,
Cutting Edge Stencils! You’ve got a friend in this Artsy Mama!
And…just so you know, they’re offering One Artsy Mama readers a special discount; 10% off any purchase with the code OAM10.
Happy Crafting!


I LOVE IT!!! Seeing this makes me wish I had been more liberal with my flower placement in my zinnia stencil project. I love how yours interact and I love the colors!!
Wow! I absolutely LOVE these! Just gorgeous!
You Smoked this Amy! I absolutely adore the way this turned out! What a nice bright cheery – makes me smile canvas art you created! Nailed it , and I second the motion on the love for Cutting Edge..they rock!
Jen
Great project!! I love the color and how you placed the words and the bigger sized zinnas! I can’t wait to get my stencil now!:)
Amy, these are gorgeous! LOVE them!
This looks great, don’t you just LOVE Cutting Edge!?!
Your canvases turned out great, Amy! I love the color combination and the way you overlapped the flowers. I won a Cutting Edge stencil awhile back and they immediately became my favorite- so easy to use and clean up, and it was my first time using a roller as well-wow, so much easier than a brush!
I love the stencil pattern you chose! And the colors are so fun and cheery. Great project!
LOVE the fun colors! I love how you show us the old fashion way of doing things…I don’t have a silhouette yet either…:(
wow I love your project so much! It’s so inspiring.
Wow!!! I love your latest creation…Great colors and such a fun pattern. You do nice work…
i love the color choices. they’re very cheerful and fun! thanks for linking up to tip-toe thru tuesday!
I love these colors! And using the roller is such a great tip! Pinning it now 🙂
I really like how this turned out. I’ve never used a stencil (yet) but seeing you do it with a roller sure makes me what to try it. Love the colors too~Awesome job!!
Those are beautiful canvases! I love Cutting Edge stencils.
They turned out so bright and beautiful! So need to just go ahead and order a Cutting Edge Stencil!
Amy, these are gorgeous! I would totally hang them in my house!
Blythe
I love them – and I love the colors you chose! Its perfect 🙂
Thanks for linking up to our Keep Calm & Link Up party – hope we see you again next week 🙂
These looks simply fantastic and you have done such a good job! They look very professional. Great work!
Love it! Love the idea of using a roller. Found you @ Tip Junkie. 🙂