My blog touches on a little bit of everything. I post a ton of tutorials like my:
with a twist. I also like to share
.
I think my specialty though is tutorials. So, I have a tutorial for you today!
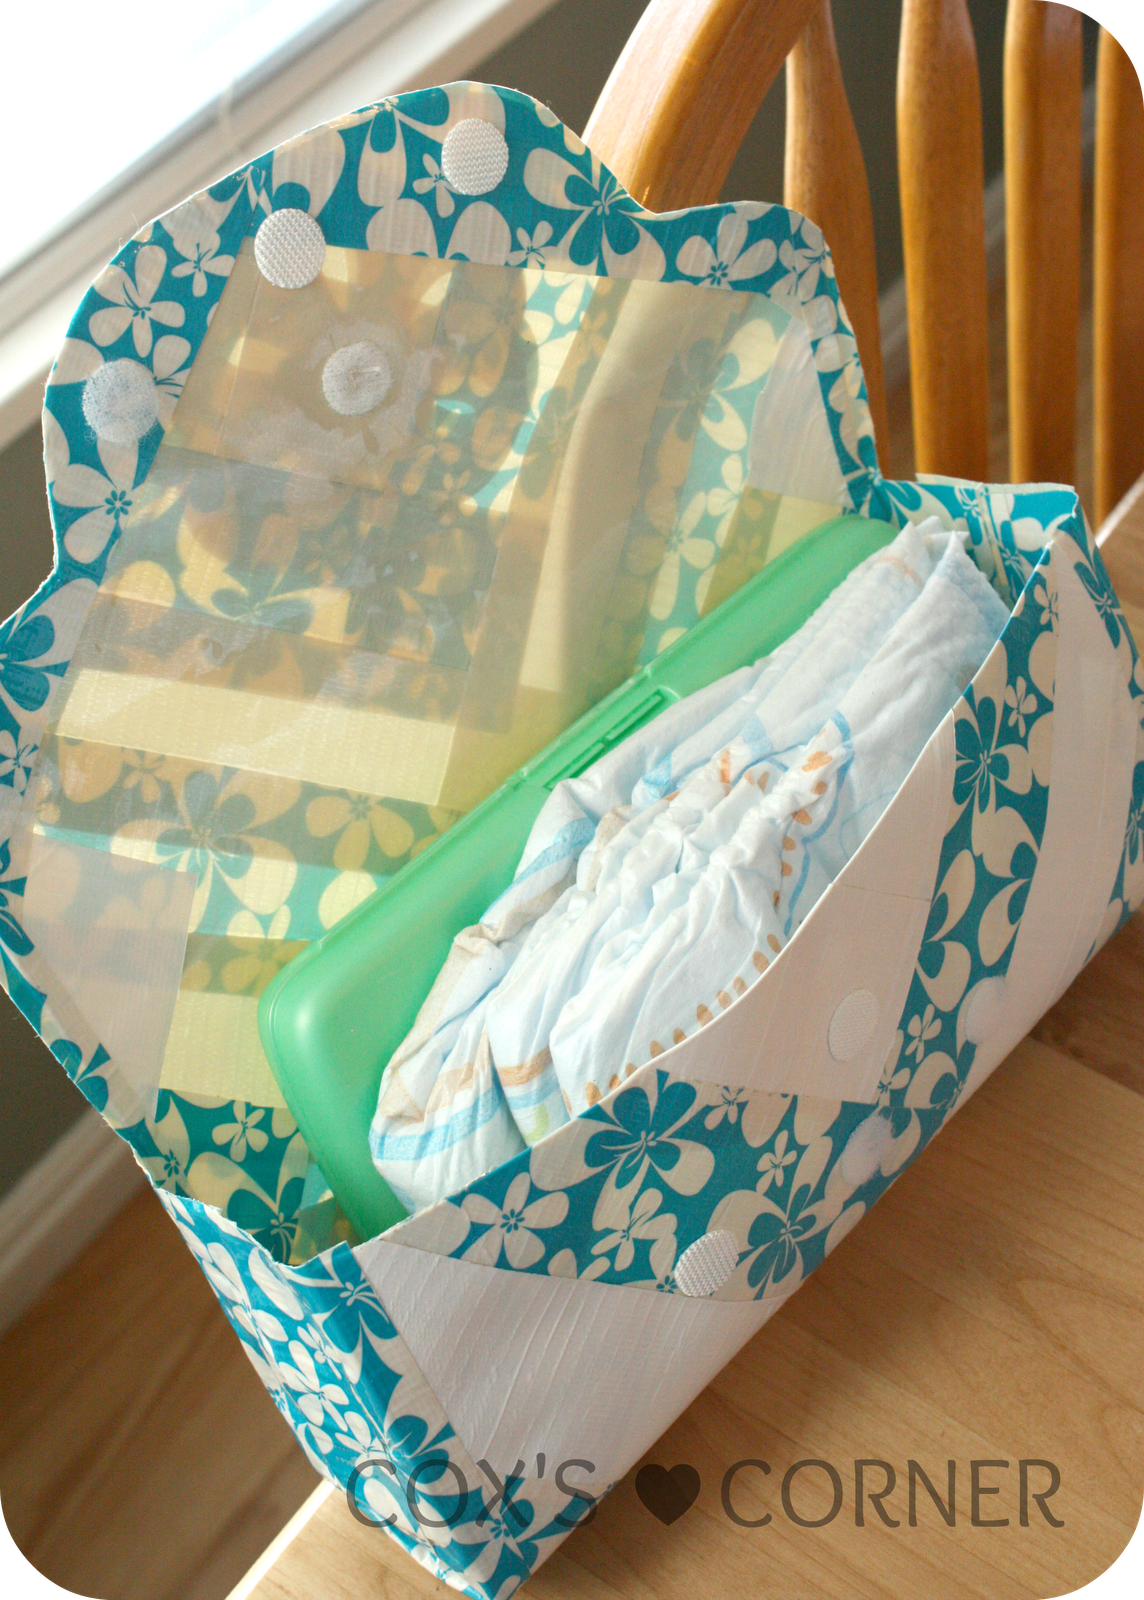
I made mine a little cutesy because I had a specific purpose in mind for it. I wanted mine to be a diaper clutch. With different colors of Duck Tape you could EASILY transform it into a classy clutch to take out on the town! Could you imagine using the a lace print of Duck Tape (it exists!) and a beautiful blingy button?! Talk about awesome!
2 rolls of Duck Tape in different colors if you’d like to do a chevron type pattern or alternate stripes. div>
Scissors (a sharp pair that you don’t mind getting gummy from tape residue)
Clear Vinyl (you can also use a plastic table cloth, trash bag, cute fabric etc.)
Velcro (I recommend heavy duty strips…I just didn’t have any on hand…)
Need & Matching Thread
Button
Now, unfortunately I don’t have any exact measurements for you. Here’s what I did:
Step 1: To start out I cut my vinyl. I went with vinyl so that I would wipe it down since it’s a diaper clutch…heaven knows what you could get on there…
I put the amount of diapers I like to carry in my purse and a wipes case on my vinyl and wrapped the vinyl around the items to see where I needed to cut it. I then cut my vinyl to the measured length. I wanted to add a scalloped edge so I folded it in half (hot dog style) and Free handed the scalloped top. You could make yours come to a “V” or just straight across. It’s all about personal preference!
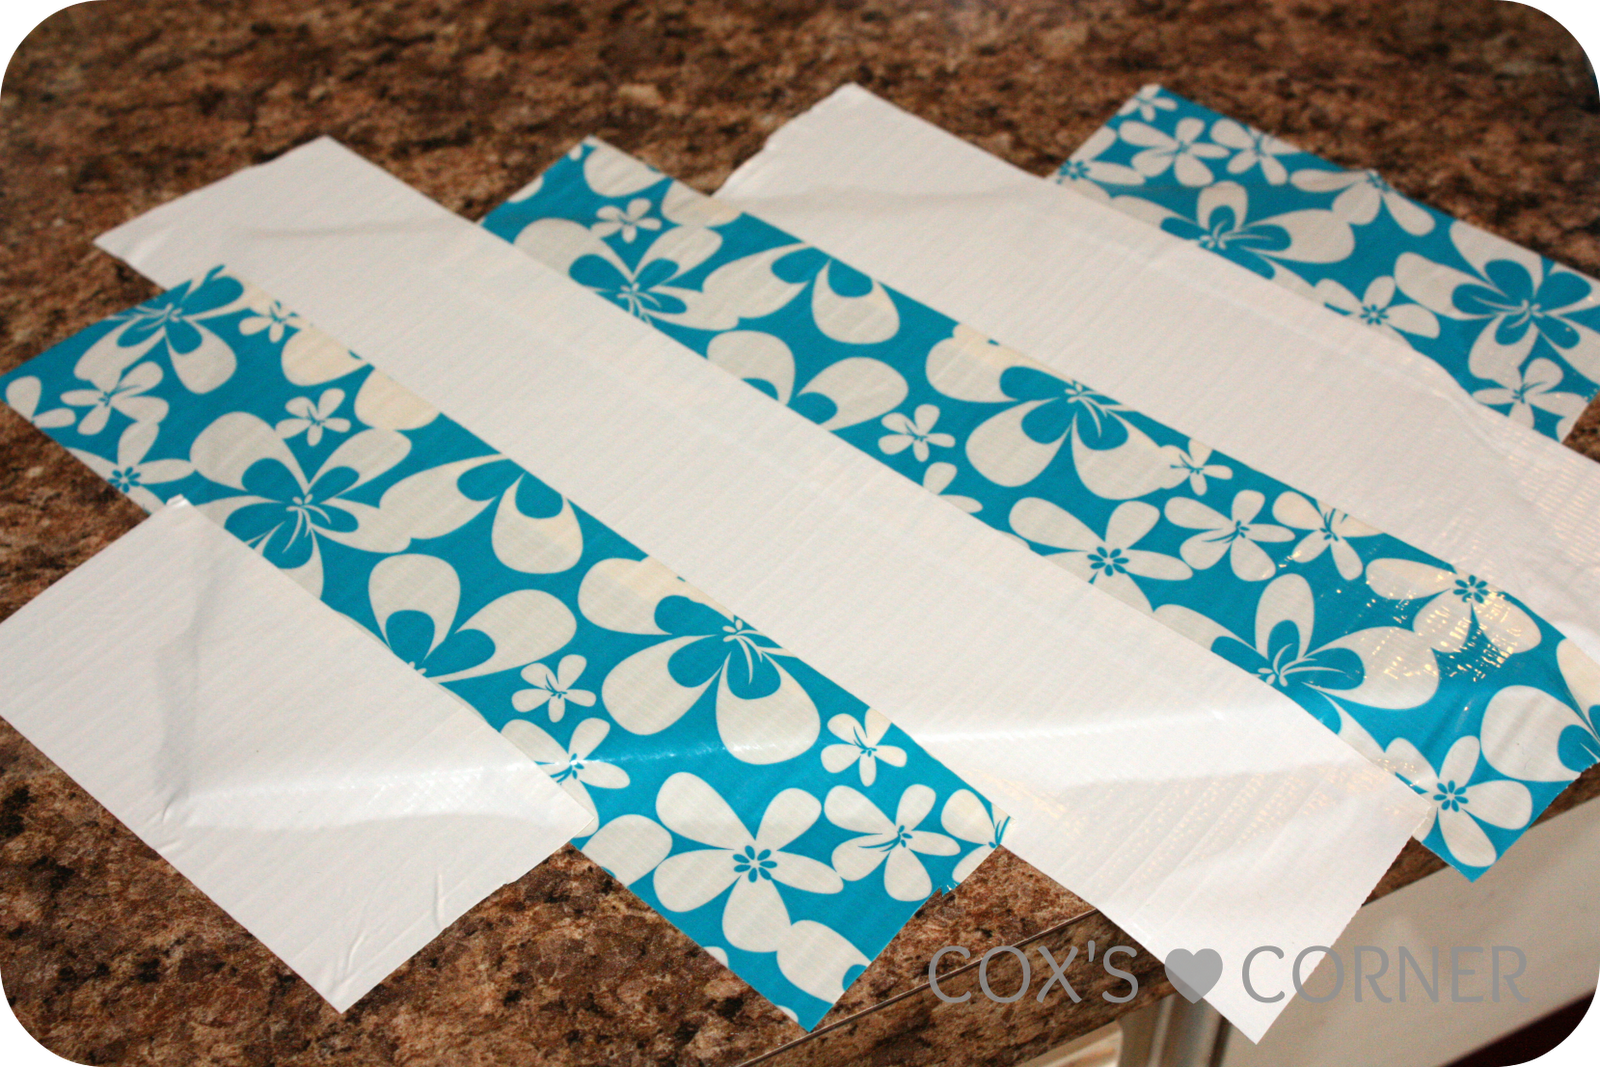
Step 2: Fold your lining into fourths (if you are making my chevron pattern) OR if you are doing an alternate strip pattern or solid color you can leave your lining flat. Anchor your lining down using two small piece of tape. I have found Duck Tape easily peels off of counter tops and wood tables…as far as other surfaces…I have no idea, so be careful where you anchor it.
Step 3: Alternate between your two tape colors. It’s ok if you go over the edges a LITTLE. By doing so you’re providing yourself with a guide on the other parts of your bag. Make sure your ends are cut straight. It doesn’t look very good if they’re choppy.
Step 4: Unfold your vinyl once, so it is not folded in half. Make sure where your tape was hanging if the sides that it is nicely attached to your vinyl. Start taping your other half of vinyl following my pattern above. To do the other half simply refold your lining so the blank side is showing and repeat steps 3 & 4!
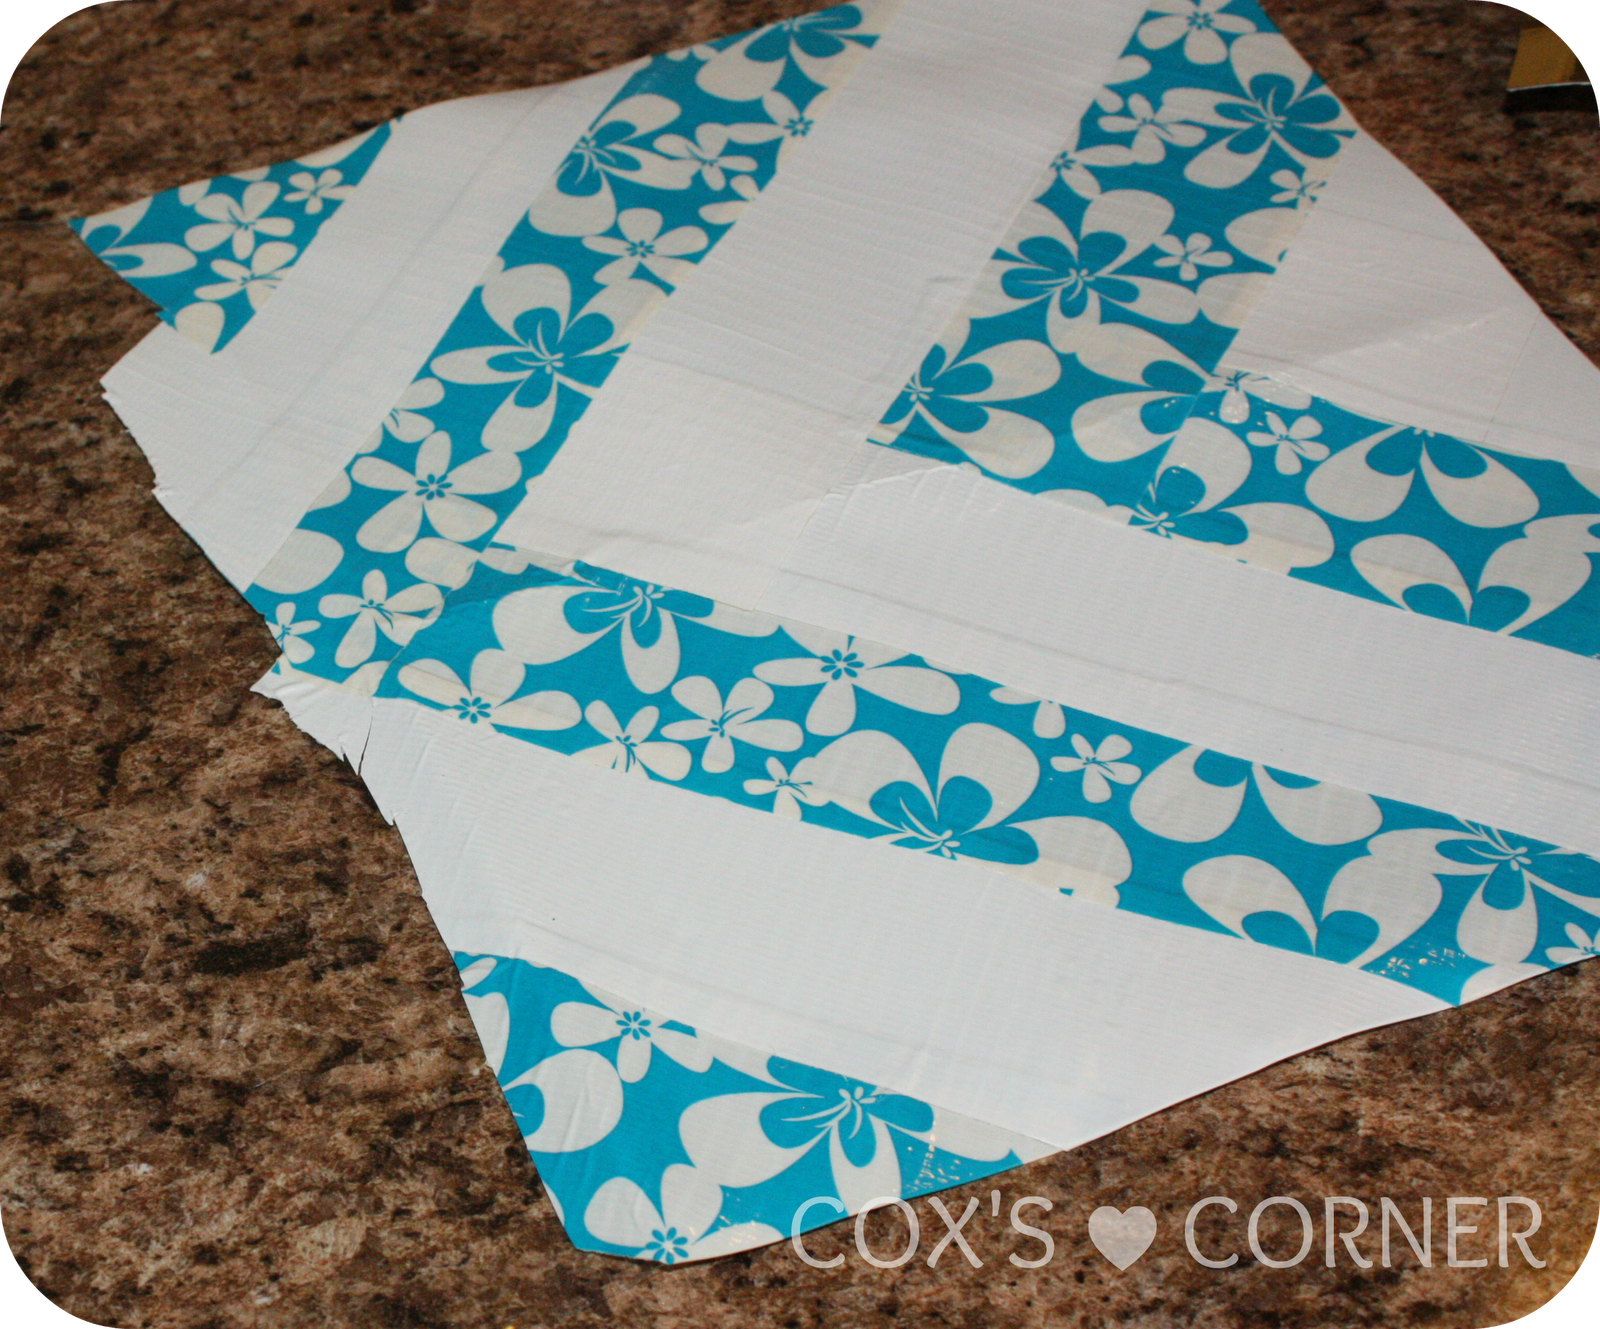
Step 5: Add a strip of duck tape along each side of your vinyl/lining, then flip your vinyl over and put a strip of duck type right on top of each strip that you just put on the sides. So that the sticky sides are together. In the picture it shows a second strip face up and ready for the other strip to be placed on top of it. I decided it made the bag too wide so I took it off.
This picture will confuse you a little. Instead of having your lining be on the bottom and duck tape up like pictured above. It is best to have the duck tape on the bottom and the vinyl facing up. So when you fold your clutch the duck type design shows on the outside.
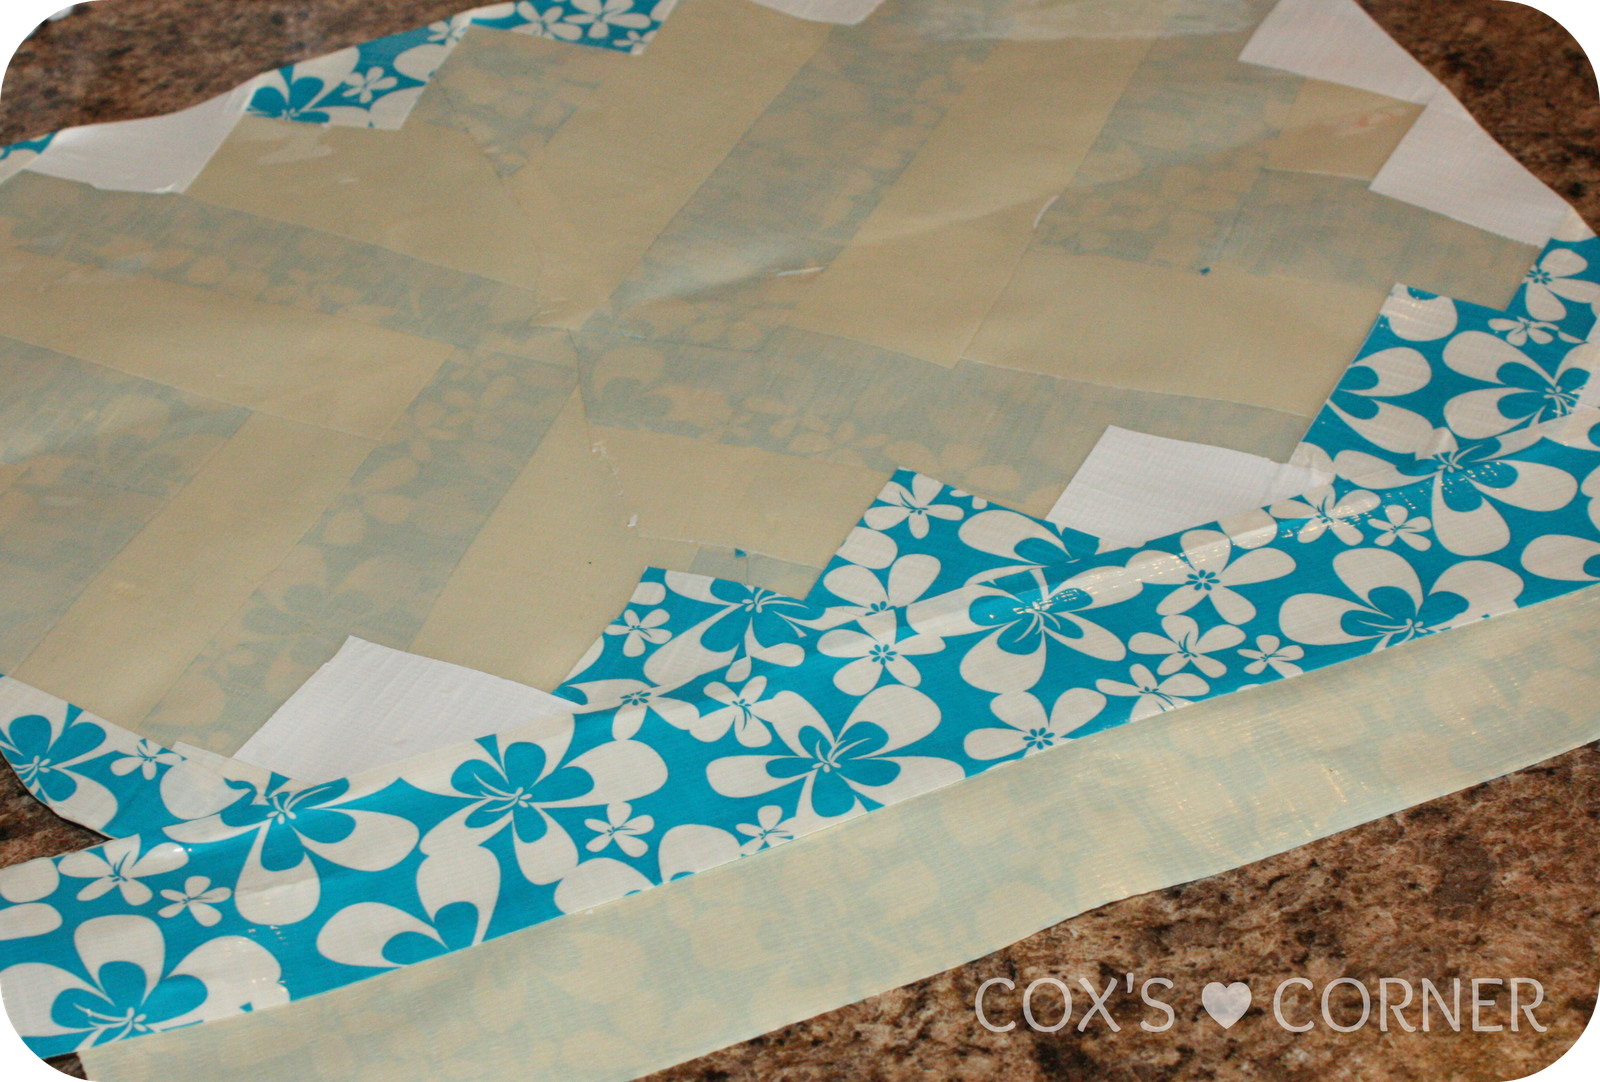
Step 6: With your clutch completely flat, bring up the bottom part of it and fold it almost into thirds. You don’t want to fold over the top just yet. I put my diapers and wipes in to make sure the pocket I was creating would be wide enough.
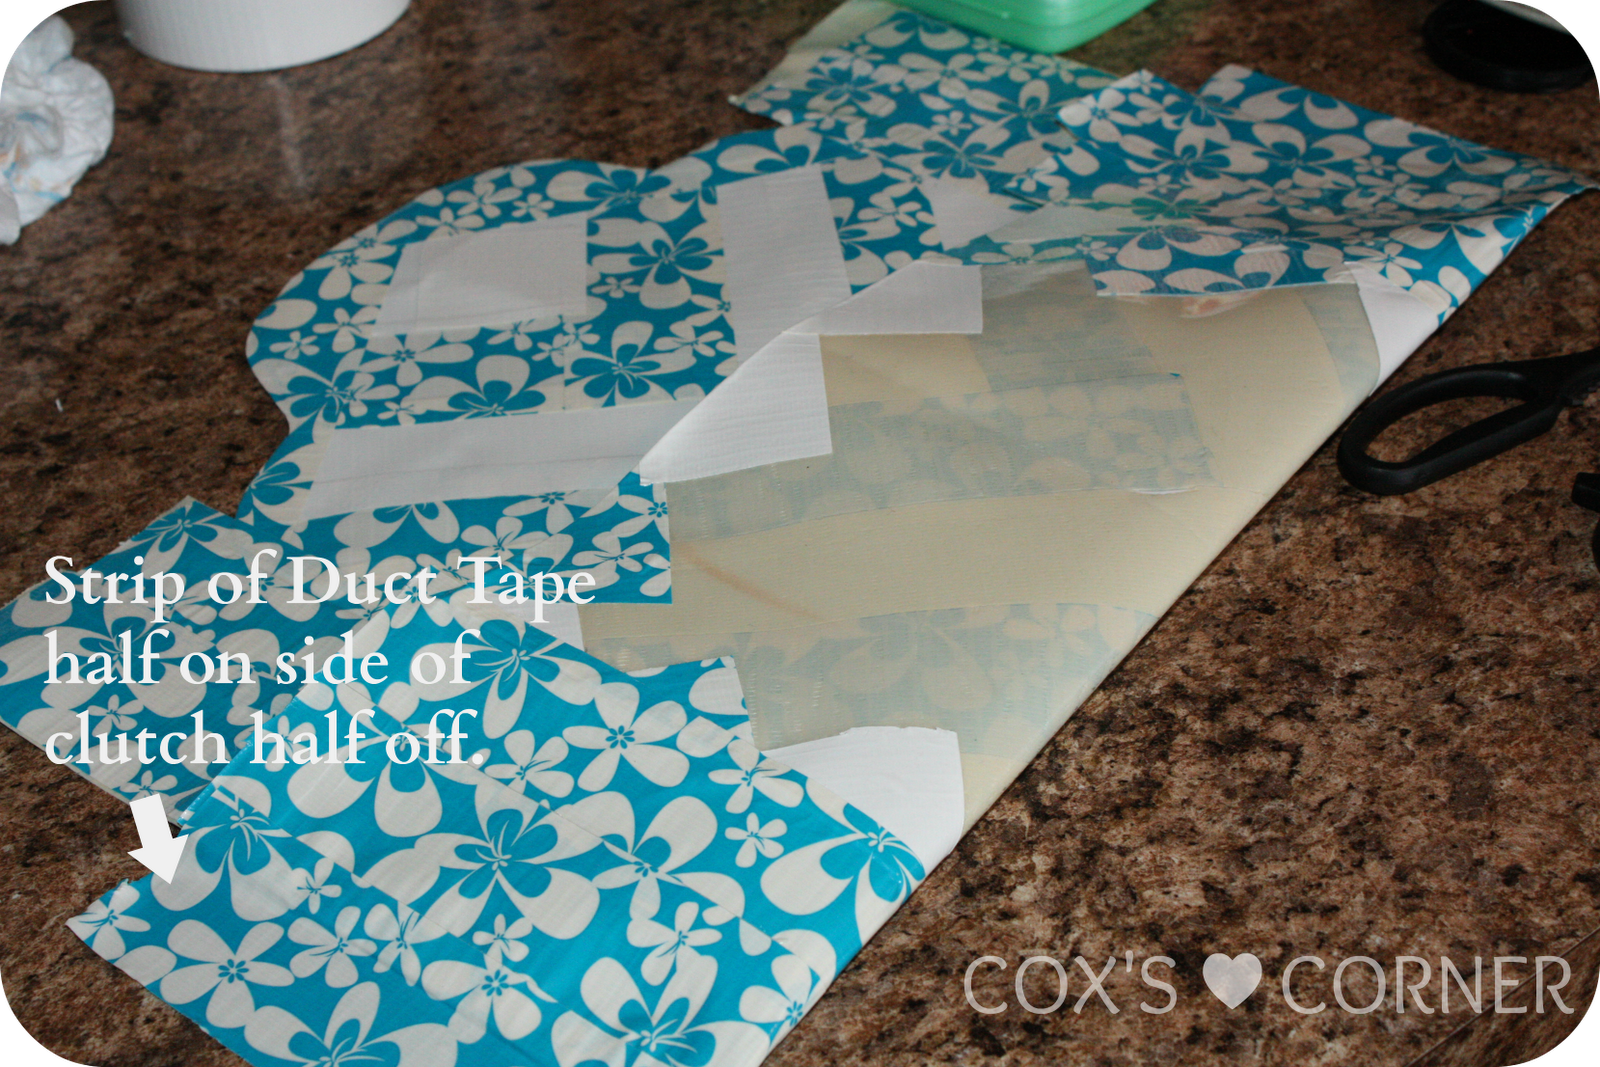
Step 7: Take a strip of duck tape long enough to go along the sides of the folded part (see above picture) and place it half way on your clutch and let half hang over the edge (see picture again). Then fold your tape over onto the other side of your clutch so that now your two sides are connected. Repeat with the other side.
This next part is a little tricky to explain so please refer to the picture below.
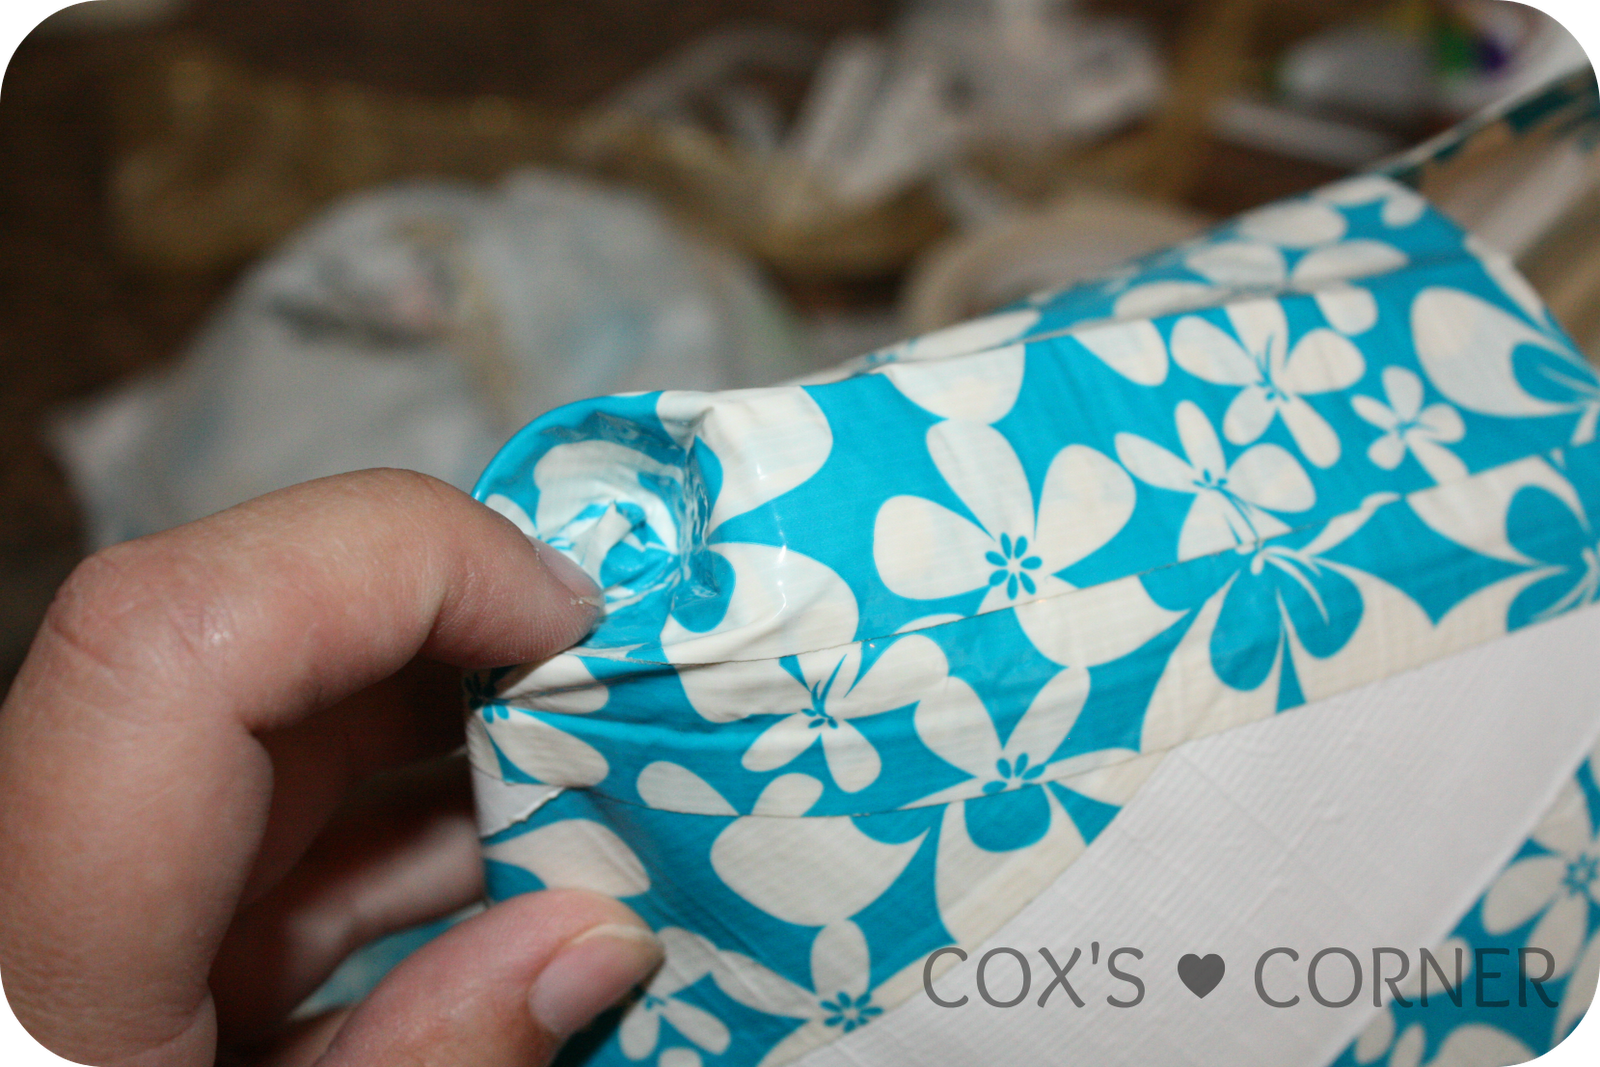
After your sides are connected if you spread out your clutch, it looks a little funny and won’t nicely hold everything. So you flip it upside down and pinch the corner. It will create a triangled looking point. See below? That’s what you want!
Step 8: Take your finger and put it at the tip of your triangle and push it through the bottom of your bag.
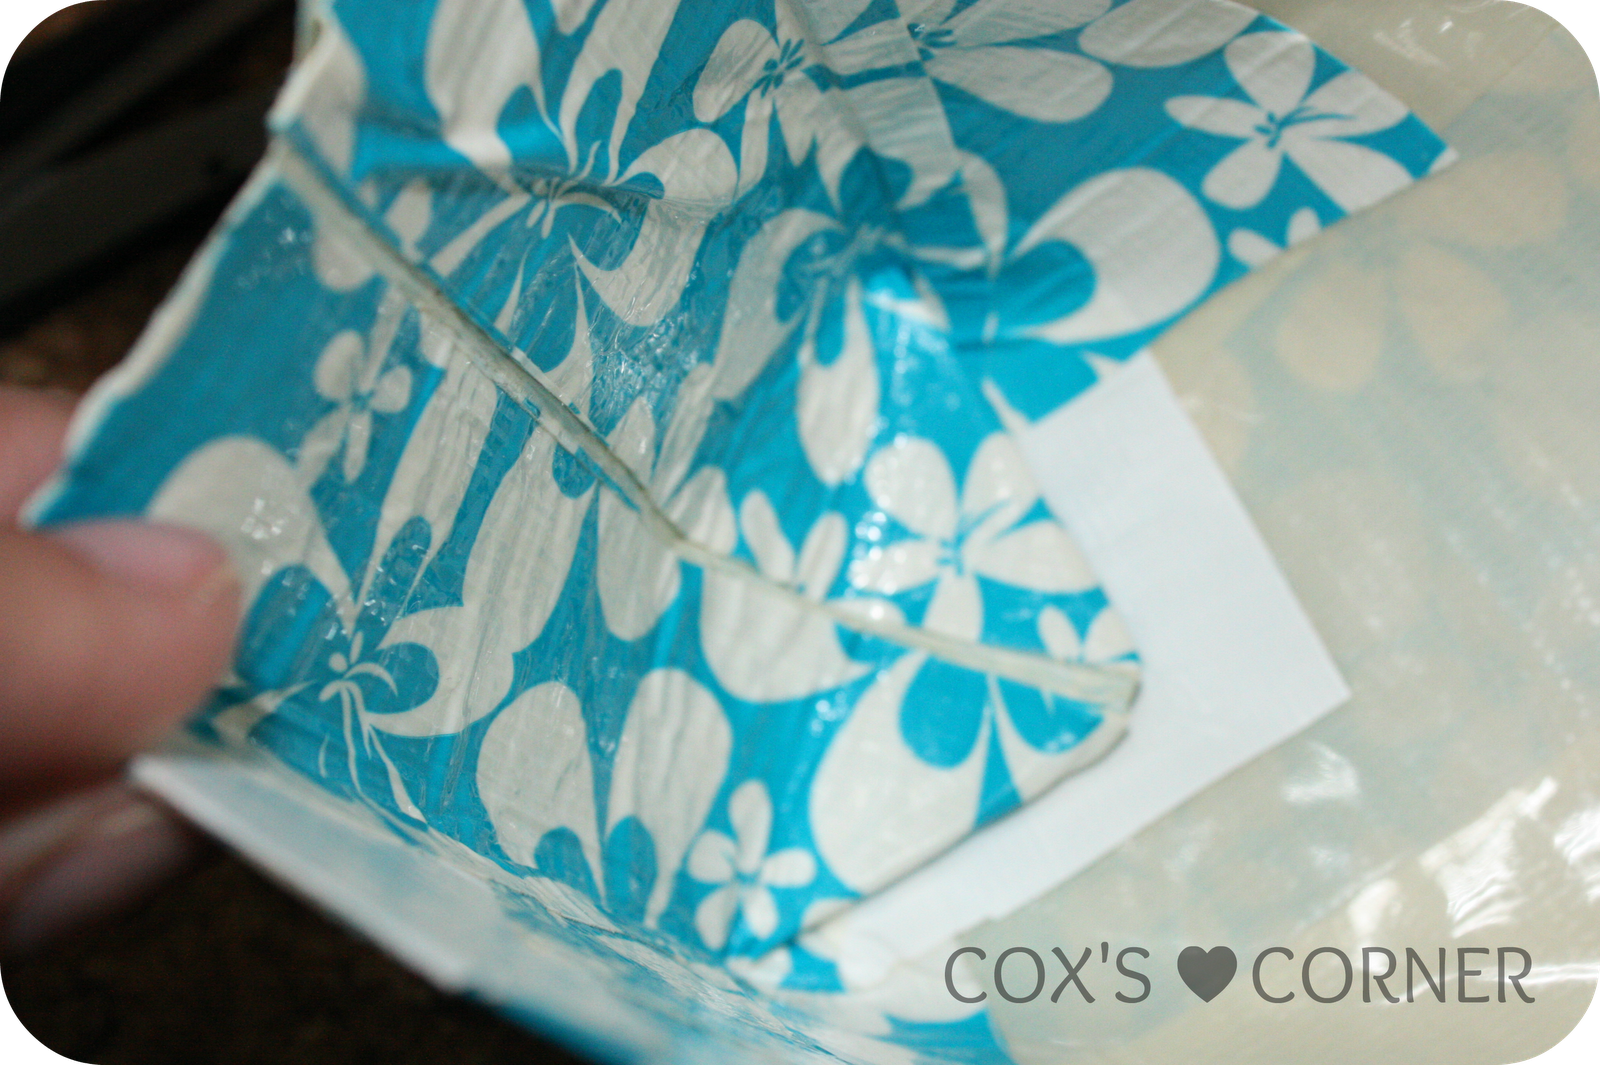
It should now look like this:
Step 9: Repeat with the other side and anchor it with a strip of duck tape. You’re almost done!
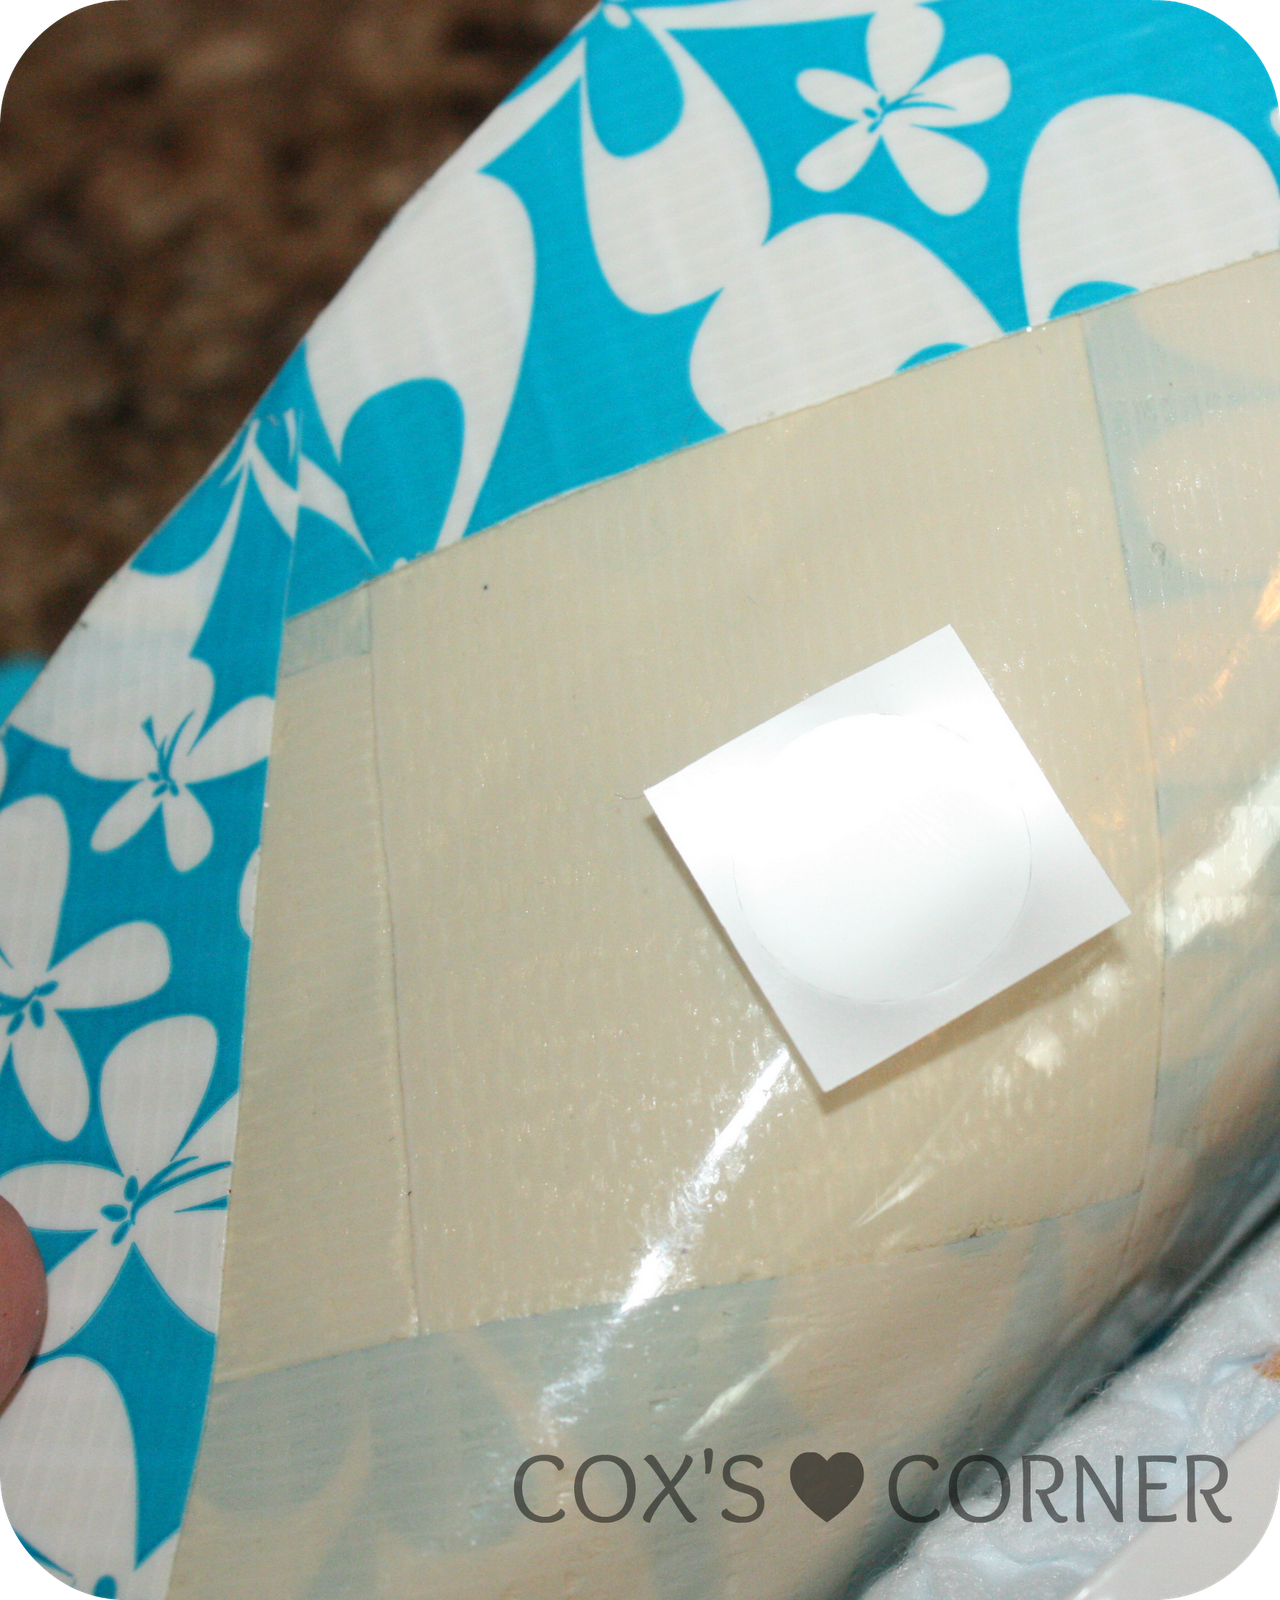
Step 10. Grab your self adhesive Velcro and make sure both parts of it are attached! Peel off the paper on one side. Attach it to the top inside flap of your clutch. Peel of the paper on the other side and fold the top of your clutch over. Press down where you want your clutch to close. Now your velcro is attached perfectly!
Step 11: Optional, sew on your button and admire your cute new clutch!
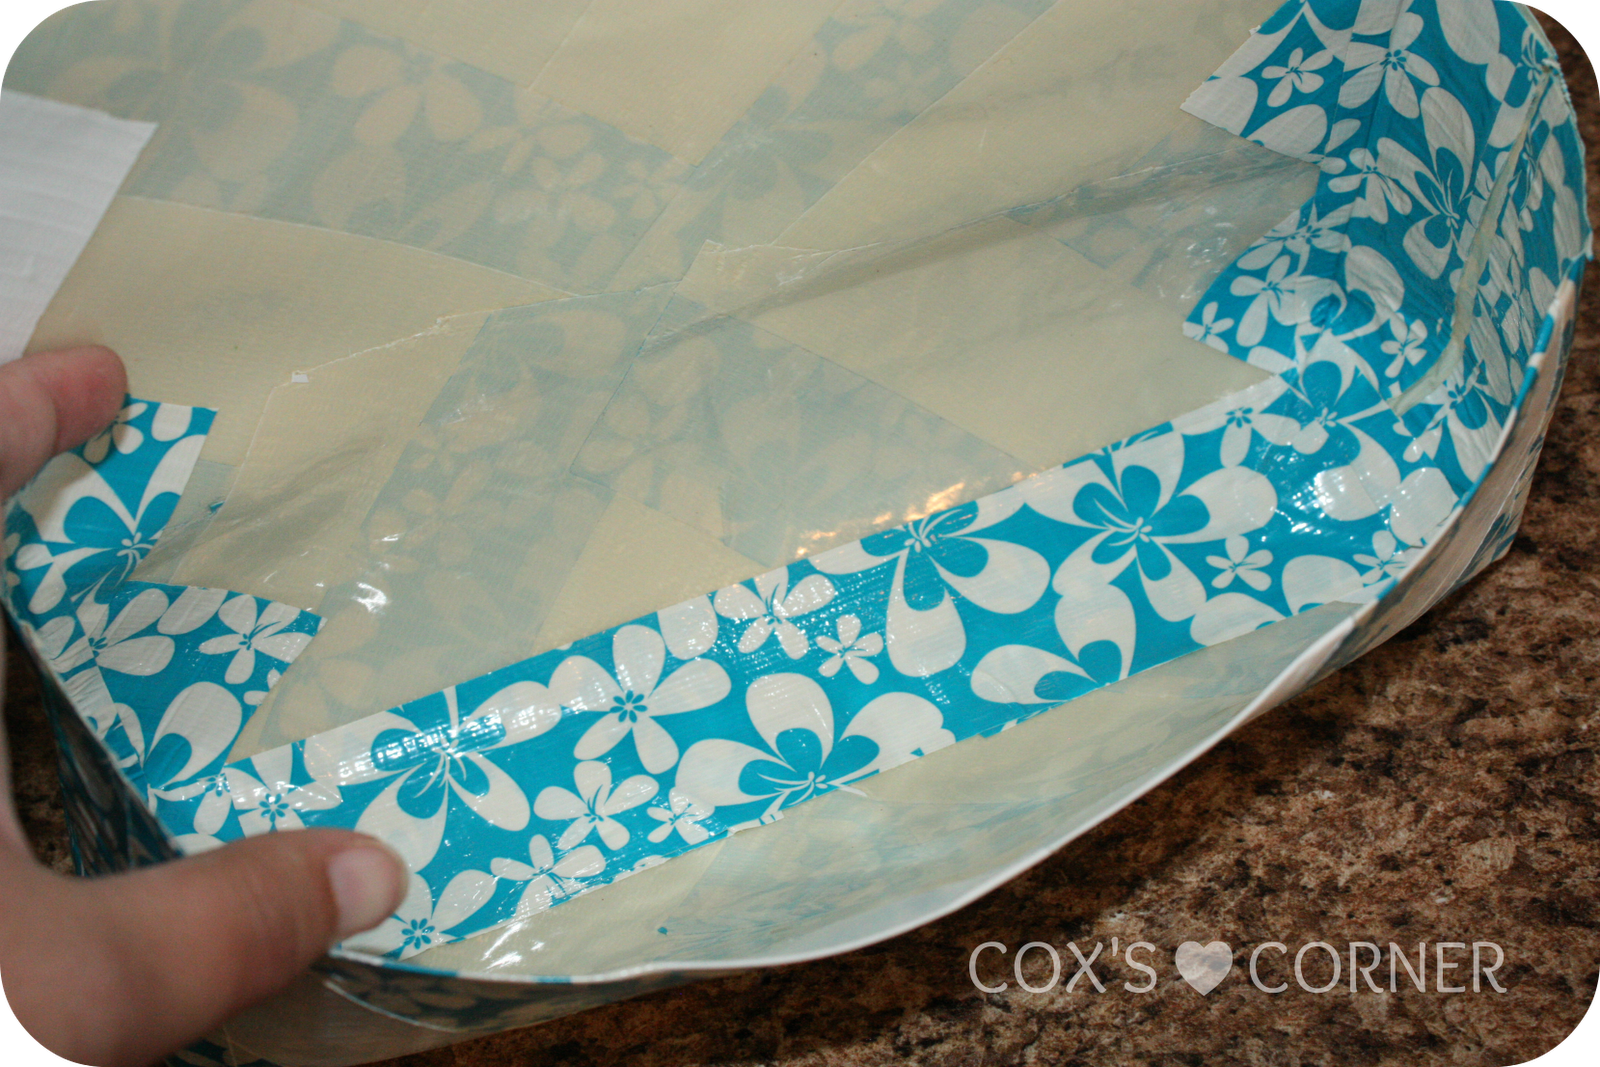
A view from the inside:
And again from the outside:
I hope you enjoyed my tutorial! If you have any questions, please feel free to stop by
Cox’s Corner! You can also find me on
Pinterest,
Facebook or Follow me via
RSS feed!
Amy, thank you so very much for allowing me to come over! You are so kind and talented!

Please remember that all of my tutorials and printables are for personal use only. This post was written by
Cox’s Corner
*******************************************************
Thanks so much, Jess! What an adorable {and affordable} project! Remember, friends, if you liked it, show Jess some comment love!
Happy Crafting!


Amy, thank you so much for featuring me today!
What a fun idea, Jess!
I just love how Duct Tape is no longer just a man’s favorite tool…but also a girl’s craft project!