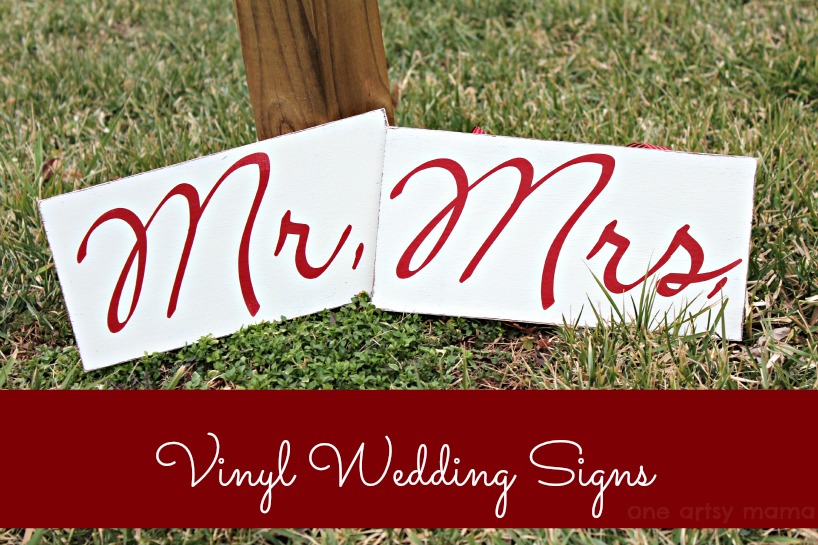
Mr. and Mrs. Signs {and a vinyl giveaway}!
My friend Sara is getting married this October!
Actually, I first met Sara when she was a 9th grade student in the English I class I was teaching {back in the pre-mama, pre-blogger days.} We’ve kept in touch, and she’s helped us out by babysitting LC from time to time.
But it makes me feel better and less old to just call her my friend, so we’ll just use that, shall we?
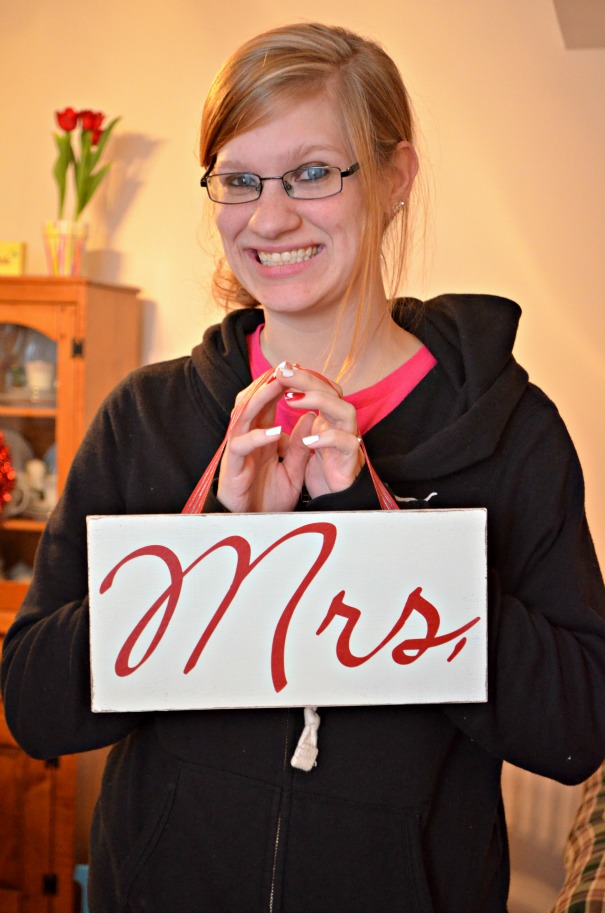
Anyway, she saw some cute “Mr.” and “Mrs.” signs on Pinterest and asked me if I’d make her a pair to go on the chairs at the reception. She chose the size for the signs and the font she wanted me to use, and told me her colors were red and silver. Here’s what I came up with:
Materials:
– 6×12 pieces of wood
– dark red adhesive vinyl {I used Oracal 631, provided by Expressions Vinyl}
– transfer tape {also from Expressions Vinyl}
– acrylic paint
– ribbon
– scissors, hot glue
– sandpaper
– Silhouette Cameo and Silhouette Studio {although you could also cut by hand}
STEP 1: Paint wood dark brown. I know, if you want the signs to be ivory or white, it’s counter-intuitive, but this is what will show through when you distress the wood. Let it dry completely before moving on. Trust me.
STEP 2: Paint over the brown with your desired color. It took me 3 coats to completely cover the brown. Just be patient even when it feels like the paint will never dry.
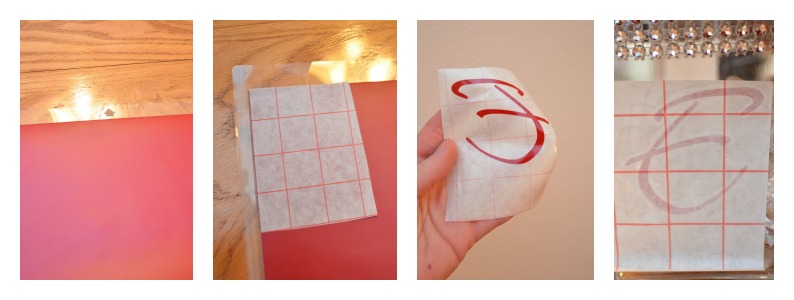
STEP 3: Cut your vinyl. Sara chose the Scrap Calligraphy font, so I typed up the Mr. and Mrs. and sized them to the wood.
STEP 4: Use transfer tape to adhere vinyl to your signs. All you do is peel off the backing of the transfer tape and put the sticky side onto your vinyl. When you peel it away, the cut vinyl will come with it. Then you can use the lines to help you get your words/images straight and properly positioned onto the wood. Rub firmly, then peel the transfer tape away and the vinyl will be adhered in place. The photos below are a sneak peek from another project I’m making for Sara’s wedding, but they show you the process of using the transfer tape.
STEP 5: Distress signs with sand paper. Rub lightly around the edges until the top coats of paint sand off and you can see the dark brown starting to show through.
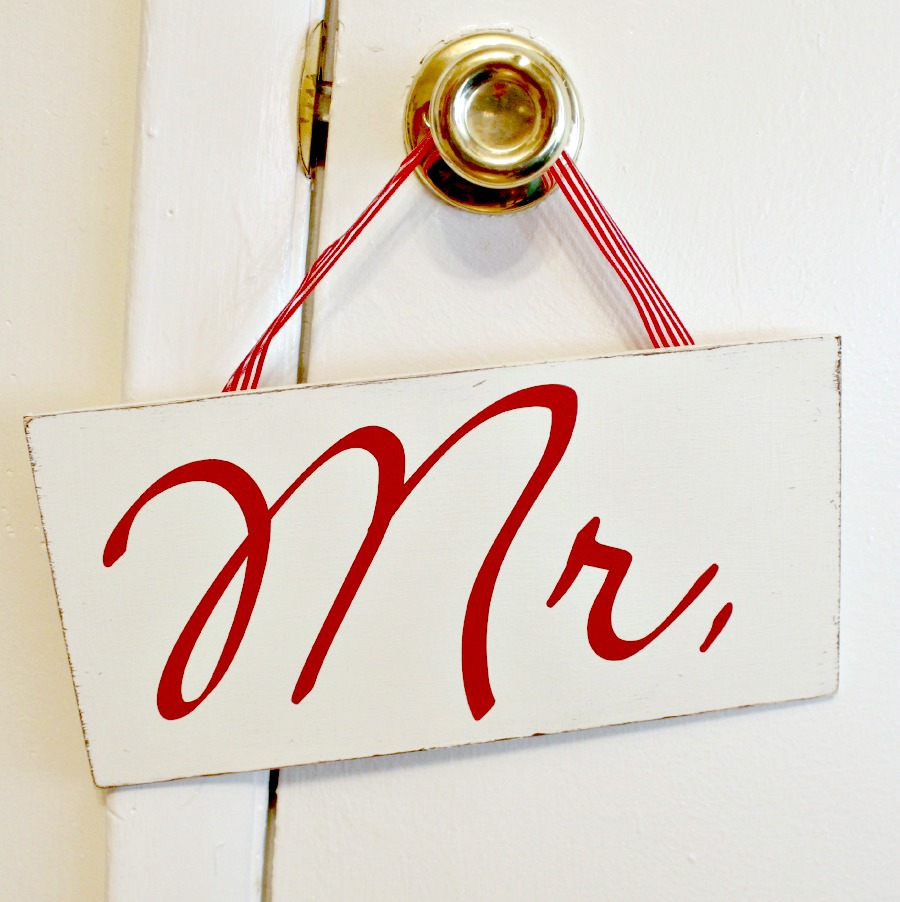
STEP 6: Glue ribbon to the back of each sign.

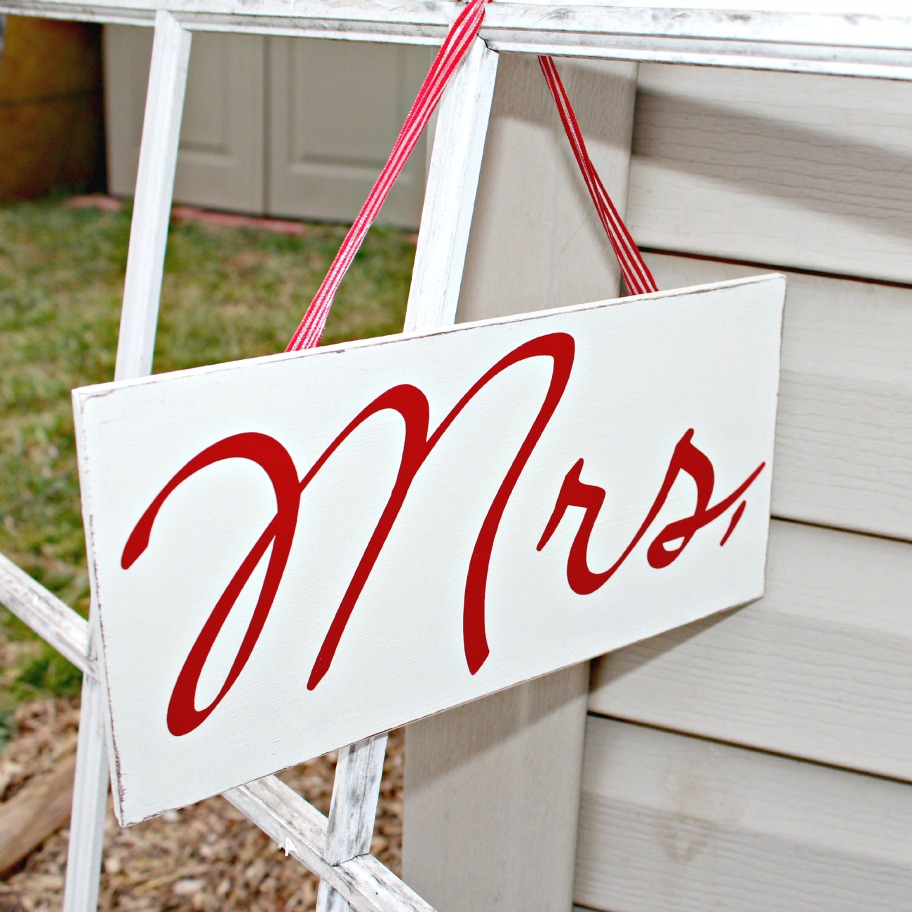
Sara and Michael both loved the finished product {whew!}. Now, they just have to wait until October to use them! Isn’t she the cutest bride-to-be? Congratulations, Sara, and thanks for letting me help you make your special day extra-special.
Meanwhile, I have to note that the Oracal 631 vinyl as well as the transfer tape from Expressions Vinyl were so easy to work with and made such a great-looking finished product. Plus, my order arrived very quickly, which allowed me to get right to work. {This is important when you’re an impatient creator like me!} If you’re looking for high-quality, affordable vinyl, I definitely recommend Expressions Vinyl as a place to buy it. Not only do they have the kind I used, they also have glossy, permanent outdoor, and specialty vinyls, including iron on and t-shirt vinyl. There are a variety of sizes available and a huge variety of colors.
Amy, they turned out lovely. And how meaningful that a friend made them for the bride and groom.
I would purchase Indoor Vinyl – 9″x10yrd.
Burgundy. 🙂
I would buy either the Oracal 631 Indoor for Cricut or the heat transfer kind for Cricut. I love both!
I would buy some transfer tape and various colors of vinyl.
I LOVE vinyl and a girl can never have enough!
I would buy some transfer tape, and some various colors of vinyl for my Silhouette.
I LOVE vinyl and a girl can never have enough! I’d probably buy some HTV since I haven’t tried that kind out yet
I would buy some vinyl sheets and hopefully quit being so scared of cutting it on my Silhouette!
I love the glitter vinyl…pretty colors…
I love that this company sells it by the sheet! I would definitely get an assortment of colors to have on hand for whatever color a project may need!
I love that this company sells it by the sheet! I would definitely get an assortment of colors to have on hand for any project! Who knows what you’ll need!!!
I would get glitter vynl!
I would get heat transfer vinyl to make tshirts.
I’d buy a roll or two 🙂
I really want to try some heat transfer vinyl and start making some t-shirts for the boys!
Thanks for the giveaway! Awesome! I would probably use the credit on some vinyl-or something practical like mats and blades 🙂
I would buy a 12×24 mat and some vinyl =)
I would probably get either the inkjet printable vinyl or some chalkboard vinyl (ooooh, the possiblities are endless!!).
The print vinyl looks awesome!
I would definitely buy a roll of brown vinyl since I use it the most and some transfer tape!
I would buy a roll of brown vinyl, my most used vinyl color, and a roll of transfer tape!
I LOVE these wedding signs. You are having so much fun with your new vinyl cutting machine! I’ve decided I’m definitely going to get one….where do you think I would get the best deal?
I’m thinking I need some T-shirt vinyl – thanks for the giveaway!!
I’ve been wanting to try heat-transfer vinyl!
I think the T-shirt Vinyl looks awesome!! I could use that for sure.
I would love the iron vinyl
I have a list of things to buy. Mostly heat transfer vinyl.
I would love some of the polka dot vinyl. Thanks for the give away.
my daughter would love the glitter vinyl
THe glitter vinyl would make my preschooler’s day.
Glitter and polka dot vinyl!!!
Glittter and Tshirt vinyl!!