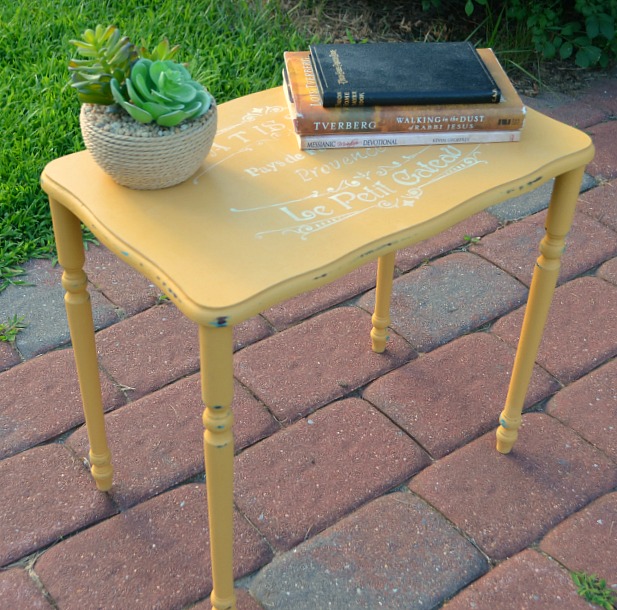
Yellow Chalk Painted Table
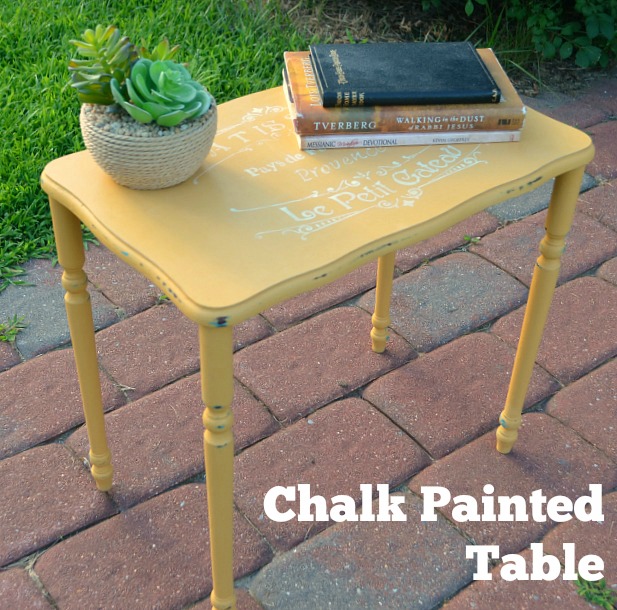
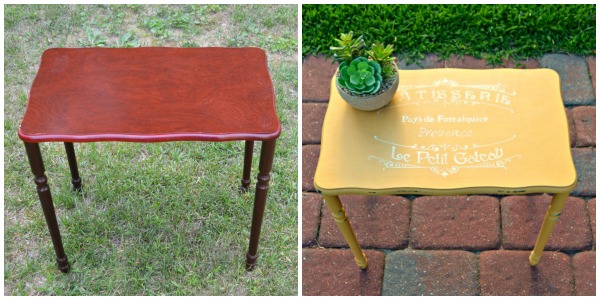
As fun as it is to create a project with all new materials, there’s something incredibly rewarding about taking an existing piece and upcycling it into a redone masterpiece! Ever since I first repainted a scratched old nightstand a few years ago, I’ve been fascinated with the idea of giving furniture new life and making it look like a completely different piece. Today, I’m so excited to show you my latest furniture project! I found this tiny table at our local Goodwill for just $7 and snatched it up immediately!
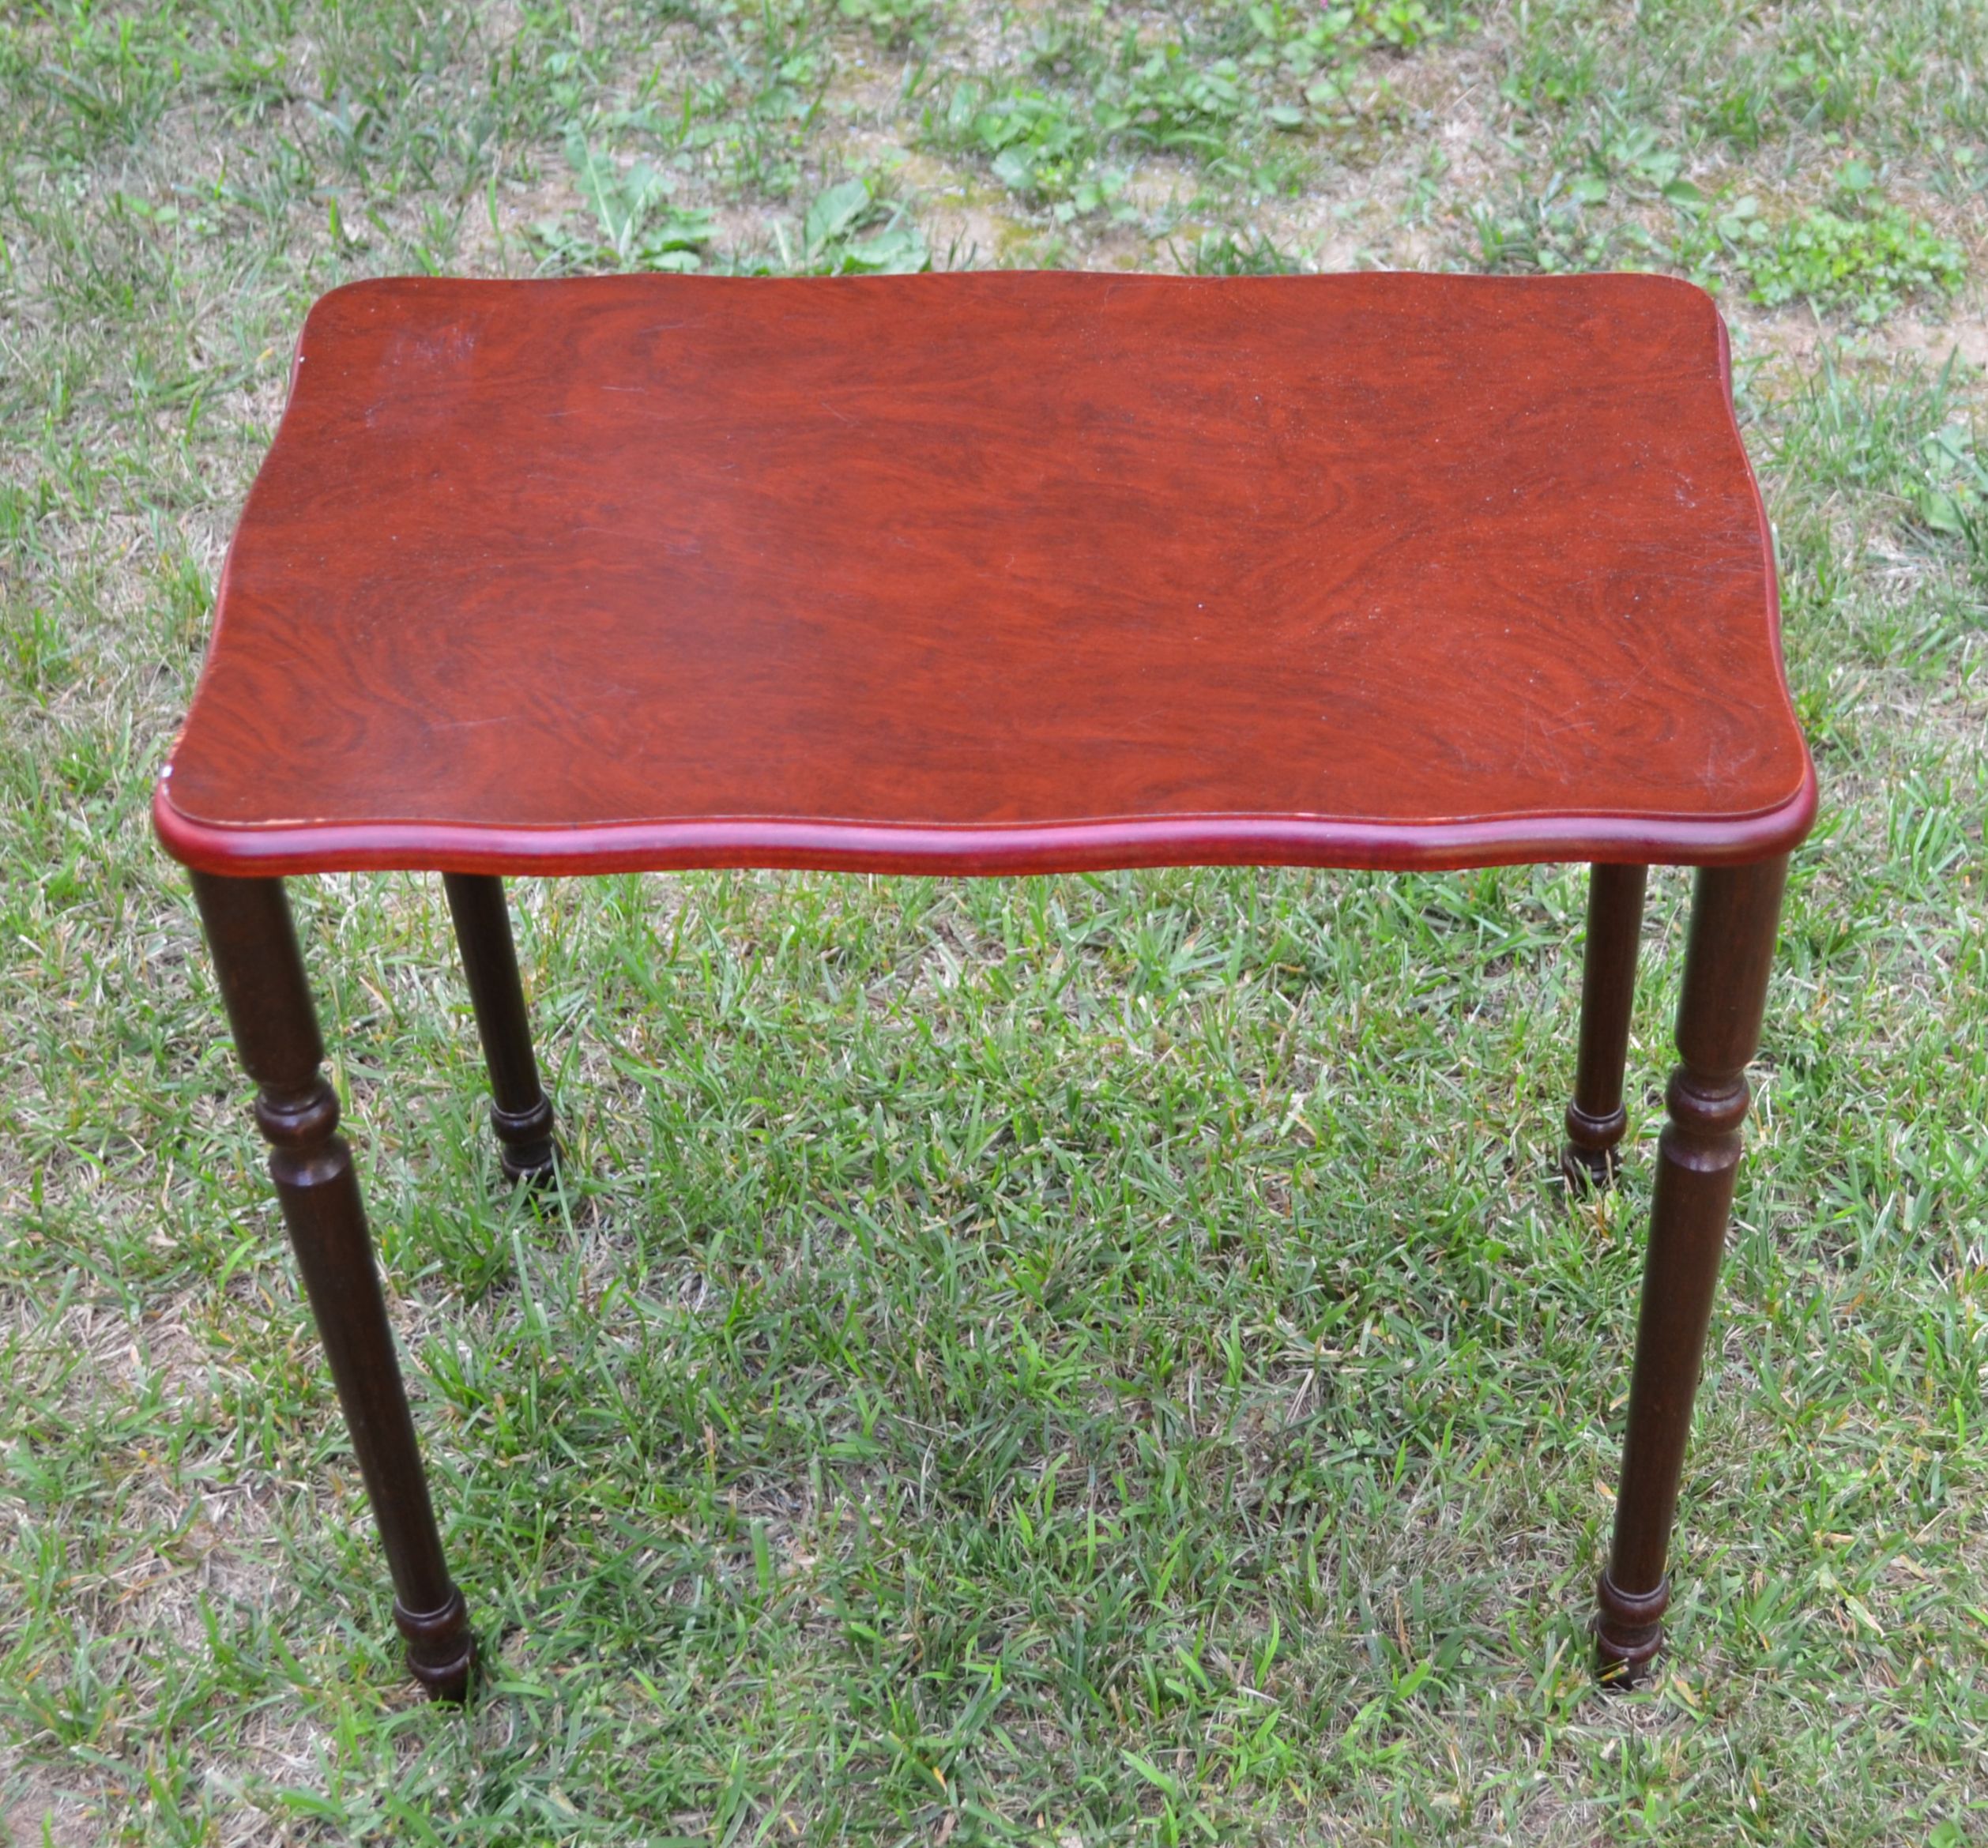
I wasn’t sure what I wanted to do with it but I knew I’d come up with something! My original plan was to spray paint it turquoise, so I tried giving it an initial coat. Then I realized that the gloss look wasn’t actually what I wanted at all. So, I sanded it a bit then painted over it with chalk paint instead. Much better! Here’s how I did it.
CHALK PAINTED TABLE

Materials:
– Folk Art Home Décor Chalk Paint: Vintage Mustard
– Folk Art Home Décor Wax: Clear
– Martha Stewart Vintage Décor Paint: Wedding Cake
– Sand Paper
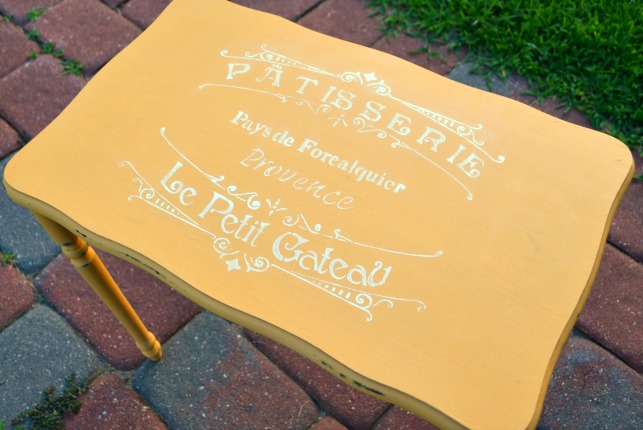
– DecoArt Stencil: Patesserie
– Sponge brushes
– Soft, lint-free cloth {I use an old sock}
– Painter’s Tape
First, I gave the entire table several coats of the Vintage Mustard paint, allowing it to dry completely between coats. Well, at least that’s what I was supposed to do. In reality, I kept trying to rush the process, which never actually works because you just end up taking off the wet paint you just put on.
Once the paint was dry, I taped my stencil in place and used a sponge brush in white paint to carefully stencil the image on top of the table. I’m currently obsessed with anything that looks like a vintage sign or label, so as soon as I saw this DecoArt stencil in Michaels, I knew it was exactly what I wanted.
The next step was to distress the table using a medium grit sand paper. I recently learned a great tip; when distressing, only rub your sand paper in one direction instead of rubbing back and forth and you’ll get nicer results. I distressed around the edges and on the legs. It ended up being kind of cool that I’d used turquoise paint first after all because a bit of it showed through when the yellow paint came off and it was a neat effect. I love that there’s no right or wrong when it comes to distressing; you can do as much or as little as you like, it’s all about personal taste.
Finally, I rubbed clear wax over the entire table to seal and protect it before putting it to use. I just put an old sock on my hand like a puppet, then use it to apply the wax in small circular motions.
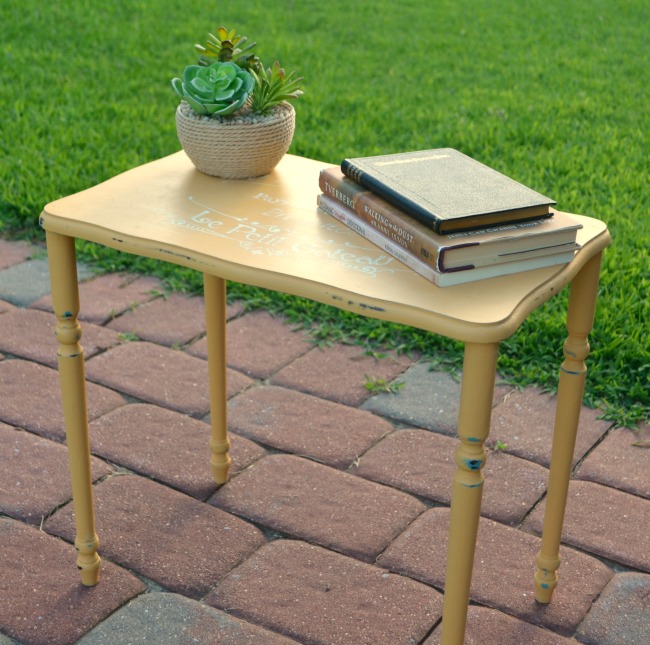
Now my cute little table is ready to go on display and hold books, plants, drinks, or whatever we need.
I love a good transformation, what about you? Have you given new life to an old piece of furniture? I’d love to see!


The final product is amazing!! The stencil is such a nice touch – I love the color, as well. Thanks for the inspiration 🙂
Lovely job on the table! I am having a love affair with yellow paints lately but have not tried the Folk Art Chalk Paint yet 🙂
Thanks, Lisa! I’m all about yellow, teal, and grey in my house!
Great transformation and so cheery. The stenciling was the perfect touch
Thank you so much, Colleen!