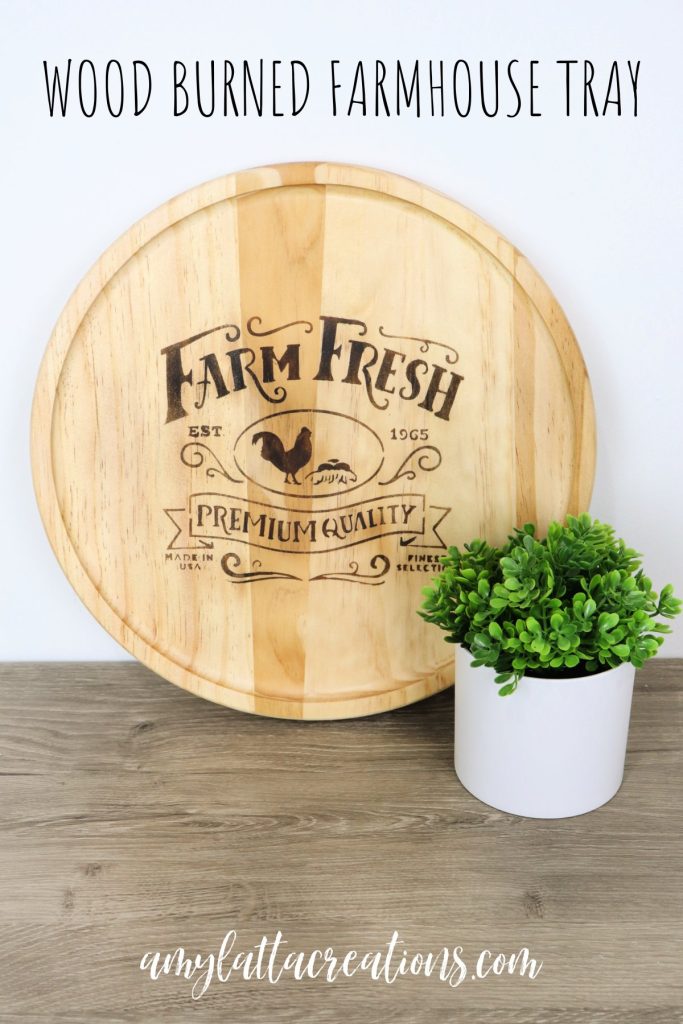
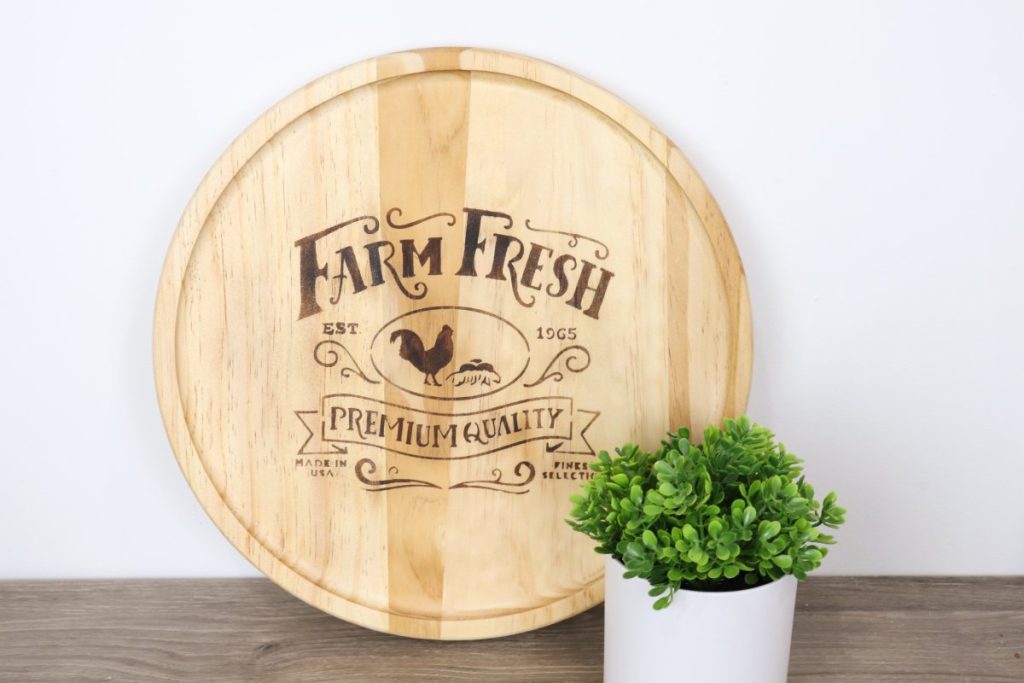
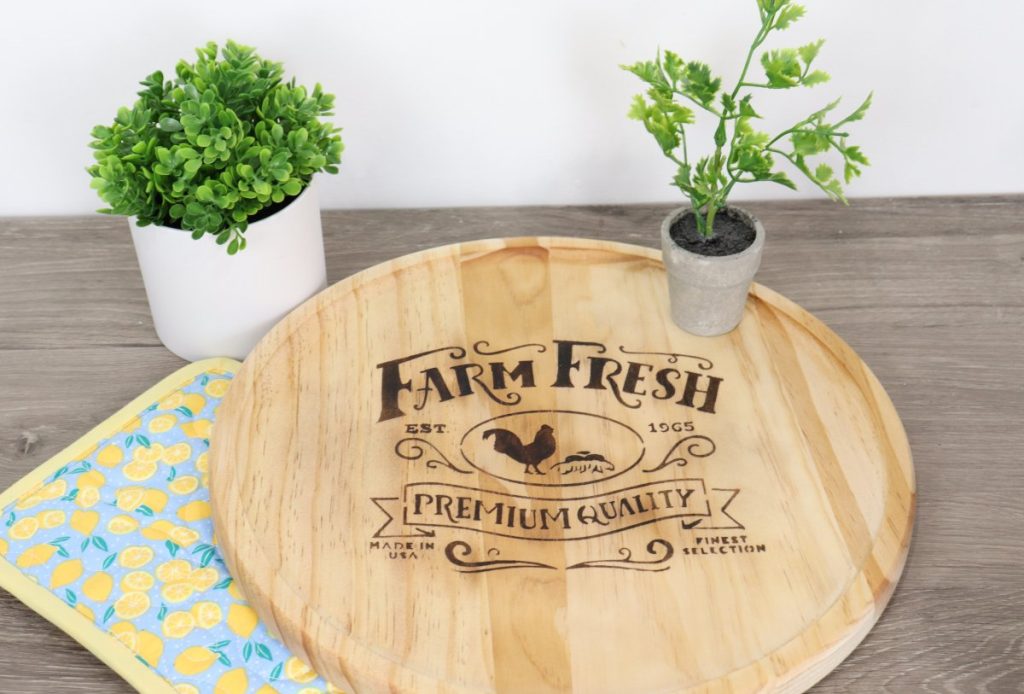
Wood Burned Farmhouse Tray
I’m a little bit obsessed with wood burning, now that I know how easy it is to do with the Scorch Marker! If you can draw or stencil it, you can burn it with the help of this handy tool. Here’s how I used it to create a fun decorative farmhouse wooden tray that’s totally food-safe, too!
How To Make A Wood Burned Farmhouse Tray
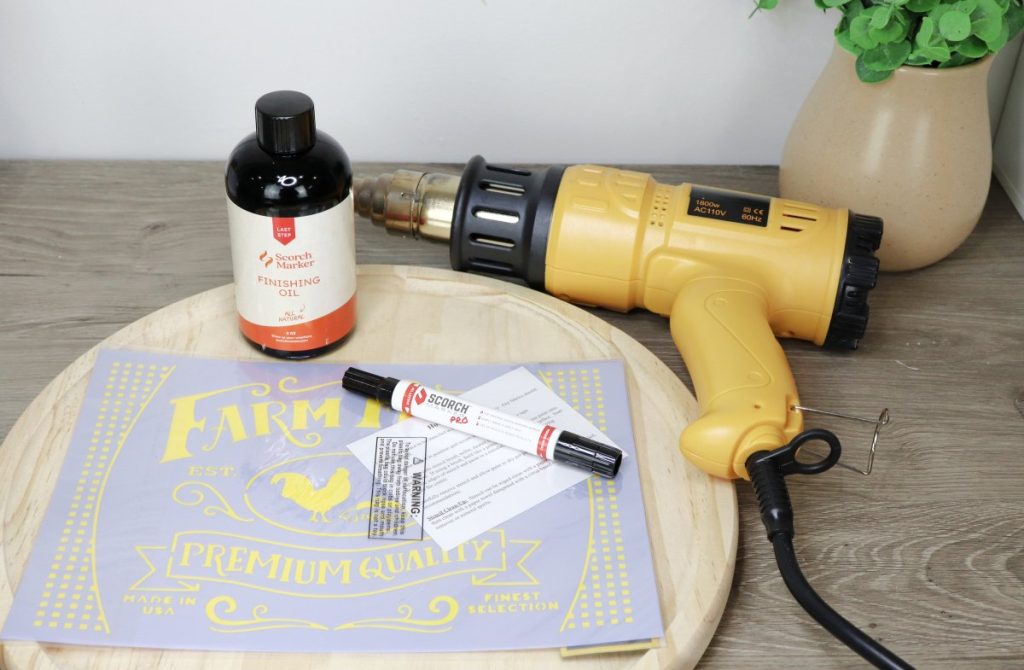
Supplies:
unfinished wooden tray (I used this one from Target)
Stencil (I used this Farm Fresh one from Hobby Lobby)
Painter’s Tape
Heat Tool (must be 1000+ watts of power/350 degrees Fahrenheit)
Sandpaper (fine grit/220)
Instructions
Step 1: Sand the tray.
Use a fine grit sandpaper and sand until smooth. The smoother the surface, the cleaner your burned image will be.
Step 2: Tape your stencil in place.
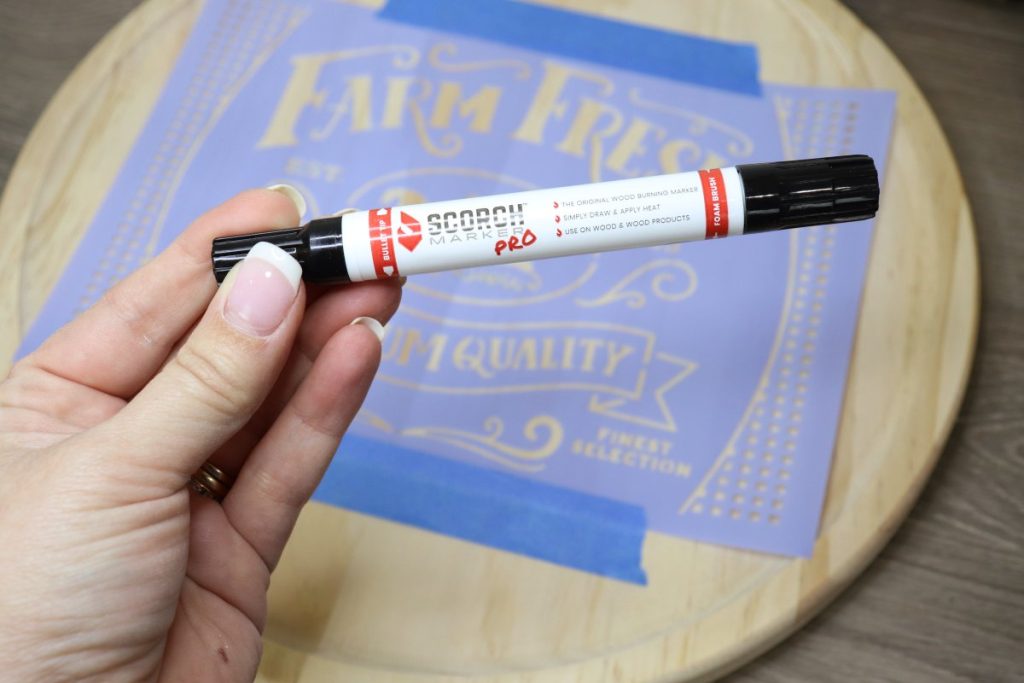
Step 3: Color in the open areas of the stencil with the Scorch Marker.
I used the bullet tip end for this, but you can also use the end with the small sponge brush. Remove the stencil. The ink will look pink/purplish before heating.
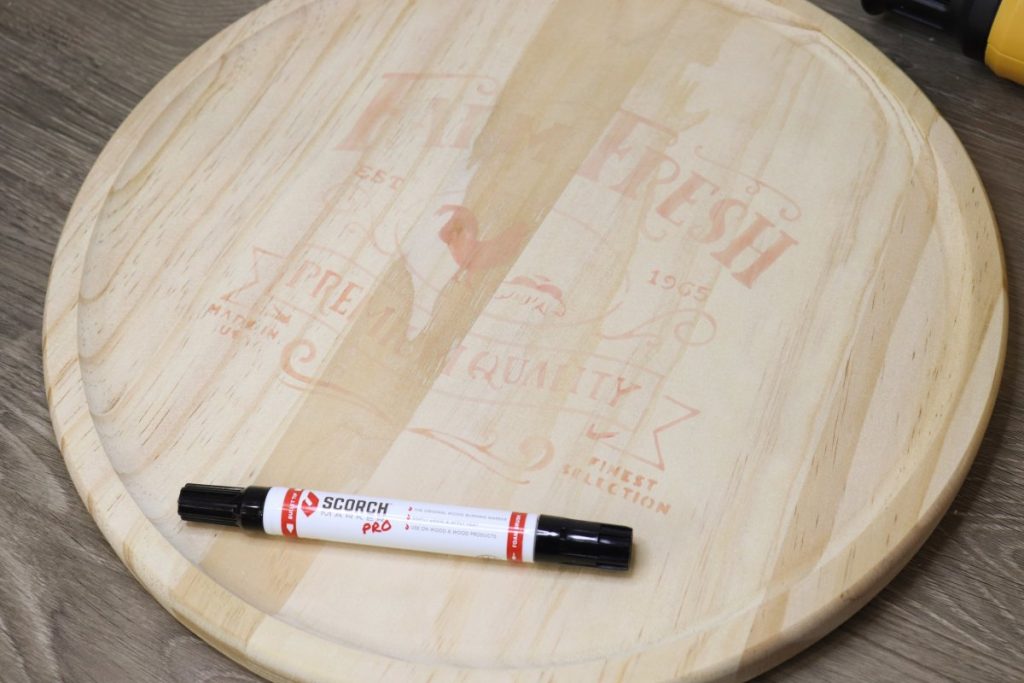
Step 4: Apply heat.
Use a 1000+ watt heat gun or place your project in an oven heated to 350 degrees Fahrenheit. When using the heat gun, slowly move it around to evenly heat the whole design. Holding it stationary can create hot spots on the wood.

As the ink reacts with the heat, your design will change from pink to dark brown. This means it’s been permanently burned into the wood! The more heat you apply, the darker the burn will be. The ink is now gone, and the tray is completely food safe.
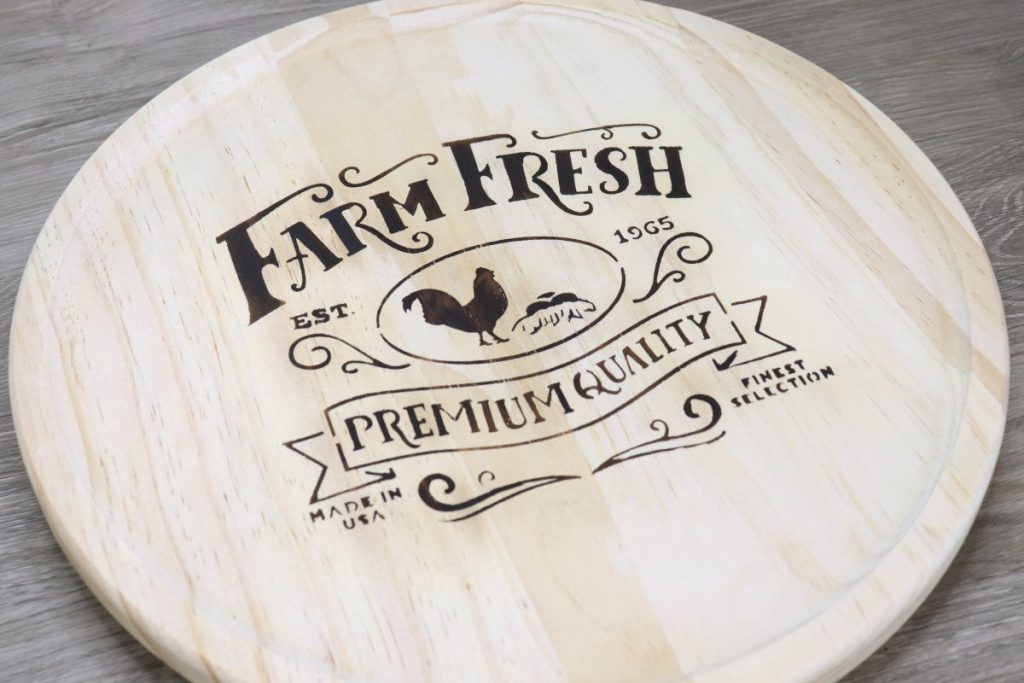
Step 5: Add a sealer.
I use the Scorch Marker Wood Finishing Oil, which is made of three all-natural ingredients and is totally safe for food so that I can use my tray for serving. You can also use your favorite wood stain or acrylic sealer, keeping in mind that it would be for decorative purposes only.

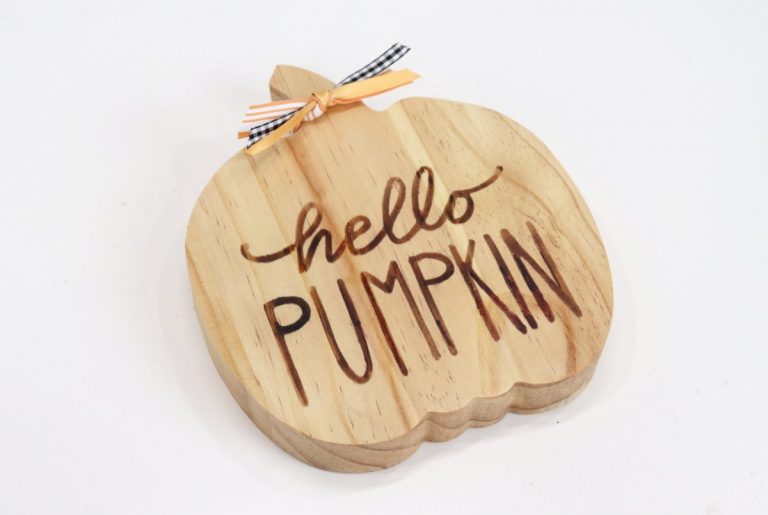
Now your tray is complete and ready to use or display! It’s easy to customize simply by changing the stenciled design. You can also create your own original design by drawing/writing anything you like with the Scorch Marker instead of stenciling.
Save 10% on any purchase on the Scorch Marker website with the code AMY67492.

If you try this project, I’d love to see how yours turns out! Make sure you’re part of the Amy Latta & Friends Facebook Group so you can share your project photos and we can all be inspired. See you there!