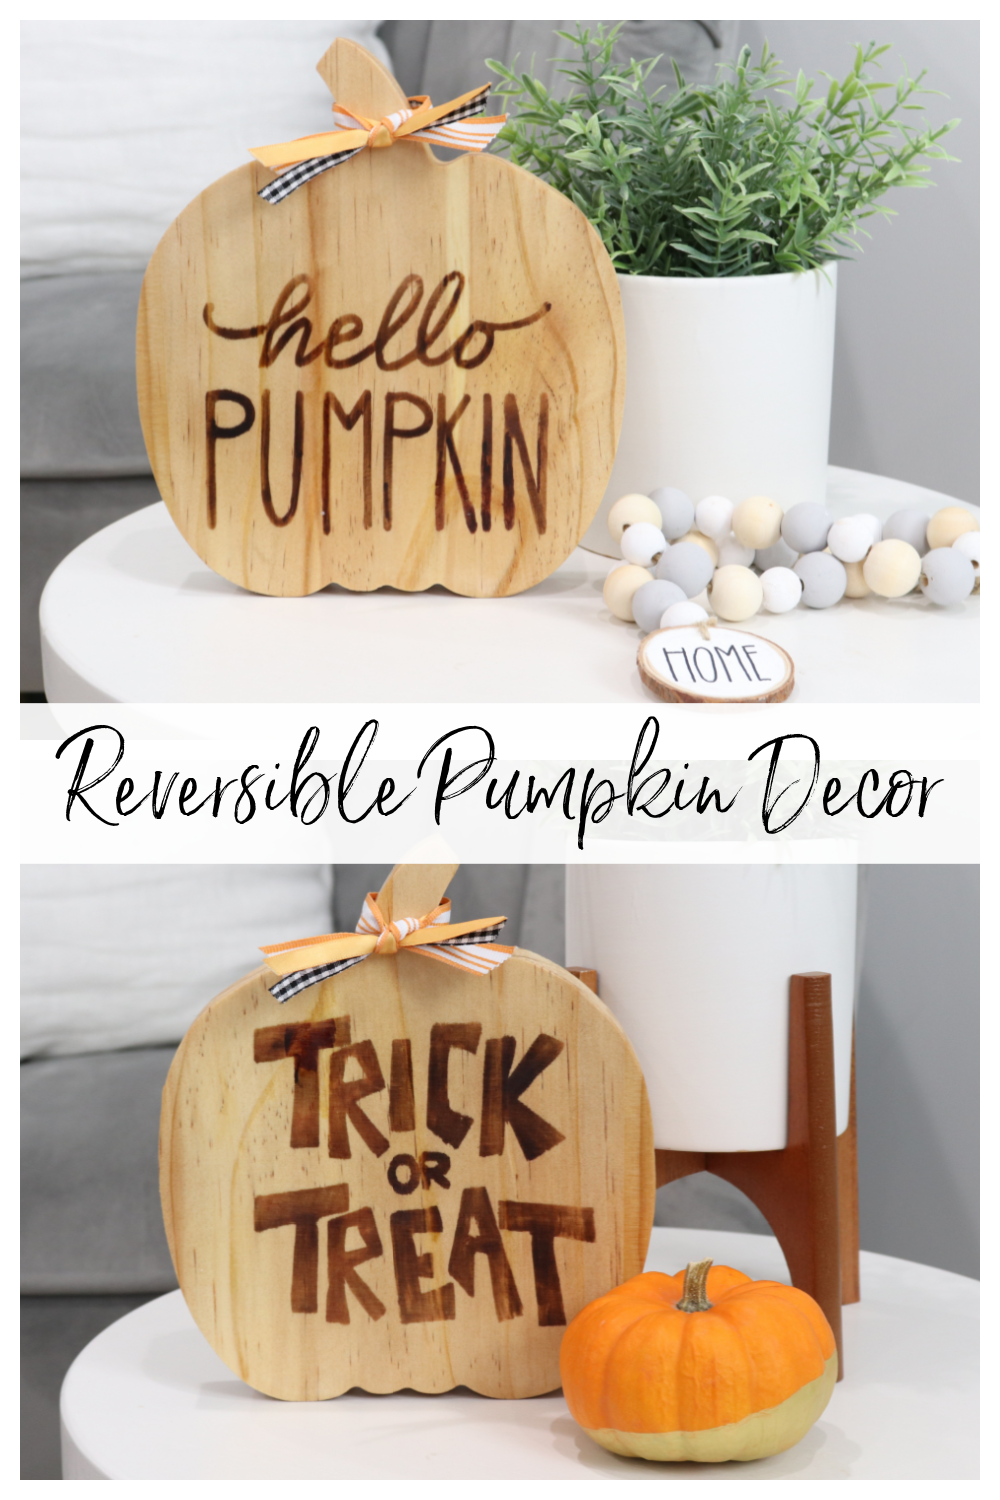
Reversible Wooden Pumpkin Decor + Free Fall Stencils
Special thanks to Scorch Marker for sponsoring today’s post; all opinions are my own.
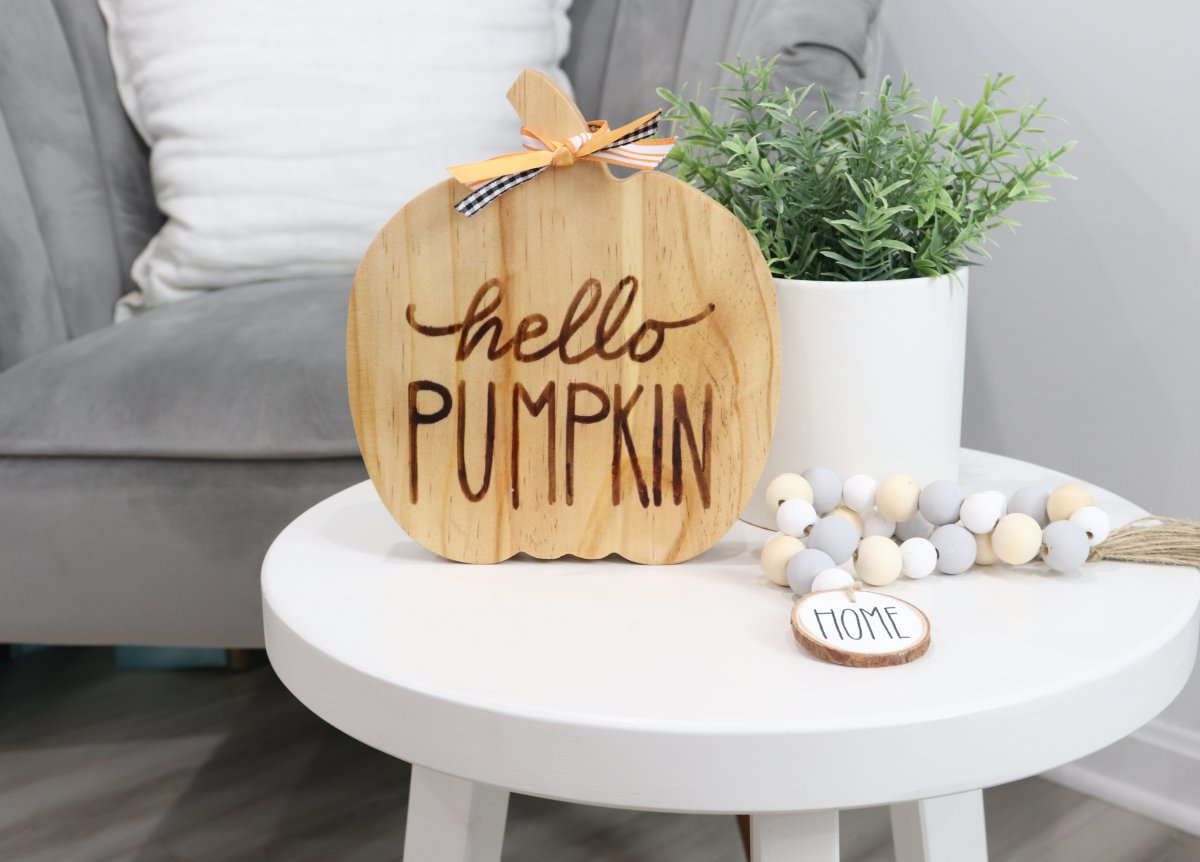
Despite weather that still feels like summer, I am in full-on fall crafting mode. I love decorating for the changing seasons, and I especially love it when I’m able to create something with more than one use. Fall can be tricky when it comes to decor, because there’s the general season, but you also have holidays thrown in like Halloween and Thanksgiving. This fun reversible pumpkin lets you display two separate messages, so you can just flip it around when you’re ready for something different…take a look!
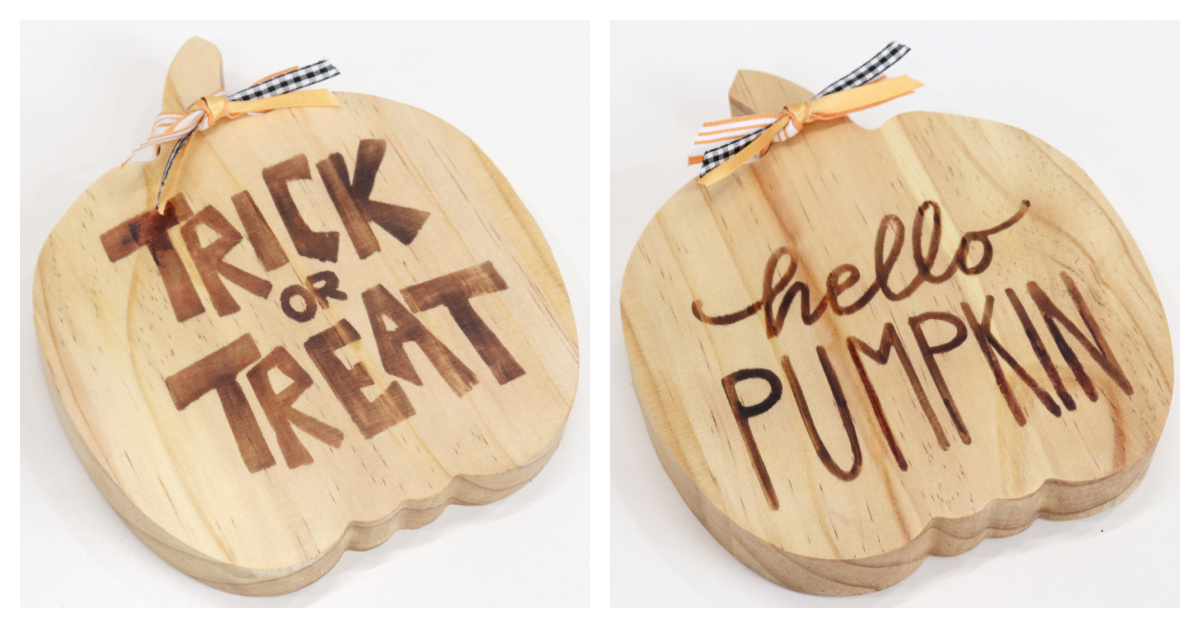
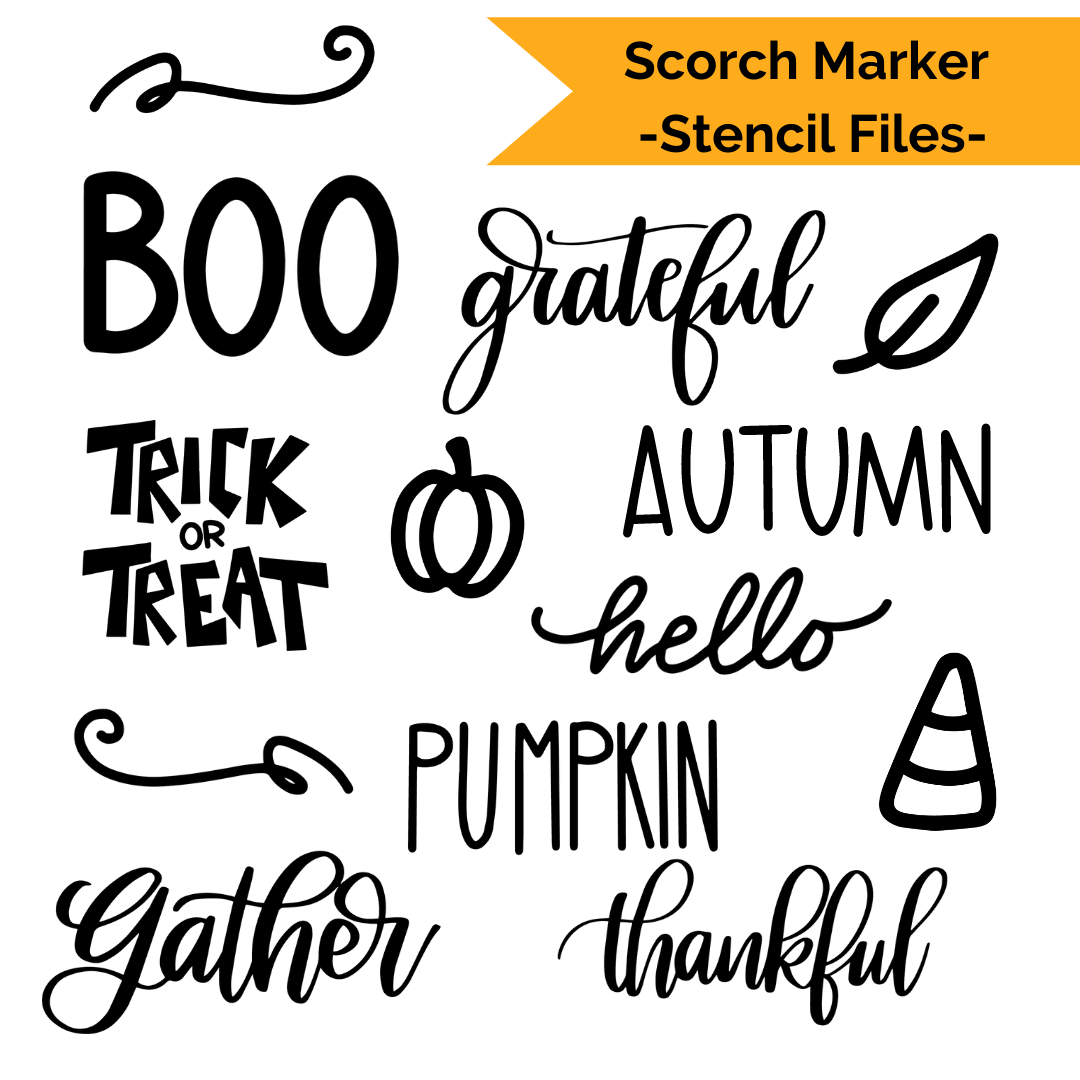
I chose to do one side of my pumpkin for Halloween and the other for the rest of the fall season. These phrases are actually stencils I created for my friends at Scorch Marker, and they are available (along with some other festive images and words) for free with the code ilovestencils! Ready to gest started on this simple project?
YOU’LL NEED:
an unfinished wood pumpkin (mine was $5 at Target)
Heat tool with 1000+ watts of power
Your favorite wood butter/stain/sealer and paintbrush
sand paper
Ribbon
Scissors
Optional: Cricut or other electronic cutting machine, cutting mat, removable vinyl
Step 1: Sand the surface of your wood pumpkin.
Make sure to sand both sides. This will make the wood as smooth as possible and allow the Scorch Marker to do its best work.
Step 2: Download and prepare your stencils.
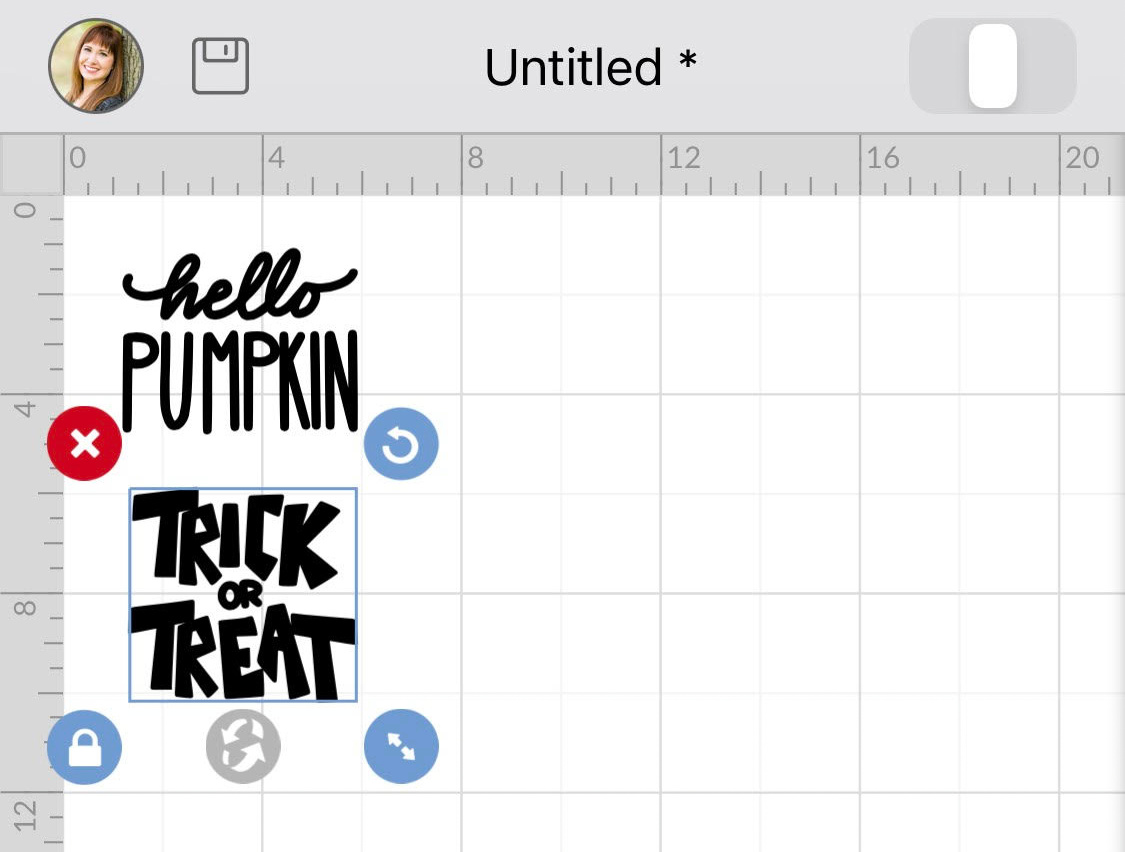
If you haven’t already, go download the fall stencil files and choose your favorites. Use the code ilovestencils to download them totally free from the Scorch Marker website. The files are a digital download, rather than a physical product, so it’s up to you how you use them. Next, if you have an electronic cutting machine like the Cricut, open the files you want to use in Design Space and cut them from removable vinyl. Make sure that you size them to fit your pumpkin. I resized mine to about 4.5″ wide.
If you don’t have an electronic cutting machine, no worries! You can use the paper and pencil transfer method! Just print out the images you want to use BACKWARDS on your computer printer. Trace all the black areas with a pencil, then flip the paper over and put it on top of the wood. Trace again from the back side, and this will transfer the pencil marks to the surface of the wood. See a full tutorial of this method here.
Step 3: Apply your stencil to the wood surface.
First, trim around each phrase and peel the cut vinyl letters away from their backing. This is the opposite of what we usually do when working with vinyl. Leave the centers of letters attached to the backing. Next, apply transfer tape on top of the vinyl and rub firmly. Peel the transfer tape and vinyl away from the backing, which will give you your stencil attached to the clear transfer tape. Apply this to the pumpkin.
![]()
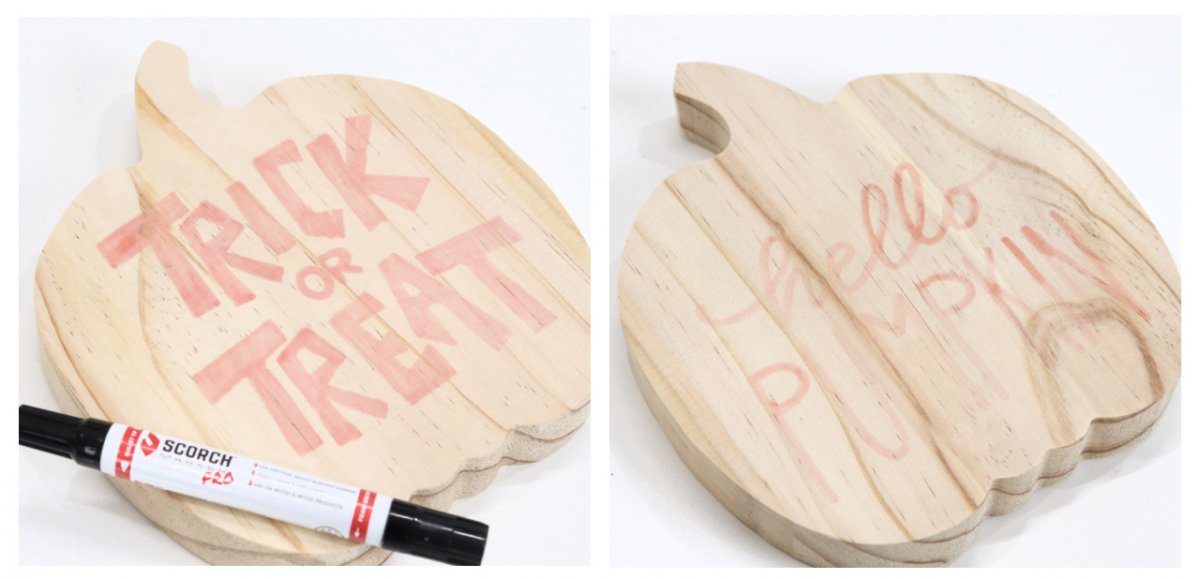
Rub to adhere the stencil to the wood, then peel away the transfer tape. Now, you’ll have just your stencil attached to your surface.

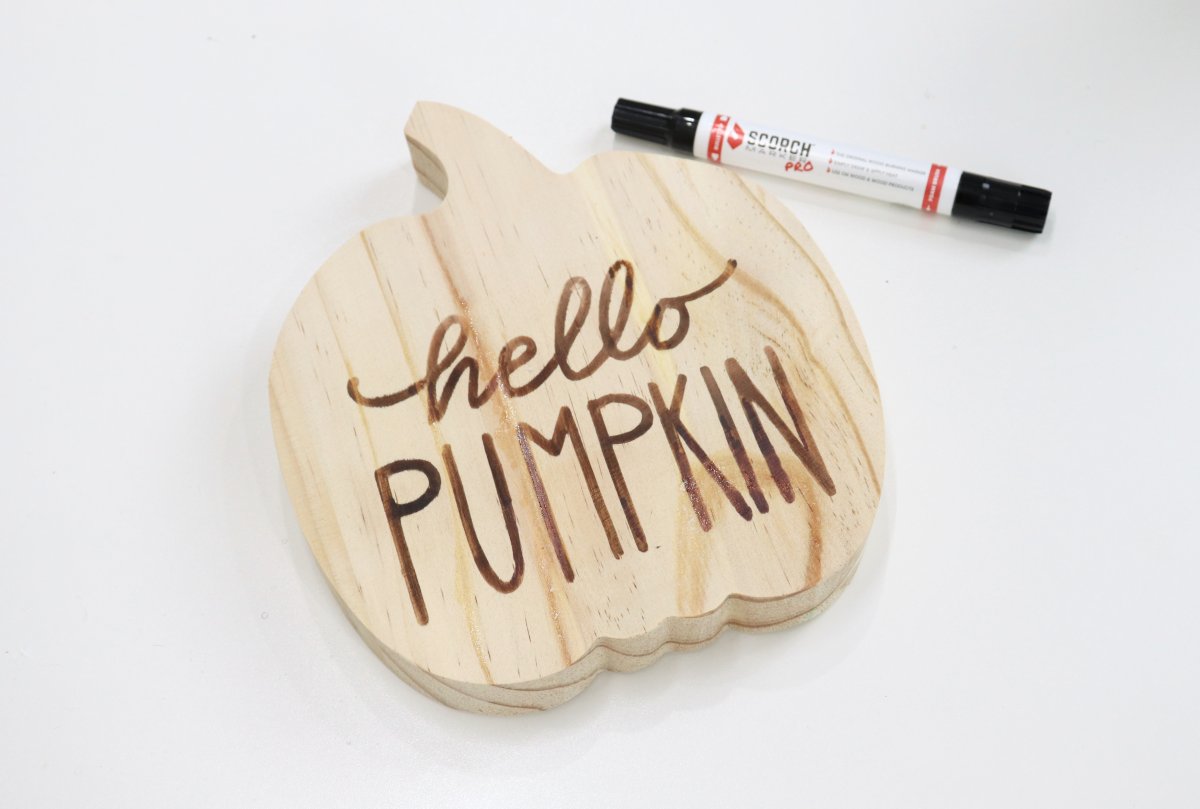
Step 4: Fill in the open areas with Scorch Marker.
The Scorch Marker is a fabulous little crafting tool that allows you to do wood burning safely and easily! All you do is write, color, or stencil with it like a regular marker, then heat it. The ink reacts with the heat to actually burn your design into wood (or other surfaces like paper mache, cardstock, and more).
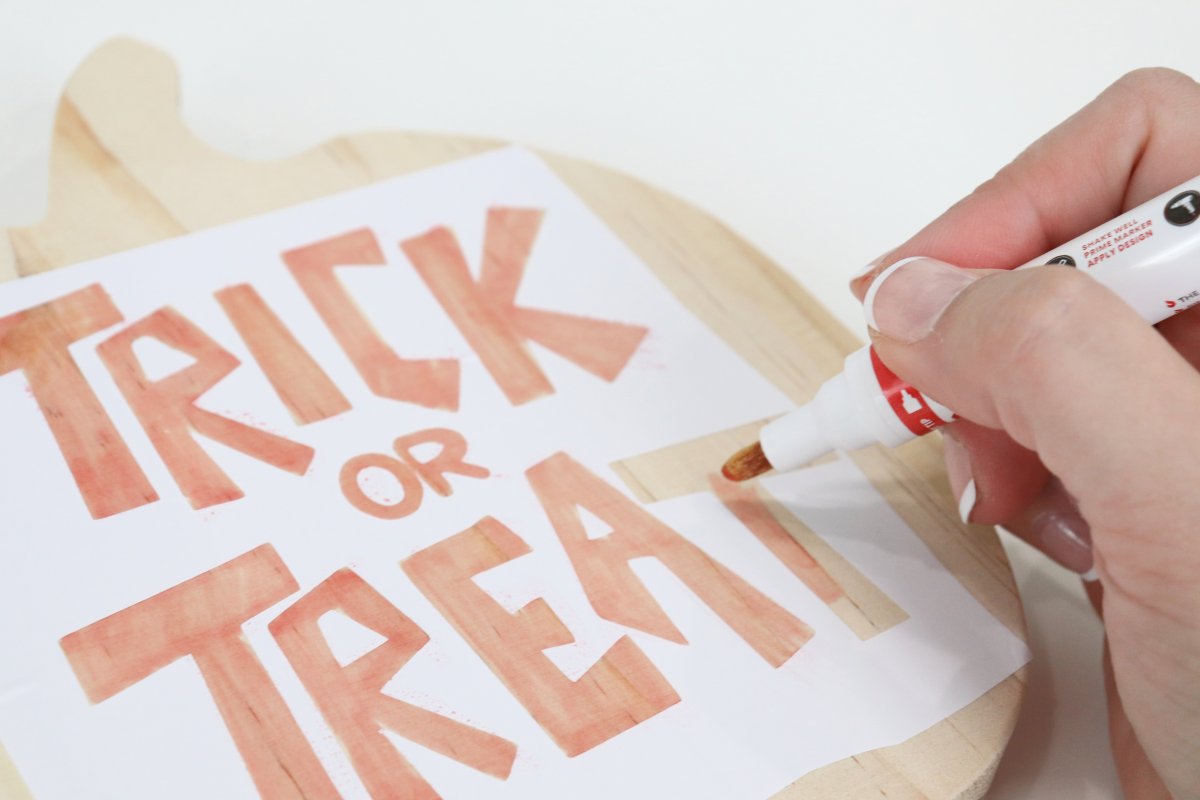
The areas you stencil will appear wet and/or slightly pink. Don’t worry, this will change when you apply heat.
Step 5: Remove your stencil and repeat steps 1-5 on the reverse side.
Now it’s time for your other message! Follow the same process to get your other design stenciled onto the other side of your pumpkin.
Step 6: Apply heat.
Use a heat gun with 1000+ watts of power (a typical crafter’s embossing tool isn’t usually powerful enough) and evenly heat the surface of the wood until you see the color of the ink begin to change. The more heat you apply, the darker the burn will become. I suggest constantly moving the heat tool, so that you avoid dark marks anywhere but your design.
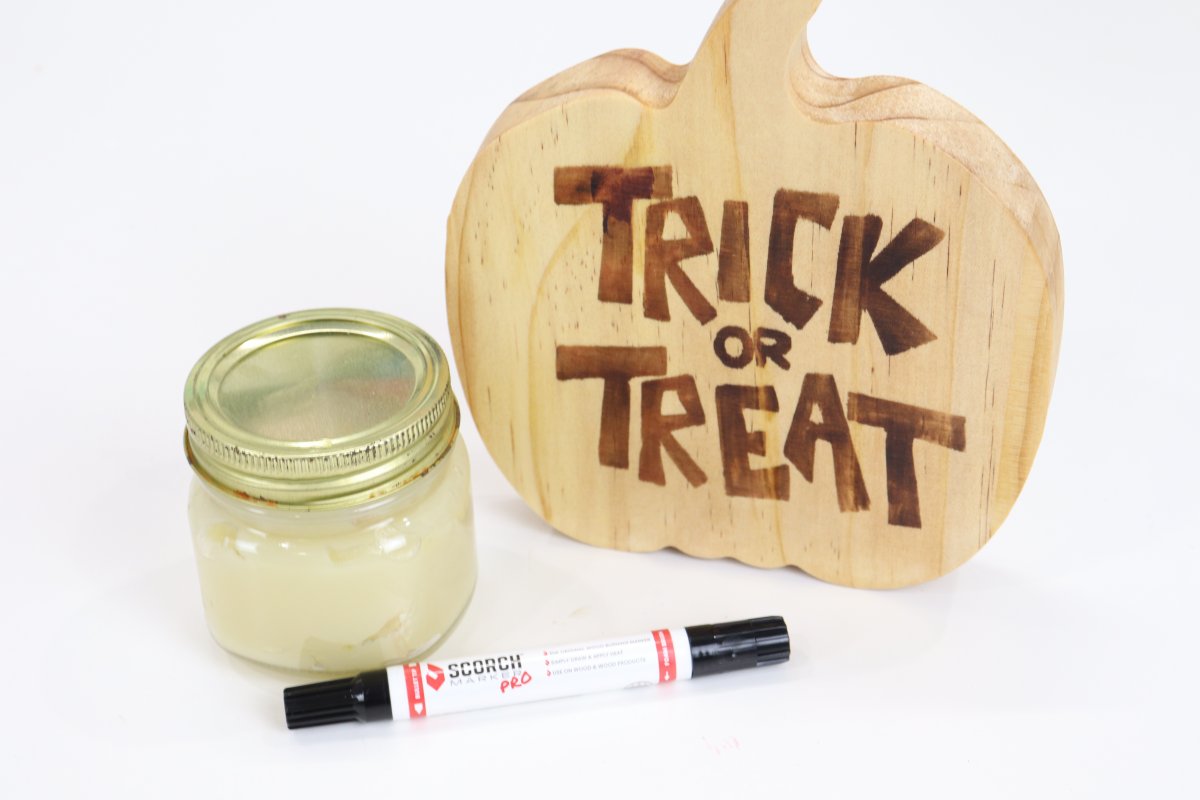
Step 7: Seal your project.
Although the design is permanently burned into the wood, it’s always a good idea to seal and protect your projects. Apply a coat of your favorite sealer, wood butter, or light wood stain. I used a homemade wood butter; you can find the recipe on Scorch Marker’s social media.
Step 8 (optional): Add ribbon.
I tied a few pieces of yellow, orange, and buffalo plaid ribbon around the stem of my pumpkin. I kept it loose enough that I can easily rotate the knot to whichever side I’m currently displaying as the front.
What do you think? Which side is your favorite? I love that I can use this one project both for the general fall season and specifically for Halloween. If you try this project, I’d love to see how yours turns out!
These stencil files can also be used for all kinds of other seasonal crafting! You can use them with paint, as vinyl cut-outs, and even with iron-on vinyl for t-shirts, tote bags, and more. Make sure to grab them for free using the code ilovestencils. Here’s a peek at the full set, all hand lettered and drawn by yours truly:
Grab the stencils here!
I can’t wait to see what you use these images to create! Don’t forget to share your photos in the Amy Latta & Friends Facebook group so we can all be inspired. Happy fall crafting!
PS. Find other seasonal projects here.


2 Comments