My DIH Fail Turned Success: The Little Wooden Sign that Could
Boy, oh, boy, friends do I have a story for you today! If ever you’re going to read every word of a post, today is the day. I want to tell you the story of the little project that could. Or maybe the little blogger that could… It’s the story of my DIY Wooden Sign that was supposed to be something else entirely. Here’s what happened…
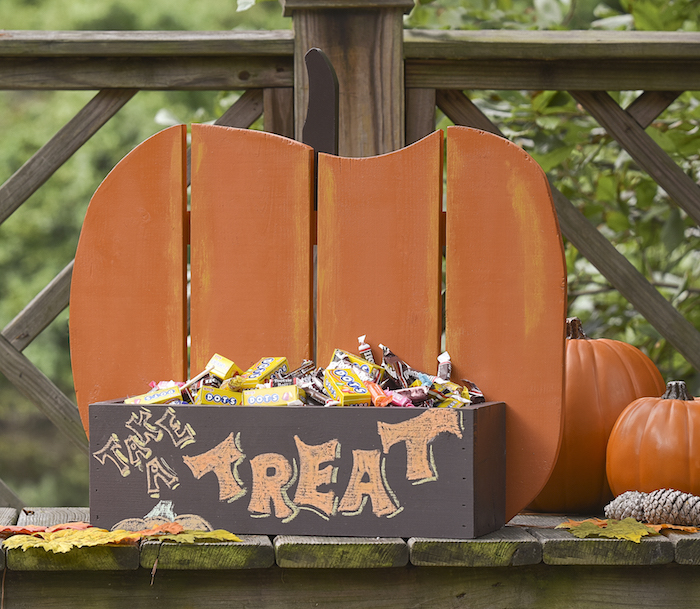
A few weeks ago, I started seeing a project I absolutely loved pop up all over the internet. A number of blogger friends of mine were part of the campaign, advertising a fun DIH {do-it-herself} workshop coming up at Home Depots across the country and creating their own version of the Rustic Pumpkin Stand the workshop would be featuring. I thought the project looked awesome, and I saw all kinds of variations on it; some bloggers left theirs with a natural look, while others painted theirs and even added chalkboard details, like this one by Amy Anderson from Mod Podge Rocks. I could hardly wait to make my own. I signed up for my local workshop and counted down the days.
When I got there, though, not only did most of the employees in the store not know there was a workshop going on, the whole experience was nothing like I had expected. The person running the workshop handed us a materials list and instructions, then began to demonstrate a few parts of the process using a hammer and nails instead of the Ryobi power tools the instructions called for. It quickly became clear to me {and to the other ladies who showed up} that this didn’t look like a make-and-take session because there were no supplies for us. One of the women asked if we would get to make our own project and sadly, the answer was no! No pumpkin stand for me! We were told we could buy the materials ourselves and make it at home, but that’s not at all what any of us had expected. I wondered if I had misunderstood. But no, sure enough, I went home and scrolled my Facebook feed to find a photo from the fabulous Erin at DIY On the Cheap. She helped lead her local workshop and the ladies who attended got to make their own projects to take home and enjoy! I wanted to pout and throw things, but that’s frowned upon when you’re over twenty-nine. So, I decided to channel my energy in a different direction.
First, I reached out {very nicely} via Twitter, Facebook, and email to ask Home Depot how they decide which stores get to do make-and-takes and which only get demonstrations, as well as if they could make it clear in the advertising which type of workshop you’re registering for, but I’ve gotten no response. In any case, I decided I wasn’t going to let that stop me. I still wanted a pumpkin stand, so I was going to buy the materials and make myself one. The instructions called for the following wooden pieces:
2 – 72” x 5-1/2” fence pickets, square edged preferred
1 – 1×2 x 4 feet long
I went in search of the 1×2 board and put hubby in charge of the fence pickets. We brought them home and started following the instructions for cutting them into shorter pieces. To make a long story short, it didn’t take long to realize there were more things stacked against me.
Problem #1: A twisted board. Yeah, no matter how you look at it, that’s not straight. Not even close. Not usable for this project.
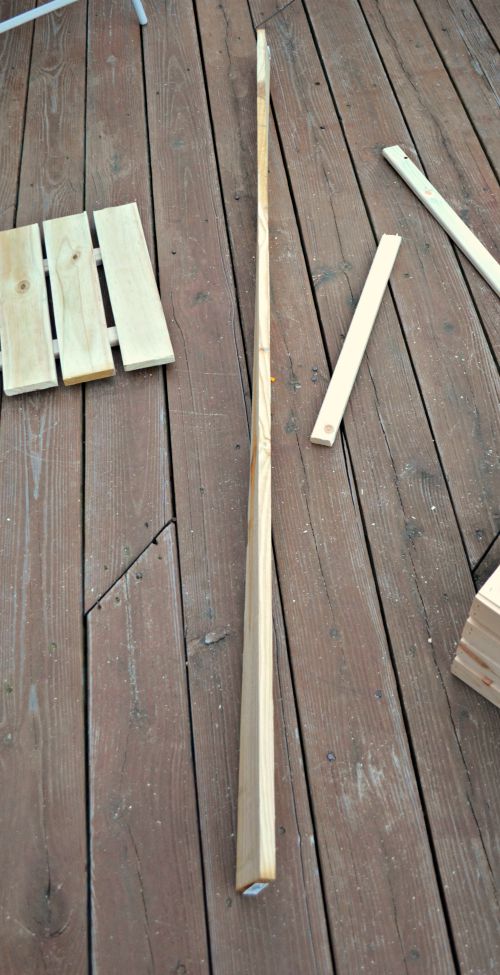
Problem #2: Hubby accidentally grabbed boards that were 3 1/2″ wide instead of 5 1/2″. Okay, so it would be a little smaller.
Problem #3: I don’t own a circular saw, jigsaw, or miter saw. So there would be no cutting any wood into a pumpkin shape for me.
At this point, I realized I might as well give up trying to make the Rustic Pumpkin Stand. I decided instead to use what I did have and make something different but still awesome. Here’s how I did it.
Materials:
2 – 72” x 3-1/2” fence pickets, square edged preferred
1 – 1×2 x 4 feet long
RYOBI AirStrike Cordless Brad Nailer and Nails
Dark Brown Wood Stain
Chalky Finish Paint: White and Brown
Outdoor Gloss Paint: Orange
Stencils or electronic cutting machine and vinyl
Paintbrushes
RYOBI Cordless Corner Cat Finish Sander
Cutting Edge Stencils Large Pumpkin Stencil
Home Decor Wax
Soft lint-free cloth
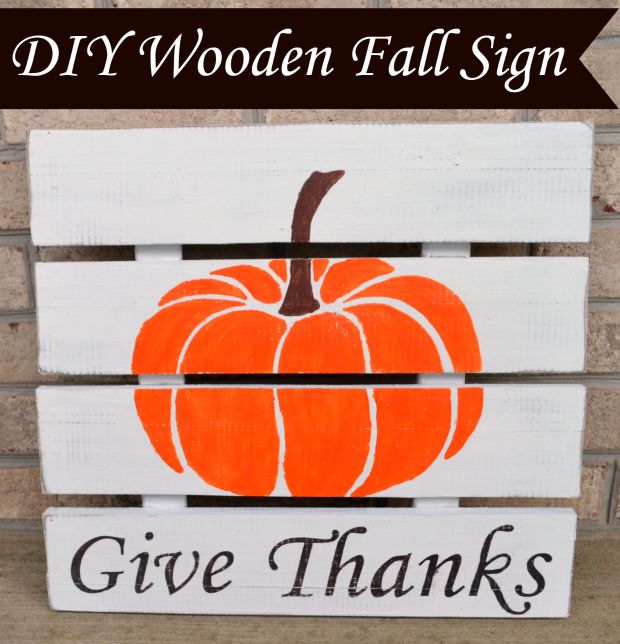
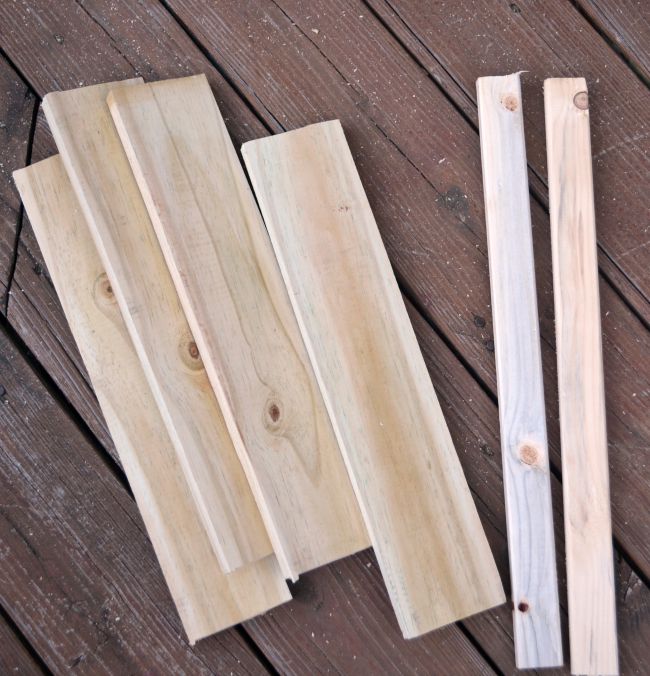
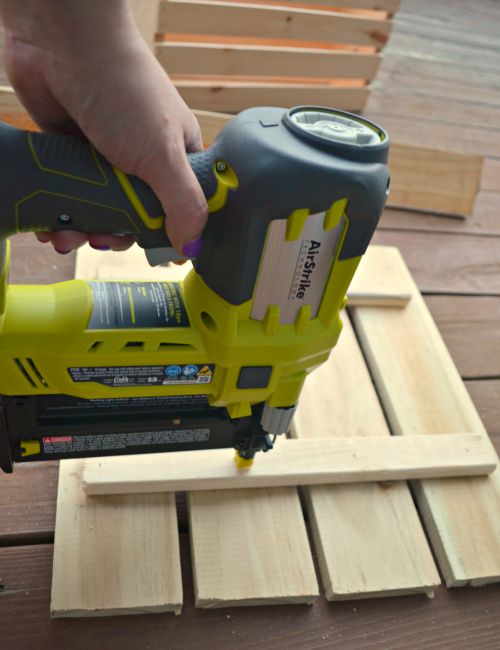
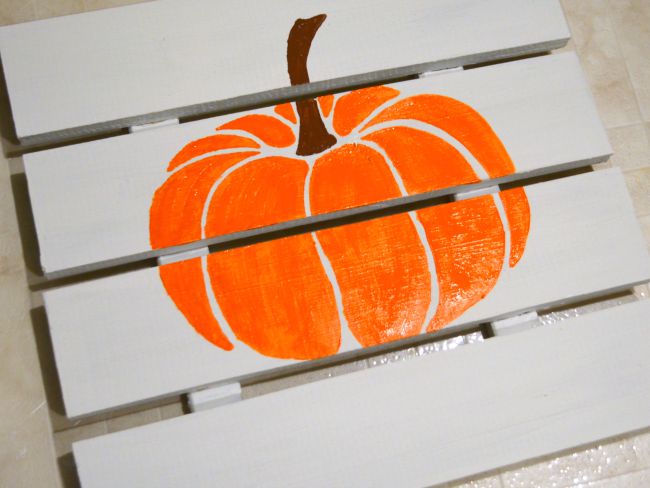
Step 1: Cut the larger boards into four 17″ long pieces and the 1×2 into two 16″ pieces.
Step 2: Lay your four boards next to each other vertically and place the smaller boards across them horizontally, touching all four. You can leave as much or as little space between the boards as you like.
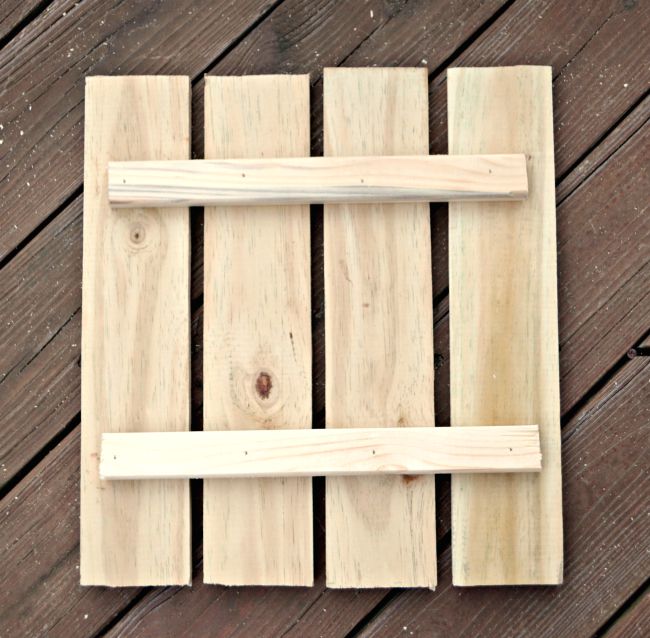
Step 3: Nail your boards in place. I was excited for another chance to use my new Ryobi AirStrike Cordless Brad Nailer. It makes projects like this so easy to do!
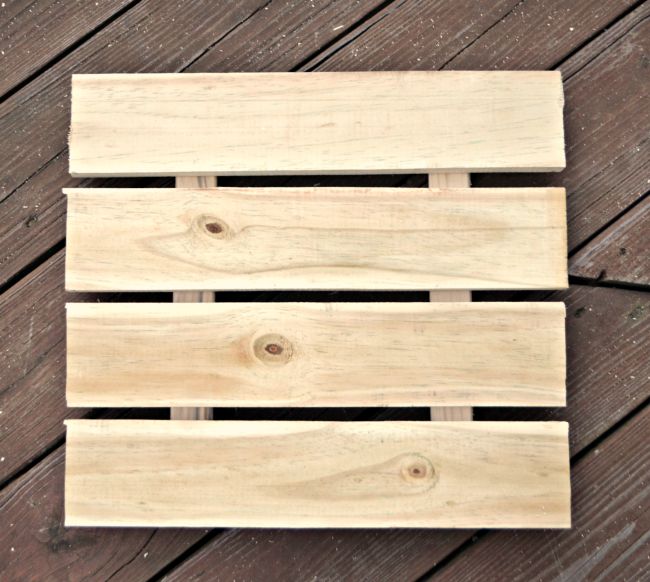
At this point, I had my basic sign constructed. I sanded a few of the roughest areas, but knew I was going to be sanding and distressing later, so I saved most of it for the end of the process.
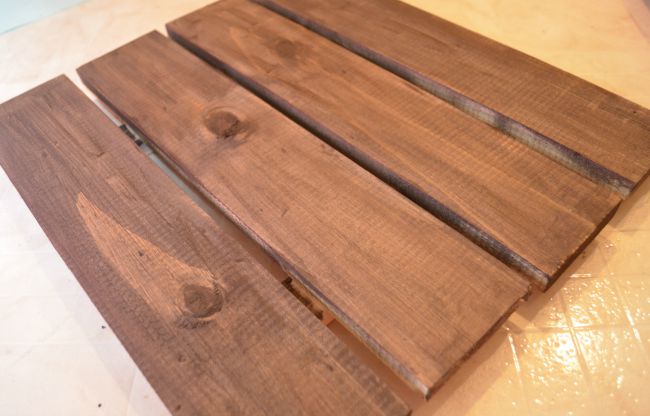
Step 4: {optional} Stain the wood. This is one of those parts where hubby sees me at work and says,
Him: “I thought you were painting it white.”
Me: “I am!”
Him: “But that’s dark brown.”
Me: “I know. I’m staining it first, then painting it white.”
Him: …???…
Me: “So it’ll show through when I distress it!
Him: “oookaaaay….”
Step 5: Paint your sign with white chalky finish paint. Because of the dark stain, I needed 2-3 coats to get the coverage I wanted.
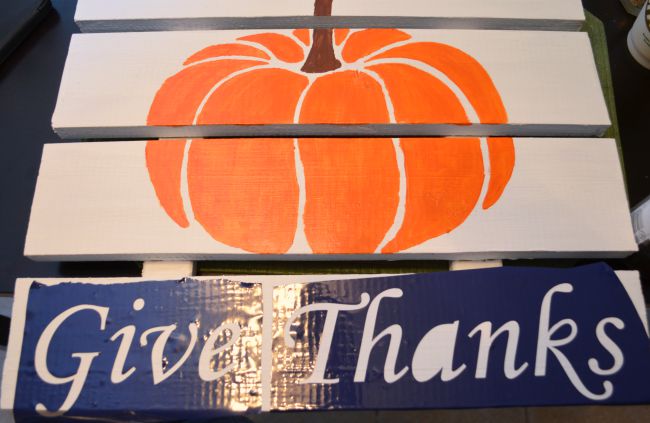
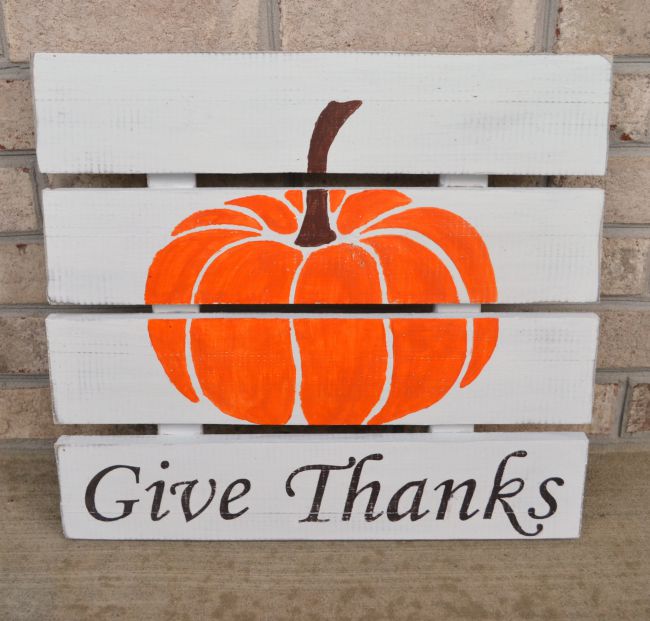
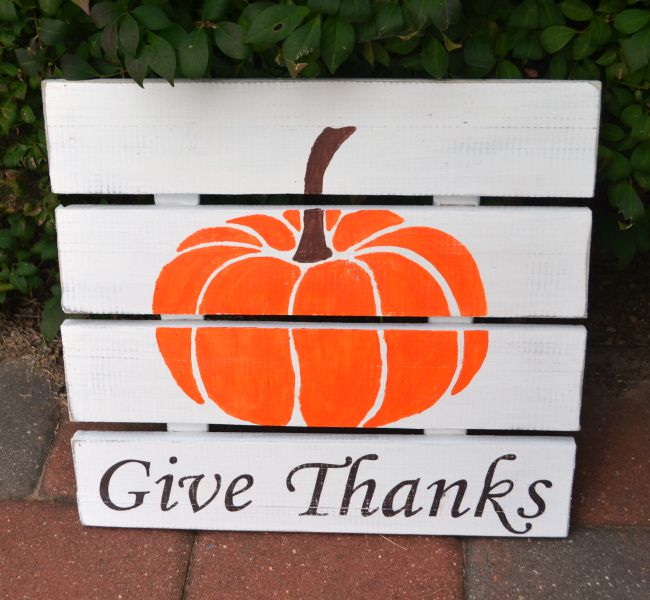
Step 6: Stencil your pumpkin. Remember, when you stencil, less is more. Too much paint causes it to bleed under the stencil where you don’t want it to be.
Step 7: Stencil your words. I created my own vinyl stencil using the Silhouette Cameo, but you could use any large alphabet stencils or stickers to do the same job. You could actually just cut and apply vinyl letters too, but I was out of brown vinyl.
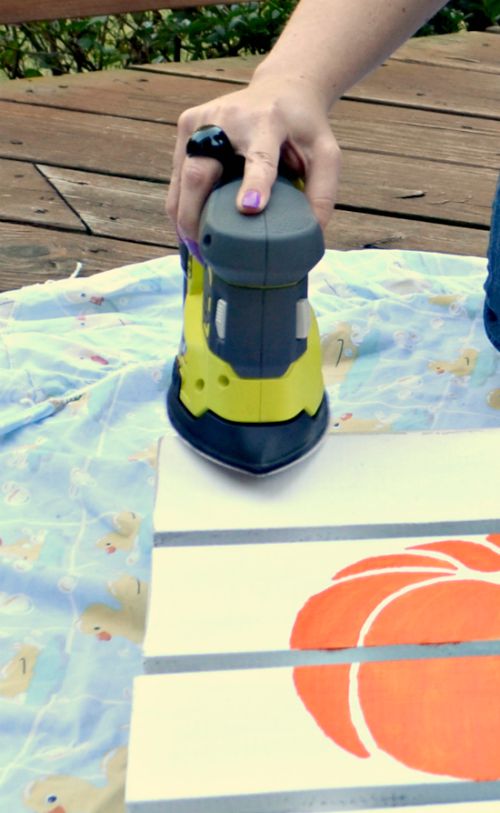
Step 8: Distress your sign as much or as little as you like! This was actually my very favorite part because I just bought myself the RYOBI Corner Cat Sander. All this time, I’ve been sanding my projects by hand. Then, at Haven, I got to play with one of these bad boys and I knew I had to have one. This was the first project I got to use it on, and it worked like a dream. I did some light distressing around all the edges and over each board…just enough for a bit of a rustic feel.
Step 9: Apply a coat of wax. I like to do this by putting an old {clean!} sock on my hand and using it to rub the wax into the wood.
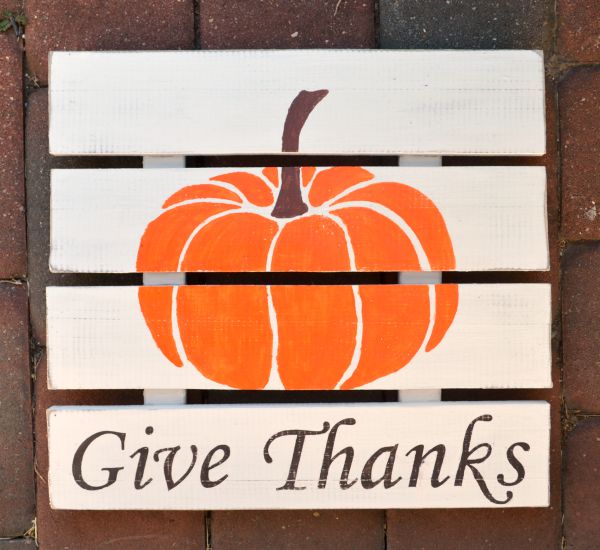
Once the wax is dry, your sign is ready to display! You can add a hanger on the back, which will allow you to put it on the wall or your front door if you like. I added mine to the fall display on my front porch.
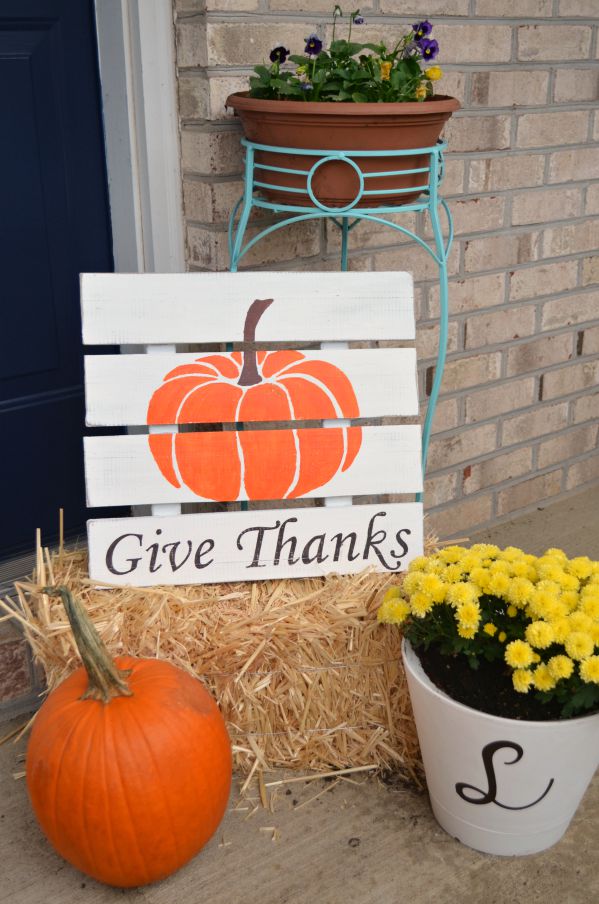
I love the way it turned out…so what if it’s not a Pumpkin Stand?! I’m still determined to somehow make one of those, but in the meantime, I’m enjoying my wooden sign. What do you think?
I’m particularly proud because I made the entire project; it’s not like I bought a wooden sign at the craft store to paint or even repurposed a pallet. I literally built it all. I keep driving hubby crazy because I’ve been running around the house saying, “I nailed it! Literally!” Haha. I definitely forsee making more signs like this for all the seasons and as gifts too.
What do you say about my little project that could?


I hope you bought the supplies at Lowes, lol!!
Very nice…How disappointing for you all to just get to watch someone else make that..
So proud of your budding construction talents…My dad would love it…
I was actually just thinking about that myself the other day. Wish he could see my bench!
He would be so proud of you…and he would have loved your bench…
Sounds like some Home Depots are better at hosting the workshop than others! Thank you for featuring my punkin . . . . and I LOVE yours! It may not have been when you originally envisioned, but it looks awesome anyway!
My pleasure…I love your project! Thanks for stopping by and for your sweet words!
I absolutely love the project that came out of your crazy experience. Create your own DIH workshop! I’m sure it will be awesome 🙂