Faux Concrete Gallery Wall Frame

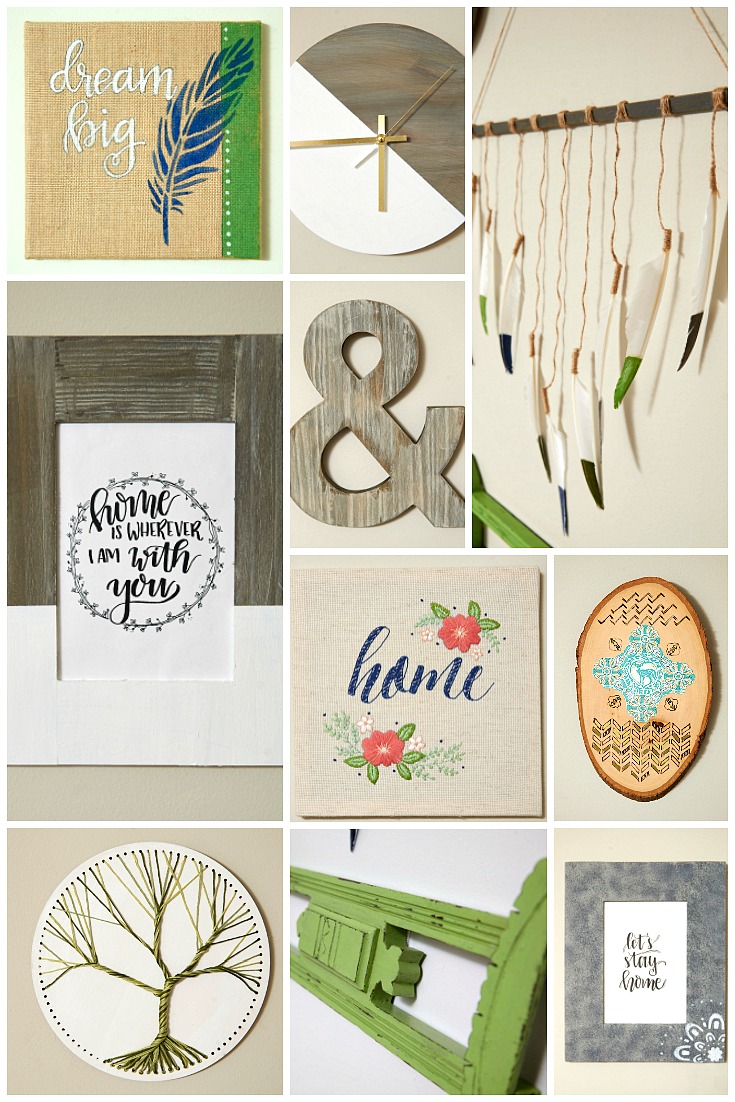
Friends, if you’ve been following along lately, you know that I had the opportunity, along with 9 other bloggers, to help create an entire DIY Living Room using products from Plaid Crafts! Each of us contributed something to the room, from decor to furniture, and we also each created one or more pieces of a statement gallery wall. I shared my Stenciled Barnwood Crate as well as my Dream Big Canvas in previous posts, now today I want to show you the other piece I made for the wall; a Faux Concrete Frame with a hand lettered print.
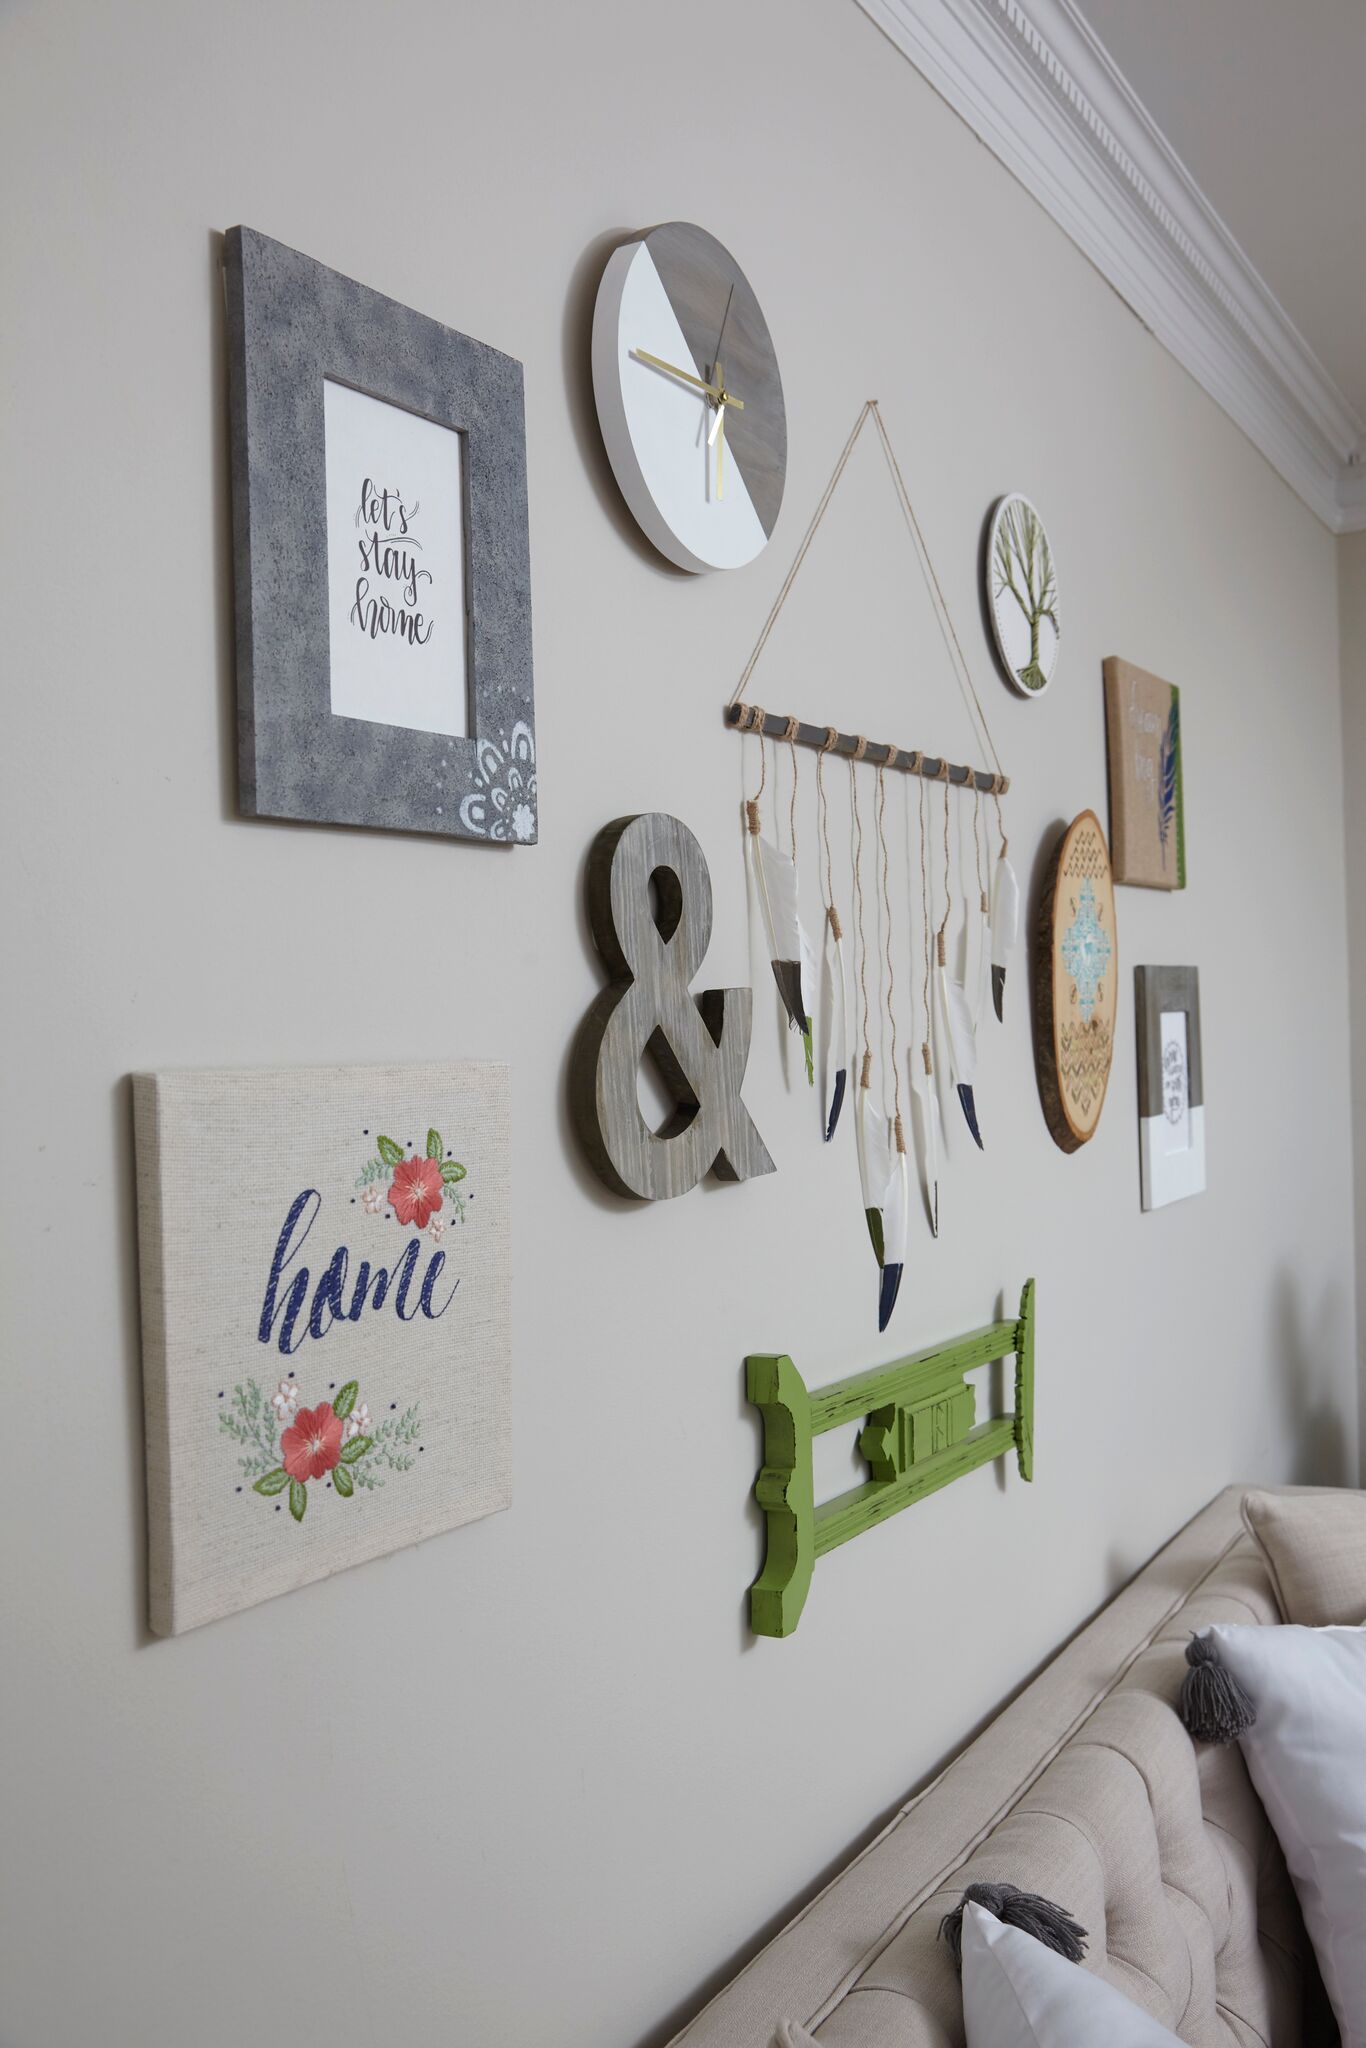
It was very simple to make, and it makes use of some of my favorite Plaid products, the FolkArt Painted Surfaces. They’re specialty paints designed to create the illusion of things like barnwood, rust, moss, and concrete. Here’s a look at my finished frame & print and how you can make your own to display at home.

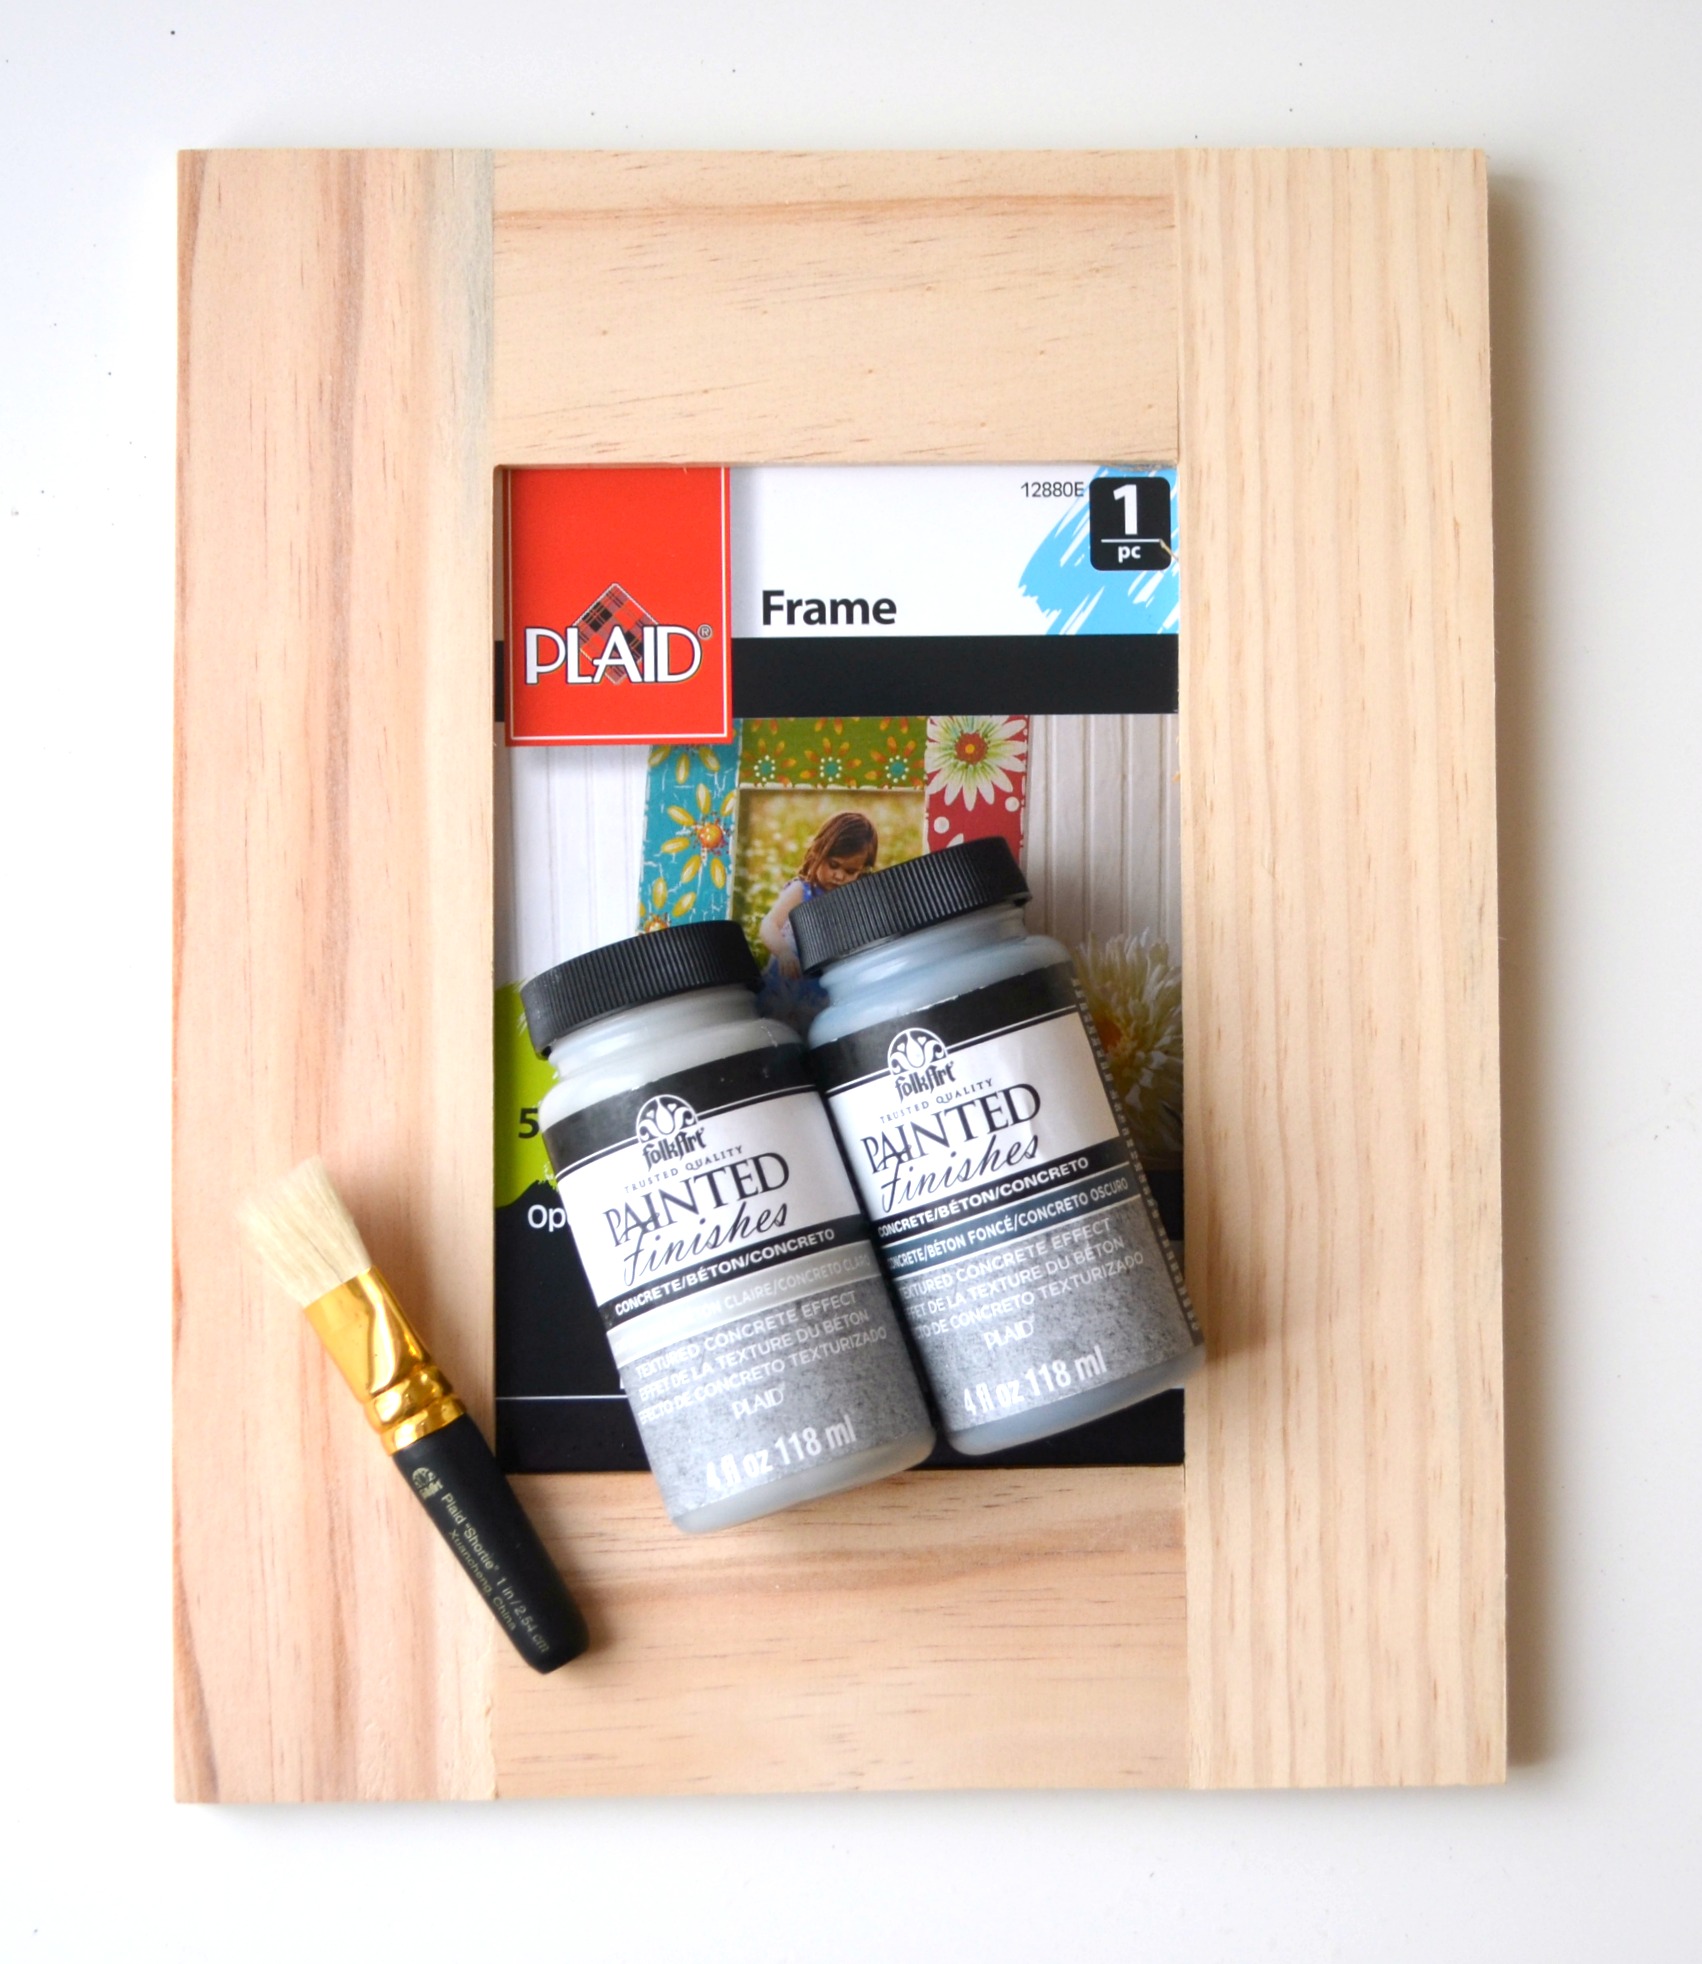
Materials:
{This list contains affiliate links.}
unfinished wood frame {mine was from Michaels and holds a 5 x 7″ photo or print}
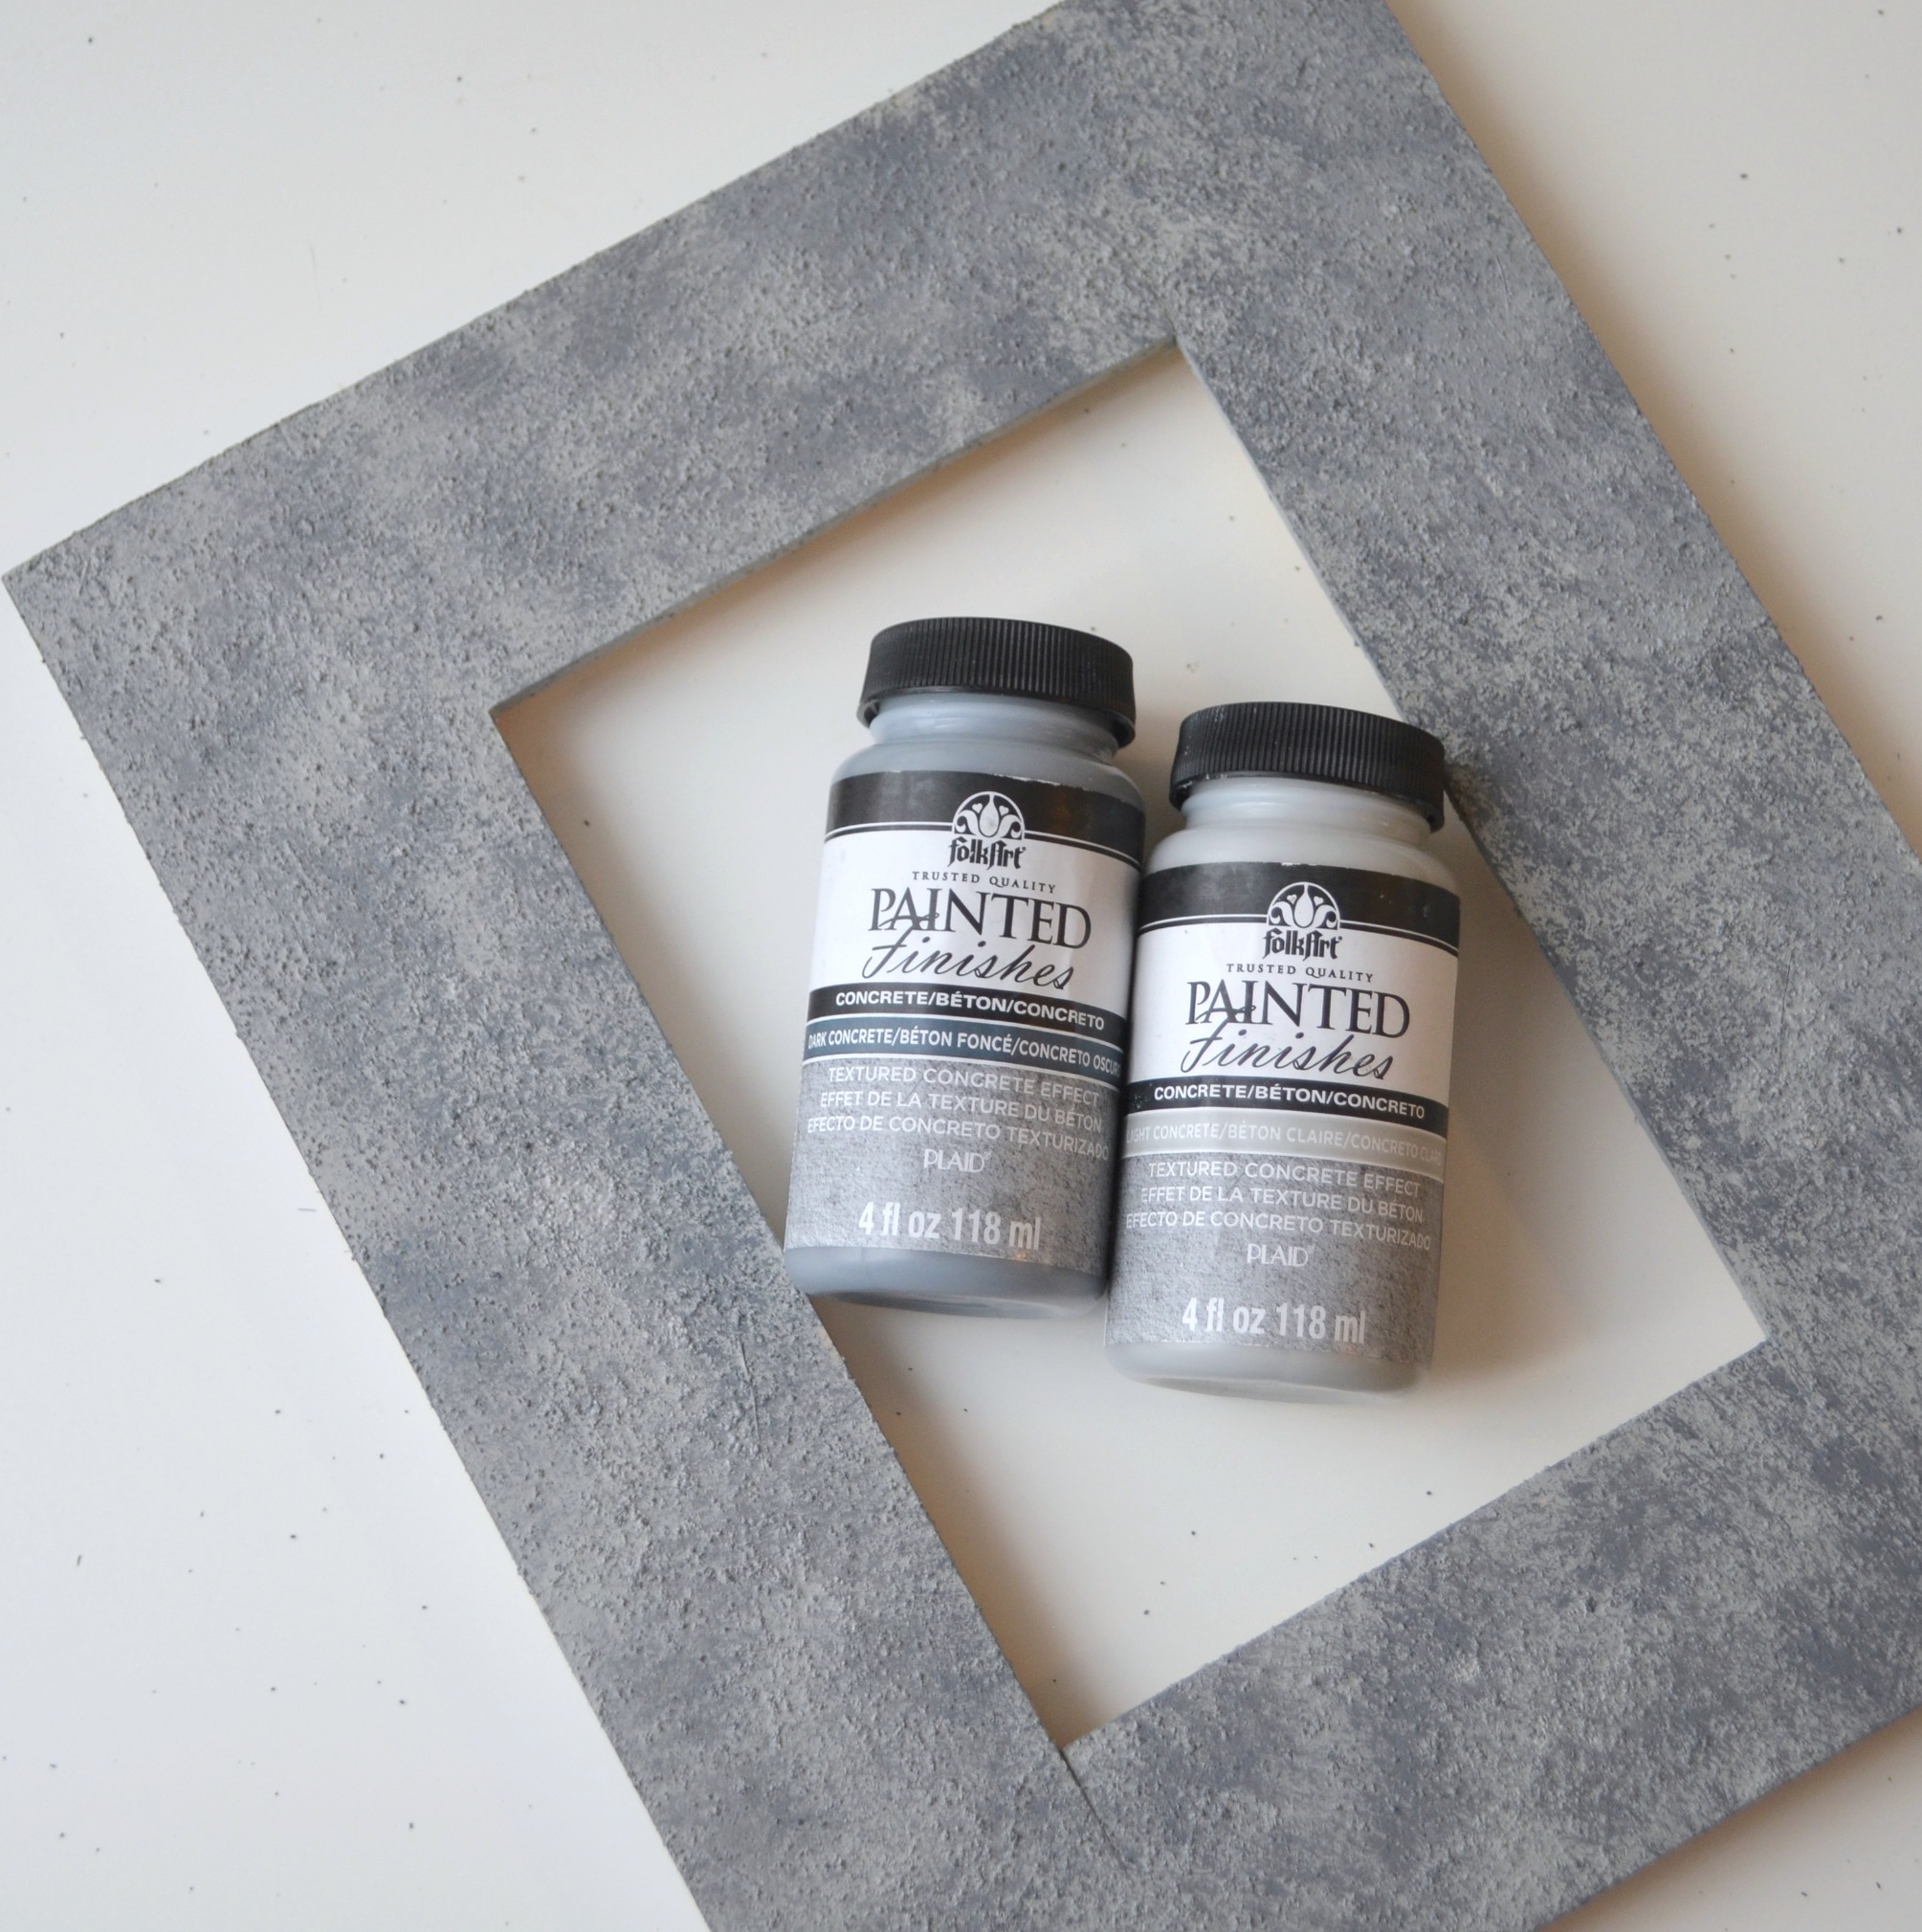
FolkArt Painted Finishes: Light Concrete, Dark Concrete
FolkArt Die-Cut Paper Stencil: Bohemian
FolkArt Multi Surface Paint: Wicker White
Painter’s or Washi Tape
Creating Your Frame
Step 1: Apply a coat of Light Concrete to the entire surface of your frame.
This paint is thick and has a gritty texture, which is what gives it the effect of concrete. Rather than brushing it on like you would acrylic paint, you’ll want to dab it onto the wood with an up and down motion to preserve the texture and create a realistic look. I like to use the Shortie brush, which is specially designed to work with the Painted Finishes collection. Plus, it’s little and cute…bonus.
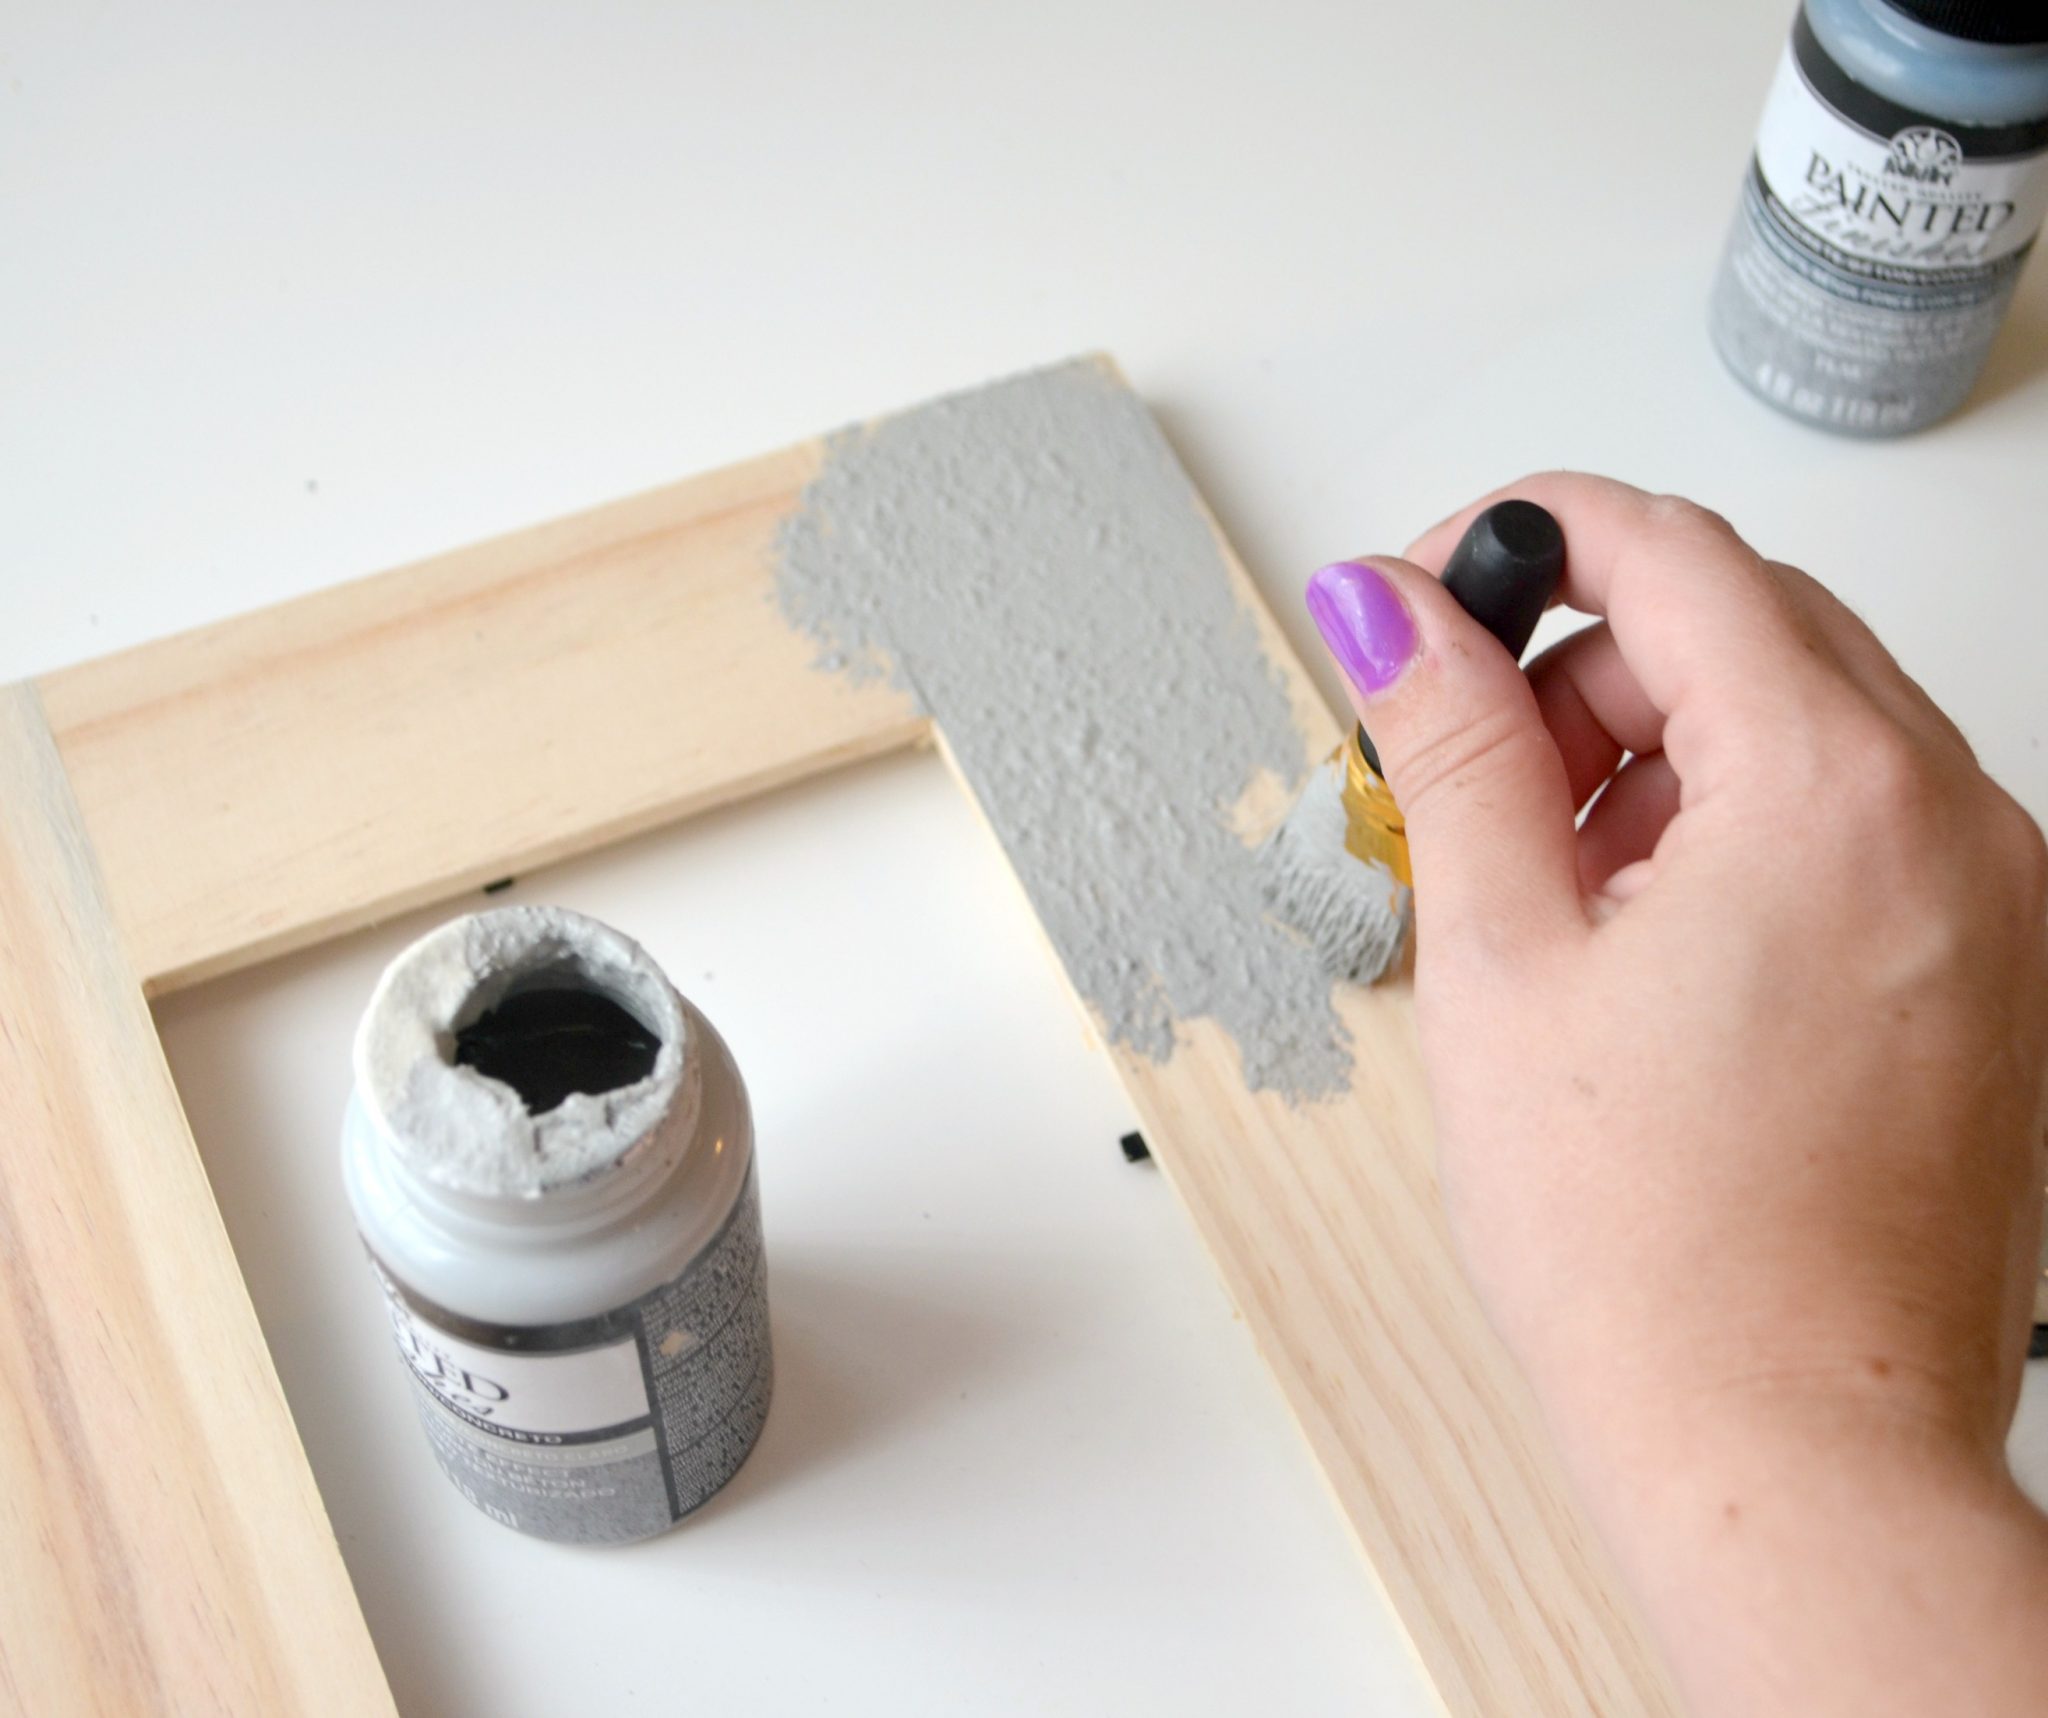
Step 2: Apply a Dark Concrete on top of your Light Concrete coat.
Wait until the light layer is completely dry first, then use that same tapping motion to add areas of the dark paint on top as accents. Make sure to leave areas of the lighter paint visible so that you get a balanced two-tone look.

Allow your frame to dry completely before moving on to the next step so that your stencil paint doesn’t mix with the concrete paints. It’s a good time to clean your little brush and get your stencil ready. The paper die-cut stencils will require you to punch out the pre-cut spaces the first time you use them. In the meantime, isn’t it crazy how realistic this looks?
Step 3: Tape your stencil in place.
Because of the size and shape of my frame, I only wanted to use the center part of this round stencil. So, I taped it in place in some areas I wasn’t planning to fill in with paint.
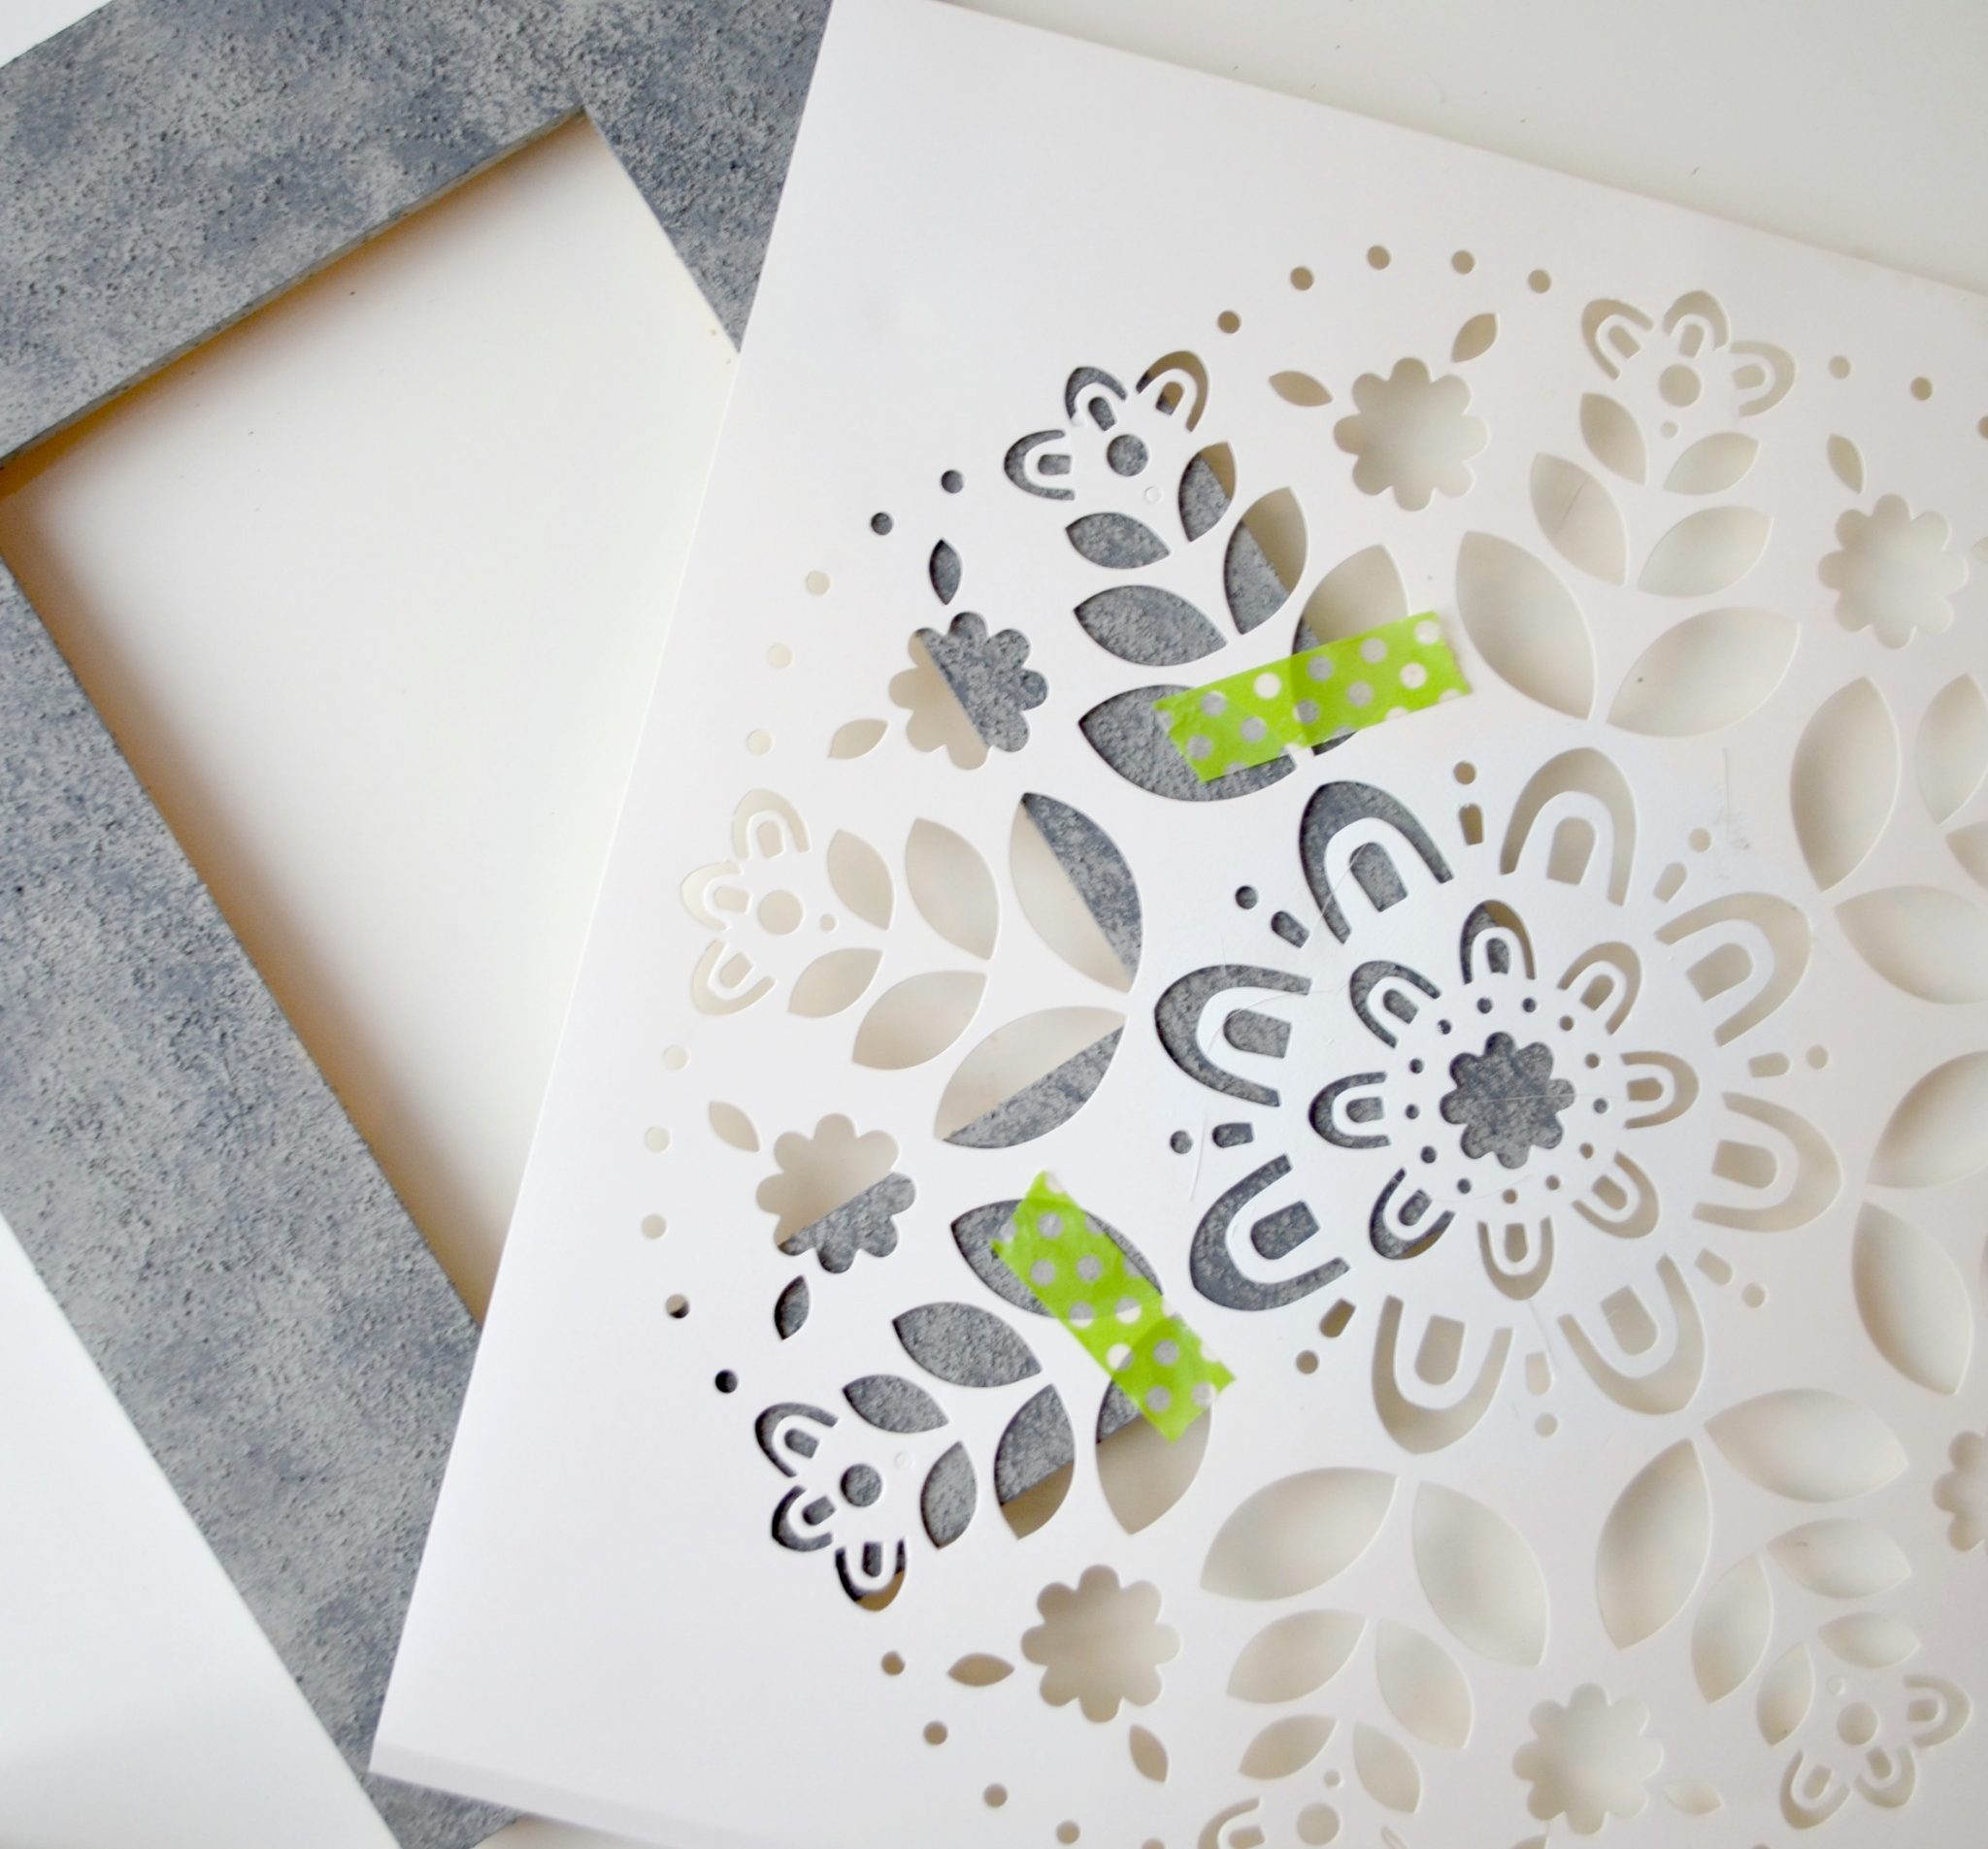
Step 4: Fill in the stencil with white paint.
My pro tip for stenciling is always that less is more. Use a brush that’s almost dry; it’s much better to have to reload often than to have too much paint. An excess will bleed under the stencil and ruin your design. Once again, use a tapping up and down motion, and I highly recommend using a stencil brush because it’s designed just for this purpose.
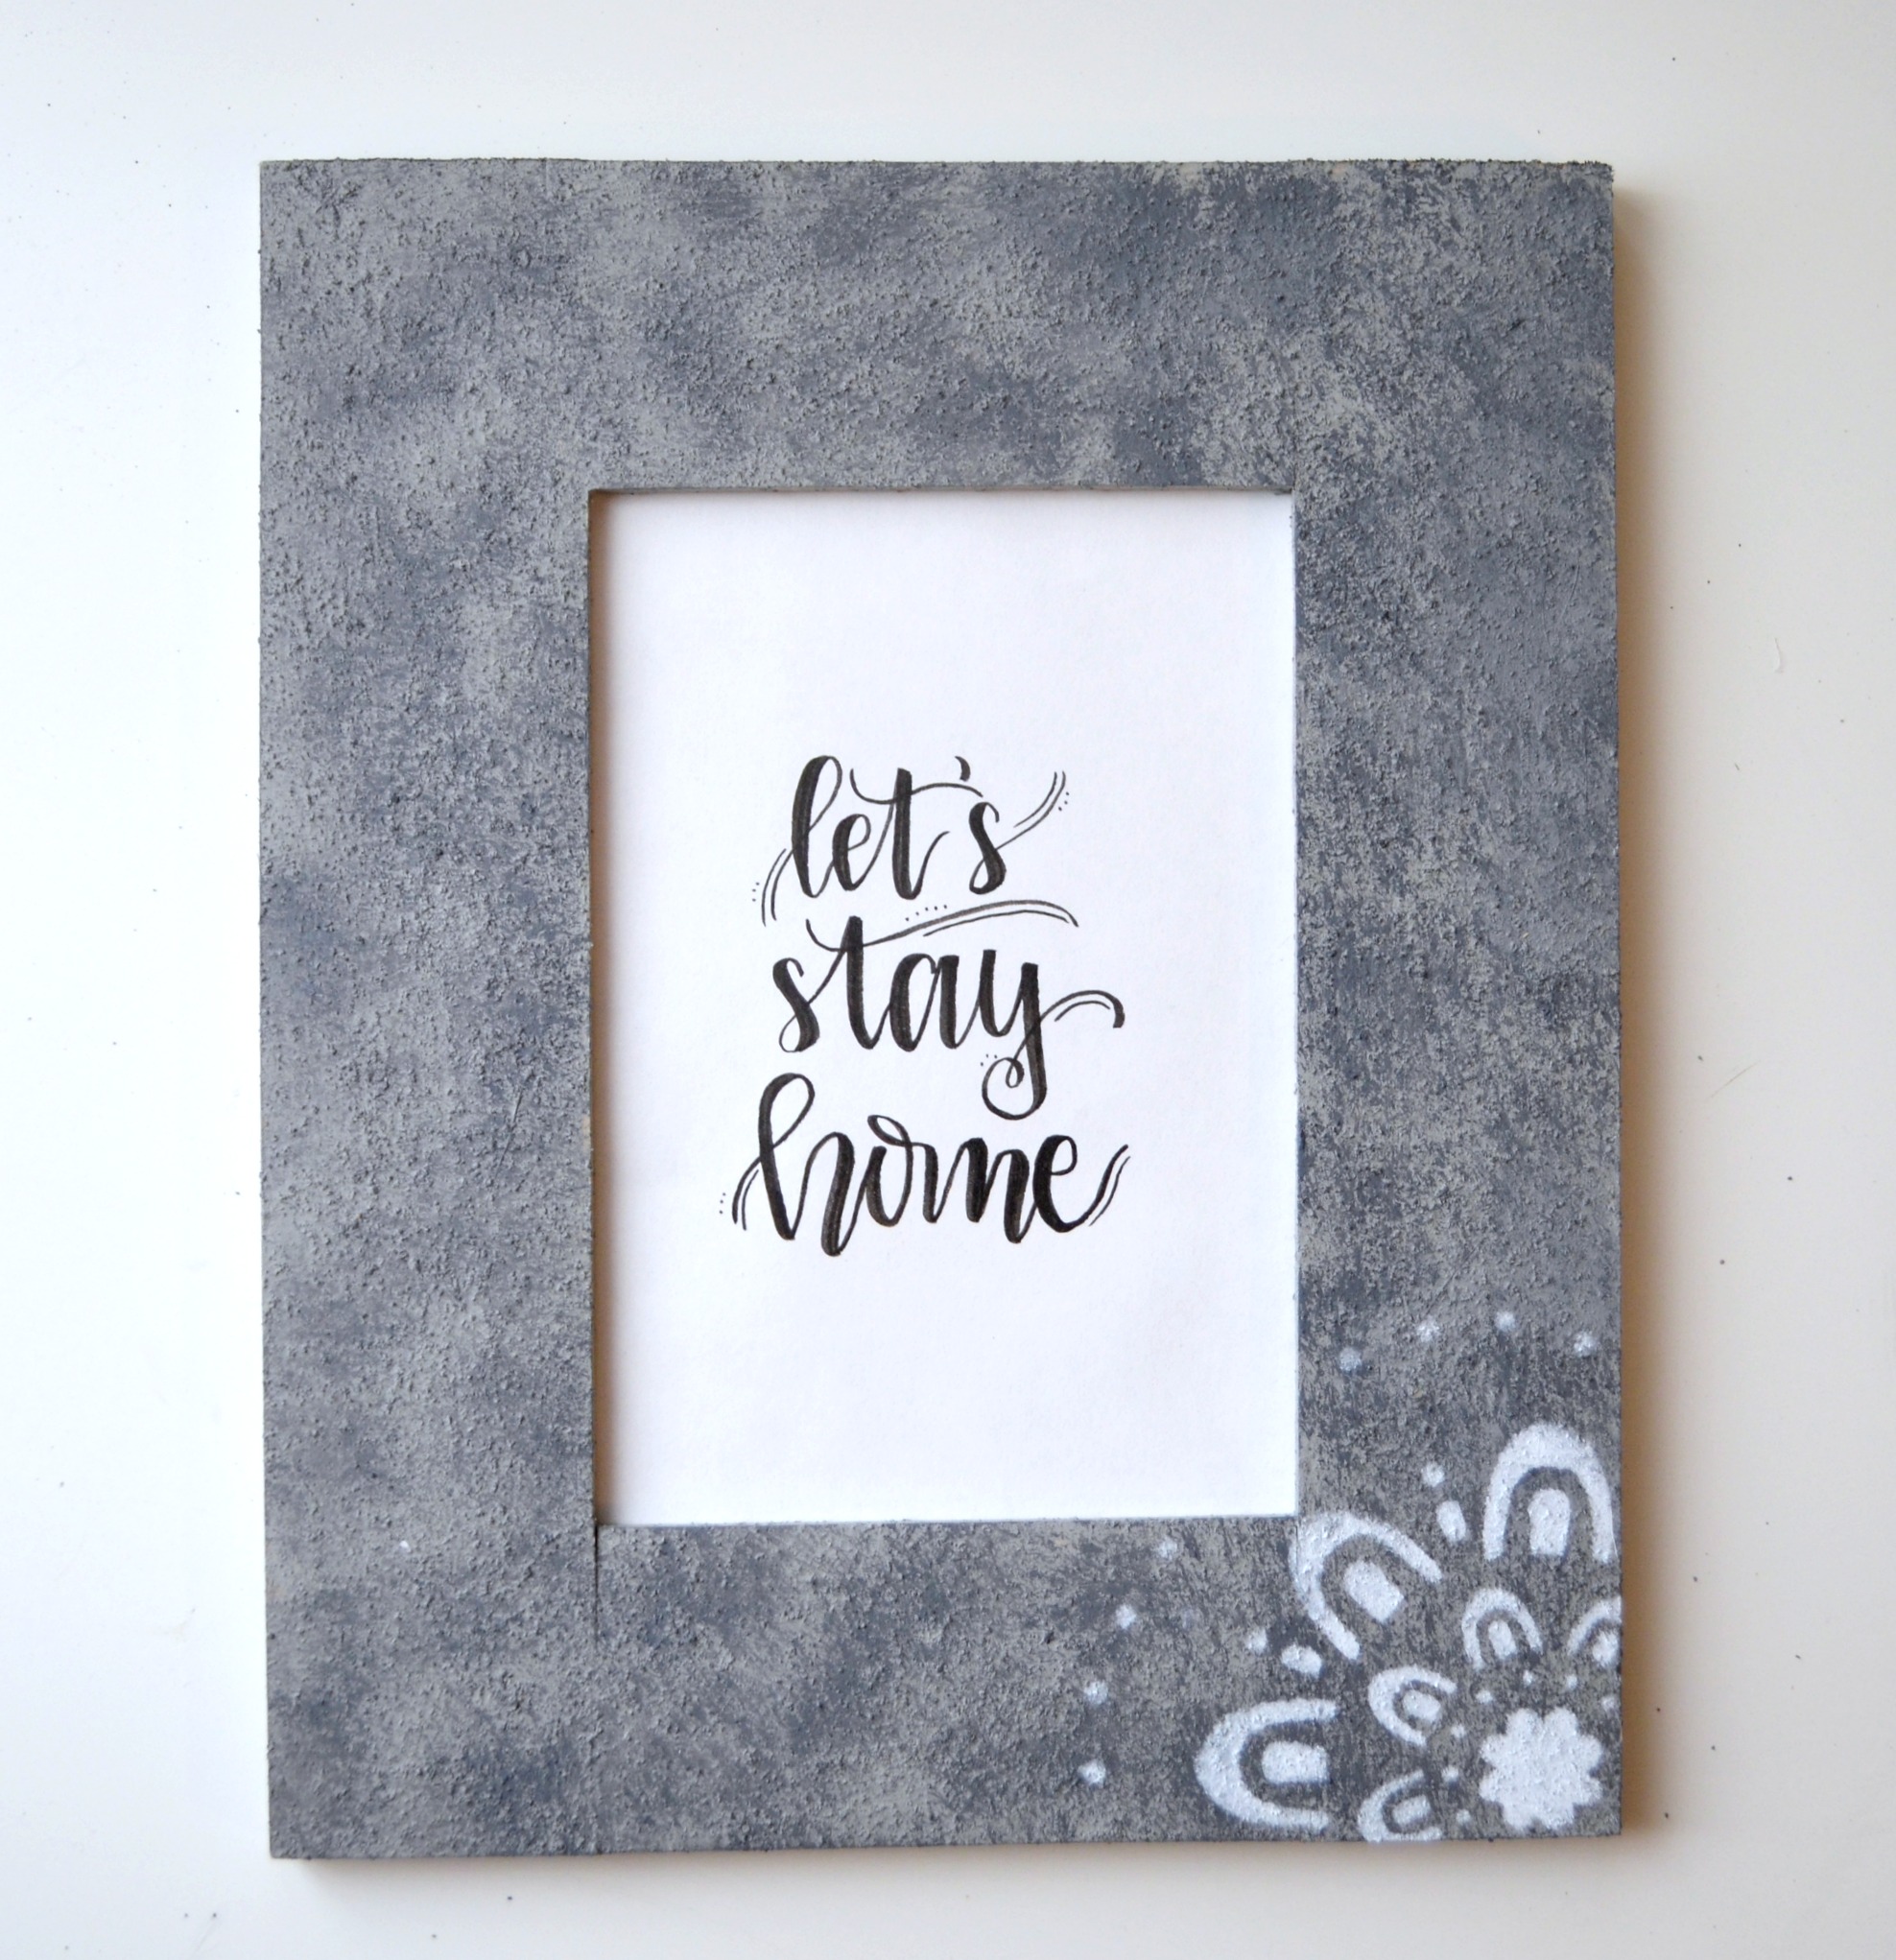
Step 5: Add your lettered print or a favorite photo.
I did a basic brush lettered message, “let’s stay home.” You can download the free printable here if you’d like to use the same one!
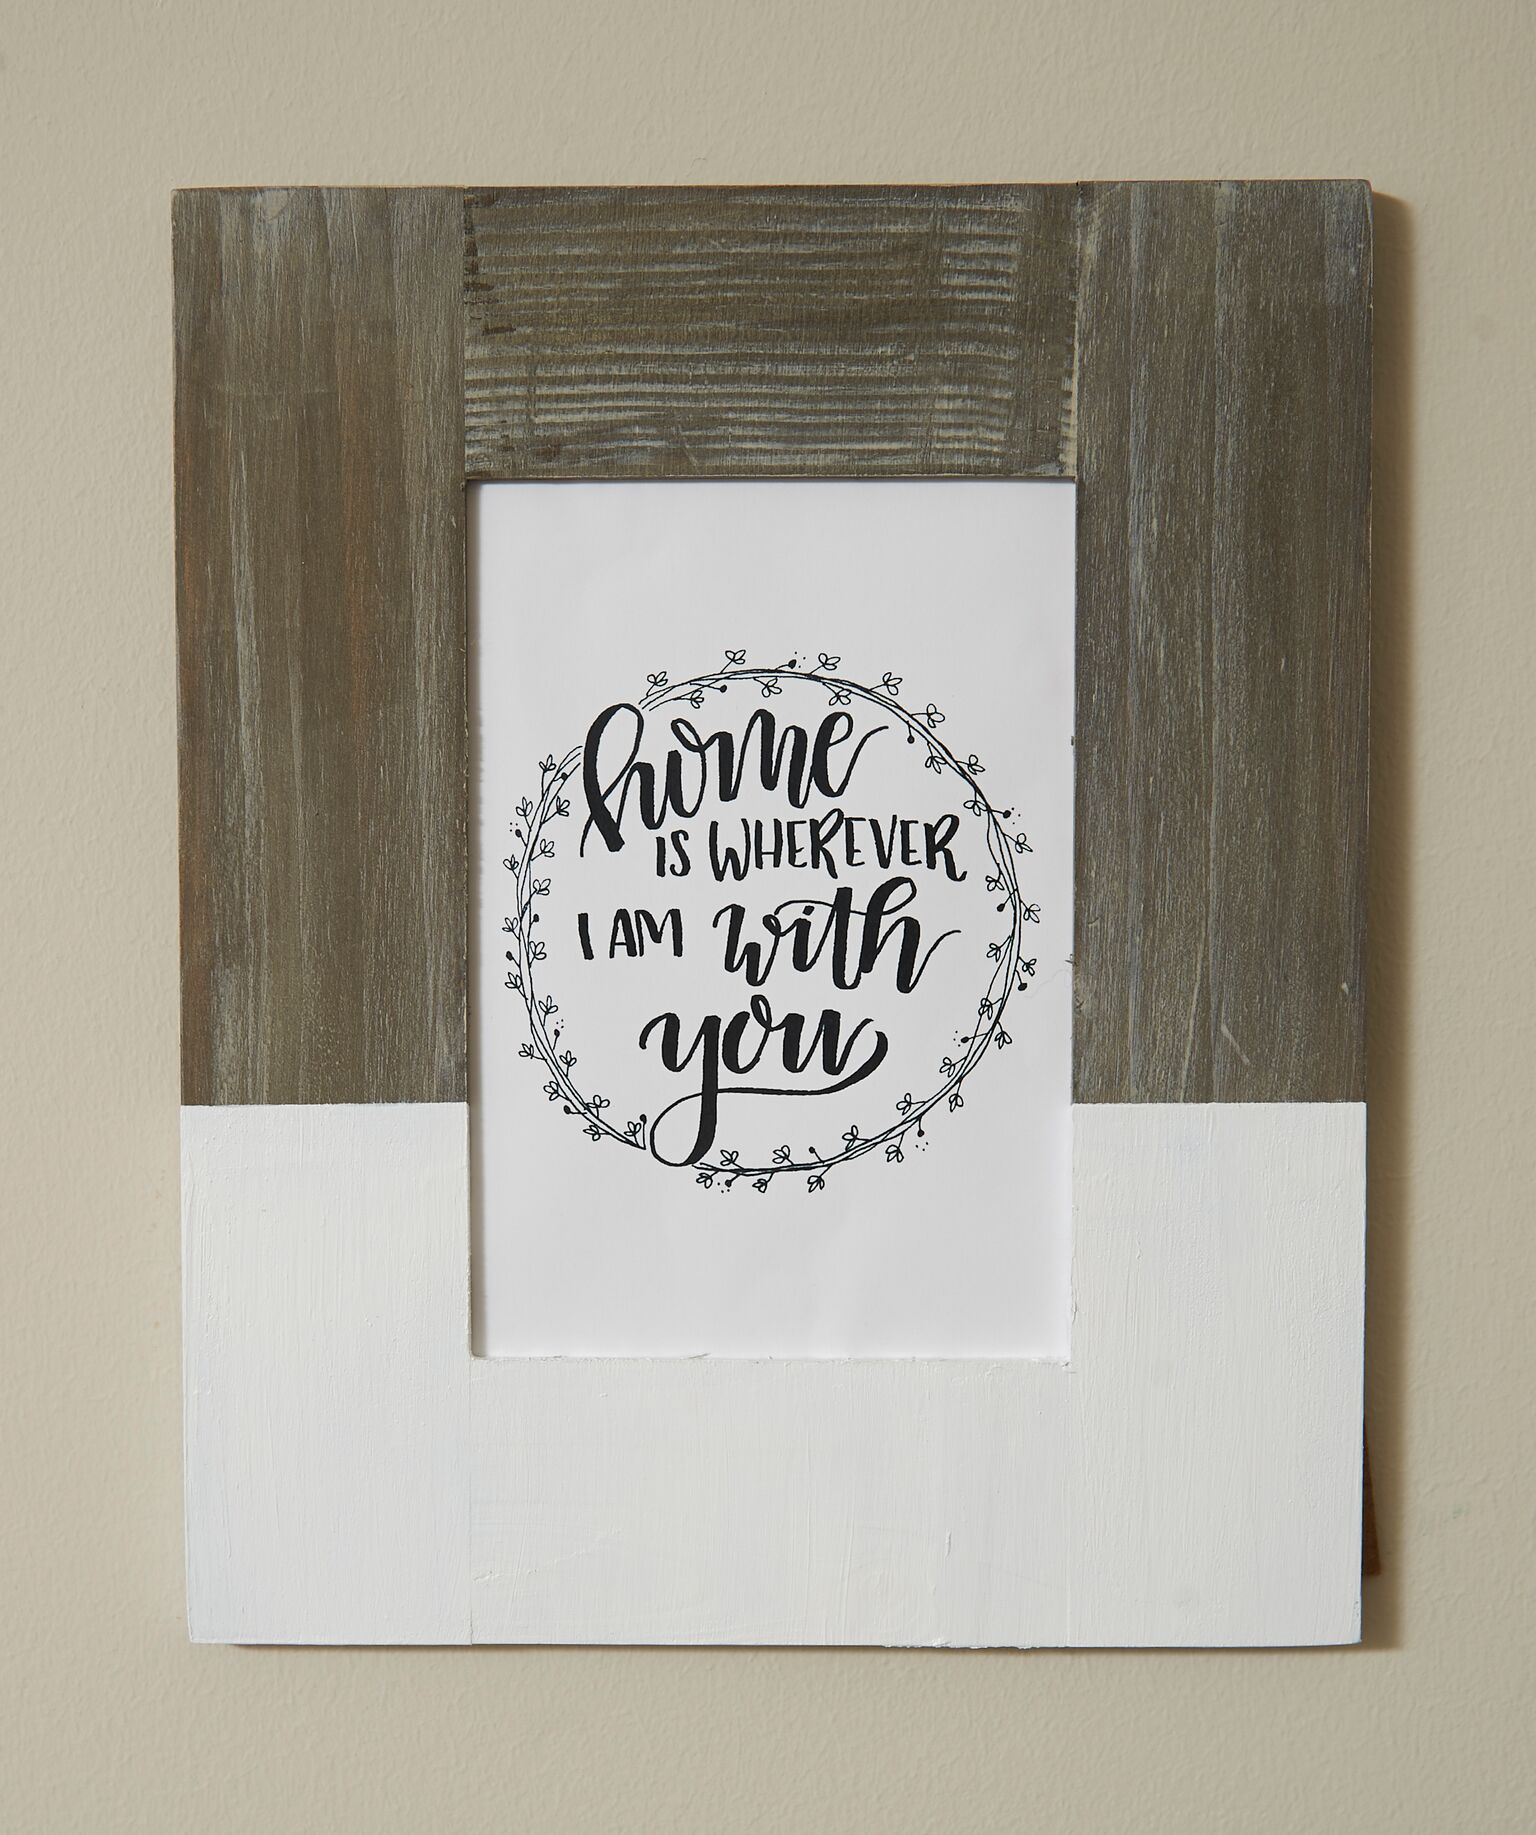
If you prefer, I also created another printable about home for my friends Sam and Liz at The Pretty Life Girls that you can use instead. They created this pretty color dipped white and barnwood frame for the gallery wall that I just love! Download the “home is wherever I am with you” printable here!
Some of the other Plaid Creators are sharing about their gallery wall projects today too; check out Kathy’s Architectural Detail on Petticoat Junktion, and Bev’s Floral Embroidery Artwork at Flamingo Toes!
Plus, did you know you can enter to win the entire gallery wall of projects AND up to $500 in craft supplies from Plaid?! Hop on over to our original room reveal post to enter! Good luck!


How neat! Your frame turned out really nice. I would like to try the Barnwood and the rust paint. Thanks for sharing, I didn’t even know plaid sold paint like that.