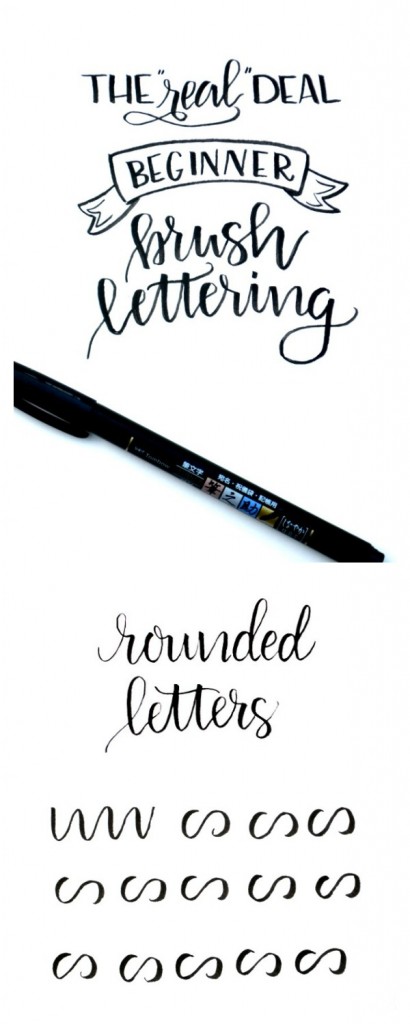
Beginner Brush Lettering: Rounded Letters
Friends, I am so excited to see and hear about your progress as we work through learning the Brush Lettering technique! If you’re just joining us, we’re talking about how to create the brush style hand lettering you see everywhere these days. It can be tricky at first, but once you get the hang of it, you’ll be creating beautiful pieces of art in no time.
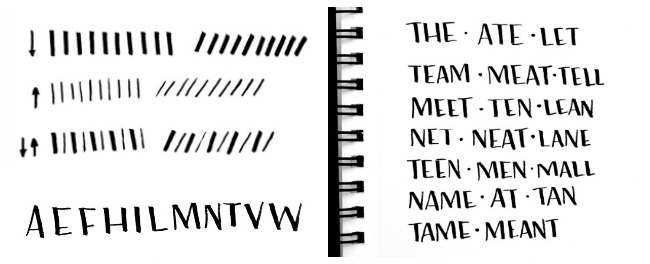
We started off our series learning about Basic Brushstrokes. In this lettering style, down strokes are thick while up strokes are thin. We accomplish this by changing the angle of our pen and the amount of pressure we apply. The easiest way to get the hang of this is by practicing straight lines. If you haven’t checked out that post and done the pressure practice exercises, you’ll want to head there first.
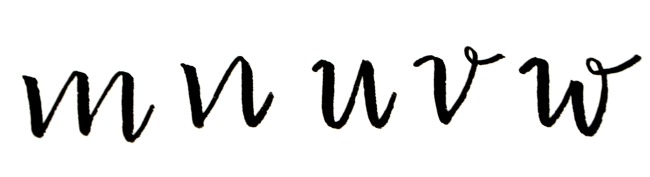
Then, in the second post of the series, we took a look at how to create curving lines. We made upward and downward curves, then starting with a down stroke, we made long squiggles for practice. Finally, we looked at how to turn those squiggles into recognizable letters, like u, m, n, and w. Again, if you missed these exercises, you’ll want to check them out first because each step we’re learning builds on the steps before.
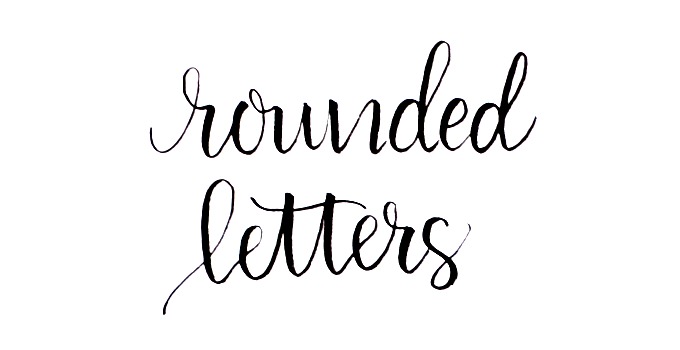
Today, we’re moving on to talk about how to modify our squiggles just a bit and create rounded letters.
The Supplies
Paper – any scrap will do, but I like to have a sketch book just for my practice!
A Brush Pen
FAQ: No, a regular pen will not work. You need something specifically designed with a brush tip to get the effects we’re working on here. The tip of a brush pen is flexible and meant to bend and react under pressure.
My personal recommendations for starting out are the Tombow Fudenosuke Soft Tip or the Tombow Fudenosuke Twin Tip Black/Gray {these are affiliate links, so if you make a purchase, a small portion supports this blog}.
The Technique
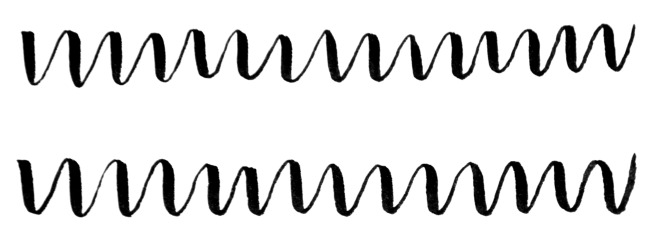
This isn’t too far off from what you did when you were creating the downward and upward curves/squiggles. The only difference is that we’re going to round off the tops and bottoms a bit. Place your pen on the paper and instead of making a line straight down, curve it out to the left while still applying pressure. When you get to the bottom, release pressure like before and start your upstroke. At the top, apply pressure again and curve your line out to the right. This will create something that looks like a sideways “s.”
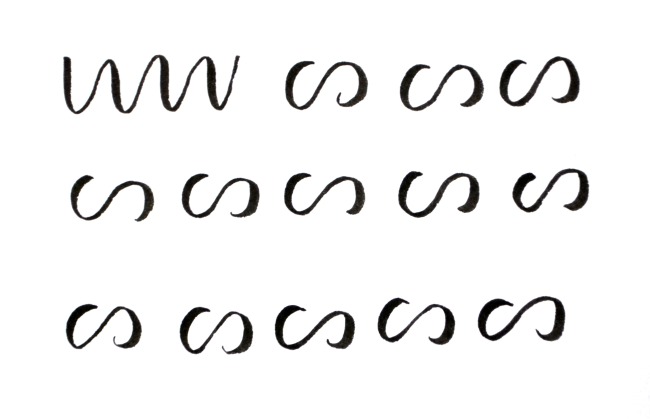
The curved parts on either side should be your thickest lines because those were down strokes, while the part in the center should be thinner. Practice, practice, practice this to get a feel for how your pen handles the curves. And remember, it’s art, not an exact science, so don’t get frustrated when each one looks a little different. The more you do this, the more the technique gets into your muscle memory just like riding a bike or driving a car, so keep going!
Fill a page with these, really.
I mean it.
The Letters
Now that you’ve practiced the technique, let’s look at how it applies to some of our script letters. We’ll start with an “a.” You begin just like you were doing in the practice exercise, but when you get to the top of your up stroke, you’ll come straight back down instead of making another curve.
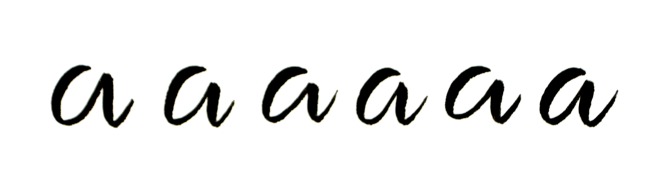
As you practice, play around with how far apart your down strokes are. In the example on the far left, you can see that I left more space, whereas on the far right, I kept my lines much closer together. Personally, I like them closer because I feel that it looks more definitively like an “a,” but there’s no right or wrong to it, just style.
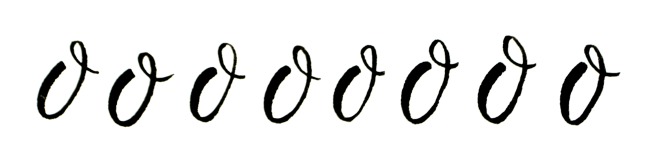
Next, let’s look at the “o” shape. Again, we’re going to start out the same way we did for the practice exercises, but this time when you get to the top of the upstroke, continue it up and around to cap off the “o.”
Creating a “c” means starting the same way but stopping shortly after you start your up stroke. This one can actually be a little tricky; sometimes I have trouble releasing pressure soon enough and my line is thicker than I want it to be, like in the example on the far right.

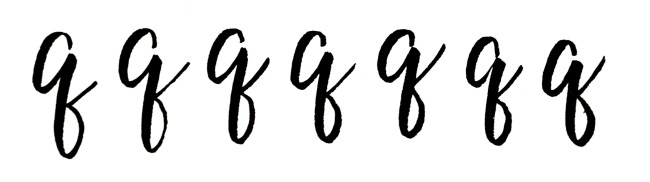
The other rounded letters we’re looking at today are extra fun because they have tails! G and q start exactly like an “a” but instead of ending our line, we continue that second down stroke about twice as long and then finish it off with a little loop.

Each of these letters takes time and practice to feel comfortable, so just keep on writing them over and over and over again. Even now as a “professional” letterer, I still spend time filling pages with letter practice to sharpen my skills. So, fill those sketch books, friends! Keep at it!
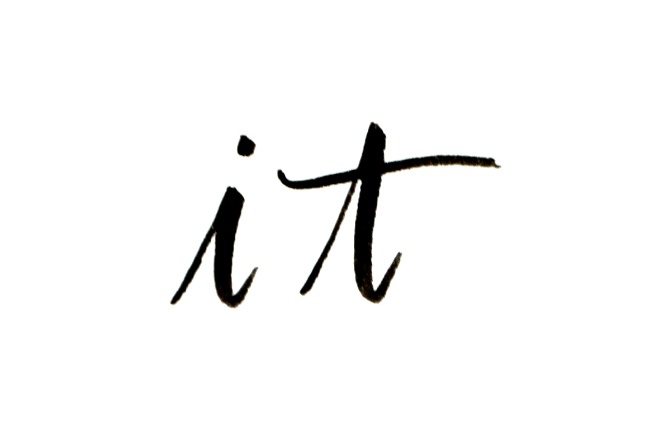
Here’s a quick review of the letters you should be practicing…”i” and “t” make use of simple, straight lines.
These letters are variations of our squiggles/upward and downward curves.
And these letters use the rounded technique we practiced today.

Next time, we’ll talk about loopy letters like “l,” “b,” “d,” and “k”…some of my favorites. Until then, practice makes progress!
Grab my free printable practice pages here: Lowercase Alphabet
I’d love for you to share your work with us in the One Artsy Mama & Friends Facebook group, and you can also feel free to ask any questions there that come up as you’re learning. Also, feel free to use the hashtag #oamandfriends on Instagram so we can see your progress and anything you’re creating. Before you go, stop by and check out my other hand lettering tutorials and project ideas for more inspiration. Happy lettering!

Awesome lesson today! Thank you sooo much!
i just wanted to thank you so much for this step by step tutorial. i feel like your lessons are the only ones that really get the frustrations that come with this type of lettering. every other blog i’ve been to is like “oh simply make the alphabet,” and it is completely unhelpful and makes me feel terrible about my lack of skills right off the bat. thank you a million times for this guide! i can feel myself getting better!
Thank you SO much, your comment totally made my day! My goal is to make the technique “honestly doable” for anyone, and to break it down into smaller, manageable steps! I am so glad to hear that it’s helping you!! I have a book coming out in the spring with more instruction and prompts, so keep an eye out for that!
Is there going to be a a follow up lesson for the letters l, b, d, k,..? Thanks!
Here you go: http://www.oneartsymama.com/2016/05/beginner-brush-lettering-looping-letters.html
I found your tutorials on pinterest and I’ve been following the lessons step by step. They are the most helpful instructions I’ve found so far on the internet. Thank you so much for breaking down the letters into manageable pieces that I can practice everyday!!
Kelley, thank you so much for your sweet comments! I am so glad you are finding the tutorials helpful! Did you know I’m writing an interactive workbook, coming out in Summer 2017?
This has been the most helpful hand lettering guide I’ve found! Did you ever continue onto do the “loopy” letters? I can’t find the next step.
Sure did! Here is the link: http://www.oneartsymama.com/2016/05/beginner-brush-lettering-looping-letters.html
Hi there! Thank you for these tutorials! I’ve been working through them this week. Is there a follow up tutorial for this one? I can’t find it on your blog. Would love to try out the “LBDK” type letters! 🙂
You mean the looping letters! Here you go: http://www.oneartsymama.com/2016/05/beginner-brush-lettering-looping-letters.html