Hand Lettering: Connecting Letters and When to Pick Up Your Pen
When it comes to hand lettering, there are many different styles and fonts you can use in your designs, but the most popular one is called Brush Script. This particular style features a mixture of thick and thin lines within each letter, and while you can definitely fake it using a Faux Calligraphy technique, it’s ideally achieved by controlling the amount of pressure you apply to a brush pen. In June, we spent 26 days looking at how to form each letter of the alphabet in this style. Now, we’re going to take things a step further and talk about how we put those letters together.
One of the most common questions I’m asked about brush lettering has to do with connecting the letters to one another. People always want to know, “when do I pick up my pen?“ You see, although Brush Script is indeed a script font, it’s different that normal cursive writing. When writing in cursive, your pen stays on the paper until the end of each word, but in Brush Script, we stop and lift the pen from time to time. So when do we do that? Well, until recently, my response has been something along the lines of, “whatever feels natural,” but I know that leaves students feeling a little dissatisfied. I realized that there has to be some sort of rhyme or reason to when I lift my pen, so I took some time to analyze my own writing process for a bunch of words and figure out what the pattern is.
Before I share my personal method, I feel like I should say that there’s not necessarily a definitive right and wrong. Other artists may use different “rules,” and ultimately it’s up to you. However, that said, this is the “rule” that seems to work for me.
Lift your pen anytime you would find yourself re-tracing an existing line.
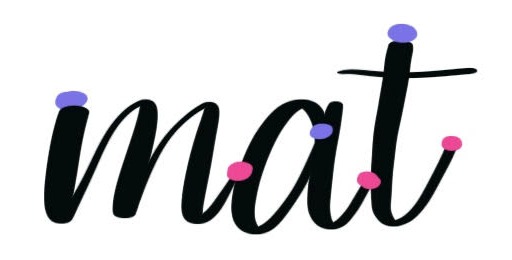
Take a look at the script word, “mat.” In normal cursive, there are two places where your pen goes back and writes over top of lines you’ve already drawn.
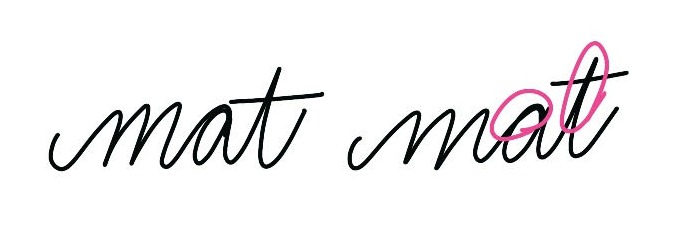
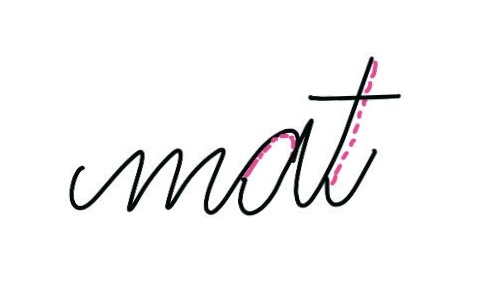
Write it for yourself on a piece of scrap paper and you’ll see what I mean. First, your pen goes up after the “m” to form the top of the “a”, then it re-traces part of that line as the “a” loops around. Then, you form the tall line of the “t” and retrace it coming back down. The dashed pink lines below indicate the retraced spots.
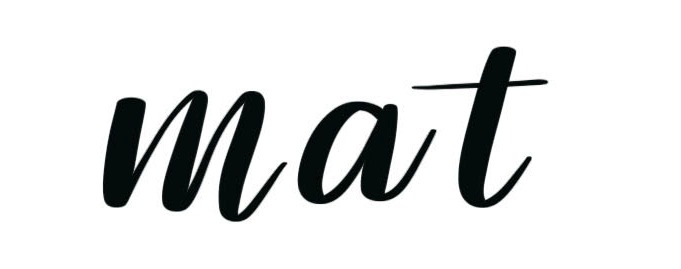
When we write this word in brush script, we’re going to pick up our pen before writing those areas instead. Take a look. First, we’ll write the “m,” then pick up our pen before beginning the “a.” We’ll write the “a” and stop before beginning the downstroke of the “t.” In the example below, I left a bit of space between the letters to show each separate pen movement, but ideally, we want the letters to touch each other to give the appearance of being connected.
Here’s another look at the same thing: the purple dots indicate the start of each pen stroke and the pink dots indicate where I lifted the pen.
Here’s how the letters look written all together.

In this particular example, we lifted the pen after each individual letter, but that isn’t always the case. In the word, “love,” the only retracing we’d have to do happens at the top of the letter “o.”
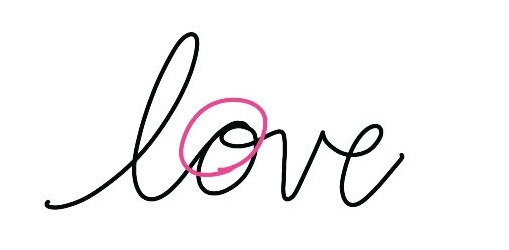
That means we pick up the pen after the first letter, “l,” but we can easily connect the remaining three letters together without having to retrace any of our lines. Take a look:
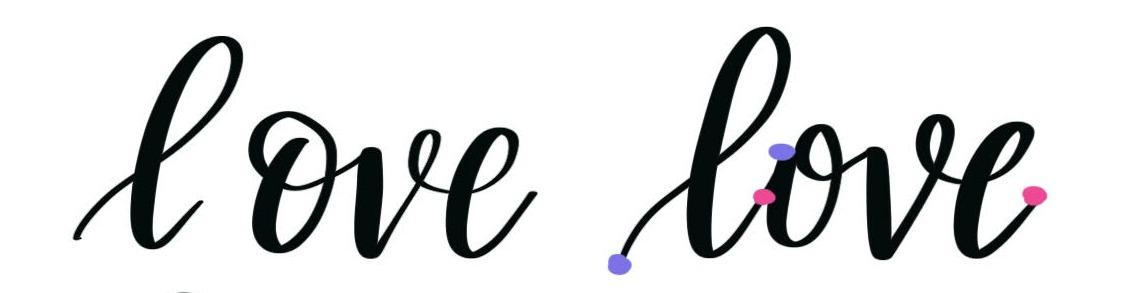
This time, we only have to lift our pen twice; once after the first letter, then again at the end of the word.
Here are a few more sample words broken down into pen strokes to help you get a feel for following this pattern. On the left, you’ll see each lift of the pen indicated by a pink dot. Notice that each word is different, based on which letters are next to each other. Over time, you’ll begin to have a feel for where the pen needs to lift in order to avoid re-tracing your lines.
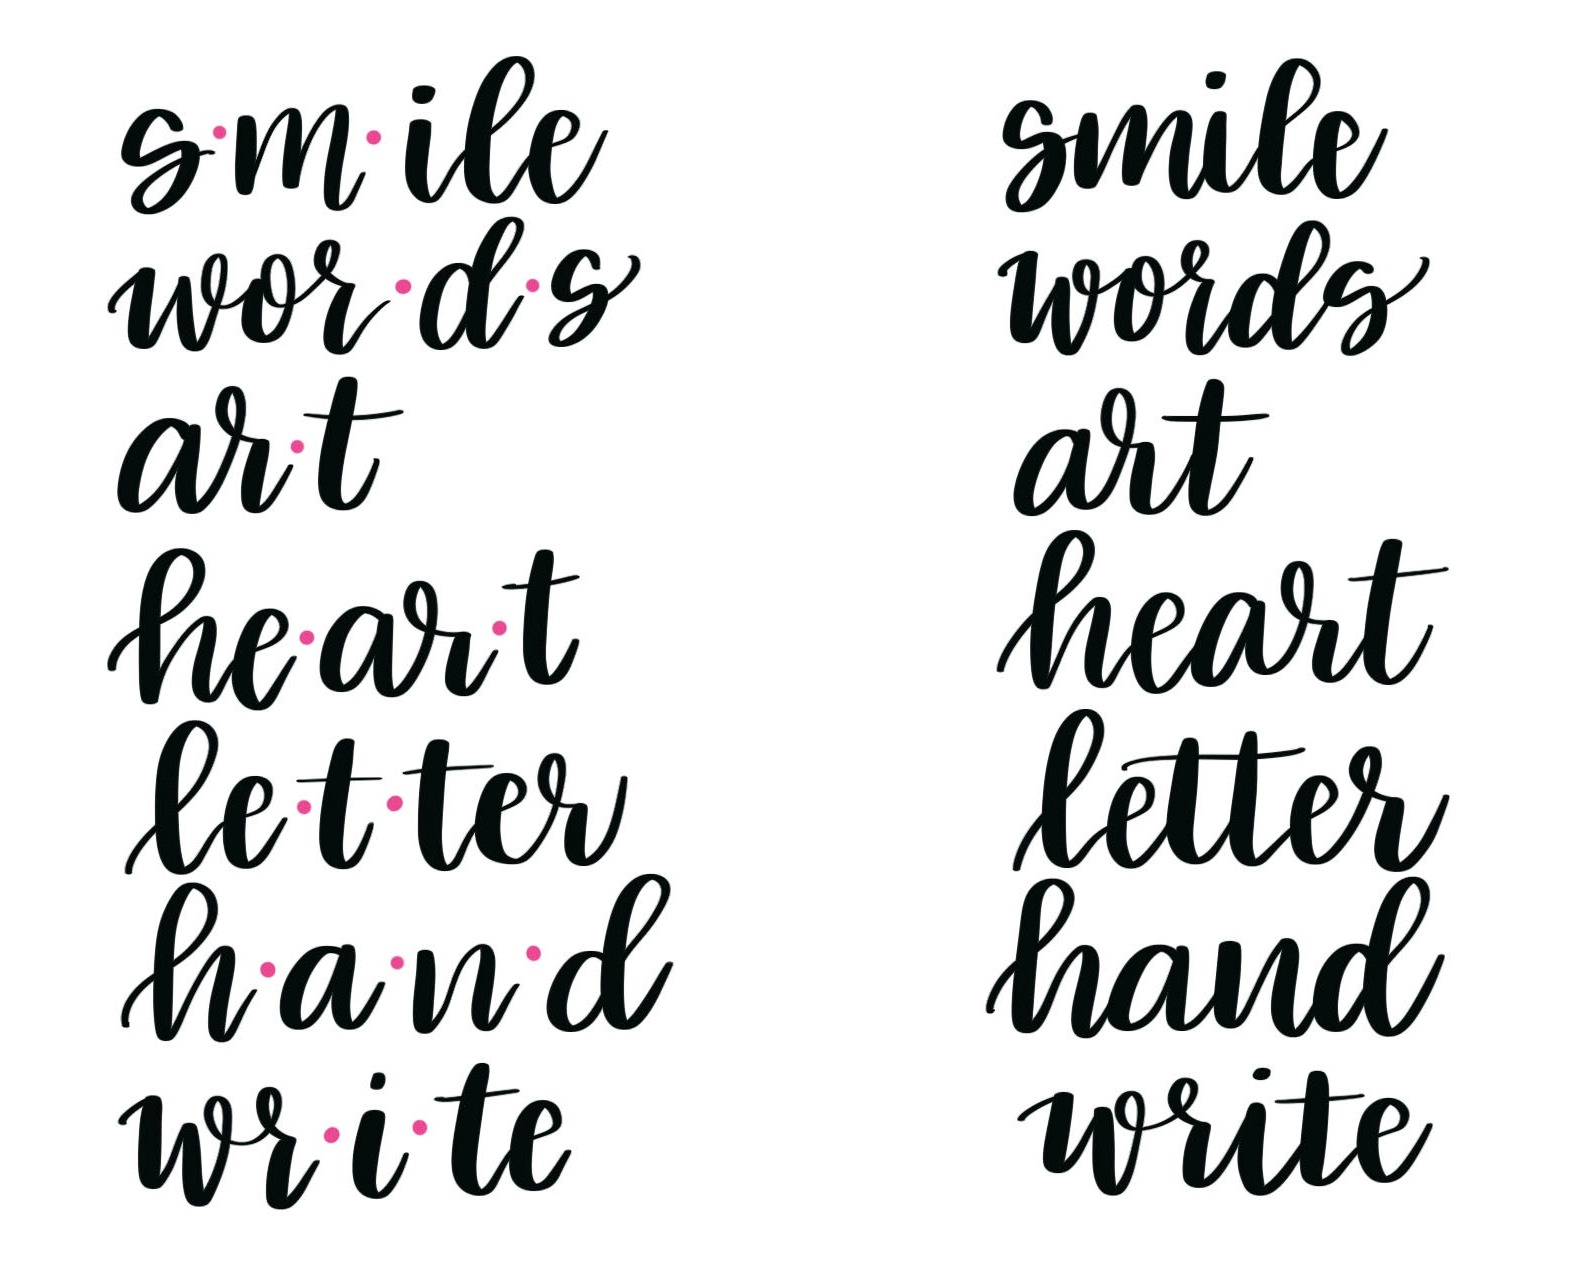
You’ll start to know what feels natural and do it without even thinking. In the meantime, feel free to use these practice words as you get the hang of things. Remember, it’s not a matter of “right” or “wrong,” just a general guideline that should help make your lettering look and feel cohesive.
If you found this post helpful, don’t forget to pin it for later and to share it with your lettering friends!


Excellent explanation – thank you!
Awesome Content
Another way to answer that same question would be that we lift our pen after completing each of the basic strokes. There are many examples of the basic strokes on Pinterest and throughout the net, The concept is that the brush letter alphabet is made of a series of connected basic strokes, for example, b= / + o (downstroke+oval- sorry, it’s not easy to find equivalent on the keypad of my phone ), and you would pick up the pen after completing each stroke individually.. This tends to simplify the whole lettering process down and help with consistency , as one can practice each stroke , as opposed to each letter. I see you have a different technique, Amy, and I love that it feels really natural. I just wanted to add , for those that approach less intuitively, and more structurally.
I am still a beginner at brush lettering, but I also have learned that you are supposed to lift your pen after every stroke (entrance/exit stroke, full pressure/down stroke, ovals, curves, loops, etc.). So, I would be lifting the pen a lot more often than the way it is explained here. I think I would be lifting the pen 7 times for the word “mat”. I’m being taught that it is basically the difference between calligraphy/lettering and cursive. Is what is described in this post a different style of lettering? Or am I being taught this way because I am a beginner?
Different people take a different approach to this. I don’t personally always follow that rule. It depends on if you are able to control the pen and changing the pressure without lifting the pen. As you practice, you should find yourself able to shift from upstroke to downstroke and vice versa without lifting.
This was great. Really clicked on how to go from letters to words!
So glad it makes sense! Yay!
That helped me so much! I have been wondering about this a lot lately and this explained it all. Thank!