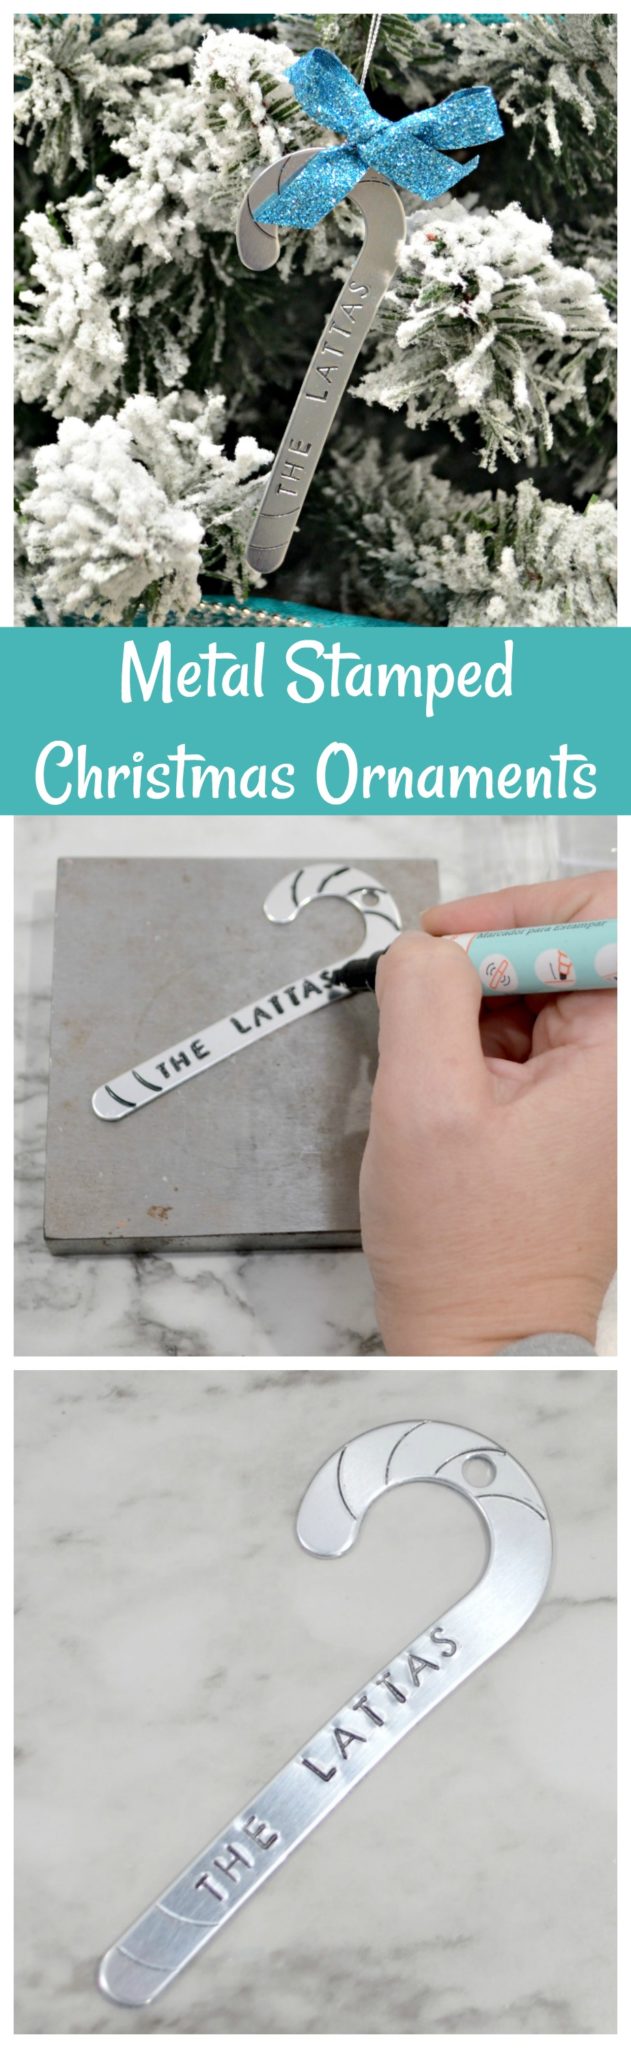
Metal Stamped Christmas Ornaments
Thanks to ImpressArt for sponsoring today’s post; all opinions are honestly my own.

It’s beginning to look a lot like the holiday season, friends! Did you catch my last post where I shared all about how I decorated a tree for in my newly renovated craft room? In it, I warned you that even though I promise our family is still making the most of this month to be grateful for all our blessings, it’s also my job to stay ahead of the seasons and share Christmas inspiration early so it’s there when you’re ready for it! Today is another one of those days…I want to show you how incredibly easy it is to make really personal ornaments for the special people in your life using metal stamping. ImpressArt has brand new holiday ornament kits that I absolutely love, and I think you will too. Take a look…
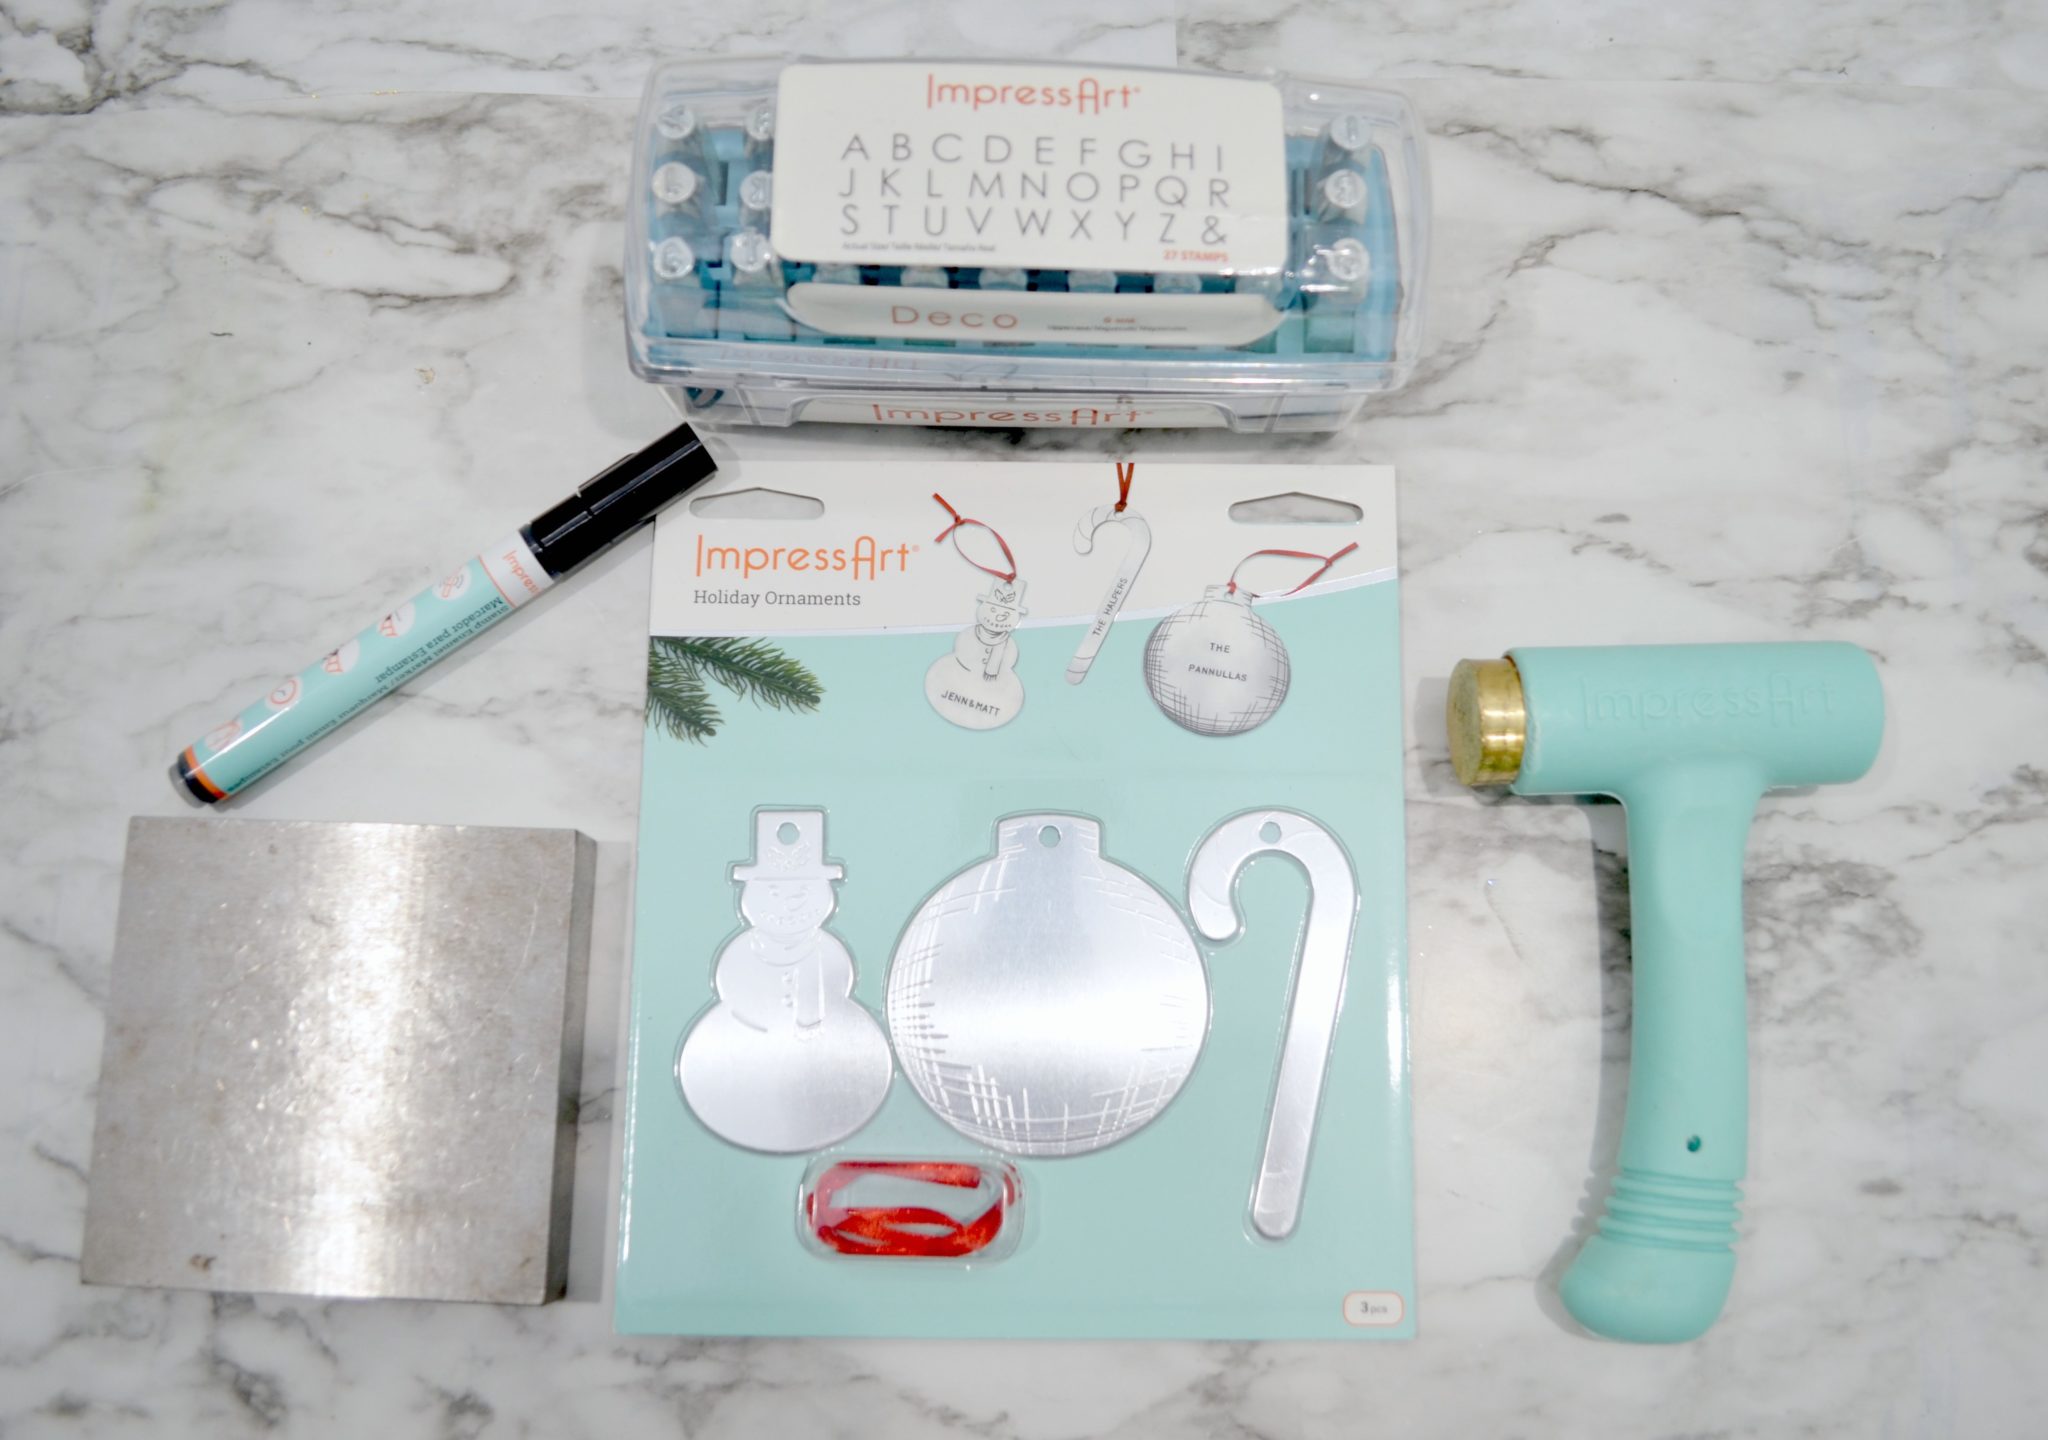
You’ll need:
ImpressArt Holiday Ornaments Project Kit
Metal Stamp Alphabet Letters – I used the ImpressArt Deco Uppercase, 6mm
ImpressArt Stamp Enamel Marker, Black
Soft cloth or paper towel
Optional: String/Ribbon in your choice of colors, Scissors
Making Stamped Ornaments
Step 1: Place your ornament on a steel stamping block.
If you want to use Stamp Straight Tape to secure it in place, feel free. A steel block is necessary because it’s hard enough to provide just the right amount of resistance, allowing the stamp to imprint the metal blank, but not your table.
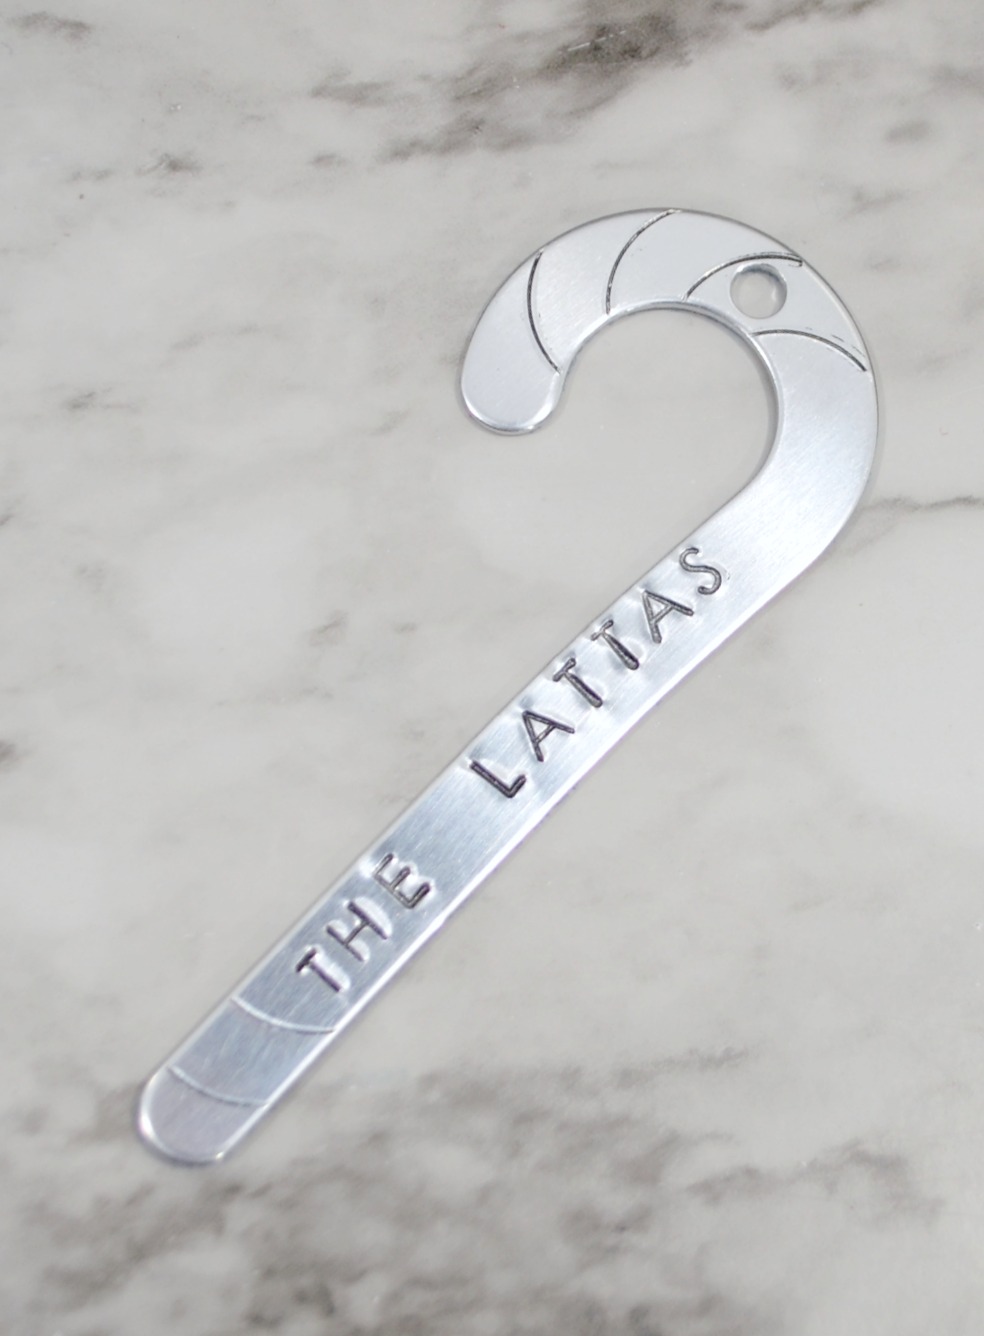
Step 2: Hold each letter stamp vertically and use a hammer to give a strong, solid tap on the flat top.
One good tap should be enough to create an impression. Tapping more than once allows opportunity for your stamp to move slightly in between hits, which makes your letter look fuzzy.
Pro tip: When working with ImpressArt stamps, if you make sure the imprinted logo on the side is facing you, your letter will always be right side up.

Step 3: Use the Stamp Enamel Marker to fill in all indented areas on the ornament.
This includes any details like the candy cane stripes or the snowman’s face, as well as the letters you stamped.
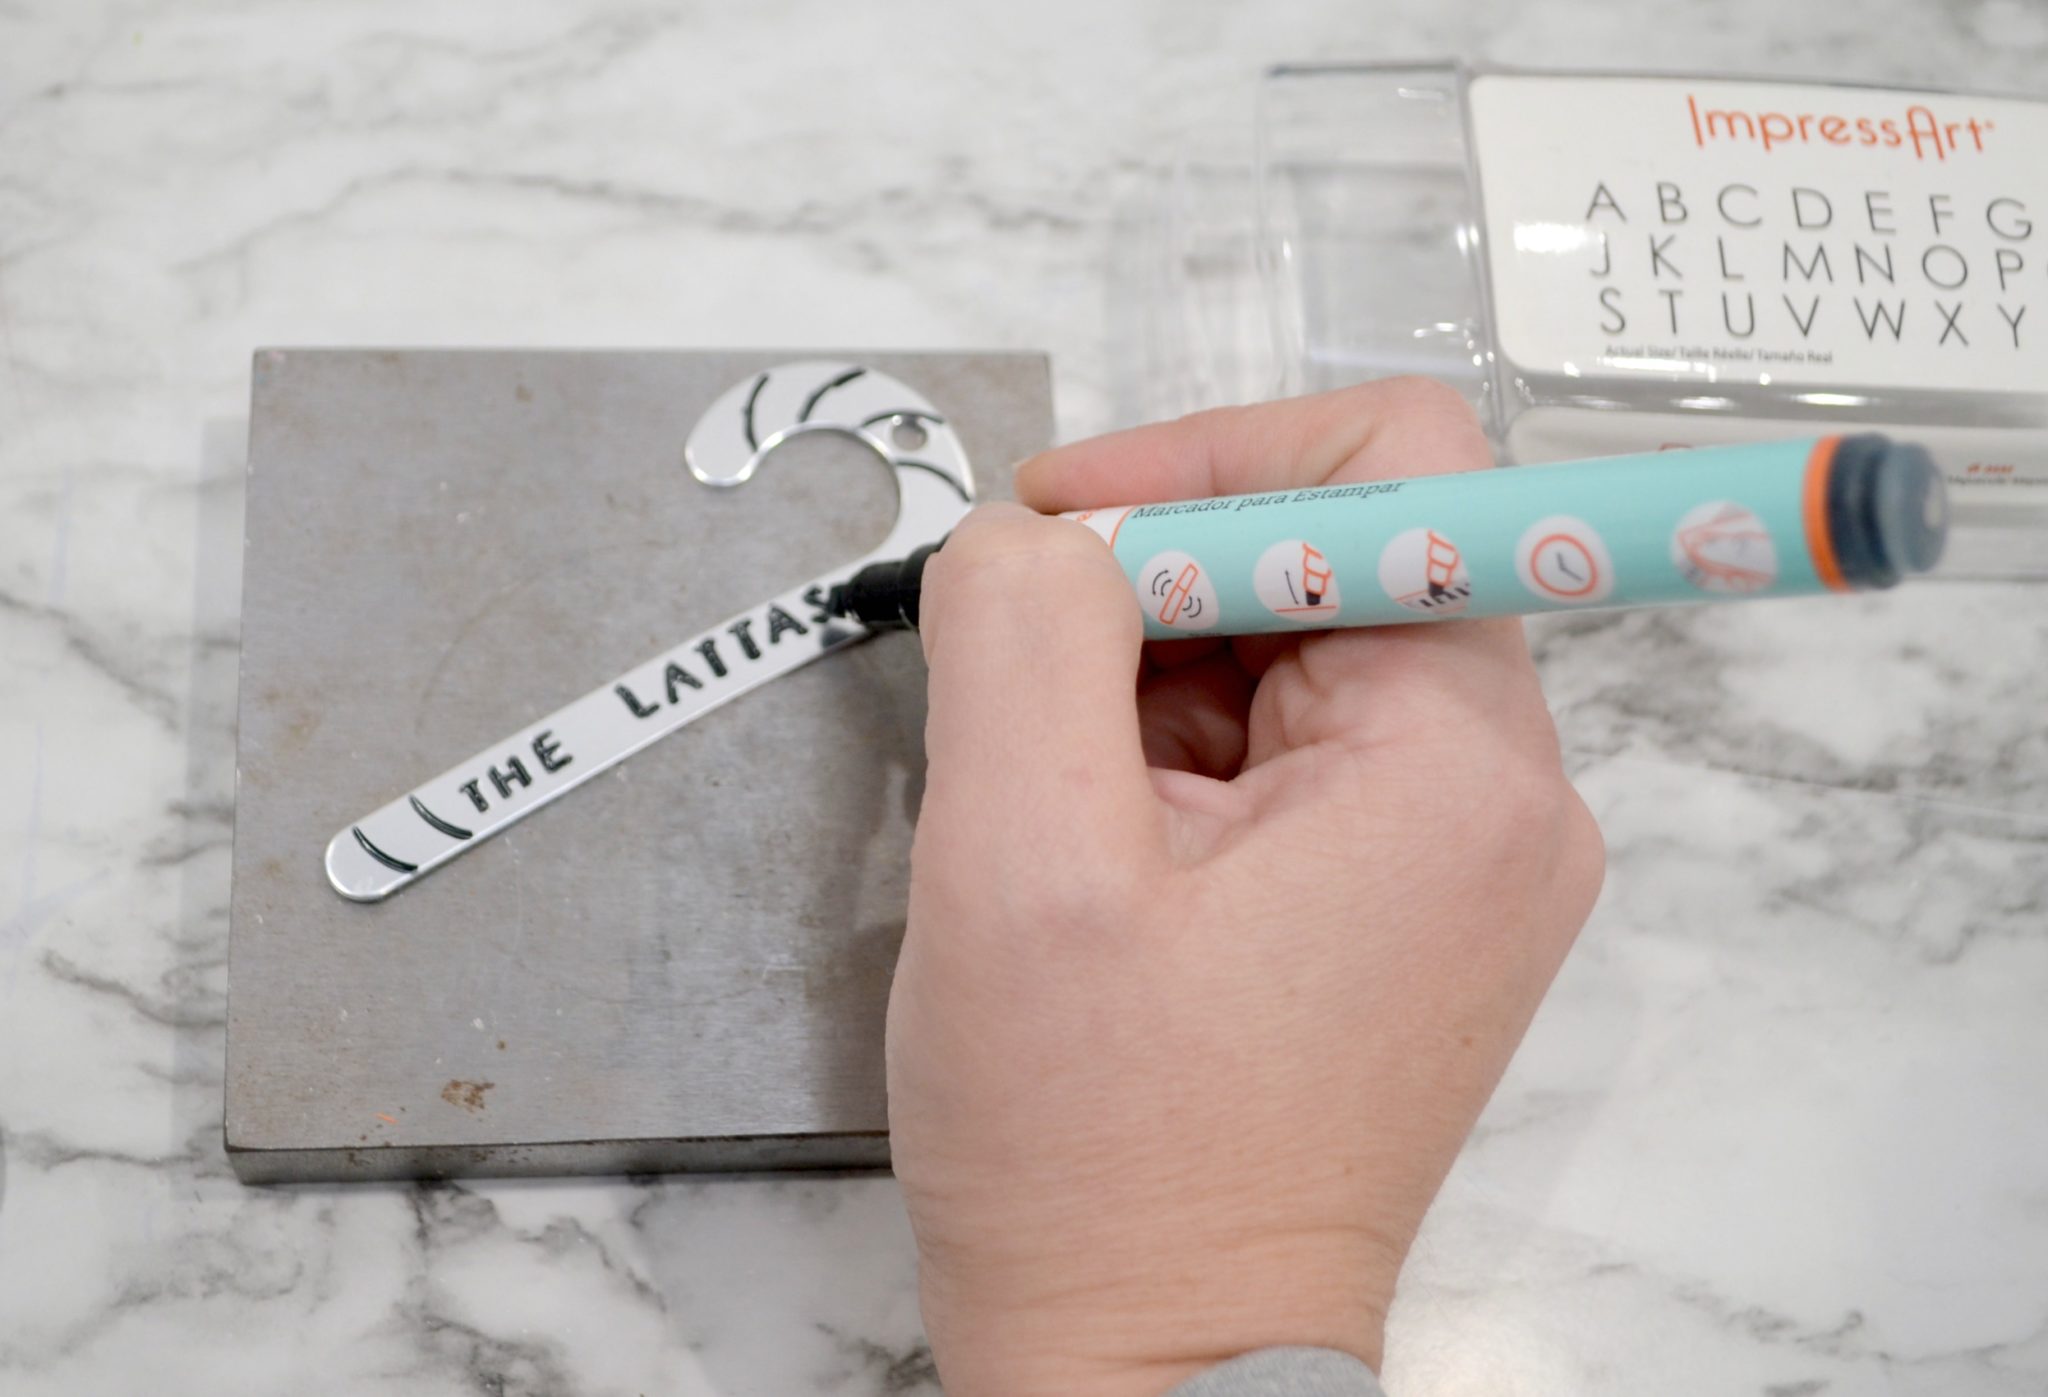
Step 4: Wait a few minutes, then wipe off the excess marker with a soft cloth.
This will get rid of any unwanted color on the surface of the ornament and leave the enamel down in the grooves, giving it that nice, oxidized look and making it easier to read.
Step 5: Attach string/ribbon.
The kit comes with red ribbon; all you have to do is thread it through the hole in each ornament and tie a knot. However, since my tree is all teal and metallics, I decided to use some silver string and teal ribbon I had on hand instead. Feel free to use whatever type of hanger you like best.
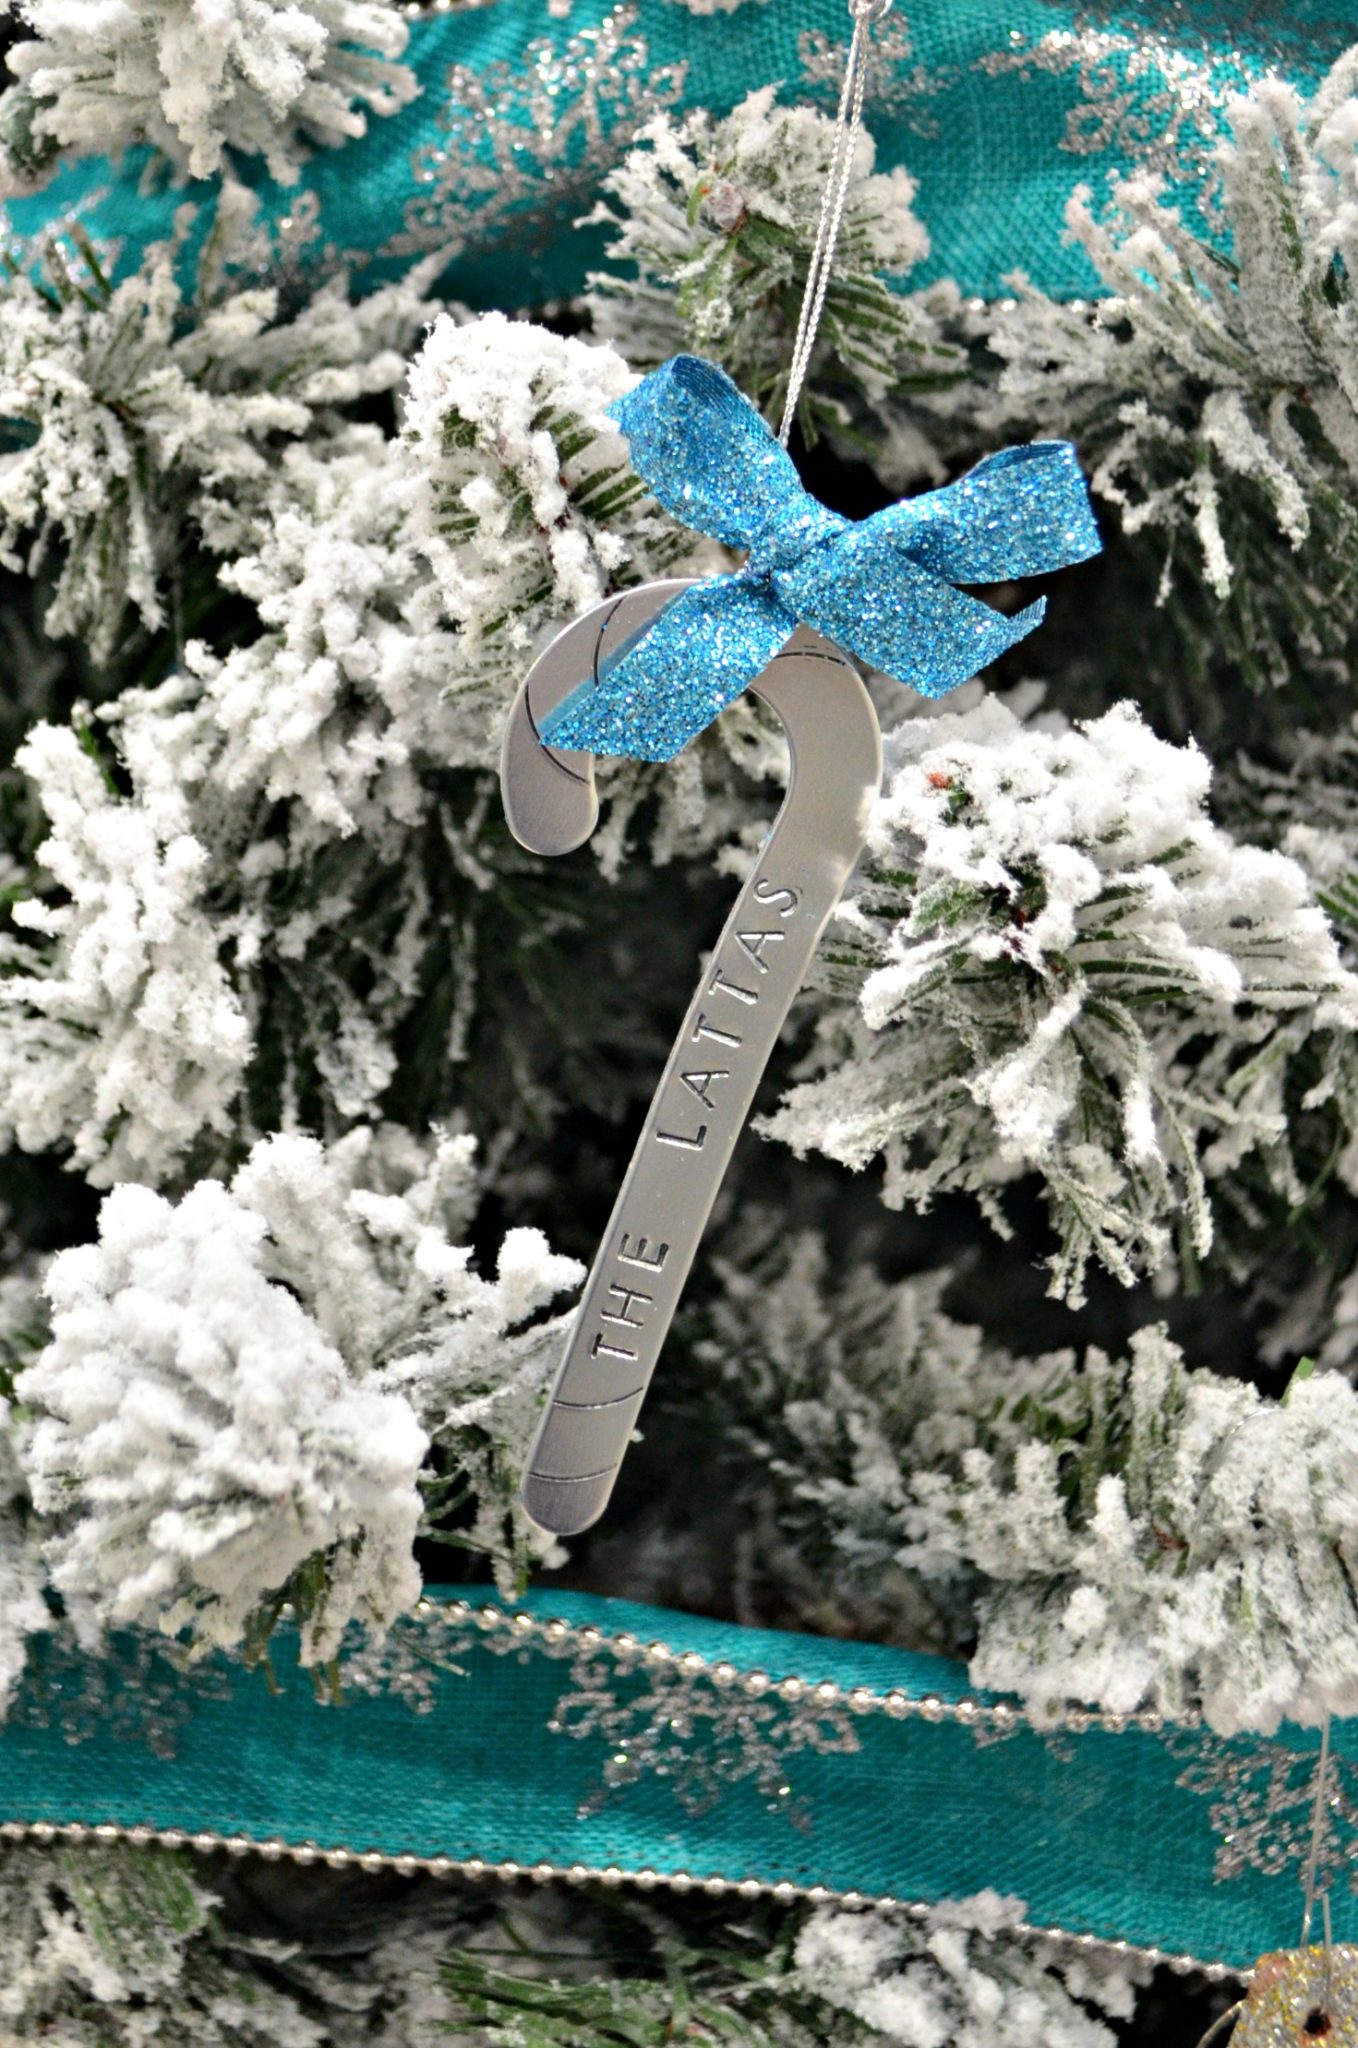
That’s all there is to it! Your ornament is ready to hang on the tree or to give away! These would also be so pretty tied onto packages; they make great name labels, then the recipient can hang them on the tree after opening their gifts.

I absolutely love these cute little kits, don’t you? You can get the variety pack like I have, or you can purchase just candy canes, snowmen, or round ornaments instead. Which shape is your favorite?
Don’t forget, if you like it, then you oughta put a Pin on it!