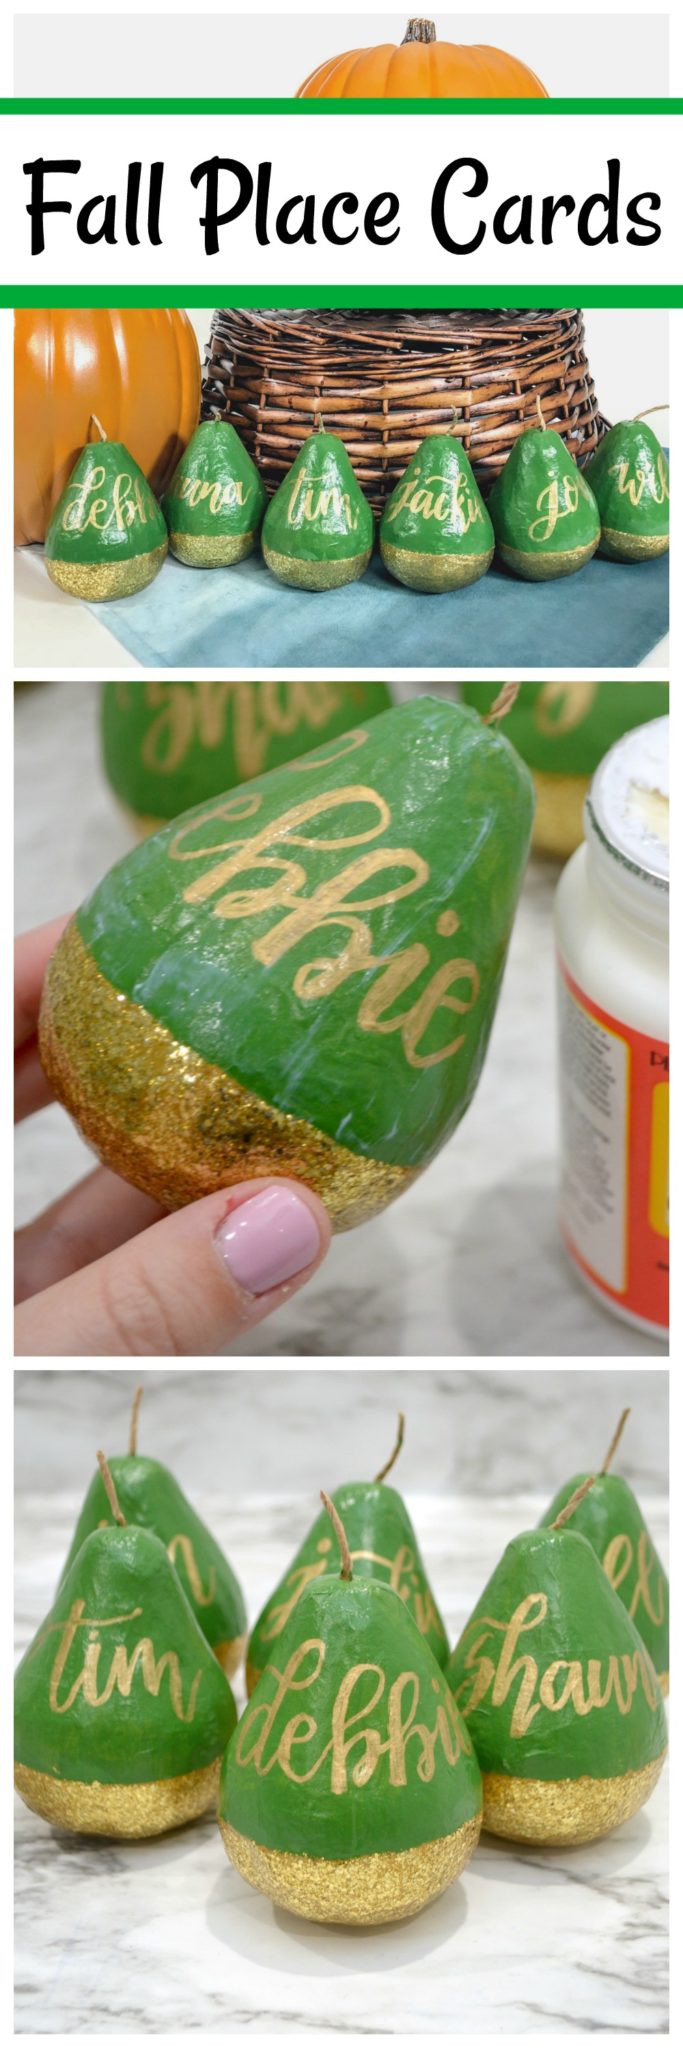
Hand Lettered Pear Name Tags
Thanks to Plaid Crafts for sponsoring today’s post. All opinions are my own.
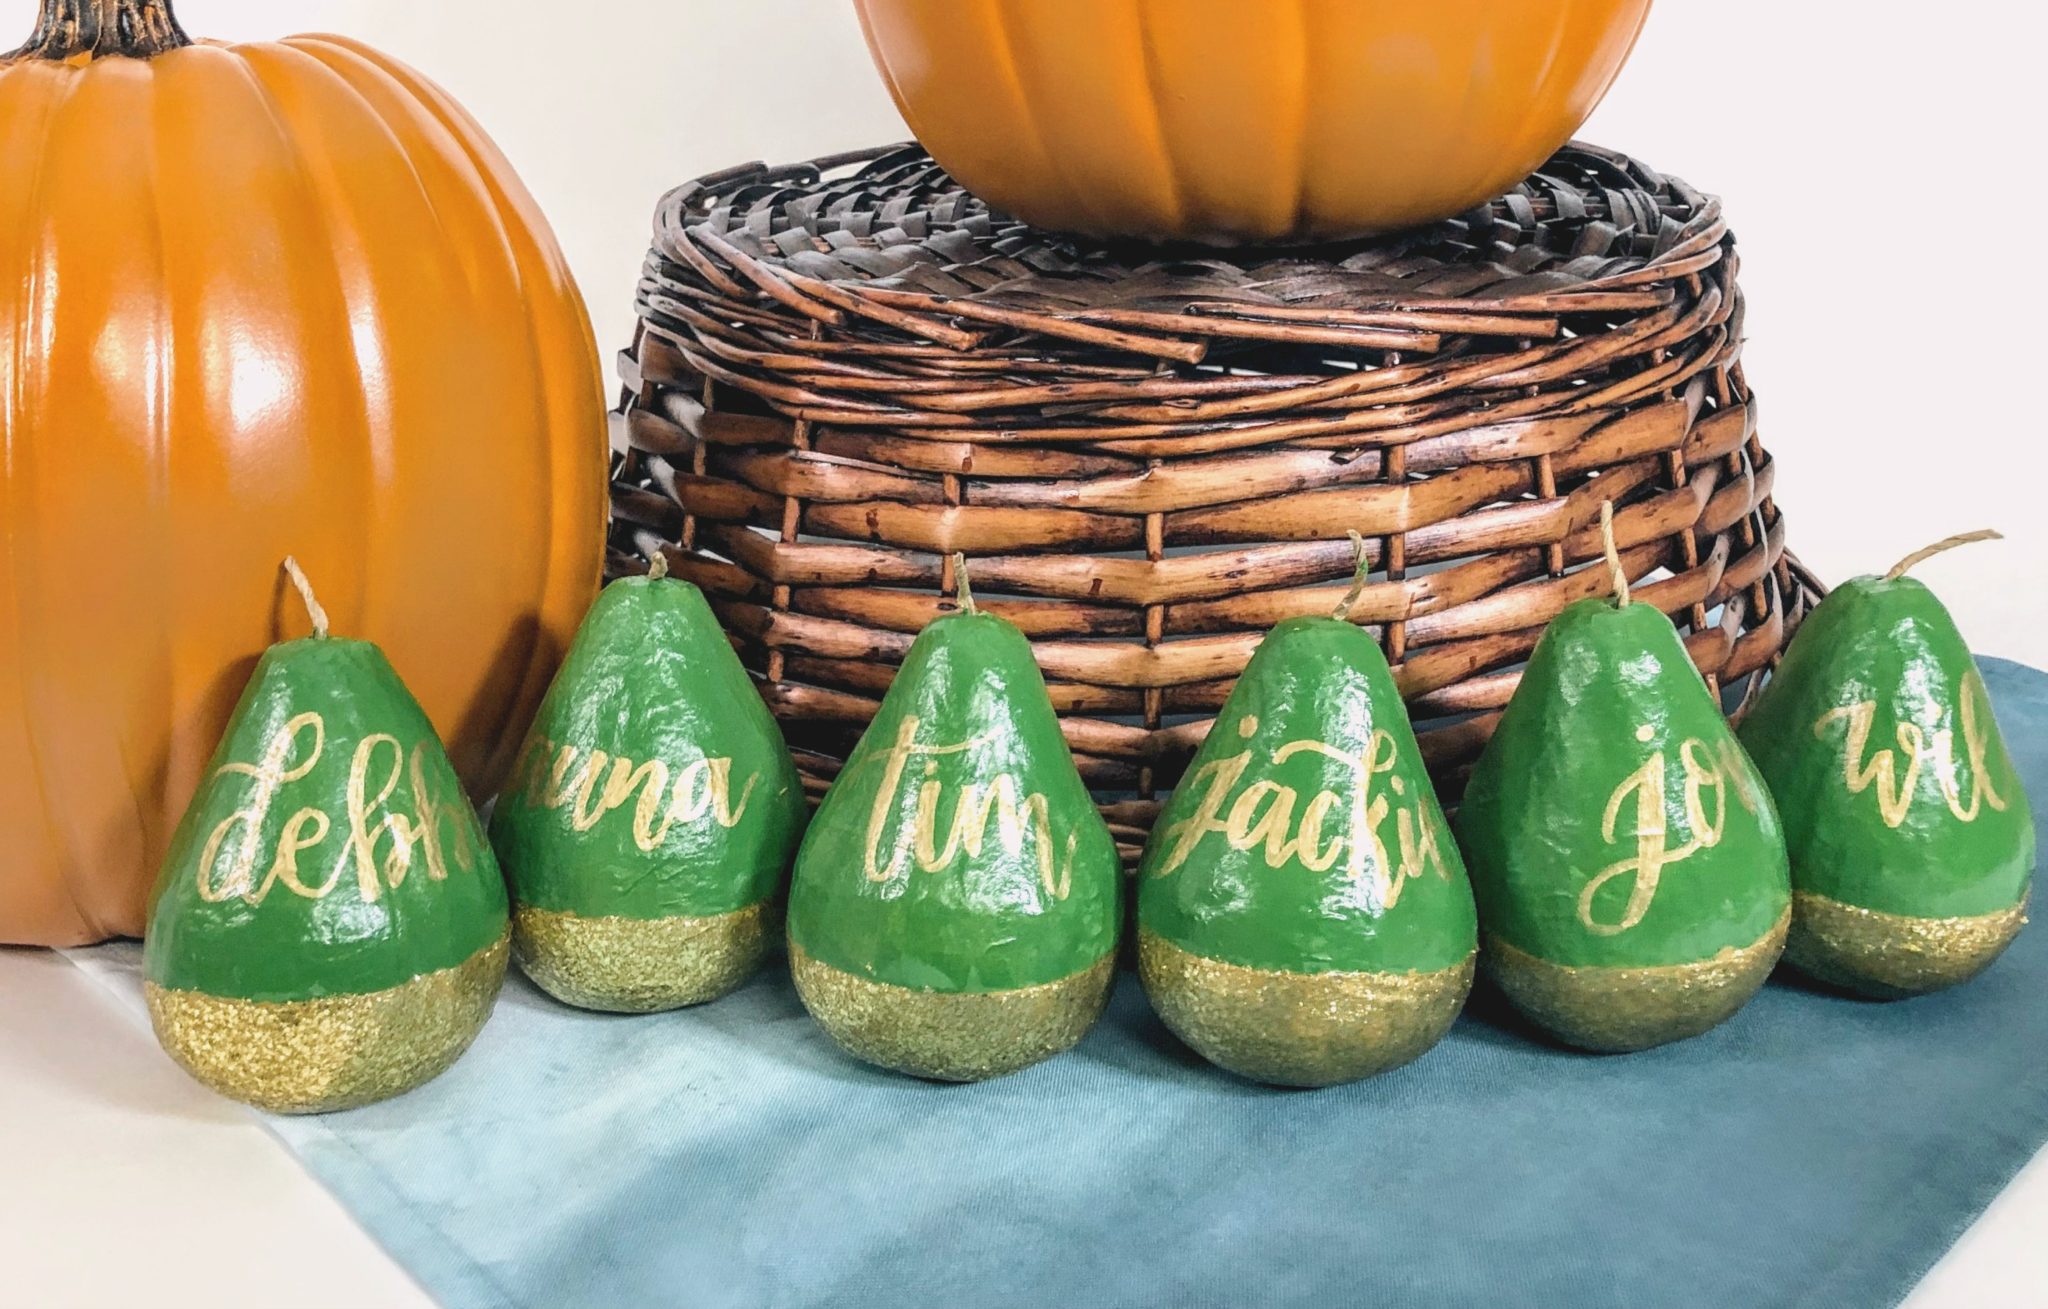
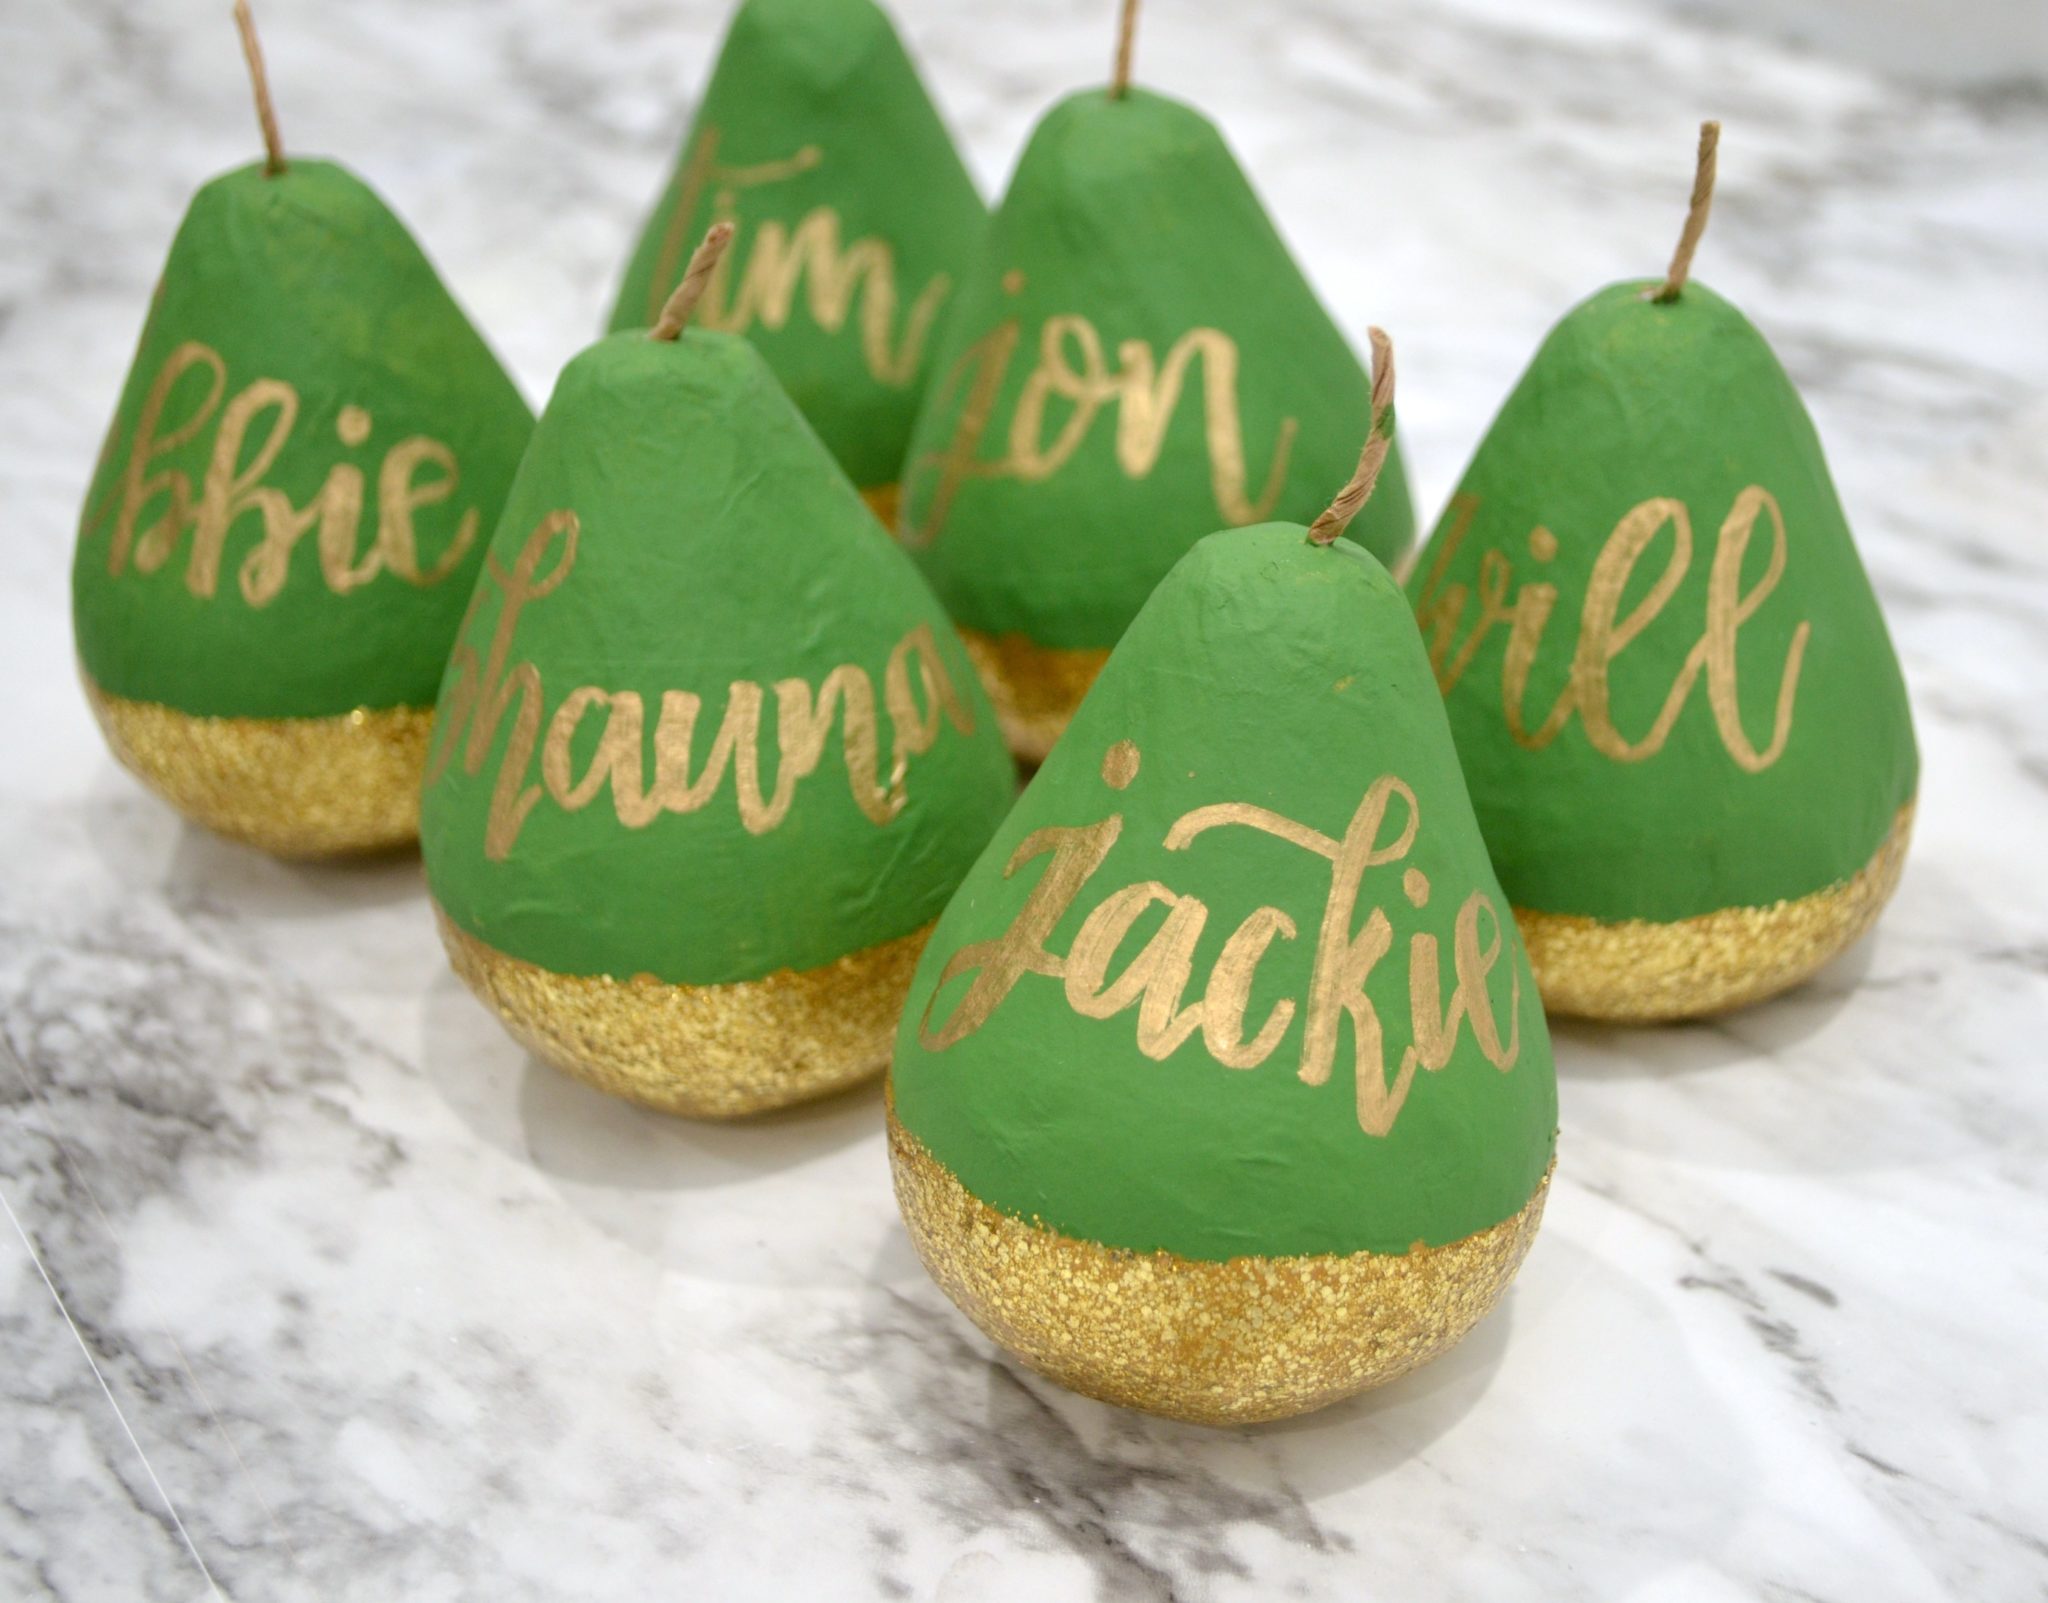
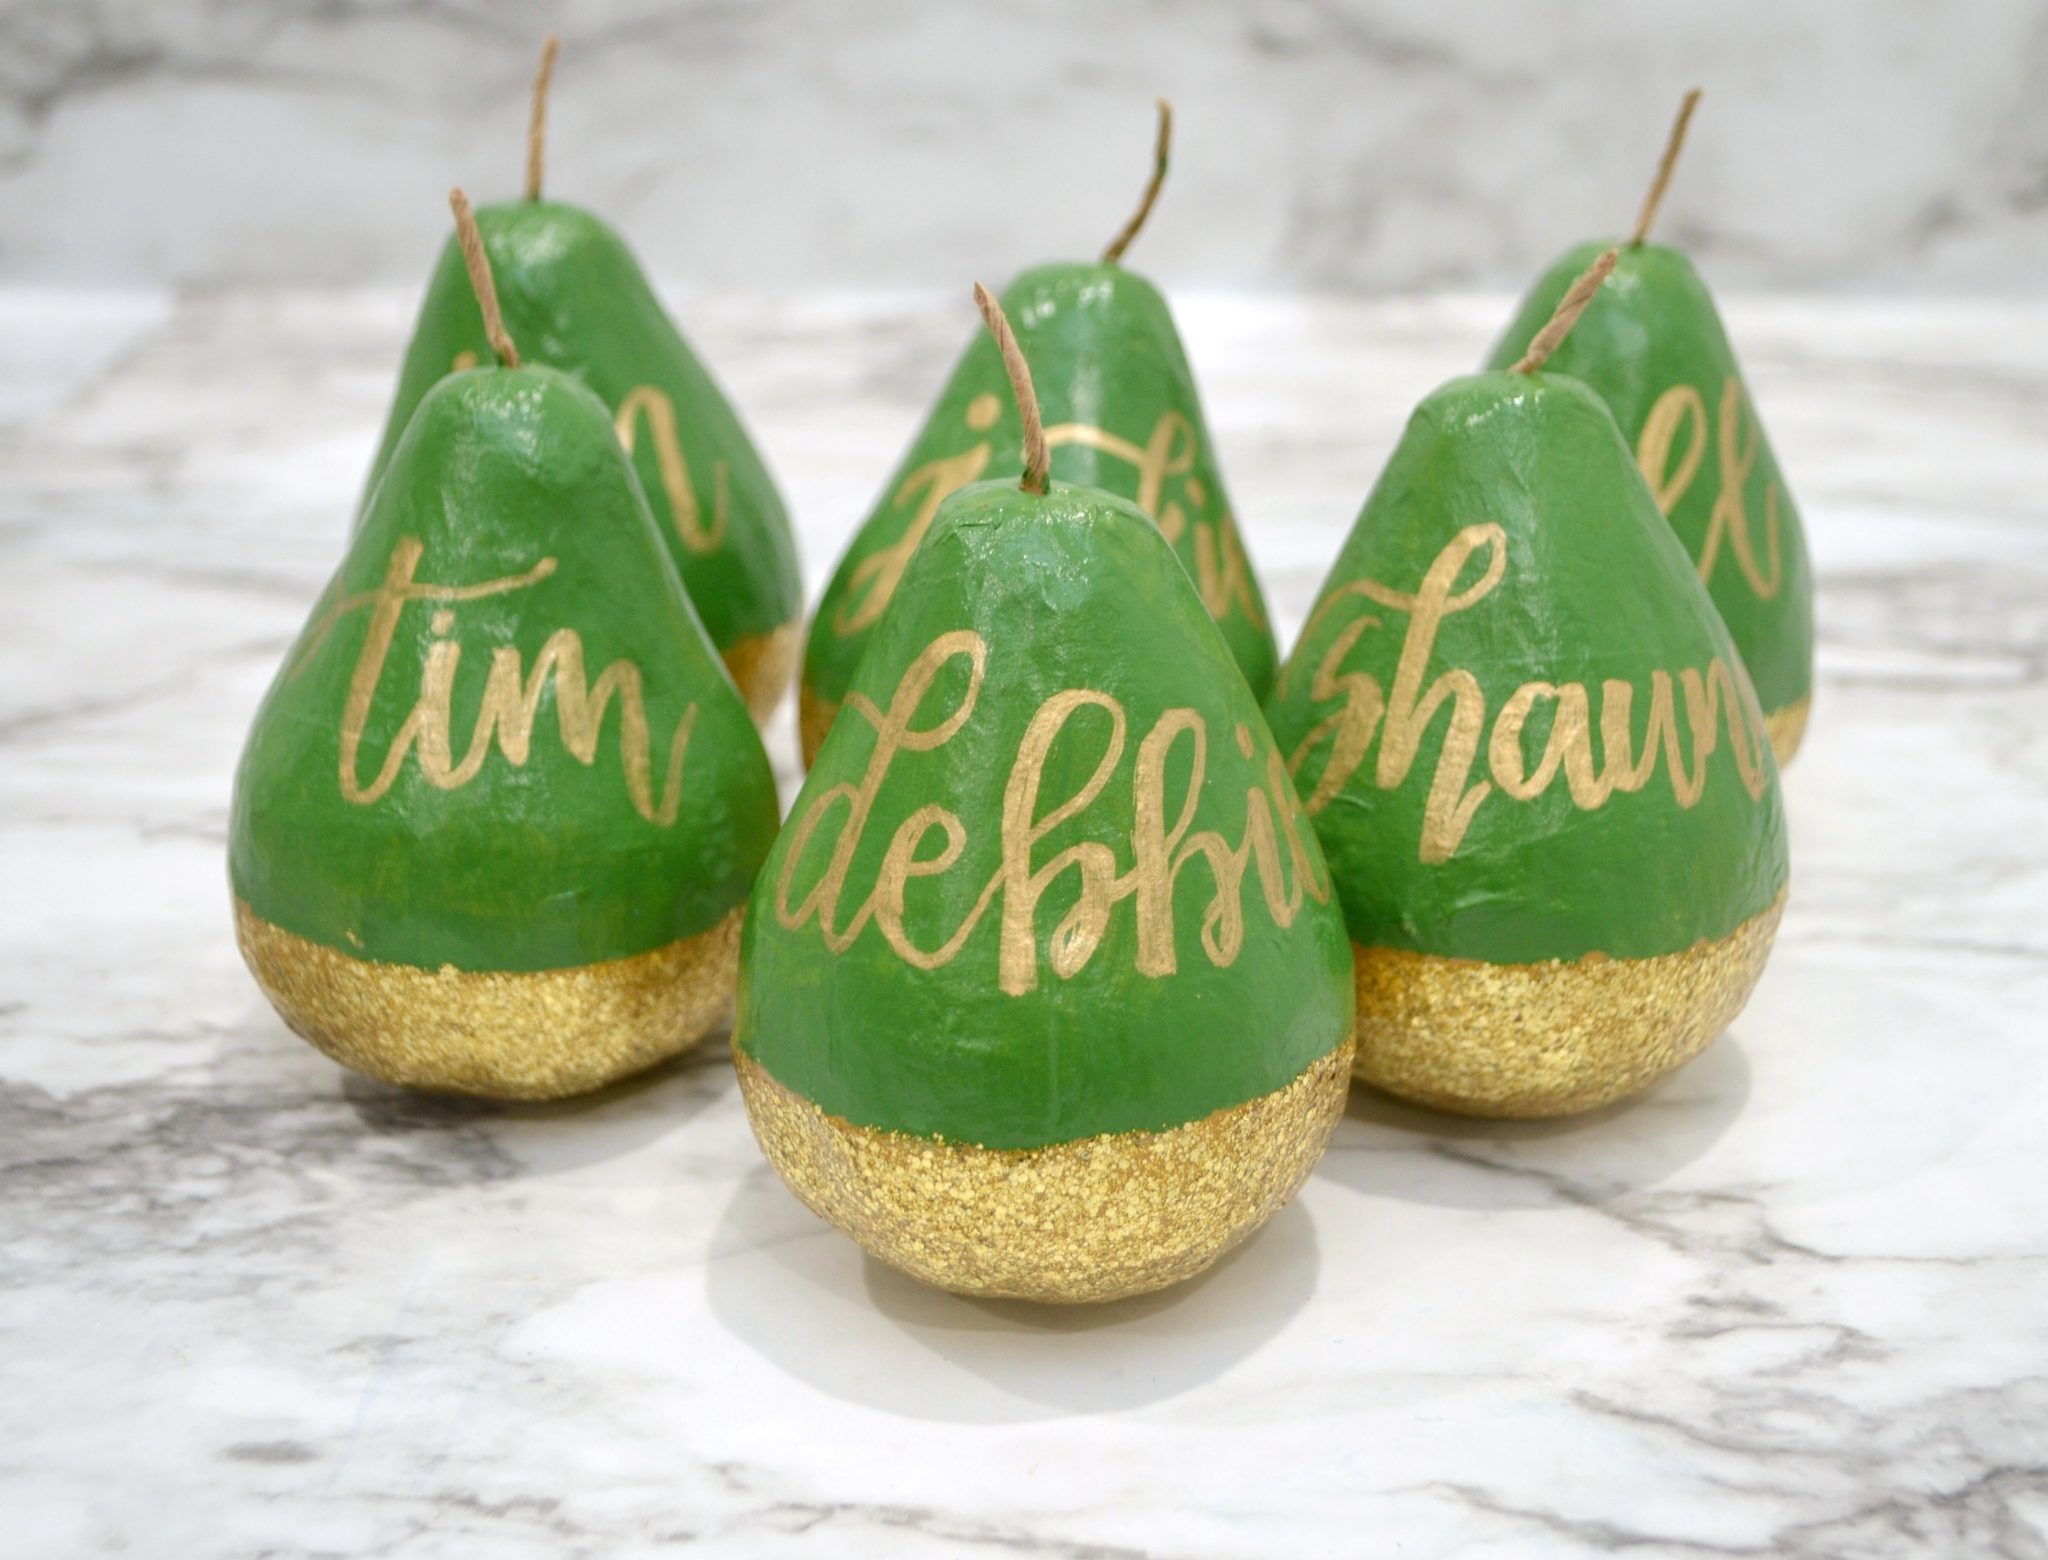
Can you believe we’re almost halfway through November already? It’s definitely time to start thinking about Thanksgiving! If you’re hosting a Friendsgiving or Thanksgiving dinner, I’ve got a project idea for you that I think you’re going to love. In lieu of paper place cards, why not make these fun and festive gold-dipped pears with each guest’s name hand lettered in metallic paint? They’ll not only look fabulous on the table, they’re a little take-home gift that your guests can add to their own fall home decor!
Here’s how I created them and so can you!
You’ll need:
FolkArt® Multi-Surface Satin Acrylic Paints – Freshcut Grass
FolkArt® Brushed Metal™ Acrylic Paint – Gold
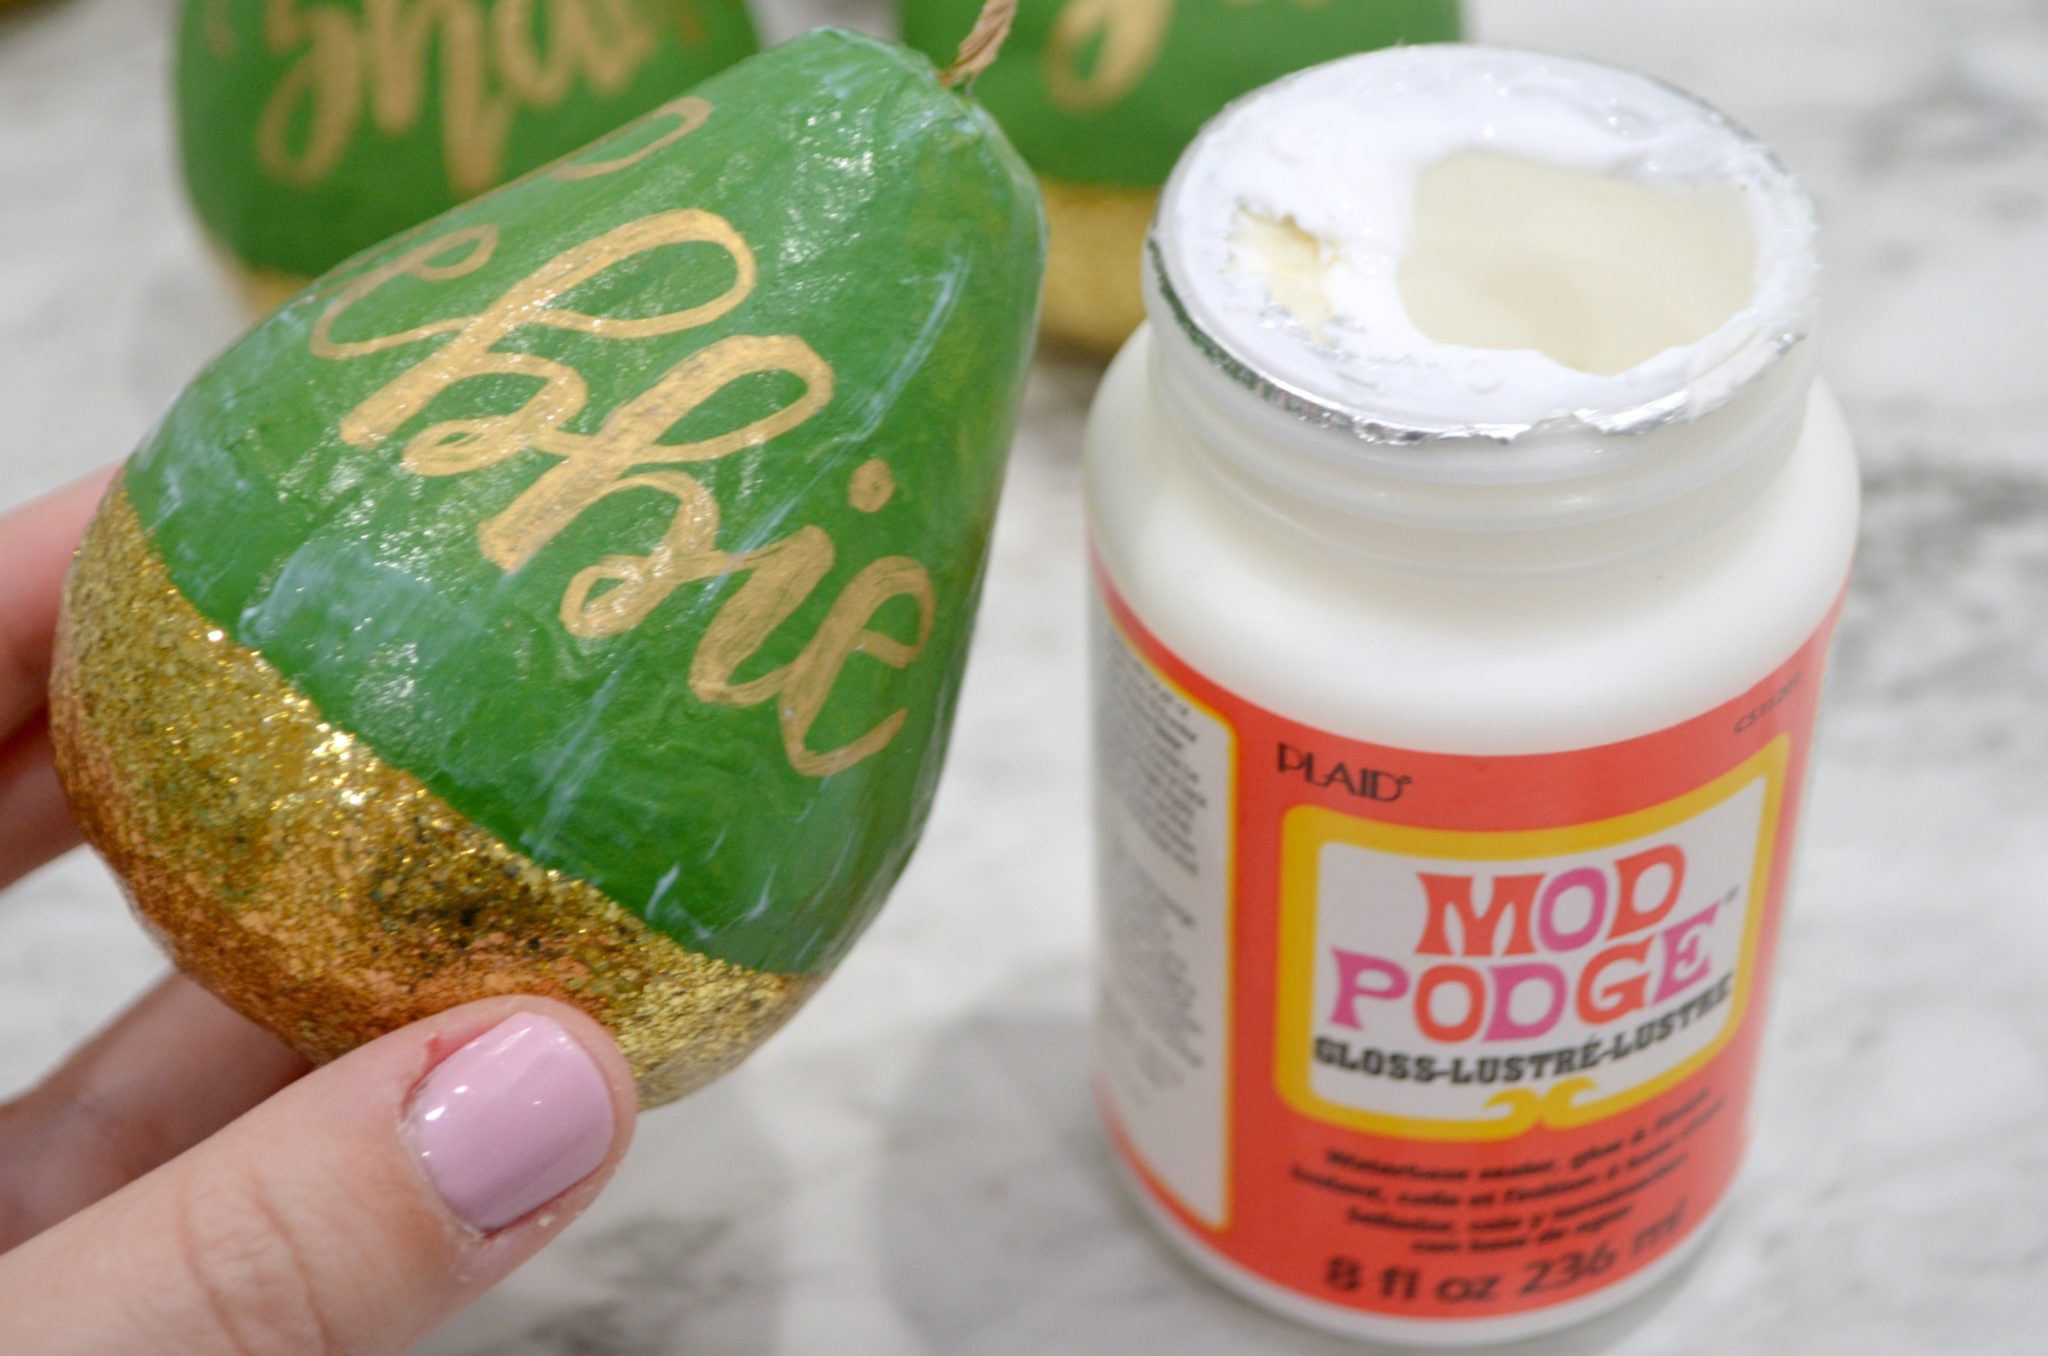
Mod Podge® Gloss
Mod Podge® Mega Glitter – Gold
FolkArt® Paint Brushes
Painters’ Tape
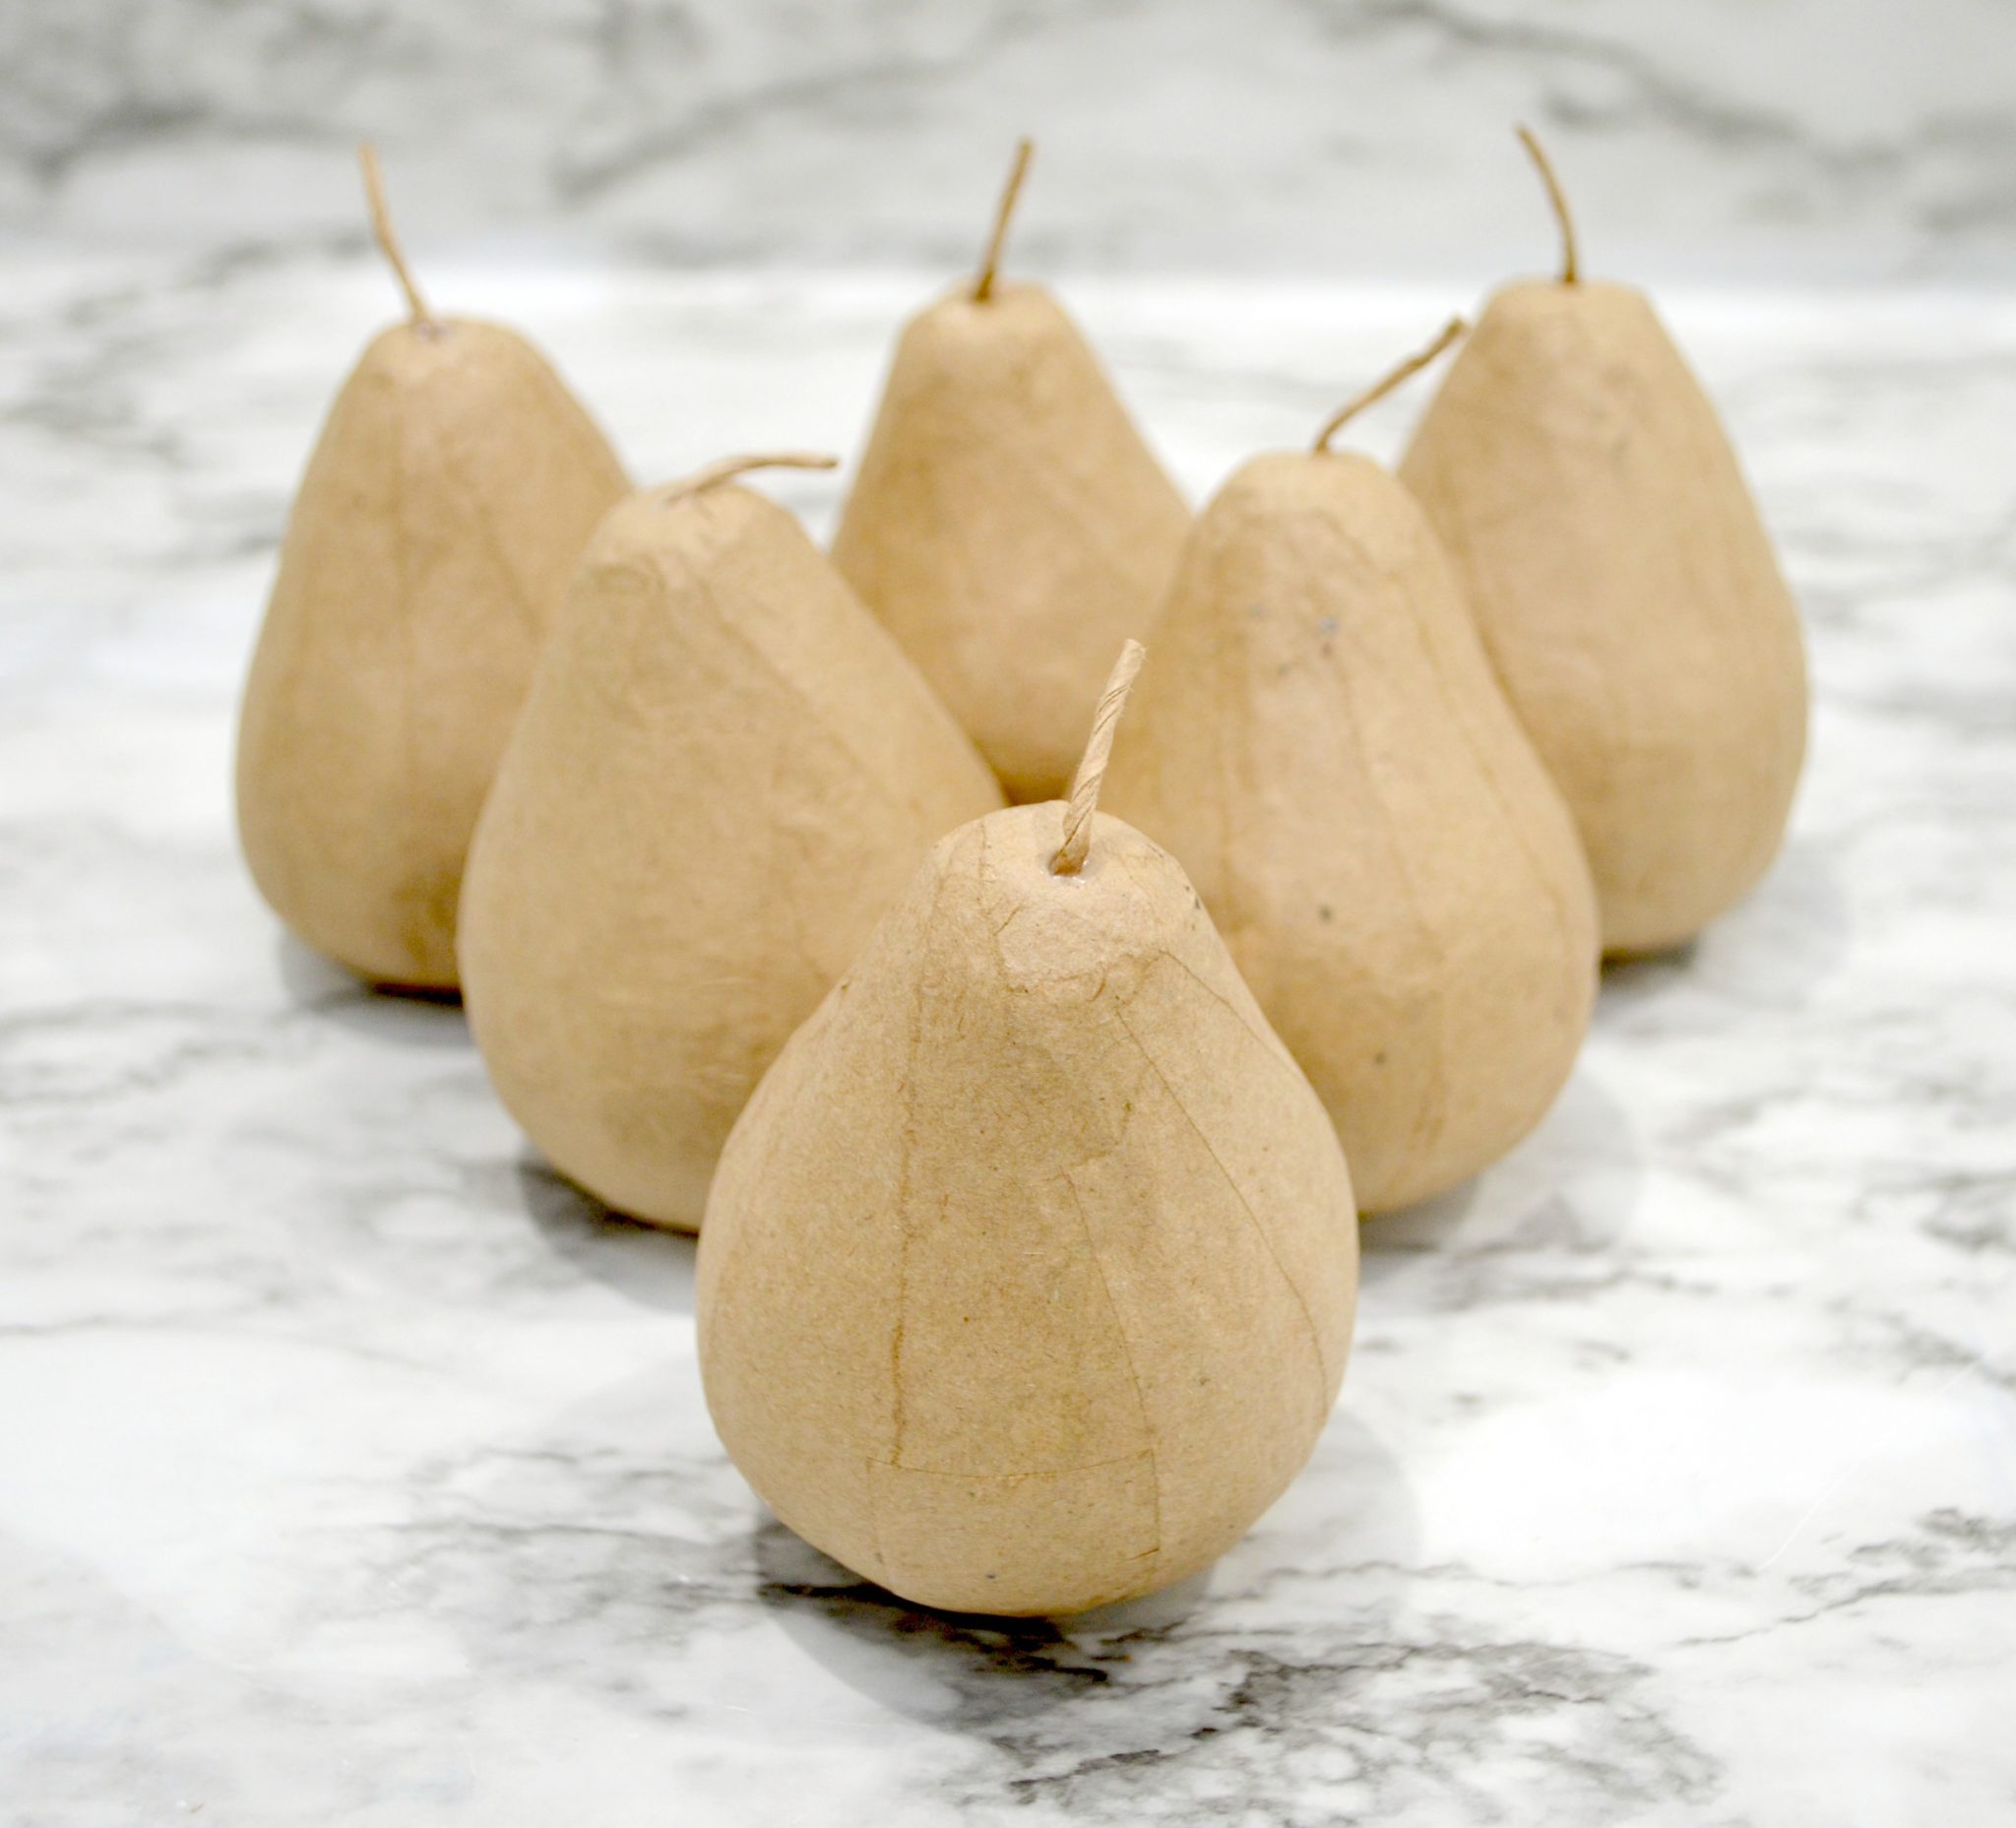
Paper Mache Pears
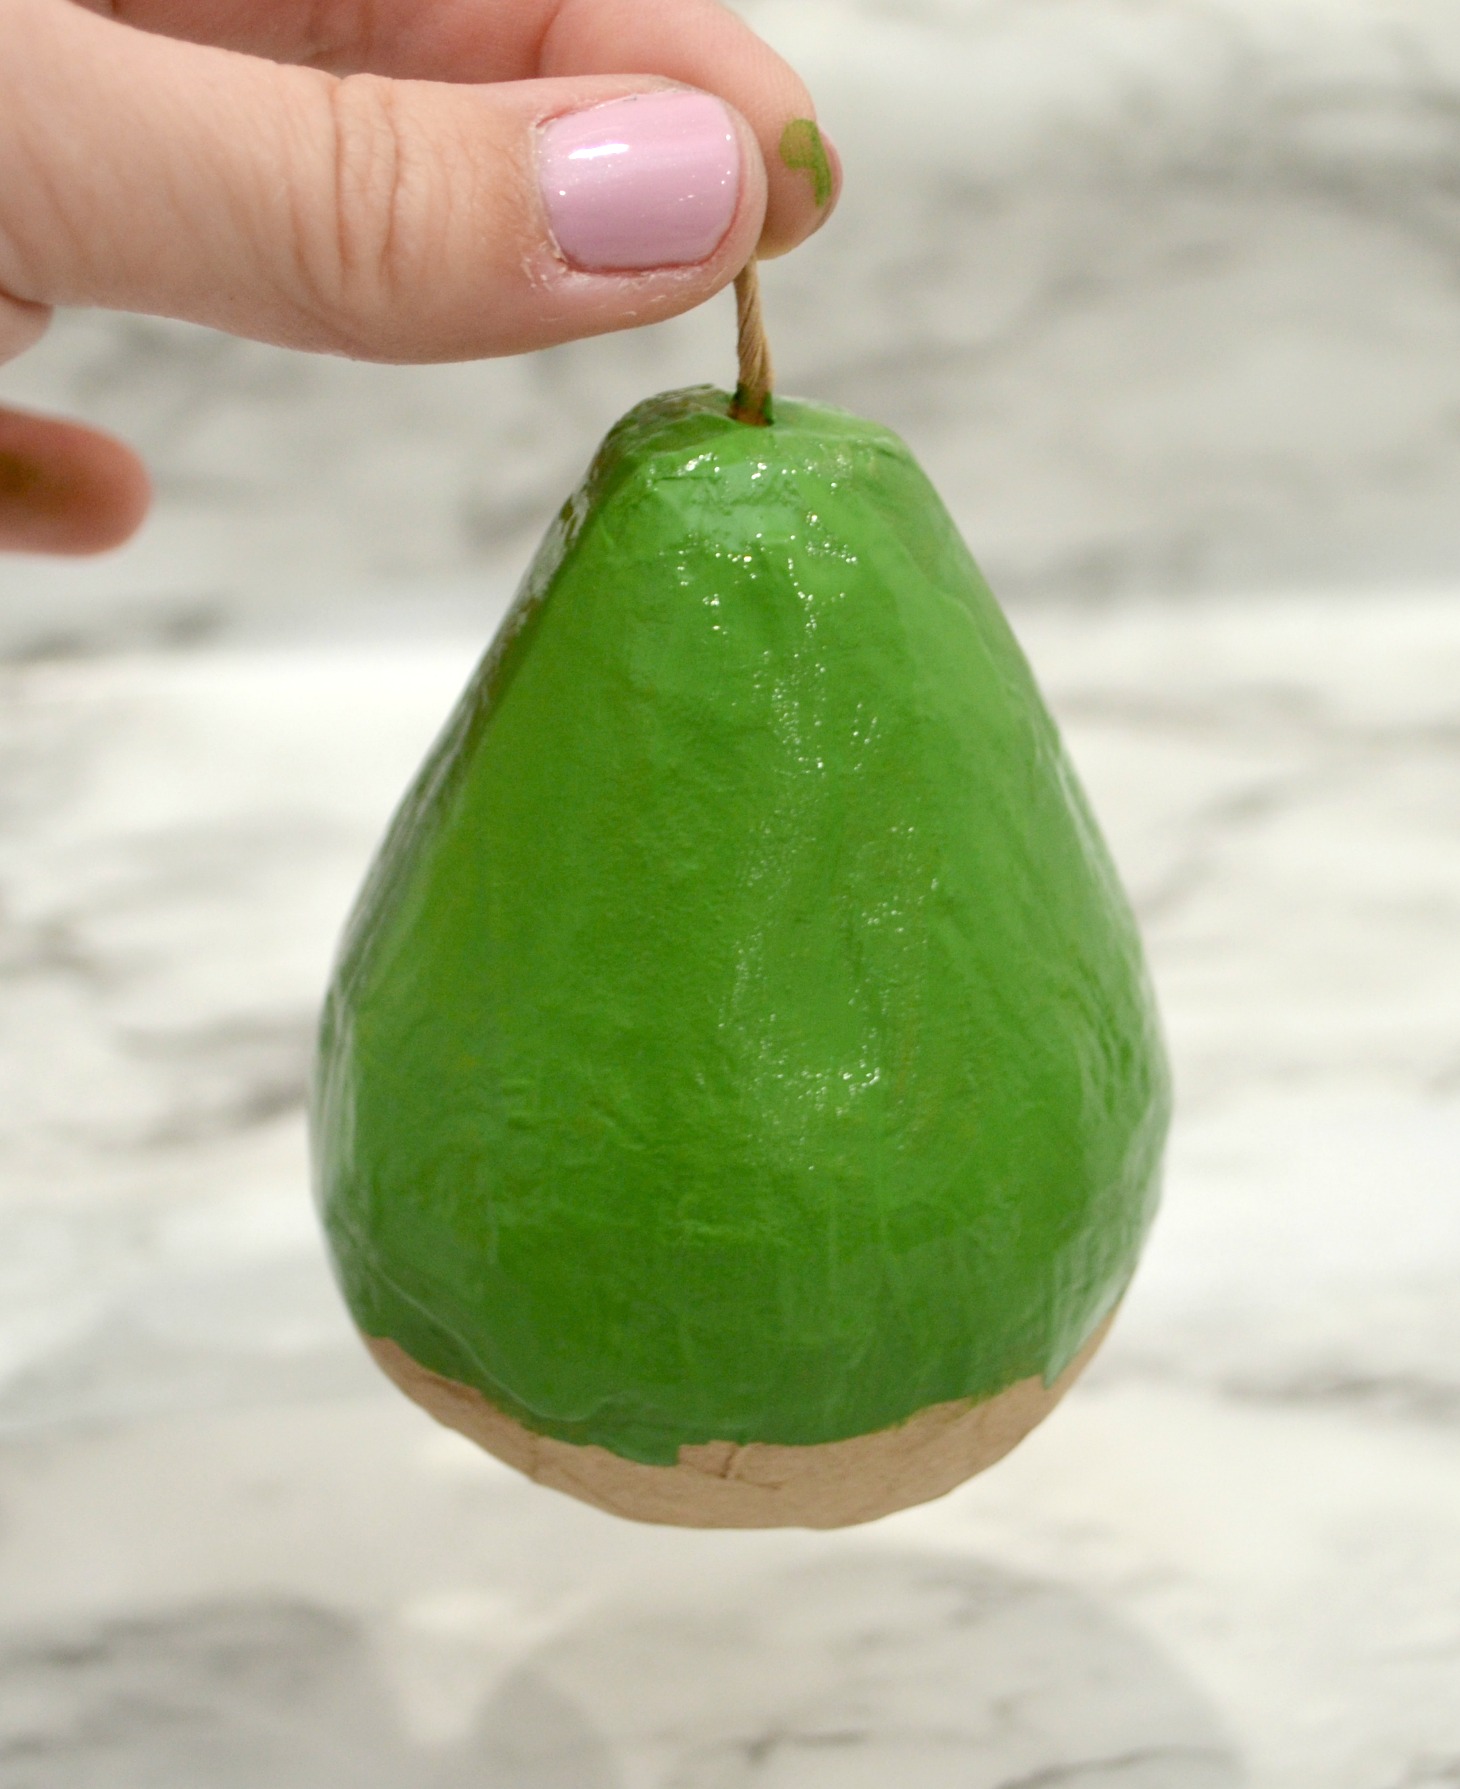
Step 1: Paint the top third of each pear with FolkArt Multi-Surface Acrylic Paint.
I found that one coat gave me great coverage, so once it was dry, I was ready to move on to the next step. FolkArt Multi-Surface paint is a perfect choice for painting paper mache surfaces like this, as well as terra cotta, metal, wood, and more. It’s made in the USA and easy to clean up with soap and water. You can find a huge color selection at your local craft store.
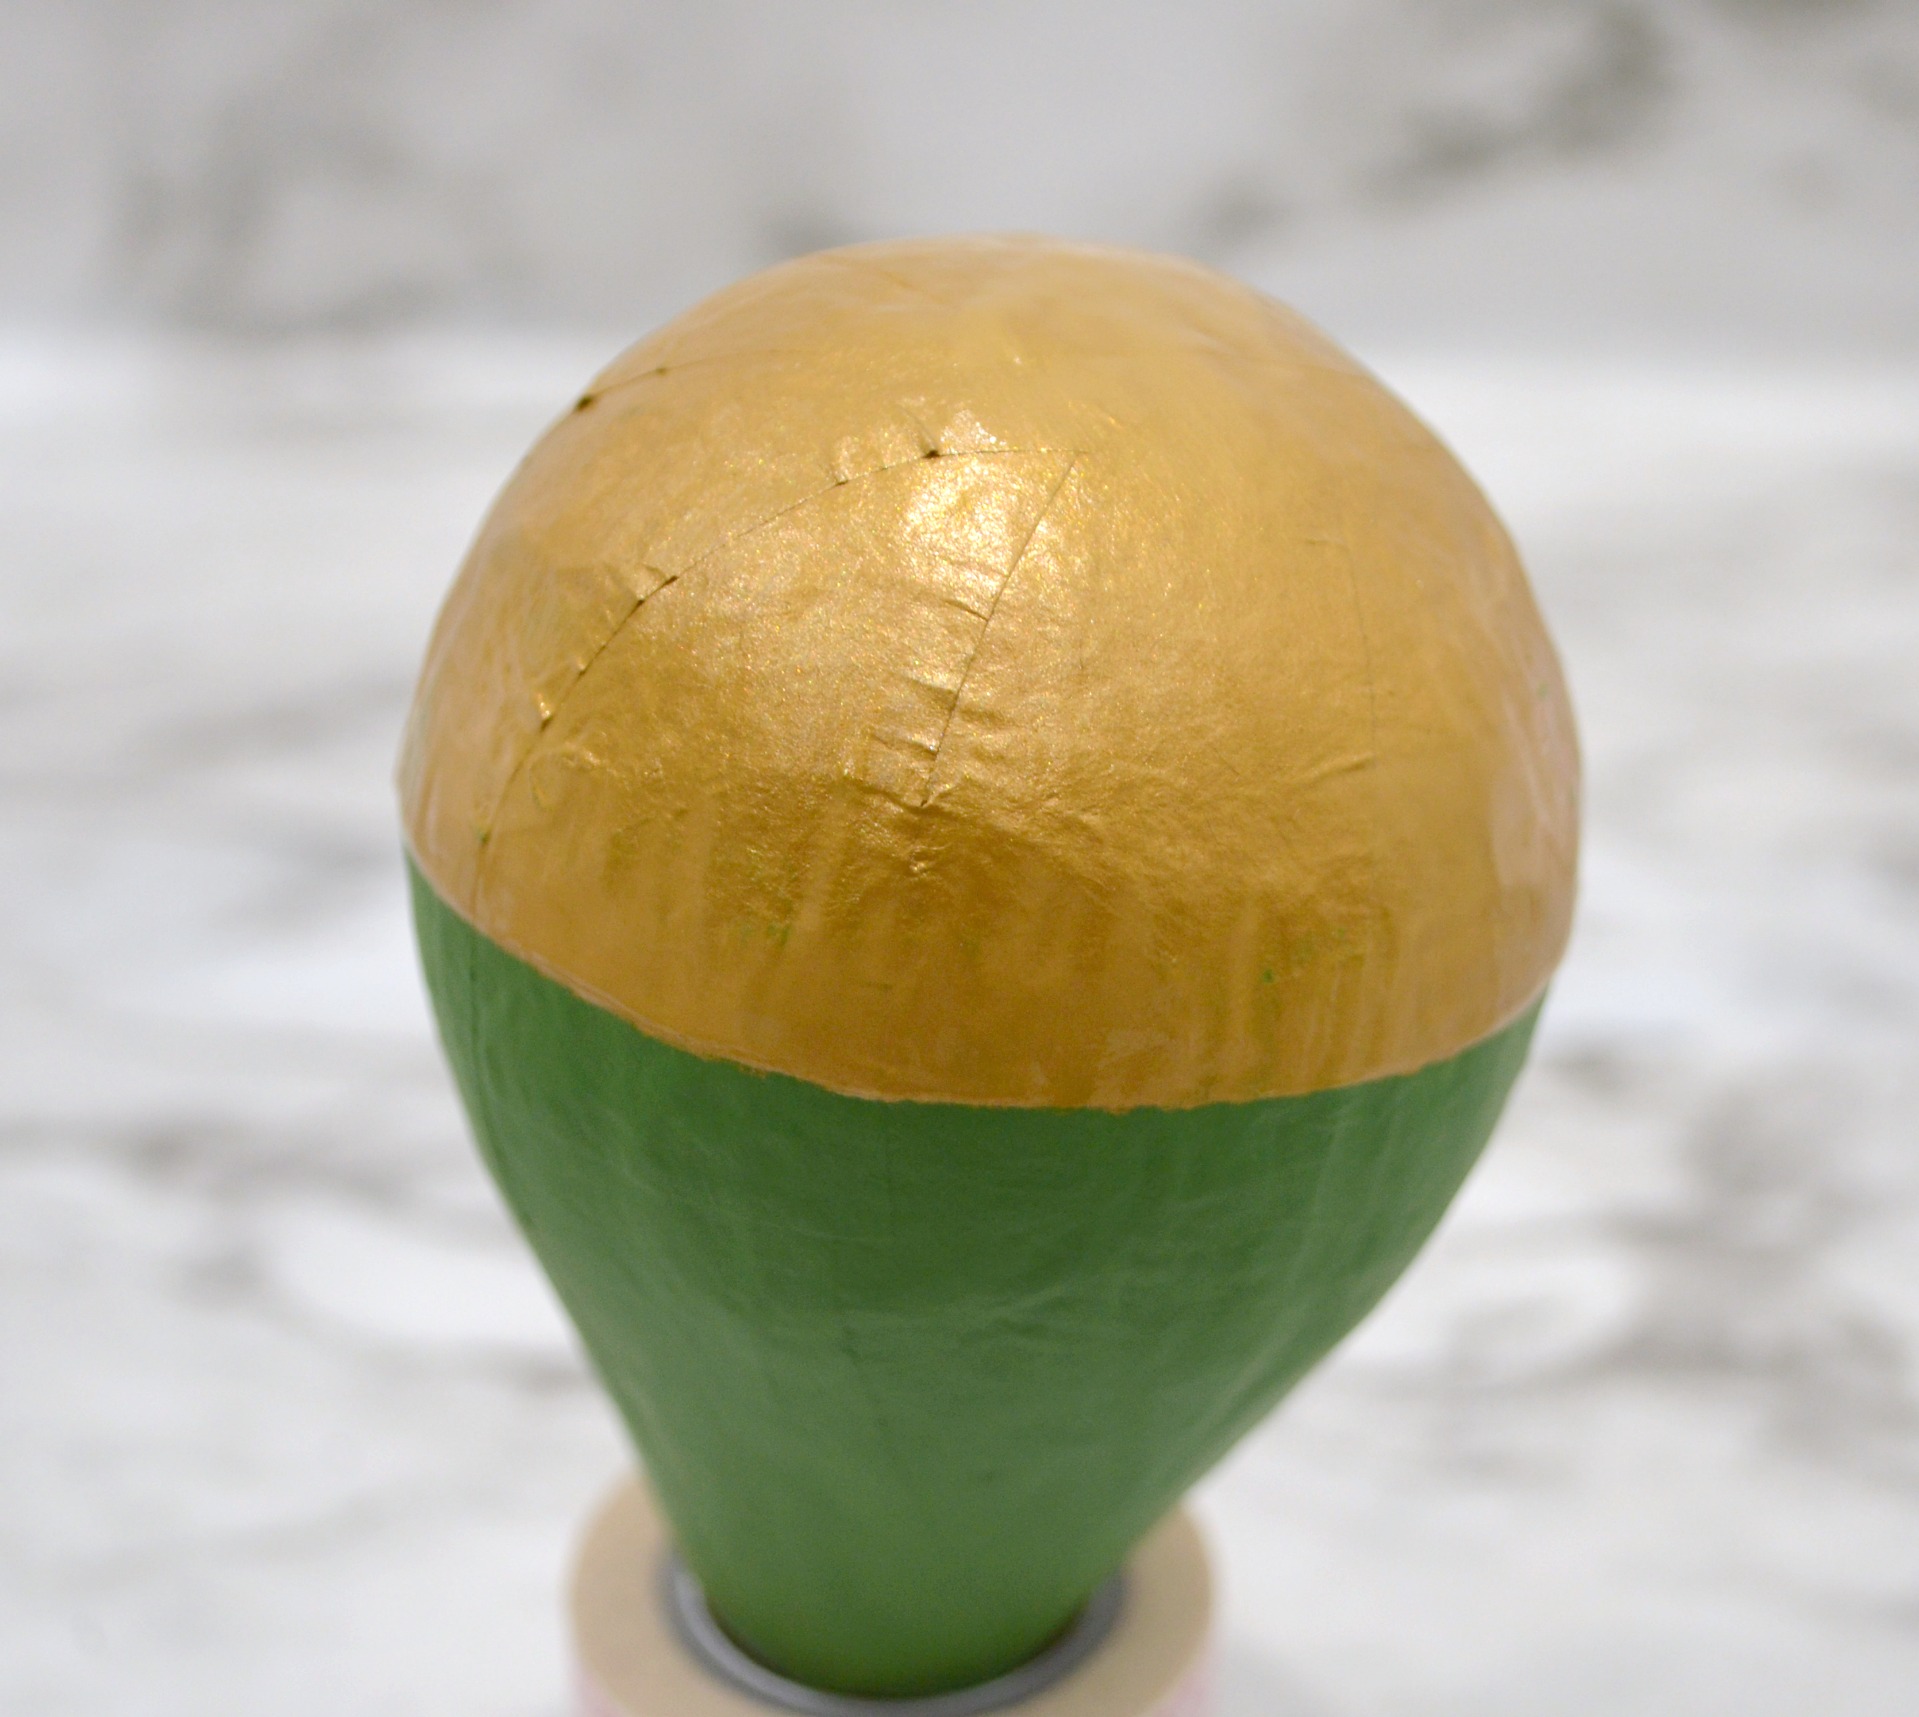
Step 2: Place painters’ tape around the pear, then paint below the tape with FolkArt Brushed Metal Gold.
I did two coats of this, then pulled off the tape while the paint was still wet. Did you know a roll of washi tape makes a great stand for an upside-down-pear while it’s drying? FolkArt Brushed Metal Paints are made in the USA and available in a variety of metallic colors.
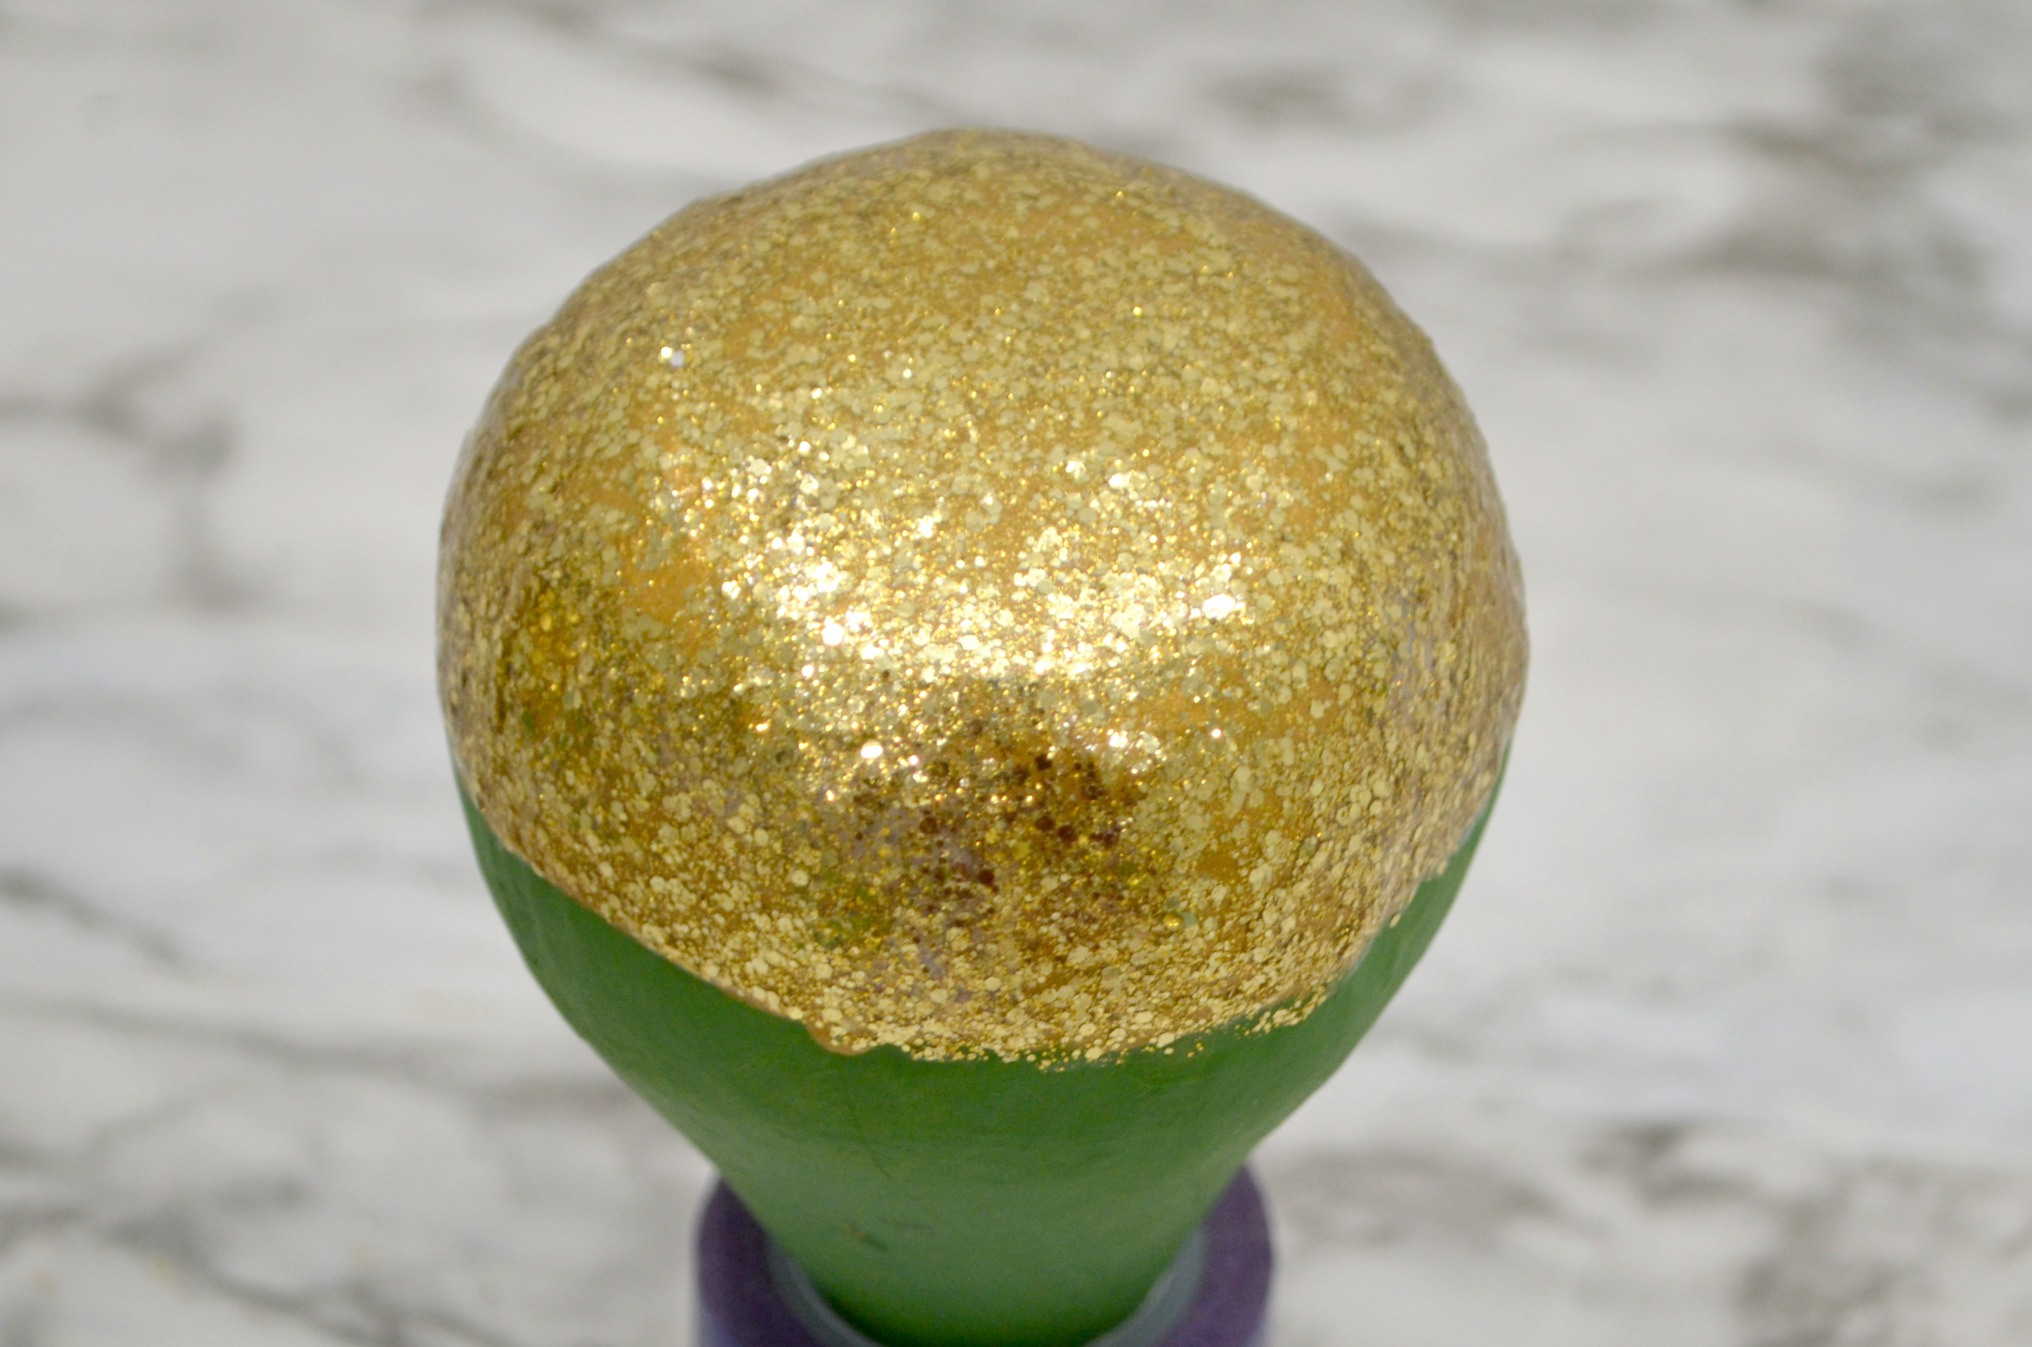
Step 3: Apply 3 or 4 coats of Mod Podge Mega Glitter Gold over top of your gold paint.
The more coats you apply, the more solid your glitter coverage will be. Make sure to let the Mod Podge dry between coats. Mod Podge Mega Glitter formula packs a powerful visual punch because it contains glitter particles of different sizes that work together to create a super sparkly finish.
Step 4: Letter each guest’s name onto a pear.
If you’re new to hand lettering, be sure to check out my beginner lettering tutorial! You can either use the gold paint and a liner brush or a gold paint pen for this step.
Step 5: Apply a coat of Mod Podge Gloss to the top 2/3 of the pear.
Make sure the lettering is completely dry before you move on to this step. The Mod Podge will seal and protect your project, as well as giving it a pretty, glossy finish. Both the Gloss and the Mega Glitter Mod Podge formulas are non-toxic, easy to clean up with soap and water, and made in the USA.
That’s all there is to it; now you have a festive, personal keepsake for each of your guests. After dinner, they can take the pear home and add it to their fall decor, enjoying it for years to come!
That’s all there is to it! My fellow Plaid Creators have been hard at work too, creating other pieces of a gorgeous DIY tablescape and a kid’s table too. Take a look at some of their ideas to get more inspiration for your Thanksgiving or Friendsgiving table.
Also, be sure to follow Plaid Crafts on Facebook, Pinterest, and Instagram.

Don’t forget, if you like it, then you oughta put a Pin on it!


4 Comments