Free Hand Lettering Practice Sheets: C
Welcome, friend! This month at Amy Latta Creations, we are diving deep into the alphabet and practicing our Brush Script one letter at a time. Brush Script is the most popular font in hand lettering, and it’s known for the contrasting thick and thin lines within each letter. To do this, you’ll need a brush pen. As you apply different amounts of pressure to your pen, you’ll create lines of different widths. Today, our focus is on the Brush Script C.
Note: If you’re brand new to lettering, you’ll want to start at the beginning and master those basic thick and thin strokes first. Then, come on back and we’ll tackle the letter “C” together!
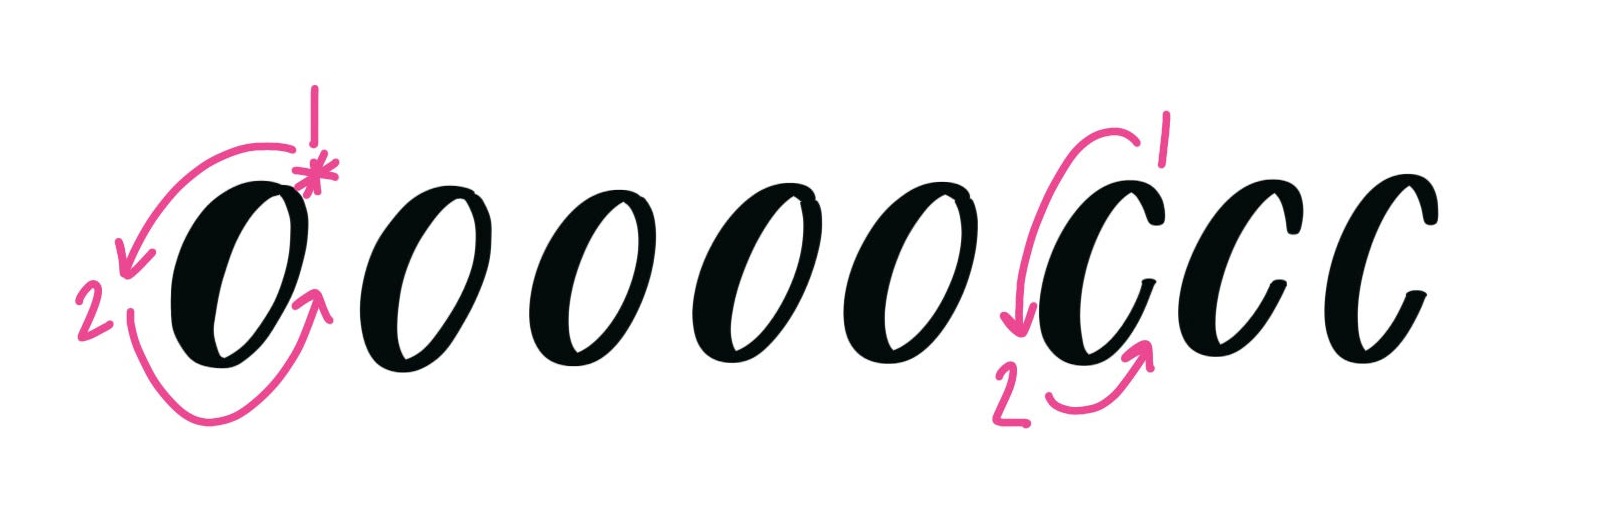
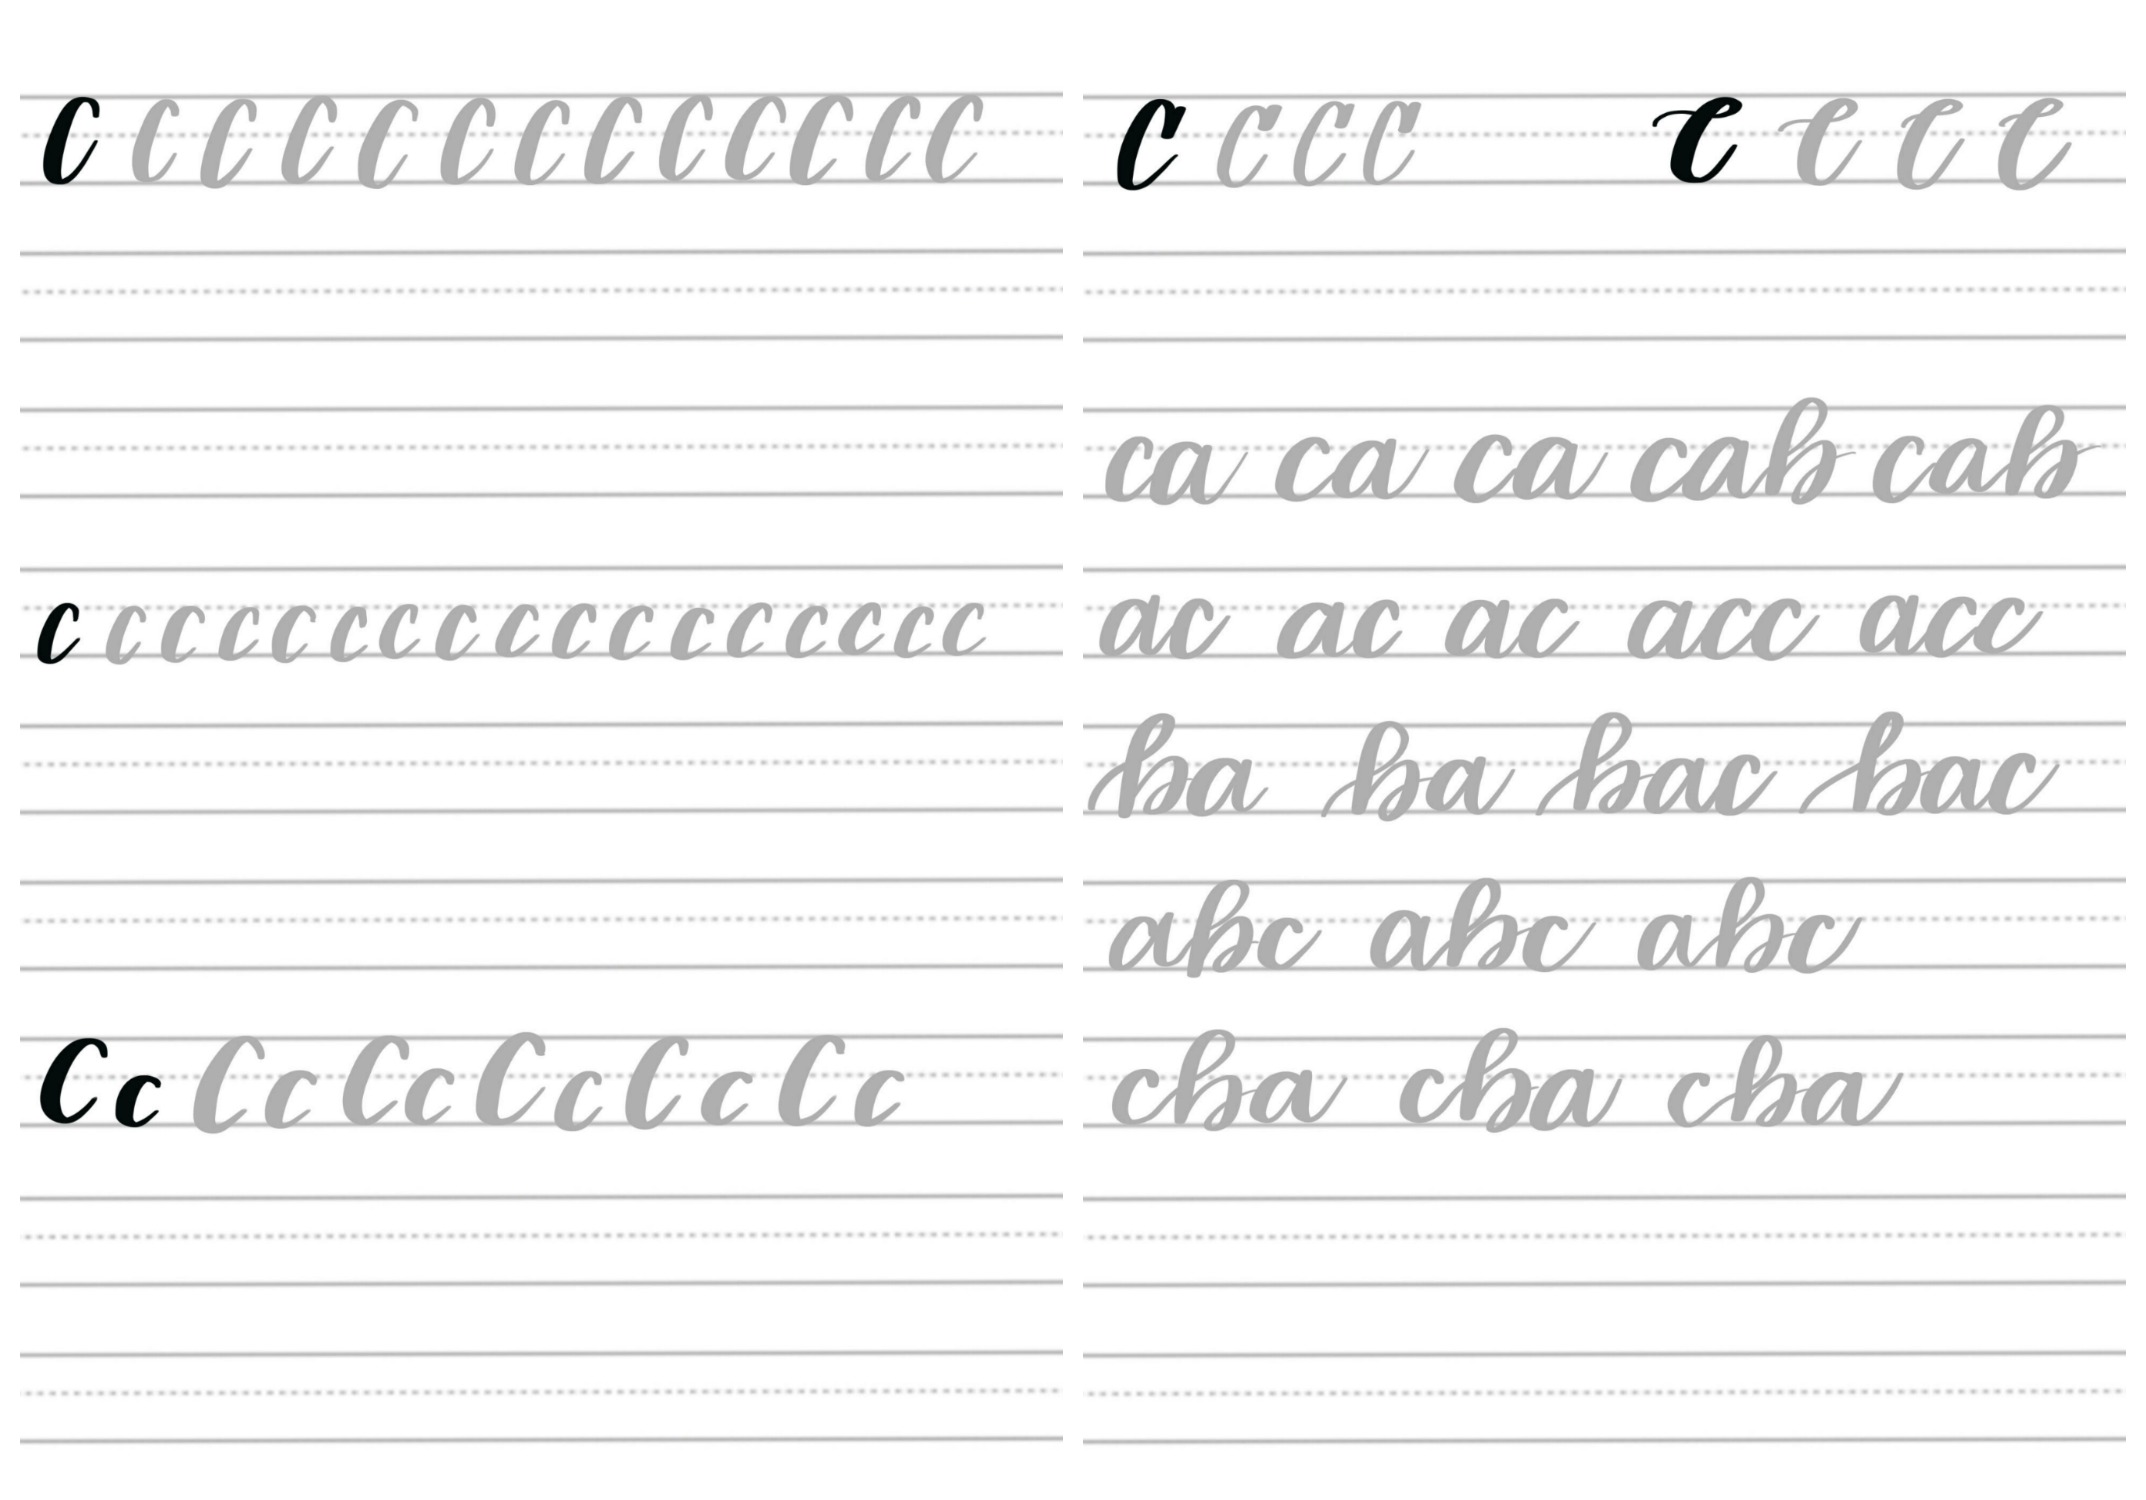
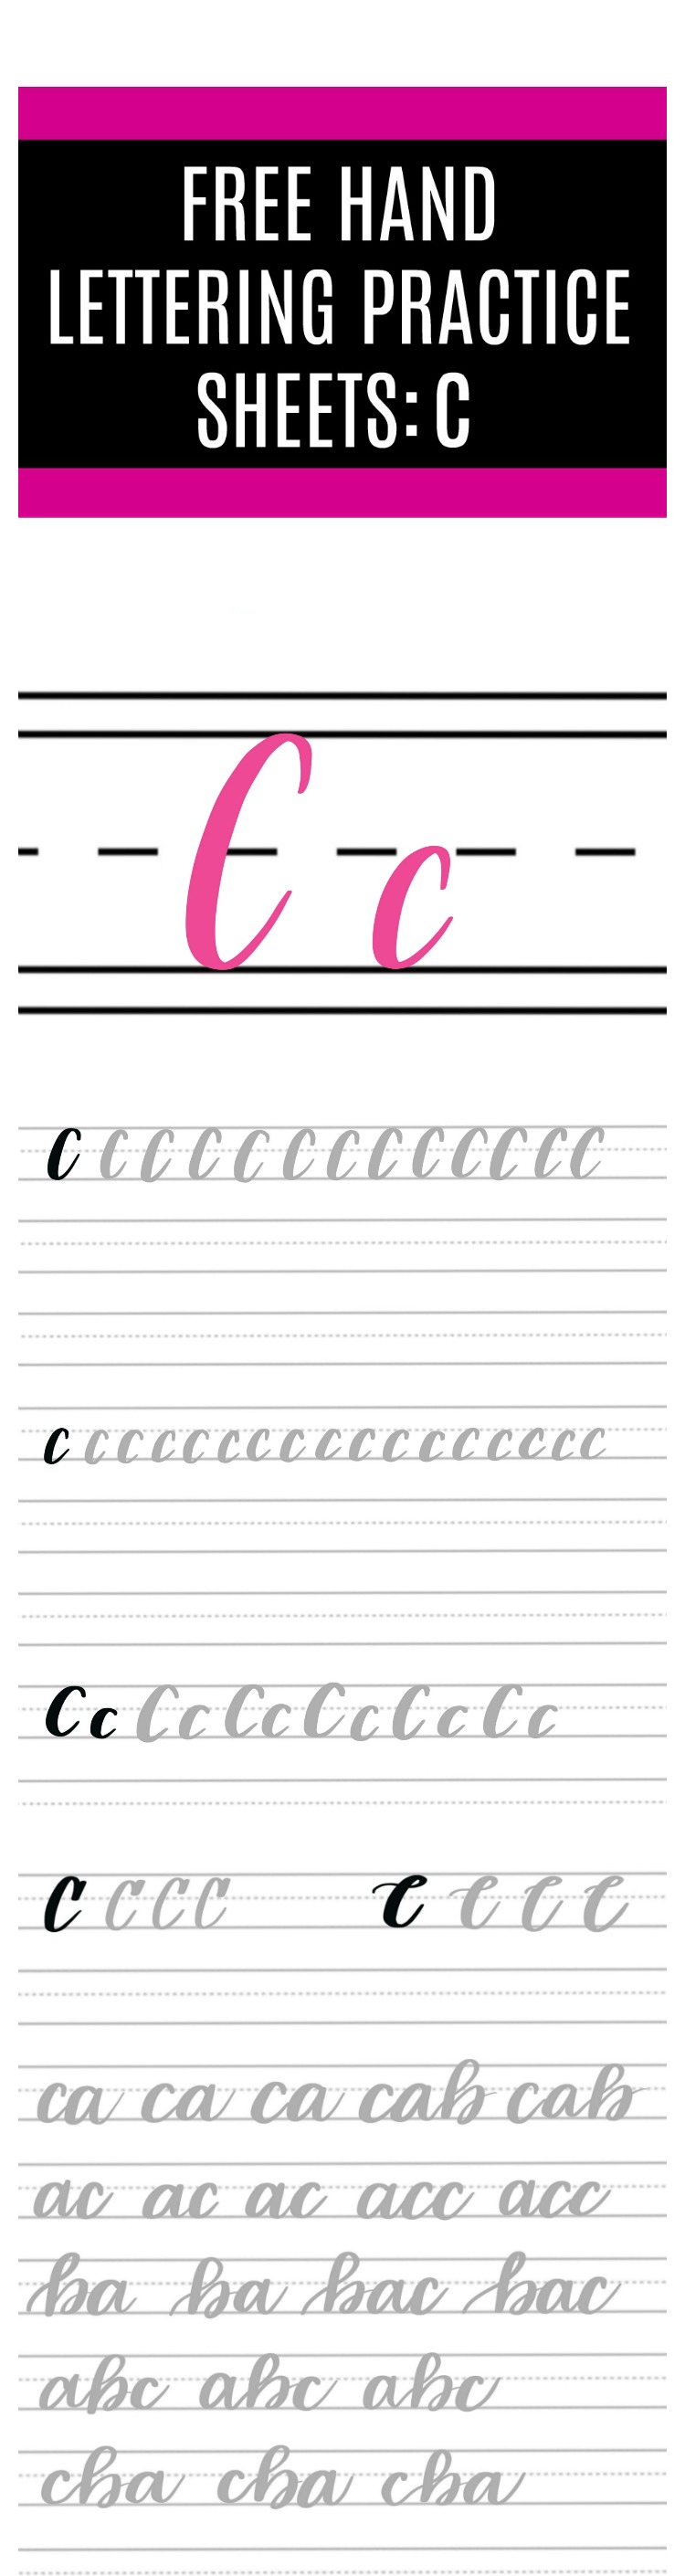
Today is an easy day, because the Brush Script C is one of the simplest letters of the alphabet to write. It’s just like the left side of an “a,” or the first 3/4 of an “o.” The best drill to do to practice the shape is actually an oval. You’ll want to start at the top right with a slight upstroke, then continue around to the left with a downstroke. At the bottom, you’ll switch back to an upstroke by releasing the pressure on your pen, then connect it with your starting point.
After you get the hang of the oval, making a “c” is a piece of cake, because you just stop short of connecting the lines.
Drawing the Brush Script C
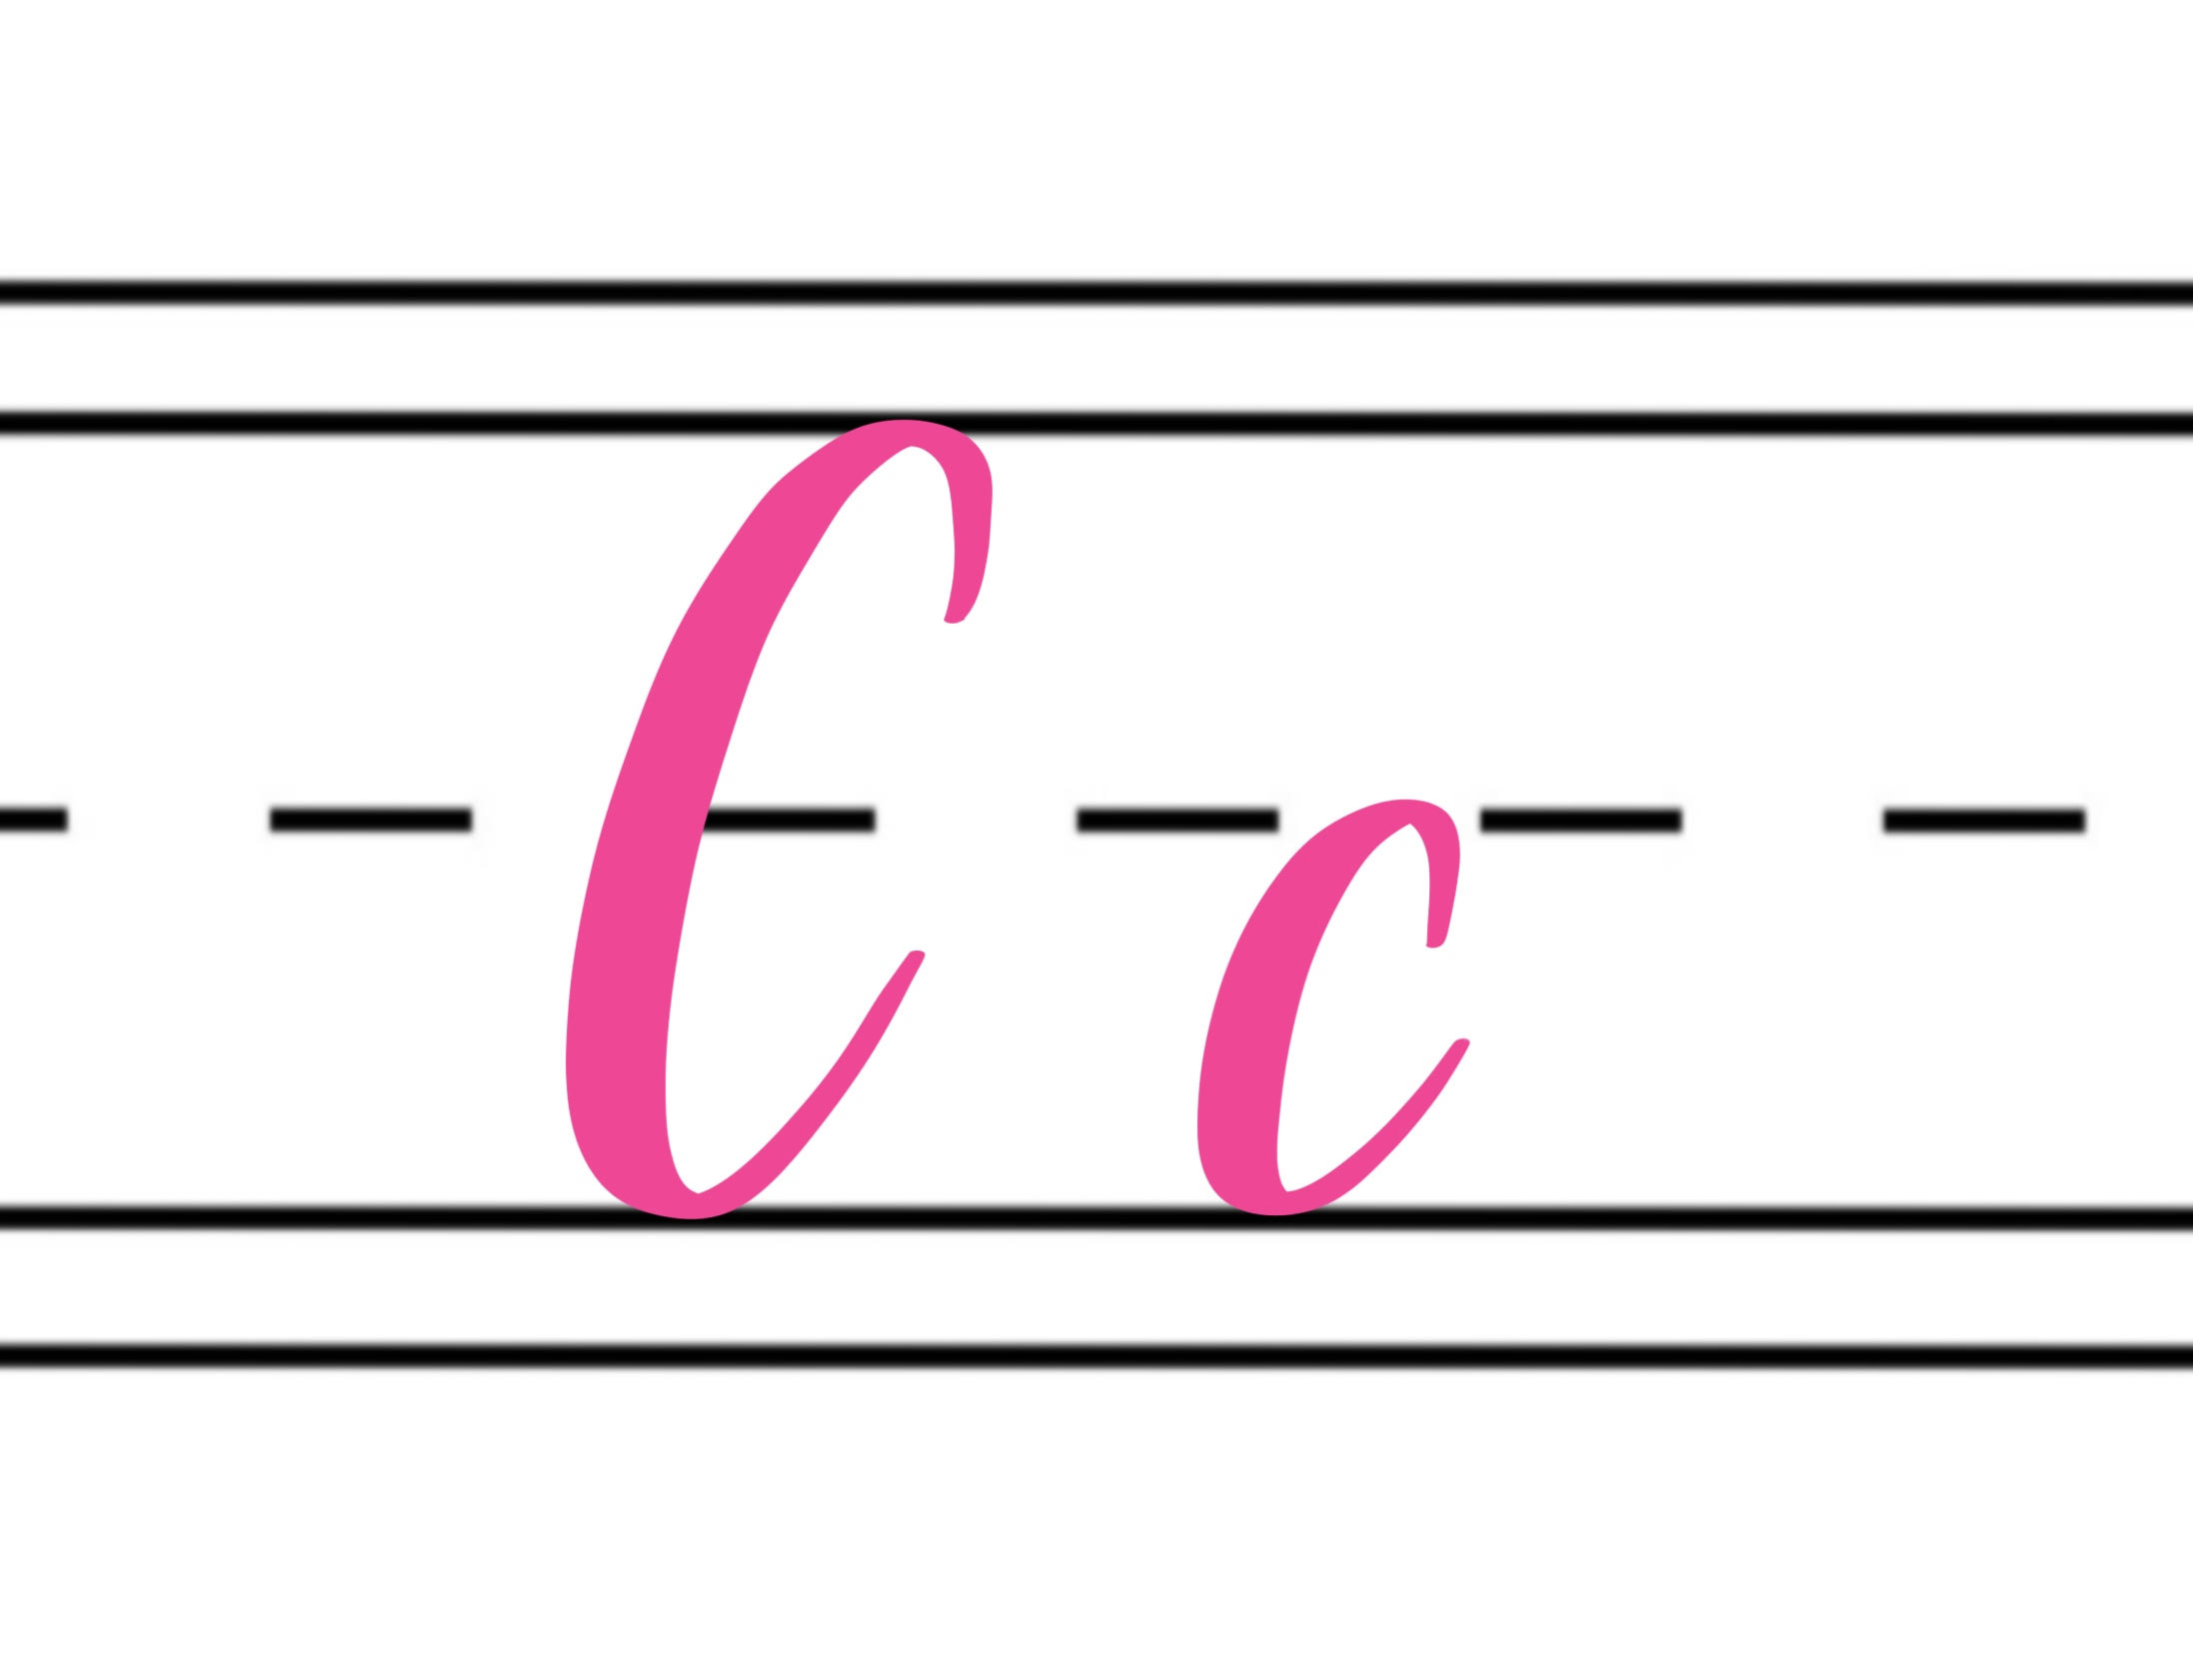
The basic capital and lowercase “c” are the same in everything except size.
Next Level Lettering
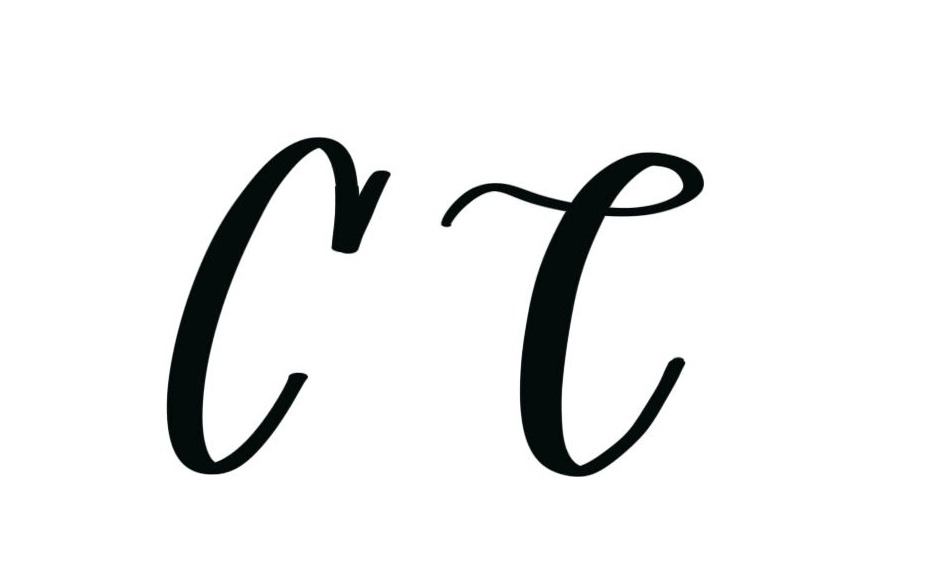
If you’re looking to add a bit more flair to your Brush Script “C,” you can add a serif {a short, straight line} at the top. To do this, you’d start with the serif as a downstroke, then form the rest of the shape the same way you usually do. Another option is to add a small loop. Starting to the left of your letter, you’d create the loop, then draw the rest of the shape. Be careful to keep the loop minimal or it can look too much like an “e”, making your script difficult to read.
Here are some practice sheets to help you master the Brush Script C! The first one focuses on the simple upper and lowercase shape, while the second one gives you space to try the variations and to connect the “c” with the other letters you’ve learned so far. Remember that hand lettering is different than cursive, so it’s okay to pick up your pen in between letters. To use these practice sheets, just click the link below and download the files to your device. Then, print them out, or open them in the Procreate app on your iPad to use them digitally.
DOWNLOAD THE FREE PRACTICE SHEETS HERE
Don’t miss the rest of the series!
Practice: A Practice: B Practice: C
Practice: D Practice: E Practice: F
Practice: G Practice: H Practice: I
Practice: J Practice: K Practice: L
Practice: M Practice: N Practice: O
Practice: P Practice: Q Practice: R
Practice: S Practice: T Practice: U
Practice: V Practice: W Practice: X
As you practice, I’d love to see your progress. Share your photos in our Amy Latta & Friends Facebook group or on Instagram.
And remember, if you like it, put a Pin on it for future reference or to share with a friend!


One Comment