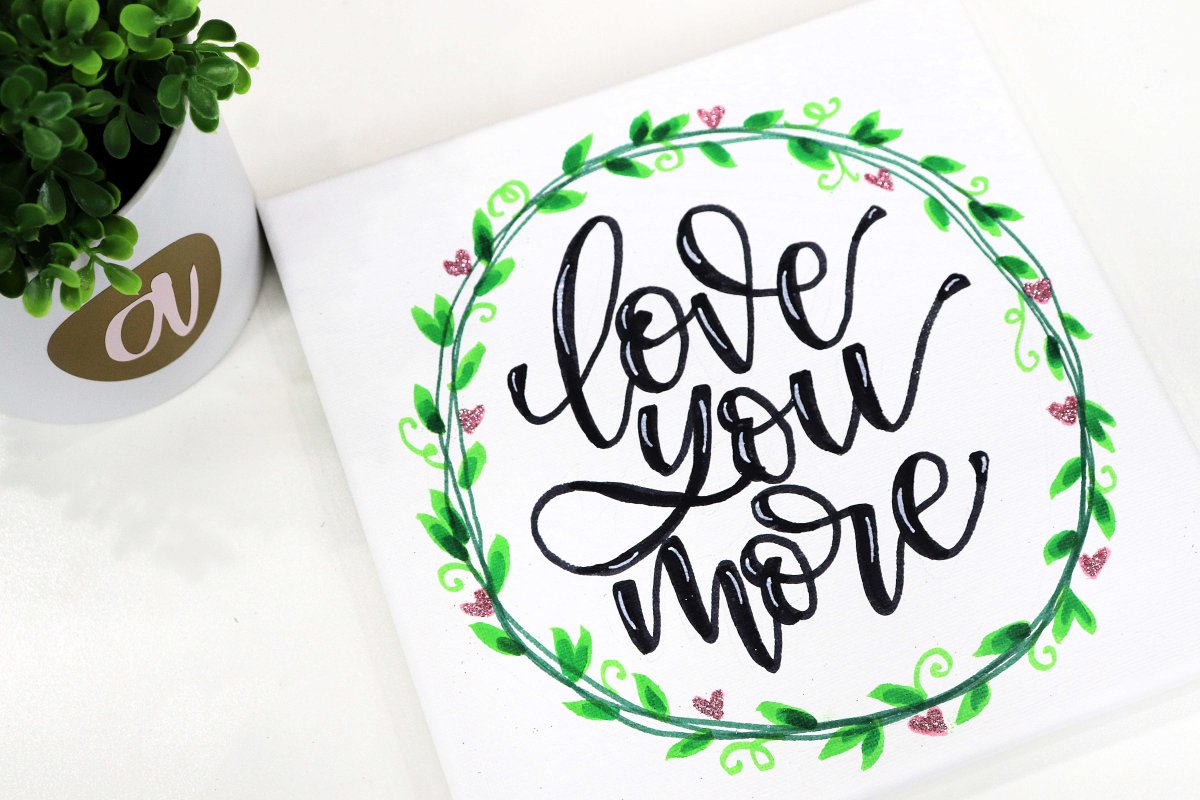
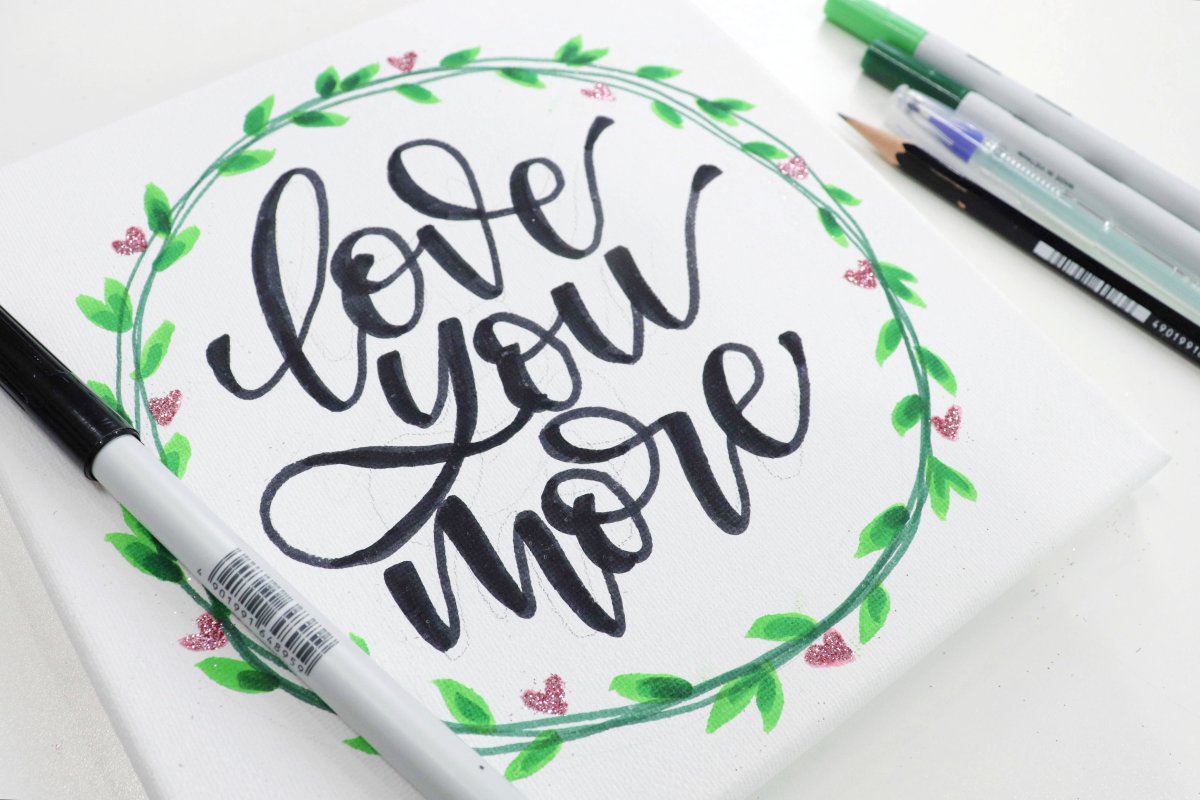
Love You More Canvas with Tombow ABT PRO
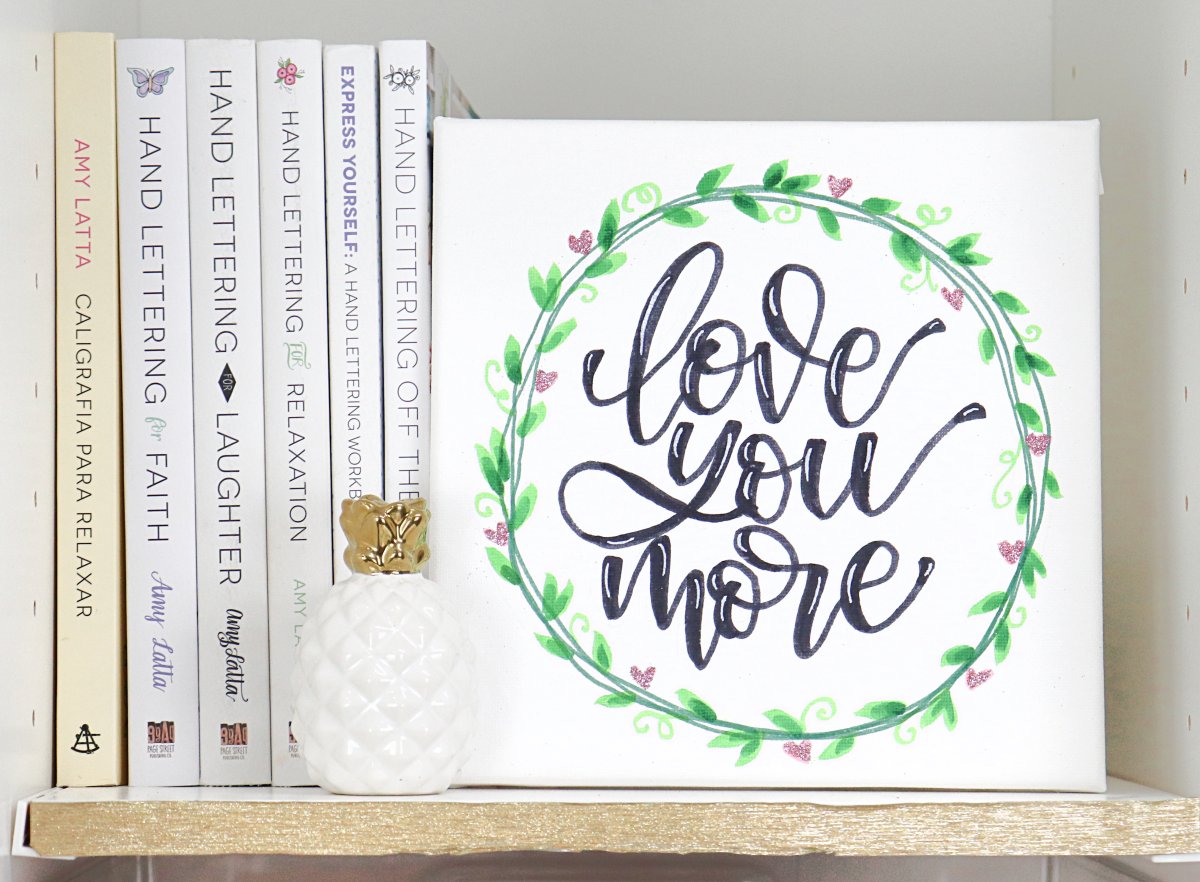
Ready to make a pretty piece of Valentine’s decor with me? This is perfect for the wall or a shelf in your home, or to give as a gift to a special someone!
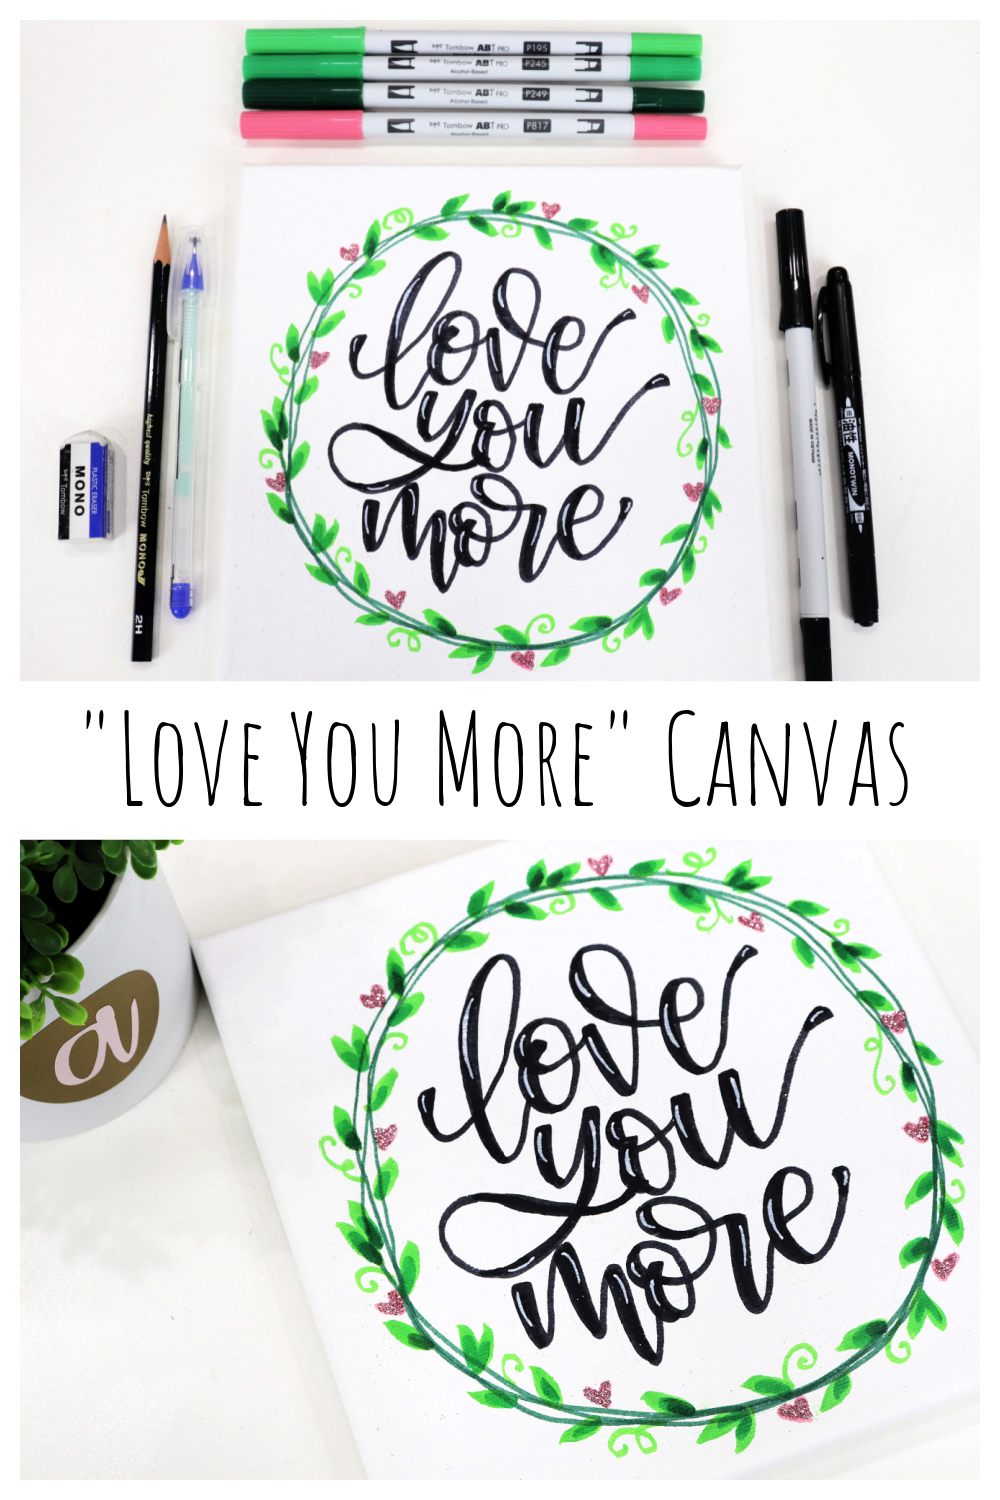
You’ll need:
(note: these are affiliate links)
a square canvas
Tombow ABT PRO Alcohol-Based Markers (P195, P245, P249, P817, PN15)
white paint pen or paint and small brush
glue (I used the Tombow MONO Glue Pen)
fine glitter
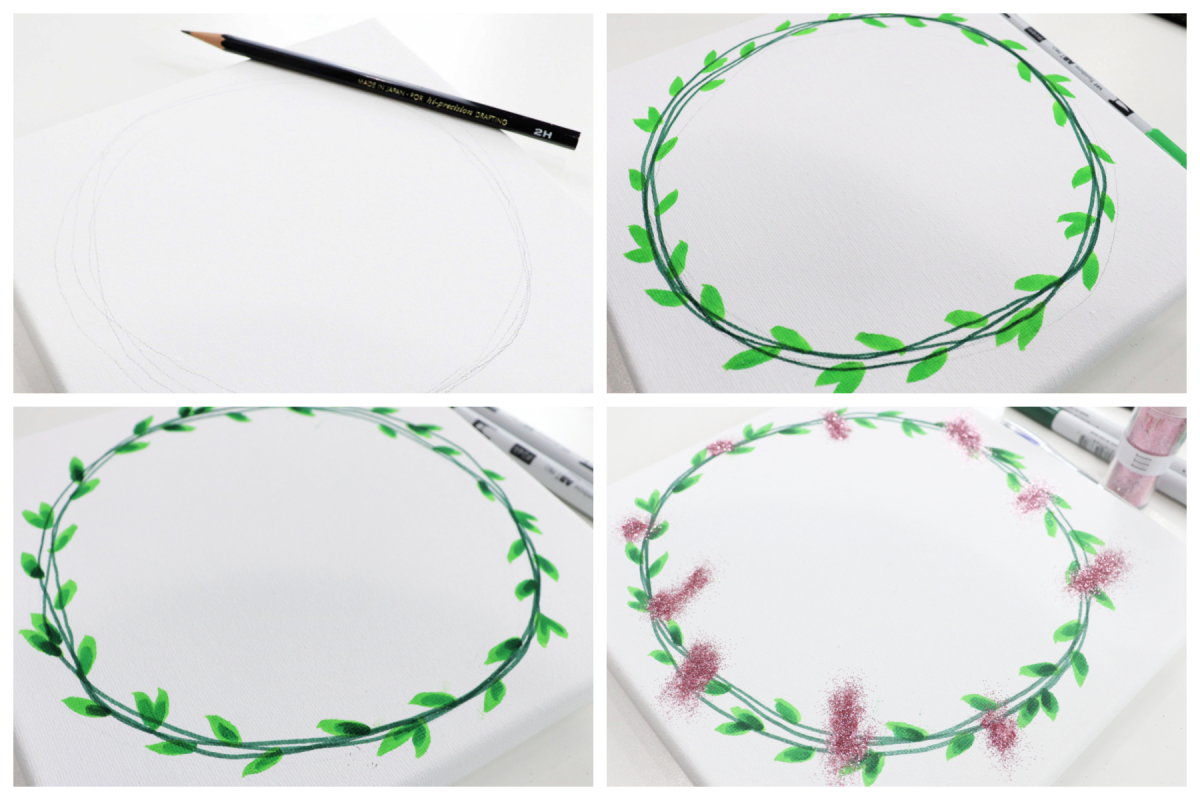
Step 1: Sketch your wreath in pencil.
Draw several “messy circles” that overlap each other to represent vines twisted together to form the wreath.
Step 2: Trace your wreath with marker and add leaves.
I traced my pencil lines with my darkest green marker, then added leaf shapes around it with my lightest green. Next, I used the two darker greens to add shading inside the leaves. Once the marker is dry, erase any pencil lines you can still see.
Step 3: Add hearts.
I drew tiny pink hearts around the wreath; some on the outside and some inside.
Step 4: (optional) Glitter the hearts.
I personally think glitter makes everything better, but if you don’t, you can skip this step. To add the sparkle, just fill in each heart with the glue pen or liquid glue, then sprinkle extra fine glitter on top. Tap off the excess.
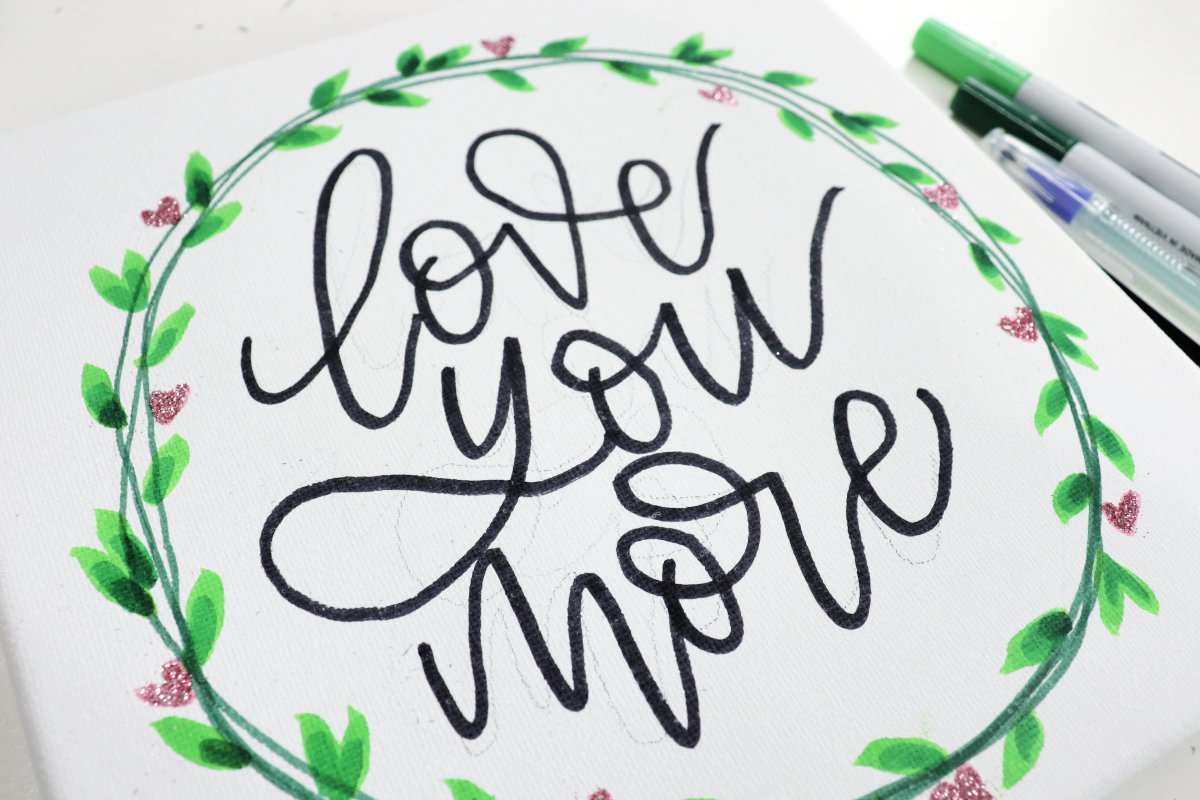
Step 5: Lightly sketch your phrase in pencil inside the wreath.
I chose, “love you more,” but you could also write a name, a monogram, or any other message. This sketch is just for positioning, so don’t worry about doing your faux calligraphy technique. All we need is to know where the letters go.
Step 6: Trace your words with a black marker.
Once the marker is dry, erase any pencil lines that are still visible.
Step 7: Use the Faux Calligraphy technique.
The key to this kind of hand lettering is that within every letter there’s a contrast between thick lines and thinner lines. To make that happen, find all of the downstrokes (places where your pen was moving down towards you) in each letter, draw a second line near the first one, and color in the space between them to create thicker lines. For a more in-depth, step by step look at how to do this, check out my beginner faux calligraphy post. It’s easier than you think!
Step 8: Add highlights.
Use a paint marker or white paint and a tiny detail brush to add little highlight areas to your letters.

That’s all there is to it! Your canvas is ready to display! If you give it a try, I’d love to see how yours turns out. Make sure you’re part of the Amy Latta & Friends Facebook Group so you can share your project photos and we can all be inspired. Also, don’t forget to check out my other holiday projects, including lots of additional inspiration for Valentine’s Day.


So pretty! And great as year round decor. I like the idea of using markers for this. Pinning to try.