Free Hand Lettering Practice Sheets: B
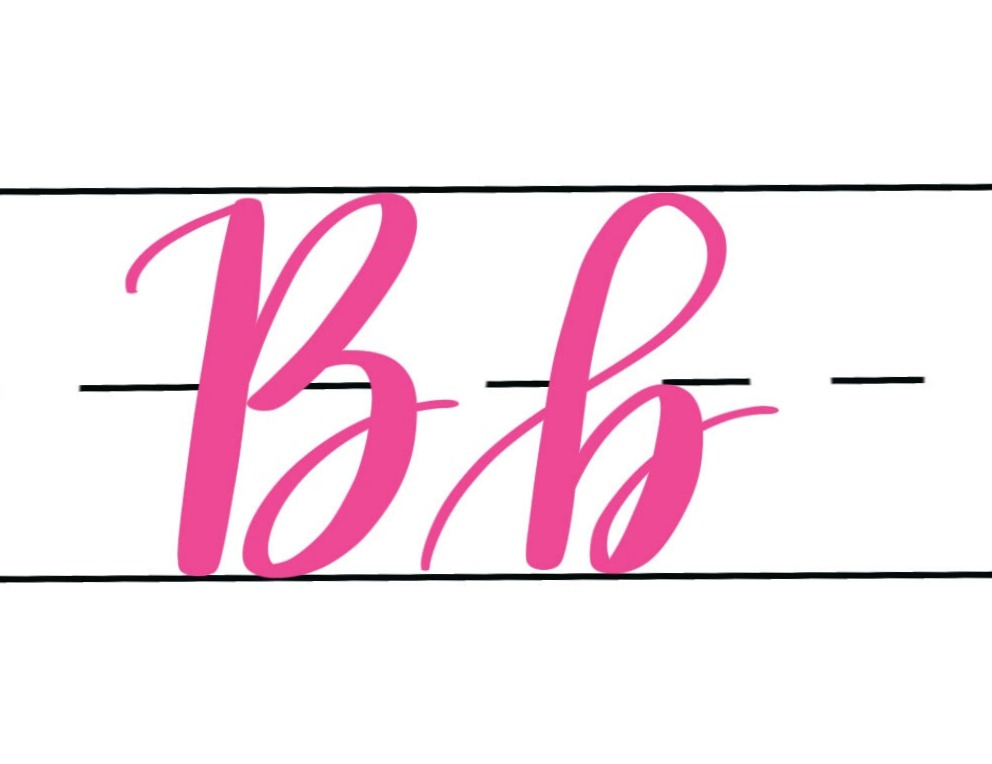
Ready to try your hand at mastering the Brush Script “B”? This month, we’re working through the alphabet one letter at a time and learning how to write it in both upper and lowercase.
If you’re new to hand lettering, Brush Script is the most popular of all the lettering fonts, recognizable by the combination of both thick and thin lines within each letter. We create thick lines on every downstroke by applying pressure to the brush pen while we write. In contrast, when our pen is moving up or horizontally on the paper, we release that pressure and get thin lines instead. If you’re not quite sure what any of that means, you’ll want to back up to the first post in this series to get a good overview of how brush lettering works. Once you’re ready to move on, let’s take a look at our capital Brush Script B.
BRUSH SCRIPT CAPITAL B
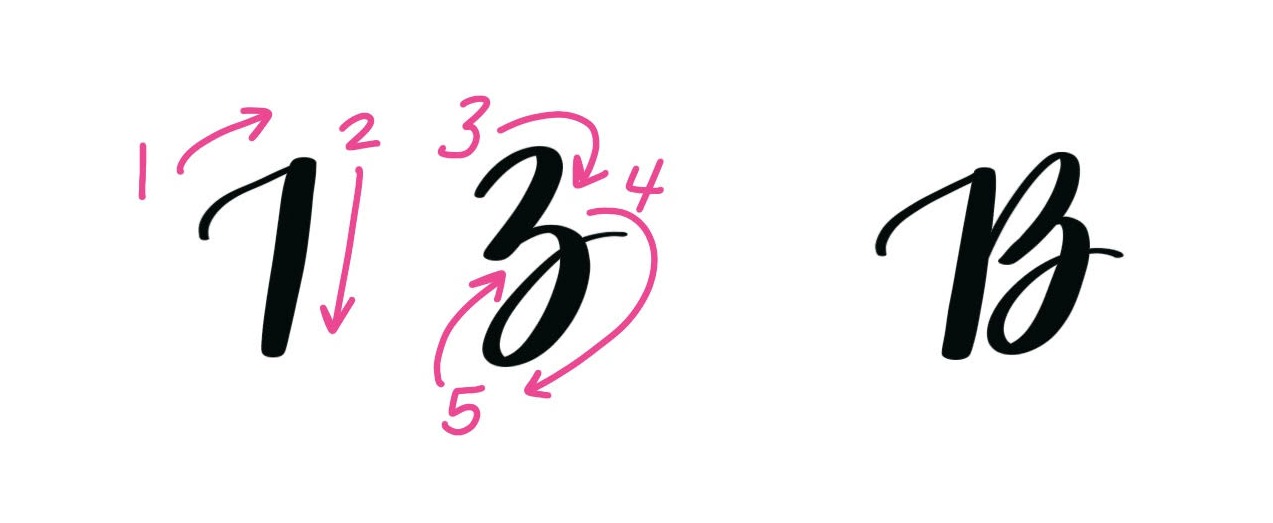
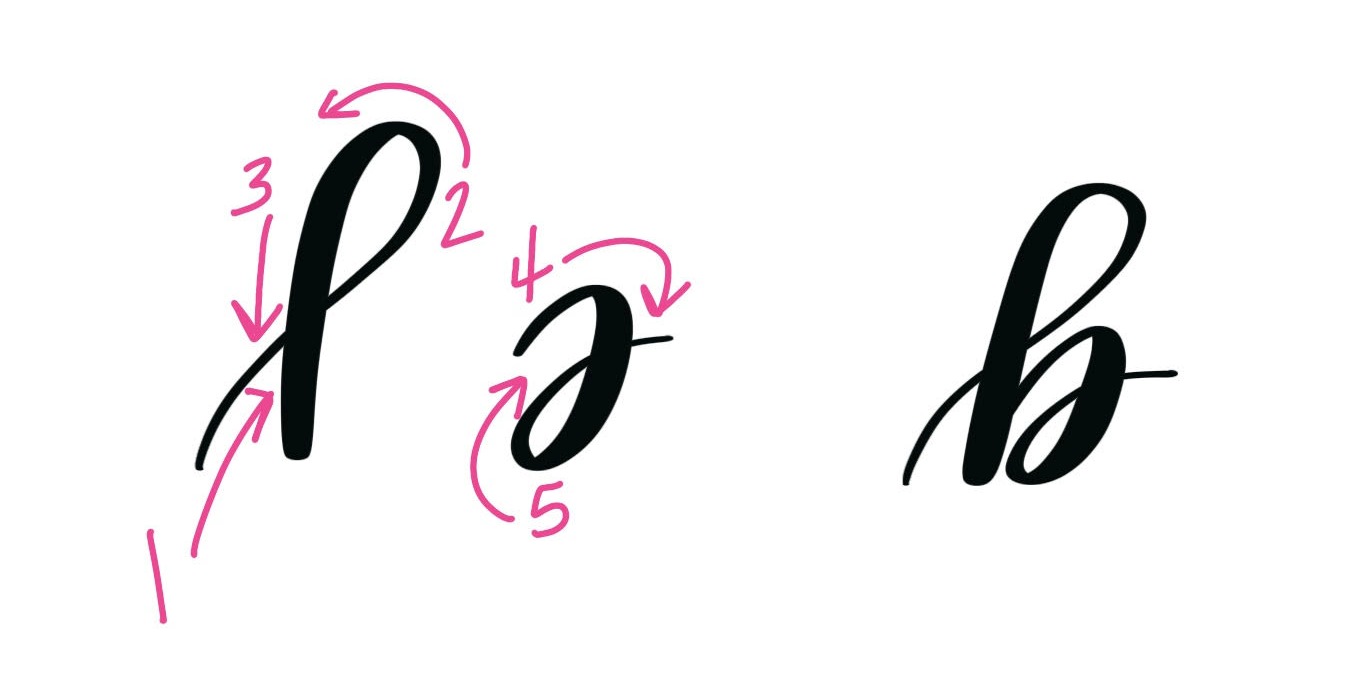
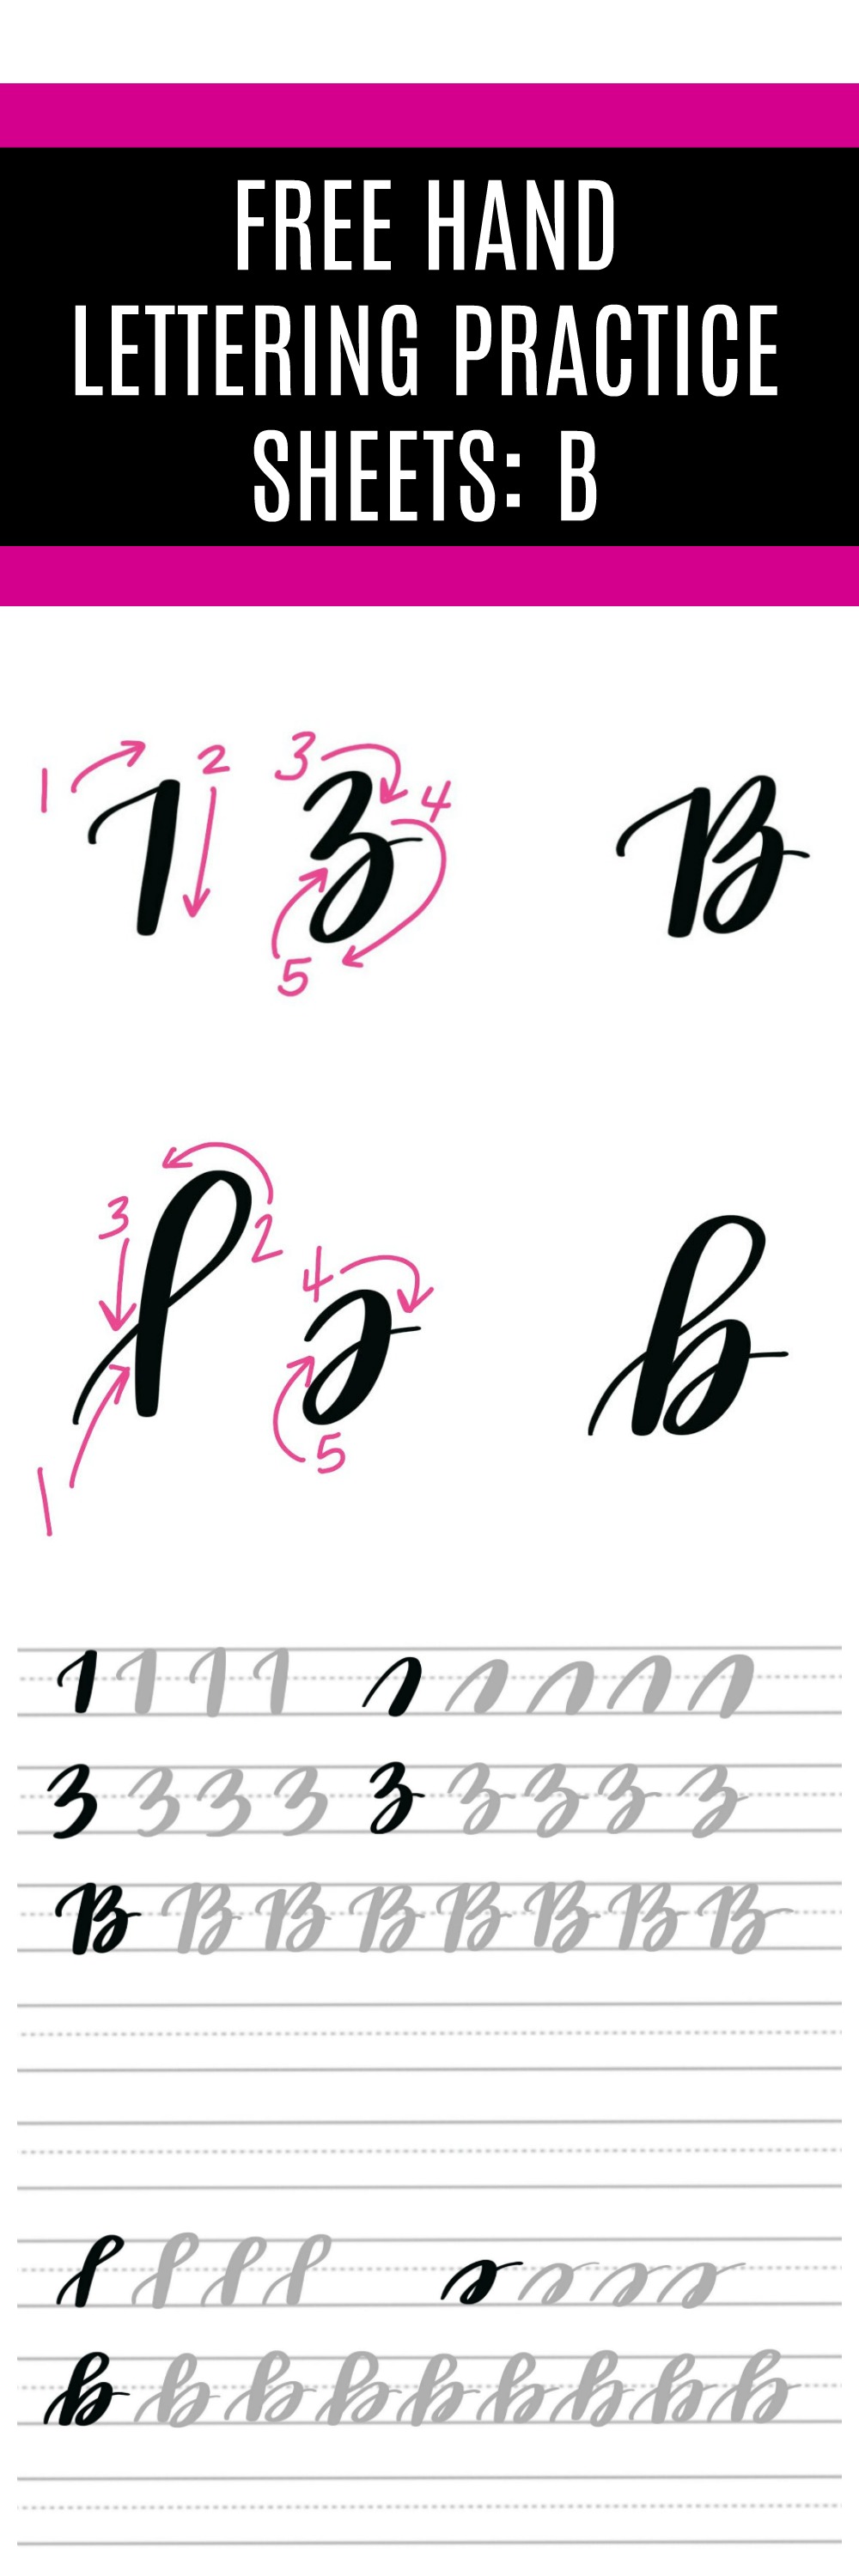
The left side of our capital B is a piece of cake. It’s simply a quick upstroke followed by a straight, thick downstroke. The right side looks trickier, but it’s all based on drills you already know! Remember when we practiced transitioning from an upstroke to a downstroke without picking up the pen? This shape is called an overturn. Let’s try making that same overturn, but on a bit of a diagonal instead of straight up and down.
The next step is just to do two of those diagonal overturns in a row. See how when you place them on top of each other they look like the number 3? Now, let’s make two in a row without picking up the pen. The final touch is to release the pressure at the bottom of your shape and finish with an upstroke that loops back up to the right. We’ll be using this for the right half of our “B,” but it’s also how to form a lowercase “z”!
When we put the first downstroke together with this double overturn, we get a capital “B.” As you’re starting out with your practice, you can pick up your pen in between the left side of the letter and the right side, but ultimately, you’ll want to get comfortable making the entire letter without lifting the pen. Now, let’s take a look at the lowercase “b,” which is formed very differently than its capital counterpart.
BRUSH SCRIPT LOWERCASE B
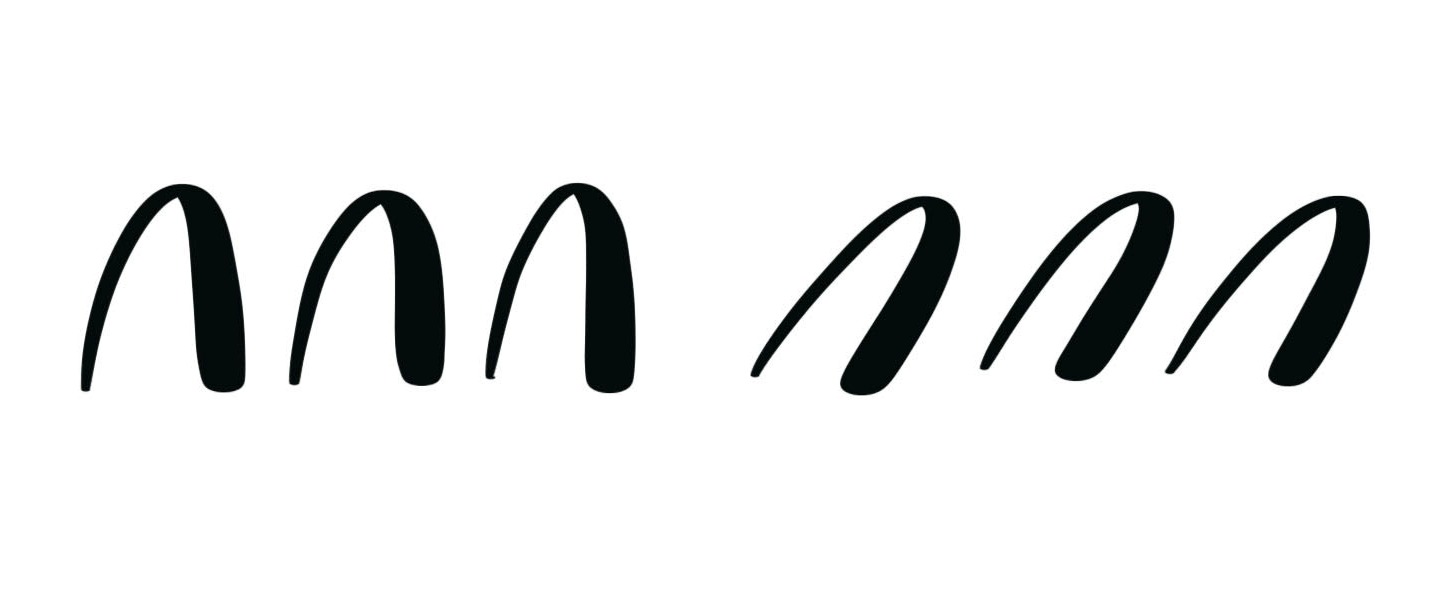
A lowercase “b” begins with a loop shape. This is formed by starting with an upstroke that goes on a diagonal toward the right side of the paper, then loops back over itself for a downstroke. The other piece of the “b” is another tilted overturn. This will feel and look like the bottom piece of our capital “B.”
The loop is a very important type of stroke to master, because not only do we need it for this letter, it will also be used many more times throughout the alphabet for letters like “k,” “h,” “l,” “d,” and “f.”
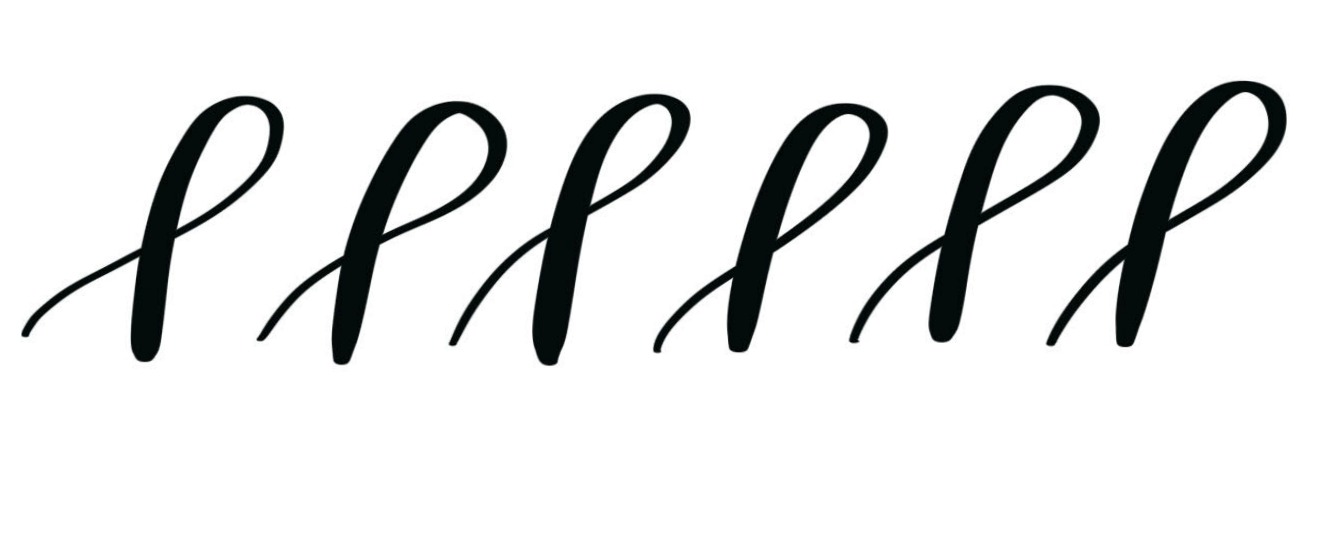
TAKING IT TO THE NEXT LEVEL
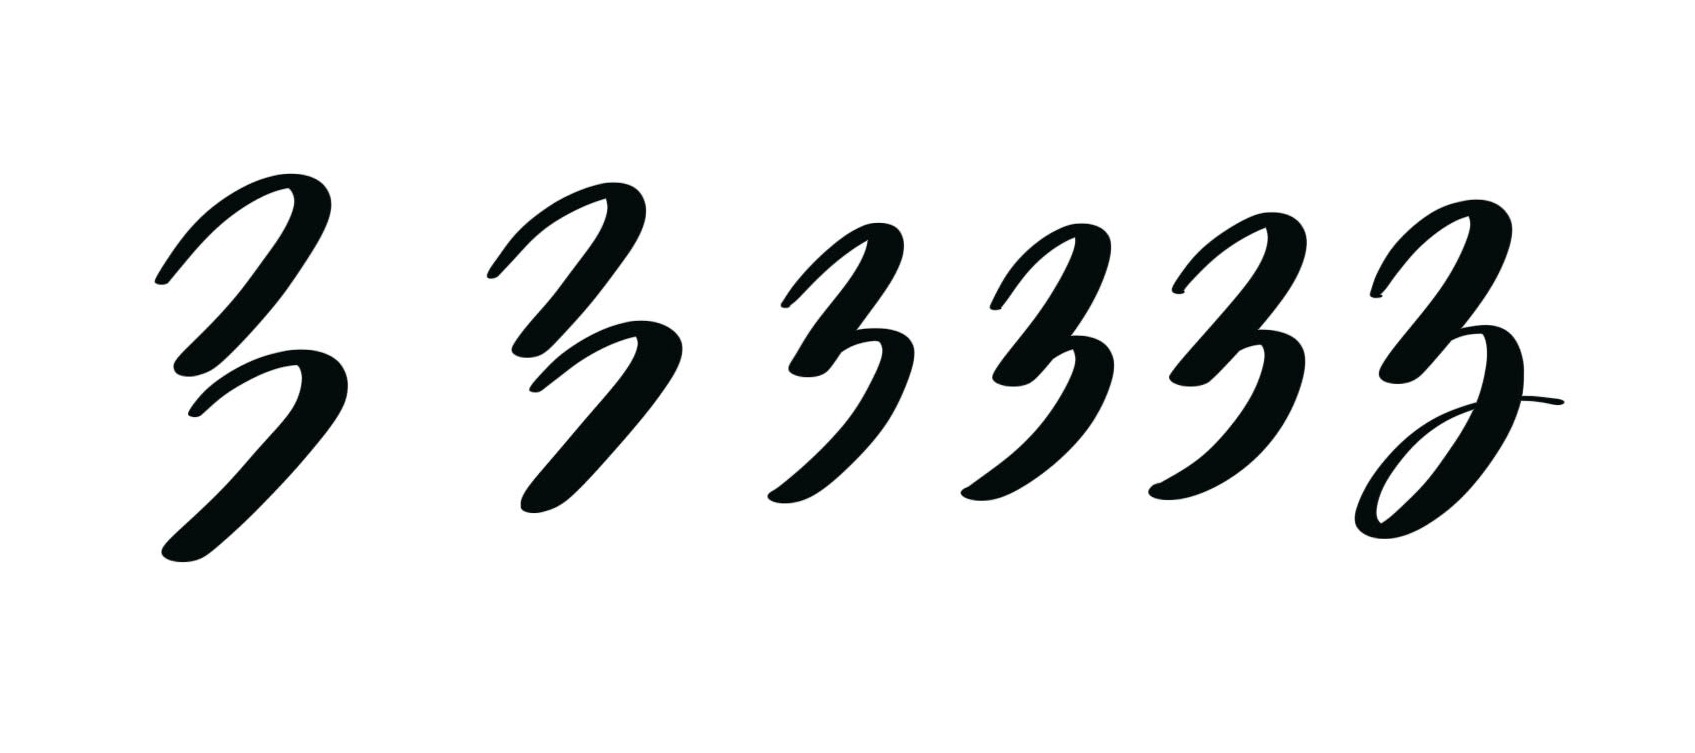
Once you’ve mastered the basic shape of a lowercase b, you can play around with the size and shape of your loop to help you stylize your lettering. All of the letters below are formed using the same steps, but the loops vary in size and position.

FREE HAND LETTERING PRACTICE SHEETS: B
Now that we’ve gone over the basic elements of the letters, it’s time to practice! I’ve created two practice sheets this time; the first one goes over the simple shapes and the basic letters themselves. The second gives you some variations, as well as practice connecting the lowercase “b” to the lowercase “a” we learned in the previous post.
DOWNLOAD FREE PRACTICE SHEETS HERE
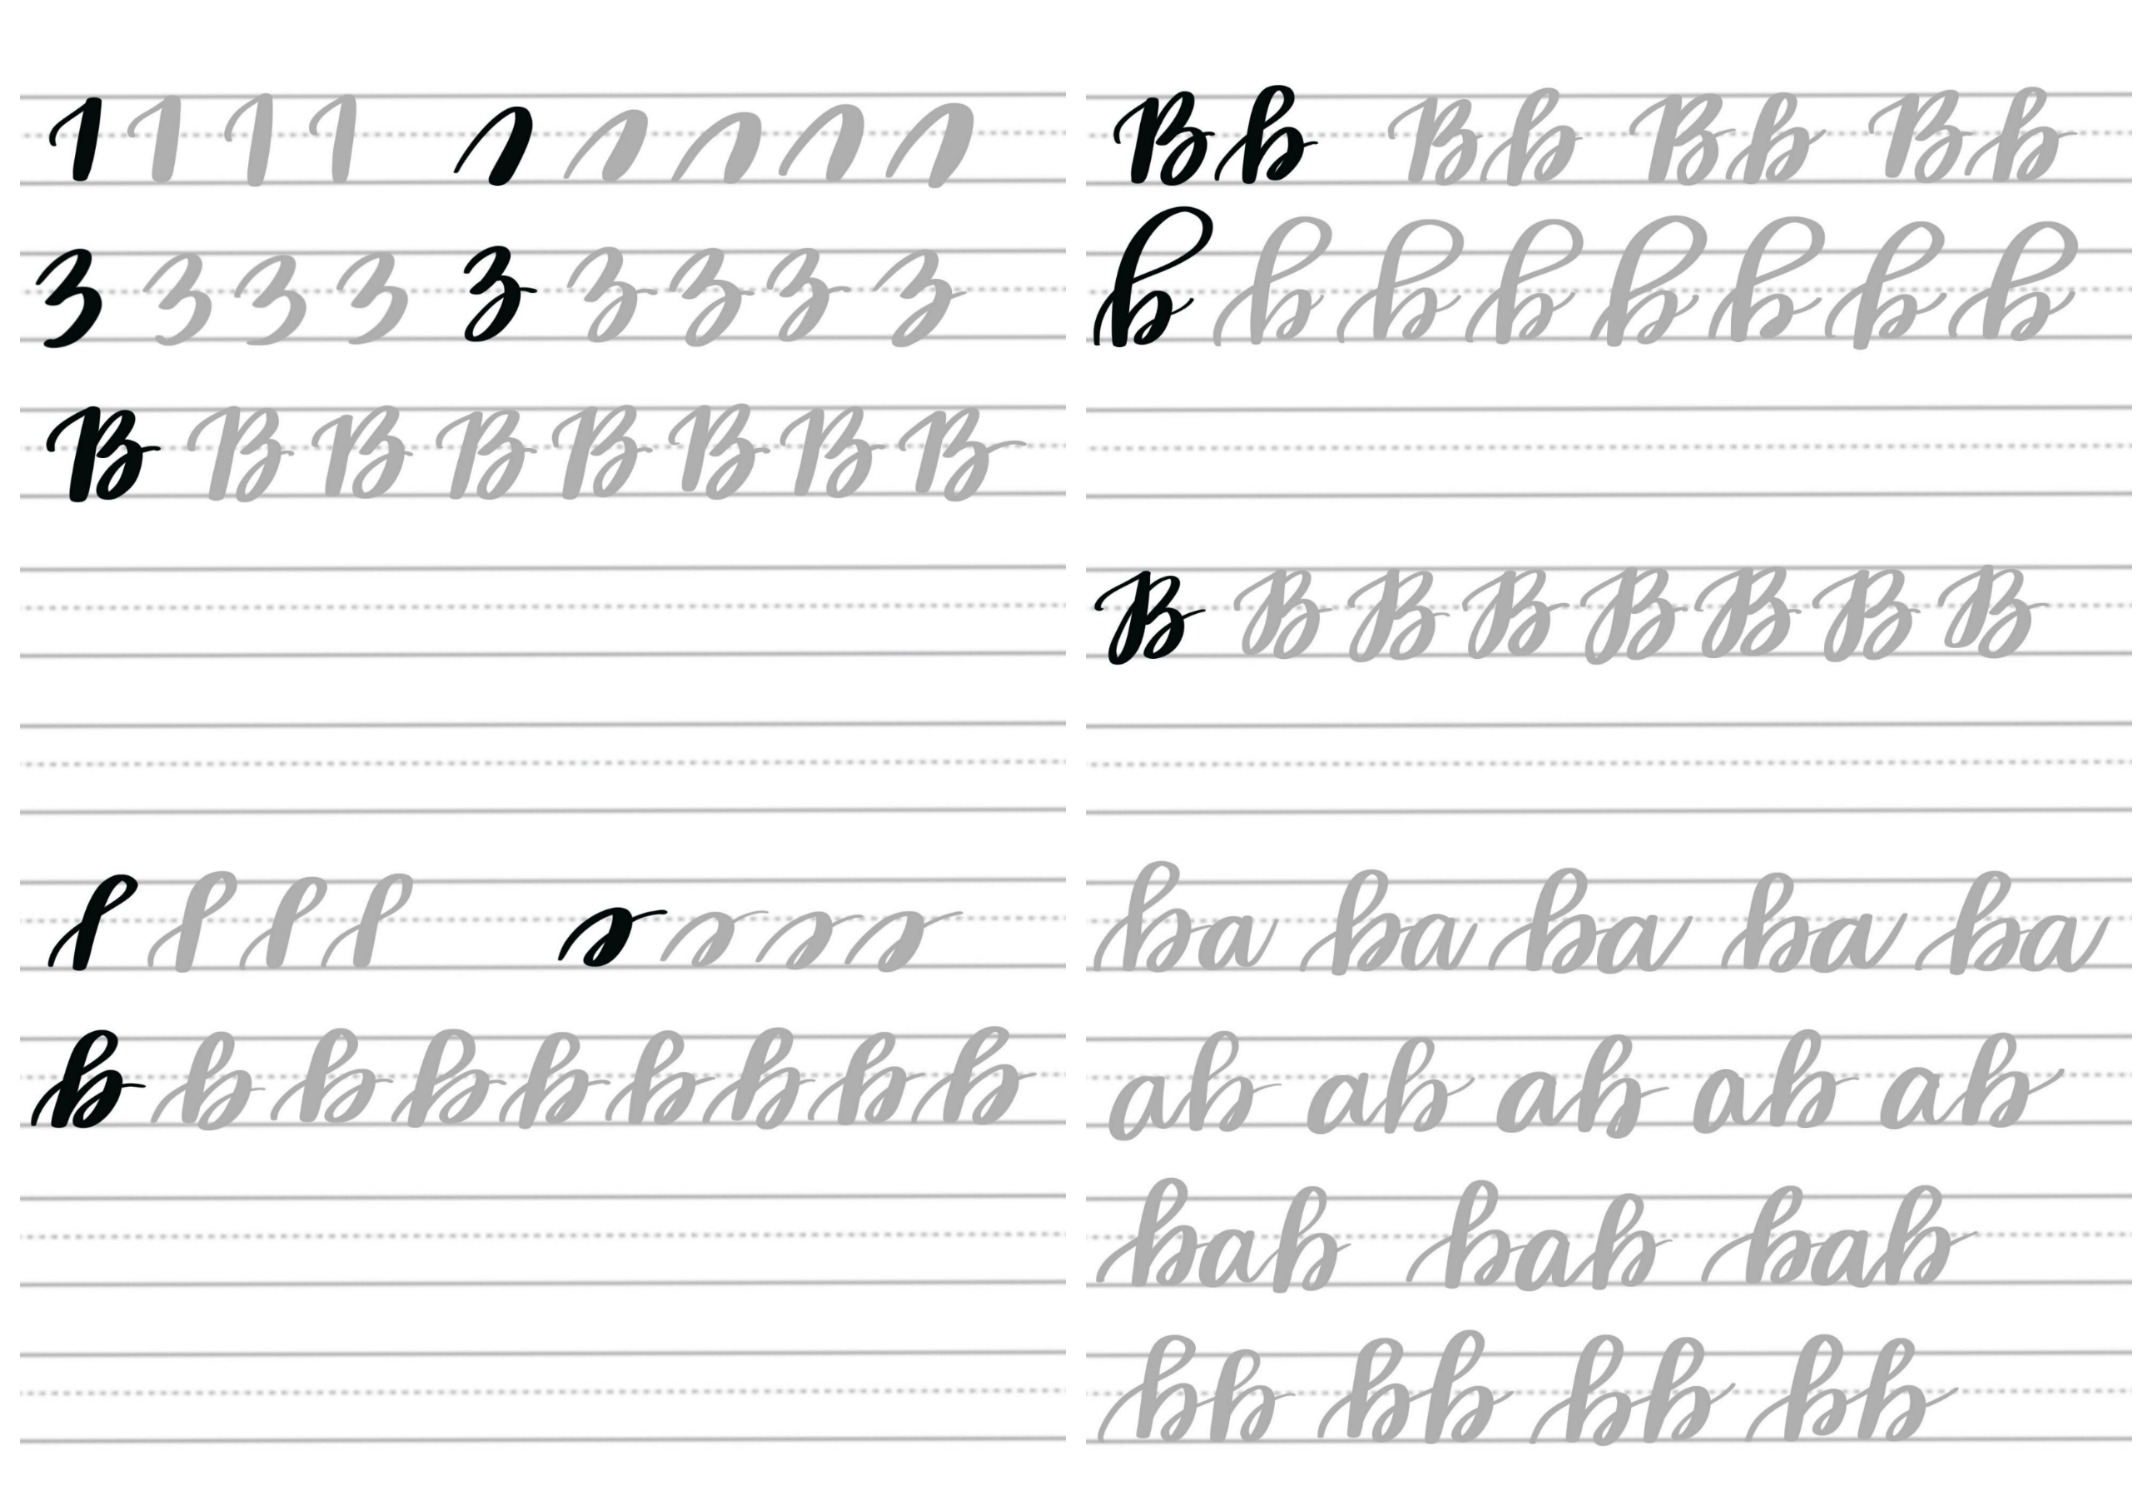
Just save these files to your device and print them out. Then, trace over the grey letters and use the blank lines to write the letters on your own. If you prefer lettering digitally, you can save the files and import them into Procreate or another program to use on your iPad. Feel free to print and use them as much as you like for your own personal practice.
Don’t forget to Pin this post for reference and to share it with your lettering friends!
And don’t miss the rest of the series!
Practice: A Practice: B Practice: C
Practice: D Practice: E Practice: F
Practice: G Practice: H Practice: I
Practice: J Practice: K Practice: L
Practice: M Practice: N Practice: O
Practice: P Practice: Q Practice: R
Practice: S Practice: T Practice: U
Practice: V Practice: W Practice: X
As you practice, I’d love to see your progress. Share your photos in our Amy Latta & Friends Facebook group or on Instagram.


5 Comments