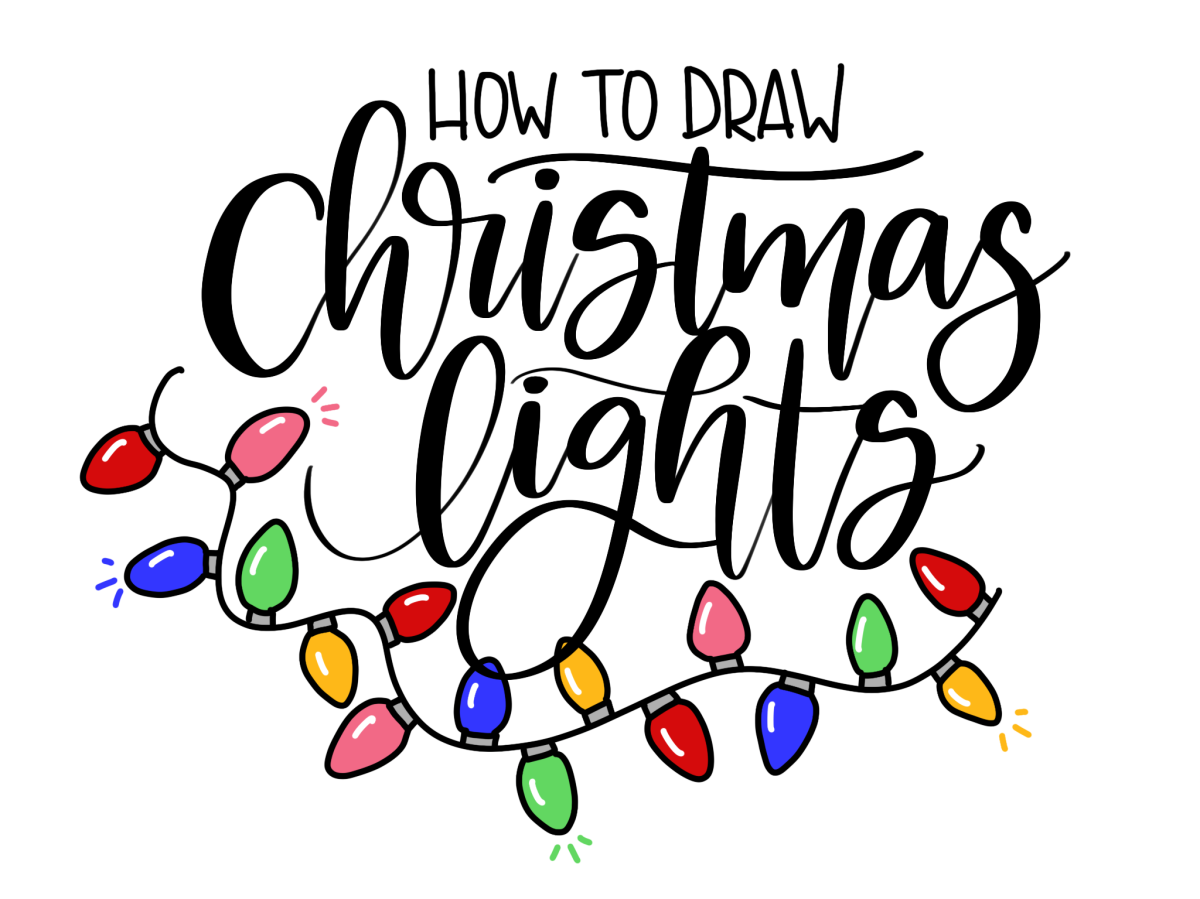
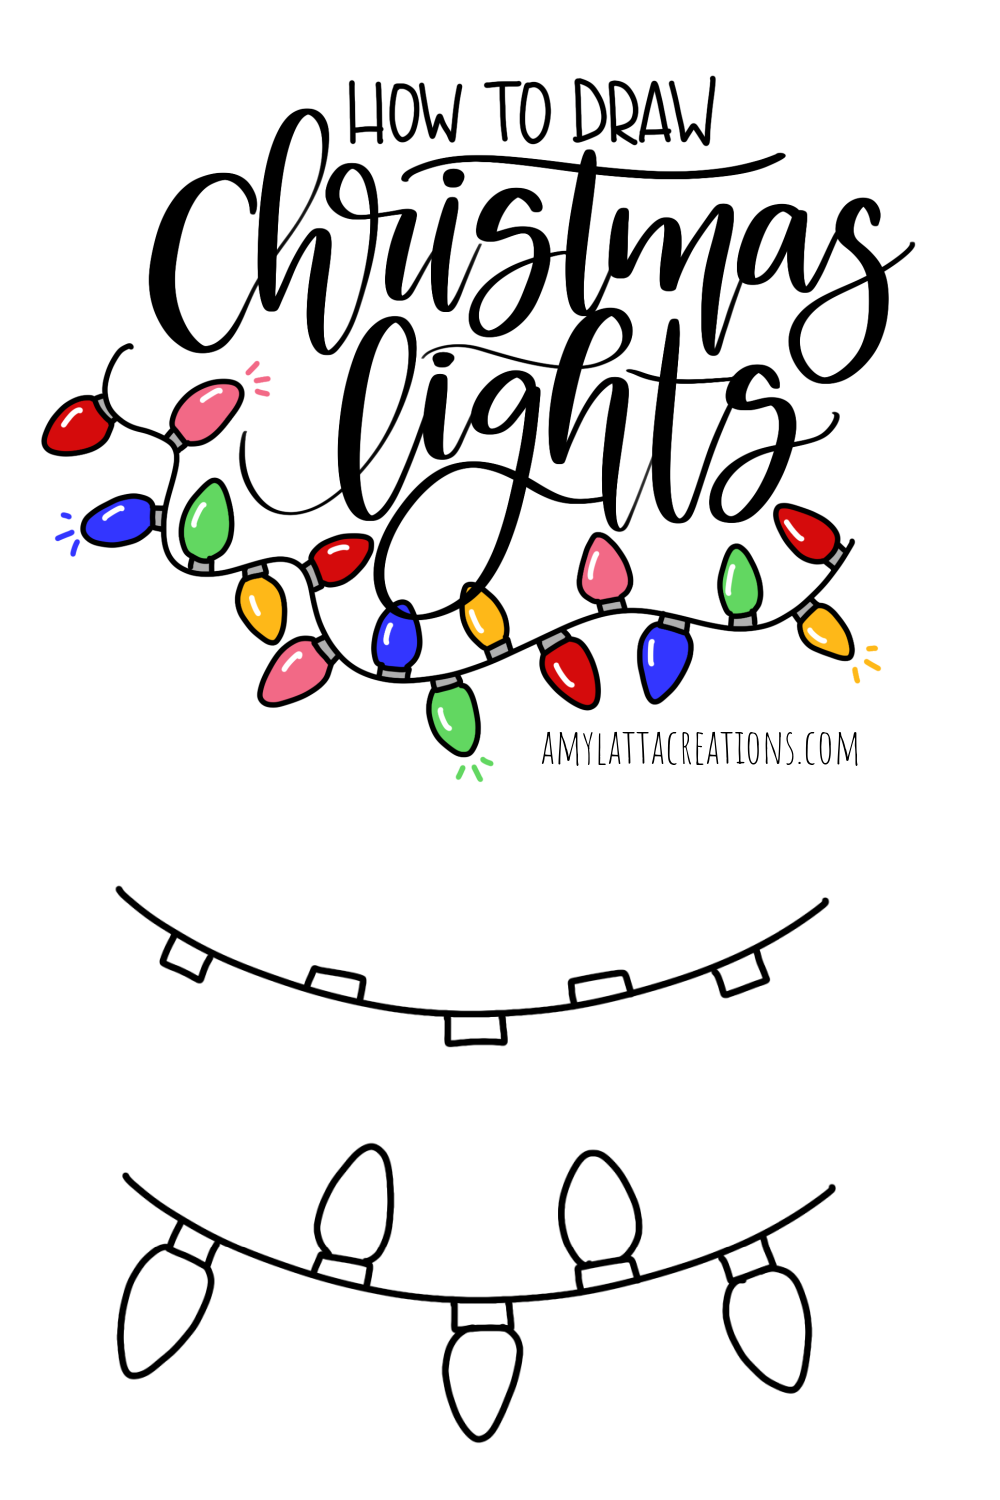
How to Draw Christmas Lights
Do you love decorating cards, gift tags, and more for the holiday season? Let’s learn how to draw Christmas lights! This is a fun and easy doodle anyone can do and it’s such a useful embellishment this time of year. You can use any markers, paint pens, or other art supplies you like to draw your Christmas lights, including drawing them digitally on your iPad in the Procreate app. Ready? Let’s get started.
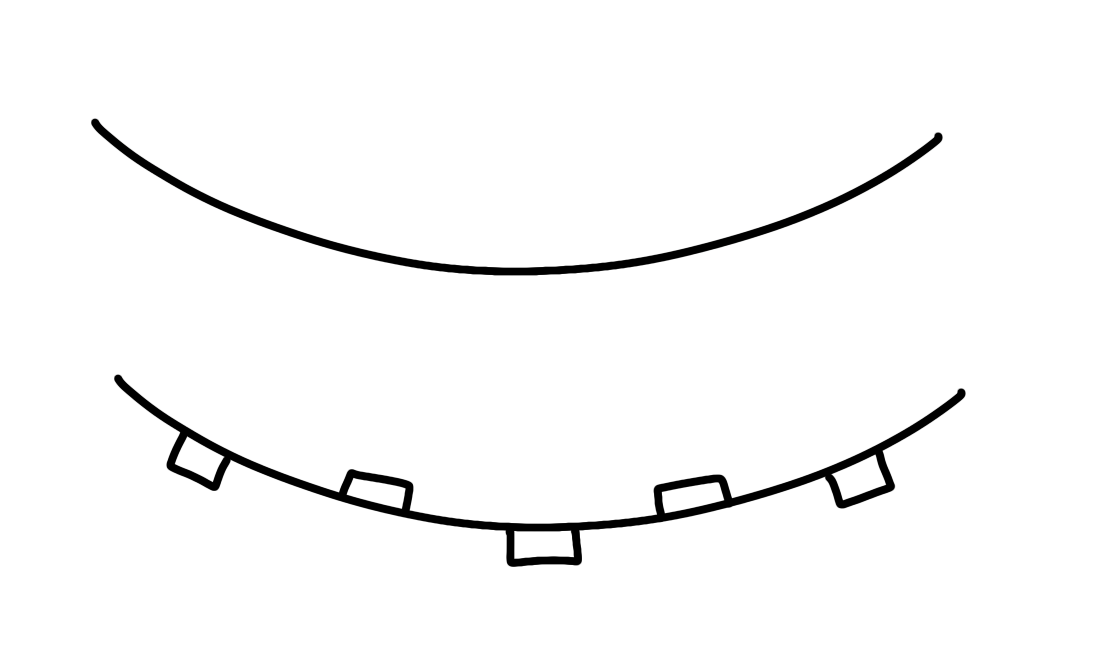
Step 1: Draw your wire.
The easiest way to do this is by making a wide “u” shape, but you can make your wire go in any shape or direction you like.
Step 2: Add small rectangles for the base of each light.
Try to space these out pretty evenly on your wire. I like to alternate sides of the wire; one under, one on top, and so on.
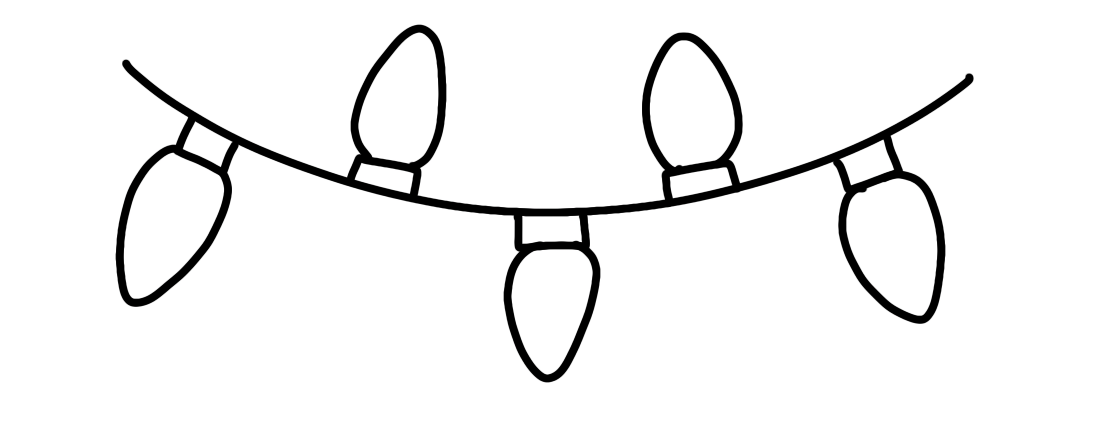
Step 3: Draw your bulbs.
Add a bulb shape to each rectangle. These can be pointed, round, or whatever shape you want your bulbs to be.
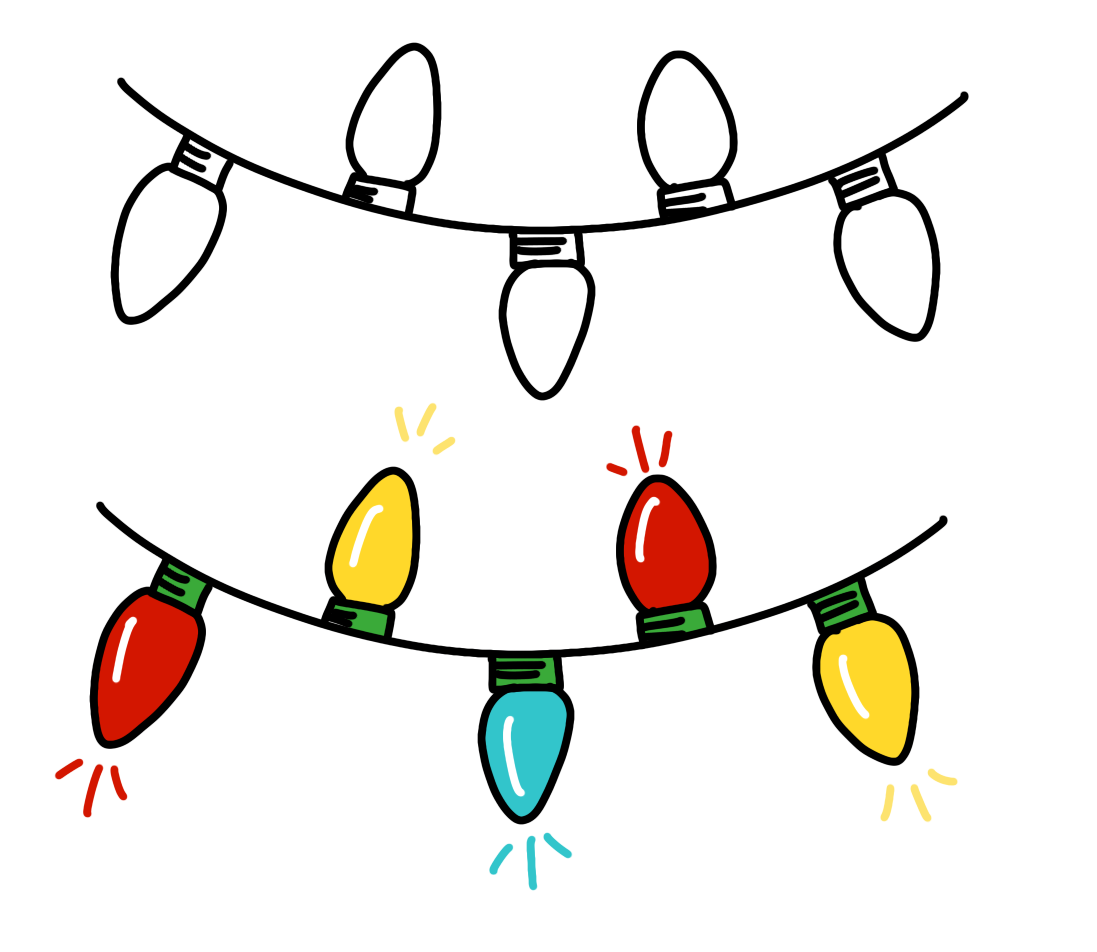
Step 4: Draw detail lines inside the rectangles.
Step 5: Add color.
It’s time to let your lights shine! A white highlight line inside each bulb adds to the effect. Sometimes, I also like to draw a few short lines coming out from the tips of some or all of the bulbs to show that they’re glowing.
Once you’ve mastered the basic doodle, try adding variations like making your lights a border all around a written message or the edges of a card/envelope. Wherever and however you use this drawing, I hope it makes your holiday a little more merry and bright!
Be sure to check out my other holiday doodles, like:
6 Ways to Draw a Christmas Tree
How to Draw a Christmas Gnome
How to Draw Retro Mid-Century Modern Ornaments


Oh Amy, I was trying to find the Christmas lights. I thought I had lost the directions, but I found on your blog. I ove to do small uncomplicated things, because I’m still learning and have been ill for many months, so I was unable to do this since I took your class last Fall. I enjoyed so much. I ❤ Love these lights. Keep putting on the small things for Cards and tags. Thanks so much. You Rock! AMY! ❣ SW. WI
Nice blog and helpful to kids