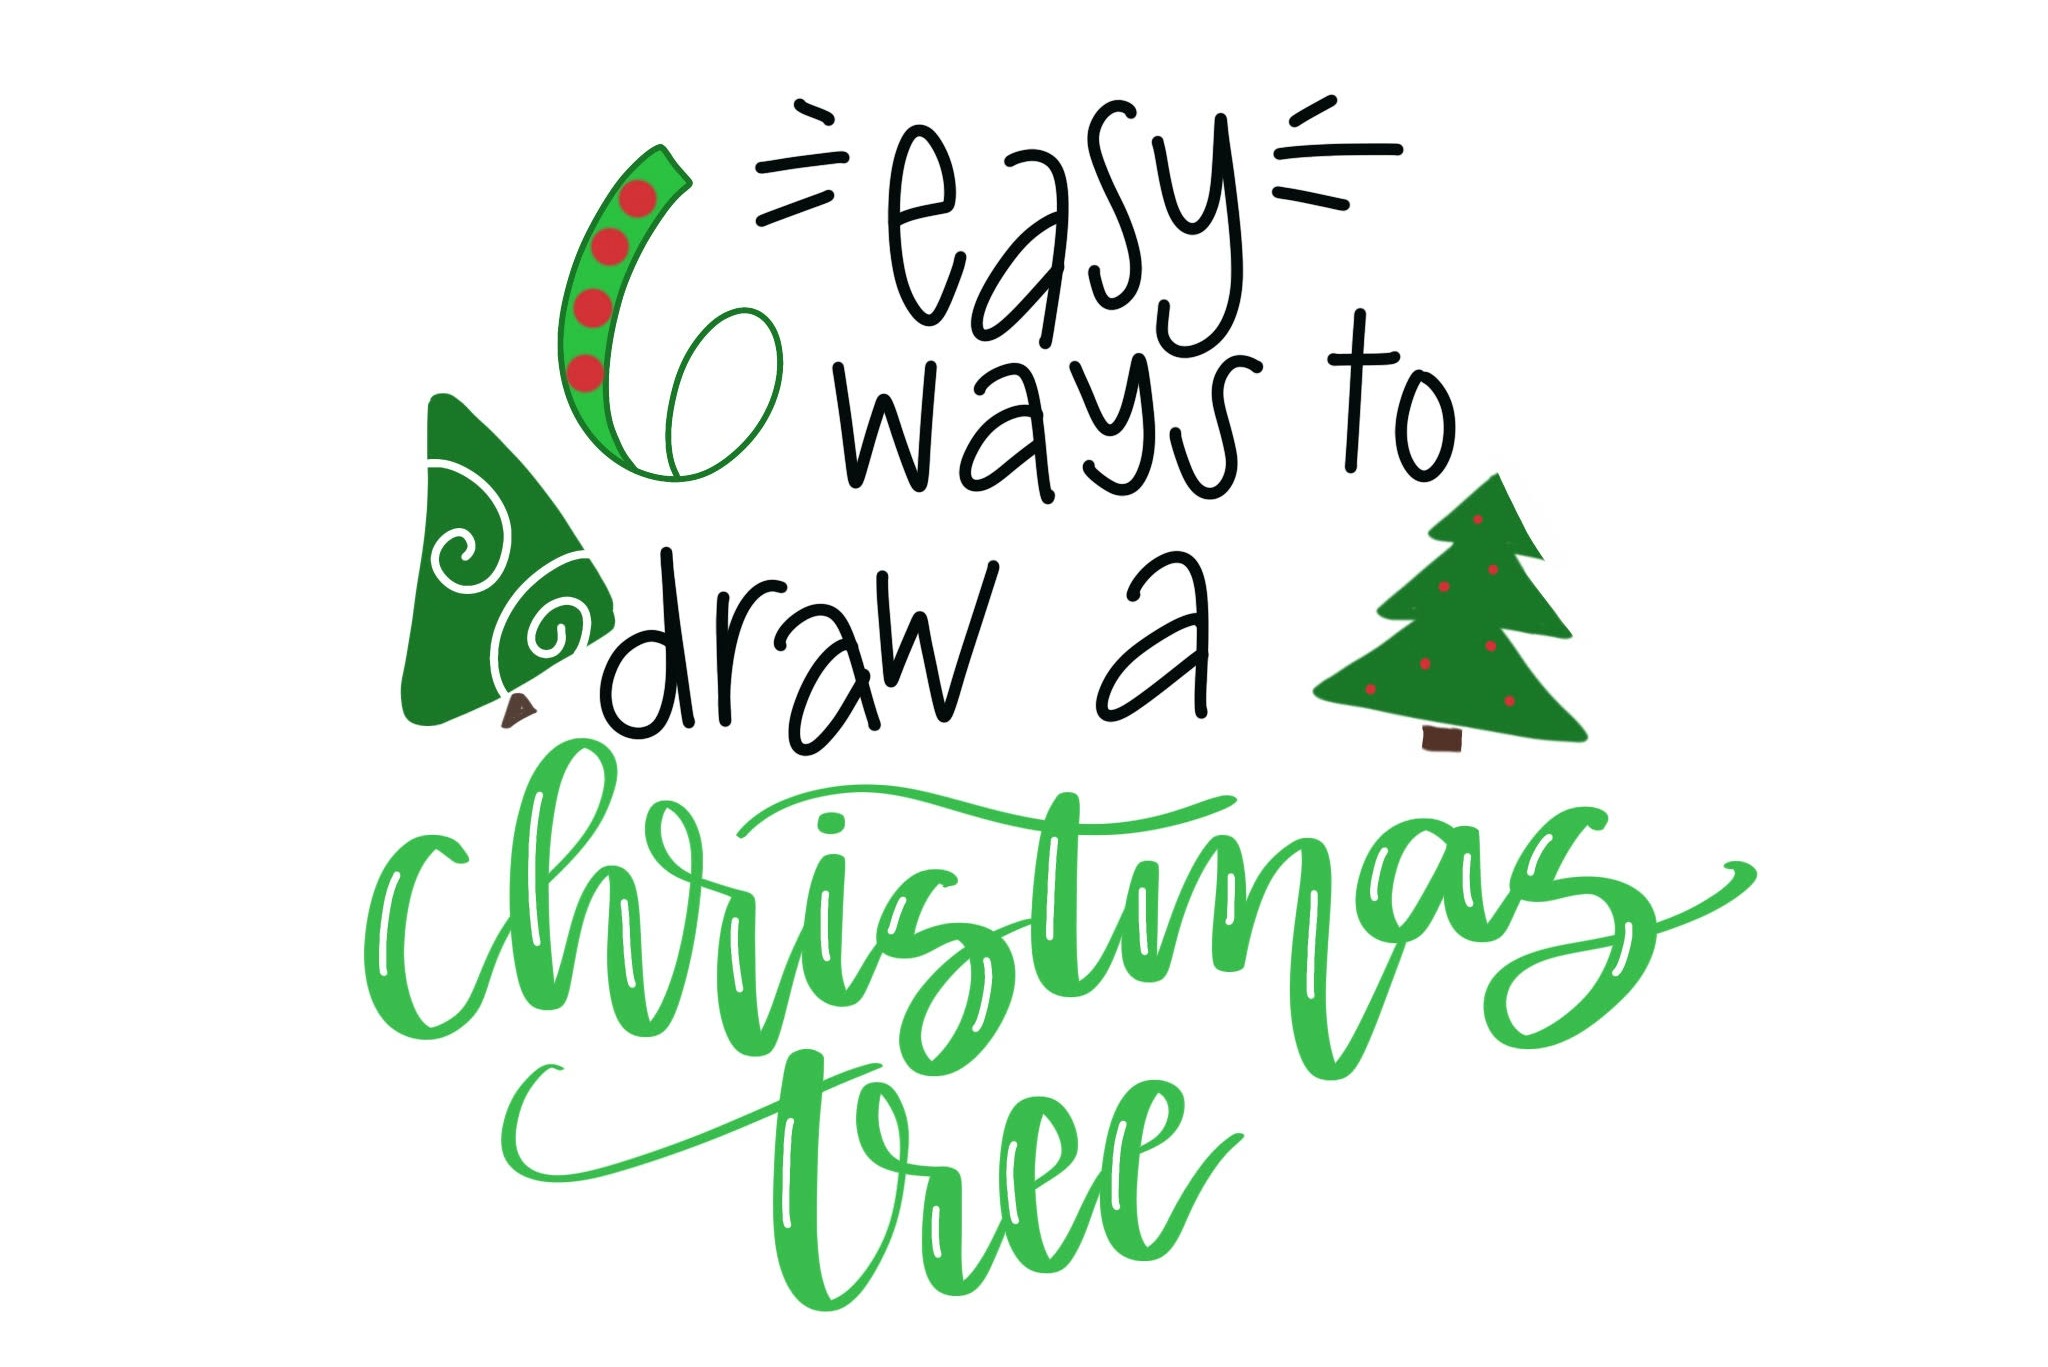
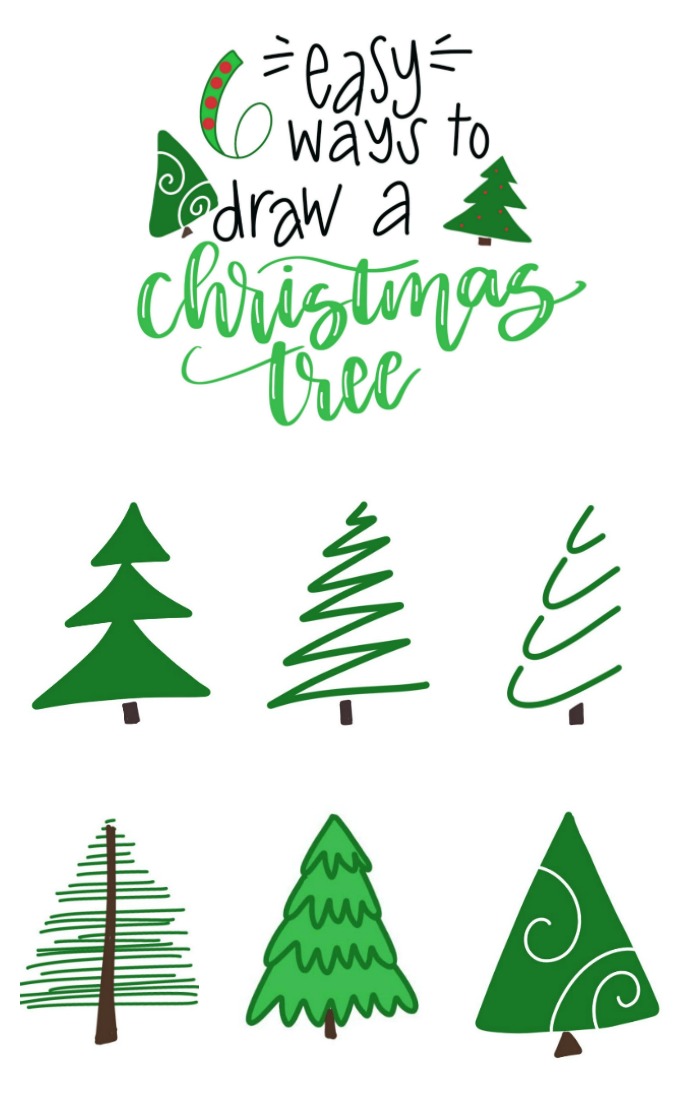
6 Easy Ways to Draw a Christmas Tree
I’ve noticed that there are two areas of life in which most people are quick to deny their abilities: drawing and dancing. For whatever reason, as we grow up, we begin to doubt our talents in these areas, so we stop trying. But it doesn’t have to be that way! It’s amazing what you can draw with just a few very basic shapes and lines. Today, I want to look at six easy ways to draw a Christmas tree that require no real artistic skills at all. Even young kids can enjoy making these various trees and using them to decorate cards, gift tags, and more. Grab a few markers (I suggest green and brown) and join me; I promise it’s easier than you think!
1. TRIPLE TRIANGLES
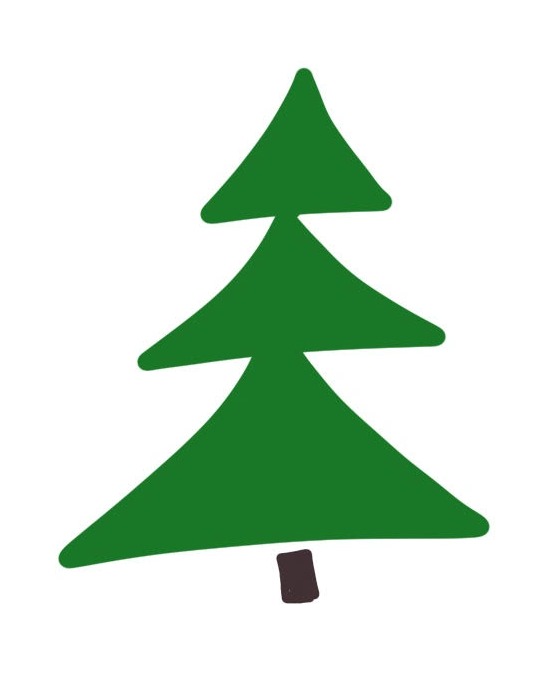
This is one of the most traditional looking ways to draw a pine tree, and if you can draw a triangle, you’ve got it made. Just stack three triangles on top of each other to form the body of the tree.
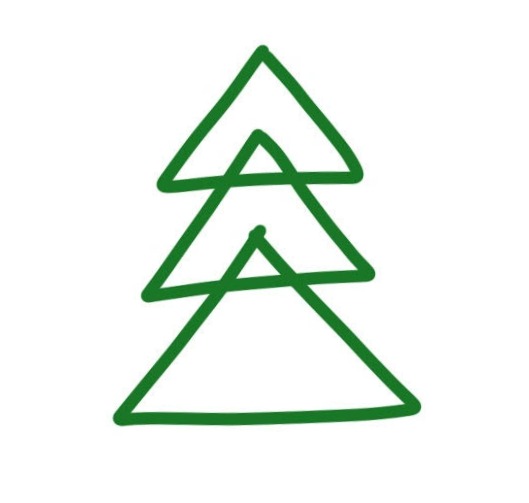
You can change the shape and appearance of the tree by choosing to overlap the triangles a lot or not much at all, as shown in the examples below. For a realistic look, each triangle should be slightly larger than the one above it.
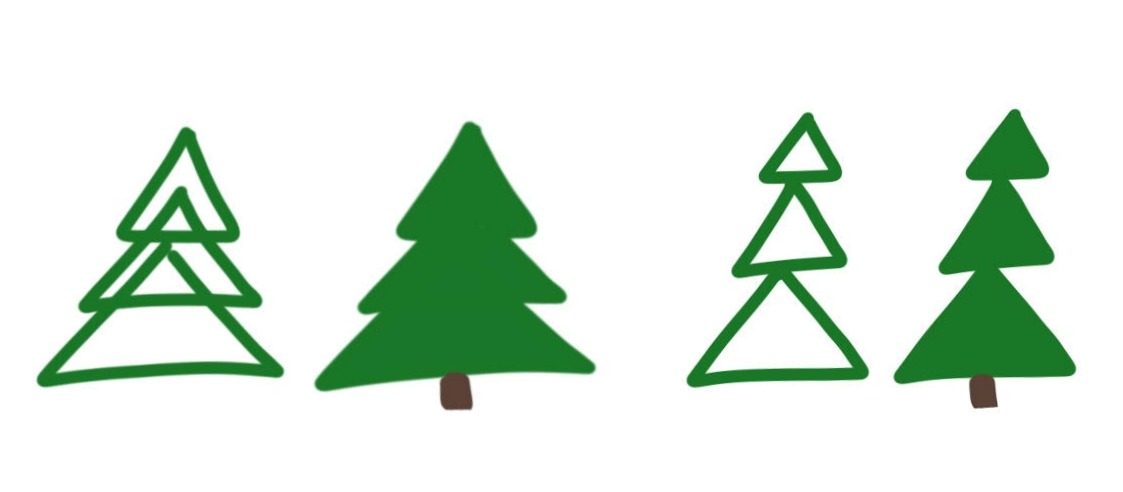
Color in your triangles and add a tiny brown rectangle for the trunk. If you want your Christmas tree to have decorations, you can add a star on top, garland, ornaments, and anything else you like.
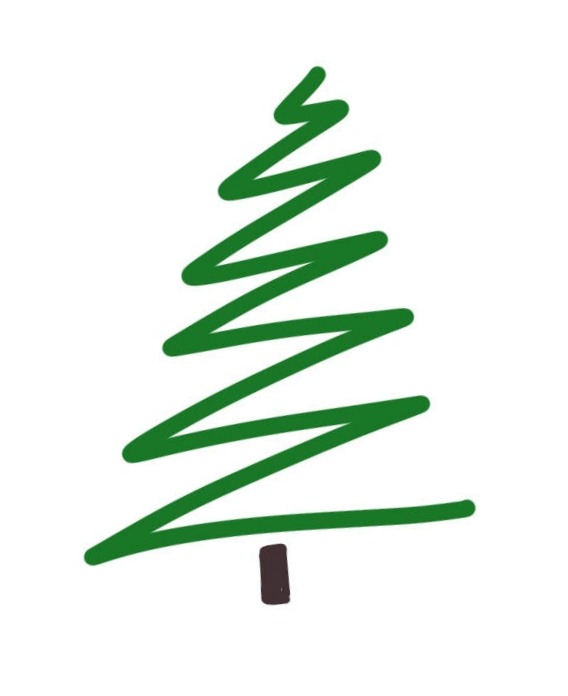
2. ZIG ZAG TREE
This next style is a bit more abstract. Rather than being a solid, colored-in shape, the suggestion of a tree is created by a line that goes back and forth, increasing in width from top to bottom. To create it, start at the top, and make a small sideways “v.” Then, go back in the opposite direction and make another. Continue creating this zig zag line, letting each row be a little longer than the one above it.
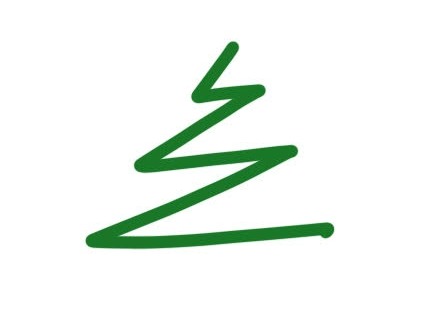
When you are happy with the size of your tree, finish it off with a brown rectangle at the bottom for the trunk.
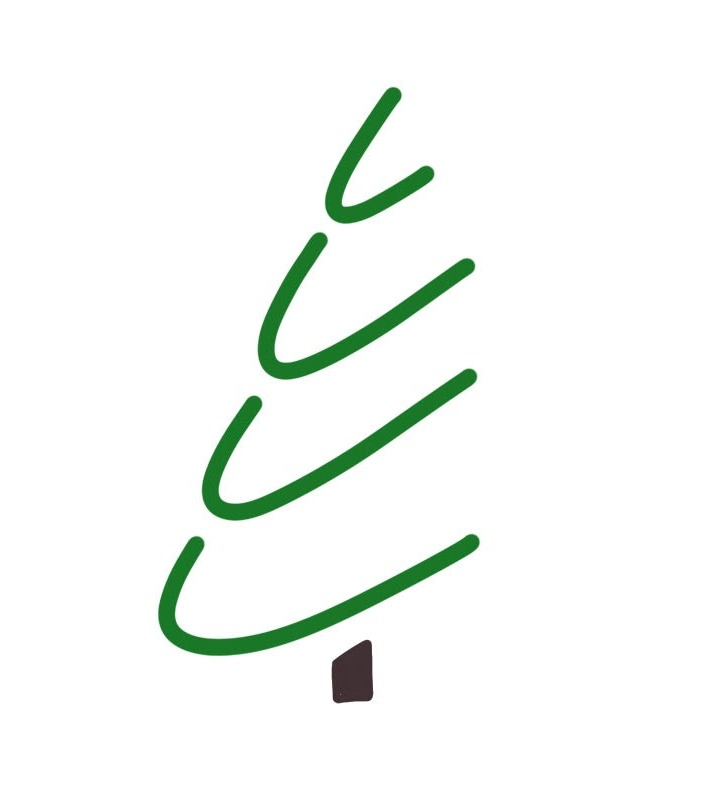
3. MODERN CURVES
Once again, this tree is more of a suggestion of the tree shape than a solid image. Starting at the top, draw a curve that resembles a rounded sideways “v.” This is similar to how we started the last tree, but we don’t want a sharp point, and we want to pick up the marker before continuing. Next, you’ll create the same shape, just slightly larger, below the first one.

Continue the same pattern until you have 4-5 rows of these curved lines, each one larger than the one above it. This will create the idea of a triangle. For the trunk, I drew a rectangle that’s slightly angled on top to match the shape of the lines.
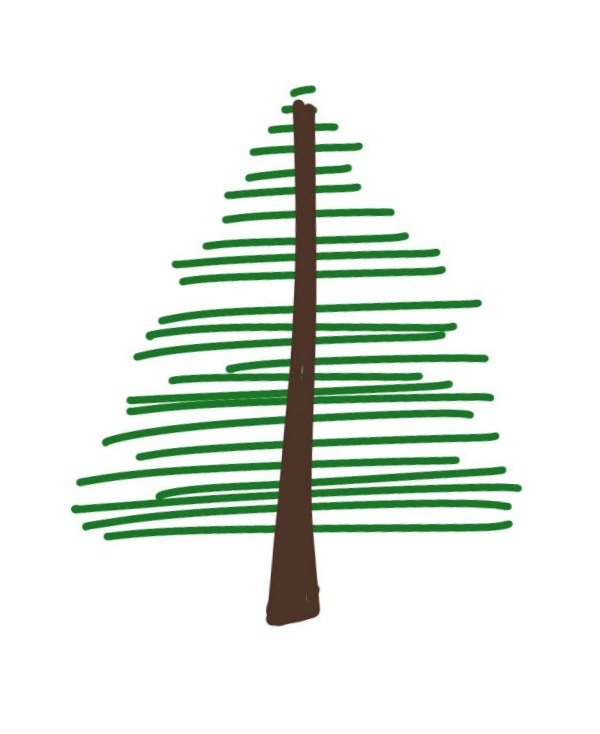
4. LOTS OF LINES
This tree couldn’t be easier! Just take a fine tip green marker and draw a series of horizontal lines that start out short and get longer as you move down the paper. Let some of the lines overlap and don’t worry about lining them all up perfectly. Real trees are imperfect, so yours can be too!
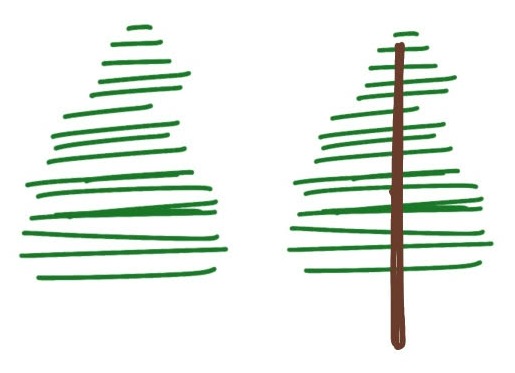
After you have a set of lines that looks something like a triangle, draw a vertical brown line going through them all and extending down past the bottom for the trunk.
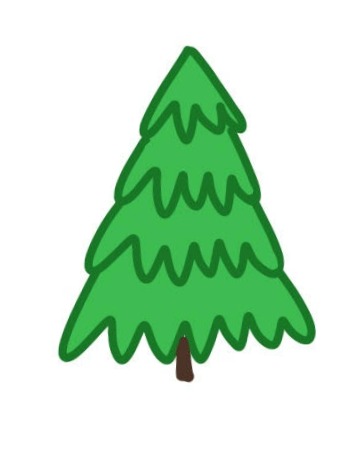
5. SCALLOPED LAYERS
To form this festive tree, start by drawing an upside down “v” shape with three little bumps across the bottom. Then, make the next layer by drawing a line with four bumps/scallops. Continue moving down the tree, creating scalloped layers that get larger each time.
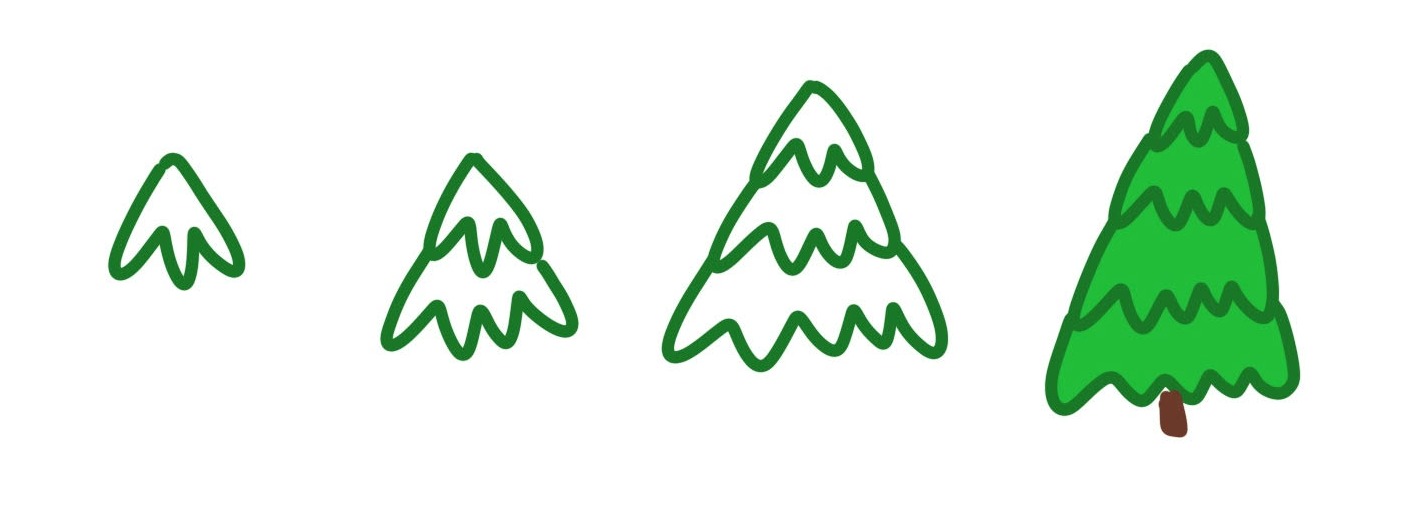
I like to color in this tree with a lighter green than my outline so you can really see the scalloped lines. A brown rectangle at the bottom makes a great trunk. Like the first tree, this one can be “decorated” by drawing a topper and ornaments if you like.
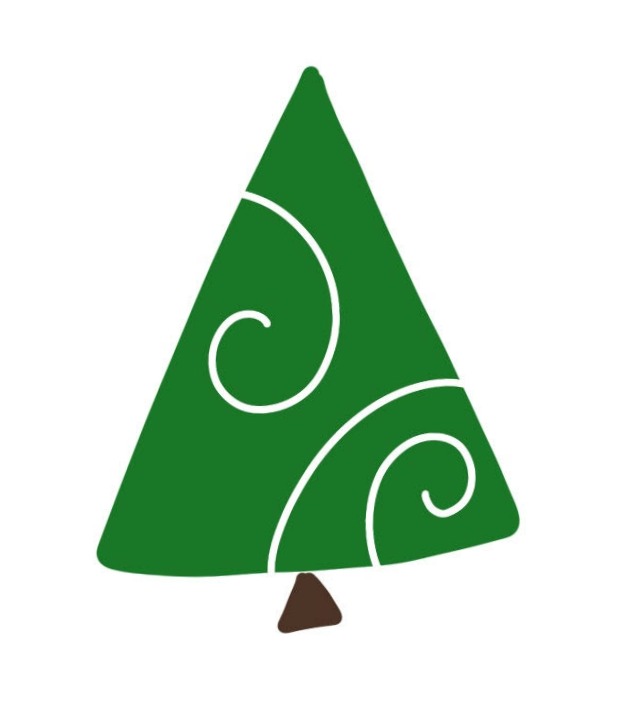
6. NEGATIVE SPACE DESIGNS
This is probably my favorite of all the ways to draw a Christmas tree. It uses the idea of negative space, which means using the areas without color to create something visually interesting. To create it, you simply begin with a green triangle. Then, add any pattern you like in white. There are several ways to do this. I created my illustrations on the iPad Pro with the Apple Pencil in the app Procreate. This allows me to actually draw with my eraser tool. So, I turned on the eraser and created the designs by getting rid of the green in the areas where I wanted my pattern to be. If you’re working with real markers and paper, you can add your detailing with a white gel pen, or you can sketch your tree with pencil first, marking where the design goes. Then, color all the parts of the triangle green except for the areas you want to remain white.
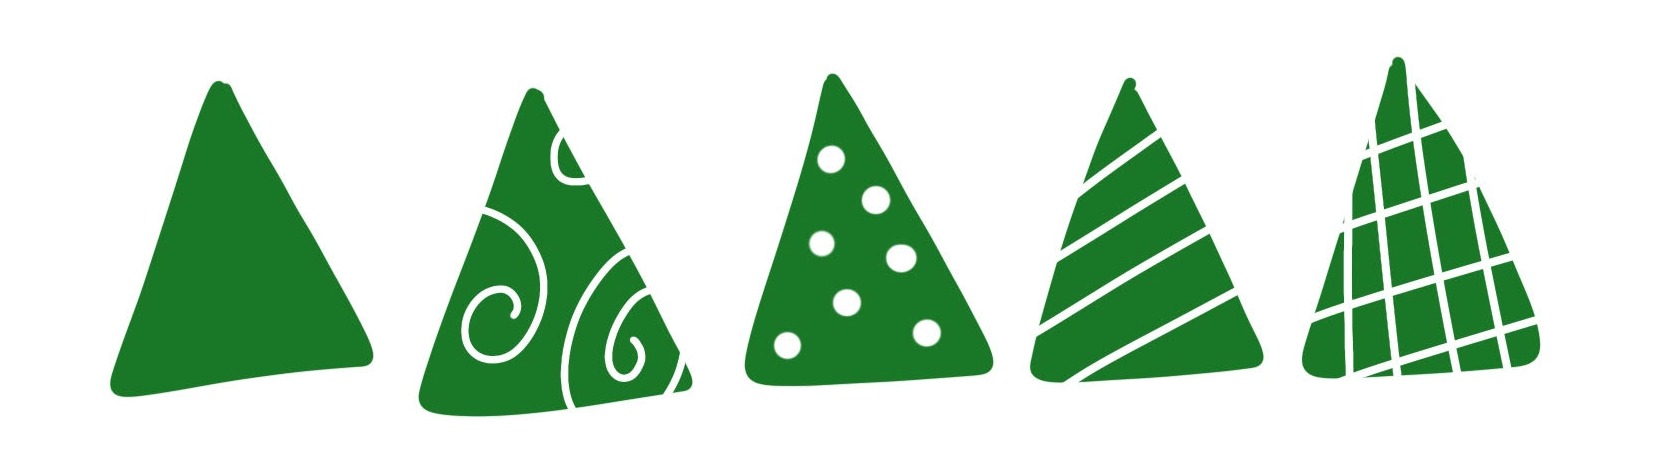
Any way you do it, these trees are fabulous and fun! All they need is a trunk and they’re ready to decorate cards, gifts, home decor, or anything else you have in mind for the holidays. I chose a triangle for the trunk, but you can use any shape you want.
See? I told you these were easy! If you can draw triangles, lines, and rectangles, you can create any of these six tree styles. Which one is your favorite way to draw a Christmas tree? Make sure to pin this post for later so you can come back and practice, or to share with a friend.
Love Christmas doodles? Try these:

Plus, be sure to check out my other holiday project tutorials, like these!


5 Comments