How to Draw Retro Mid-Century Modern Ornaments
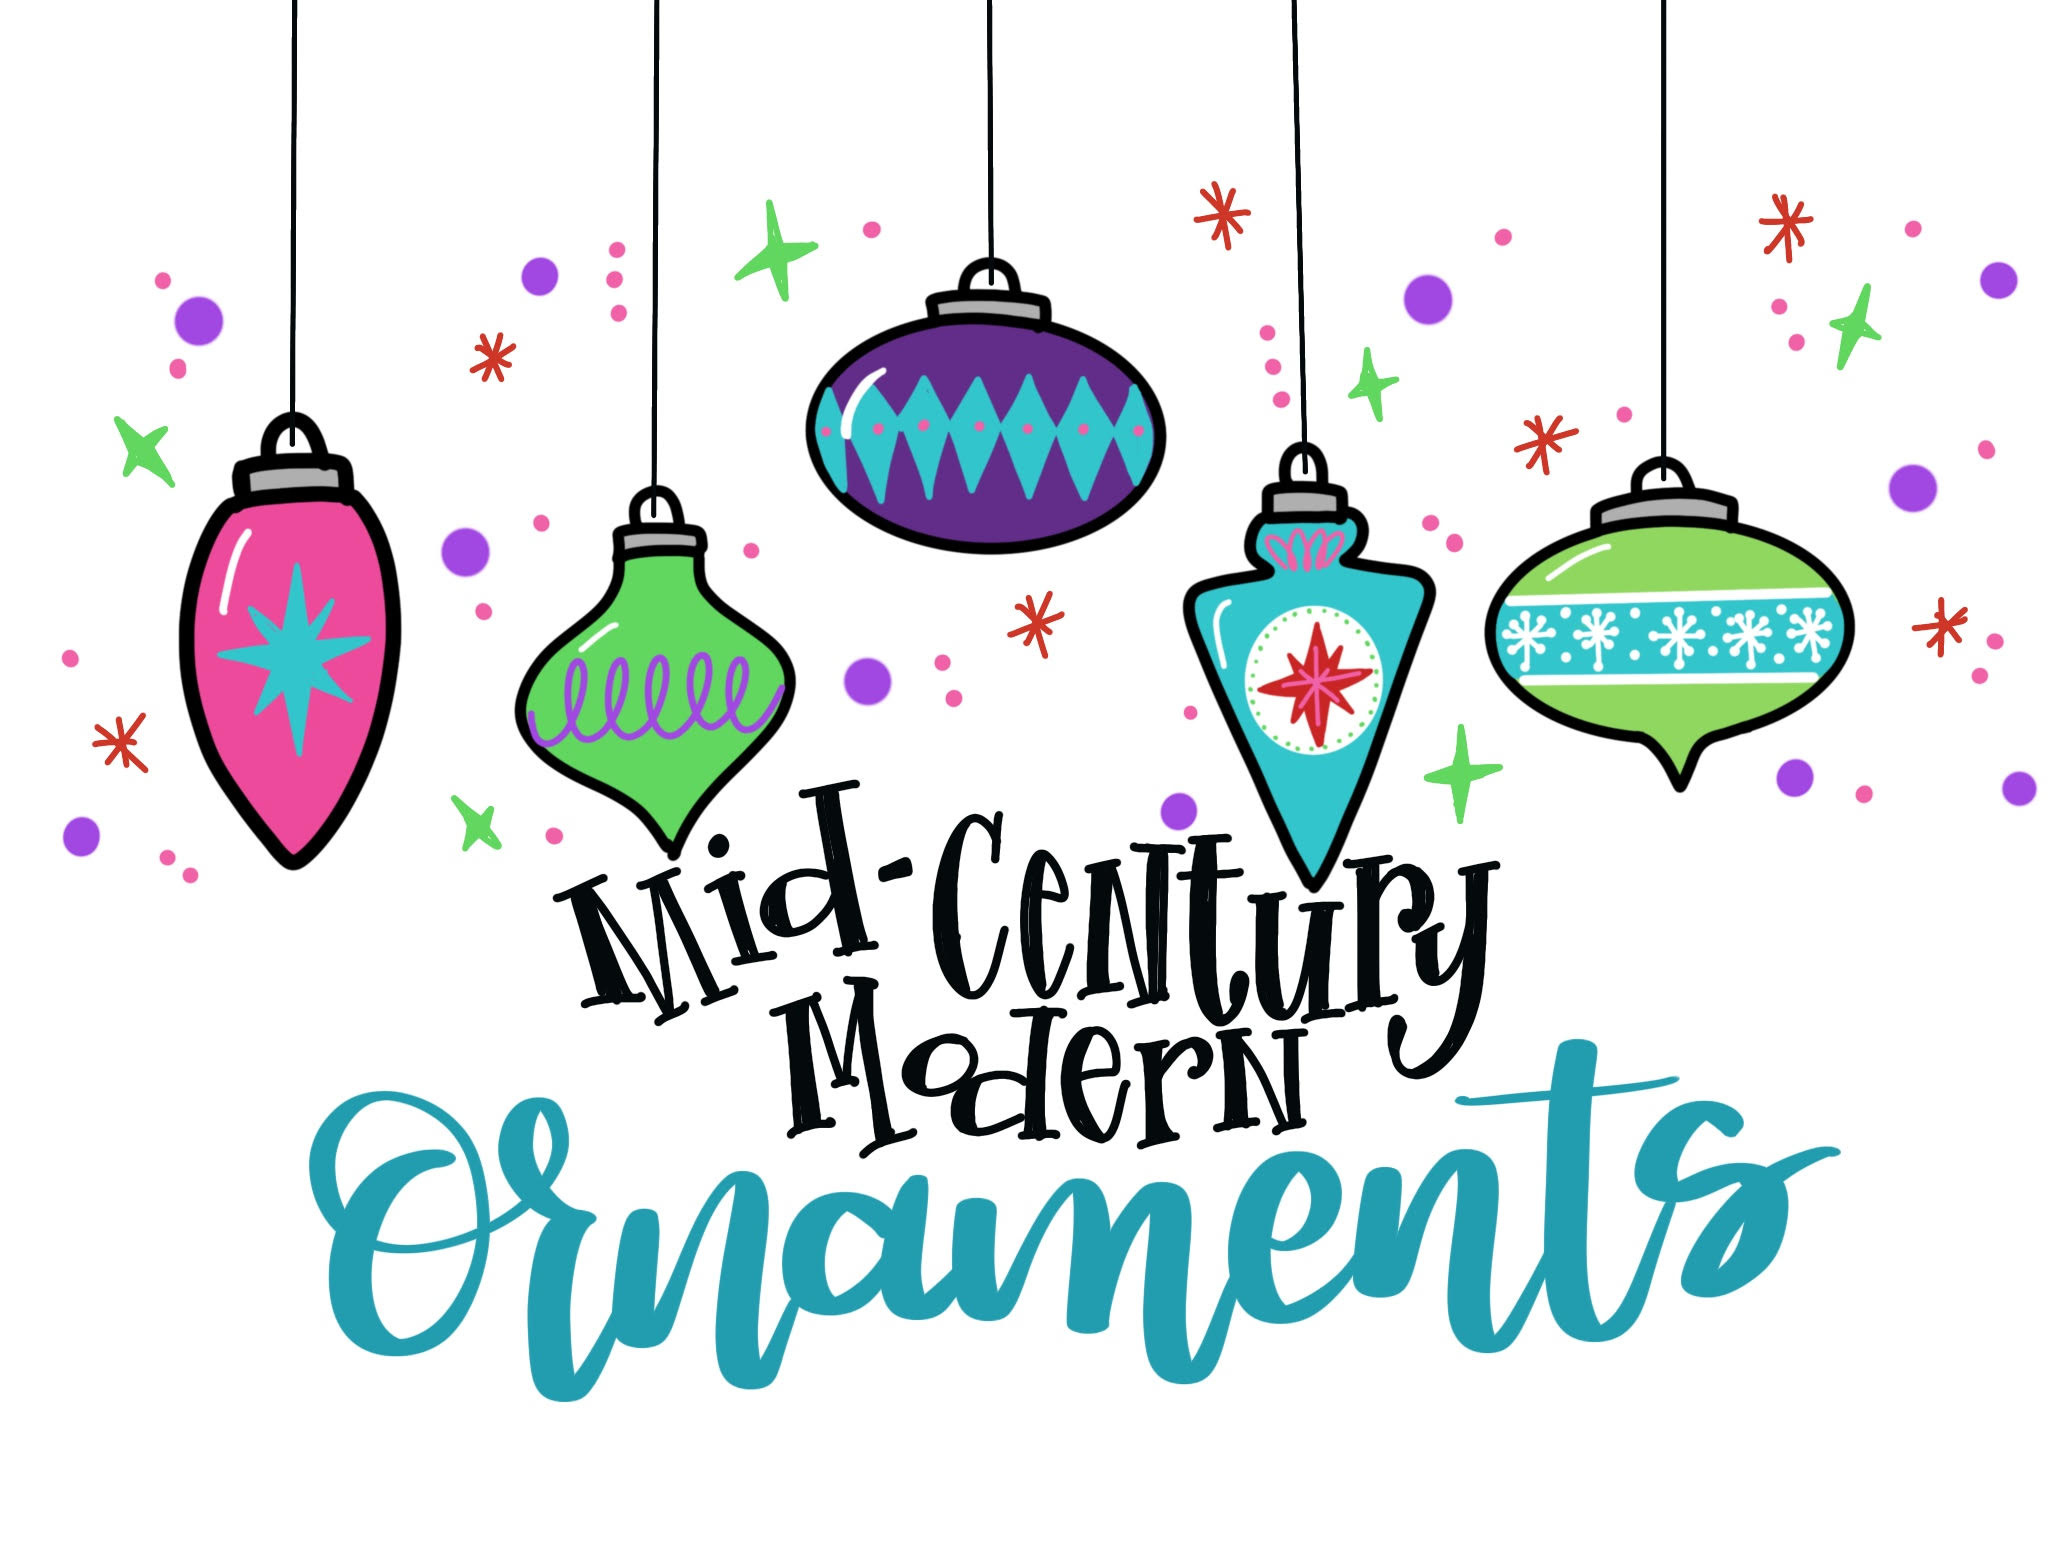
It’s beginning to look a lot like Christmas, and this year one of the most popular trends is giving your holidays a bit of a Mid-Century Modern feel. This fun, colorful retro vibe is showing up everywhere, so why not in our doodles too? Here’s how you can draw some Mid-Century Modern Ornaments (and embellishments) to decorate your gift tags, envelopes, and more.
You’ll need:
a pencil and eraser
a black bullet-tip marker
colorful markers of any kind
white gel pen (optional)
sketch paper (even scrap computer paper will work)
THE SHAPES:
Let’s start by mastering the shapes of these retro ornaments. One thing to note is that most Mid-Century Modern ornaments are just basic shapes (oval, triangle, diamond) that taper down to a point at the bottom. Here are some basic shape ideas to get you started. The hardest part is getting them to look symmetrical, but remember, hand-drawn things are never meant to look perfect, so give yourself a little grace. Try sketching these shapes with a pencil first, then tracing the ones you like with black marker.
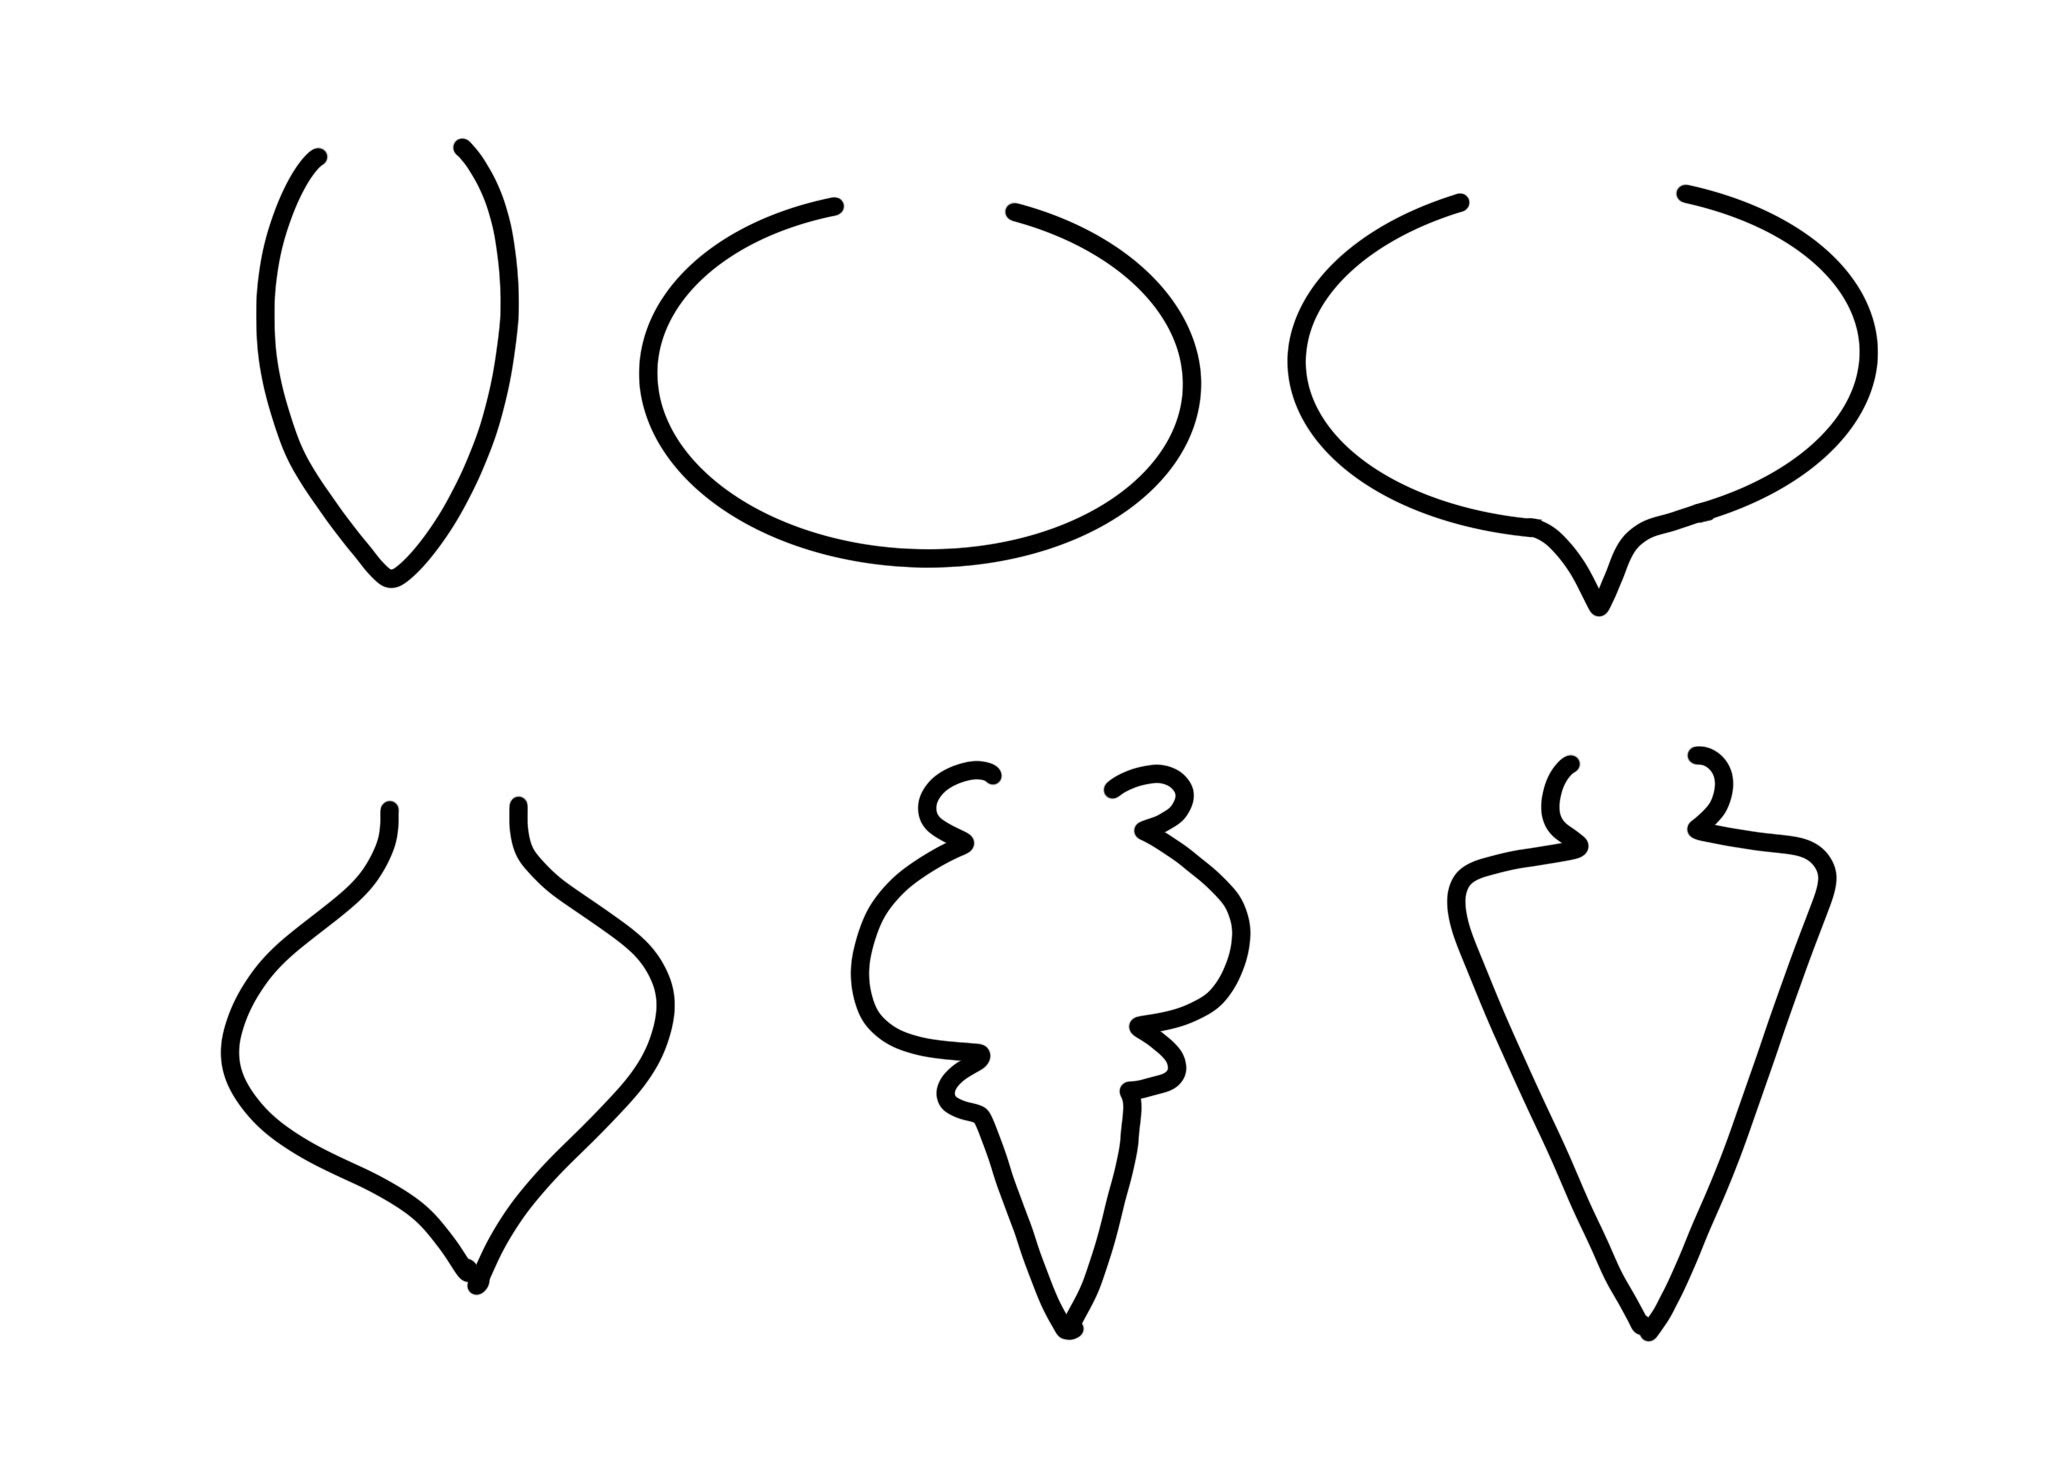
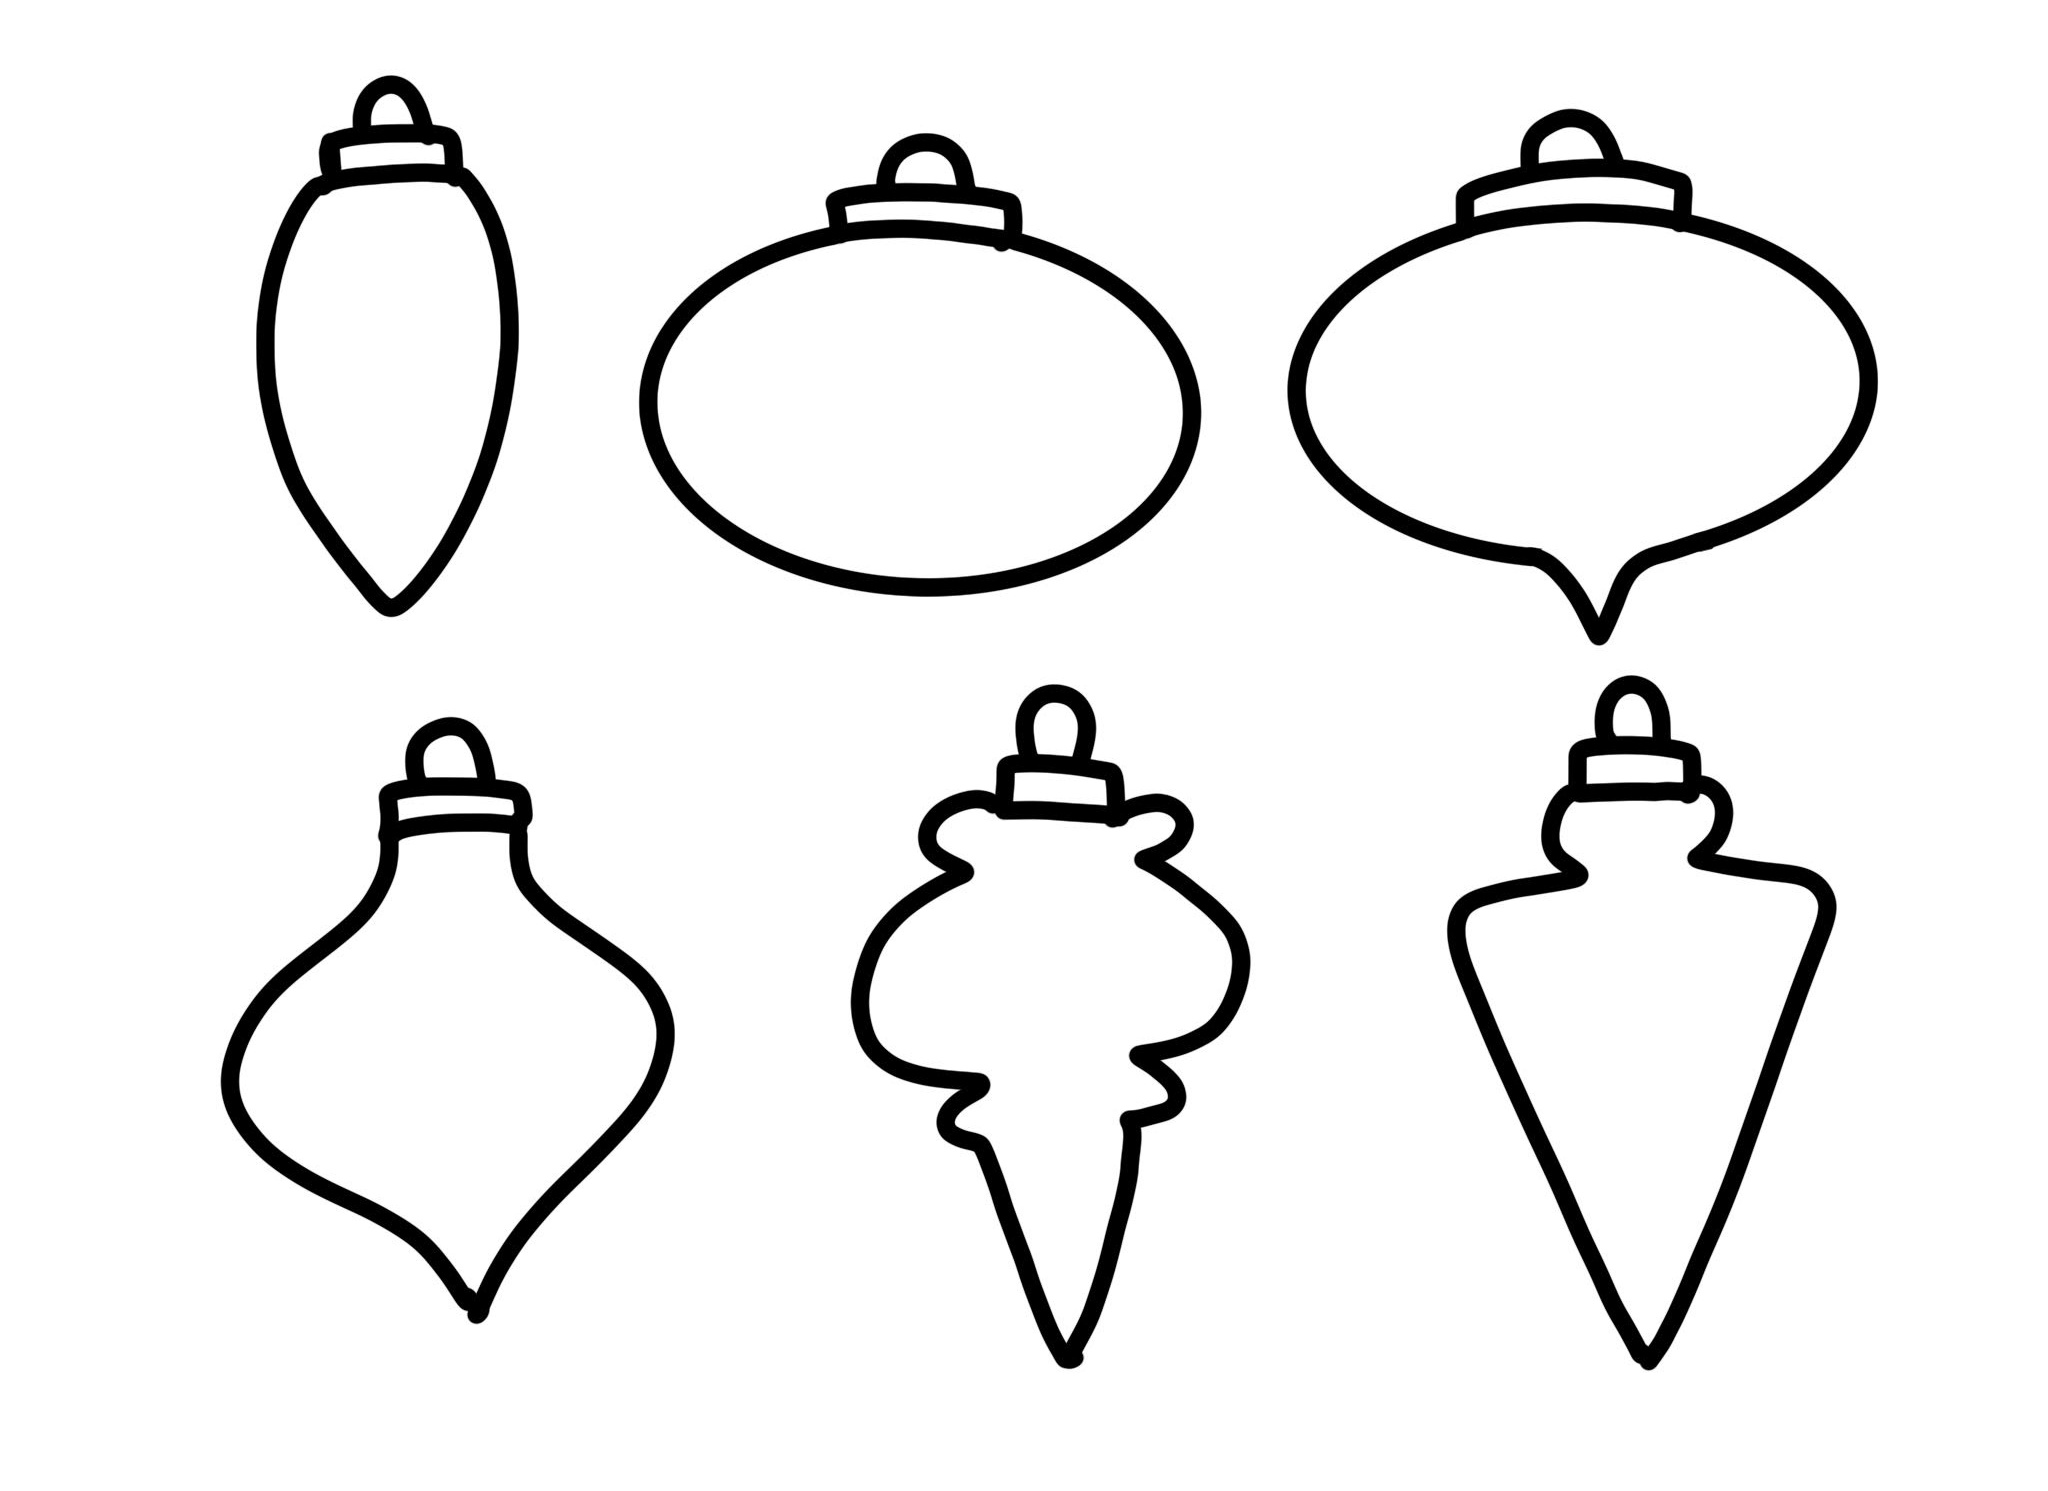
Once you have some shapes to work with, you’ll close up the opening at the top by drawing a rectangle with a semi-circle on top to turn them into ornaments. Play around with these, trying out your favorites and getting comfortable sketching them. Then, set them aside for a few minutes while we learn about embellishments. We’ll come back to these at the end and put everything together!
THE EMBELLISHMENTS: DOTS, DIAMONDS, & ATOMIC SNOWFLAKES
The classic Mid-Century Modern embellishments are so much fun! Diamonds, dots, and stars (aka atomic snowflakes) are the tools you’ll need to decorate on and around your ornaments. Diamonds and dots are pretty self-explanatory, but let’s take a look at three versions of the atomic snowflake!
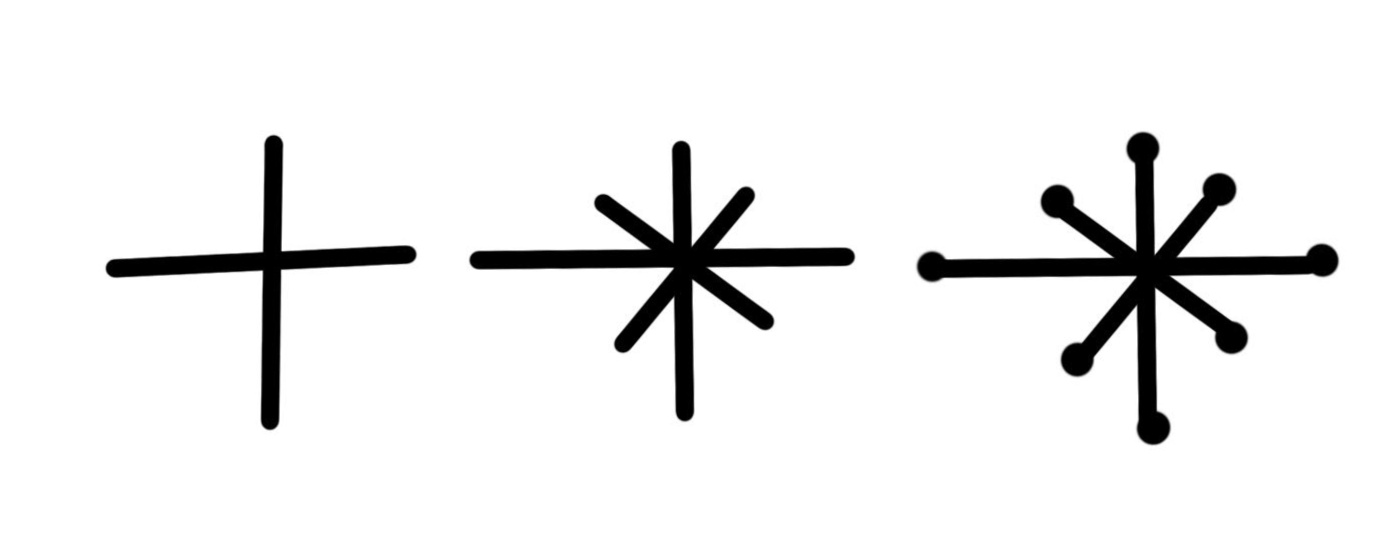
Version 1: Simple Lines Atomic Snowflake
I’m pretty sure all of us have doodled a star/snowflake like this at some point. Start by drawing a plus sign or cross, then draw an “x” on top. You can experiment with making some of the lines longer than others, which will give you totally different effects! Leave it as is, or add a circle to the ends of each line.
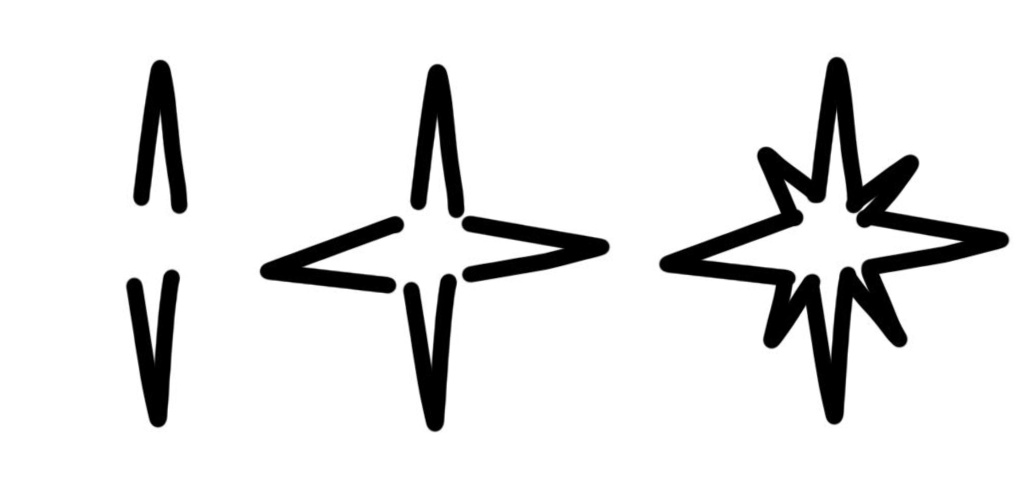
Version 2: 8-pointed Star
Start this one by making “v” shapes for the top and bottom points. Add two more, one on each side. Finally, draw 4 more (smaller) “v” shapes, one in between each of the larger points. Remember, these don’t have to be perfectly even…you can see that mine aren’t. No two stars or snowflakes are alike!
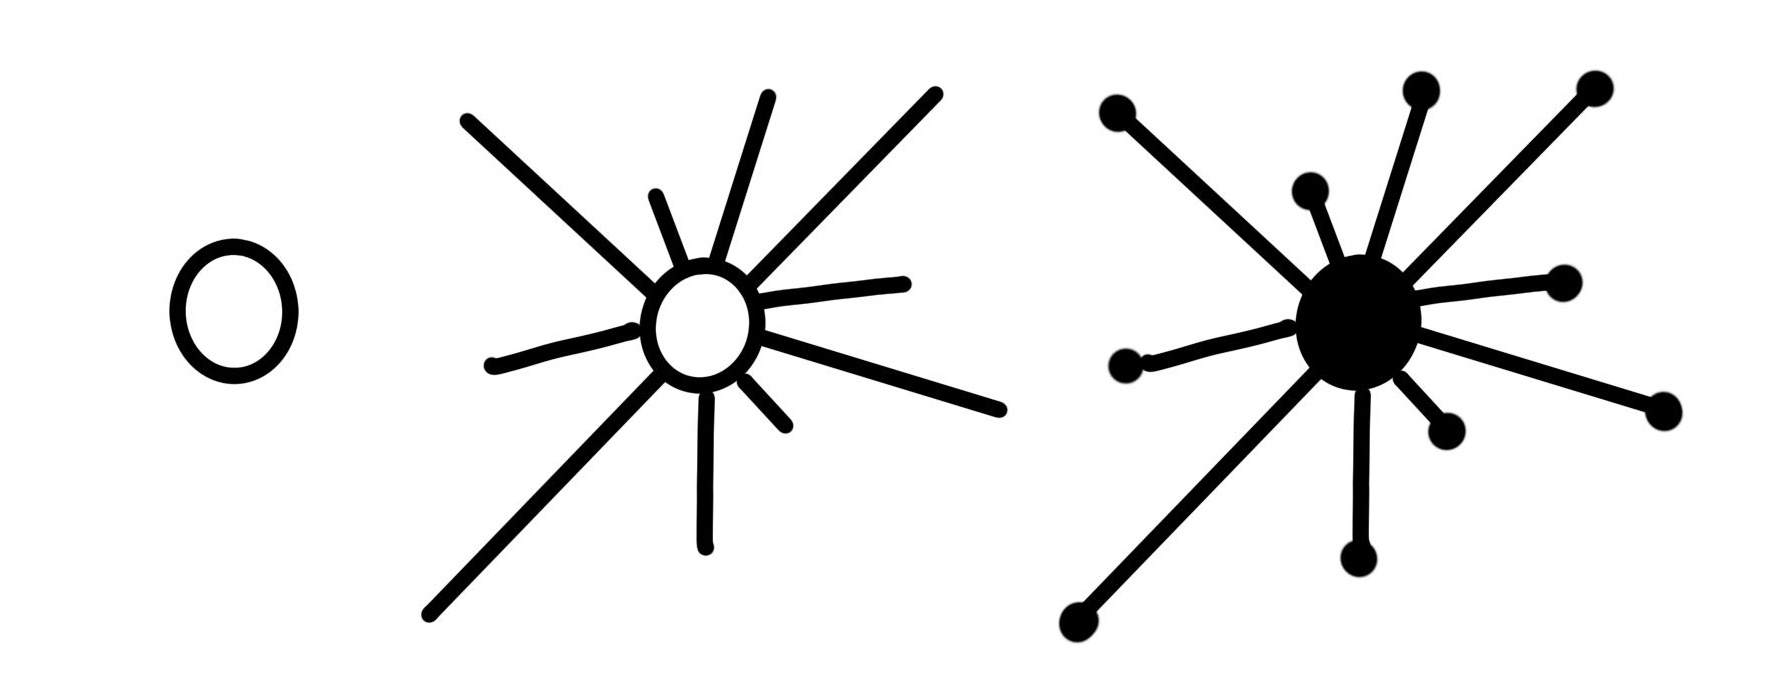
Verison 3: Lines and Circles Snowflake
Start by drawing a circle for the center of your snowflake. Then, draw a series of lines extending from it. Vary the lengths of the lines in no particular order or pattern. Finally, add a small circle to the end of each line.
Now, it’s time to take these embellishments and add them to our ornaments!
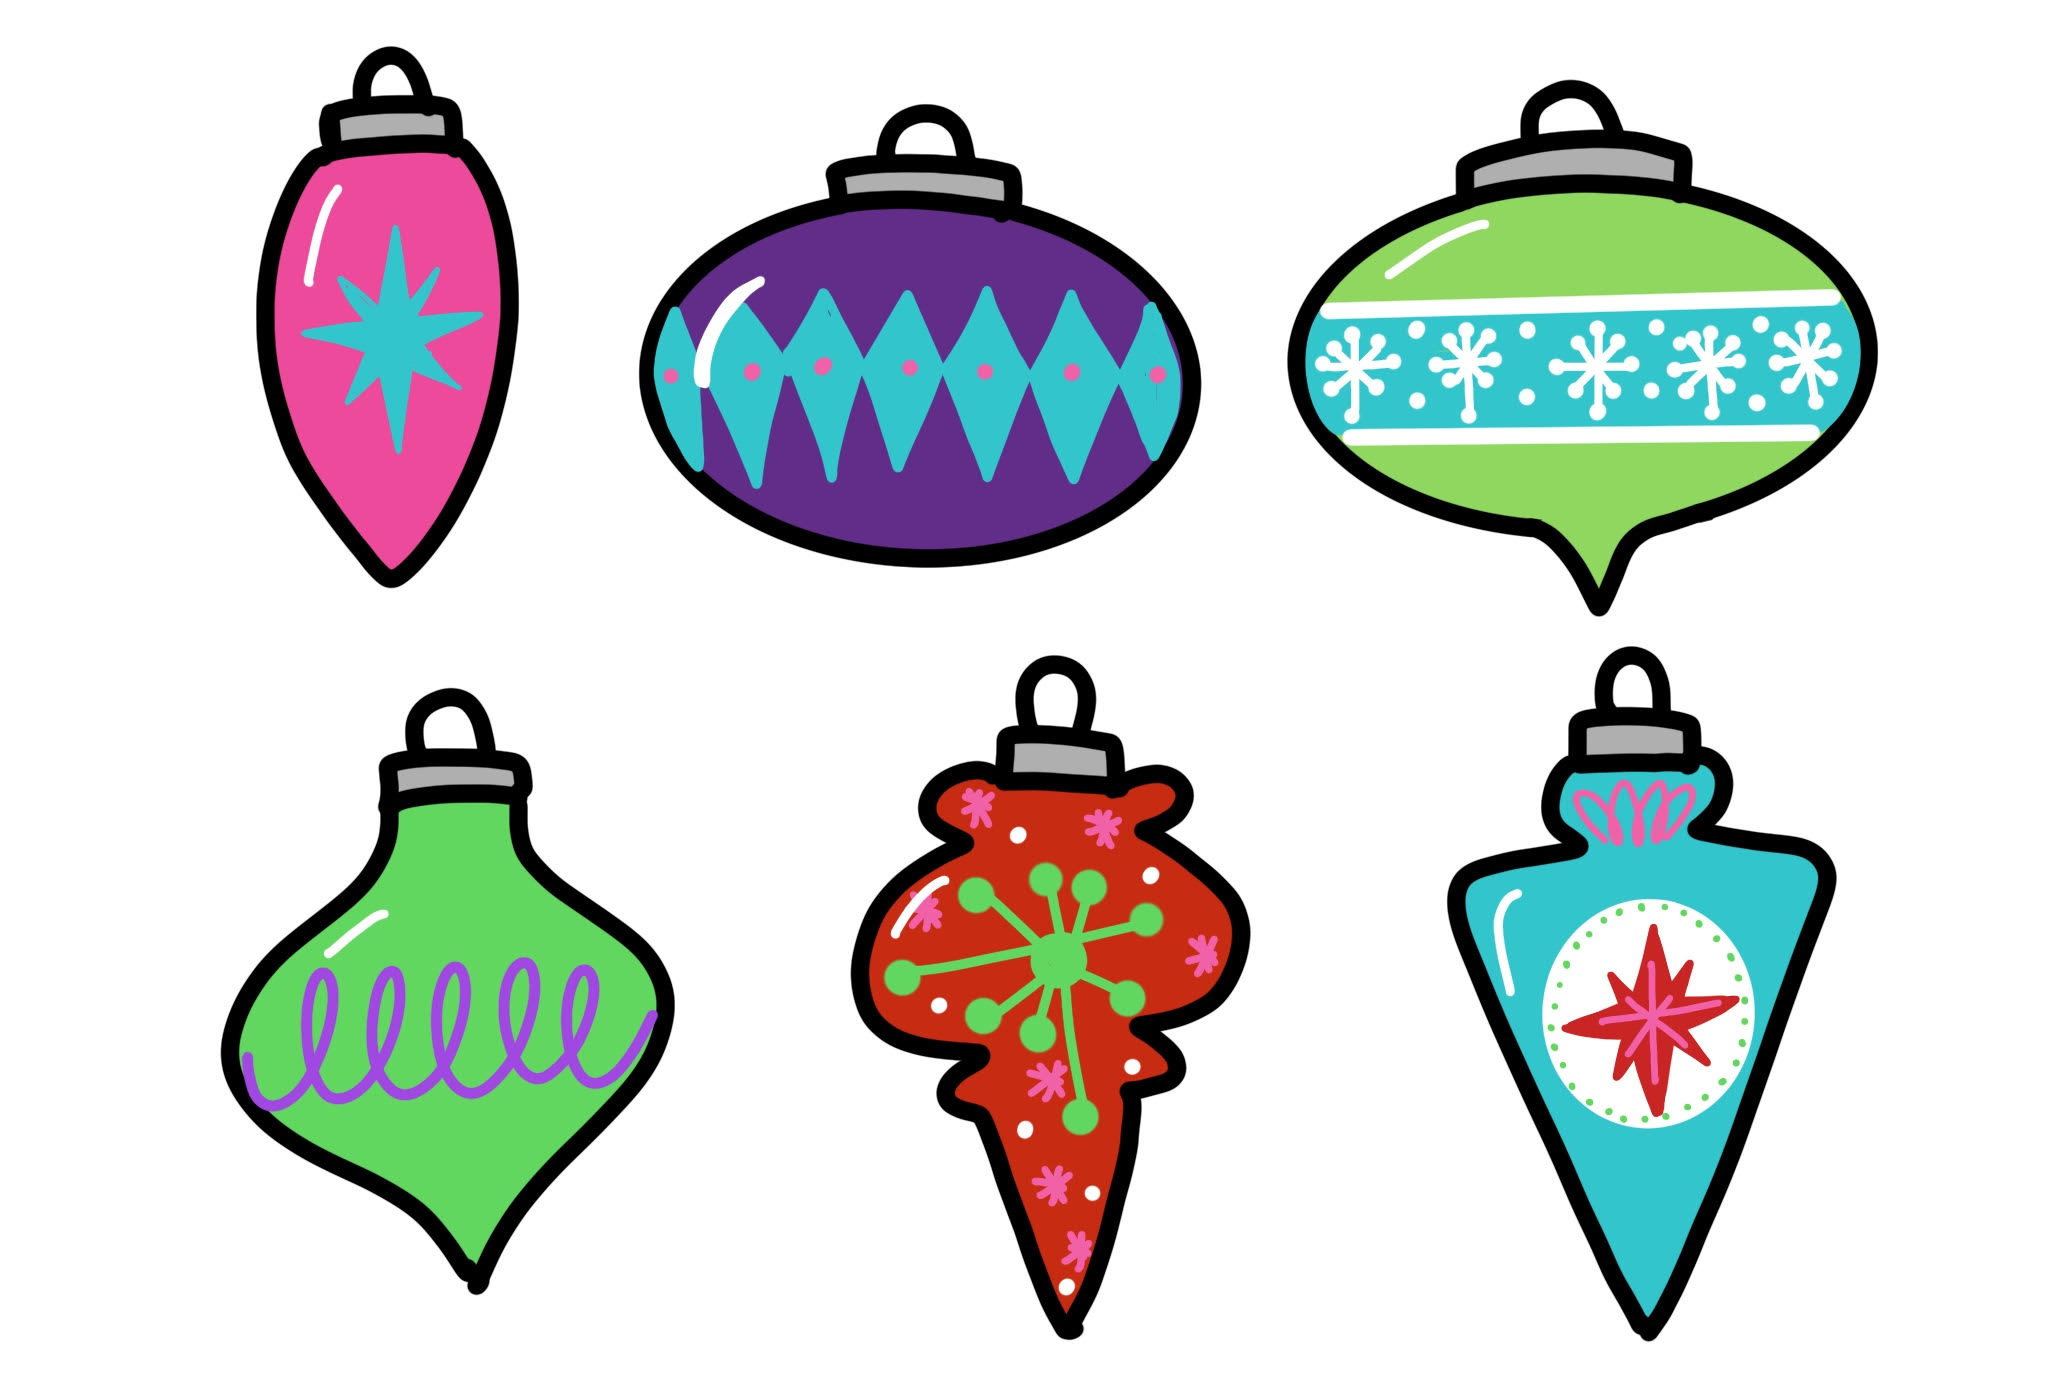
THE COLORS: BRIGHTS! {I USED RED, PINK, GREEN, TEAL, & PURPLE}
One of the hallmarks of this retro decor is the bright color scheme. So, grab your favorite colorful markers and those ornament shape sketches you set aside. It’s time to brighten things up! I recommend using your pencil to lightly sketch your embellishments first, then you can go back and add color. Your ornaments can be super simple, like the pink one below, which just has one 8-pointed star to embellish it. Take it a step further and try a series of diamonds or a row of atomic snowflakes on a solid colored stripe. Play around with different combinations of these embellishments and colors; there’s no wrong way to do it! Just have fun combining shapes and seeing what you can create.
Now, let’s try putting everything together. Sketch your ornaments at varying heights, embellish and color them, then add a few embellishments in between, like dots, diamonds and tiny snowflakes. I hope you love creating these as much as I do! Just think how adorable they’d look on the envelopes of your Christmas cards or on handmade gift tags. If you try these doodles, I’d love to see what you create! Be sure to join the Amy Latta & Friends Facebook Group and share photos of your latest projects so we can all be inspired. See you there.

Also, if you love Christmas doodles, be sure to check out this post on 6 Ways to Draw a Christmas Tree!

2 Comments