How to Decorate a Themed Christmas Tree
Decorating a themed Christmas tree is so much fun, and easier than you think!
Step 1: Choose a color scheme and/or theme.
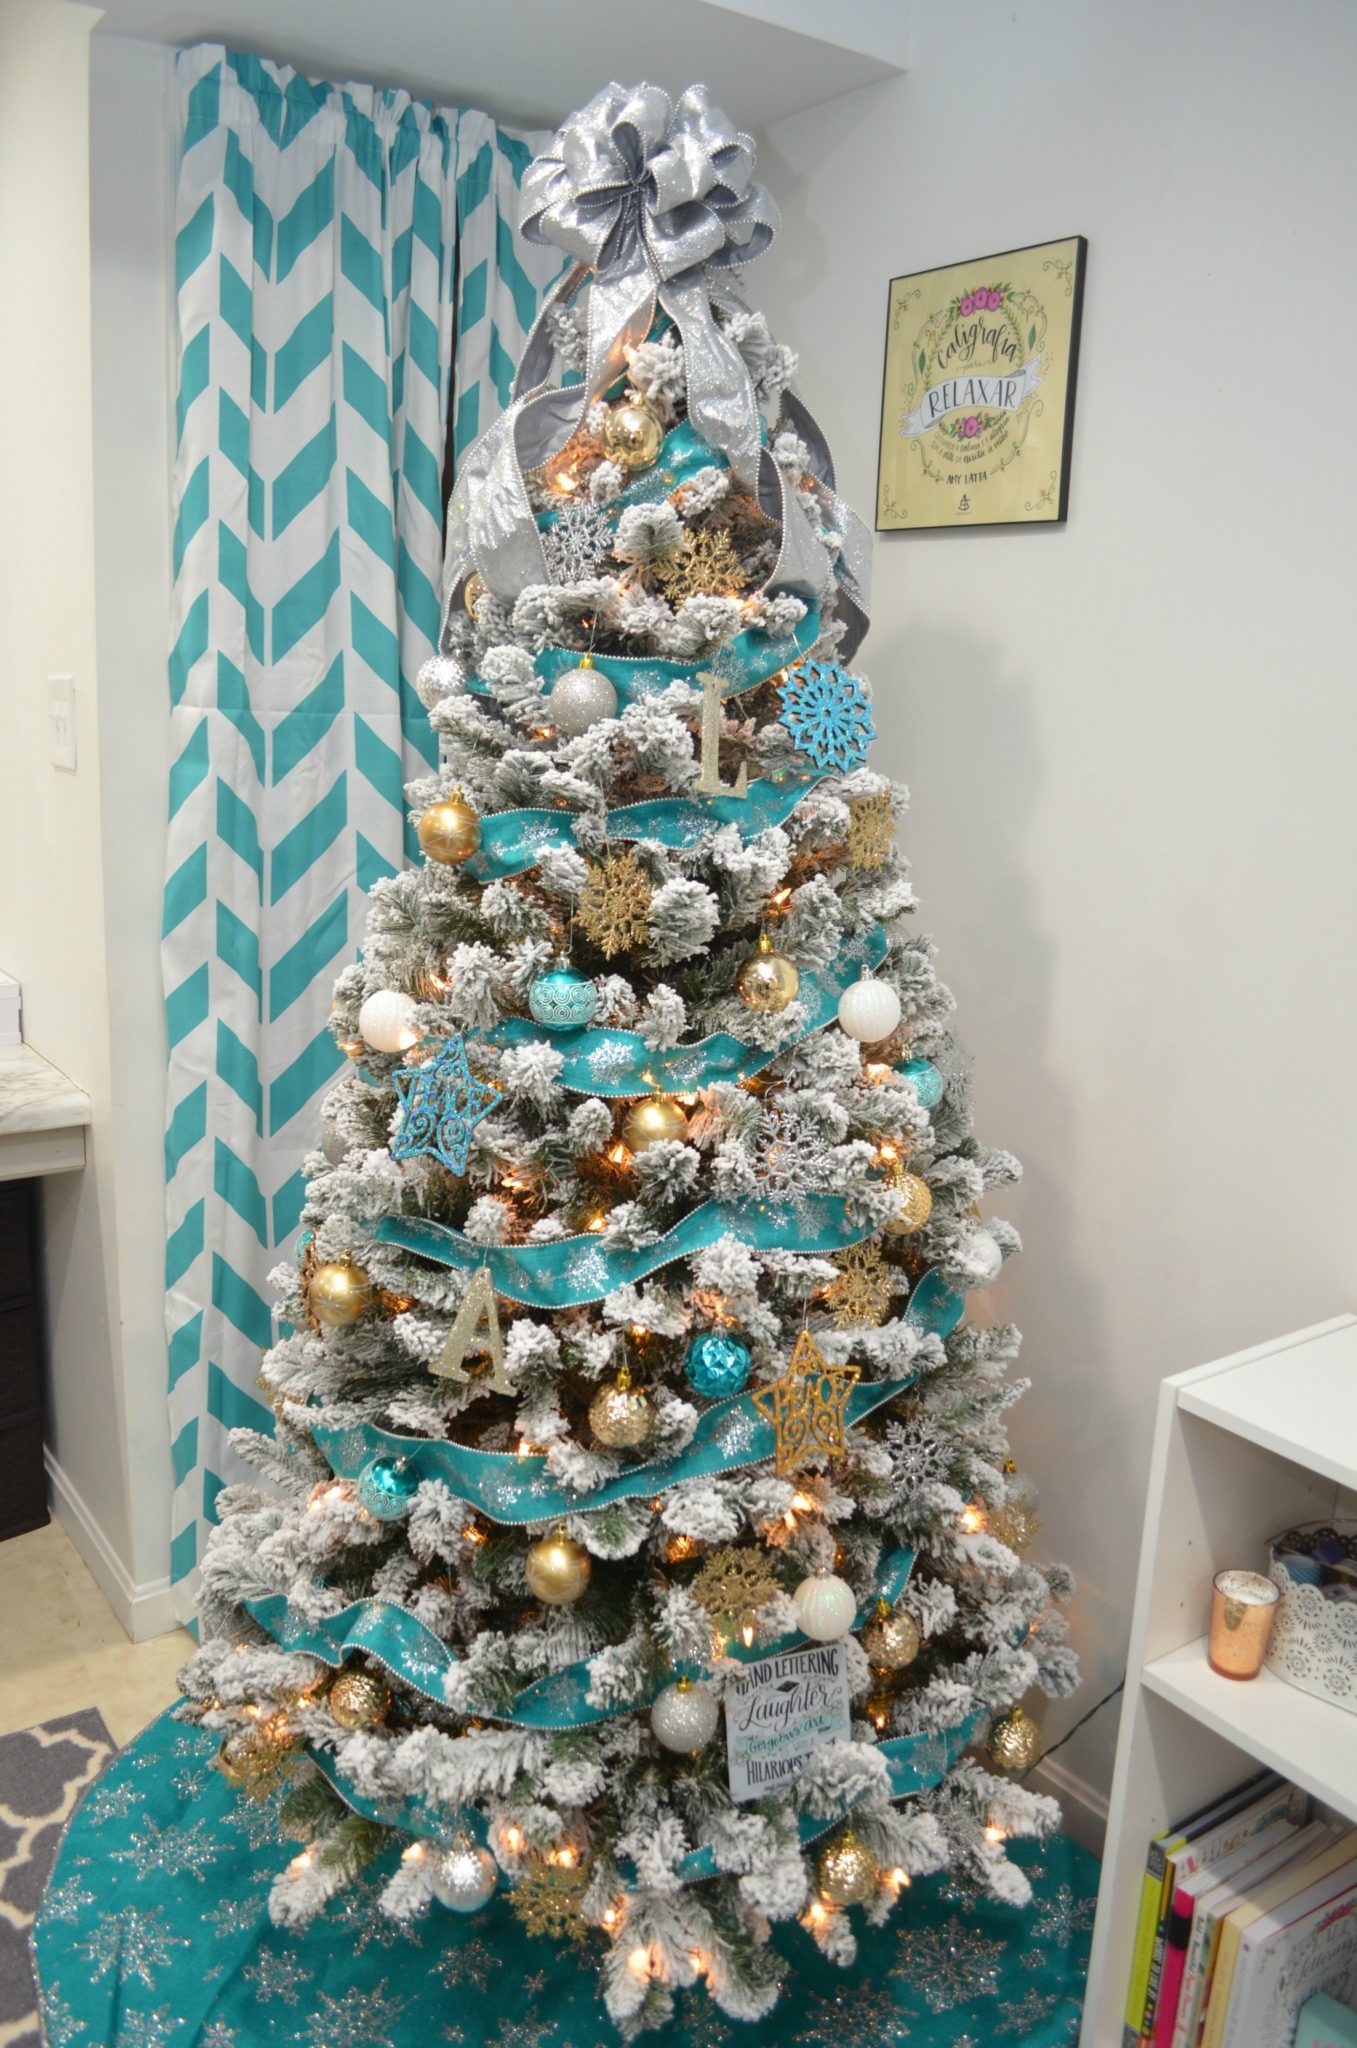
There’s no wrong choice to make; it should be anything you personally love! I have done a silver/gold/teal theme, as well as a red/metallics theme and love both. (Here’s a photo of my same tree in the teal color scheme two years ago).
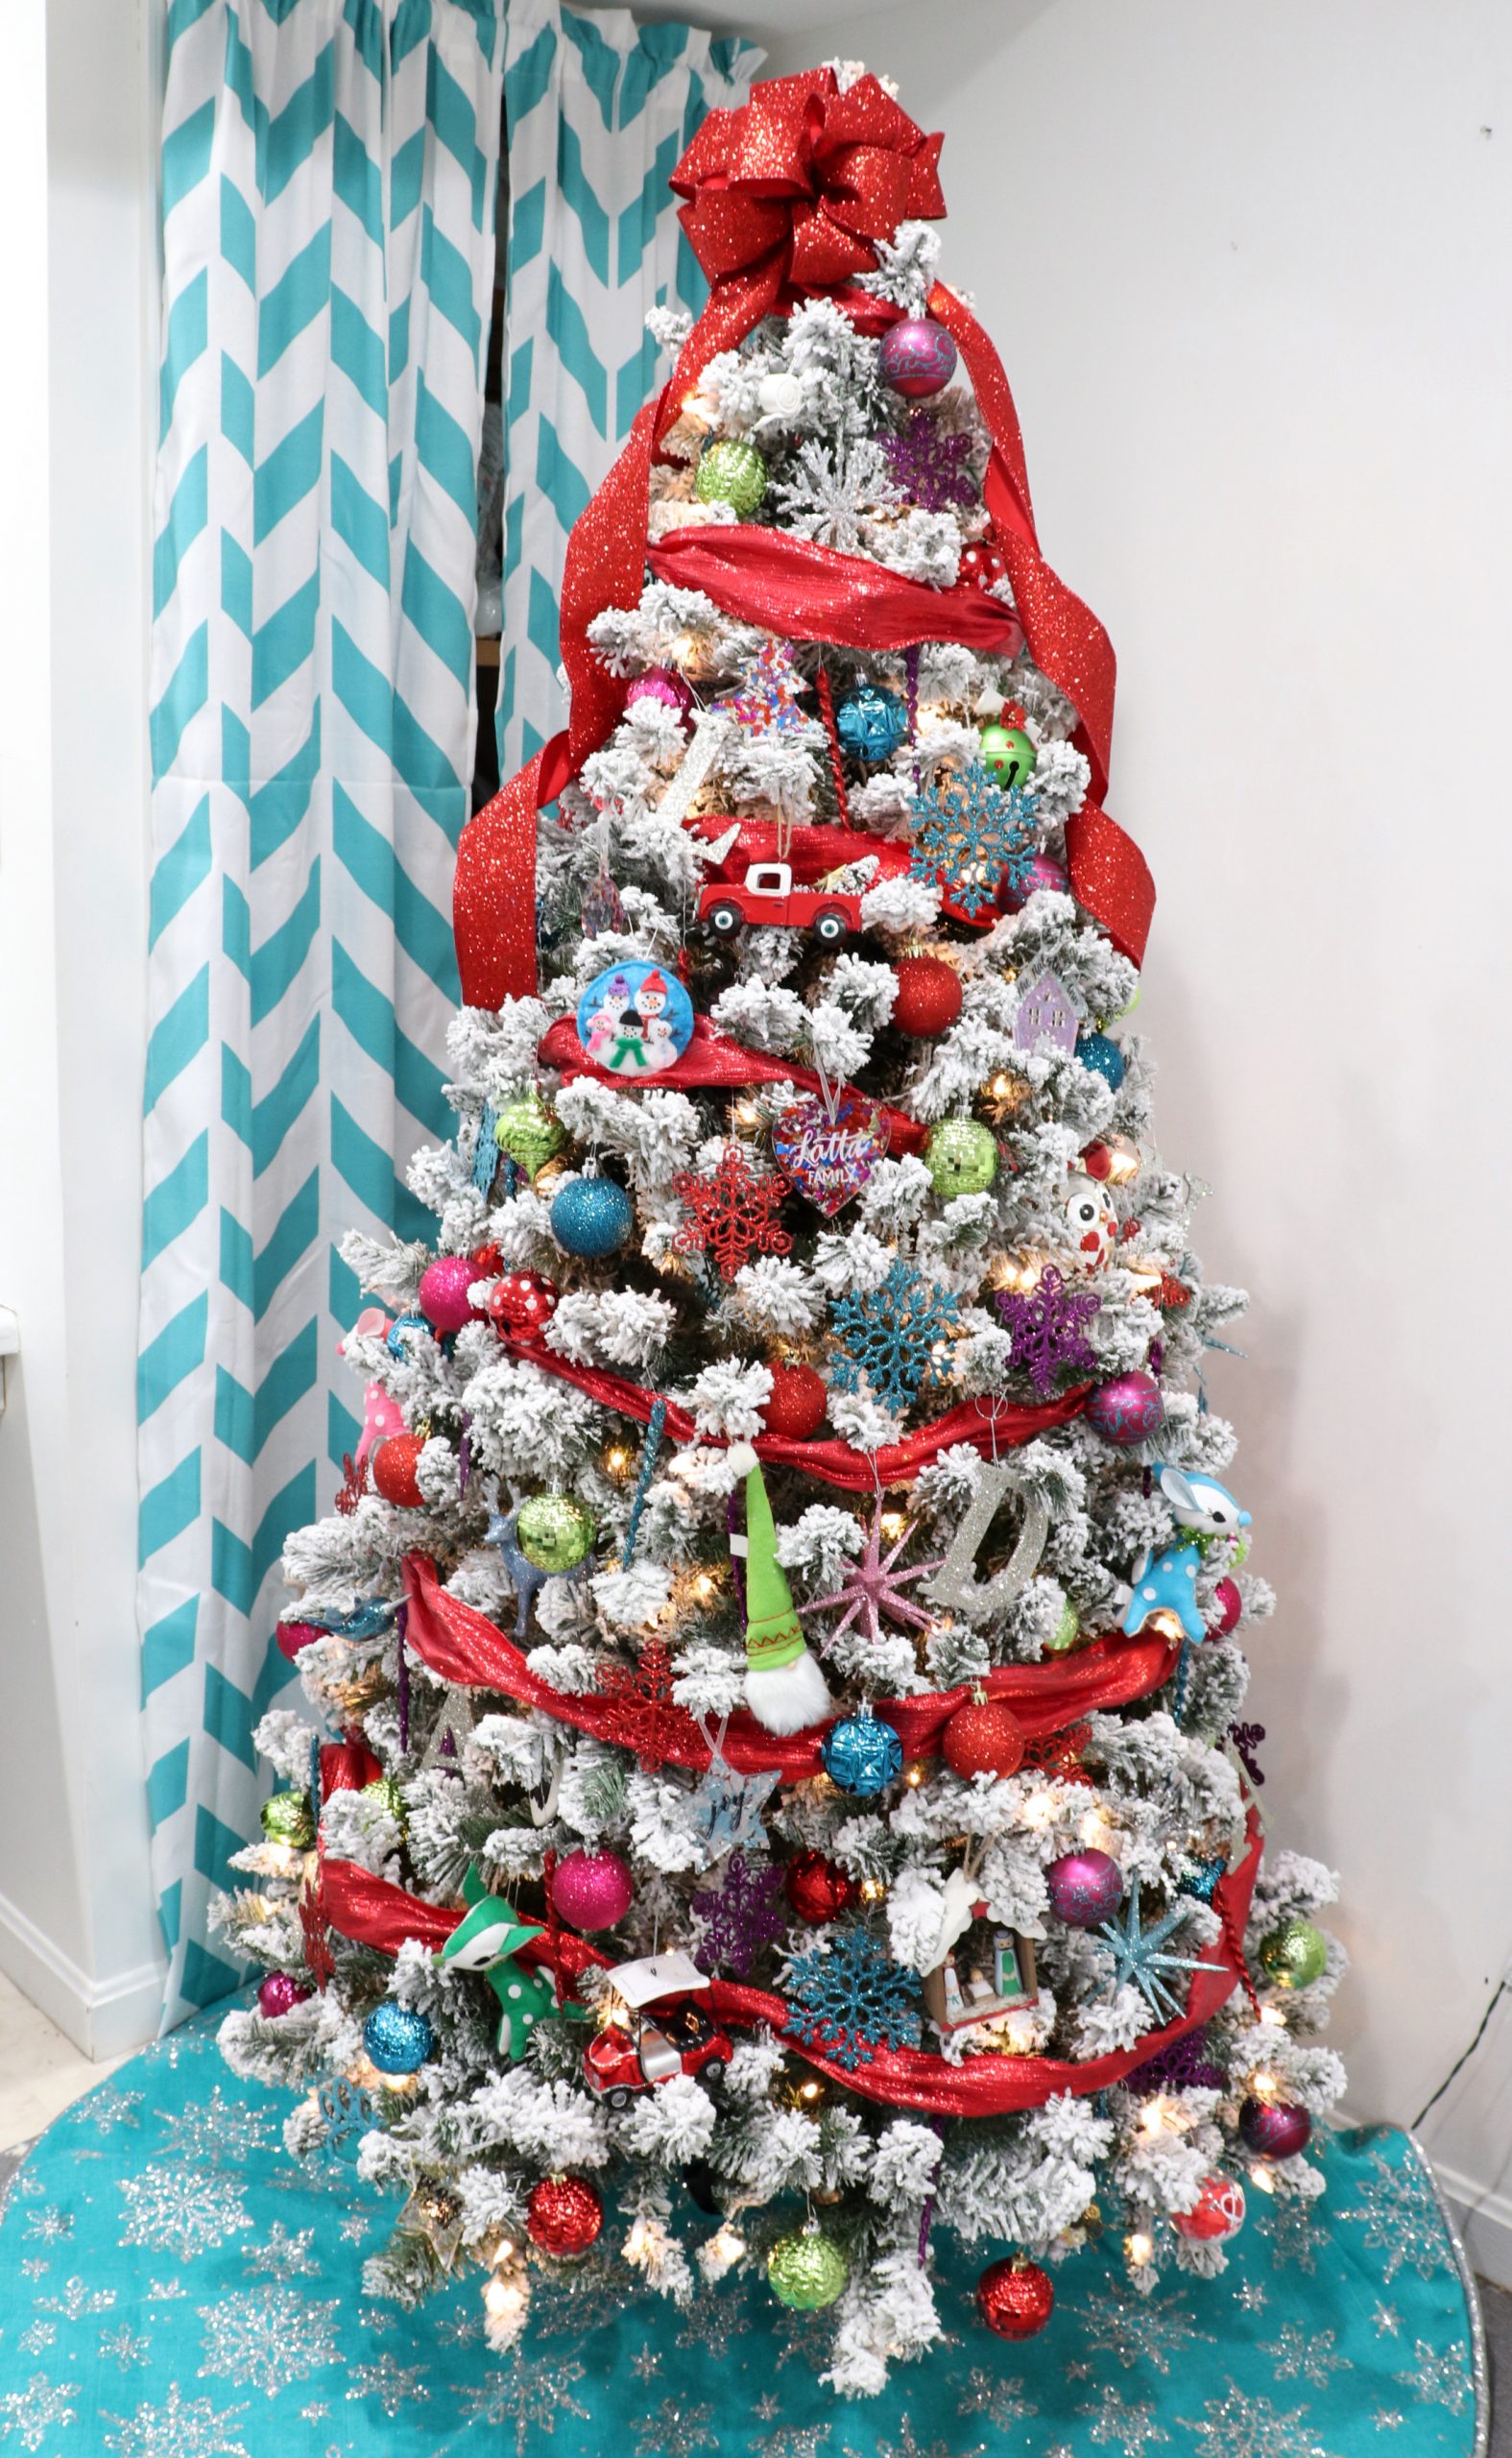
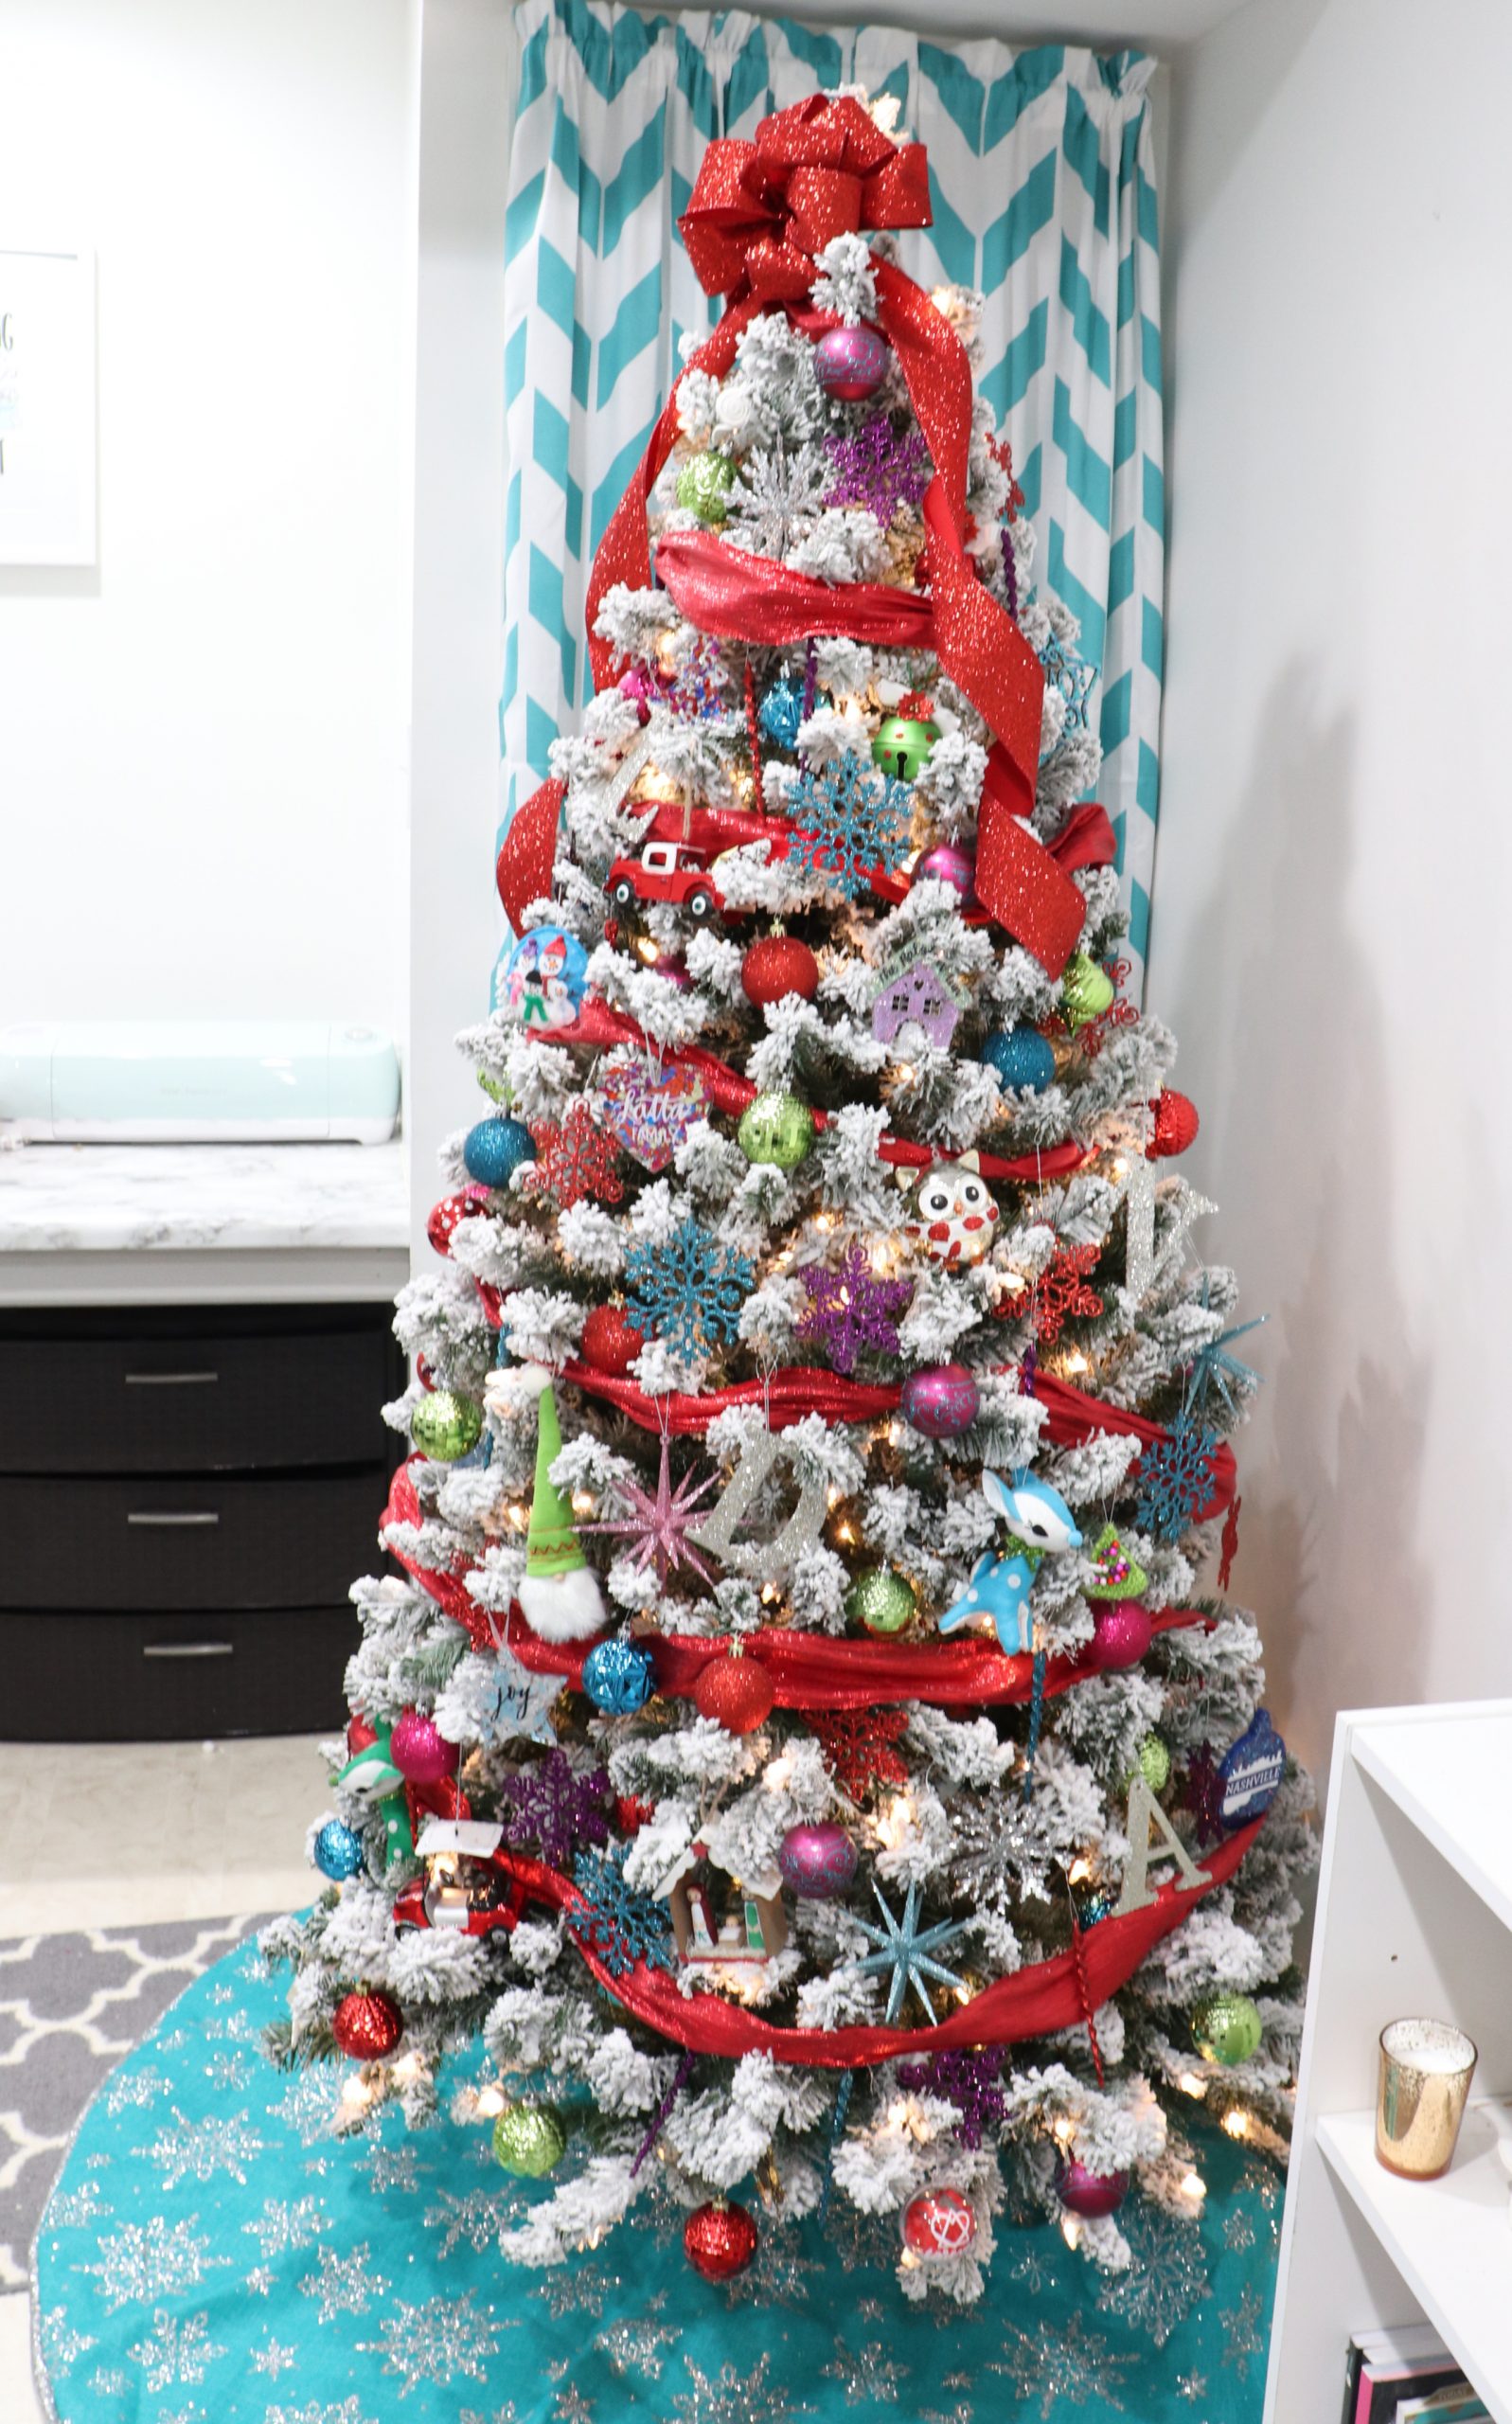
I’ve also seen gorgeous pink and blush trees, buffalo plaid themed trees, beach themed trees, and lots of other creative ideas. For this particular tree, I wanted something really cheerful and bright, as well as a little bit retro, so I decided to go for a mid-century modern vibe. My color scheme is red, pink, lime green, teal, and purple. No matter what theme or color scheme you choose, the steps for decorating it are the same, so let’s move on to the next one!
Step 2: Wrap it and top it!
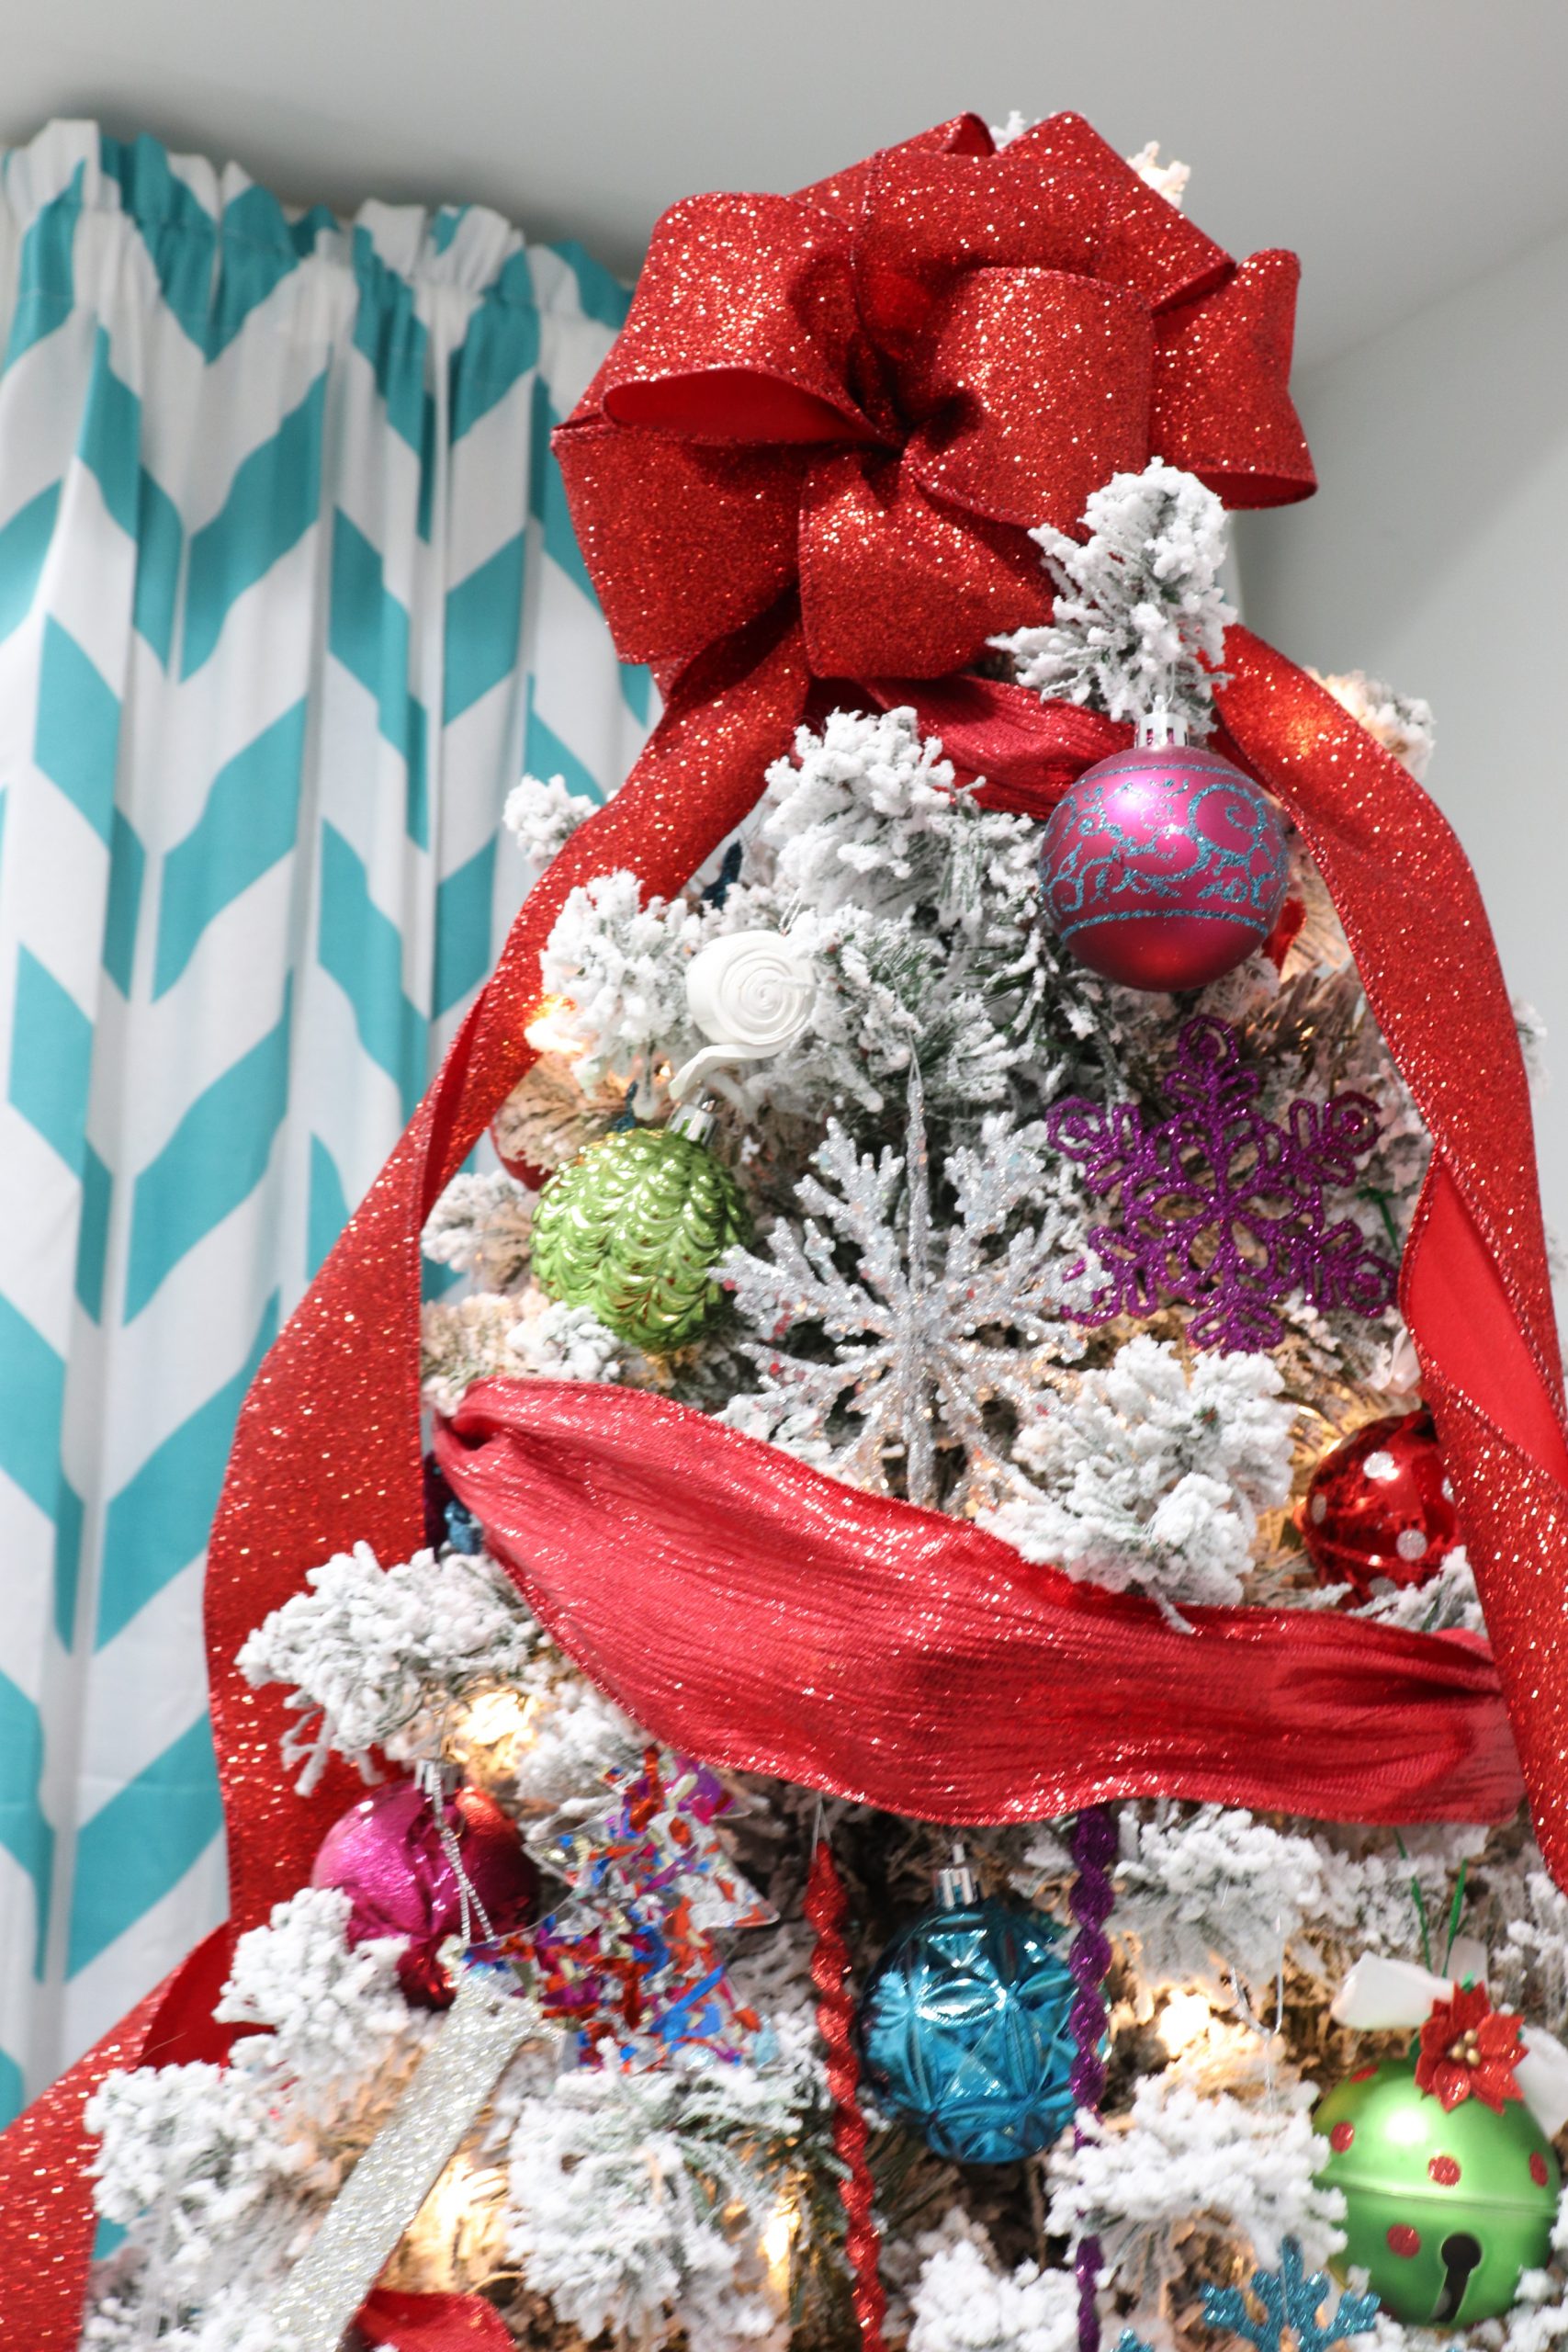
My tree is artificial and pre-lit, but if yours isn’t, the first step is to wrap it with lots of lights! I personally prefer white lights, but you can choose whatever goes best with your theme. Next, wrap your tree with ribbon or garland. I like to use a wide ribbon, in this case, red! Just start at the top and work your way down, wrapping around the tree as you go. My favorite type of topper is a giant bow, but stars and other kinds of toppers work too. Choose whatever makes you the happiest.
Step 3: Fill with your “basics.” These are ornaments (balls, icicles, snowflakes) in your theme colors, of which you have multiples.
Once your tree is wrapped and topped, it’s time to fill it with ornaments, starting with what I call the basics. You’ll want to use 1-3 shapes of ornaments in your theme colors. You want LOTS of these; I included a list of what I used below, all purchased at Walmart this season.
Holiday Time Fucshia/Lime Green/Teal 40 count shatterproof ornaments
Holiday Time Red/Gold 40 count shatterproof ornaments
Red, Purple, and Teal Glittered Snowflake ornaments
Red, Purple, and Teal Glittered Icicle ornaments
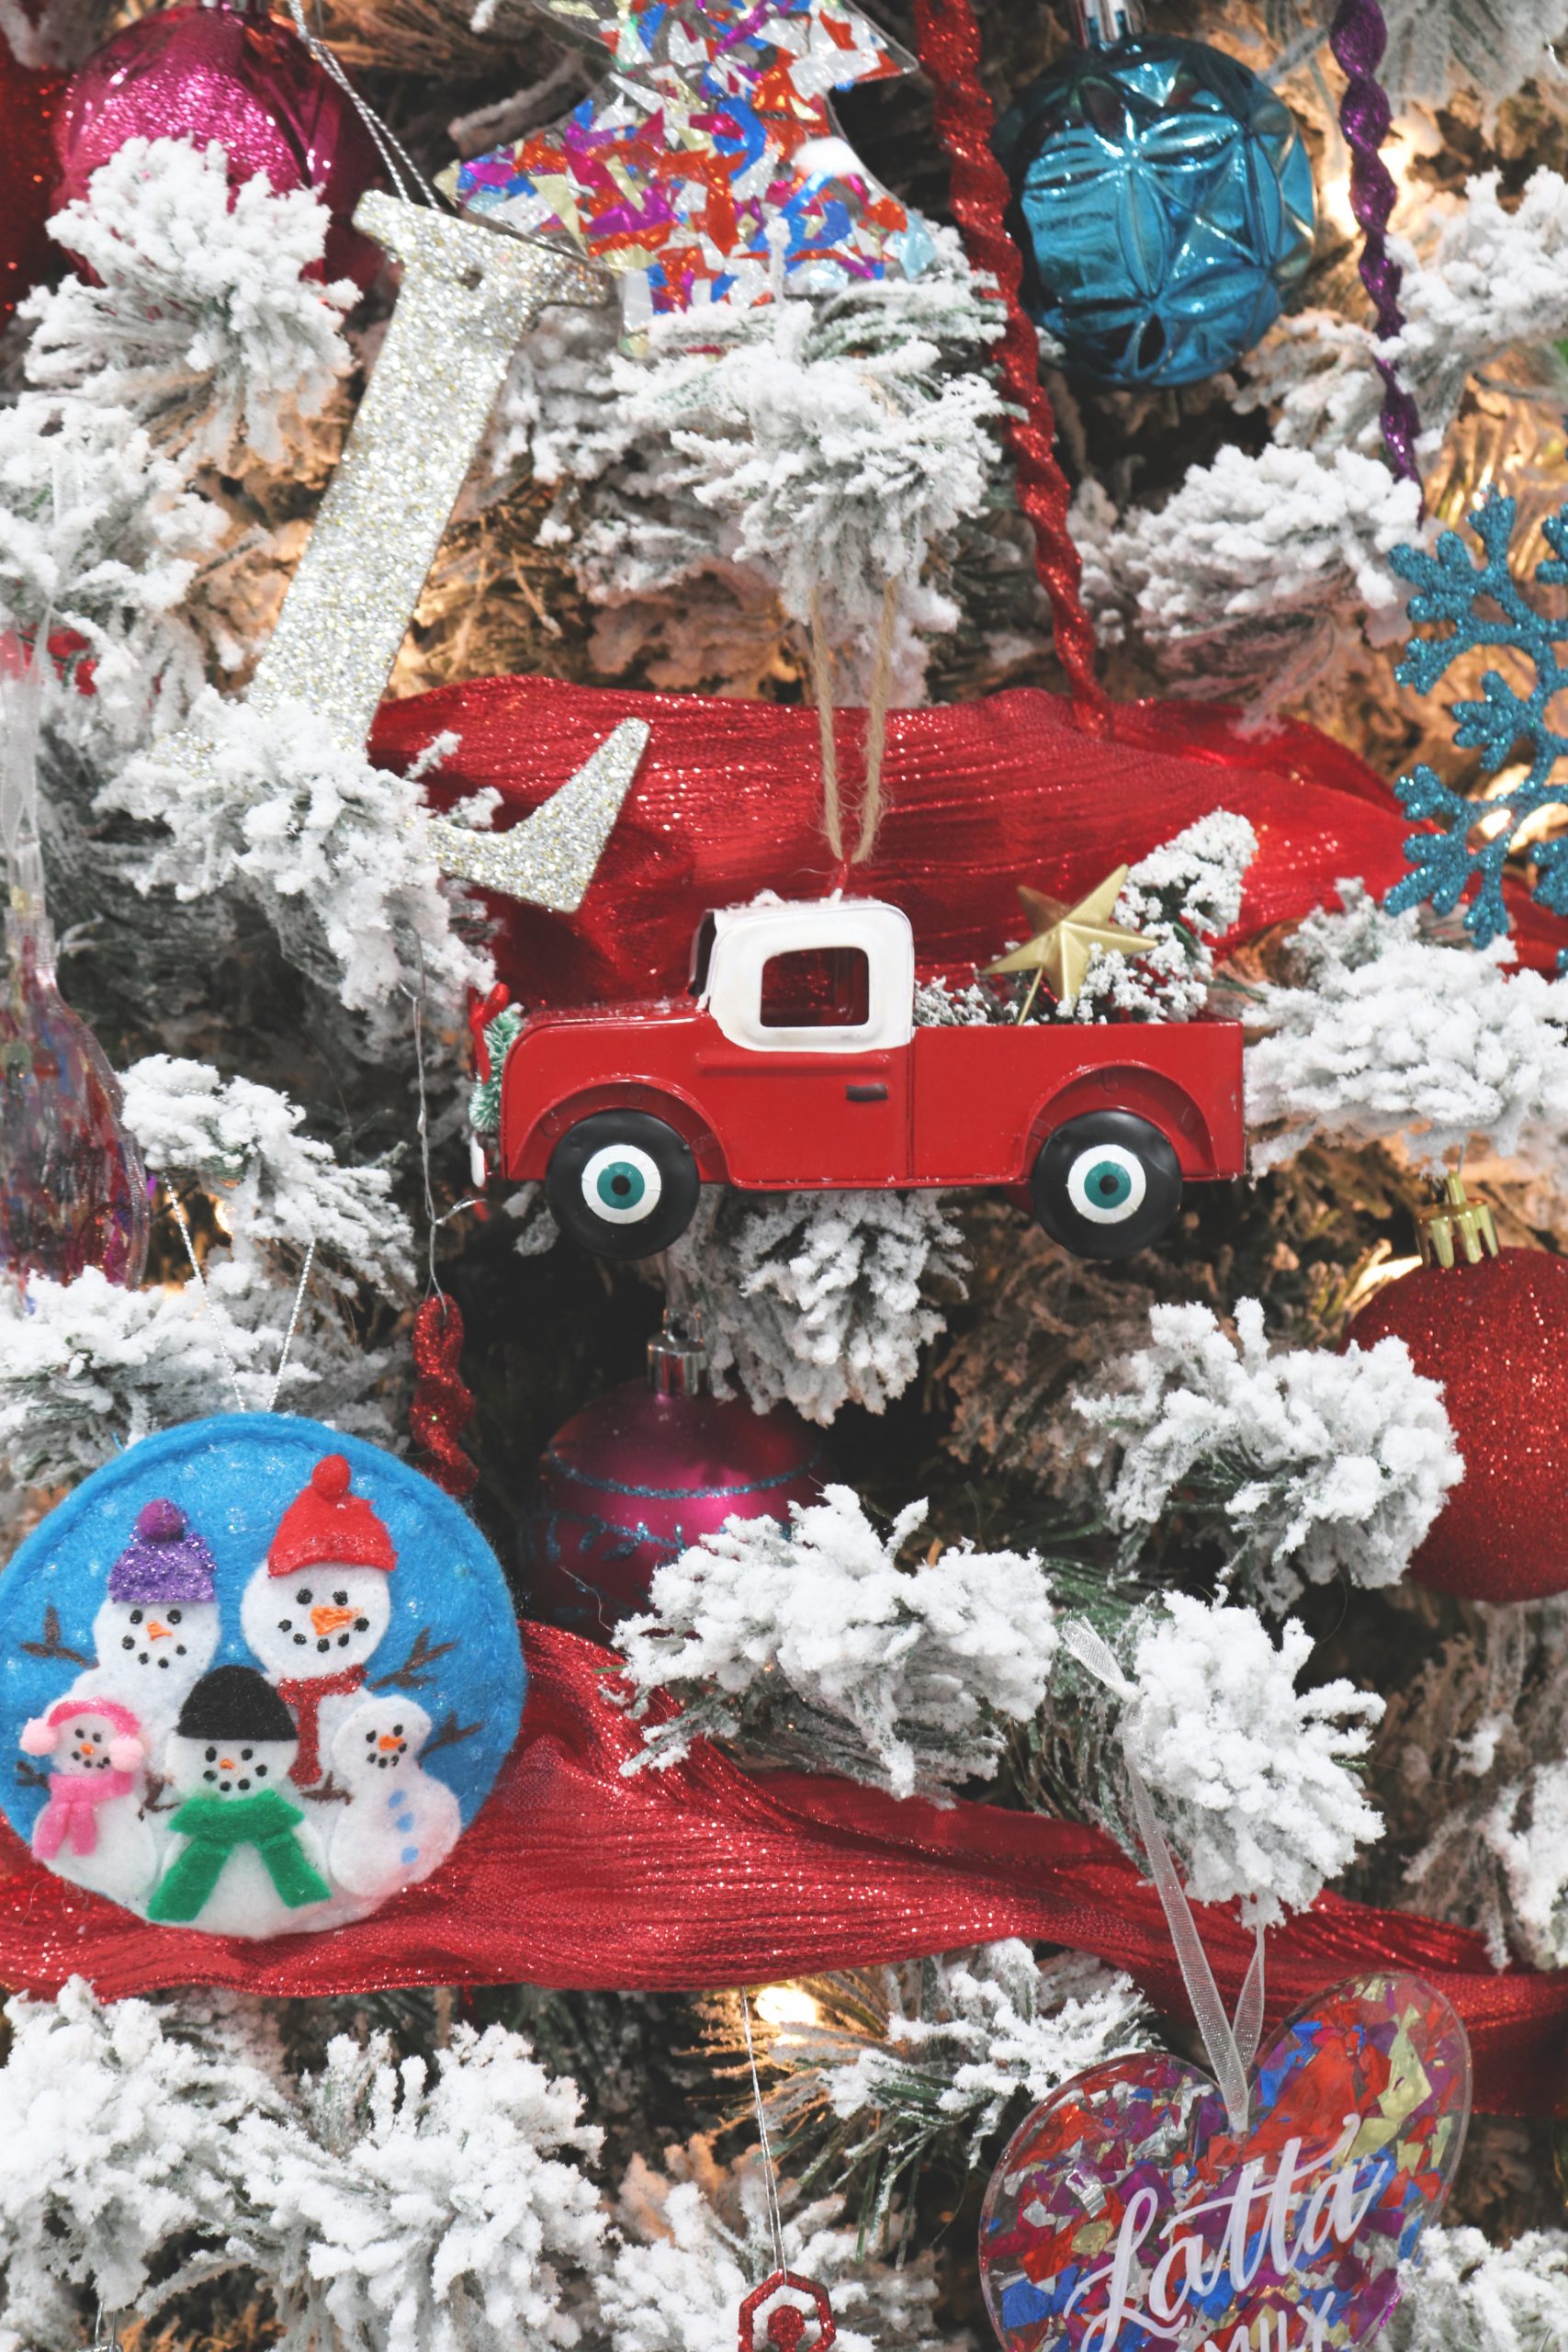
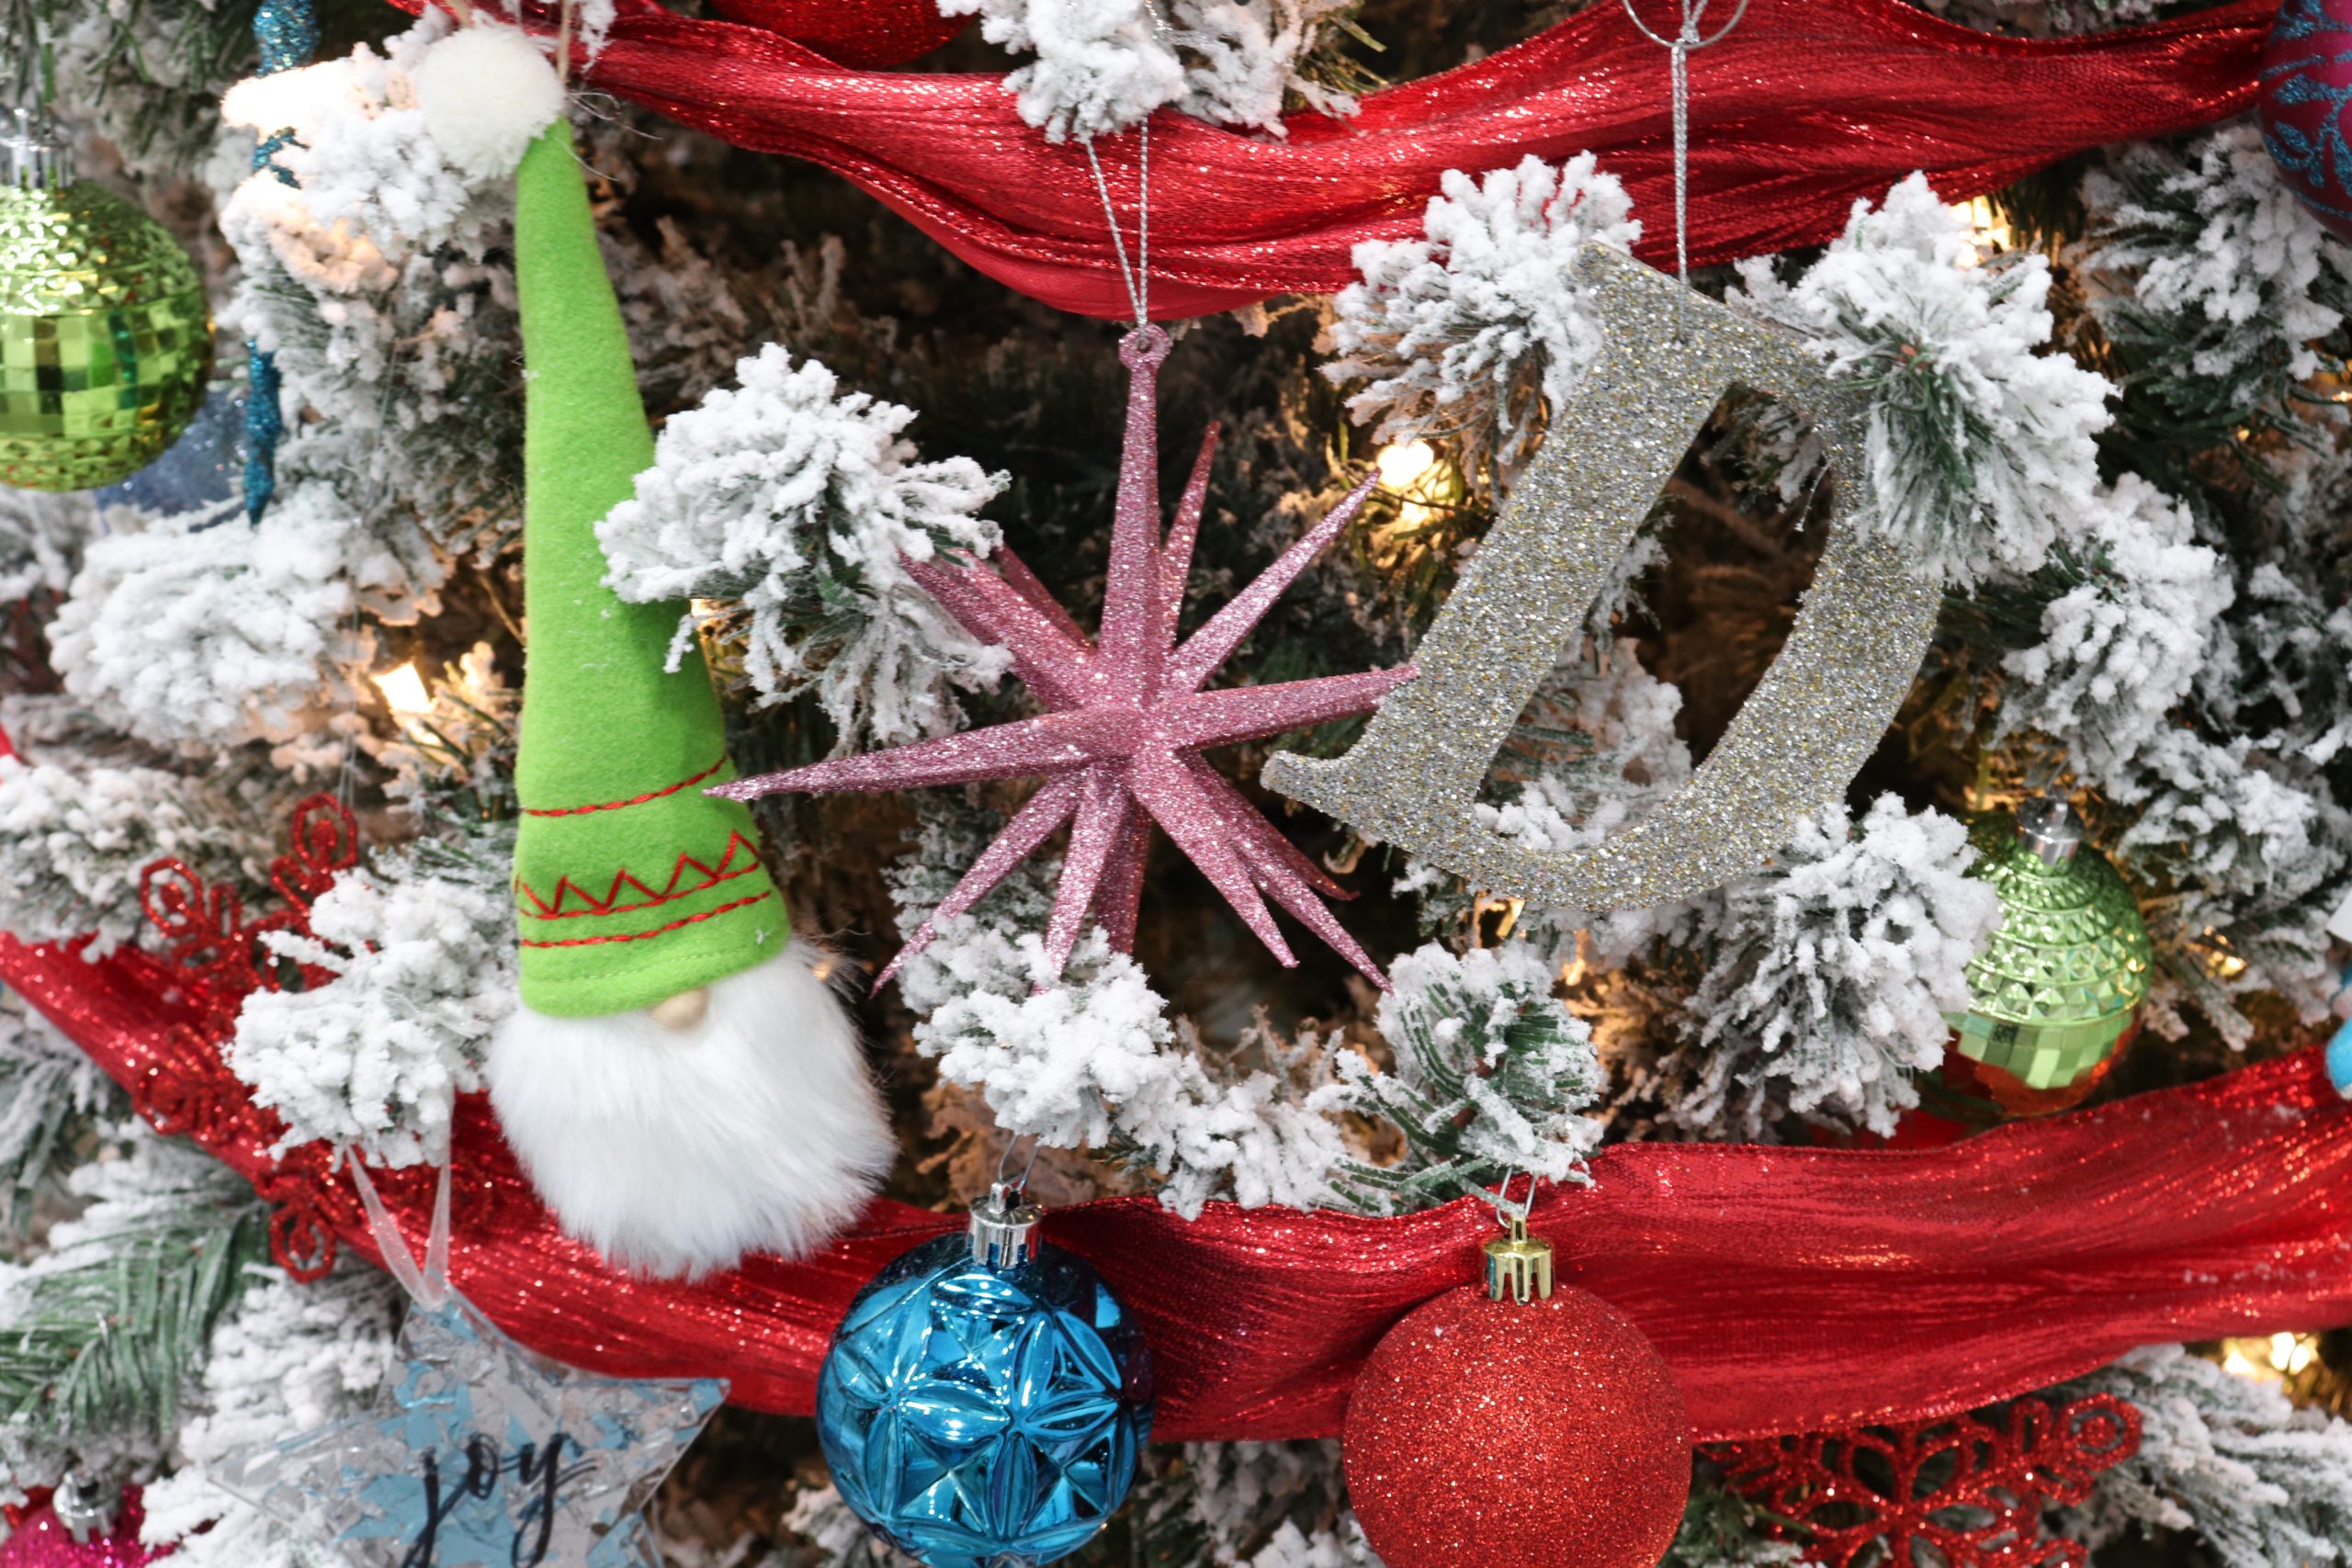
As you hang these, keep an eye on your colors so that they’re well-distributed; you don’t want areas that feel like a clump of all one color ornaments. This step creates the foundation of your tree, making it feel cohesive even though you’ll be adding unique ornaments too. Take a look at the photo below and see how the round, snowflake, and icicle ornaments provide a unifying effect.

Step 4: Finish off with coordinating specialty ornaments.
These are one of a kind ornaments (or maybe you have 2-3 of them) that you love that generally coordinate with the colors and theme of your tree. Here are some of our favorites this year:
My 12 year old son chose this Red pickup truck with a tree in the back, because it reminded him of the Christmas in Evergreen Hallmark movies. We also have glitter monogram ornaments for our last name and each of our first names. I created the Felt Snowman Family ornament and a few of the Acrylic Confetti Glitter ornaments this year; be sure to check out those tutorials so you can make your own!
All of us are suckers for a cute little gnome, so Little Crafter chose this Farmhouse Gnome and another with a red hat. The glittered Spike Starburst felt so perfectly retro, so I grabbed a few in different colors, including pink and teal.
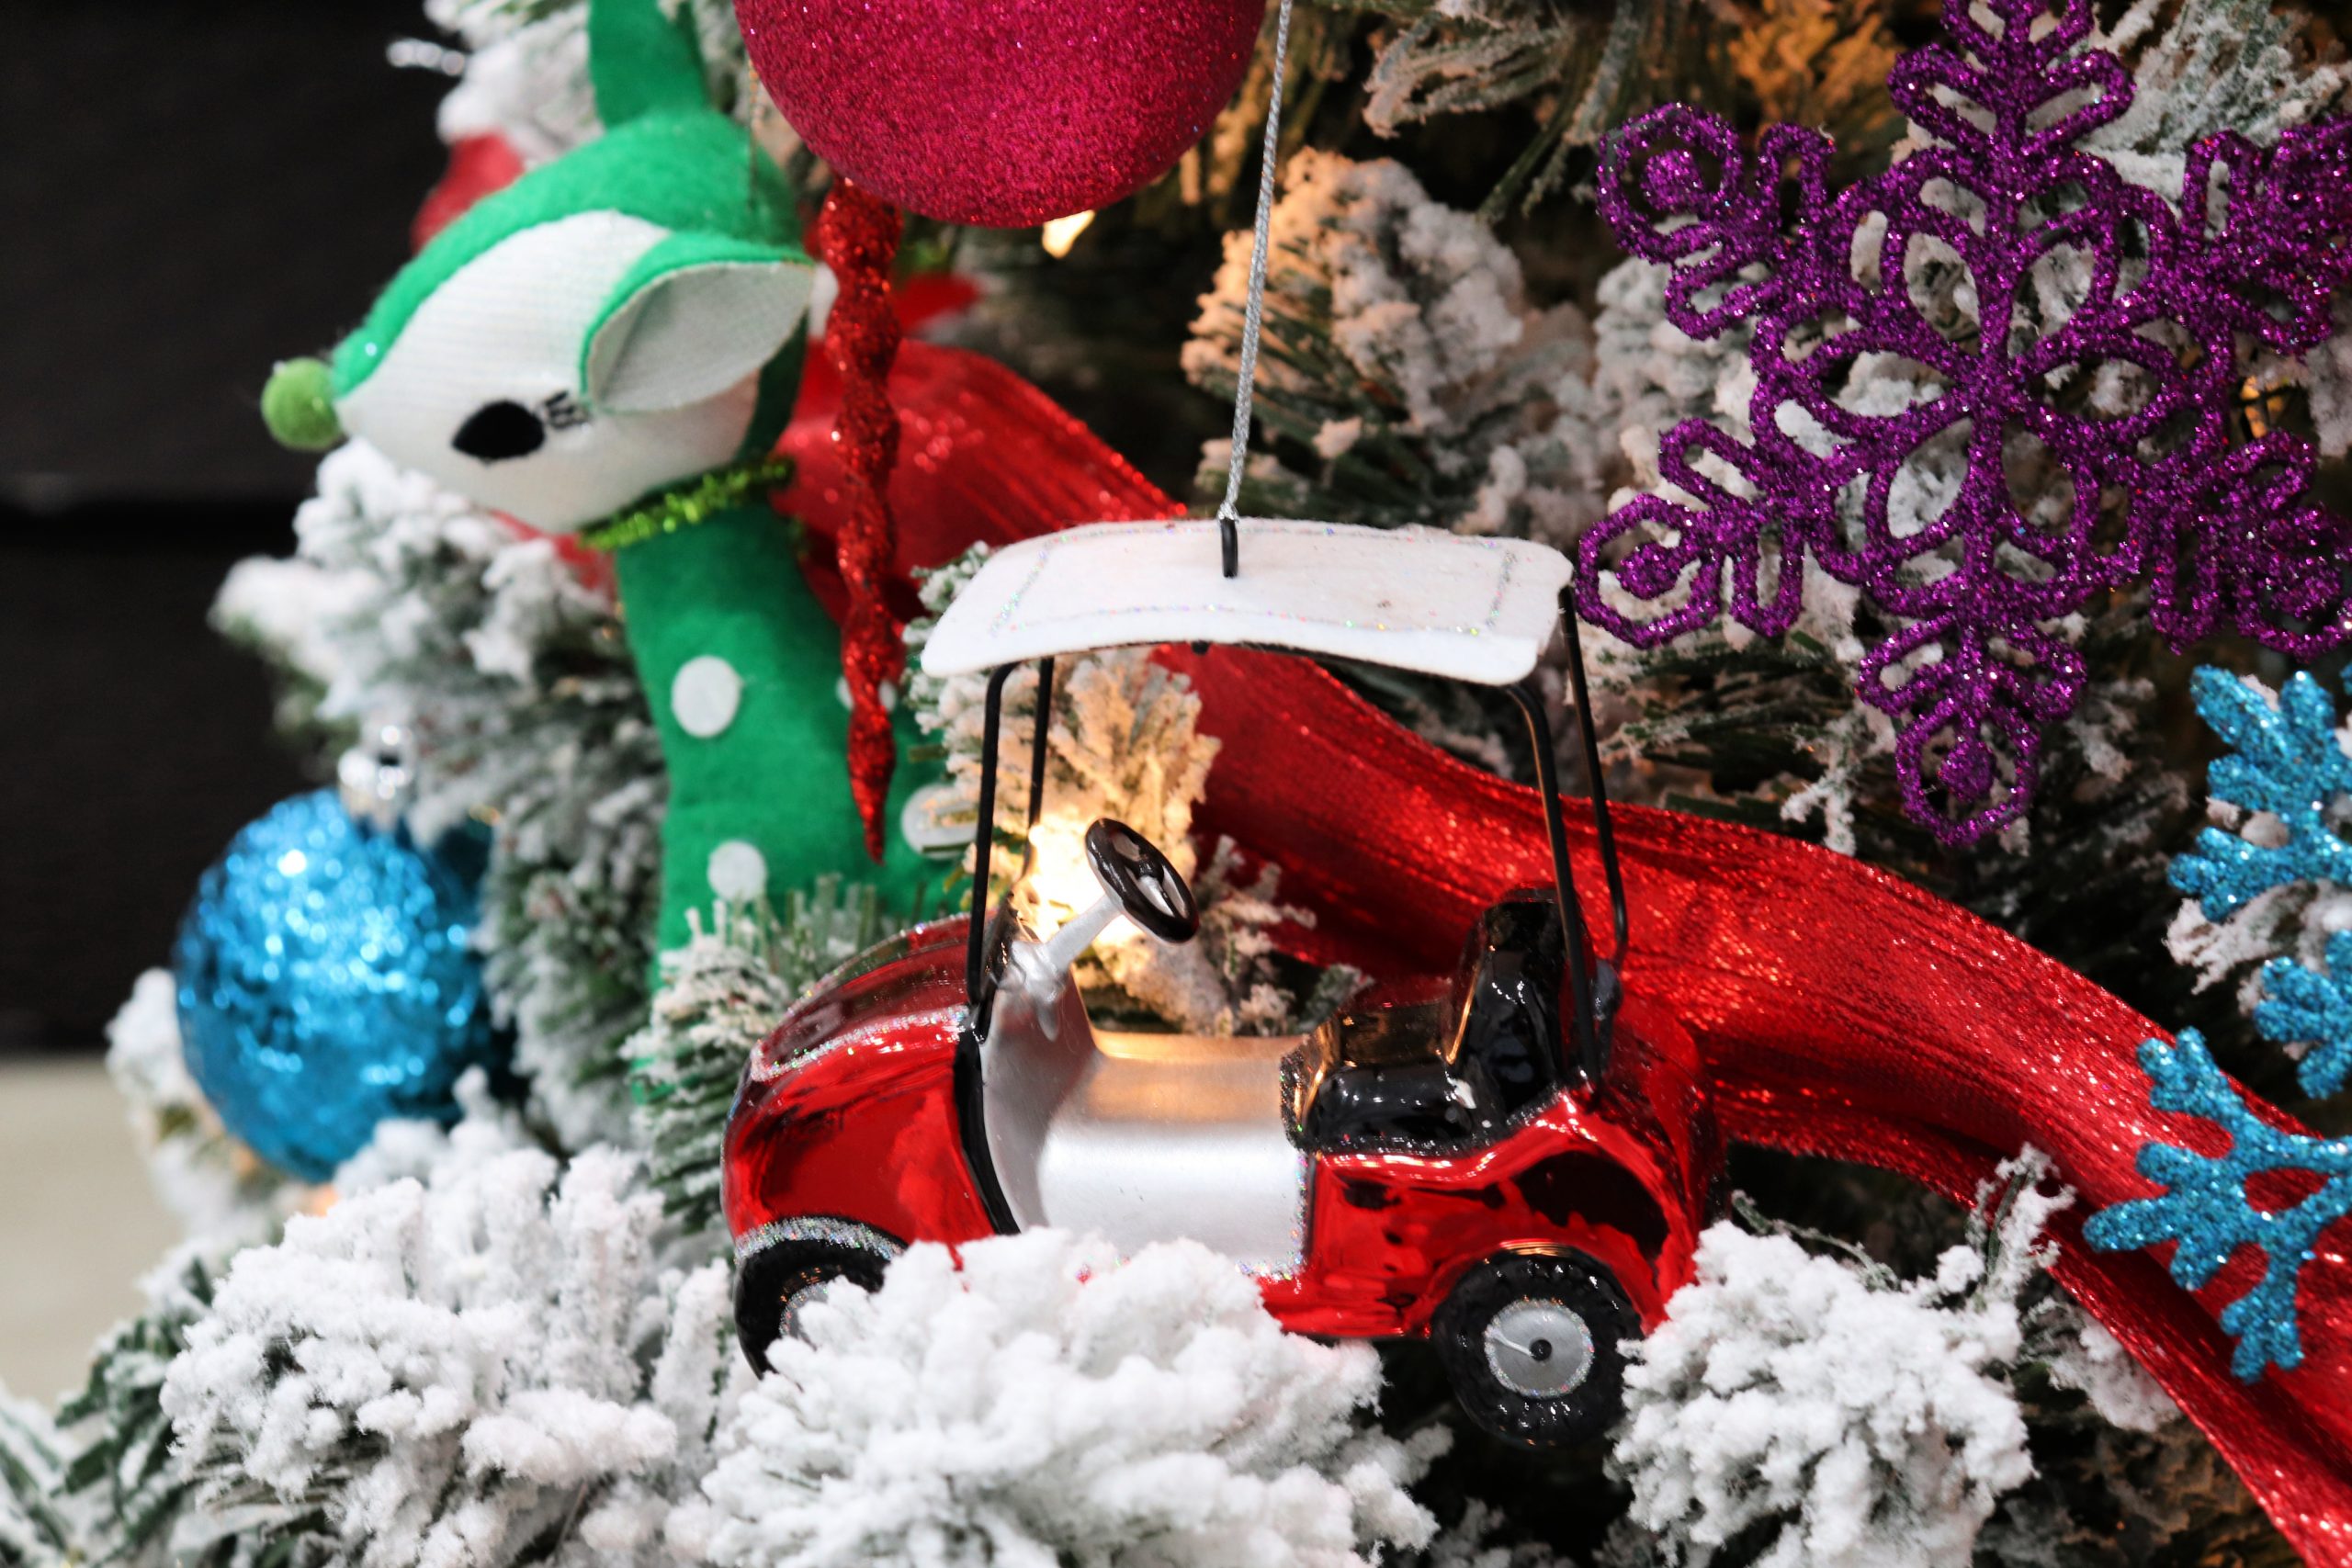
As soon as LC saw this red Golf Cart,he added it to our shopping cart. It’s a perfect tribute to the love our whole family has for playing golf (and my fondness for driving golf carts too!} ThePlush Retro Deer was so cute I couldn’t resist buying it in green, pink, and teal.
That’s all there is to it! Following these simple steps will help you create a fun and fabulous themed tree in no time. The one other thing to keep in mind is that when it comes to this kind of tree, more is more! As I was decorating this one, my husband asked me what my secret is, and I told him this. “Add ornaments until you think you’re done, then keep going. When you get to the point where you feel like you can’t physically add another ornament, still keep going.” The more ornaments you have, the more full and colorful your finished tree will look, so pile them on!

I am thrilled with how this bright Mid-Century Modern tree turned out. It makes me smile every time I see it, which is no small feat in 2020! Now, it’s your turn. There’s a special thread in the Amy Latta & Friends Facebook Group that’s just for sharing photos of your Christmas trees, no matter when or how you decorate them, and I can’t wait to see yours! Won’t you come and join the fun?
Don’t forget to pin this post for later and/or to share with your friends!


2 Comments