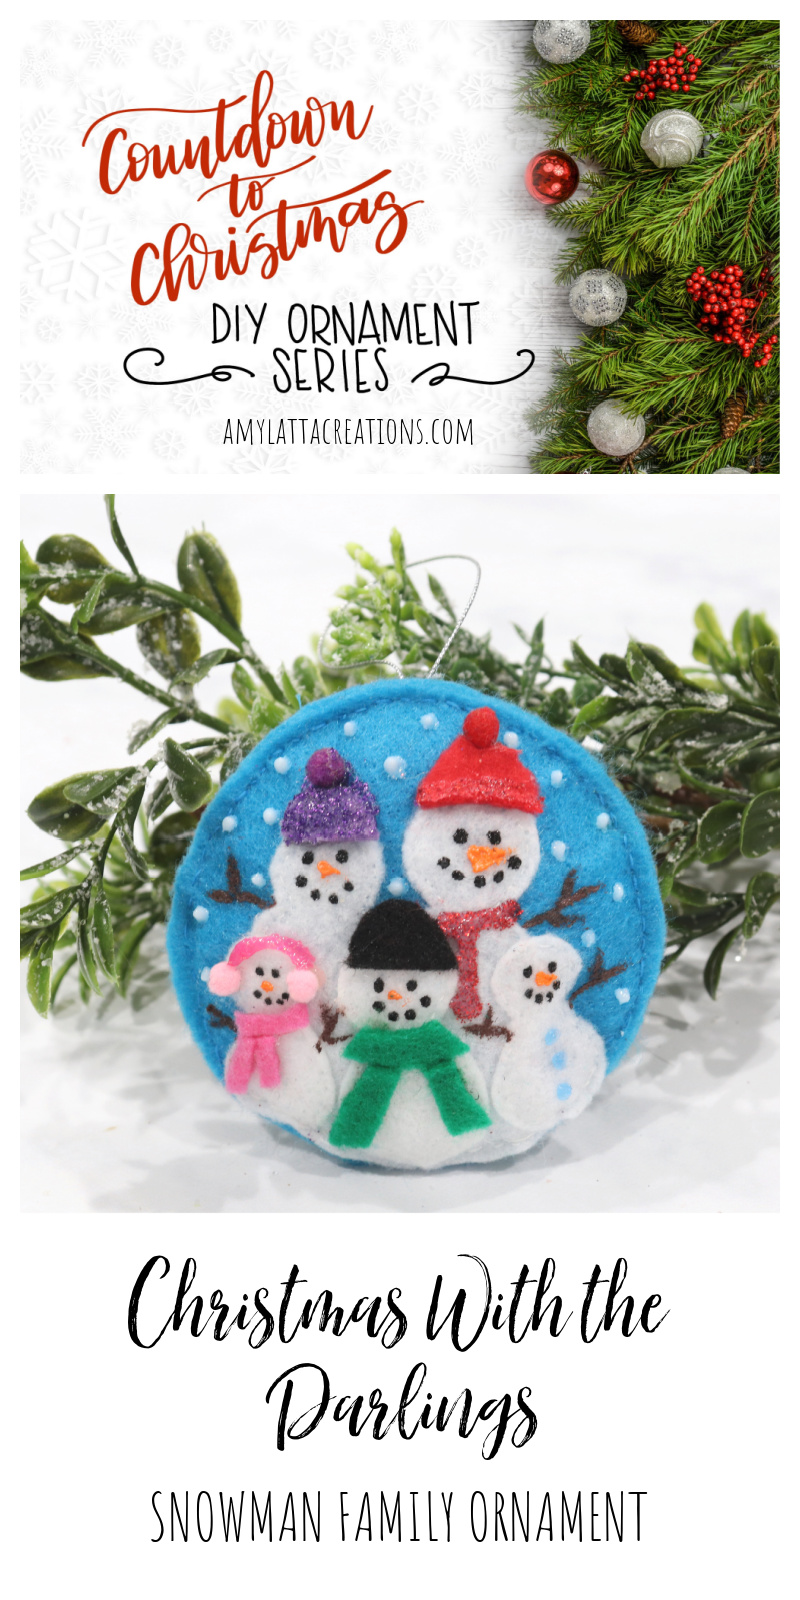
Countdown to Christmas Ornament: Christmas With the Darlings
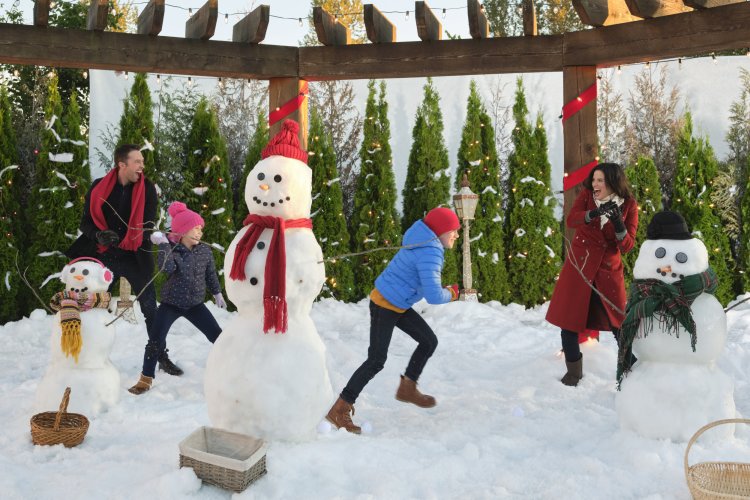
The next movie in the Hallmark Channel Countdown to Christmas is called Christmas With the Darlings. Starring Katrina Law and Carlo Marks, it tells the story of an assistant who helps her boss’ charming younger brother as he looks after his orphaned nieces and nephew during Christmas. (Find out more about the movie here!)
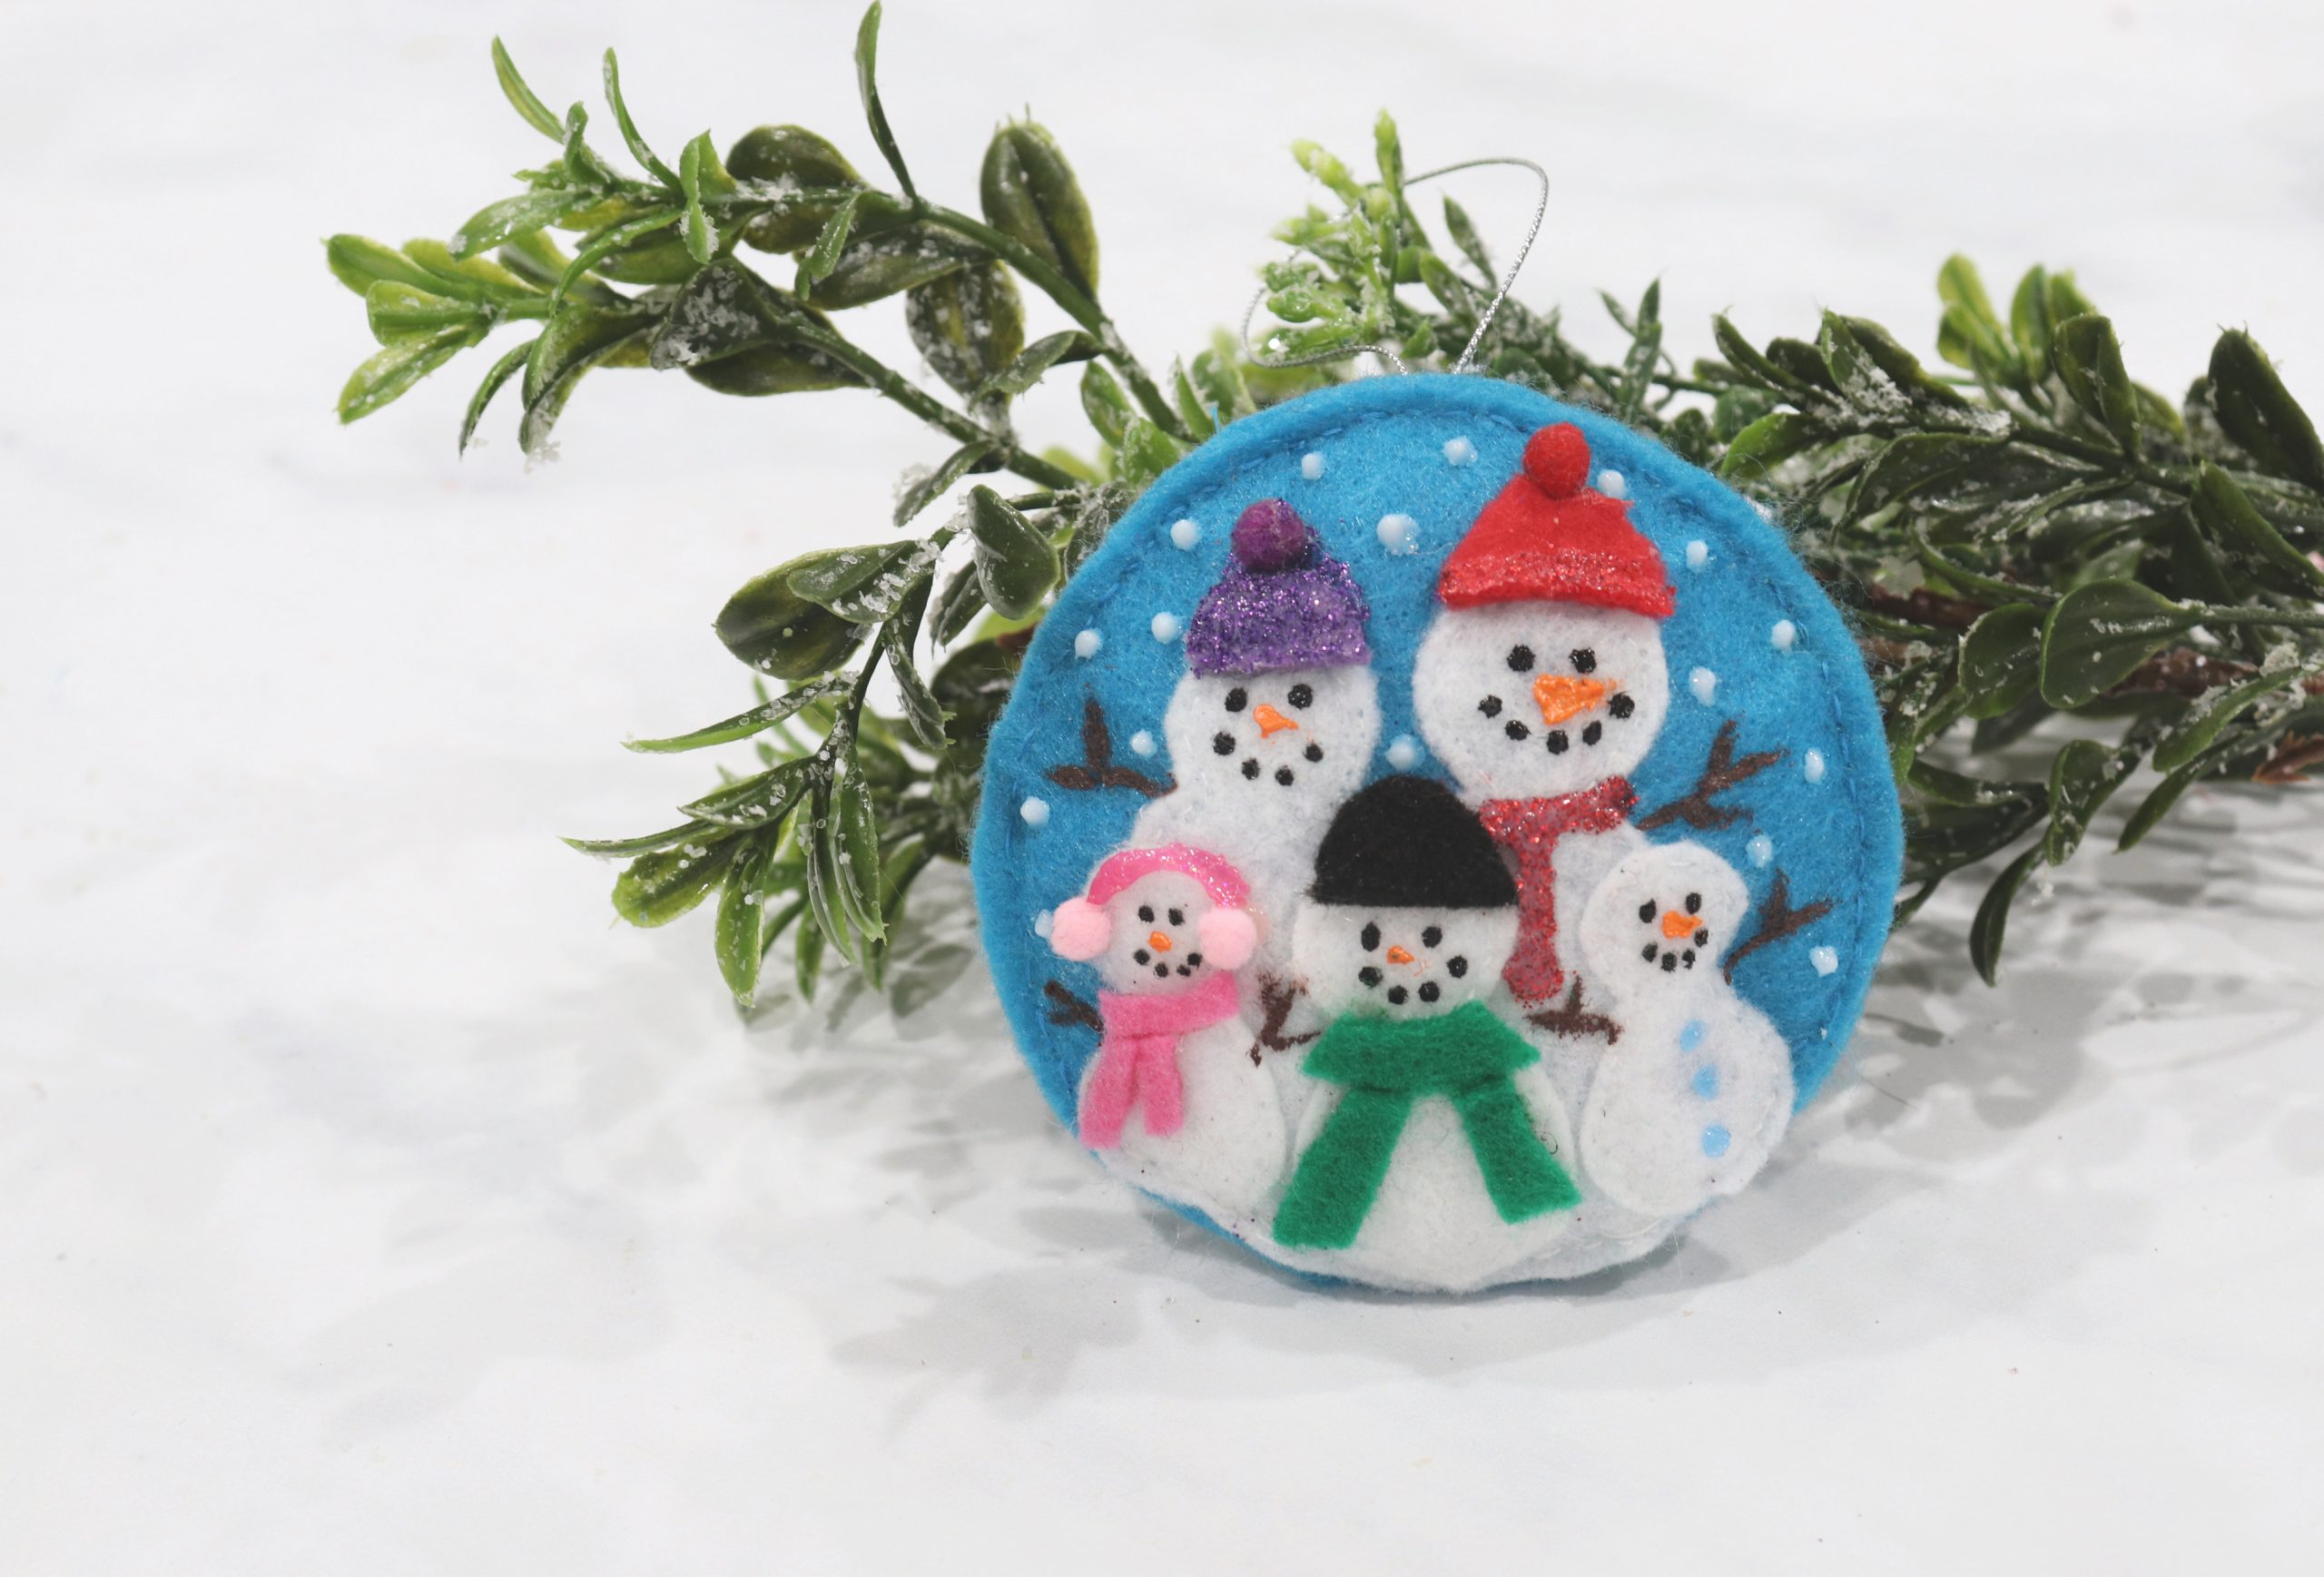
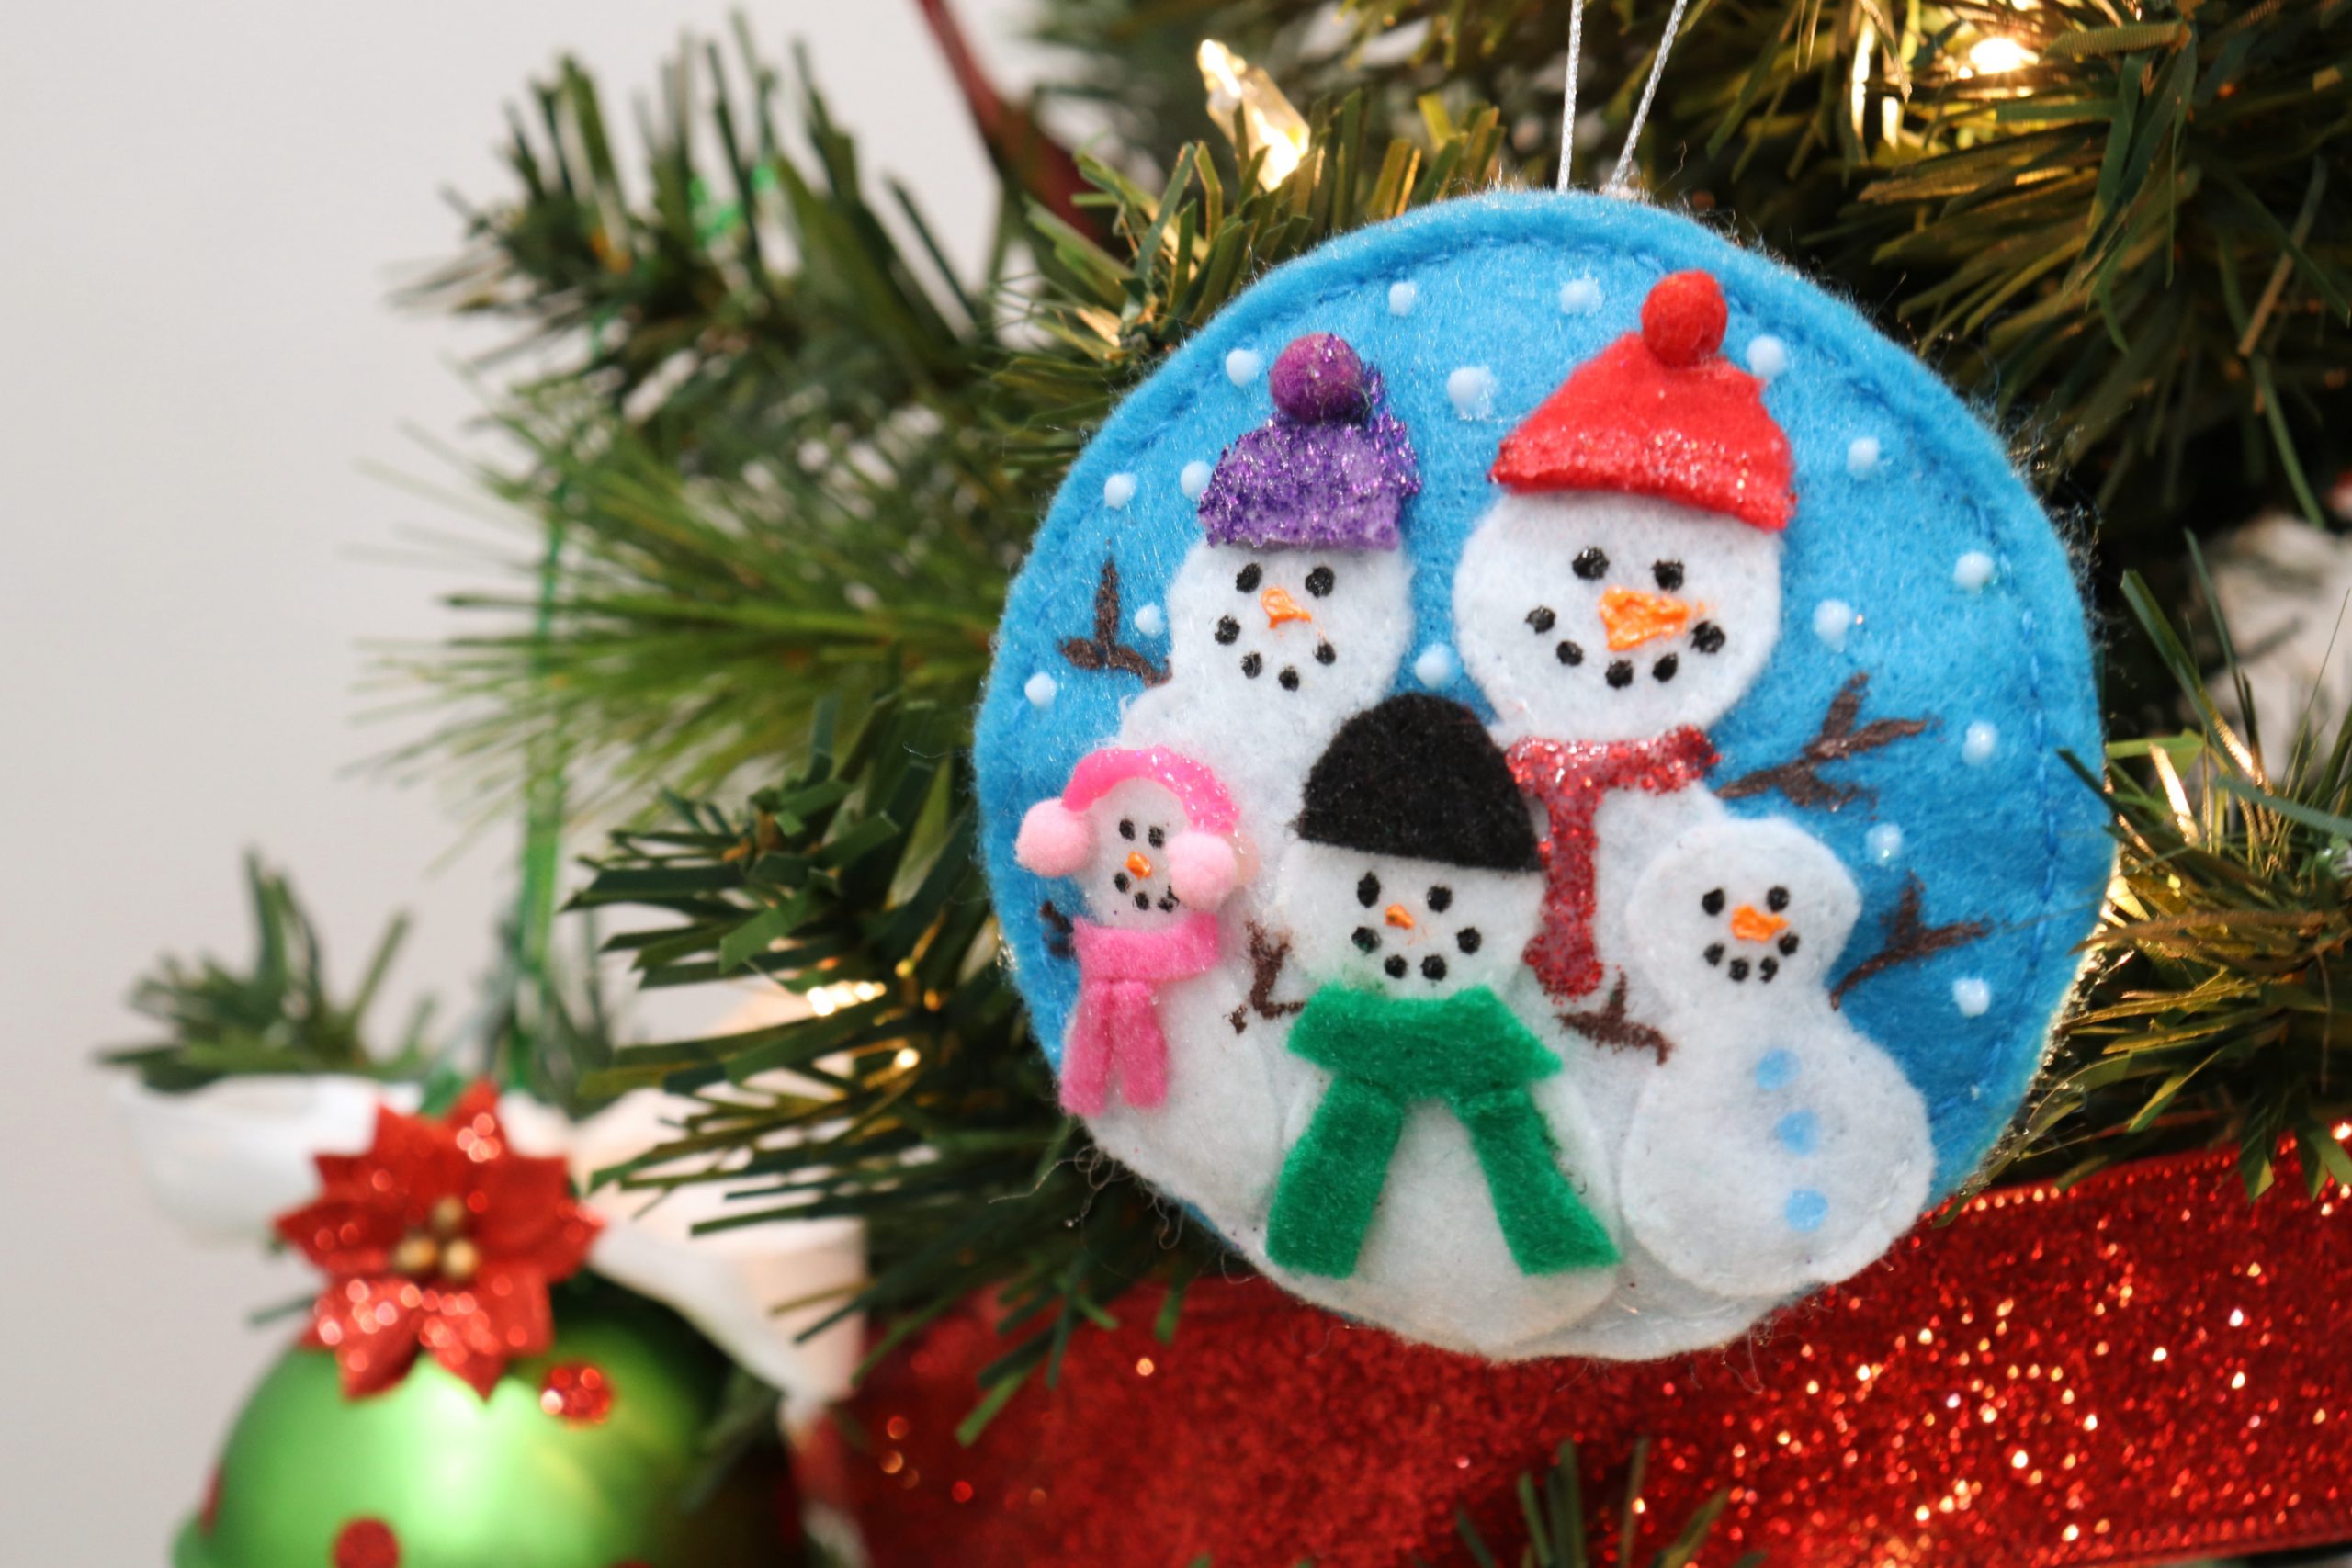
The overriding theme of this sweet movie is family, so I knew I needed to find a way to incorporate that into the ornament. Throughout the movie, the five main characters take part in lots of fun holiday activities together, one of which is building several snowmen, a bonding experience for all of them. So, I decided to create a “snow family” of five (two “grownups” and three “kids”) to represent this film. Here’s how to make your own.
SNOWMAN FAMILY ORNAMENT
You’ll need:
felt (blue, white, and assorted color scraps)
fabric paint (black, orange, and other assorted colors)
tiny pom poms
thread (white and blue)
sewing needle
scissors
Poly-Fil
ribbon, cord, or twine for a hanger
pencil
round object to trace
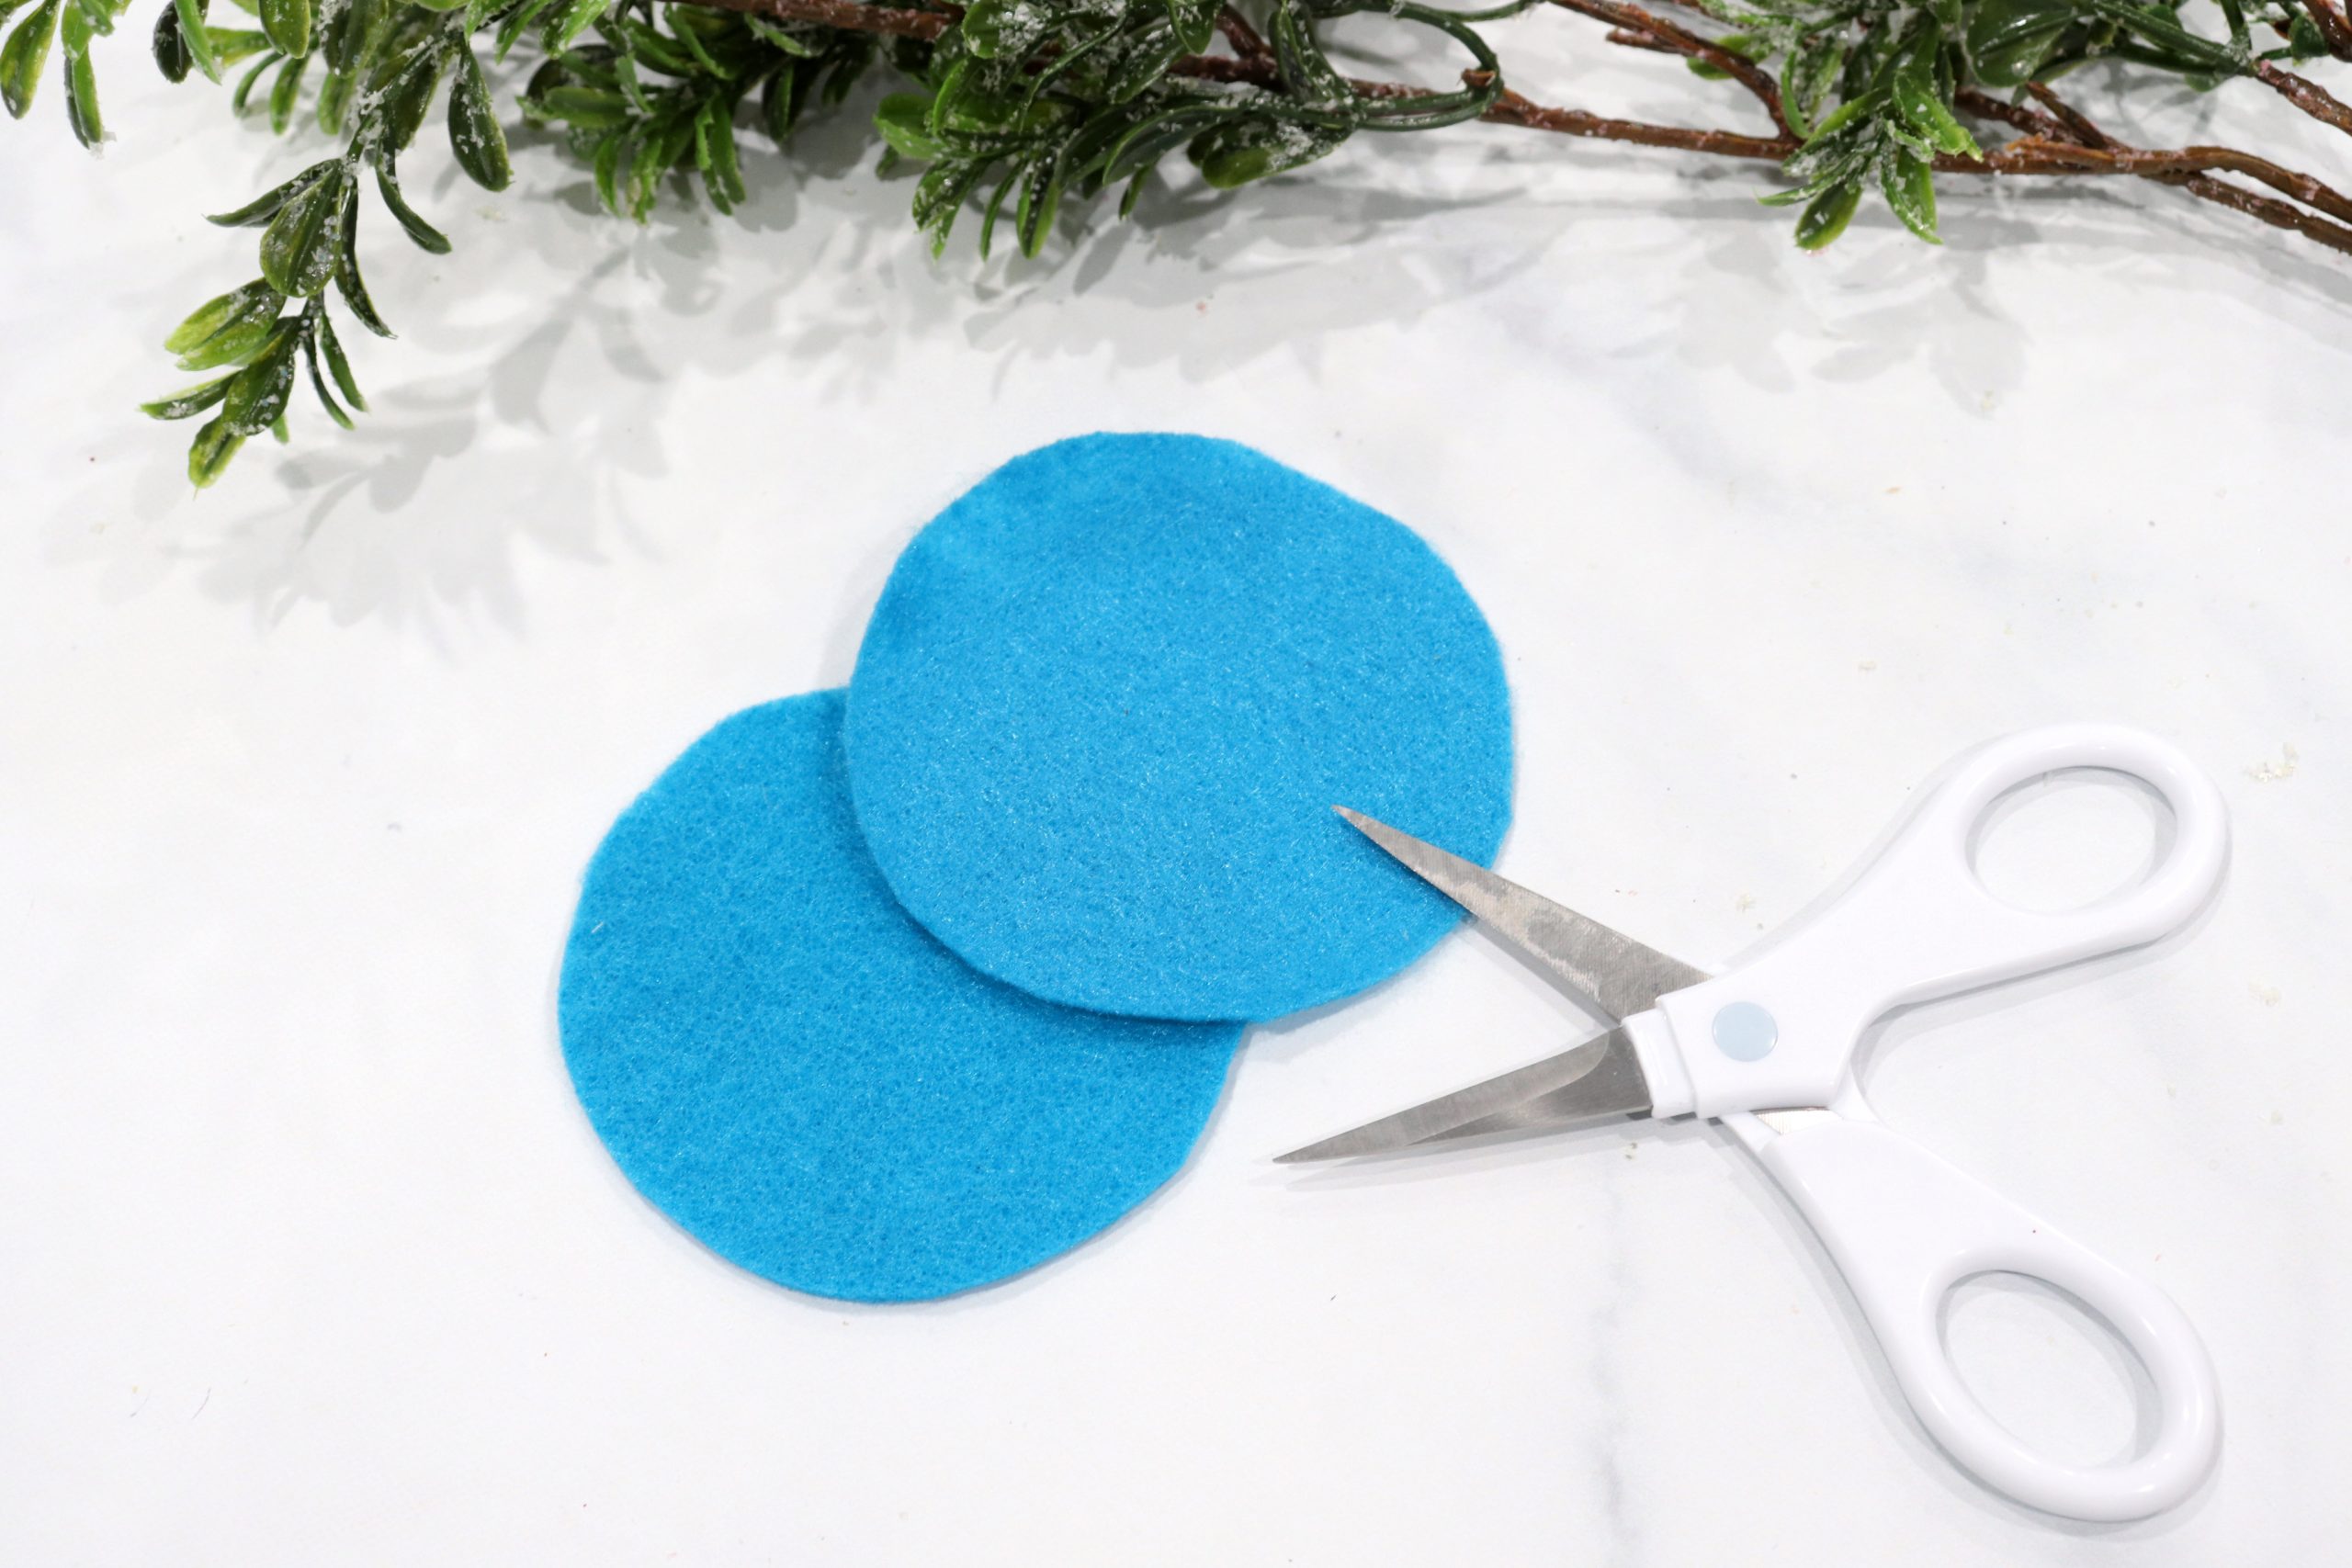
Step 1: Trace and cut two circles from blue felt.
I traced the lid of a mason jar I’m using for another project. The size of your circles will be the size of your finished ornament, so keep that in mind as you look for an object to trace.
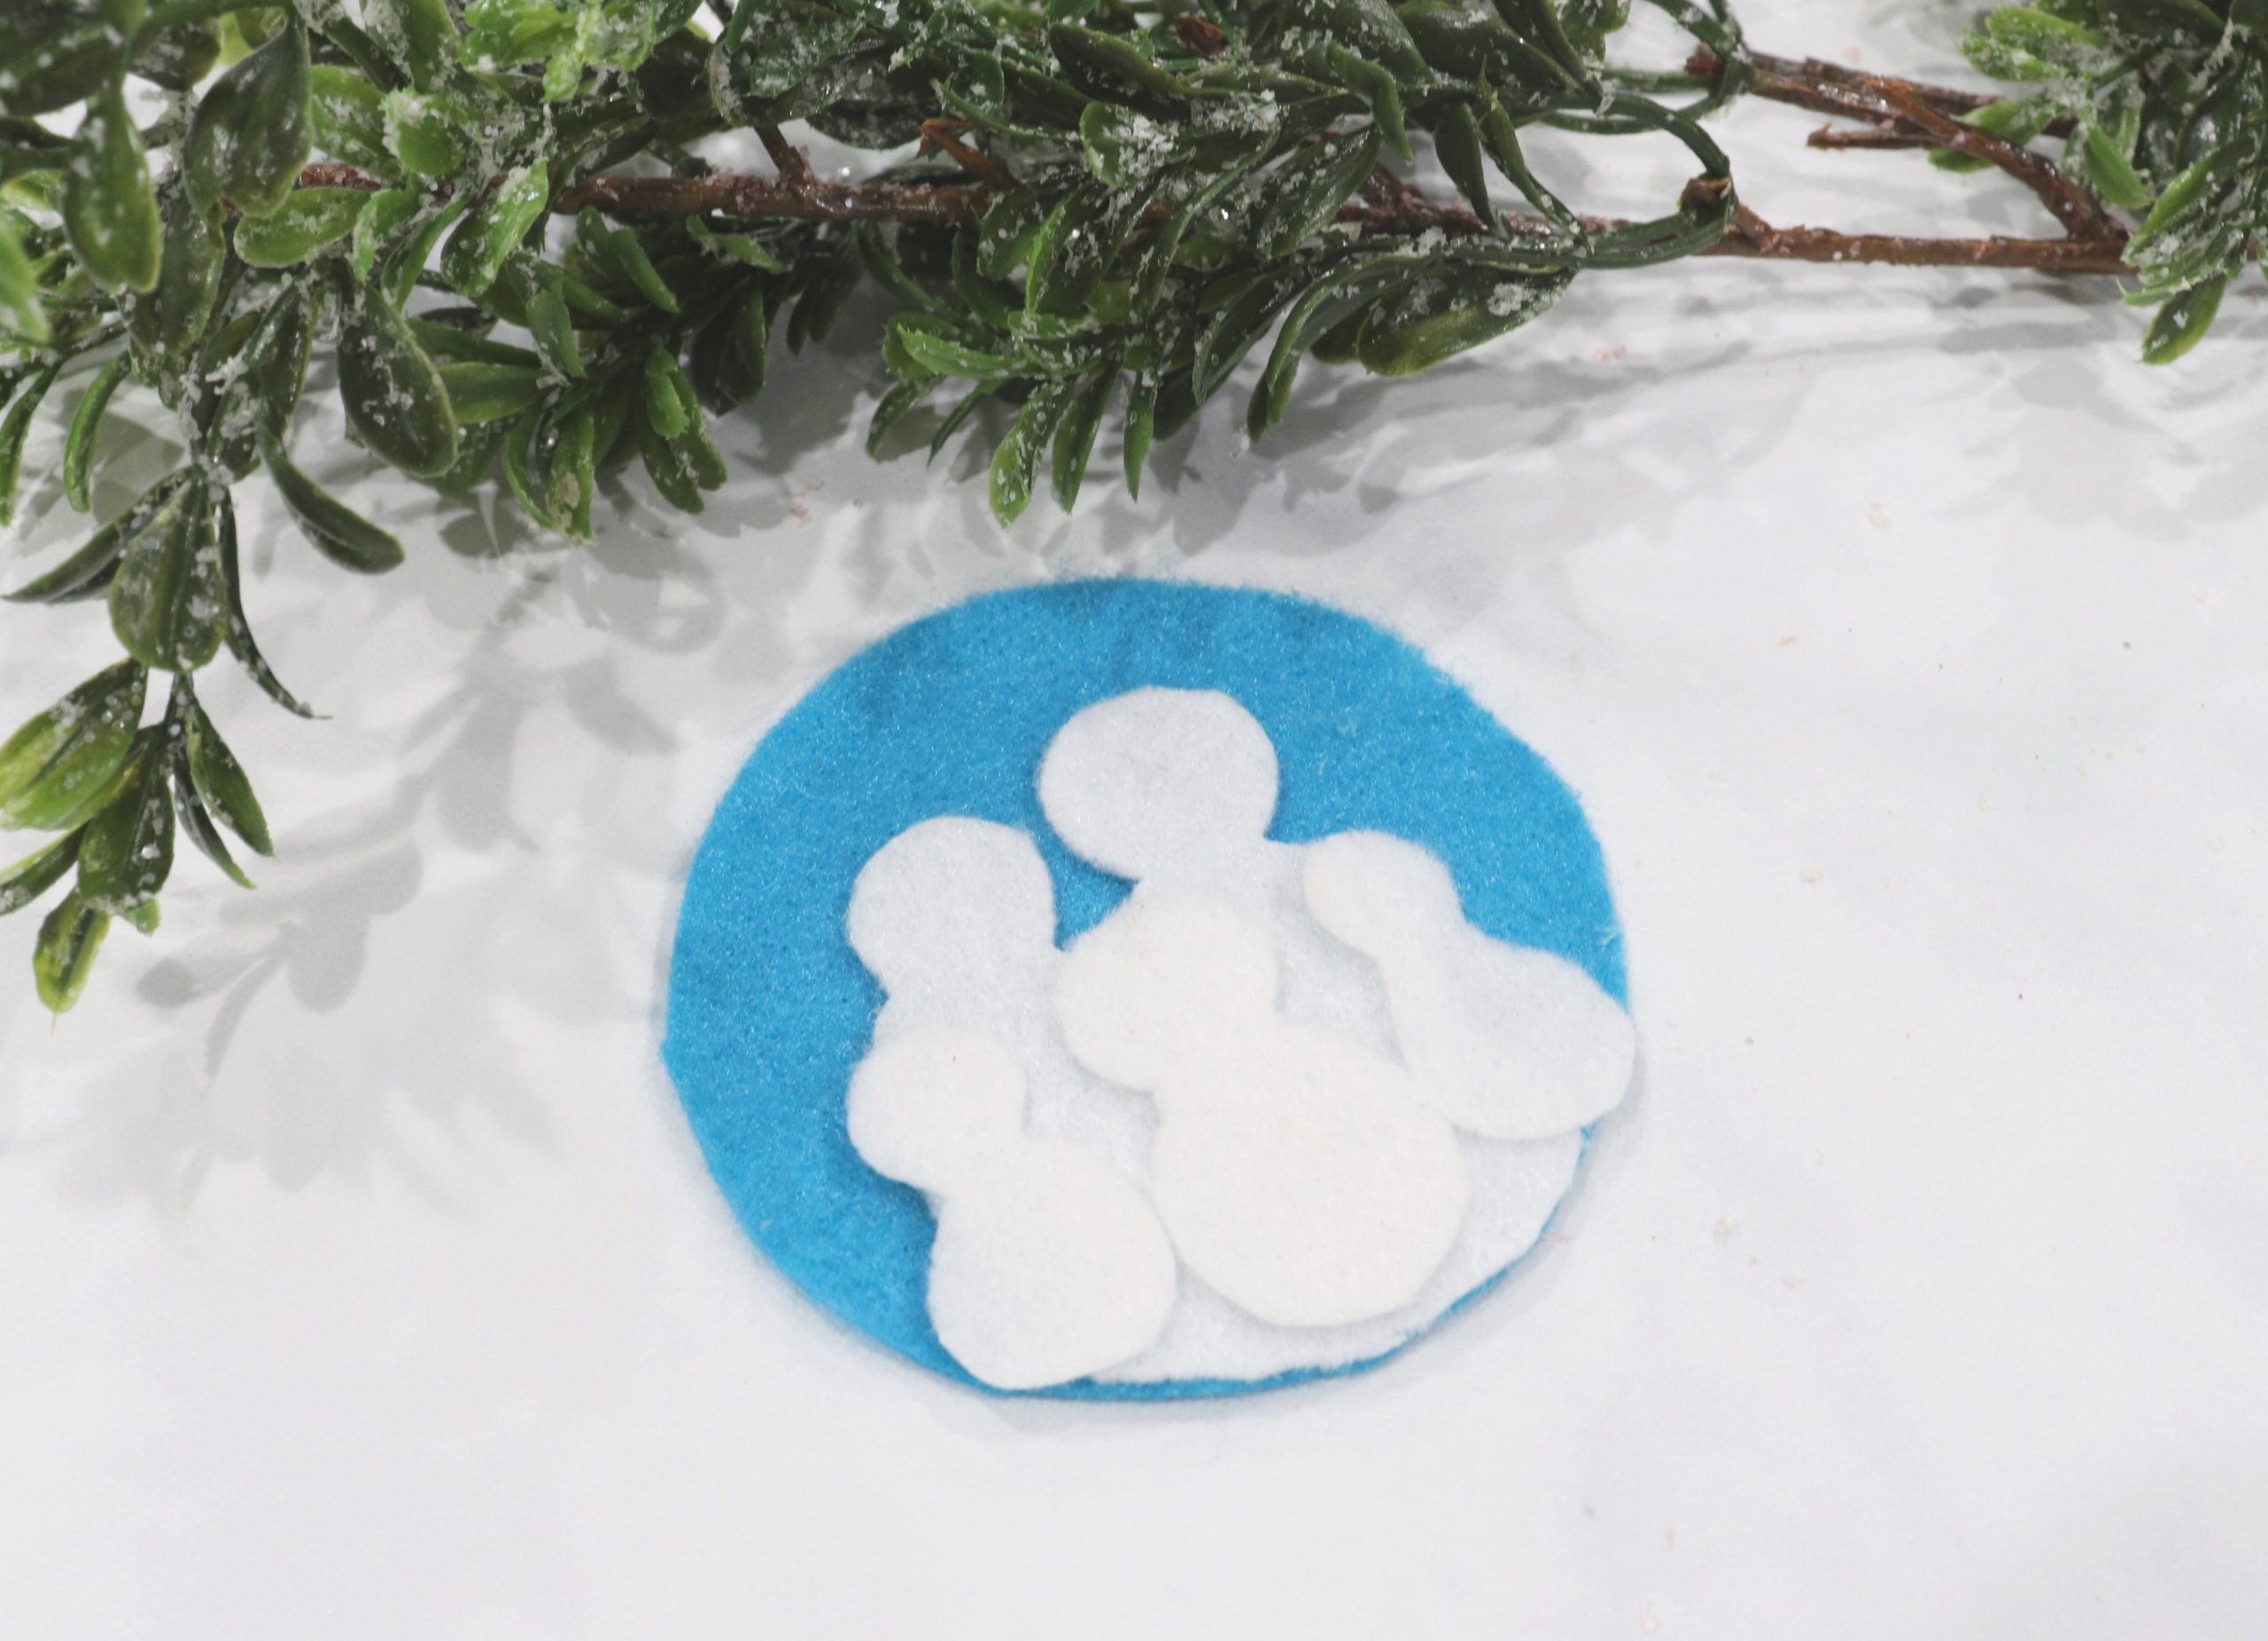
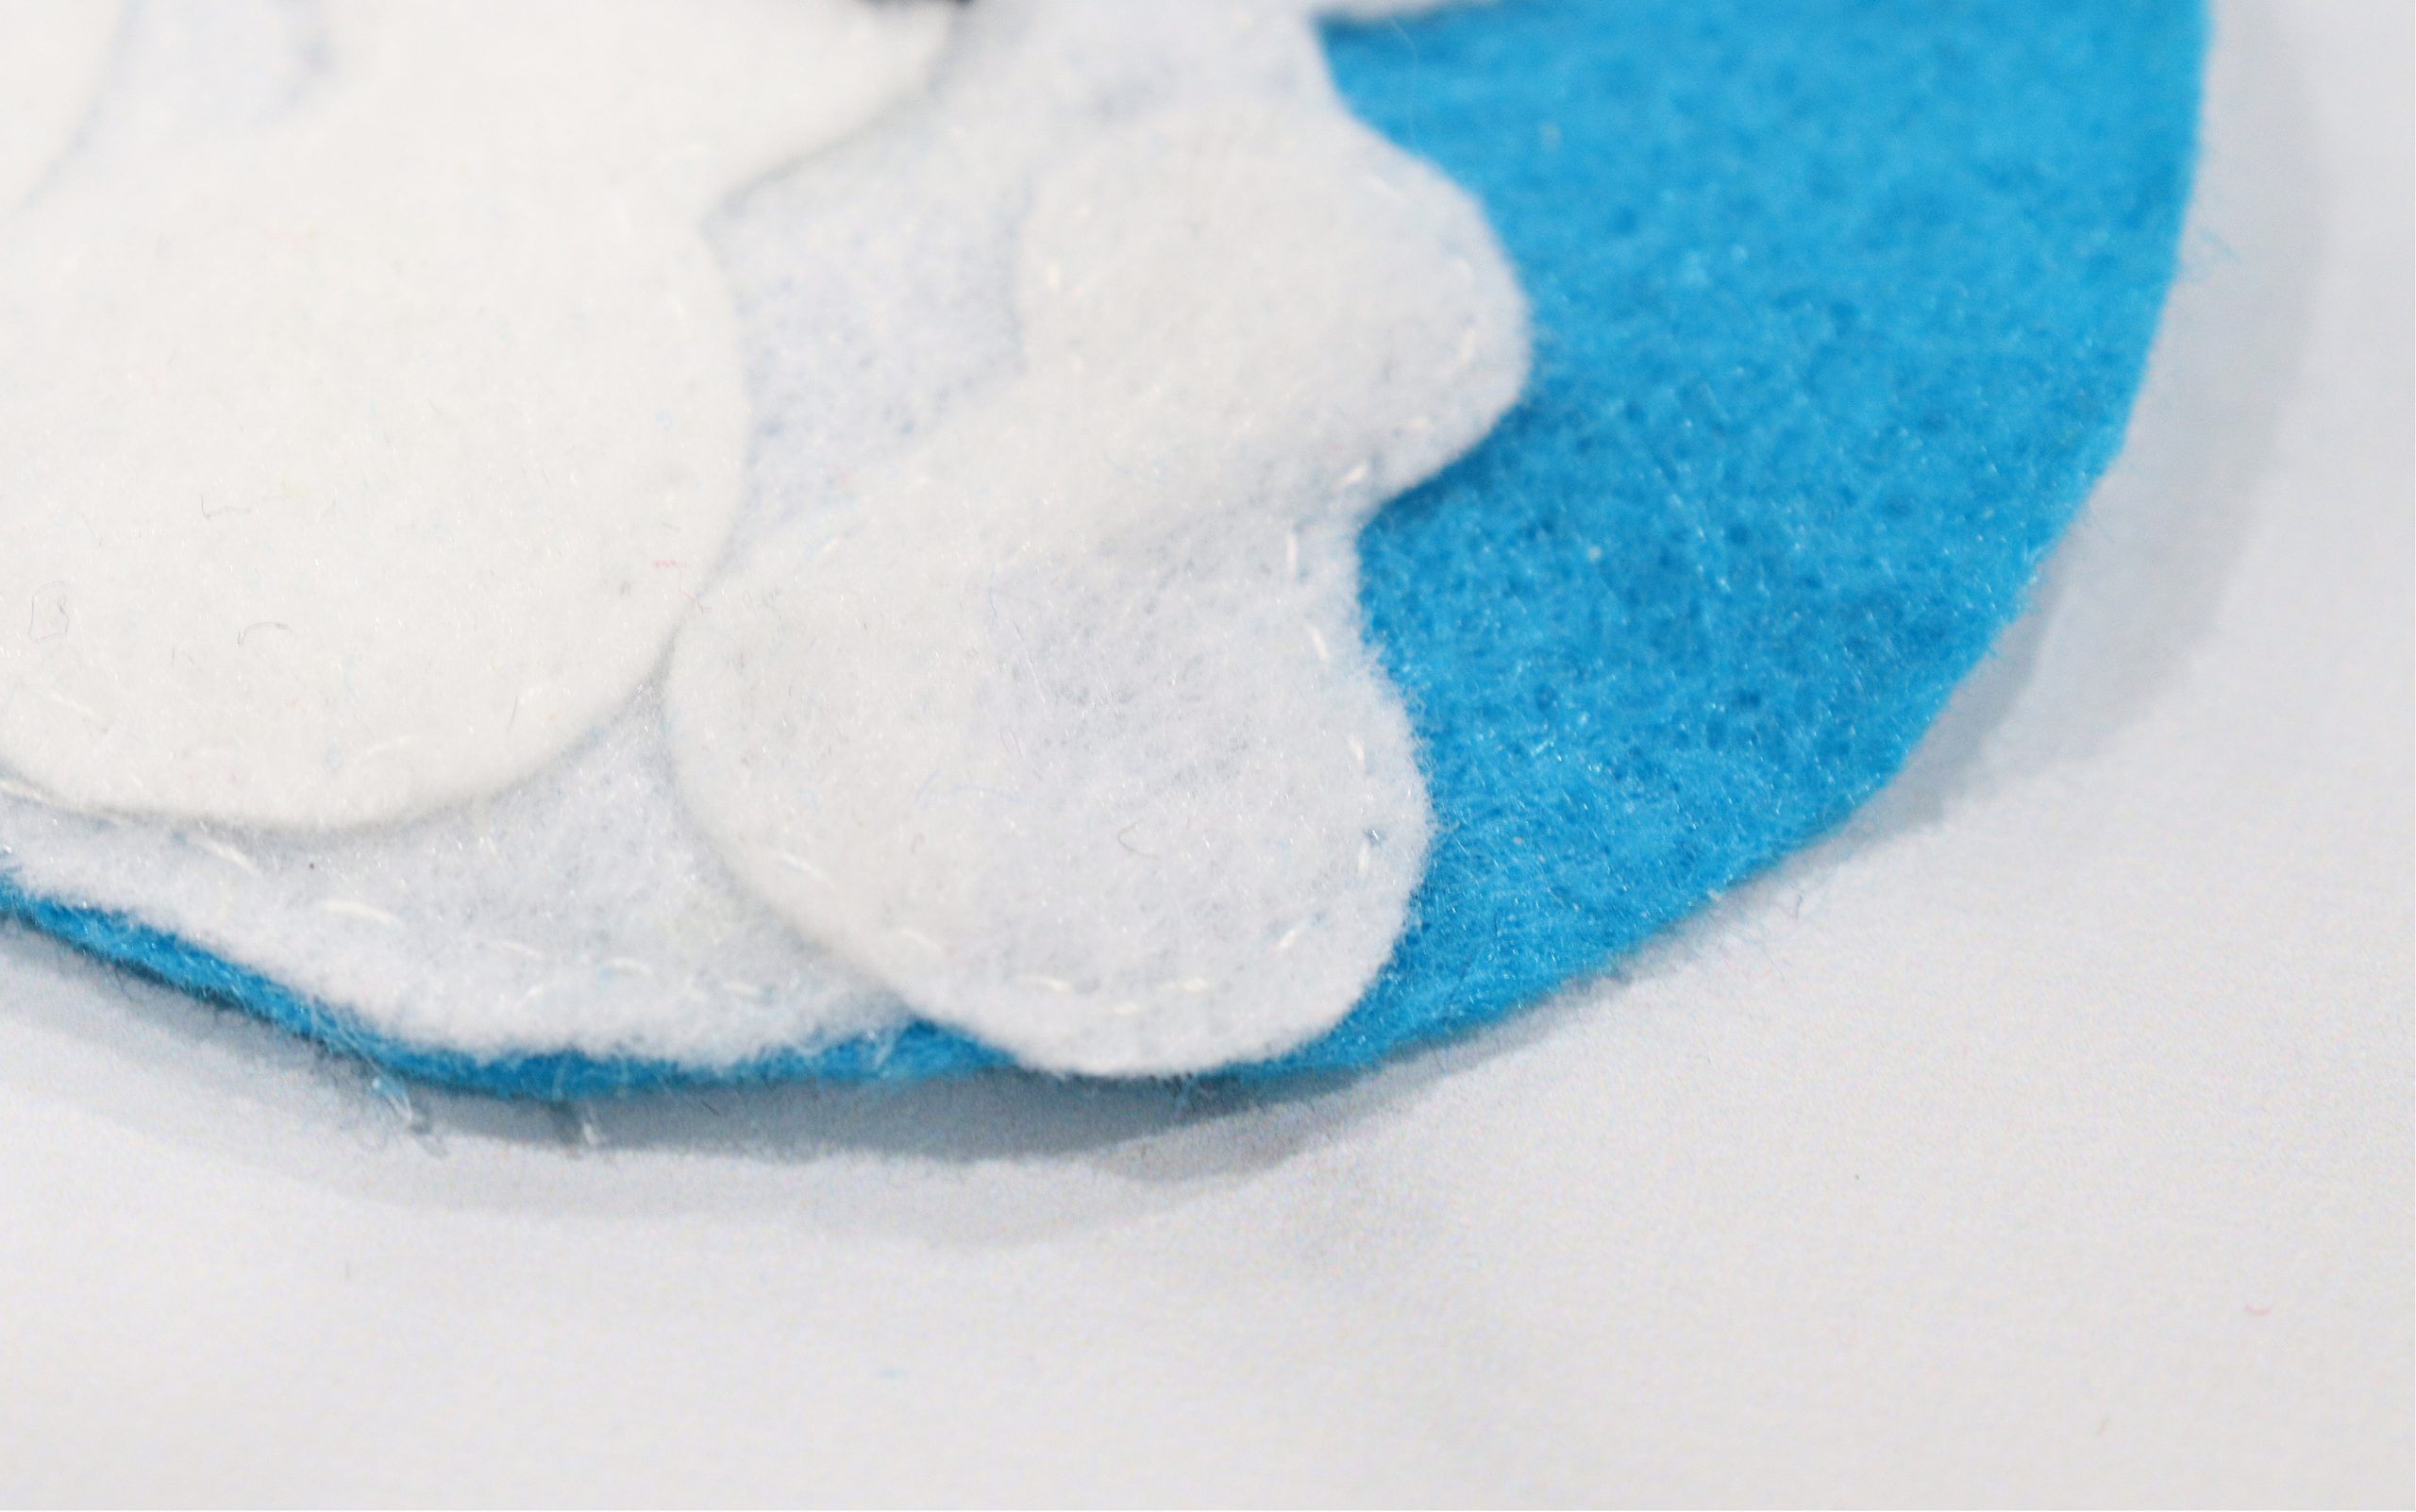
Step 2: Cut five snowman shapes from white felt and glue them onto one of the blue circles.
I made two larger ones and three smaller ones. You can freehand these like I did, or you can find something to trace. They don’t have to be perfect, just like real snowmen. My two bigger snowmen were made of three “snowballs,” and the smaller ones were made of two. Once they are cut, use just a bit of hot glue in the center of each one to hold it in place.
Step 3: Stitch around the edges of each snowman with white thread.
This will firmly hold them in place and adds a nice finished-looking touch to the edges.
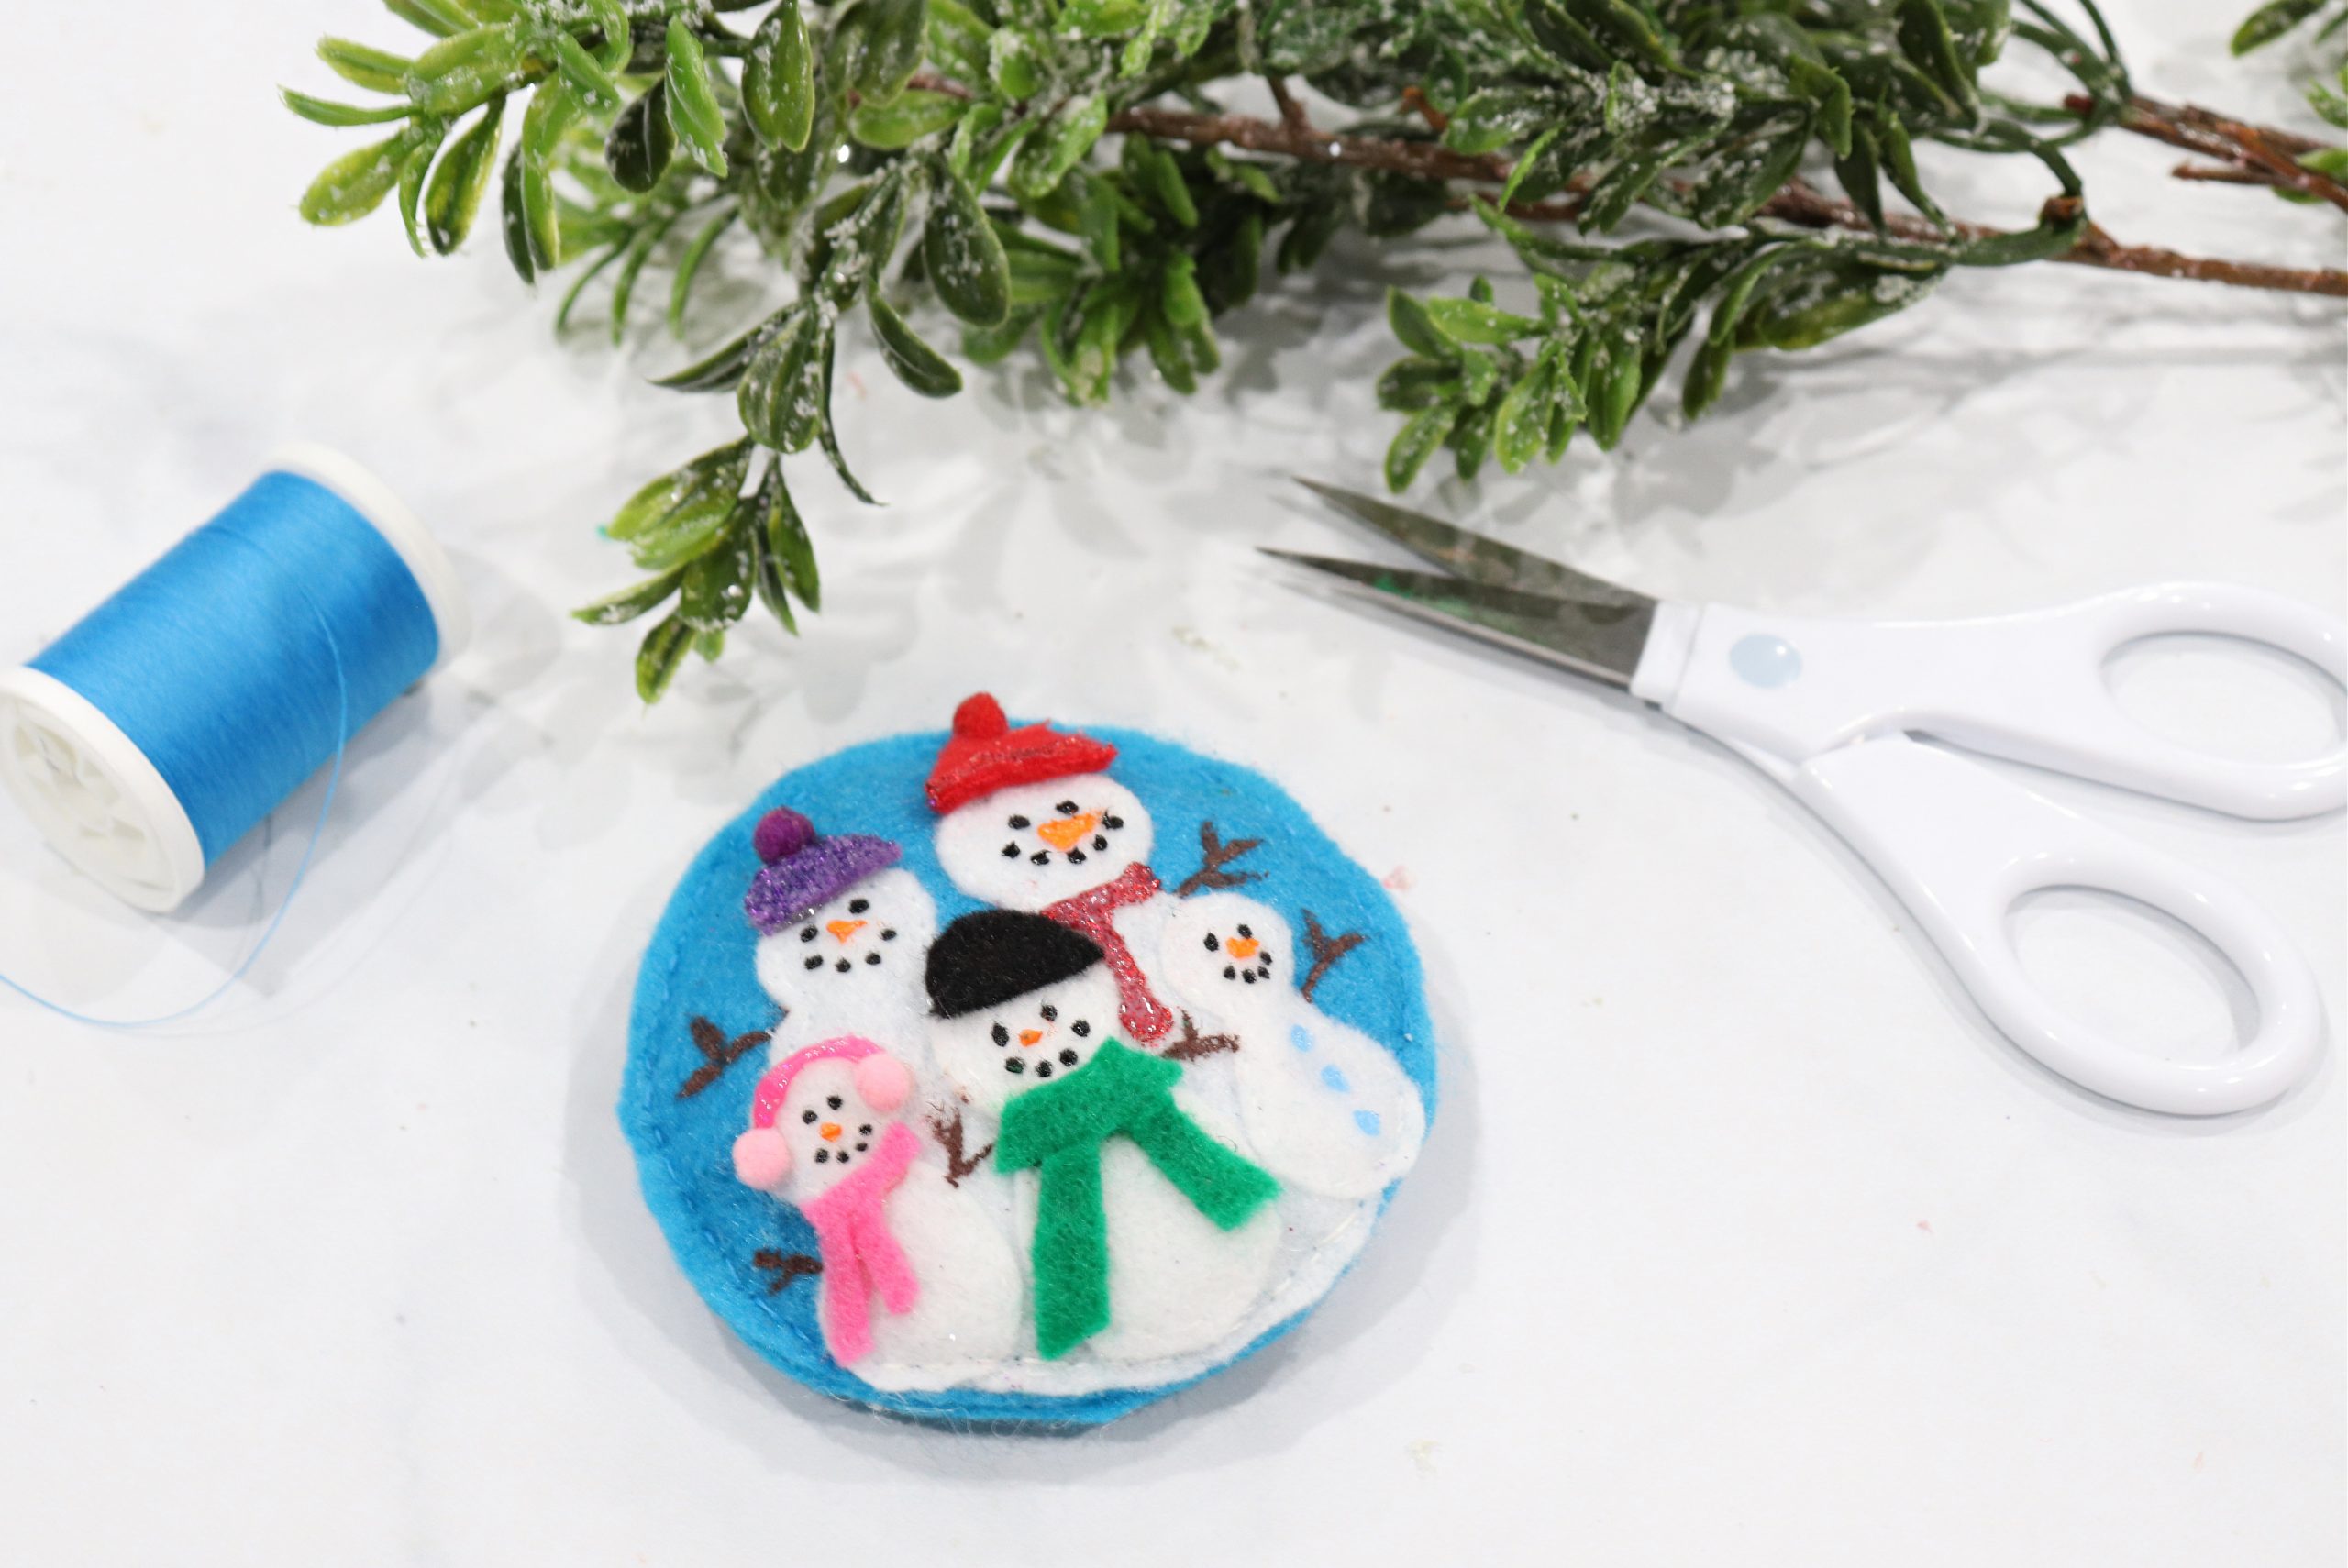
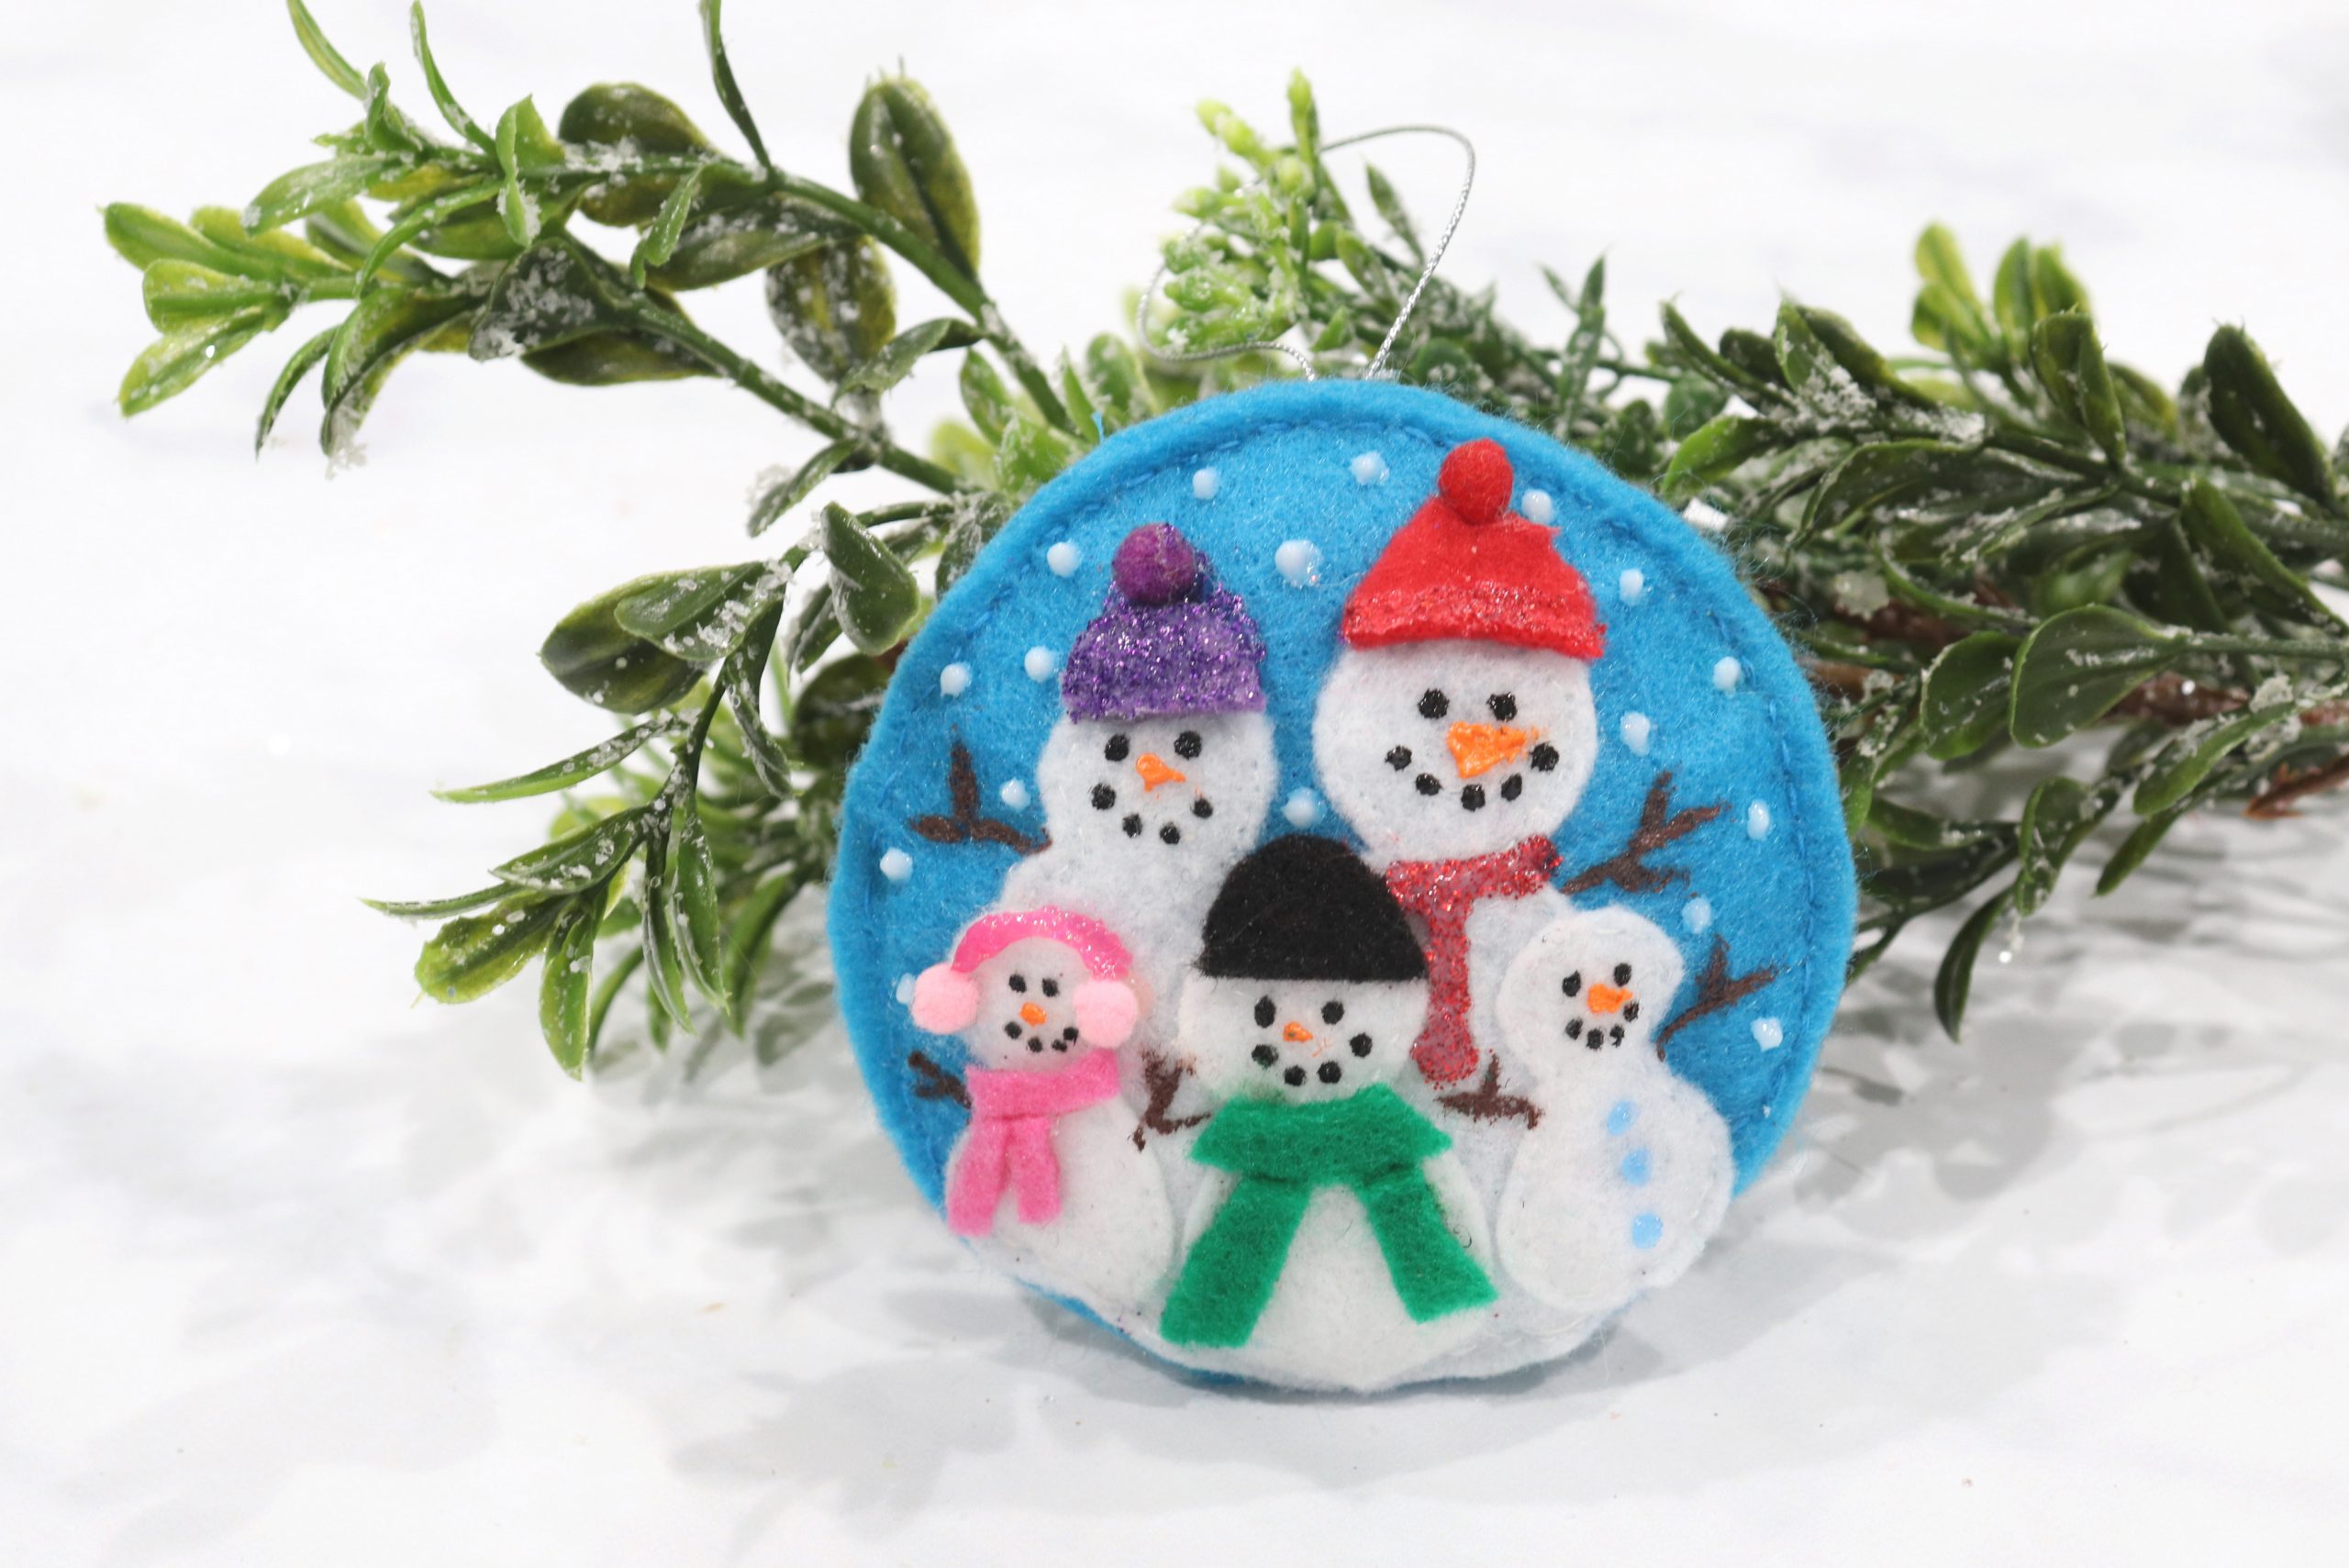
Step 3: Add details and embellishments to your snowmen.
I wanted to make these snowmen (at least three of them) like the actual ones the characters built in the movie, so I made sure one had pink earmuffs, one had a red hat and scarf, and one had a black hat with a green scarf. I took some creative license with the other two, adding a purple hat for one and blue buttons for the other.
To create these embellishments, I used several different materials. First, I cut small scraps of felt to be hats and scarves. Tiny pom poms made perfect earmuffs and a hat topper. Finally, I used fabric paint to create faces, stick arms, and to add glittery accents.
Step 4: Place the second felt circle underneath the first one and hand stitch around the edge of the blue part to attach the two circles together.
Make sure to leave the bottom section (where the white snowmen bottoms are) open.
Step 5: Stuff the center of the ornament with a small amount of Poly-fil. Then, hand stitch the bottom of the ornament closed.
Step 6: Attach a piece of cord or ribbon to the back of the ornament with glue.
This Snowman Family Ornament was so much fun to create and personalize, and it can also easily be adapted to represent your own family. If you create your own, I’d love to see how it turns out! Be sure to share photos of your latest projects in the Amy Latta & Friends Facebook Group so we can all be inspired.
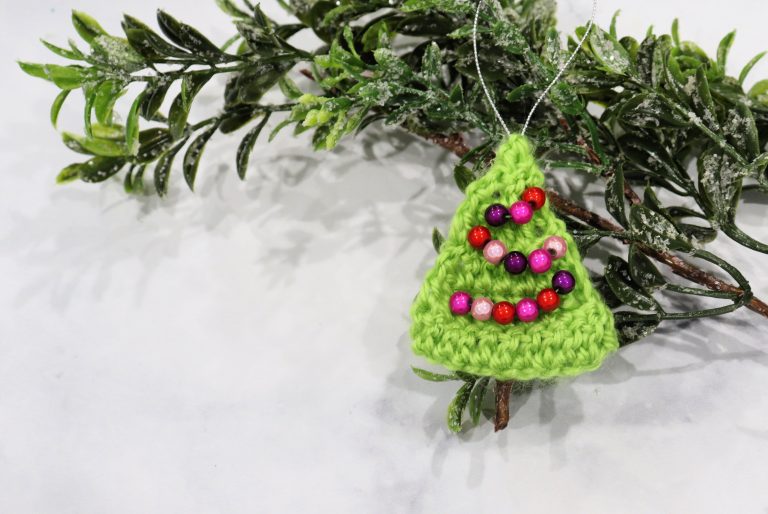
Be sure to check out the other ornaments in this series that I’ve created based on the Hallmark Countdown to Christmas! Click on the movie title to see the ornament tutorial for each one.
Jingle Bell Bride Chateau Christmas
One Royal Holiday On the 12th Date of Christmas
Never Kiss a Man in a Christmas Sweater
CHRISTMAS IN VIENNA
A TIMELESS CHRISTMAS A NASHVILLE CHRISTMAS CAROL
THE CHRISTMAS HOUSE HEART OF THE HOLIDAYS
A CHRISTMAS TREE GROWS IN COLORADO
GOOD MORNING, CHRISTMAS CHRISTMAS BY STARLIGHT
FIVE STAR CHRISTMAS CHRISTMAS WALTZ IF I ONLY HAD CHRISTMAS
CHRISTMAS IN EVERGREEN: BELLS ARE RINGING
CHRISTMAS SHE WROTE LOVE, LIGHTS, HANUKKAH
CHRISTMAS COMES TWICE A CHRISTMAS CAROUSEL
I just confessed to my Facebook world that I am a “Closet Hallmark Christmas movie addict”. I was thrilled to find these creative ornaments inspired by the movies. I posted a link to your blog on my page so other closet addicts can find them and have as much fun as I am having in creating them. Thank you for these wonderful little creative packages of fun. Happy Holidays.