Countdown to Christmas Ornament: A Timeless Christmas
Ryan Paevey and Erin Cahill (two Hallmark actors I really love!) star in tonight’s time-travel romance, A Timeless Christmas. History major Megan, played by Cahill, is a tour guide at Whitley Manor. While showing a group of tourists around the home, she gets a surprise visit from the manor’s original owner, Charles Whitley. At first, she thinks he’s an actor, but she soon realizes that he has traveled there from the early 1900s! Together, the two attempt to figure out how and why he went missing a century ago. (Learn more about the movie here!)
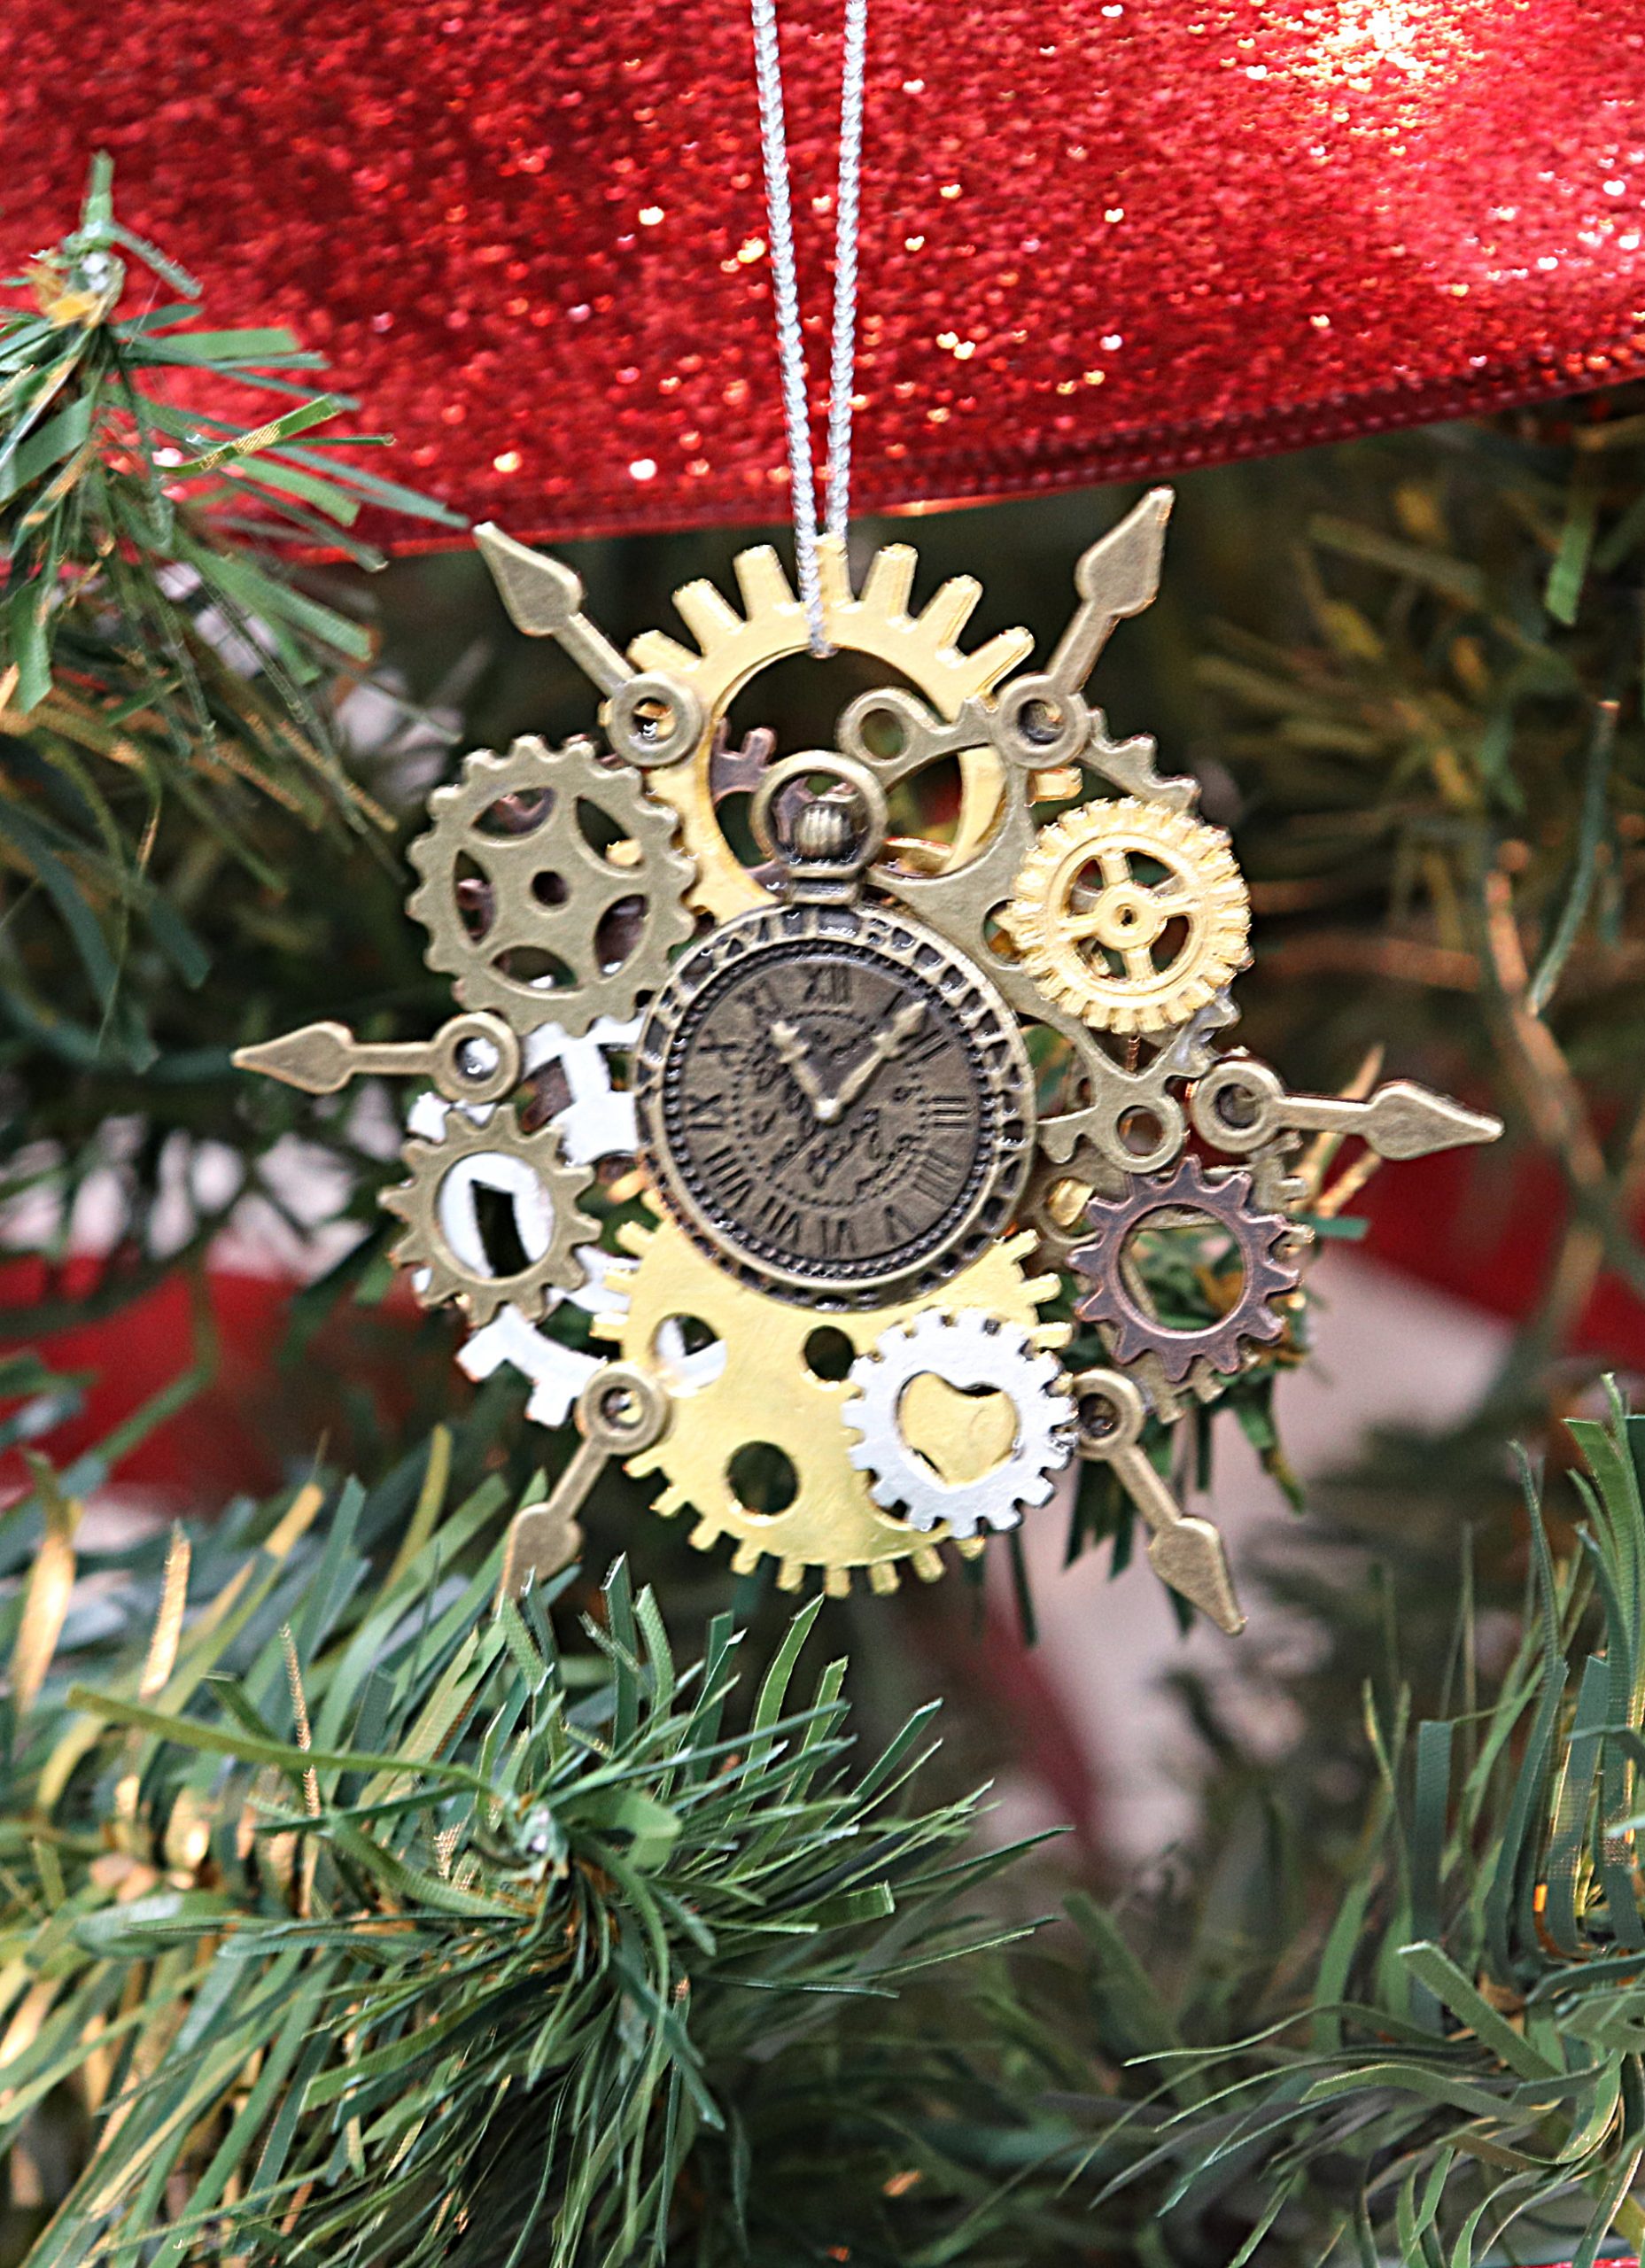
A central image in the movie is the Christmas Clock, which is the means of Charles’ travel through time, so I wanted the ornament to reflect its significance. However, the original clock is beautifully intricate and ornate, which means it would be pretty difficult to recreate in ornament form.
I decided that rather than trying to replicate the actual one from the movie, I’d “think outside the clock” and use some clock and watch gears and pieces instead. This way, you get the idea of time, as well as a great vintage feel, with a lot less effort! Here’s what I did and how you can create your own Timeless Christmas Vintage Clock Ornament.
VINTAGE CLOCK ORNAMENT
I have to admit that when I first got the idea, I wasn’t totally sure how it would turn out, or if the finished project would match the vision I had in my mind. Instead, it turned out even better than I imagined, and I think it may be my favorite ornament in the series so far! Here’s how I made it and you can too!
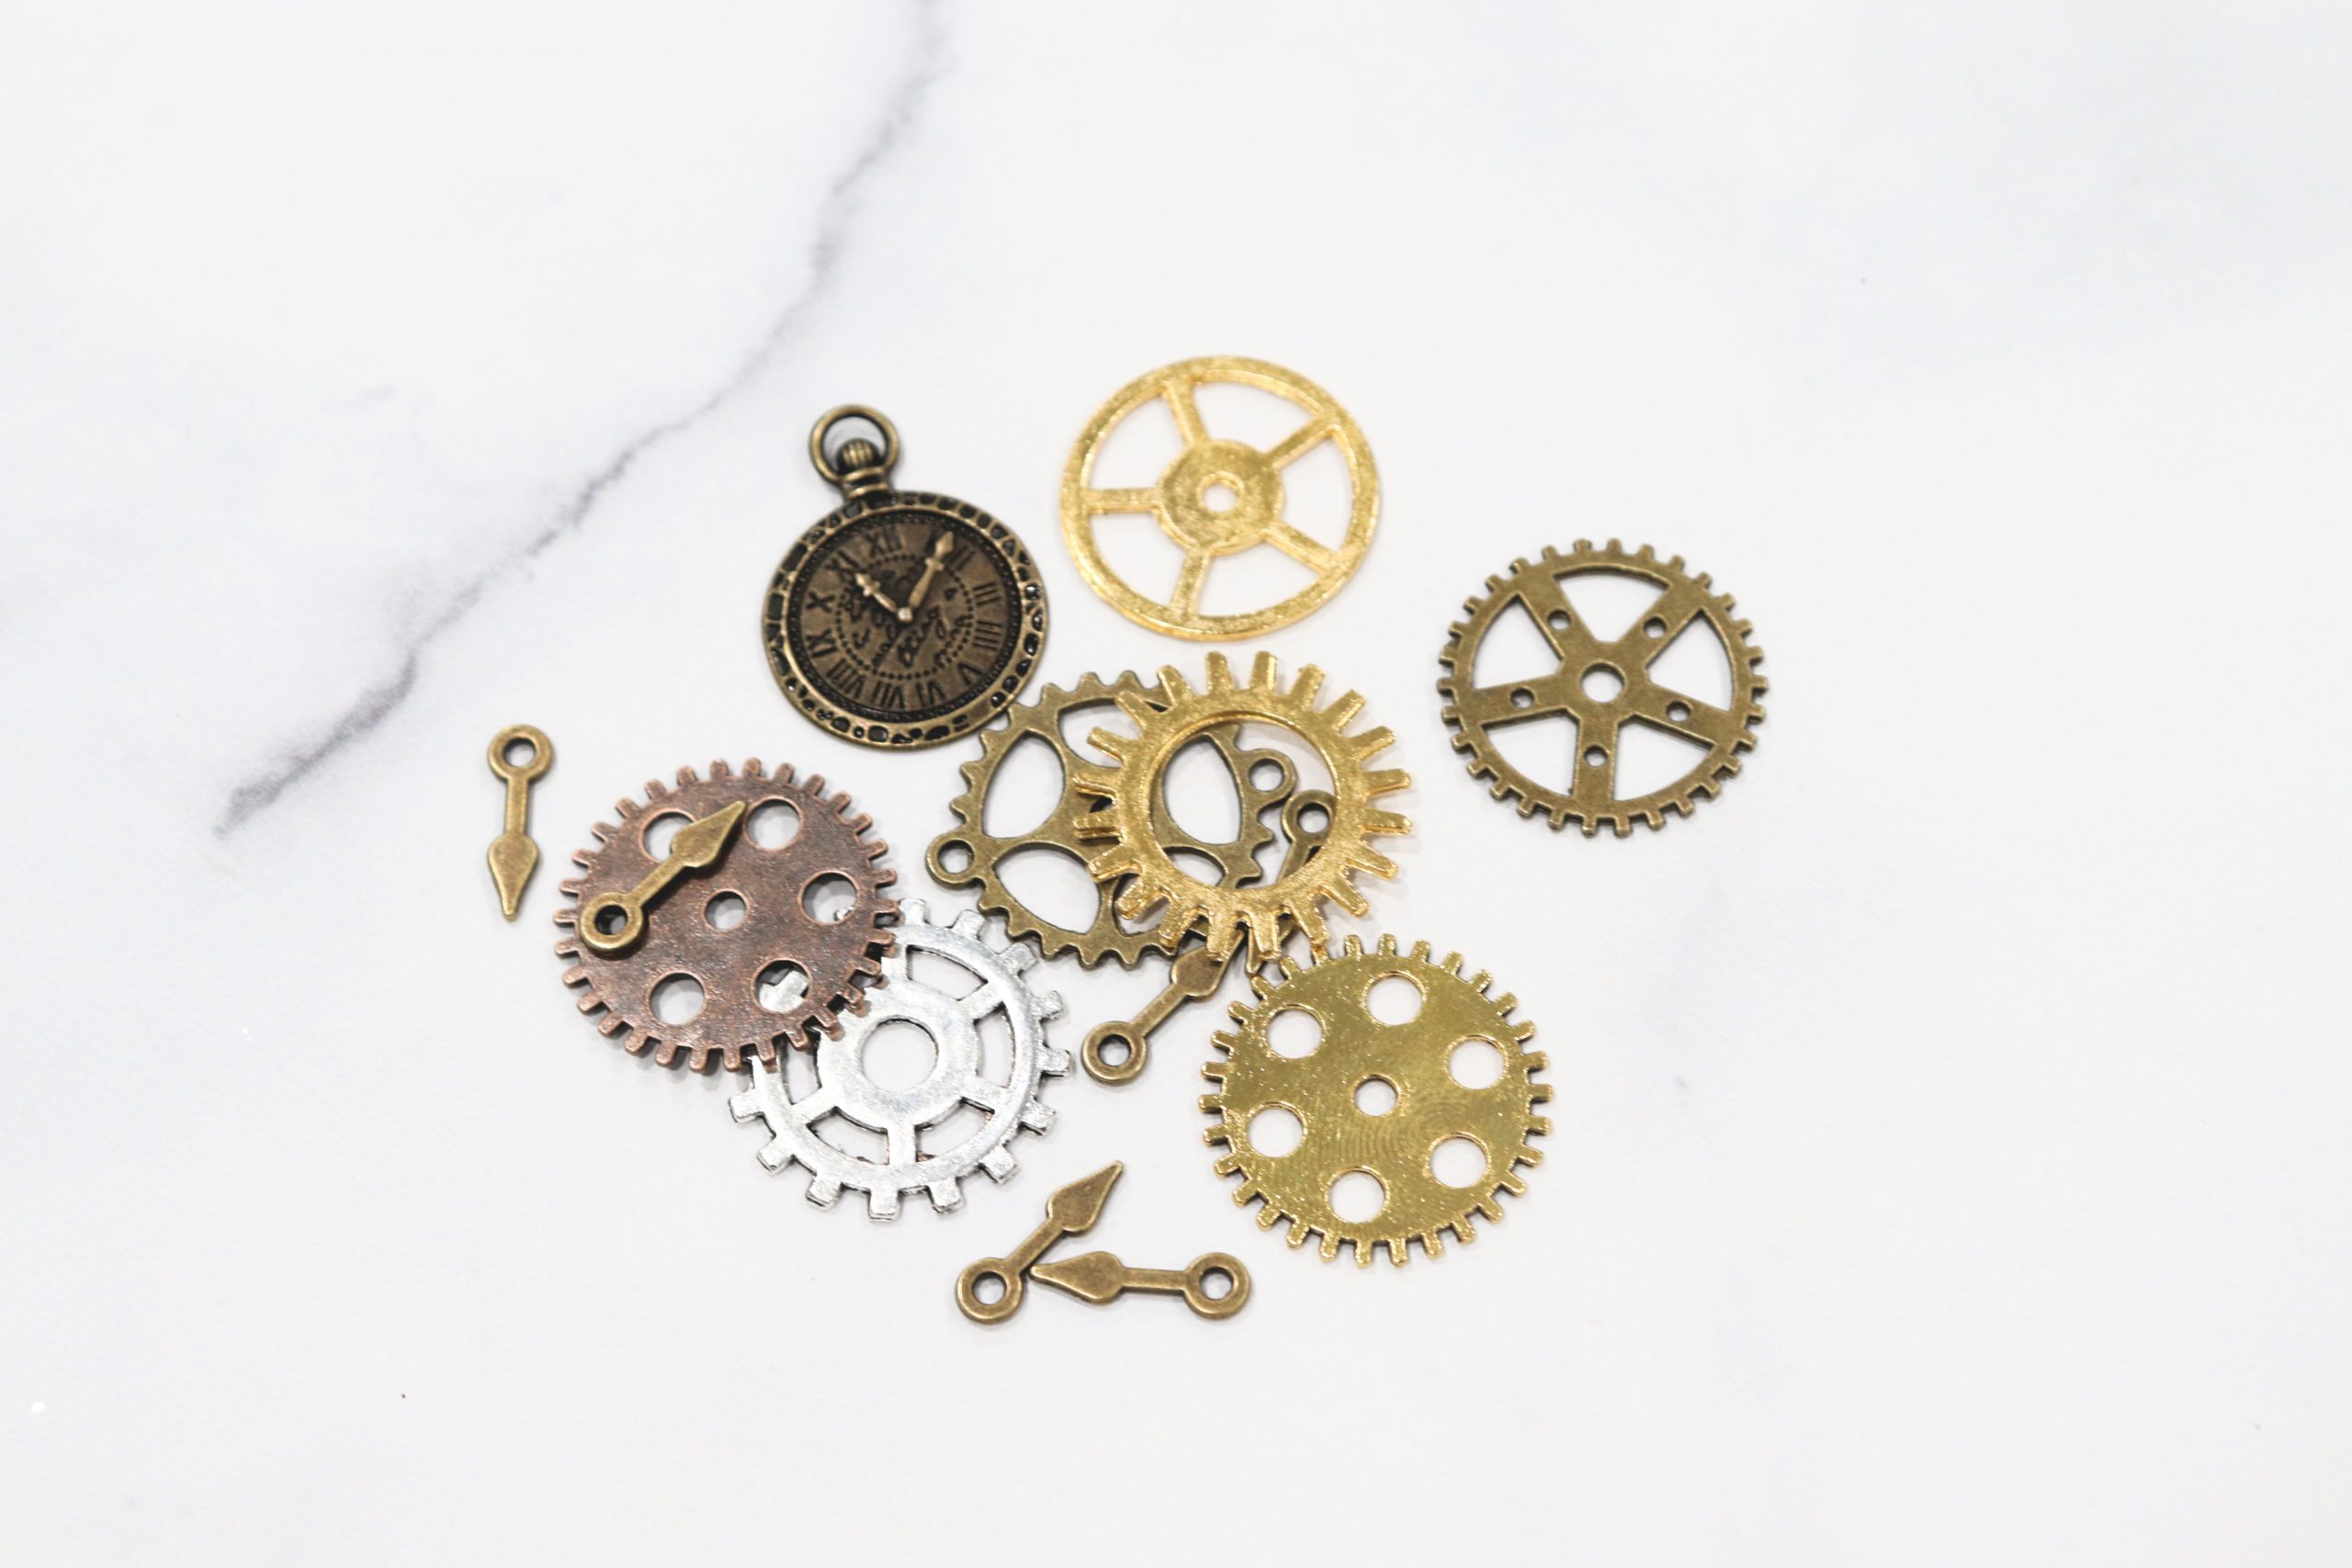
You’ll need:
Clock/watch/gear charms (I specifically used these two packs from Amazon: Clocks & Watches, Wheels & Gears)
Superglue
Cord or ribbon
Scissors
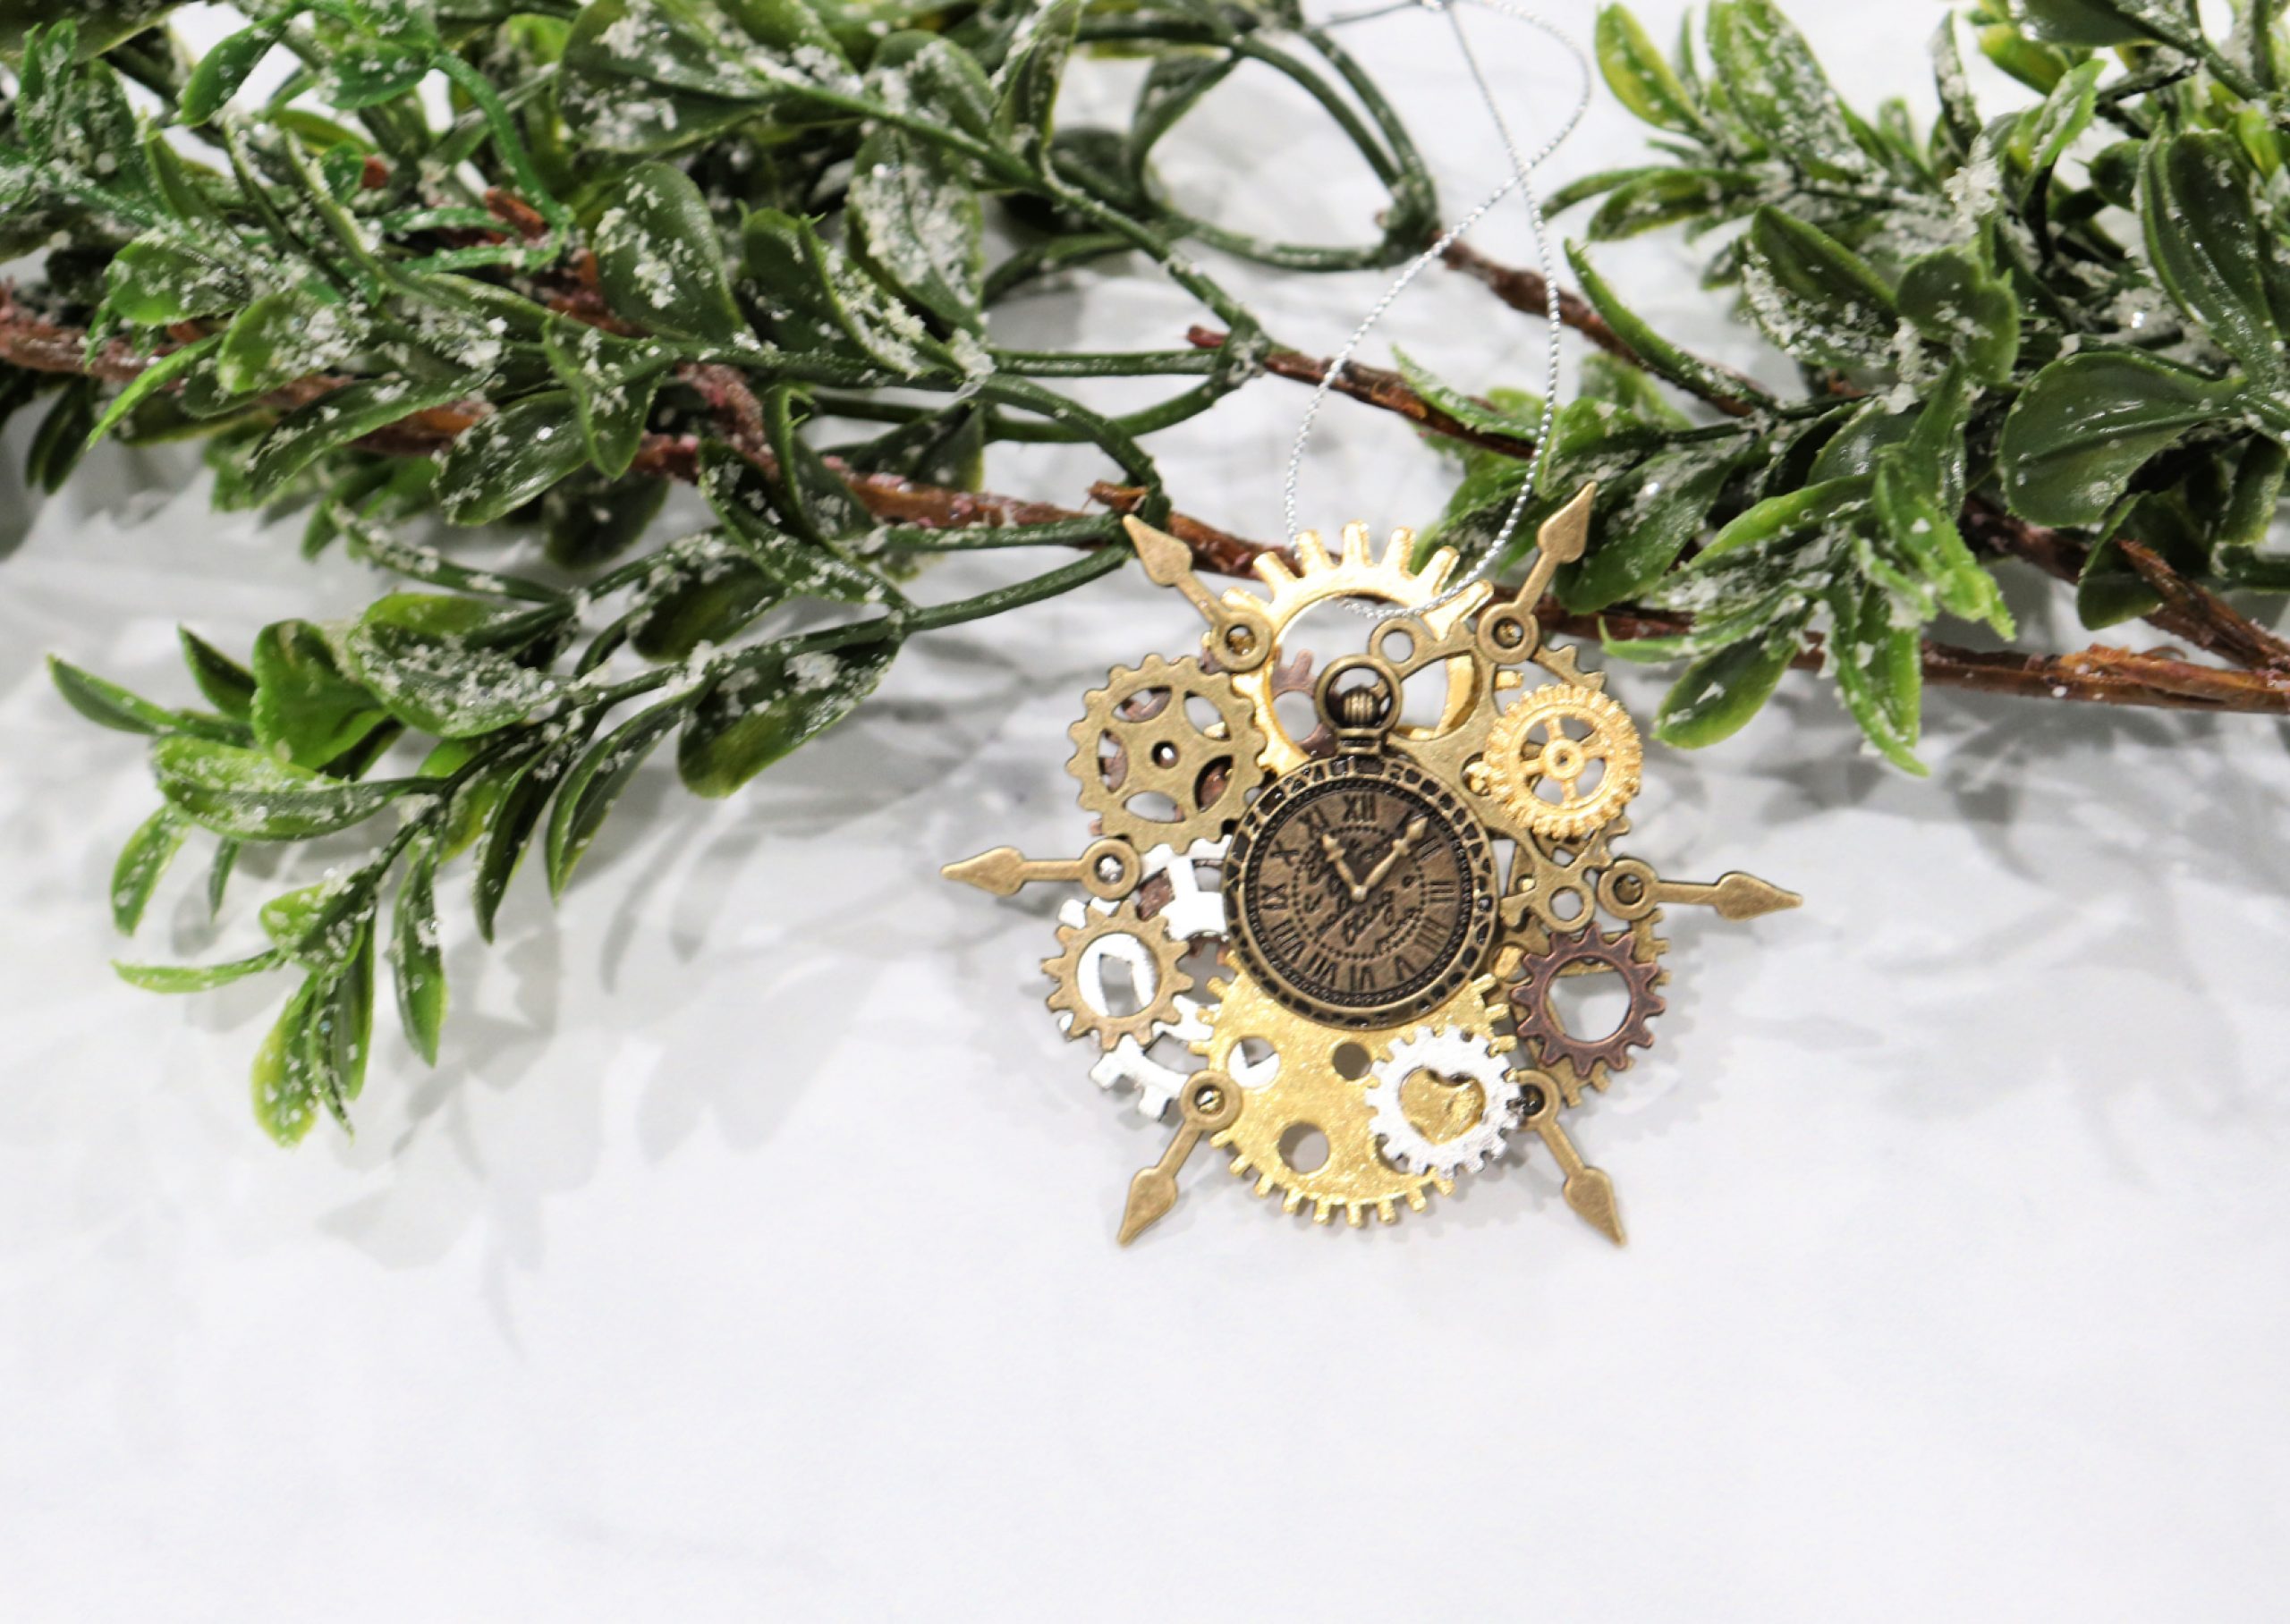
I decided I wanted the ornament to be based on a snowflake shape, built from the clock pieces, and to have a clock face in the center.
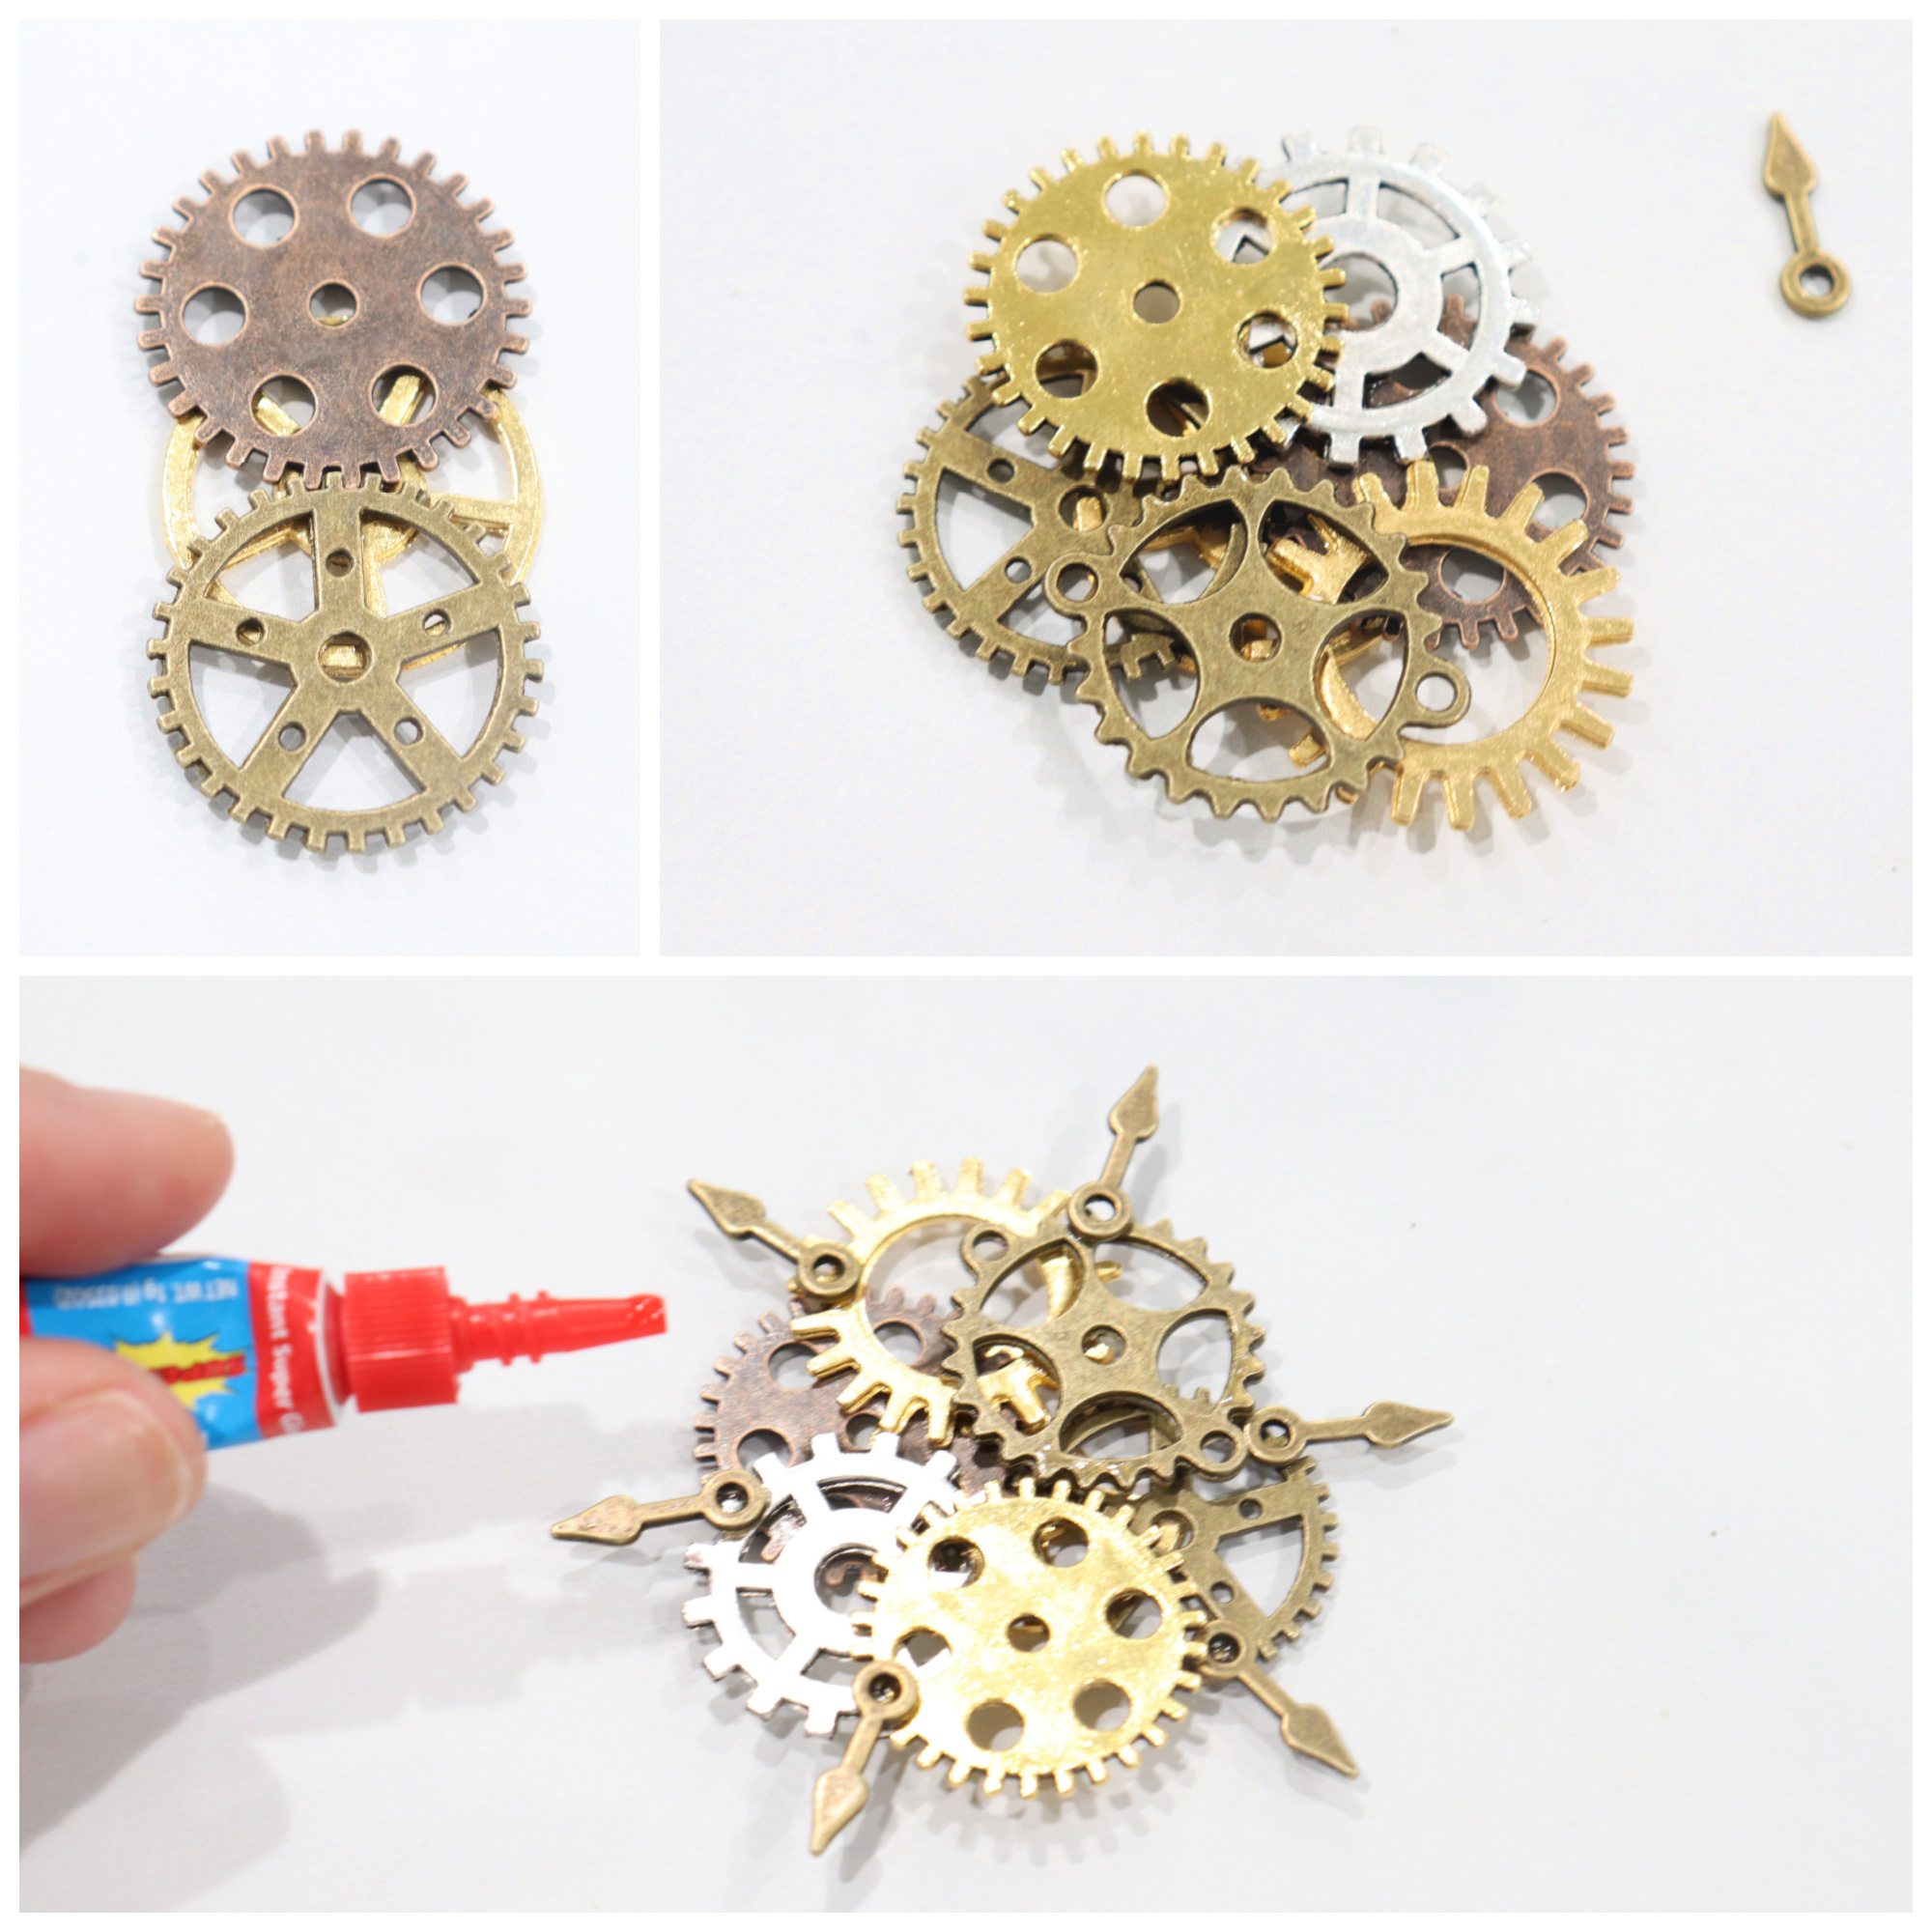
Step 1: Choose a base piece and glue six cogs to it.
I started by placing two, then added two more in between them on each side. I tried to alternate colors and styles to add visual variety.
Step 2: Glue a clock hand in each spot where two cogs come together.
These will be what really gives the suggestion of a snowflake shape.
Step 3: Glue a clock face in the center.
I had lots to choose from in my package, but I went with this antique bronze one with Roman numerals.
Step 4: Fill in the extra space with small cogs.
I added a few little ones just to fill out the shape, once again trying to alternate colors and designs. I love that the silver one in the bottom right has a heart shape…another great tie-in to the movie’s theme!
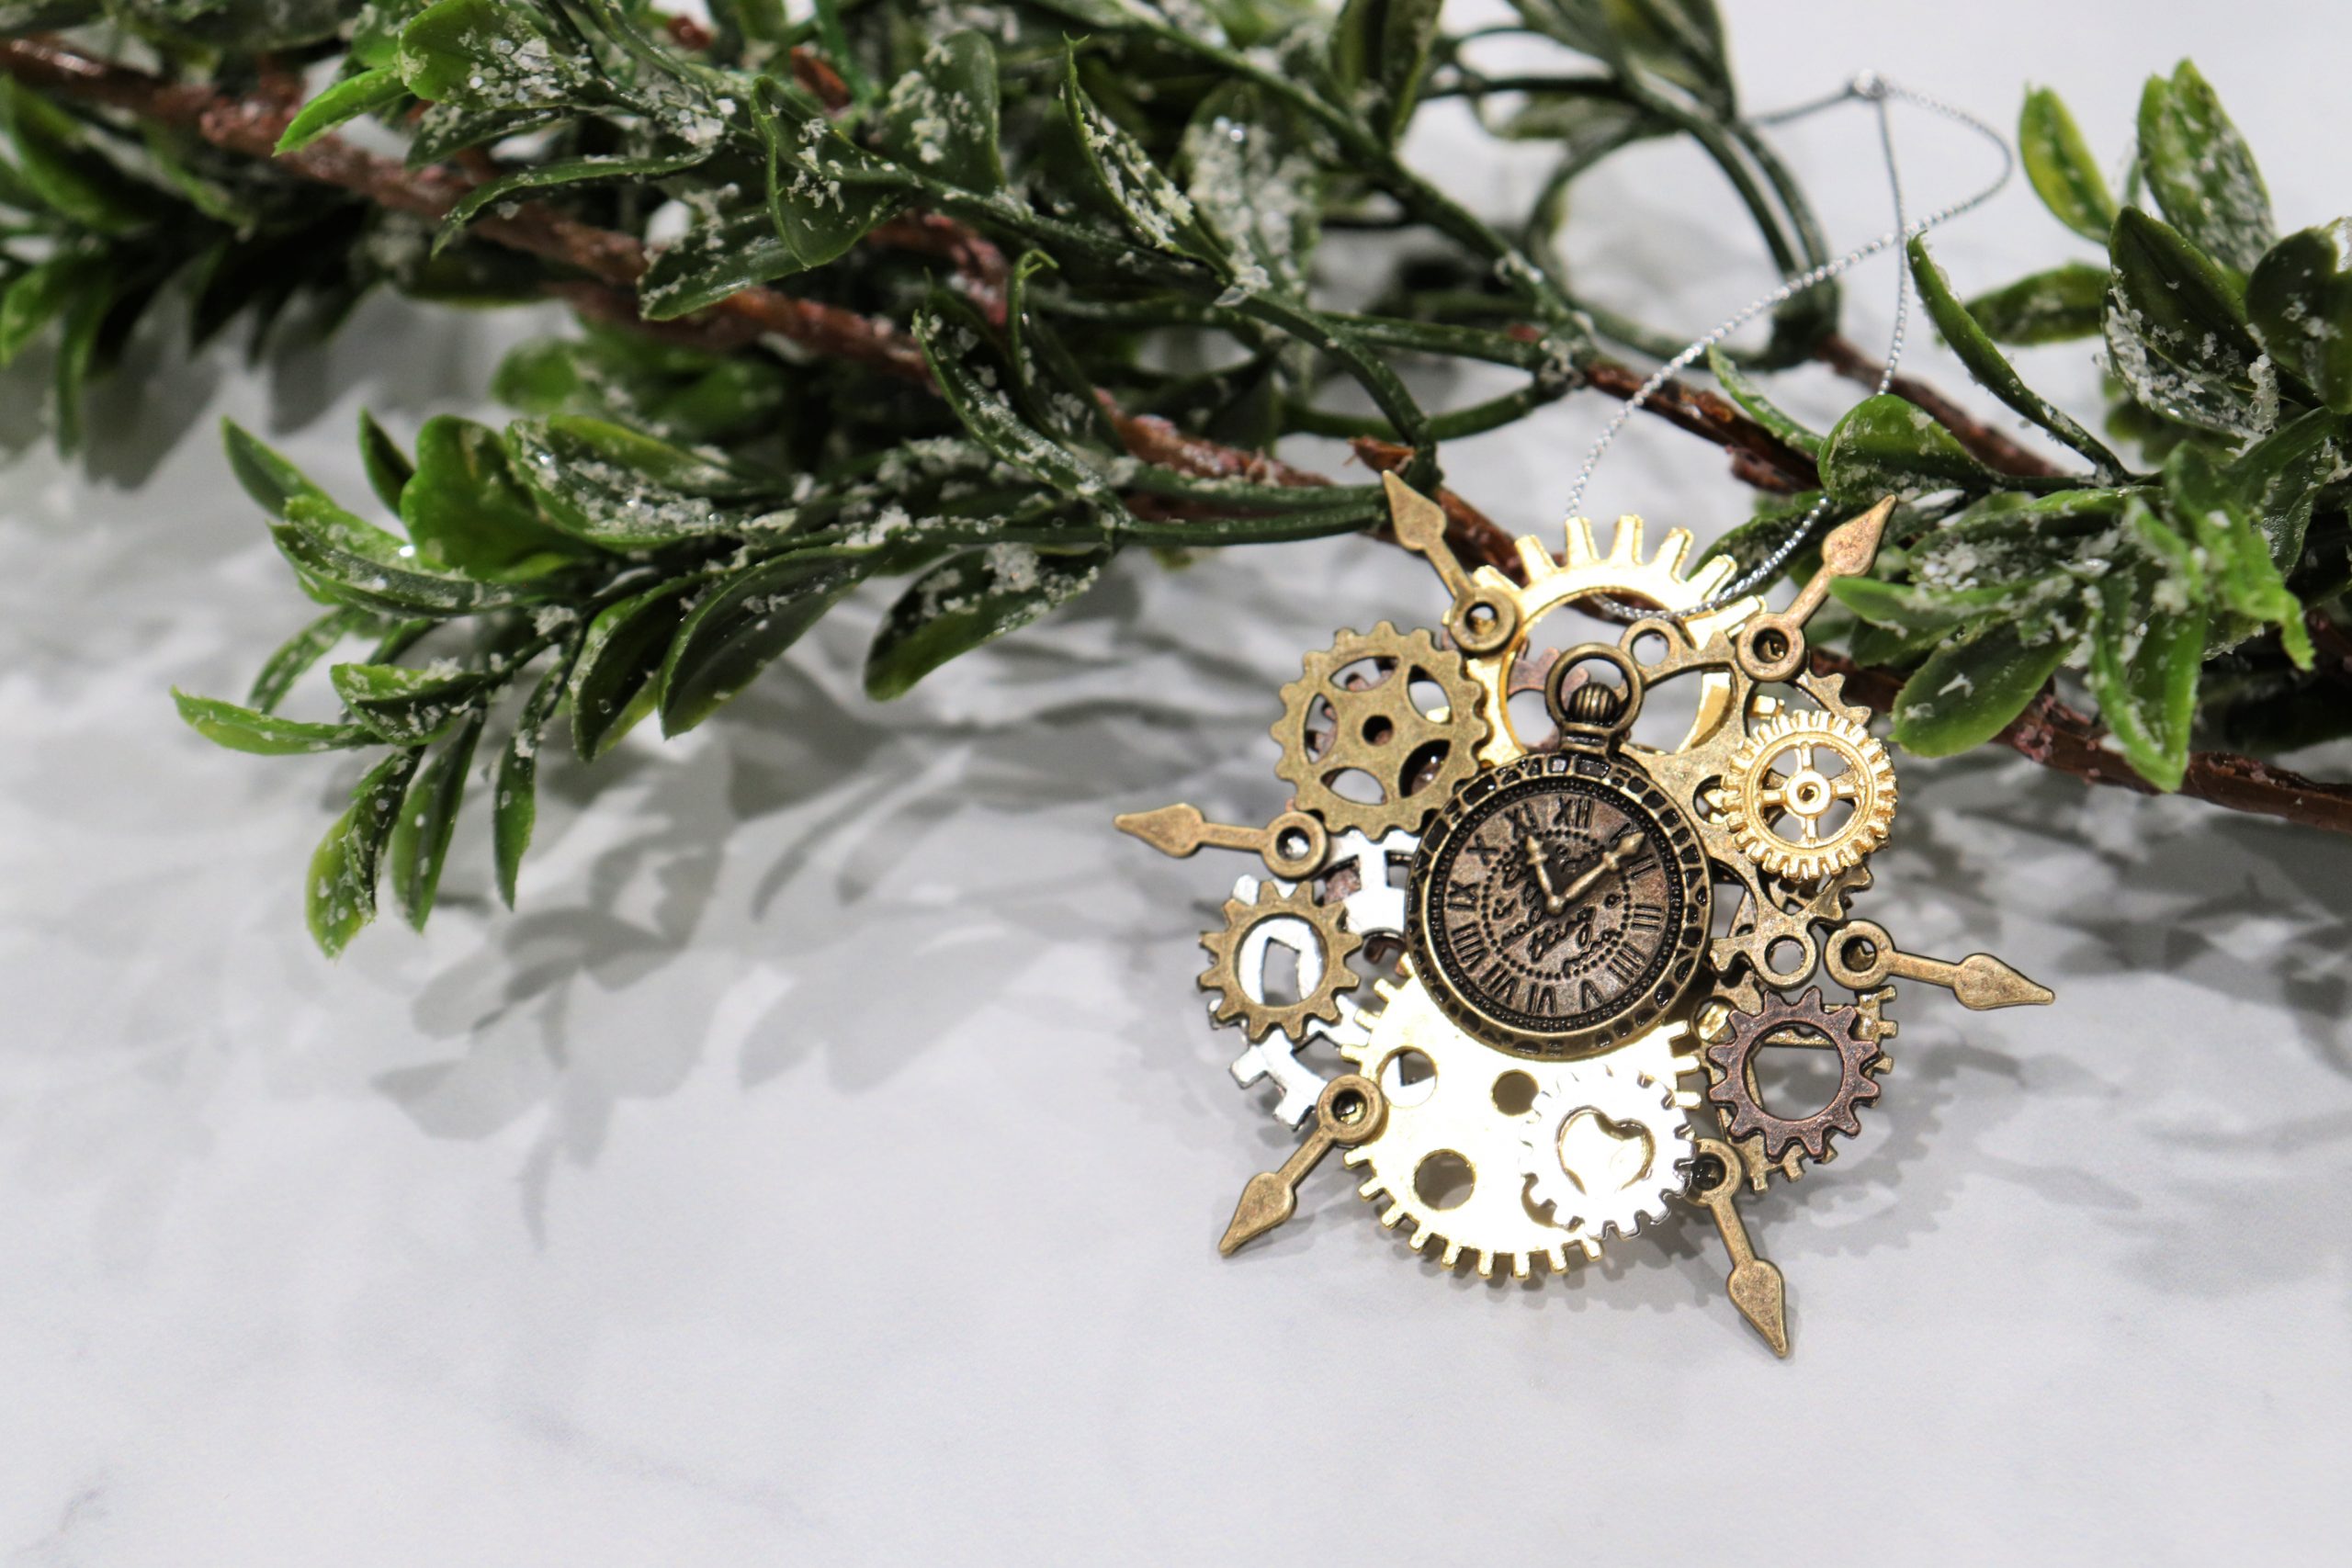
Step 5: Add a hanger.
I just cut a piece of silver cord and tied it to the top cog.
Now your ornament is ready to display!
If you try this project, I’d love to see how your Timeless Christmas Vintage Clock Ornament turns out. Be sure you’re part of the Amy Latta & Friends Facebook group so you can share your holiday project photos with us and we can all be inspired.
Don’t miss the other ornaments in the Hallmark Countdown to Christmas series:
JINGLE BELL BRIDE CHATEAU CHRISTMAS
ONE ROYAL HOLIDAY ON THE 12TH DATE OF CHRISTMAS
NEVER KISS A MAN IN A CHRISTMAS SWEATER
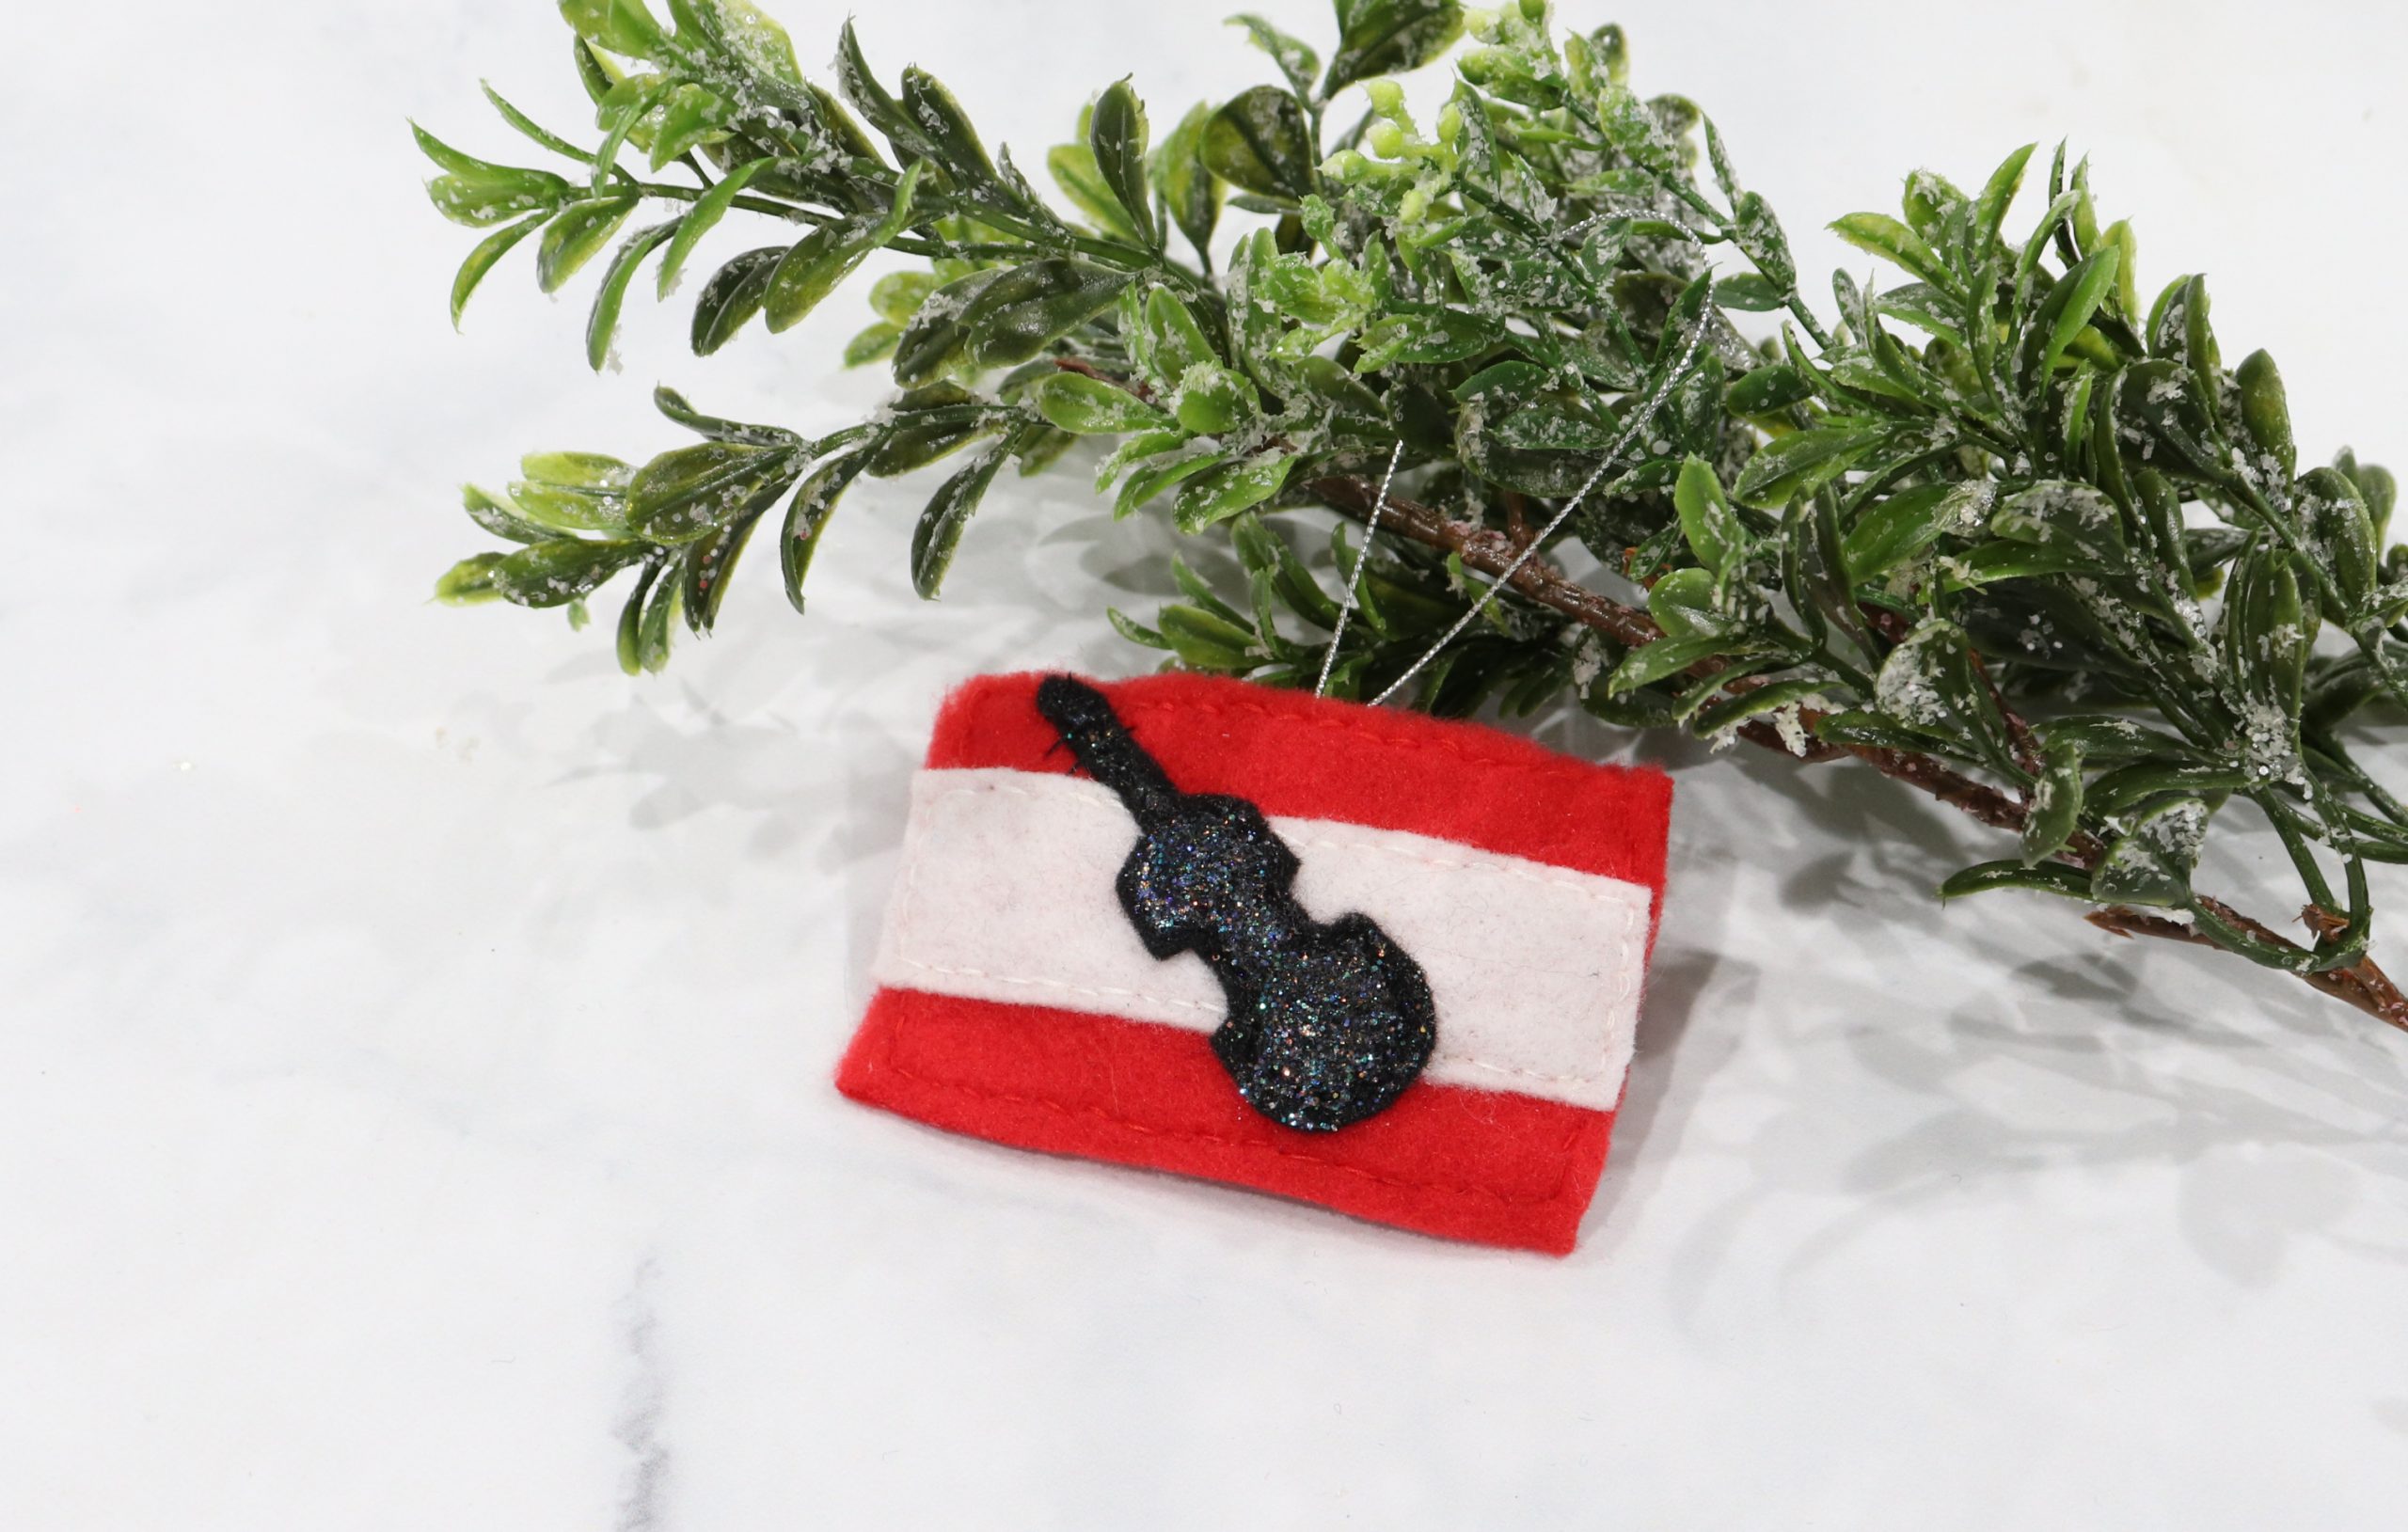
CHRISTMAS WITH THE DARLINGS CHRISTMAS IN VIENNA
A NASHVILLE CHRISTMAS CAROL
THE CHRISTMAS HOUSE HEART OF THE HOLIDAYS
A CHRISTMAS TREE GROWS IN COLORADO
GOOD MORNING, CHRISTMAS CHRISTMAS BY STARLIGHT
FIVE STAR CHRISTMAS CHRISTMAS WALTZ IF I ONLY HAD CHRISTMAS
CHRISTMAS IN EVERGREEN: BELLS ARE RINGING
CHRISTMAS SHE WROTE LOVE, LIGHTS, HANUKKAH
CHRISTMAS COMES TWICE A CHRISTMAS CAROUSEL
If you like this project, make sure to save it to Pinterest and/or share it with a friend!


This is so cool Amy and I think I have all of these components in my stash….the benefits of being a craft supply hoarder! Pinned and on my list of things for this season!