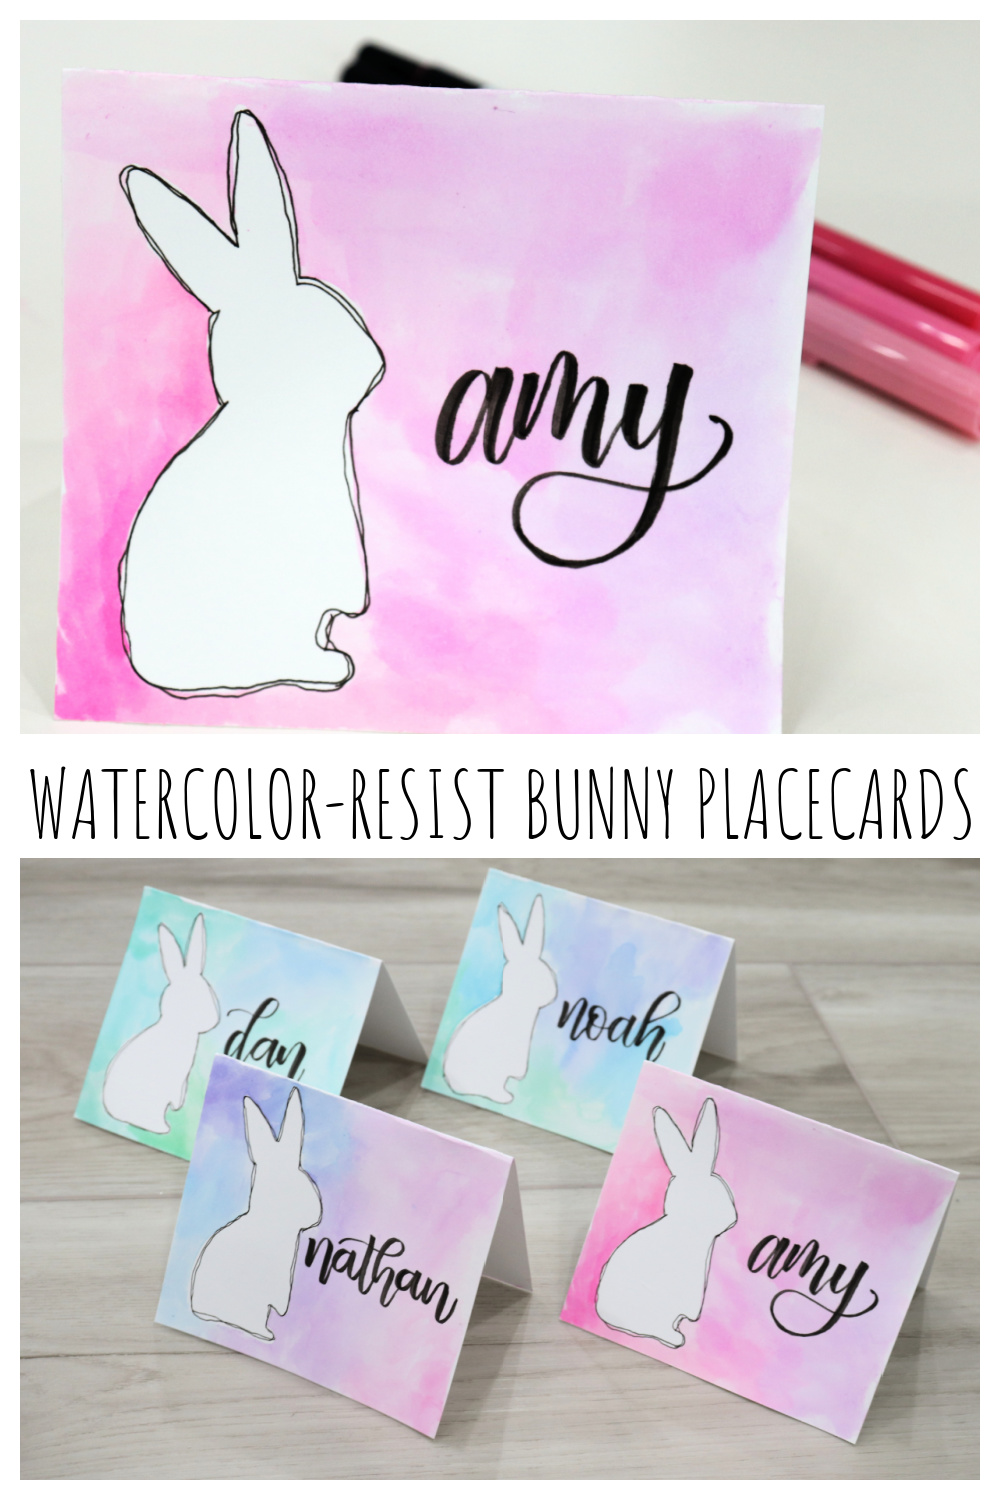
Watercolor-Resist Bunny Placecards (With Markers!)
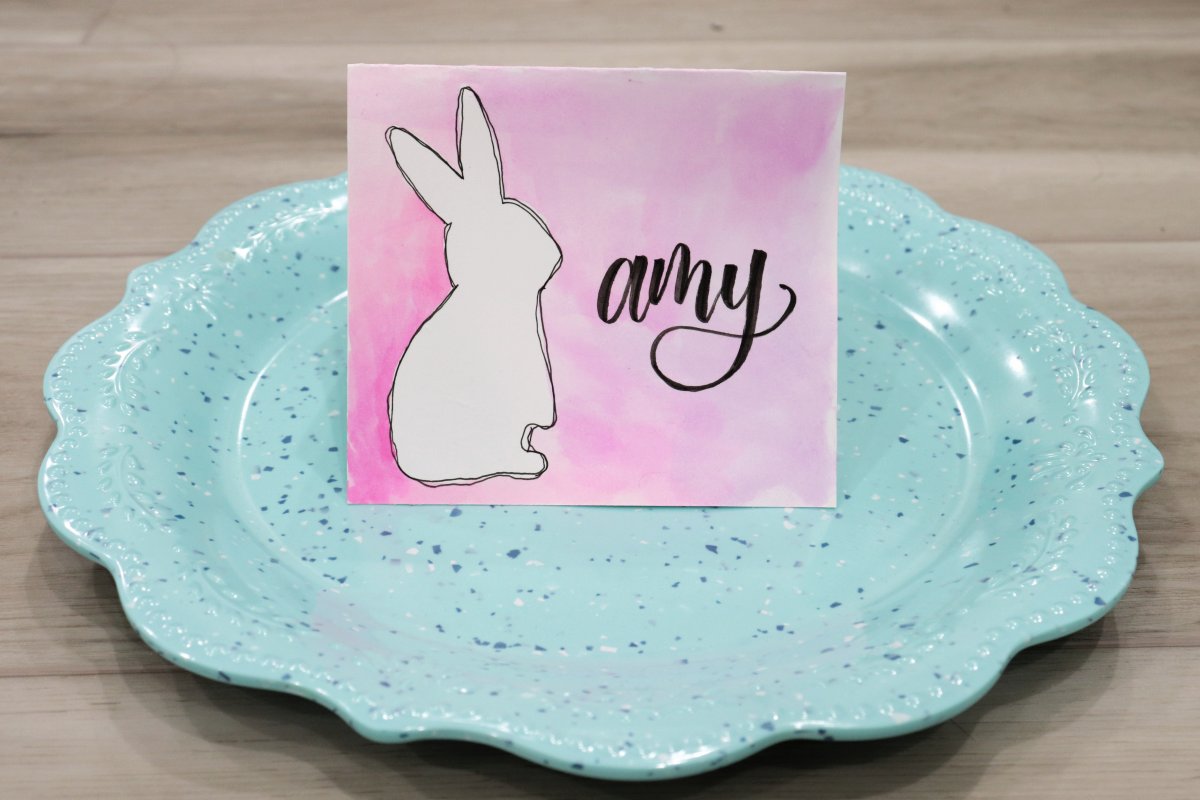
Want to a festive touch to your Easter table? Try these Watercolor-Resist Bunny Placecards! Believe it or not, they’re made with markers, not paint, and they’re lots of fun for crafters of all ages.
You’ll need:
Bristol Board or hot press watercolor paper
Removable vinyl, any color
Cutting machine or scissors (I used the Cricut Maker 3)
Water-based markers (I used Tombow Dual Brush Pens)
Paintbrush and water OR Water Brush
Non-absorbent surface (a plastic baggie or a piece of laminated cardstock will work)
Fine tip black drawing pen (I used Tombow Mono Drawing Pen 02)
Black brush pen (I used a Tombow Fudenosuke)
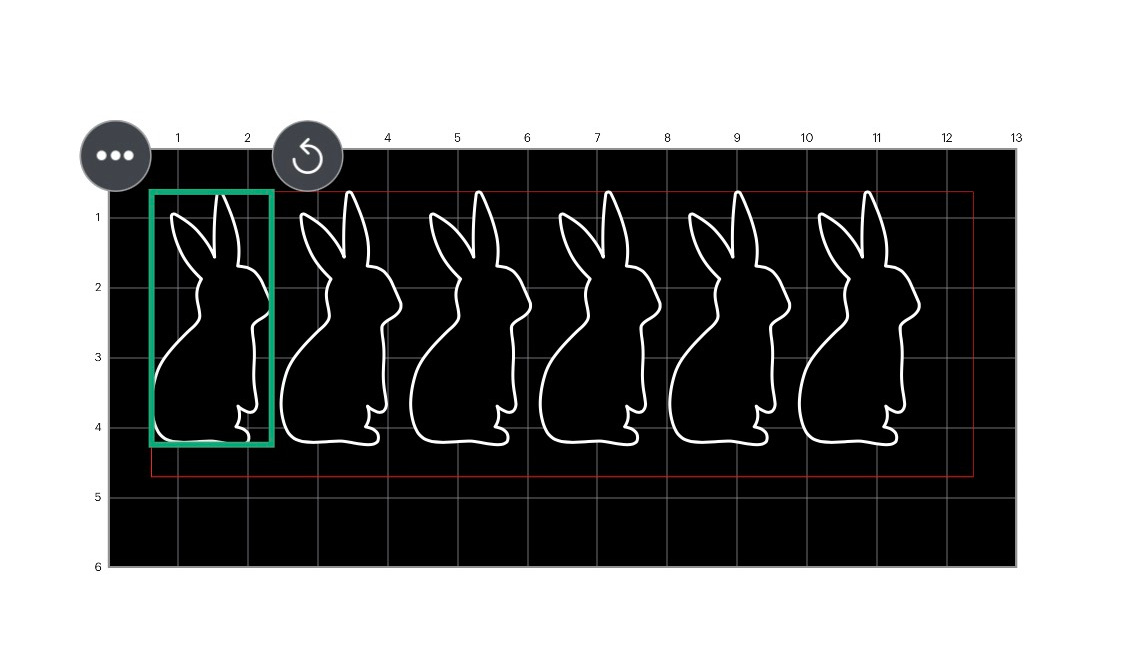
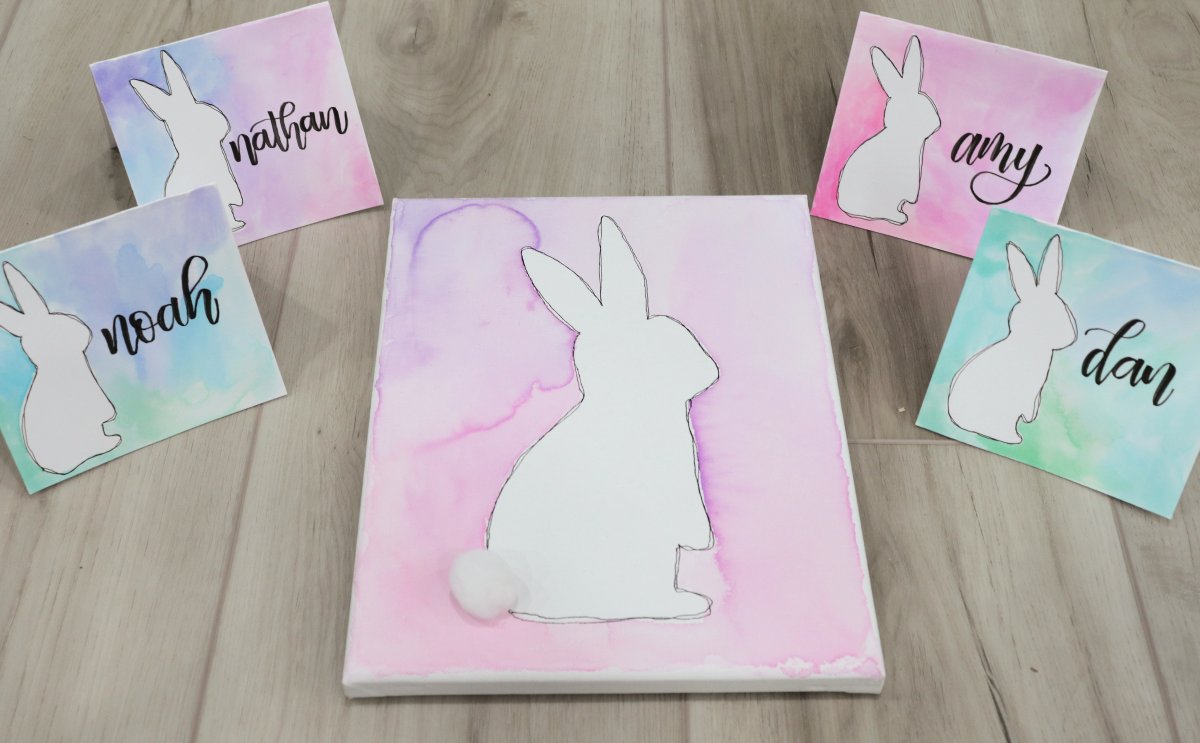
Step 1: Cut your shape from removable vinyl.
The particular shape I used is from the Cricut Design Space app, called Bunny #M33BB6A74. I sized it to 3.75″ and duplicated it so that I had multiple stickers to work with. If you don’t have an electronic cutting machine, you can certainly cut a shape by hand using scissors.
Step 2: Cut a piece of Bristol Board for your place card and apply the sticker wherever you like.
I cut my Bristol Board into pieces that were 4.5″ x 8″ and folded them in half so that they measure 4.5″ x 4.” Then, I applied the sticker to the left side of the front. The purpose of the sticker is to resist the color we are about to apply, keeping the Bristol Board underneath it white.
Step 3: Apply watercolor to the surface of the Bristol Board.
This is the really fun part! Scribble with your markers on the non-absorbent surface. Rather than soaking in, the ink will sit on top of it. Now, pick up that ink with a wet paintbrush or aqua pen. This will allow you to “paint” with the marker ink! Mix together different shades of the same color, or try adding in complimentary colors. For some of mine, I used pinks and purples; for others I used greens, blues, and purples. Fill the entire front of the place card with colors.
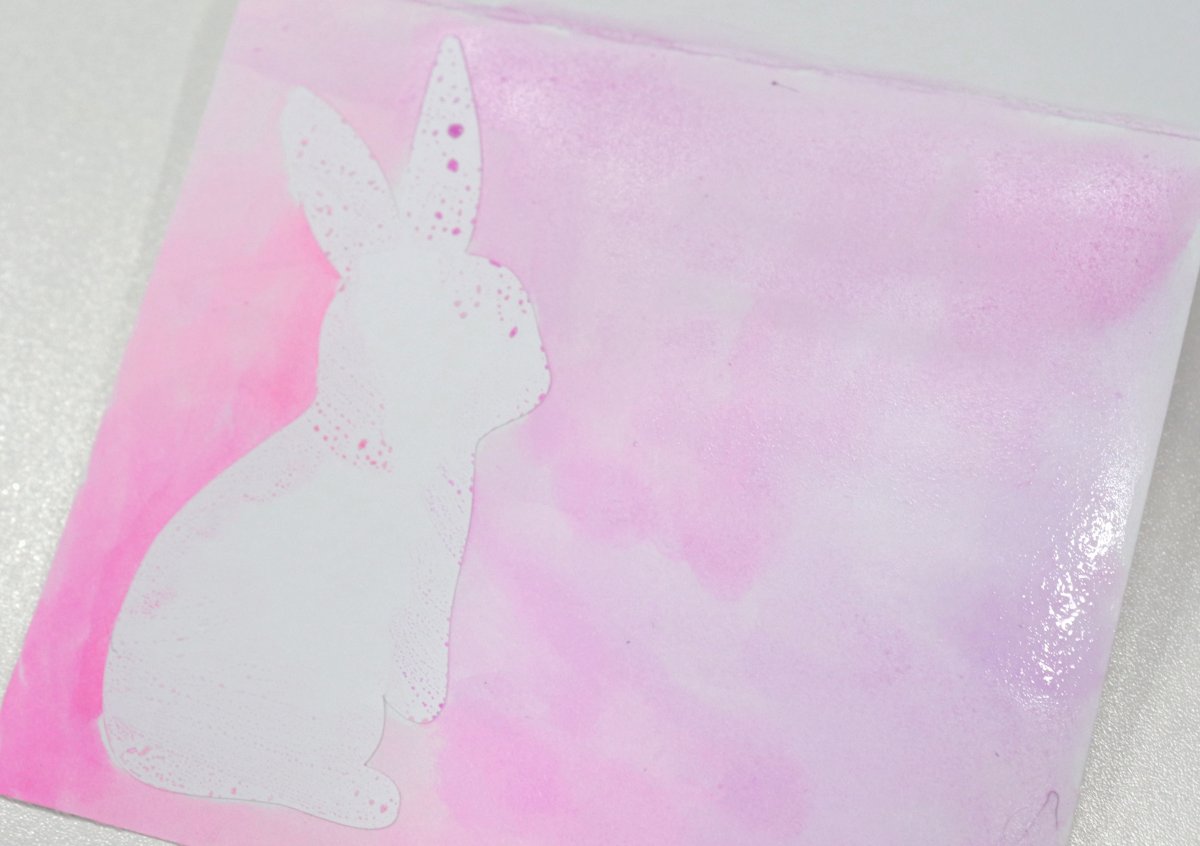
Step 4: Carefully remove the vinyl.
This will reveal a white space shaped like the sticker. Let the color dry completely before moving on.

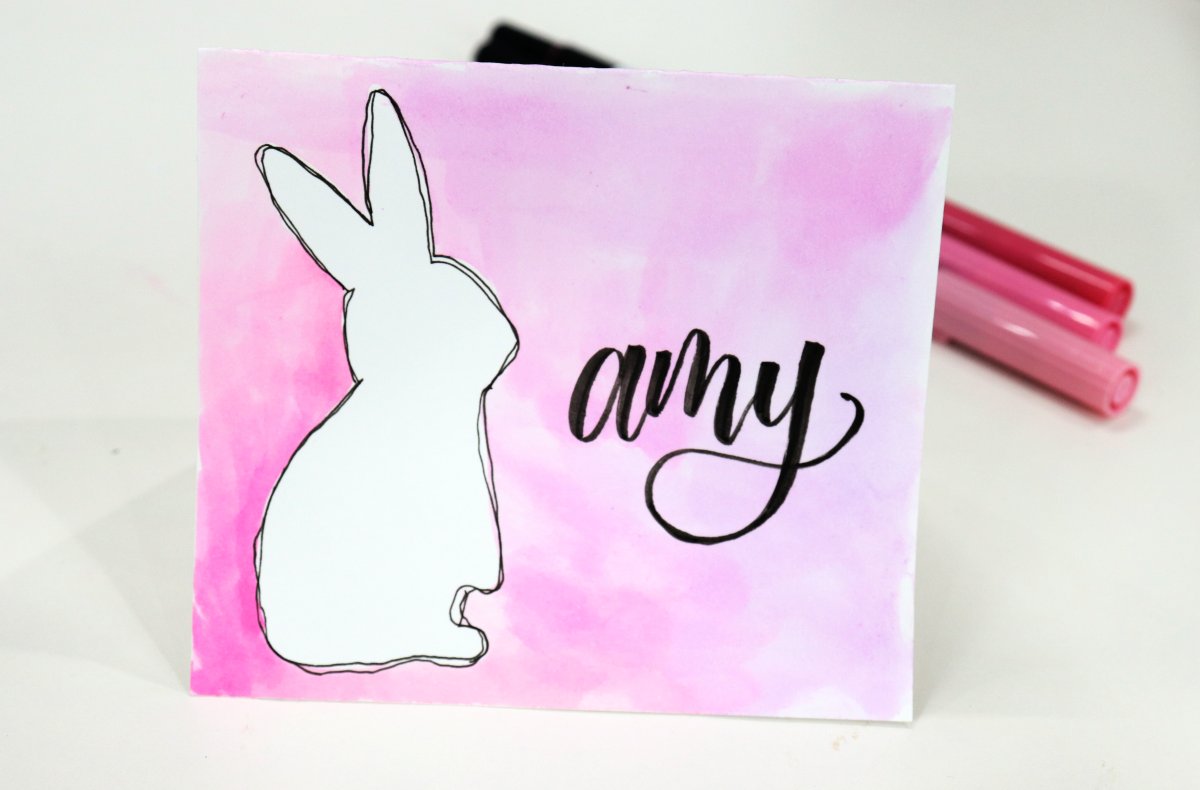
Step 5: Trace the shape with a fine tip drawing pen.
I traced around it twice, purposely allowing my lines to separate and overlap to give a hand-drawn look. Make sure that the pen you are using is either permanent or pigment-based, like the Tombow Mono Drawing Pens; otherwise it will bleed into the watercolor background.
Step 6: Write a name or message next to the bunny.
I made place cards, so I wrote our names on them, but you could also write a “Happy Easter” message and give this as a greeting card instead! For more about brush lettering and faux calligraphy, check out my lettering tutorial posts and/or my books. Make sure that the marker you use for this step is also permanent or pigment-based, like the Tombow Fudenosuke, so it doesn’t bleed.
My favorite thing about this project is that each place card ends up looking totally unique because of the different color blends. It’s hard to pick a favorite!
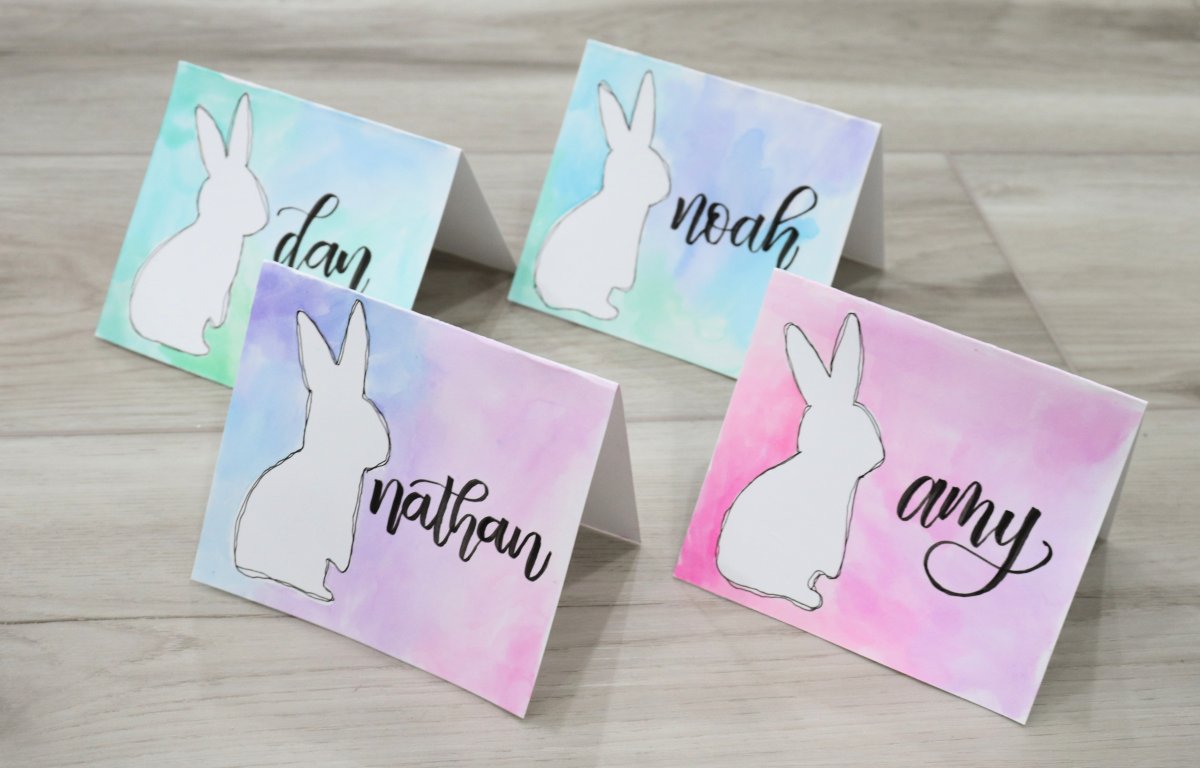
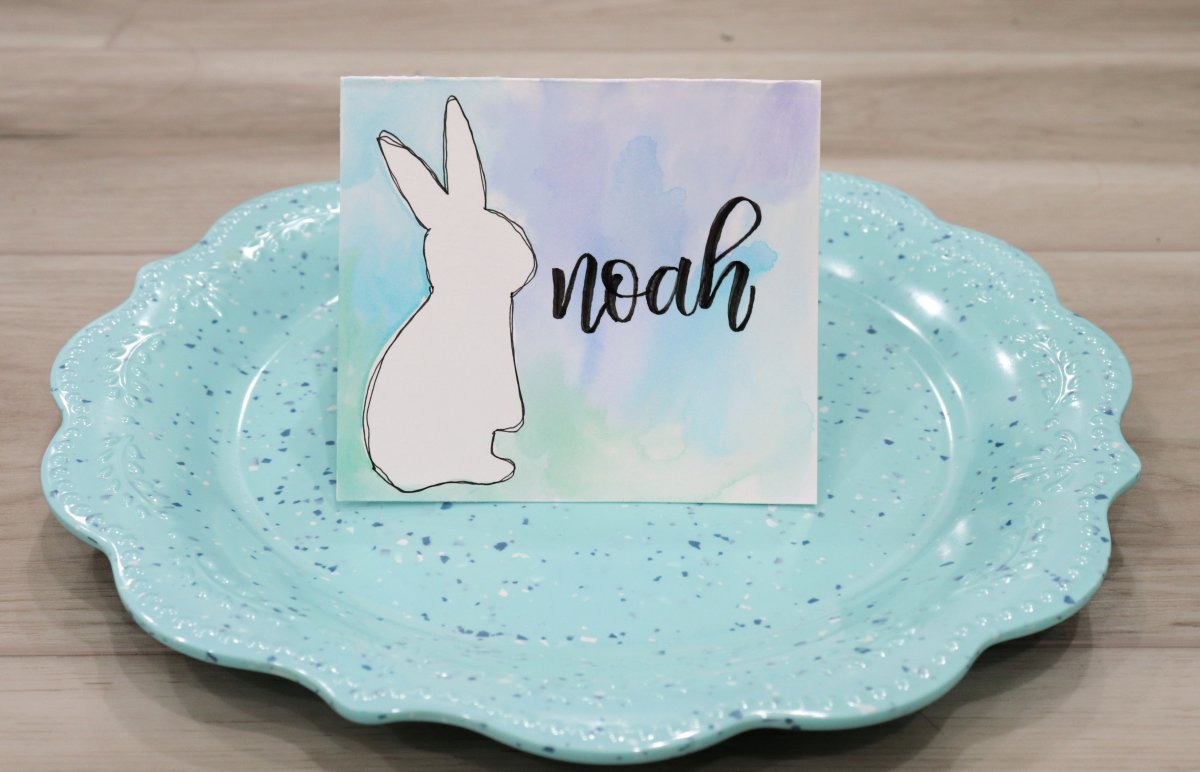
These will look so cute on the dinner table, and they’re sure to be a hit with your guests.
If you enjoy this technique, you can try it on other surfaces too, like a canvas. If you want, you can even add a pom-pom tail!
Whether you make place cards, greeting cards, canvases, bookmarks, or something else, I hope you enjoy this watercolor-resist technique! I would love to see what you use it to create. Make sure to join the Amy Latta & Friends Facebook Group so you can share your project photos and we can all be inspired. See you there!