Free Hand Lettering Practice Sheets: E
Can you believe we’re already five letters into our Brush Script Alphabet series? Today, we’re focusing on how to form the Brush Script E in both capital and lowercase. If you’re new to brush lettering, it’s the most popular style of hand lettering, characterized by a combination of thick and thin lines within each letter. These lines are formed by controlling the amount of pressure applied to a brush pen while you write. This month, we’re looking in-depth at each individual letter, and today is E’s moment to shine.
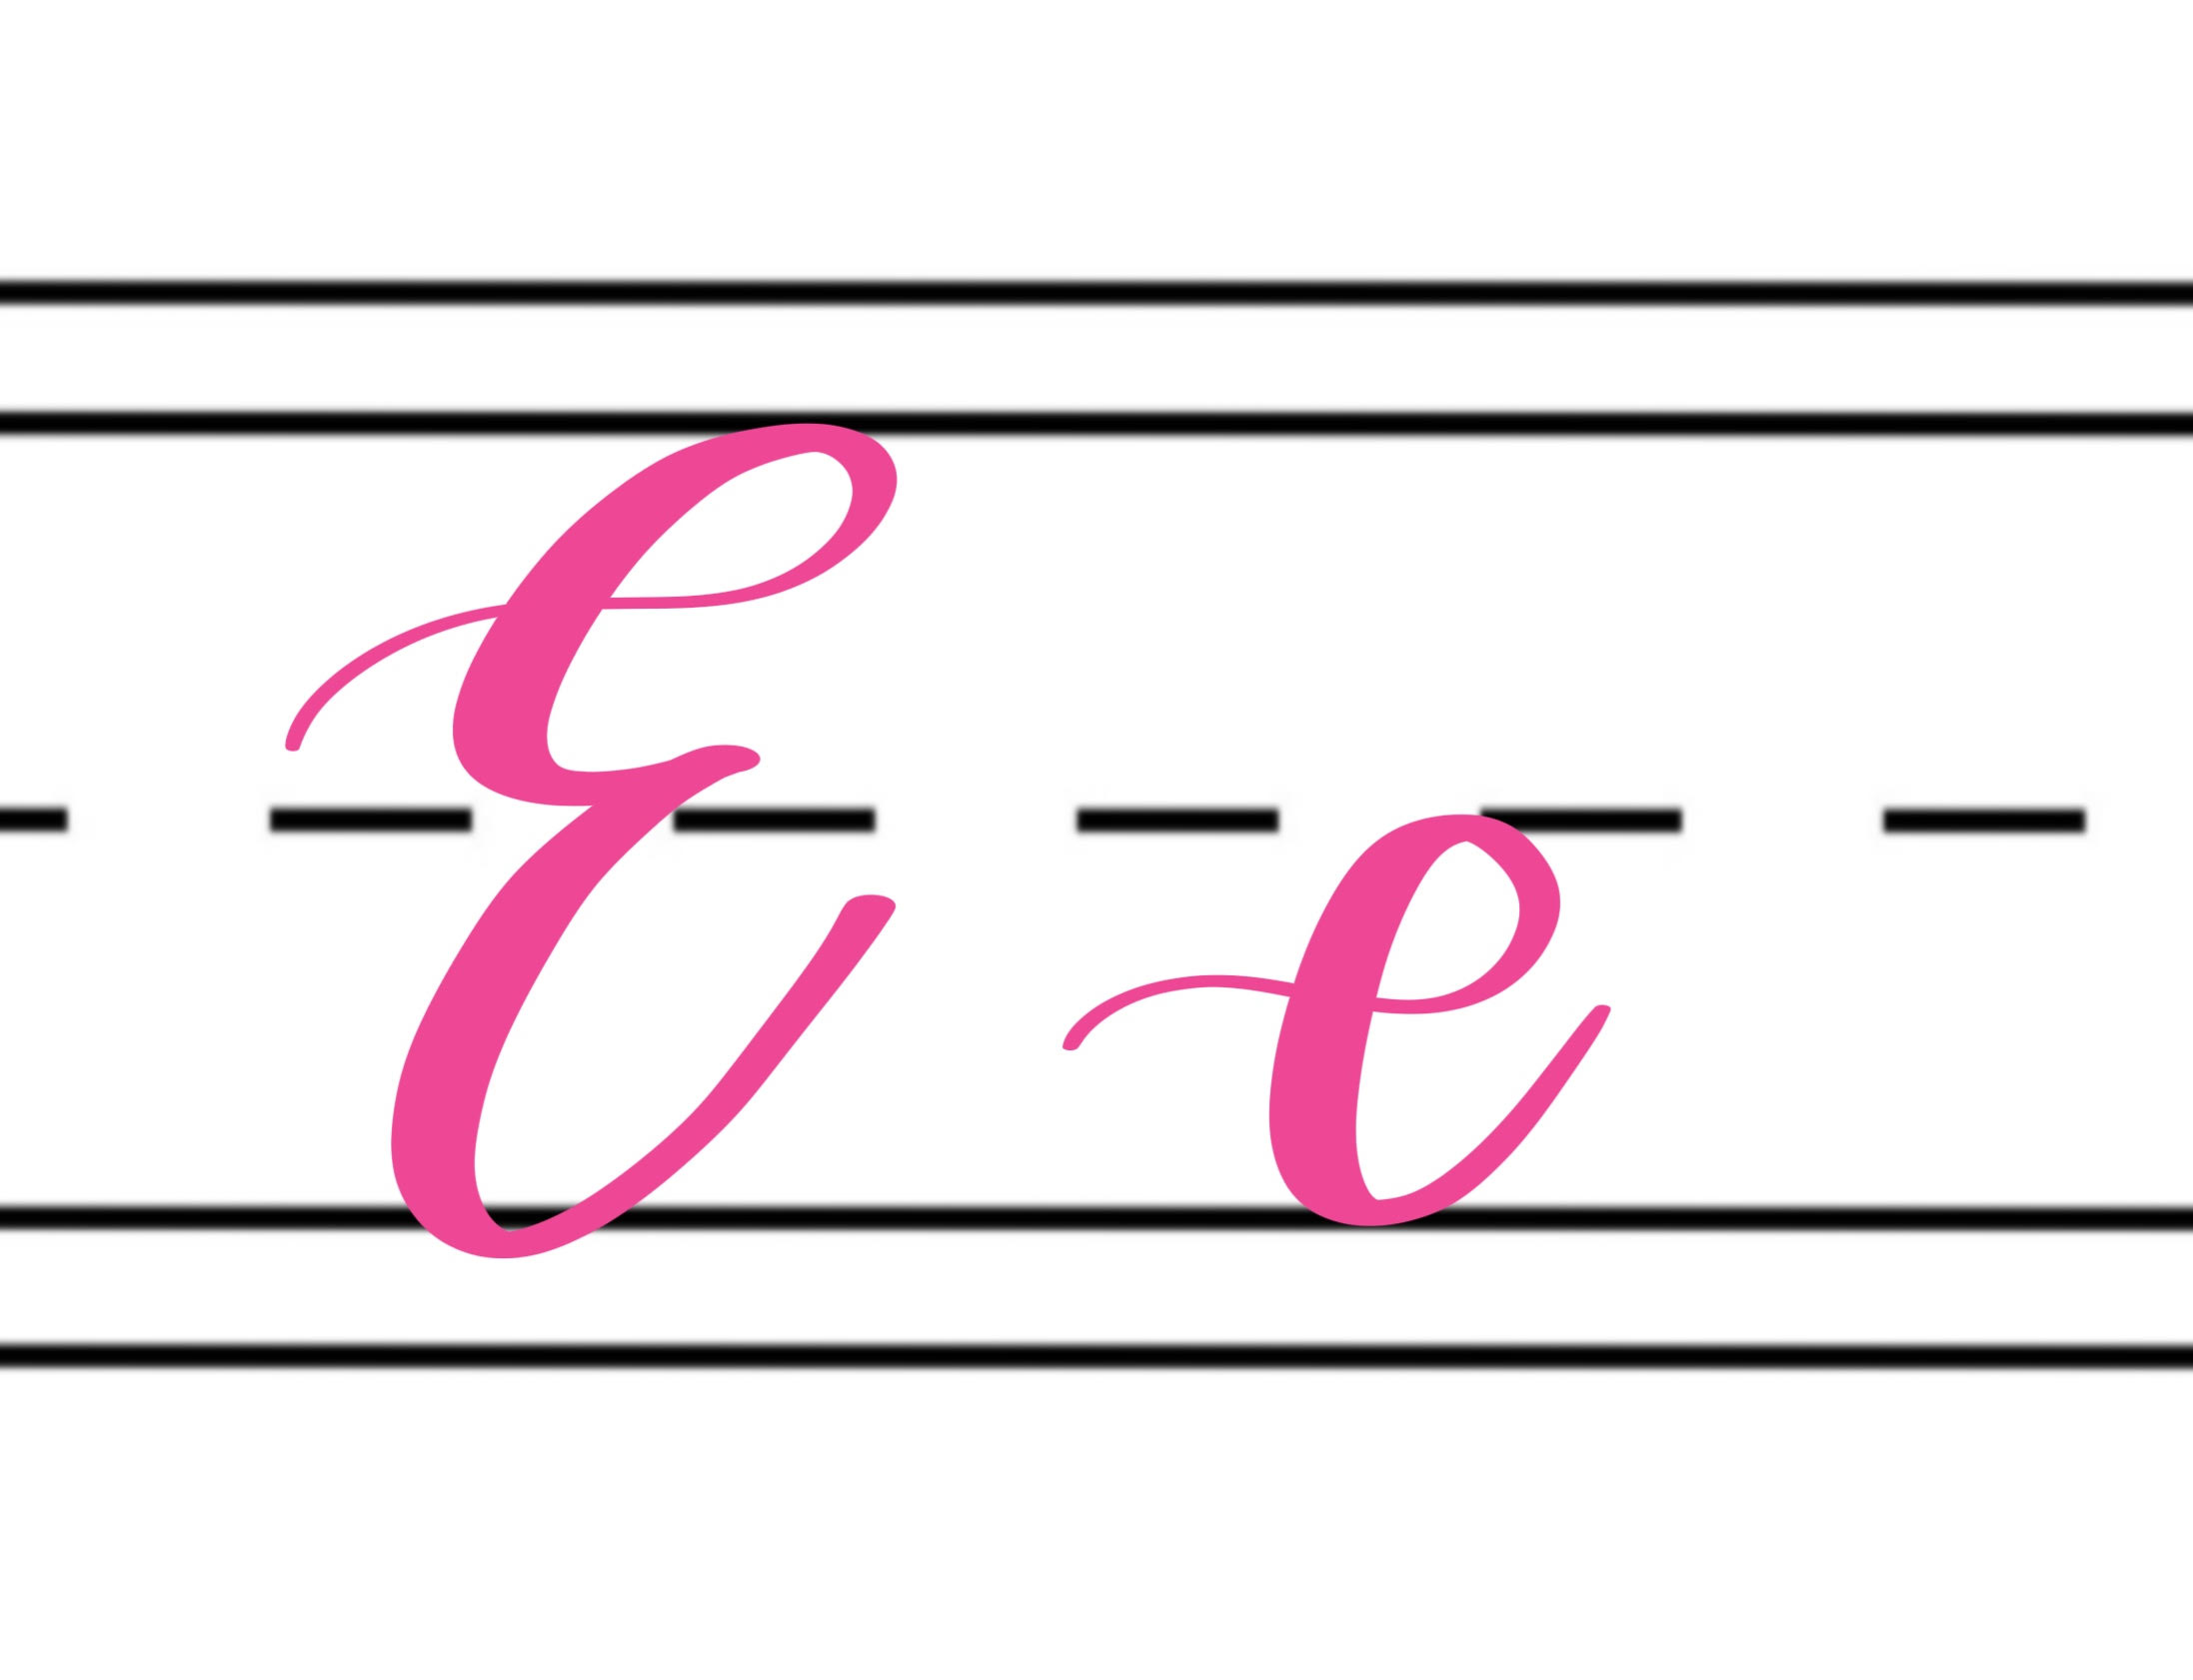
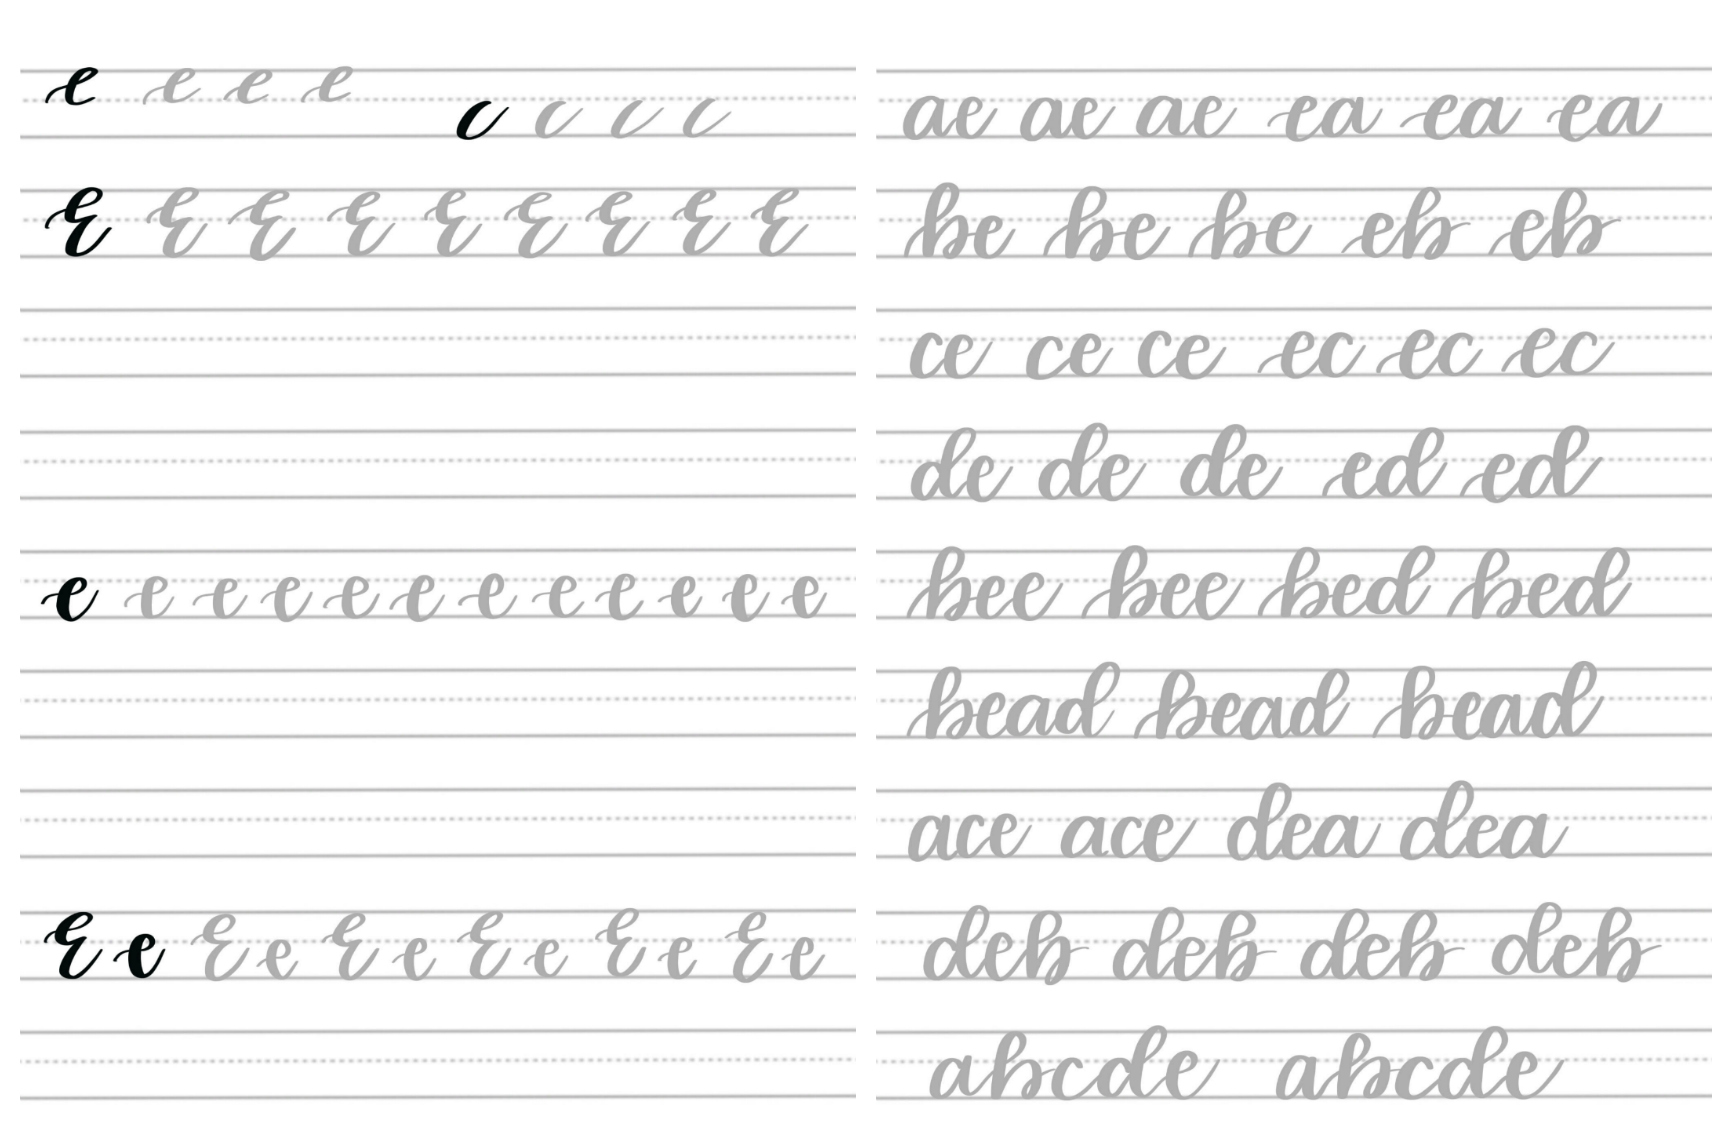
Did you know that “e” is the most frequently used letter in the entire English alphabet? No matter what you’re lettering, chances are, there’s going to be at least one “e” involved, so it’s an especially important letter to practice! Luckily for us, it’s easy to form, because we’ve already learned the basic shapes.
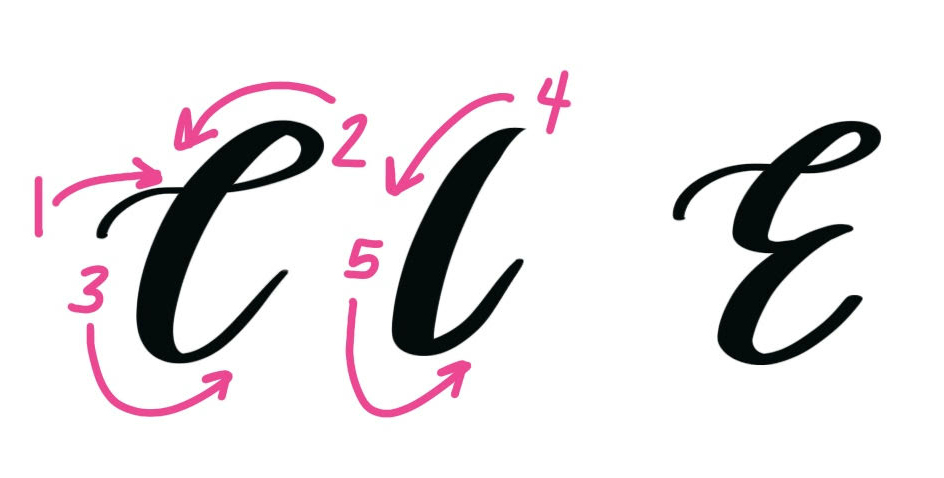
DRAWING A CAPITAL BRUSH SCRIPT E
A capital E is made up of two shapes we’re already familiar with; in fact, if you’ve mastered the Brush Script C, you’re going to have no trouble with it at all! The top piece of the letter is just like the embellished “C” we practiced and formed a few posts ago. It begins with a small loop, continues around with a downstroke, and finishes with an upstroke. The second shape is like the basic “C” and is positioned directly under the first shape.
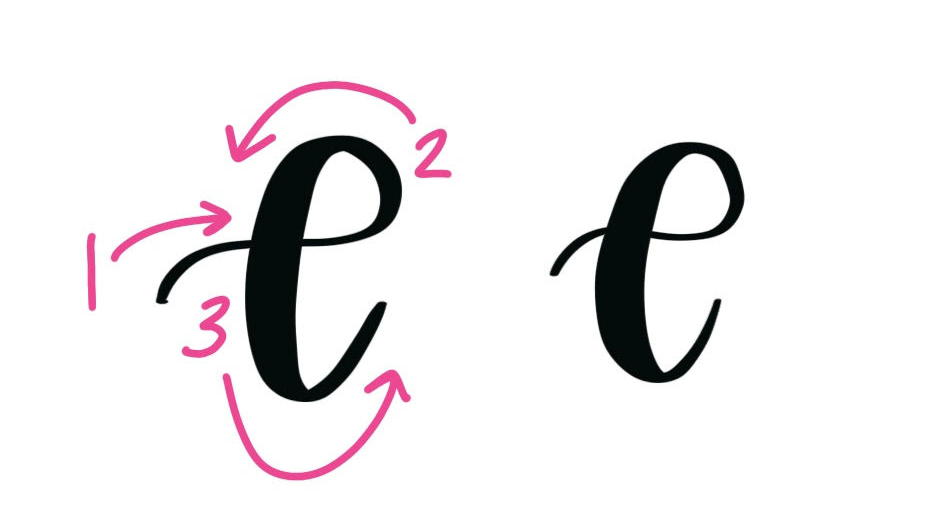
DRAWING A LOWERCASE BRUSH SCRIPT E
A lowercase “e” is very similar to the embellished “C” as well, but you’ll notice that the loop is larger to distinguish it as the correct letter. This time, we want to make sure the line that begins the loop is a horizontal one and that it intersects the downstroke near the center instead of at the top. You’ll notice that when I form this letter, it looks more like a printed “e” than a cursive one. I find that this makes my lettering easier to read, because a typical cursive “e” can look a lot like a small “l.”
That’s all there is to it! Are you ready to start practicing? I have two printable sheets for you today; one that focuses on forming the letters, and one that focuses on connecting the “e” to the other four letters we’ve practiced so far. For more tips, practice, and printable pages all about connecting the letter, check out this post.
To use these pages, simply download them to your device using the link below, then print them or upload to your digital lettering software. Feel free to use them as often as you like for personal practice. I’ve provided grey letters for you to trace, as well as blank lines where you can write on your own.
DOWNLOAD THE FREE PRACTICE PAGES HERE.
PS. Don’t miss the rest of the series!
Practice: A Practice: B Practice: C
Practice: D Practice: E Practice: F
Practice: G Practice: H Practice: I
Practice: J Practice: K Practice: L
Practice: M Practice: N Practice: O
Practice: P Practice: Q Practice: R
Practice: S Practice: T Practice: U
Practice: V Practice: W Practice: X
As you practice, I’d love to see your progress. Share your photos in our Amy Latta & Friends Facebook group or on Instagram. And remember to pin this post for reference!


I love these free hand lettering practice sheets! They’re so helpful and I can’t wait to try them out!
Thank you so much! Enjoy!