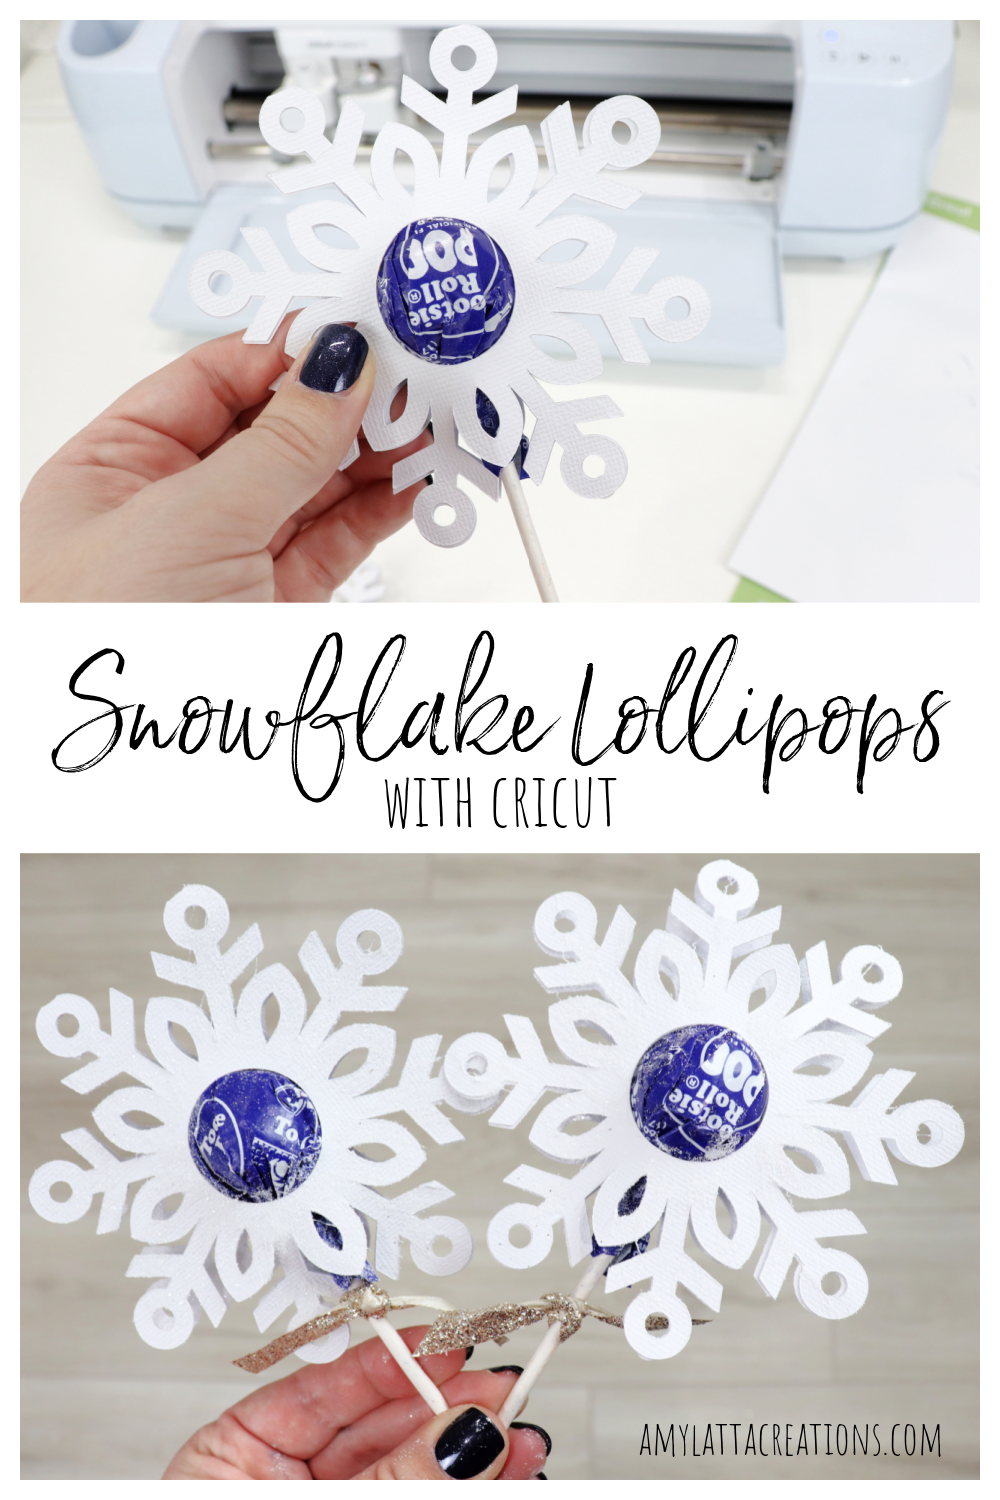
Snowflake Lollipop Treats with Cricut
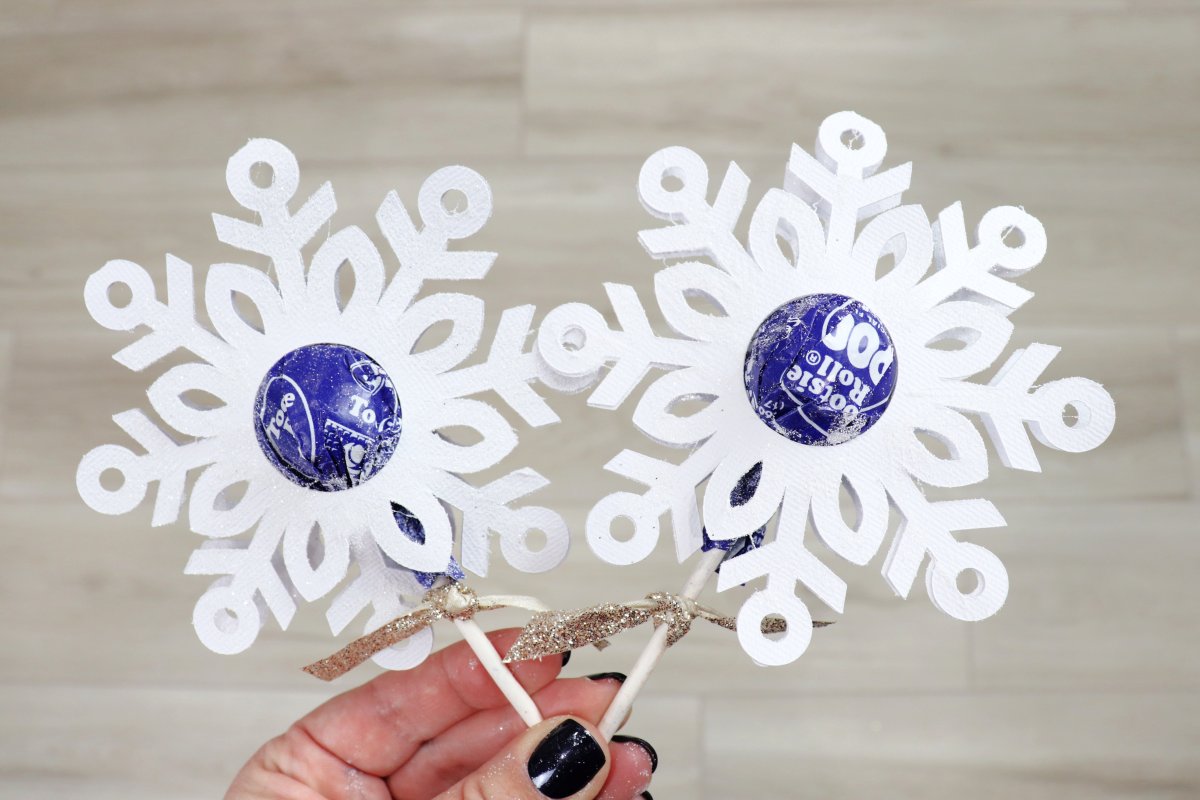
Winter is here, and with it comes lots of fun opportunities for crafting, like these adorable snowflake lollipop treats!
You’ll Need:
Cricut Maker or Explore cutting machine (I used the Maker 3)
Adhesive Backed Cardstock (or cardstock and glue)
Snowflake Lollipop Holder Cut File
Glue
Fine glitter (optional)
Ribbon and scissors (optional)
Large, round lollipop
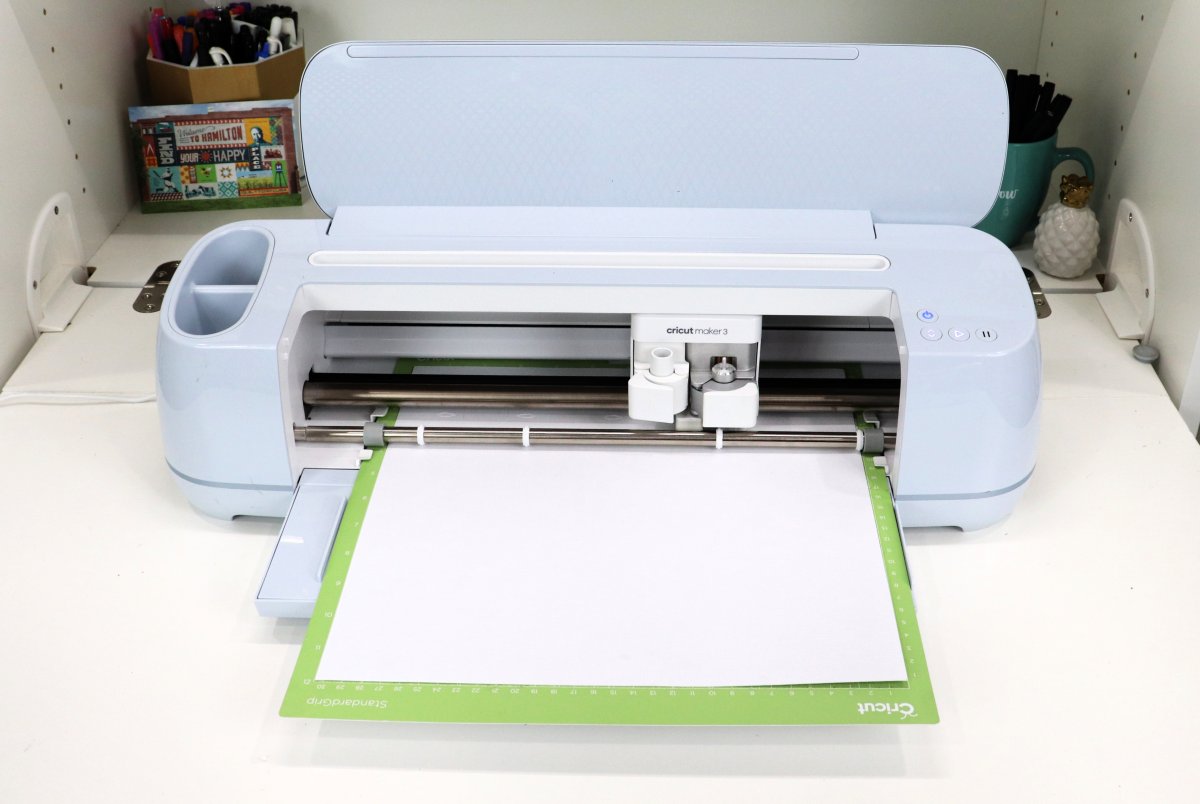
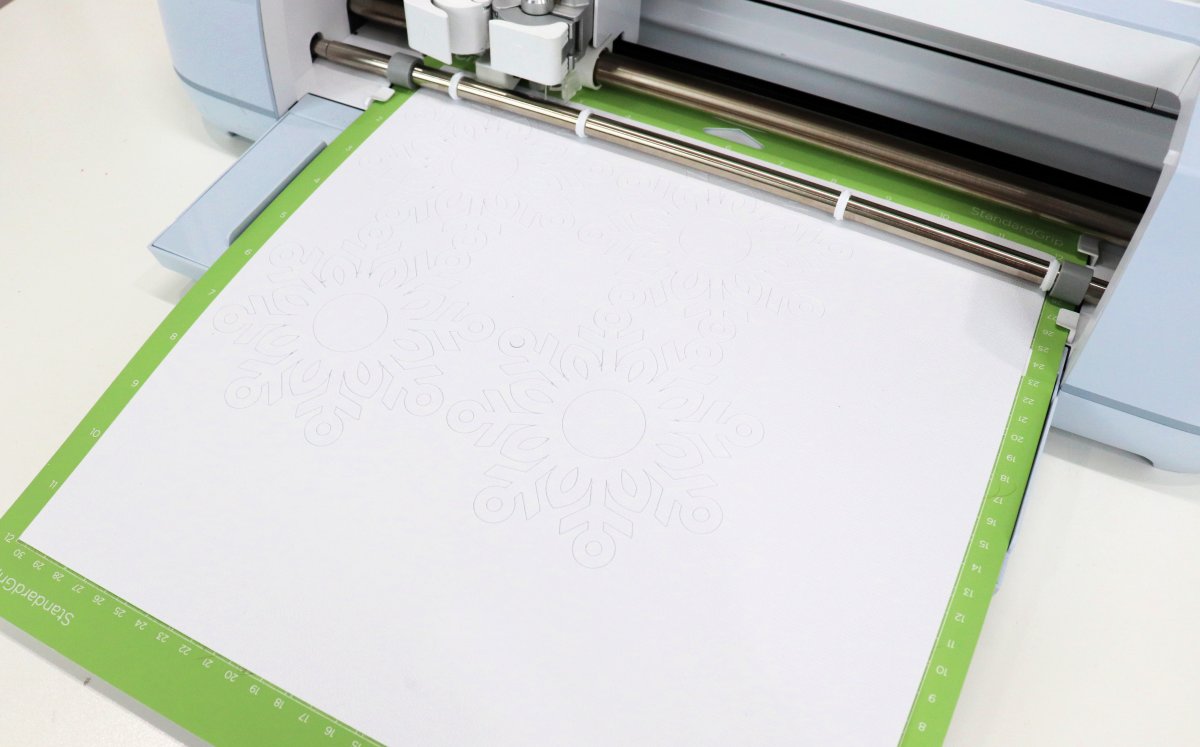
Step 1: Send the project to your Cricut.
Click the link to open the Snowflake Lollipop Holder cut file. It’s already sized perfectly, all you have to do is click “make it” and follow the prompts in Design Space to choose your material, load the machine, and start your cut. You’ll be prompted to swap out the usual fine point blade for a scoring tool at the beginning so the Cricut can create the fold lines for you. Then, Design Space will prompt you to put the blade back in for the cut.

Let the Cricut work its magic! I adjusted my project to cut two of these at the same time from one piece of 12×12 cardstock, but you can also cut one at a time and use any color/type of cardstock you like.
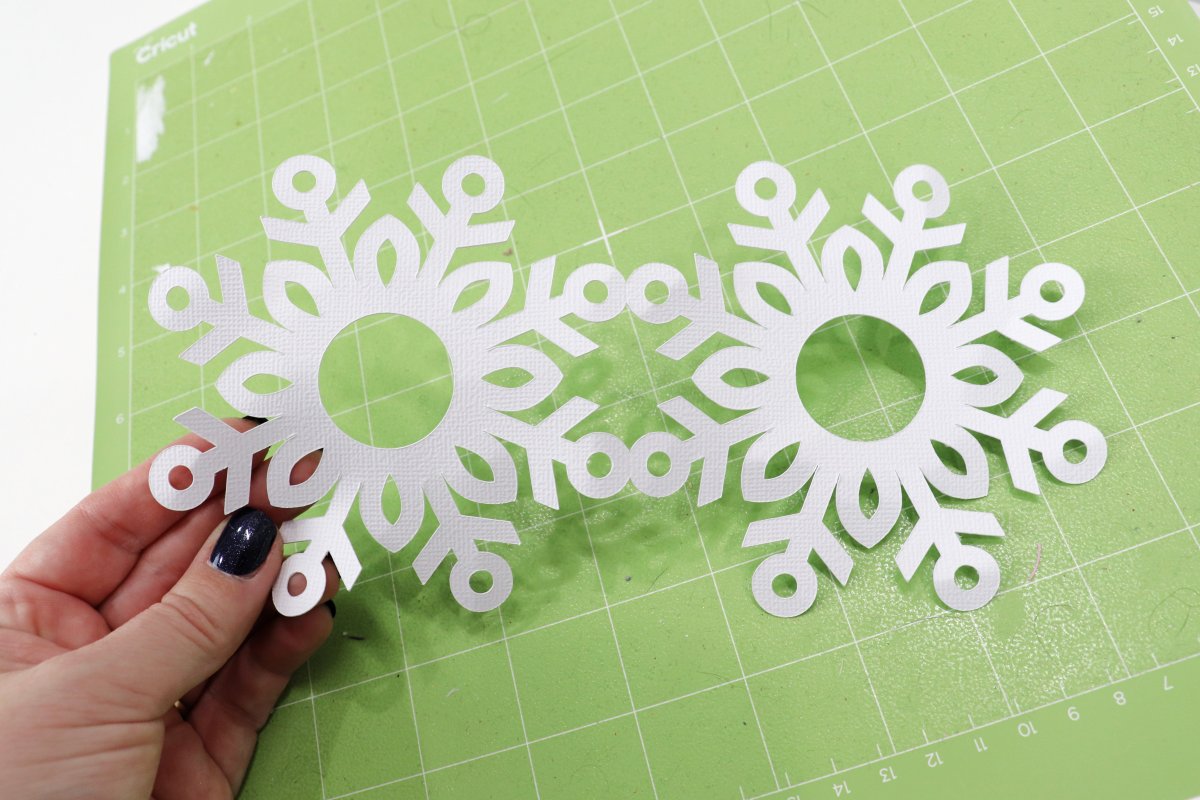
Step 2: Weed the design.
That means gently peeling it away from the mat and removing all the pieces that are not part of the design, like the little circles and shapes in the flakes.
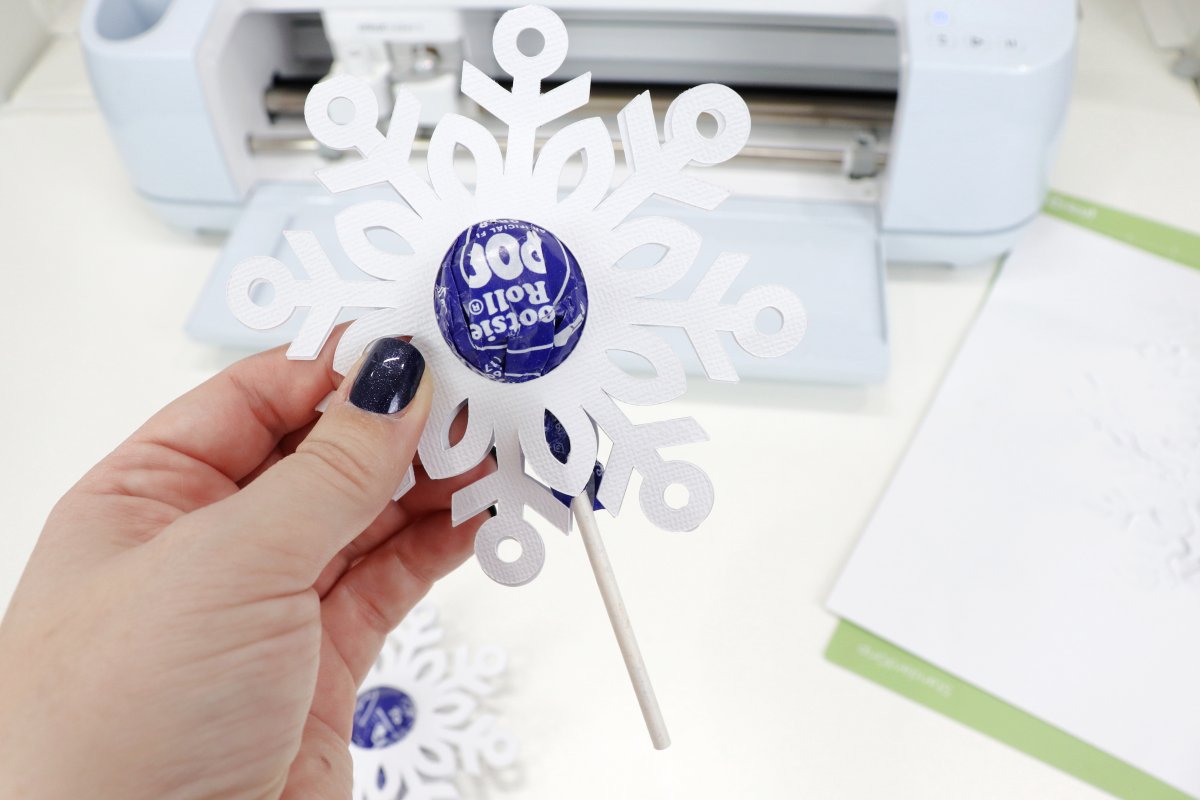
Step 3: Place your lollipop in the center, fold the snowflakes, and attach.
Since I used adhesive cardstock, when I pressed the two sides together, they stuck to each other right away. If you are using regular cardstock, you can apply glue or other adhesive to the inside of the snowflakes to help them adhere.
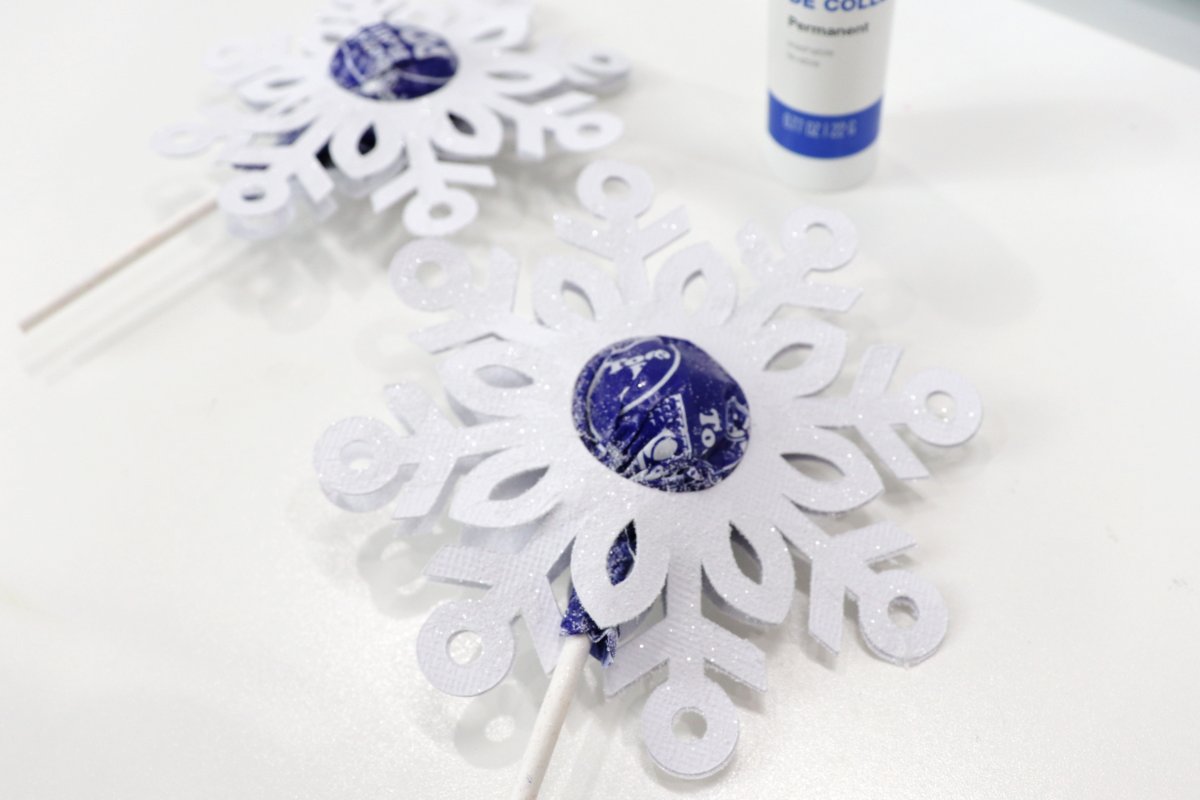
Step 4: Add glitter! (optional)
Some of you are glitter-haters, I know, so you can go ahead and skip to the next step. But if you’re like me and you think that a little sparkle makes everything better, apply a little bit of glue to the front of your snowflake, then sprinkle some glitter on top. Shake off the excess, and you’ve got yourself a sparkly snowflake. Another alternative is to use glitter cardstock!
Step 5: Add ribbon. (optional)
To finish off my project, I wanted to add one final touch, a little tie of gold glitter ribbon.

That’s all there is to it! Now you have a fun winter craft that also doubles as a random act of kindness when you give it away. Who in your life would enjoy receiving one of these on their desk, in their lunchbox, or any time of day as a sweet treat?
If you try this project, I’d love to see how your snowflakes turn out! Come share your project photos for this or anything else you’re working on in the Amy Latta & Friends Facebook group. See you there.